Using MIDI in Pro Tools 2018
MIDI is getting some renewed attention. Mike Hillier delves into some of the impressive new features to further help when using MIDI in Pro Tools 2018… While Pro Tools’ audio handling has made it the industry standard DAW for recording, its MIDI capabilities have long been seen as inferior to other DAWs, particularly Logic Pro, […]
MIDI is getting some renewed attention. Mike Hillier delves into some of the impressive new features to further help when using MIDI in Pro Tools 2018…
While Pro Tools’ audio handling has made it the industry standard DAW for recording, its MIDI capabilities have long been seen as inferior to other DAWs, particularly Logic Pro, with many engineers and studios keeping a Logic install handy simply for MIDI-heavy sessions.
This view has probably been a little bit unfair; Pro Tools has actually had some fairly robust MIDI editing capabilities since version 8, and Pro Tools 2018 once again sees Avid expand the DAW’s power.
Always on
In this workshop we’re going to delve into the MIDI side of Pro Tools, looking at some of the more overlooked features and the handy and flexible new tools that were introduced in Pro Tools 2018.
Possibly the most useful of the new MIDI features is the opportunity to record MIDI retrospectively.
This ensures that any great ideas you might have while playing through aren’t lost by forgetting to put Pro Tools into Record mode. Instead Pro Tools is constantly recording MIDI performances of any record-enabled tracks, which can then be brought back and saved to the timeline using the Retrospective Record tool.
There are some quirks to the behaviour of this when altering the Record Enabled track during playback, as all MIDI data is recorded to a single track. So it isn’t possible to switch Instrument Channels during playback and bring back MIDI independently to both channels.
However, MIDI data isn’t hard to manipulate, so you should be able to quickly chop the resulting clip into two or more parts and move each clip to the correct channel. If there was any MIDI data already on the channel, then the retrospectively recorded MIDI will be merged with the existing MIDI.
Another useful tool, especially for composers and arrangers, is the ability to pull a chord sheet from MIDI data by simply selecting one or more clips and using the new Extract Chords from Clips tool. This tool analyses the MIDI data selected and adds chord markers to the Chord Ruler which will then show up in the Ruler and the Score Editor. In our experience it’s been pretty accurate too, even marking out “slash” chords – informing you of the bass note in the chord if it isn’t the standard root note.
Chord rulers
The Chord Ruler doesn’t have any function other than as a visual guide and for adding Chord Symbols to the Score Editor ready for printing. And altering the chord in the Chord Ruler will not at this stage change the MIDI data to match your new chord. But we look forward to Avid developing this in the future, perhaps adding the opportunity for plug-ins to interact with data from the Chord Ruler to add functions that could combine with pitch correction software, or auto-harmonising in the future.
While the Chord Ruler doesn’t currently have any deeper functions, the Key Ruler can be used with some of the new key commands to ensure that edits to your MIDI data are kept in key. We see this as the start for these two Rulers, with plenty more functionality hopefully ready to be added as these are developed.
Key commands
The new key commands are perhaps some of the most powerful new options at your disposal, and while they are unlikely to garner the same level of attention as the flashier, more newsworthy functions, like Retrospective Record, they will probably get more day-to-day use. In the same way that we now work almost exclusively with key commands when working with Clip Gain to nudge audio up or down in level, we can now nudge MIDI data up or down in velocity, as well as up or down in pitch, or side to side in time, without ever taking our fingers off the keyboard.
If you regularly work with MIDI in Pro Tools, or flip from Pro Tools to another DAW for MIDI, then it’s definitely worth spending some time to learn how to use these new functions and key commands.
In this workshop we’ll develop a simple arpeggio pattern – initially composed on guitar – into a more solid arrangement using only MIDI. We’ll transpose notes in key and add chord pads. We’re using the built in Structure Free virtual instrument for the tutorial, but feel free to play around with your own plug-in collection to bring even more life to the arrangement.
Using MIDI in Pro Tools: step-by step
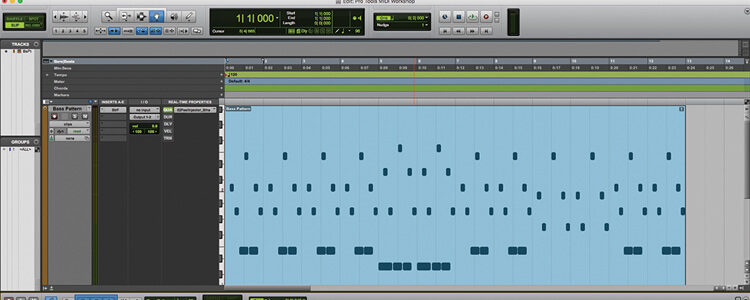
1. The supplied session has a fairly simple 12-bar blues bass pattern supplied as MIDI on an Instrument Channel, running through an electric piano patch in Structure Free.
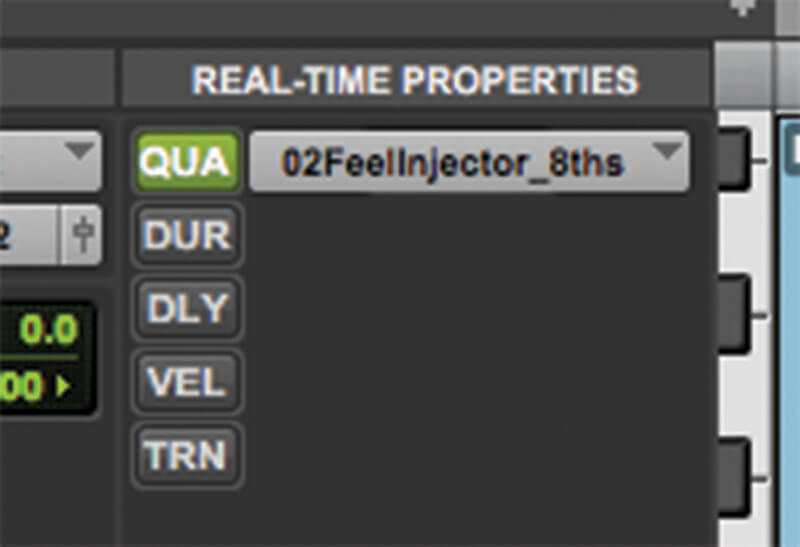
2. In the Real-Time Properties track menu (Alt+[4]), we’ve quantised the MIDI using the “02FeelInjector_8ths” groove to give the pattern a little more life. Experiment with different grooves to see what impact this can have.
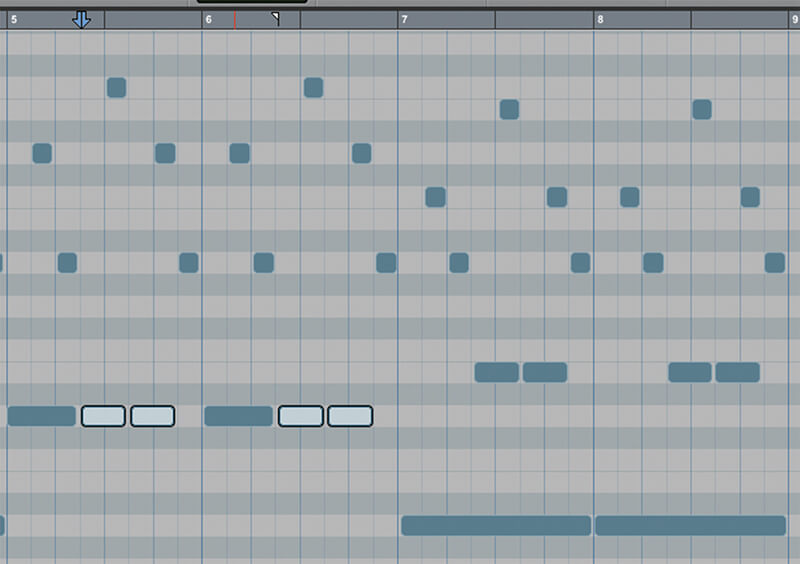
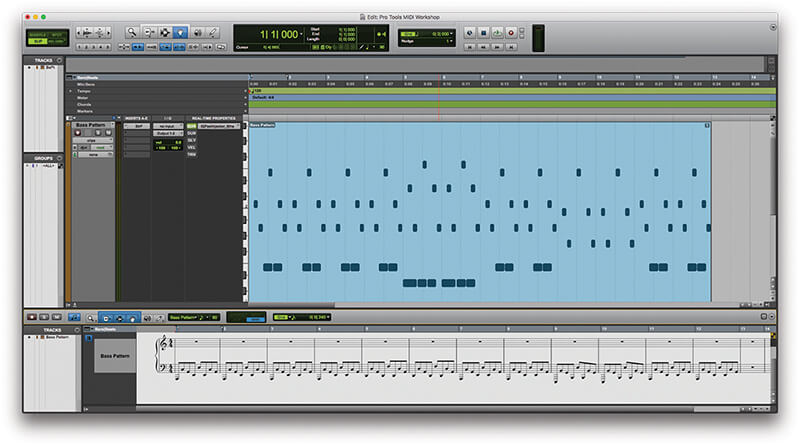
3. In the 5th and 6th bars the lowest note isn’t held across the whole bar, but repeats following the rhythmic pattern set by the other bars. Move highlighted notes in the MIDI Editor window up or down a semitone with the arrow keys.

Mirrored MIDI Editing This function lets you edit one loop while simultaneously editing all copies of that loop – even when they are on another channel. This is the ideal method for layering samples in a track.
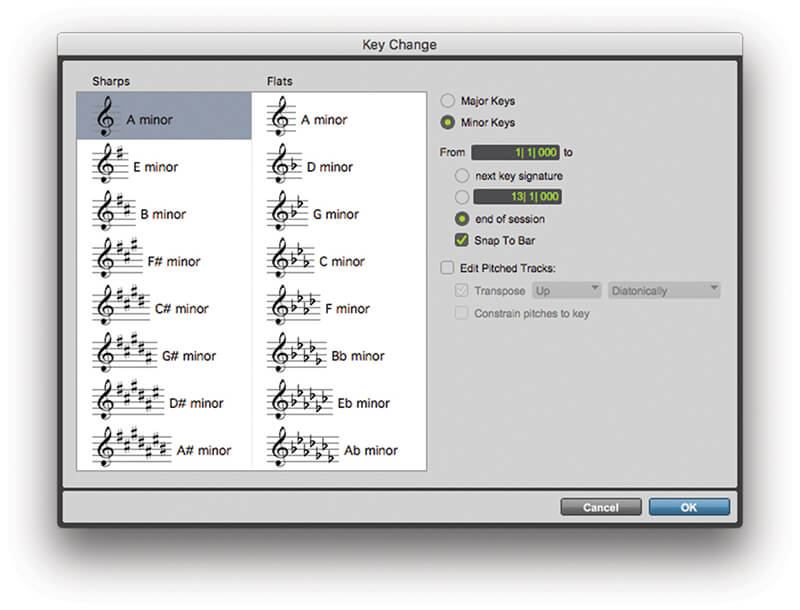
4. Instead of moving notes up or down in semitones you can also move them in key. Click Event>Add Key Change, or the + button on the Key Ruler in the Edit window to bring up the Key Change window. Add an A minor key at beat 1 of bar 1.
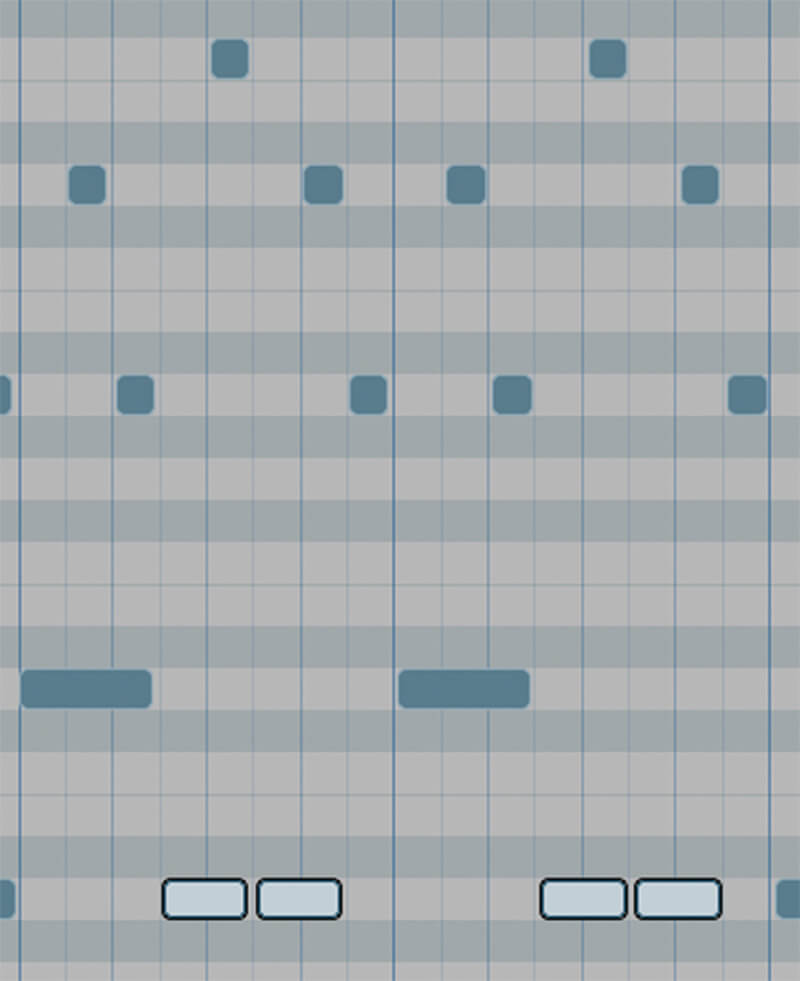
5. Now highlighted notes can be moved up or down through the notes in the key of A minor by holding Start (PC) or Ctrl (Mac) when pressing up/down. Try moving the 4th and 6th beat notes of the 5th and 6th bars down from the D to the A.
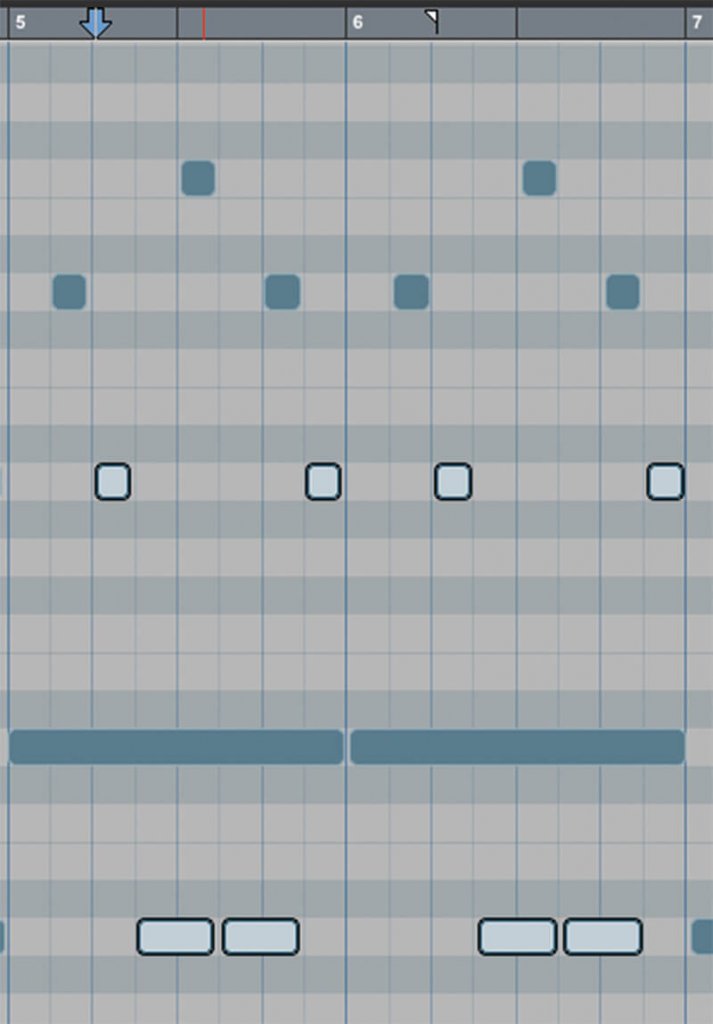
6. Now we can drag the root note out to fill the whole bar. Previously we might have done this with the Trim Tool, but we can now use Alt+Left/Right to move the end position of the note to the left or right by a grid position.