Using Sampler Tracks in Cubase 9.5
Cubase’s Sampler Tracks can handle only a single sample and give basic control, but as Adam Crute discovers, that’s what makes them so useful… Upon its 1985 release, the Ensoniq Mirage sampler massively undercut the price of the then competition – chiefly the E-mu Emulator, the Fairlight CMI and the Synclavier. Despite being a less […]

Cubase’s Sampler Tracks can handle only a single sample and give basic control, but as Adam Crute discovers, that’s what makes them so useful…
Upon its 1985 release, the Ensoniq Mirage sampler massively undercut the price of the then competition – chiefly the E-mu Emulator, the Fairlight CMI and the Synclavier.
Despite being a less powerful system than these established competitors, the Mirage’s comparative affordability – $1,500 as opposed to between $25,000 and $200,000 for a Synclavier II, for example – brought digital sampling within reach of a much larger number of producers and musicians, and in so doing laid the groundwork for the explosion of electronic music through the 90s and beyond.
Whilst this affordability may explain the initial appeal and success of the Mirage, it doesn’t explain why an instrument that’s almost laughably primitive by modern standards can nevertheless evoke a wistful, misty-eyed admiration to this day. To explain this we need consider just one word: Immediacy.
Because, you see, the Mirage’s real party trick was the ease and rapidity with which it allowed you to record and synthesise a sound, and end up with a usable and characterful result. This ability was unique at the time, and remains elusive even now – arguably more so since the advent of powerful, but complex software samplers. Until, that is, Steinberg added Sampler Tracks to Cubase.
What Sampler Tracks are… and aren’t
Sampler Tracks are in many ways similar to Instrument Tracks in that the track records MIDI data but outputs audio. However, rather than a user-selectable plug-in, Sampler Tracks generate their audio by feeding the track’s MIDI data through a simplified, HALion-based, sampler engine.
The main thing one needs to appreciate about Sampler Tracks is that they aren’t intended as a replacement for a full-featured sampler plug-in like Kontakt or HALion: you can’t create zones/key groups for assigning different samples across the keyboard, nor can you create velocity-switched stacks of samples.
Aside from hard-wired ADSR envelopes for pitch, filter and amp, there are no LFOs or other modulation sources; there are no built-in effects, no fancy scripting facilities… but what there is – in the true spirit of the Mirage – is immediacy. And lots of it!
Working with Sampler Tracks
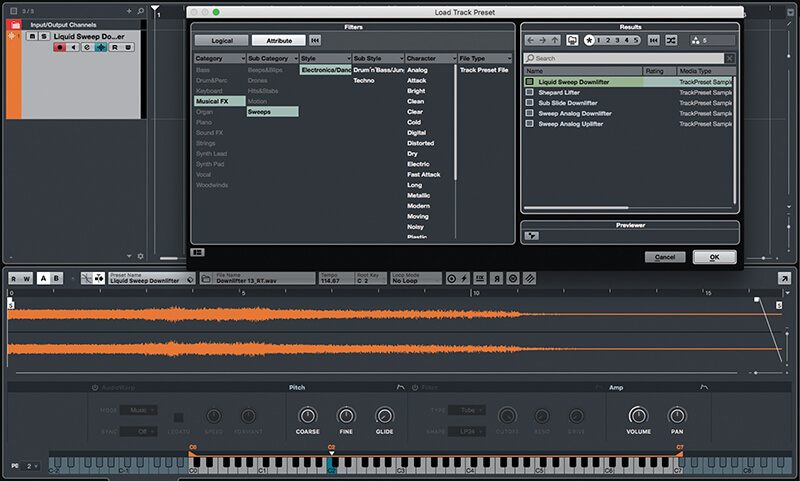
When you create a new Sampler Track, or select an existing one in the track list, the bottom zone of the project window shows the sampler control panel. The upper portion of the panel shows the currently assigned sample’s waveform along with start, end and loop markers; the same area can be switched to show the pitch, filter or amp envelopes.
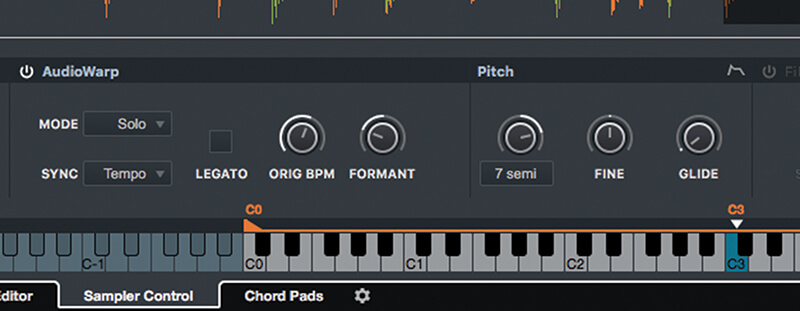
In the middle of the panel is a set of self-explanatory controls, grouped in sections for AudioWarp (i.e. time-stretching), Pitch, Filter and Amp. At the bottom of the panel there is a keyboard graphic showing the root note and note range of the assigned sample.
Assigning a sample to the track is a simple matter of dragging-and-dropping from the project window or Media Browser to the Sampler Track control panel. If dragging from the project window you can drag an audio part or a MIDI part from an Instrument Track (Cubase bounces the MIDI part to audio before assigning it to the Sampler Track).
A Sample Track’s settings are saved as part of a project file, but you can also save the sampler’s setup as a preset so that it can be easily reused in other projects. Additionally, Cubase comes with a large library of Sample Track presets (and associated samples) called Caleidoscope.
Limiting the limitations
Whilst Sampler Tracks offer no in-built LFO or modulation beyond the fixed-destination ADSR envelopes, all control movements can be written, read and edited as standard track automation data. This opens up a whole load of new creative possibilities, especially when coupled with the recent improvements to Cubase’s automation tools.
As an added bonus you can export the Sampler Track’s setup to HALion, from where you can take advantage of the full set of sampling tools that it offers. Similarly, you can also export to Groove Agent, Groove Agent SE and Padshop Pro, and bring the features of those plug-ins to bare.
Immediacy
If all you want is to create and mangle a loop based on a cool MIDI beat you’ve created, or a stab snipped from a larger recording, or to turn an interesting sound texture into a playable, looped instrument, then setting things up in something like HALion or Kontakt can really slow down your workflow and choke the creative process.
It’s in these situations that Sampler Tracks really come into their own: A quick flick of the mouse gets the audio into the sampler, and – far from choking the creative process – the effectiveness of the simple controls can actually assist it, presenting new ideas and alternatives with a simple twist of a dial. Let’s try it out…
Using Sampler Tracks: step-by-step

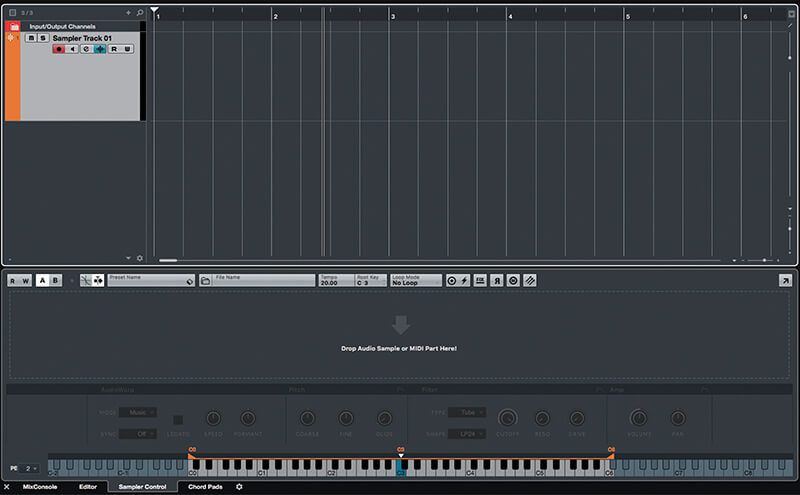
1. Start Cubase and create a new project. Create a Sampler Track, either by right-clicking in the tracklist and selecting the option from the pop-up, or from the program menu (’Project -> Add Track -> Sampler…’).
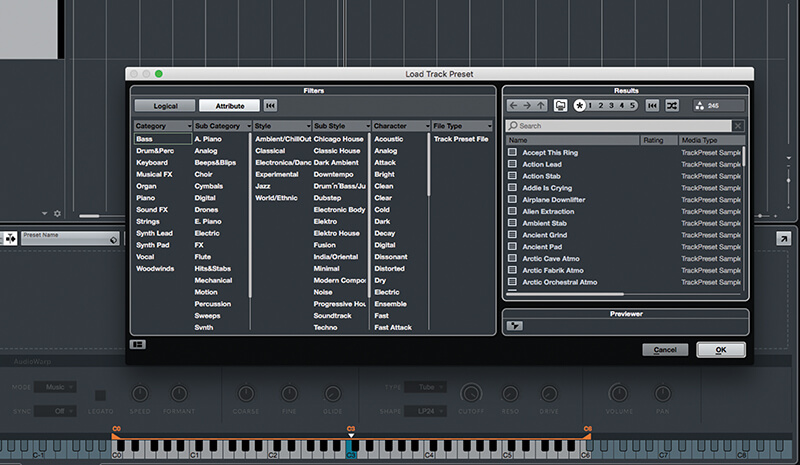
2. Notice that the lower zone of the project window now shows the Sample Track control panel. Click the Preset Name field at the top of the control panel – a standard preset browser window opens.
3. Cubase comes with a large collection of Sample Track presets, which you can filter and search using the browser window. Highlighting a preset in the Results section of the browser temporarily loads the preset for auditioning.
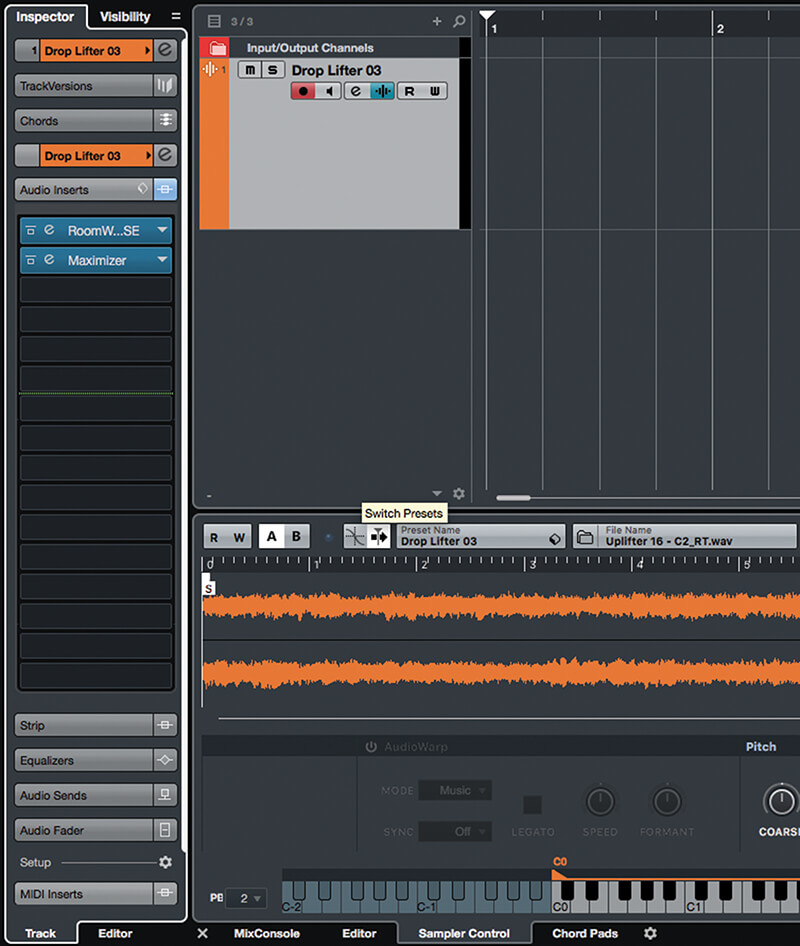
4. Once you’ve found a preset you like, click ’OK’ to load it (I’ve selected Drop Lifter 03). Take a look at the Audio Inserts section of the track inspector – notice that track effect plug-ins are included in the preset.
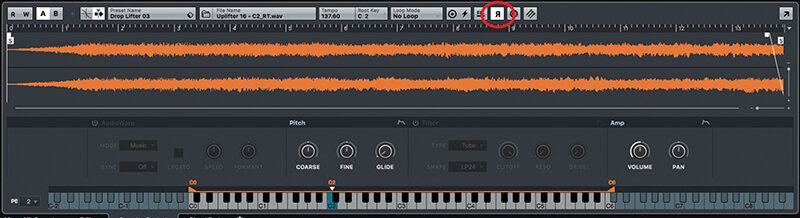
5. Play the sound a bit to familiarise yourself with it. There’s a collection of drop-downs and buttons arrayed above the sample waveform – towards the right is one that’s a mirrored ’R’; click this button.
6. Play the sound again, noticing that the sample has been reversed – this is a very quick and easy way to create reverse effects. Let’s try something new – delete the Sampler Track and create a new, empty one.

Finding a looping point It’s very easy to find a loop point in a drum or percussive sample, but much harder in a pitched sound. Sampler Tracks help here by overlaying the main waveform with a green-coloured version of the looped section of the waveform. This then provides cues that help you identify good loop points.
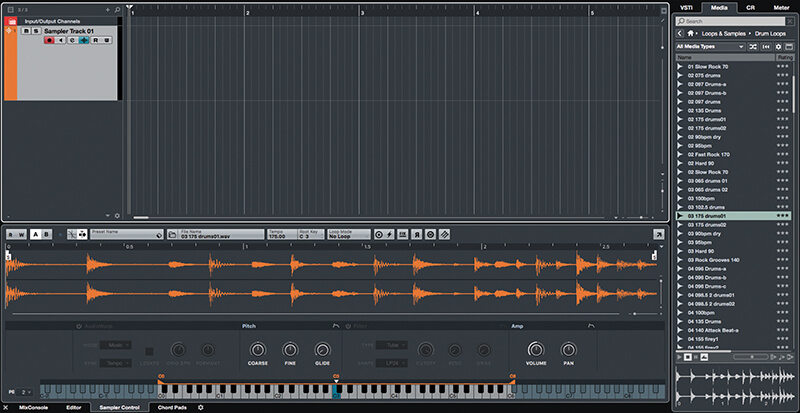
7. Open the right-hand zone of the project window and click on its Media tab. Select Loops & Samples and then Drum Loops. Find a loop that you like and drag it from the browser to the Sampler Track’s control panel.
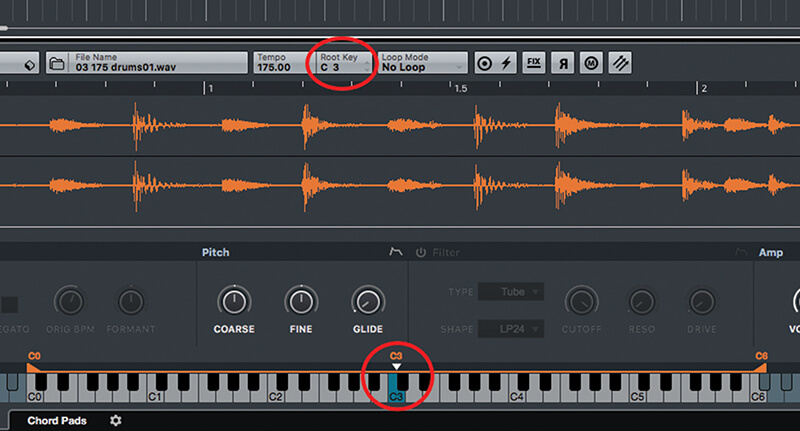
8. By default the sample will be assigned to note C3 – you can change this by dragging the root note on the keyboard graphic, or by using the increment and decrement buttons alongside the sample’s Root Key readout.
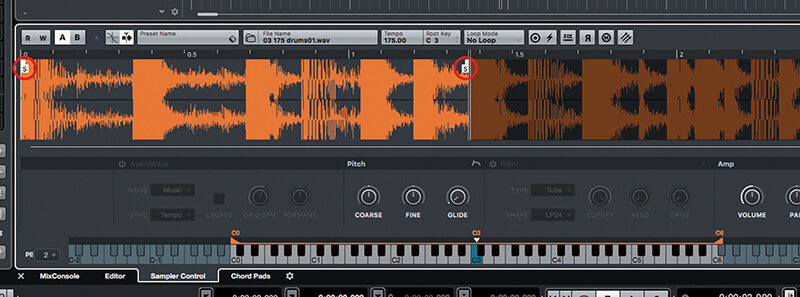
9. The small boxes marked ’S’, located at either end of the waveform, adjust the start and end points of the sample – use these to adjust the length of your loop, e.g. to make it a one bar loop.
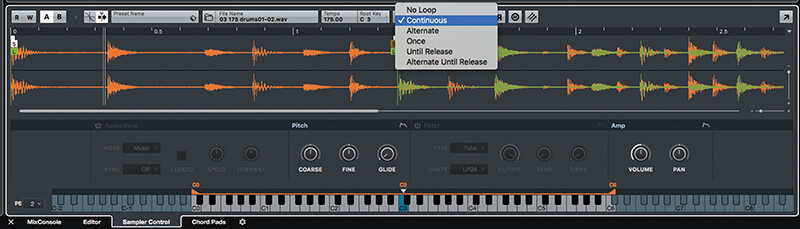
10. Locate the Loop Mode selector, above the waveform, and use it to switch to Continuous mode. Notice how green loop start and end markers are now shown, and a green waveform is overlaid (see ’Finding a Loop Point’).
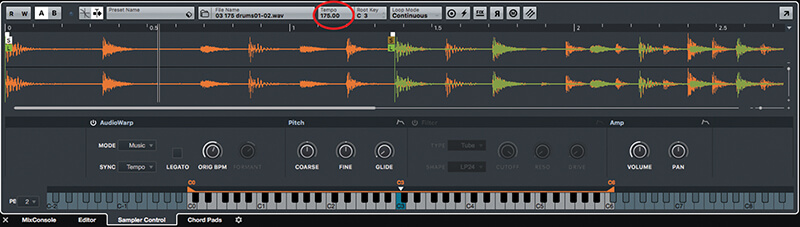
11. Notice that Cubase has identified the tempo of your loop. If this doesn’t match the project tempo, enable the AudioWarp section and change Sync to Tempo – sample and project tempo will now be locked in sync.
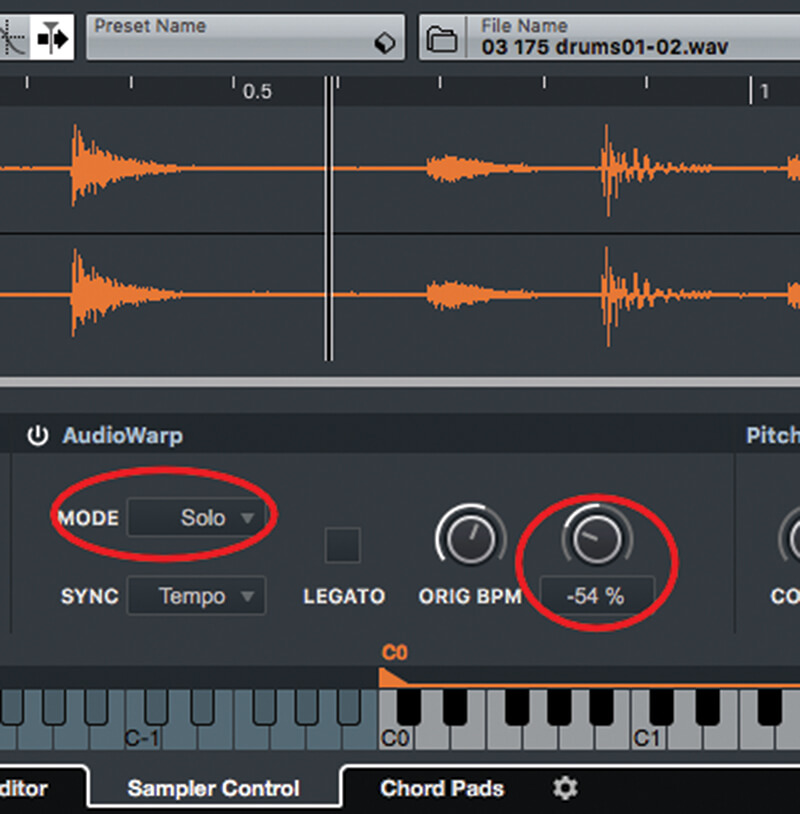
12. Changing the AudioWarp mode to Solo enables the formant control. Trigger the loop (with a keyboard or by creating a note in the track) and dial-in a formant setting to alter the character of the sample.
All-pass filtering The Sampler Track filter section features not just all the familiar filter shapes, but the less familiar all-pass filter. All-pass filters actually create interesting phase effects around the cut-off frequency, and are particularly effective when modulated over time.
13. When AudioWarp is enabled, the controls in the Pitch section do not alter the timing of the loop. Conversely, if you wish to adjust timing and pitch together for a more analogue effect, disable AudIoWarp mode.

14. Enable the Filter section and experiment with the settings. There are six filter types to choose from (some have overdrive, some don’t) and a whole bunch of different filter shapes, including an all-pass shape.
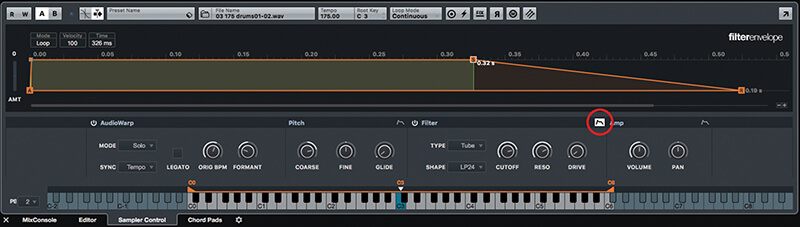
15. Clicking the small envelope icon at the top of the Pitch, Filter or Amp sections opens the envelope editor, which replaces the waveform display. Clicking the icon again returns you to the waveform view.
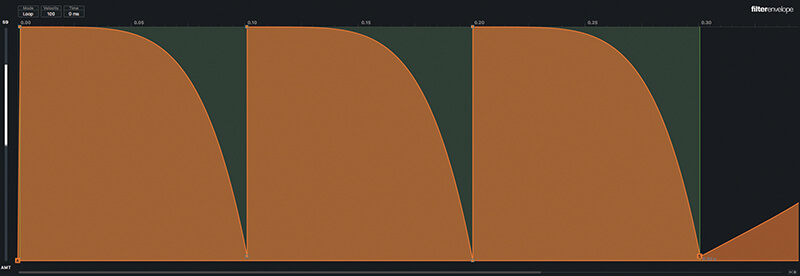
16. Envelopes are edited by dragging the control points, by dragging the lines between the points, and by double-clicking to add new points. The overall envelope amount is determined by the slider to the left of the display.
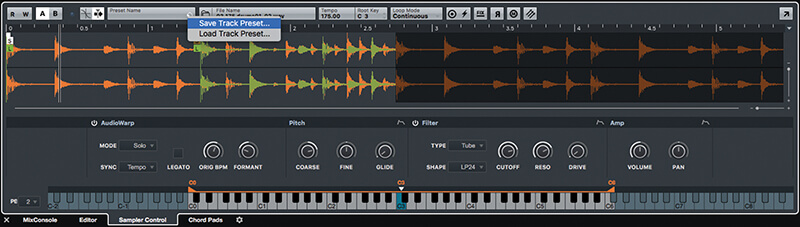
17. Once you are happy with the way your loop is sounding, click the small diamond symbol on the Preset Name box, which is located above the waveform display. Select Save Track Preset from the pop-up menu.
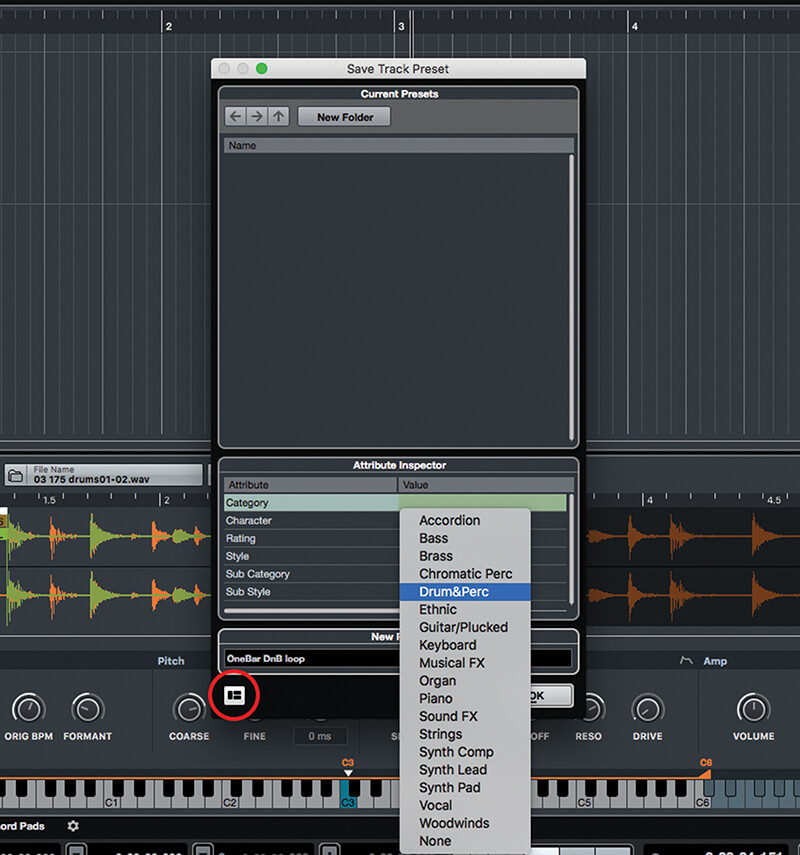
18. In the panel that opens, enter the name for your preset. Also, click the button at the bottom-left to open the Attribute Inspector, and use this to define attributes so that the preset’s easy to find.