Vocal Production Tutorial
For most forms of music, vocals are the focus of a song’s structure and mix. Their execution, capture and subsequent processing are all up for scrutiny as it’s the one instrument that we all have a natural affinity with – so that’s scrutiny not just from bat-eared pro engineers, but literally anyone who takes the time […]

African-American recording artist recording an album in the studio
For most forms of music, vocals are the focus of a song’s structure and mix. Their execution, capture and subsequent processing are all up for scrutiny as it’s the one instrument that we all have a natural affinity with – so that’s scrutiny not just from bat-eared pro engineers, but literally anyone who takes the time to listen to them.

A vocal could lack conviction in its delivery; a badly compiled vocal part could sound technically OK but unnatural and lacking fluidity. Going further still, the overall production values of the part might not be suitable for the surrounding instrumentation and mix.
However, this last issue is exactly what we’re not focusing on in this feature. Although many budding engineers and recordists will find it a struggle to get a vocal to sound right in the final mix anyway, this feature aims to address the kinds of issues that can make that task all the more difficult before you even get to that stage – all the processing in the world won’t disguise the fact that the vocalist let down the track (or was let down) from the outset. Here, then, we’re going to examine those elements that are key to getting the perfect vocal take – many of which tend to be overlooked. The aim is to raise your awareness of the performance side of things, and explore how you as an engineer or producer can work with the performer to achieve the best possible results. To begin, therefore, we’ll look at the relationship and nurturing involved.
Nature And Nurture
Special care and attention shouldn’t be reserved just for diva vocalists who may demand/expect it. Your role is to be as accommodating as possible irrespective of who you’re working with – taking a few minutes out to sit down with your vocalist before spending any time in the studio can be worth its weight in gold. This will allow you to introduce yourself, assess their personality and find out the following: Have you recorded in a studio before? What do you want to achieve? How do you prefer to use monitoring? How well rehearsed is your track?
Asking these questions will help you to assess how to approach your session without finding out through mistakes as you go. If you can, listen to the vocalist performing away from the recording setup before you start. Observing them in a room over speakers or at a live gig beforehand will enable you to judge how well they perform and – most importantly – what their pitch is like. This useful bit of prep lets you gauge whether their monitoring is causing tuning issues during a session or whether the singer’s abilities need addressing. Monitoring is a difficult element of recording to get right, so any information on what they’ve experienced and felt comfortable with before is very useful. Check the Monitor Mixes and Playback box for more on this.
If you have the luxury of time, a good way to build more trust with a potentially nervous first-time singer is to get into the studio for pre-production. No recording will take place, but you will get them used to singing in a recording setup and get a chance to experiment with their monitoring requirements. You can officially refer to this as a practise session if it helps the artist to relax.
All of this preparation serves two purposes: it lets you know what level of ability you’ll be working with (which you can then plan around), and it cements a degree of trust that will ultimately get you a better final performance.

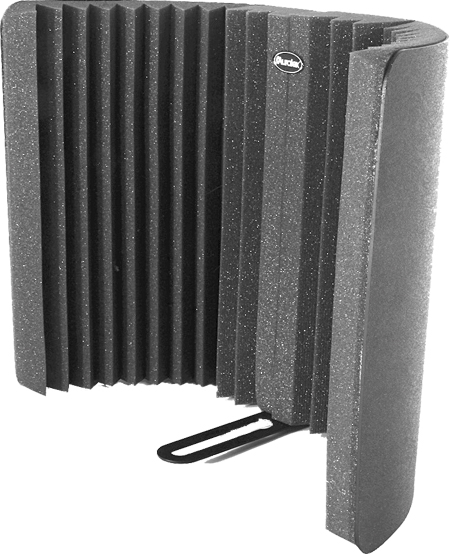
Many commercial solutions are available that will help improve your recordings. Left to right: Primacoustic FlexiBooth, and the Auralex MudGuard.
Real-Time Assessment
Broadly speaking, there are three stages at which you might start working with a vocalist: when composition of the vocal track or song is still under way; when the track is written but needs further practice or refinement; and when the track is fully written, rehearsed and well executed every time. The latter is a rare treat unless you are recording the very cream of the professional crop. These artists will no doubt be experienced and a few takes may be all that’s needed to complete the job.
However, the first two – what we’ll term ‘development’ –stages are usually more typical, and both will involve some carefully worded communication. You’ll be spotting their strengths and weaknesses as you go, so employ the 2:1 rule about two positives cushioning a negative. Even if the negative list is as long as Albert Collins’ guitar cable, prioritise and decide on a realistic outcome that you can achieve given the time you have available.
Even though you can set up a foldback system through a vocalist’s monitoring to talk to them during the recording session, ensure that you can get together during break times (out of the studio) or find time for some one-to-one chat between takes. It’s important to maintain a good level of direct, verbal communication and have clear eye contact to help give feedback and progress reports (they may start to feel a little like a lab animal if they’re being talked to via comms all the time). Do your best to break up this feeling of recording pressure and ‘having’ to get it right.
Personal interaction aside, if you’re finding fundamental issues with a singer’s ability to pitch correctly, suggest using a different note here or there, or experiment with different types of vocal projection or vocal styles in problem areas. You could even change the key of a track if the instrumentation isn’t already committed to. Of course, the key should ideally be determined during the composition stage, but it’s always an option if it avoids you having to spend hours at the editing stage trying to fake a good take from fragments of many not-so-good performances.
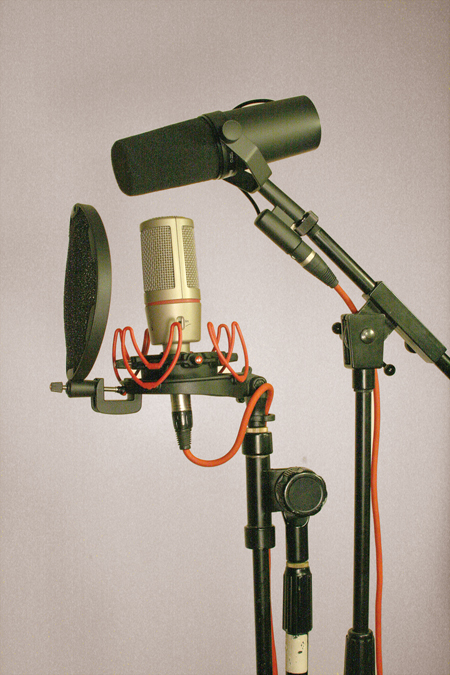
If a singer moves from a loud passage to a quiet one in a single pass, use two mics – a condenser for quieter parts and a dynamic for louder ones.
Match-Making
When it comes to recording your performer, you might have only a single mic to choose from or several. Time and hardware permitting, it is worth trying out as many options as you can to find the best match between voice and mic. If you’re working to a tight schedule, though, go with what you instinctively know works best as the performance is more likely to make or break the quality of the take than a perfectly matched singer and microphone.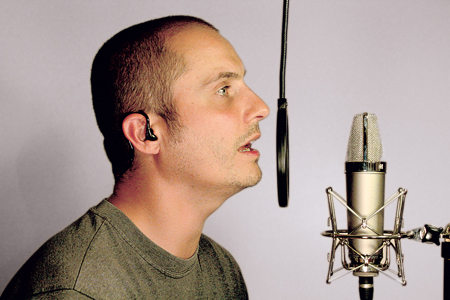
Ambience Balancing
There are quite a few variables when it comes to setting up and positioning your microphone. The mic itself, the room you’re in, performance styles and desired tone all need to be considered. Unless you have the benefit of a live room with nice reverberation characteristics, aim for a reasonably dry-sounding recording. You can balance the direct vocal and indirect room ambience by minimising the distance between the vocalist and the microphone. You can also minimise the reflected sound from other walls by positioning the singer towards the centre of the room so they are facing the wall that’s furthest away. This avoids any immediate reflections from nearby walls. A condenser will be most sensitive to capturing indirect sound, so their use will require the most acoustic consideration. Dynamic and ribbon microphones are less sensitive, so indirect sound is less of a concern.
Strategically placing acoustically absorbent material such as a gobo, duvet, acoustic foam or one of the many dedicated products designed specifically for this task behind the microphone will absorb a large amount of the vocal travelling past the mic before it reaches the nearest bouncing point. It also acts as a shield so sound travelling back from other walls is absorbed before it has a chance to enter the microphone from the rear or sides of the capsule. These basic rules should get you a tighter and ‘drier’ recording.
Creature Comforts
When you’ve got your microphone positioned as best you can, turn your attention to the other things you can do to maximise the quality of your session. First and foremost, try to set the right vibe. A relaxed approach to the session – glasses of water, the right lighting and being aware of positioning them to achieve any extra privacy they may prefer – will all put the performer in their comfort zone. Run through the track a few times to make sure that your monitoring is giving them what they need to perform well, and make sure you’ve planned your actual recording approach.
Unless you have such a tight schedule that you can do only one or two full passes of a song, aim at least to record multiple passes. This will give you the option of selecting the best sections from each one afterwards.
Alternatively, work on smaller sections of the track one at a time (each verse and chorus, for example) or identify areas to focus on by the type of delivery required from the vocalist (don’t record full-on screaming sections before soft, whispery parts and so on). Some people will choose to track line by line, but this approach can be an obstacle to achieving a fluid performance overall. What may sound fine in isolation might sound quite unnatural when played through from start to finish. A way around this is to record longer passes first and mark areas of attention on a lyric or comping sheet. You will then be able to go back and punch-in any bits that need improving on.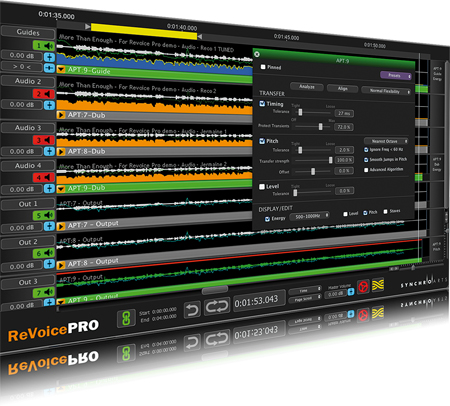
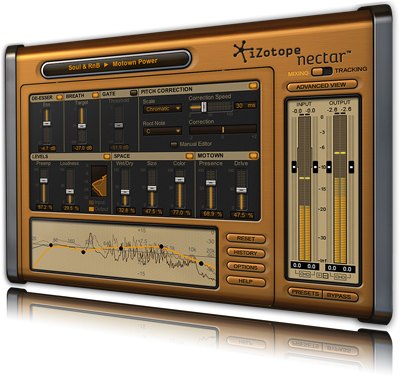
Time-saving options range from time- alignment tools for backing vocals like Synchro Arts’ Revoice Pro (above) to vocal suites such as Nectar from iZotope (below).
Vocal Editing
Since multitrackers first appeared in the studio, engineers having been editing and improving parts to create that perfect studio take. These days the bar of perfection is set incredibly high in most genres, so your vocal track will probably require at least a little editing. Identifying the best parts is the first task, followed by applying timing adjustments, breathing edits and so on. Your choice of DAW has a big impact on what you can realistically achieve. Logic, Sonar, Reason, Cubase and Pro Tools all have a native approach to editing multiple takes on one track. Ableton Live lets you edit recordings but is less than ideal for this task, especially if you intend to go quite deep with your editing.
Breath sounds are an interesting aspect of vocal editing as they affect both realism and timing, but a general requirement is to control their level in relation to the vocal parts. Some engineers will tackle this with volume automation, but we find that moving all breath sounds to a separate track makes them a lot easier to manage. This can be done when you’re generally tidying up a vocal track and removing unwanted sounds between sung parts, so it also saves time if the only alternative is the separate task of applying automation. The breath track’s level can then be readily readjusted when applying compression to both tracks through a group. This helps to avoid heavier compression starting to make breathing noises increasingly overpowering in relation to the rest of the performance as you can still adjust the overall breathing level as you determine your compression settings and strike a balance between both elements.
Perfect Process
If you’ve captured and refined a great vocal take through editing, you may or may not need a lot of processing afterwards. However, a couple of treatments are 99 per cent necessary every time. The first is an EQ treatment for the very low sub-80Hz frequency area (although this area is only a starting point as it varies depending on the vocalist and personal taste). In any event, low-end rumble isn’t useful in any musical way and if it’s left untreated it will eat up the headroom in your mix.
To remove it, apply a high-pass filter and sweep the frequency cutoff to remove any excess low end without removing or colouring the body of the vocal. Moving higher up will thin out the vocal, but this can be useful if it’s to sit comfortably among a lot of other mix-filling information.
If a recording has less than ideal sound quality due to a poor-quality microphone, there is a little repair trick you can try. Using a very narrow-width (Q) parametric EQ, apply additive gain to a single band and sweep the central frequency to pinpoint any unpleasant, ringing frequencies. Set the gain to subtractive to lower the volume of these nasty resonances. A few of these careful dips can help to achieve a much more pleasant tone. Naturally, the application of compression and limiting varies depending on vocal style, microphone choice and mix context. However, adjusting the volume of vocal parts at the compiling stage will achieve a much smoother and less obvious-sounding compression effect.
Like breathing, sibilant sounds can be another problem that’s amplified by compression. De-essers are useful tools and can be sourced on their own or as part of a dedicated vocal processor. If you don’t have these tools to hand you can edit the sibilant parts and move them to another track. This enables you to control their levels independently from the main vocal part – just be careful to use a reference track when working on sibilance as it’s very easy to go overboard and make a vocal sound unnatural or create a lisping effect.
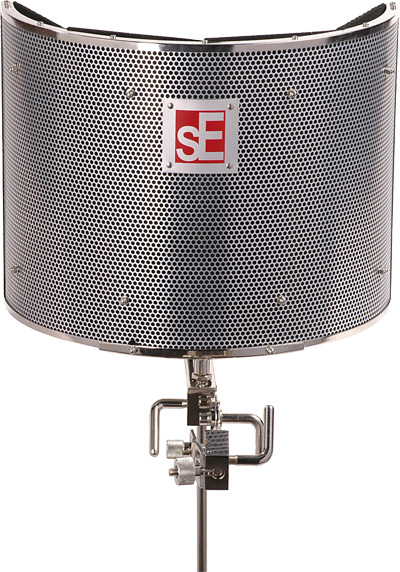
The sE Reflexion Filter Pro
The Next Session
Recording a professional vocal track is no easy task, but we hope you can now see where your energy is best spent. Yes, you may have to do quite a bit of editing if you’re after a contemporary, super-perfect vocal take, but the main focus should be to work with the source material at the earliest stage possible. This is when you have the choice of recording something good to edit into something better, or record something with that magic factor which may or may not need a little tweaking at the editing and mixing stages. If you take note of the good practice we’ve recommended, you’ll improve your vocal production skills for many sessions to come.