Exploring The New Wavetable Synth In Ableton Live 10: Step-By-Step (Continued)
We imagine you’re much like Martin Delaney and can’t stop playing with the wavetable synth. Here, he continues to explore some more cool features… 7. Play some notes and you’ll be hearing the sound of Osc 1 sweeping through the wavetable – it’s much more dynamic! Repeat the procedure with Osc 2 and LFO 2, […]
We imagine you’re much like Martin Delaney and can’t stop playing with the wavetable synth. Here, he continues to explore some more cool features…
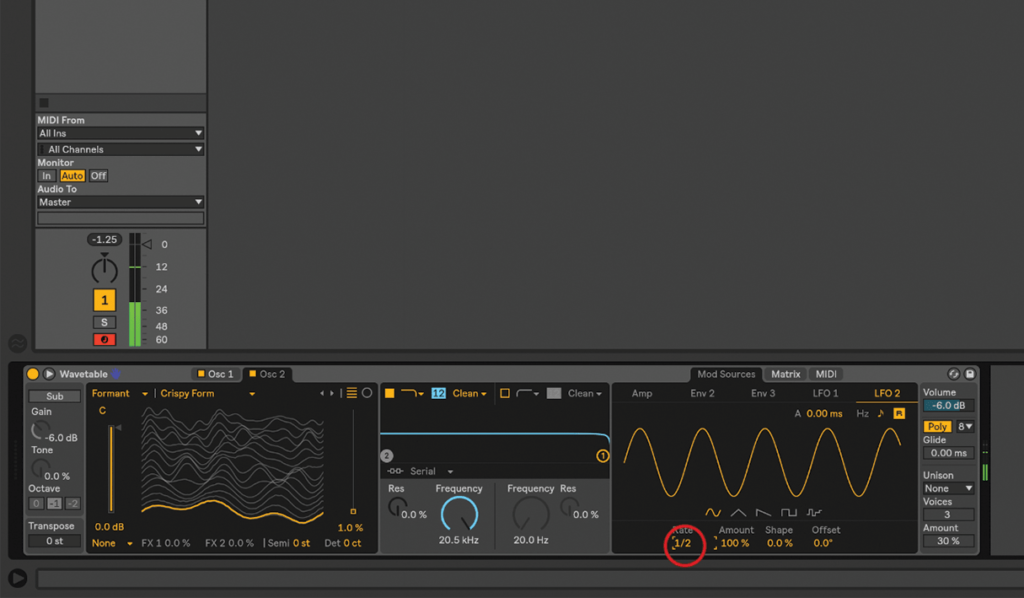
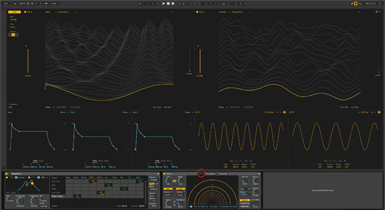
7. Play some notes and you’ll be hearing the sound of Osc 1 sweeping through the wavetable – it’s much more dynamic! Repeat the procedure with Osc 2 and LFO 2, but set the Rate to 1/2.
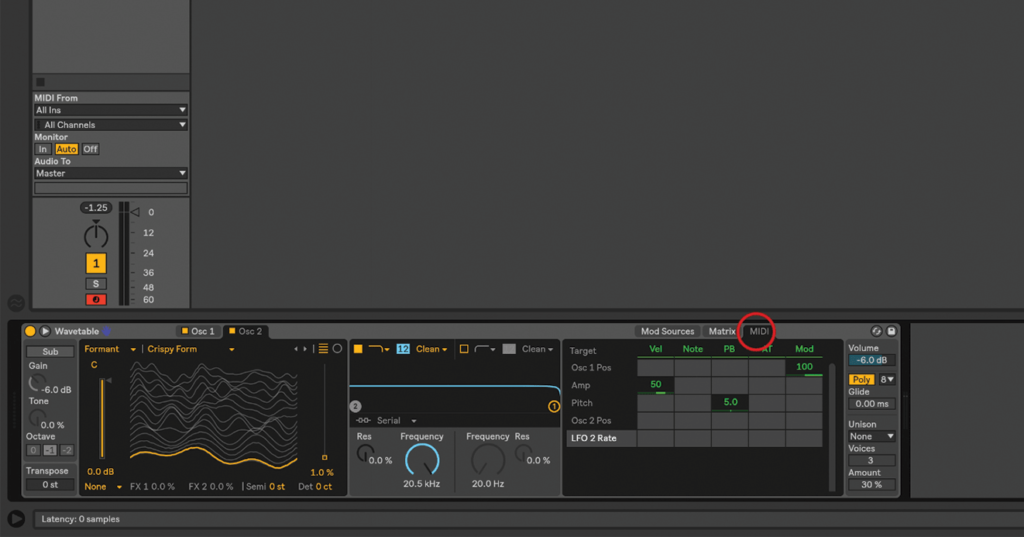
8. You’ll see that other modulation sources are available inside the Matrix, and also under the MIDI tab next to it. Feel free to experiment – I like using velocity with the Osc positions, for example.
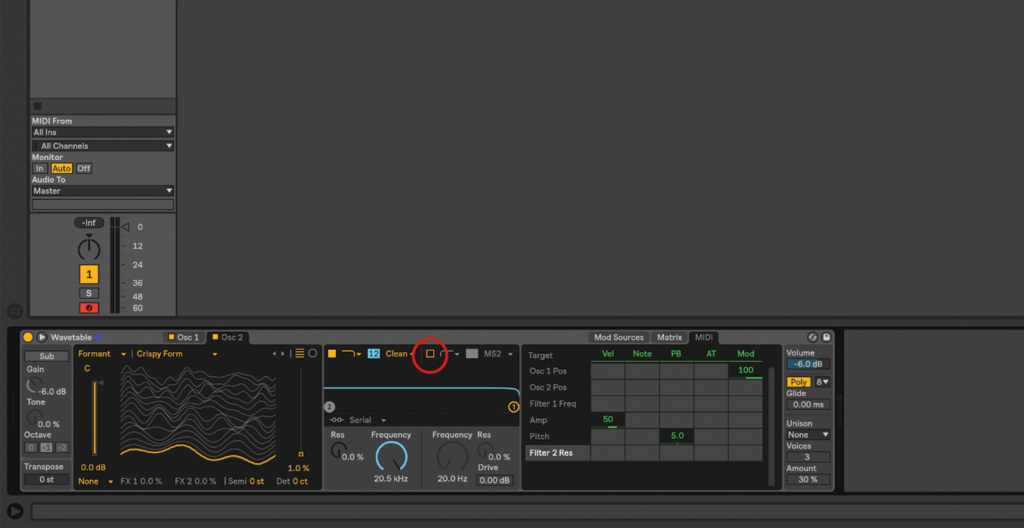
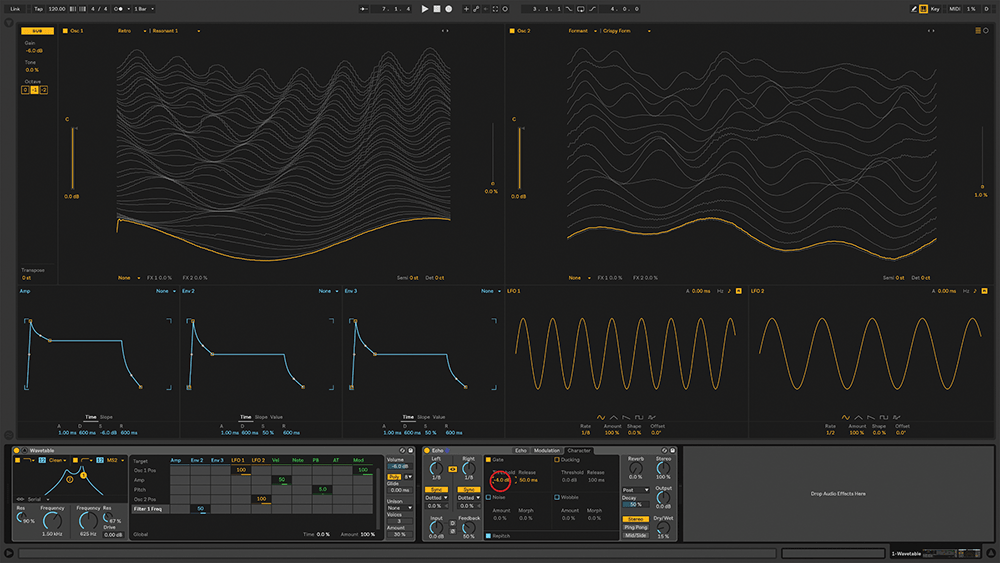
9. Wavetable has two filters, which are always visible in the centre of the device. Turn them both on with the little square switches: they play in series by default – 1 feeds into 2.
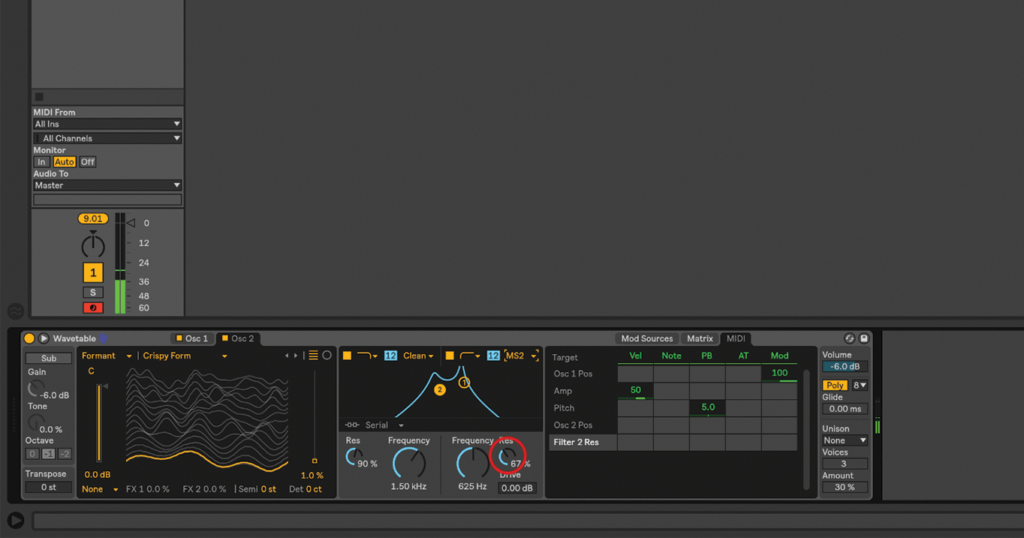
10. Set Filter 1’s Frequency and Resonance to 1.50 kHz/90%, and Filter 2’s to 63.5 Hz/67%. We’ll also change Filter 2’s type to MS2 – choosing filter types can make a huge difference.
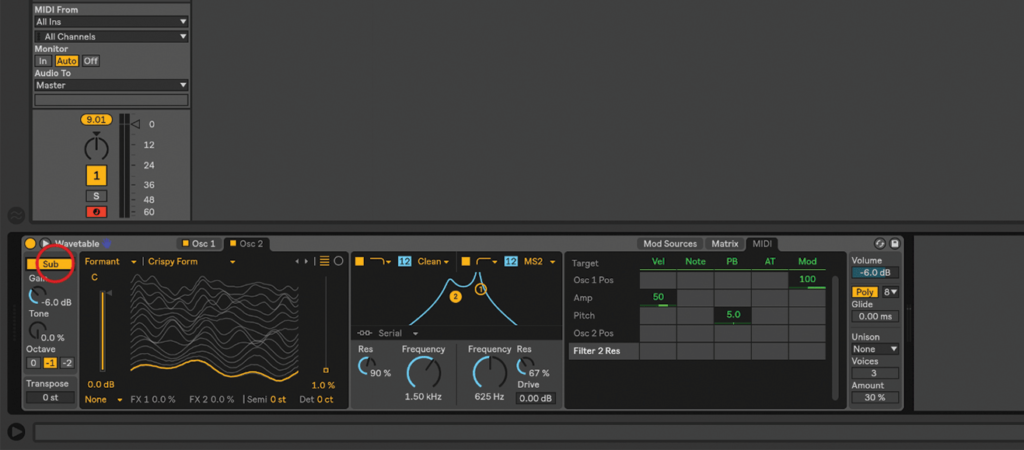
11. Live 10 is about nothing if not bass – so turn on the Sub oscillator at the far left of Wavetable below the On/Off switch. It has its own set of controls, so explore those.

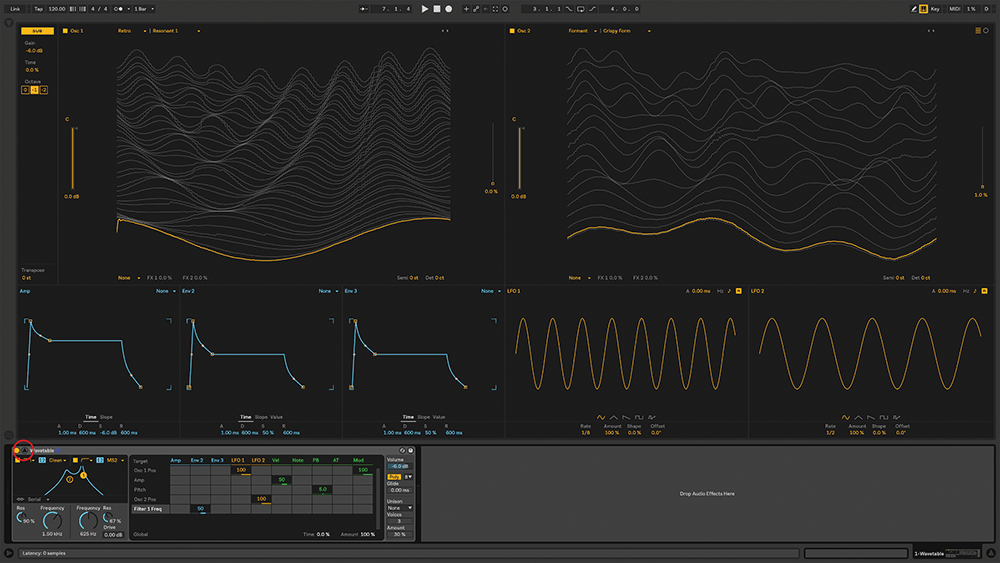
12. Let’s go back to the Modulation Matrix, and apply Env 2 to Filter 1’s Frequency – set it to 50. Click on the words ‘Env 2’ if you want to view and edit the envelope.
![]()
Bang the drum The new Drum Buss in Live 10 is worth delving deep into, with compression, distortion and transient-shaping on-hand to manipulate your rhythms to suit. Also useful are the low-end manipulation tools, including tuneable low-frequency enhancement via the ‘boom’ controls.
13. While you’re working, play in the octave range that you want to use the finished sound in. And use the triangle next to the device name to pop Wavetable out into a lush full-screen mode.
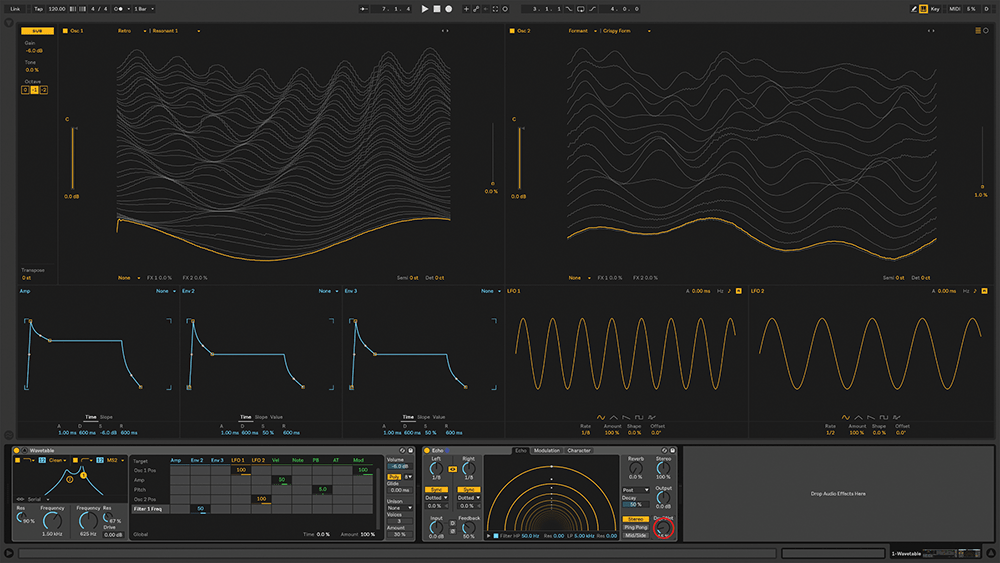
14. Wavetable pairs up beautifully with Live 10’s new Echo delay effect, so let’s load that in the same track. We’ll keep most of the default settings, but set the Dry/Wet to around 15%.
15. Where Echo differentiates itself from Live’s other delays is the Character section, with controls for Gate, Ducking, Noise, and Wobble. Adjusting the Gate Threshold can yield interesting results relating to input volume.
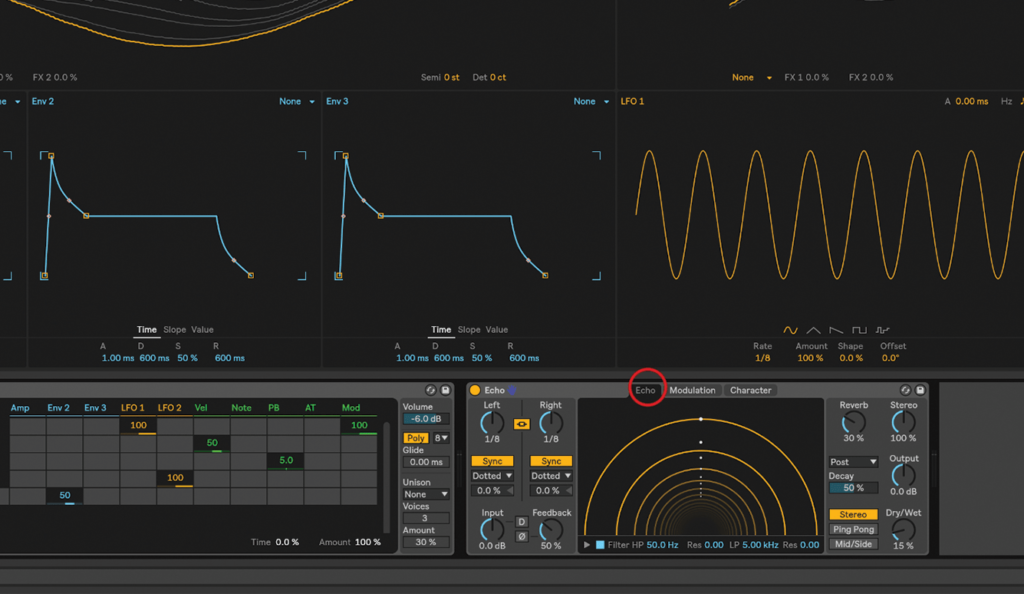
16. Echo also has a reverb, with the controls always visible on the right. Try setting the Dry/Wet amount to around 15%… of course, in the real world, that depends entirely on the project you’re working on!
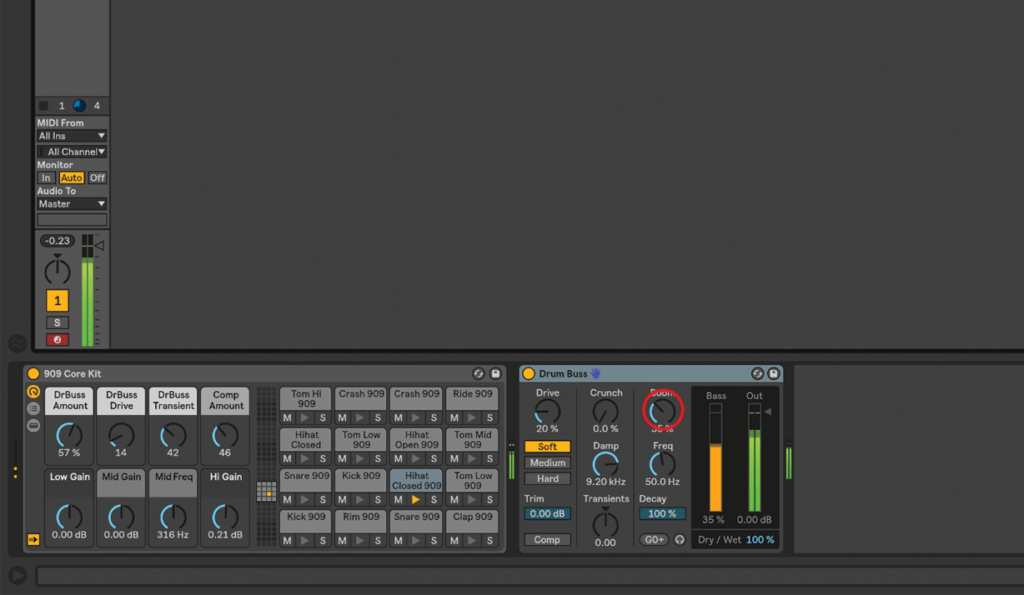
17. Live 10 also has Drum Buss, which includes drive, distortion, compression, transient shaping, and a great low-end boost called ‘Boom’, which can be tuned to the correct pitch for your song.
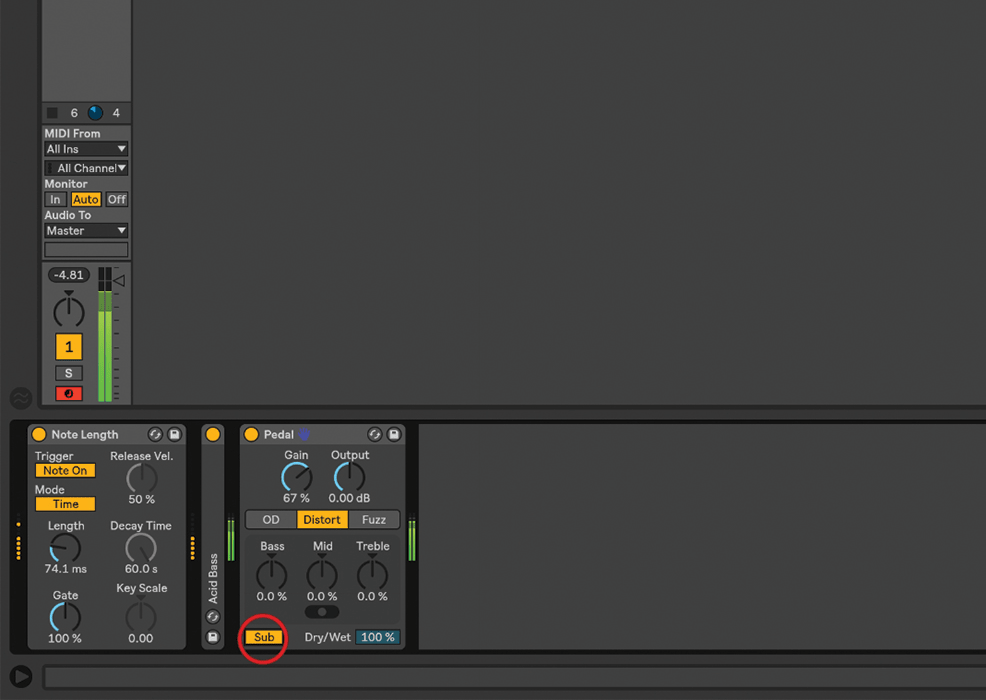
18. Guitar players (and distortion freaks in general) will love the new Pedal, which provides, overdrive, distortion, and fuzz, with some basic EQ controls, and like Drum Buss, a very handy low-end boost, called ‘Sub’.