Weekend Workshop: Create authentic dusty samples using freeware
Make those charity shop missions a thing of the past with our guide to making your own authentically crackly loops.
There are few things more satisfying than sampling an old record in a track, particularly if you’re lacking inspiration when faced with a blank DAW project. Using a musical sample as a building block gives you a key and structure to work within, as well as adding tonnes of character thanks to the musicianship and studio equipment used at the time.
Meanwhile, entire genres of music have been built around samples of classic rock, funk or soul drum breaks, which are prized for the vintage tone and top-level, groove-filled playing that characterised recorded music back in the 1960s and 70s. Bearing all this in mind, it’s no surprise that many sample-junkie producers have spent a large chunk of their time digging through charity shop bargain bins, market stalls and car boot sales to find those dusty gems waiting to be sampled.
However, with copyright detection algorithms and lawsuits for breaching copyright through sampling being evermore commonplace now, there’s never been a better time to create authentic-sounding, dusty loops from scratch. Let’s run through some killer techniques that’ll make those missions to your local Oxfam a thing of the past…
What you’ll need:
- A DAW
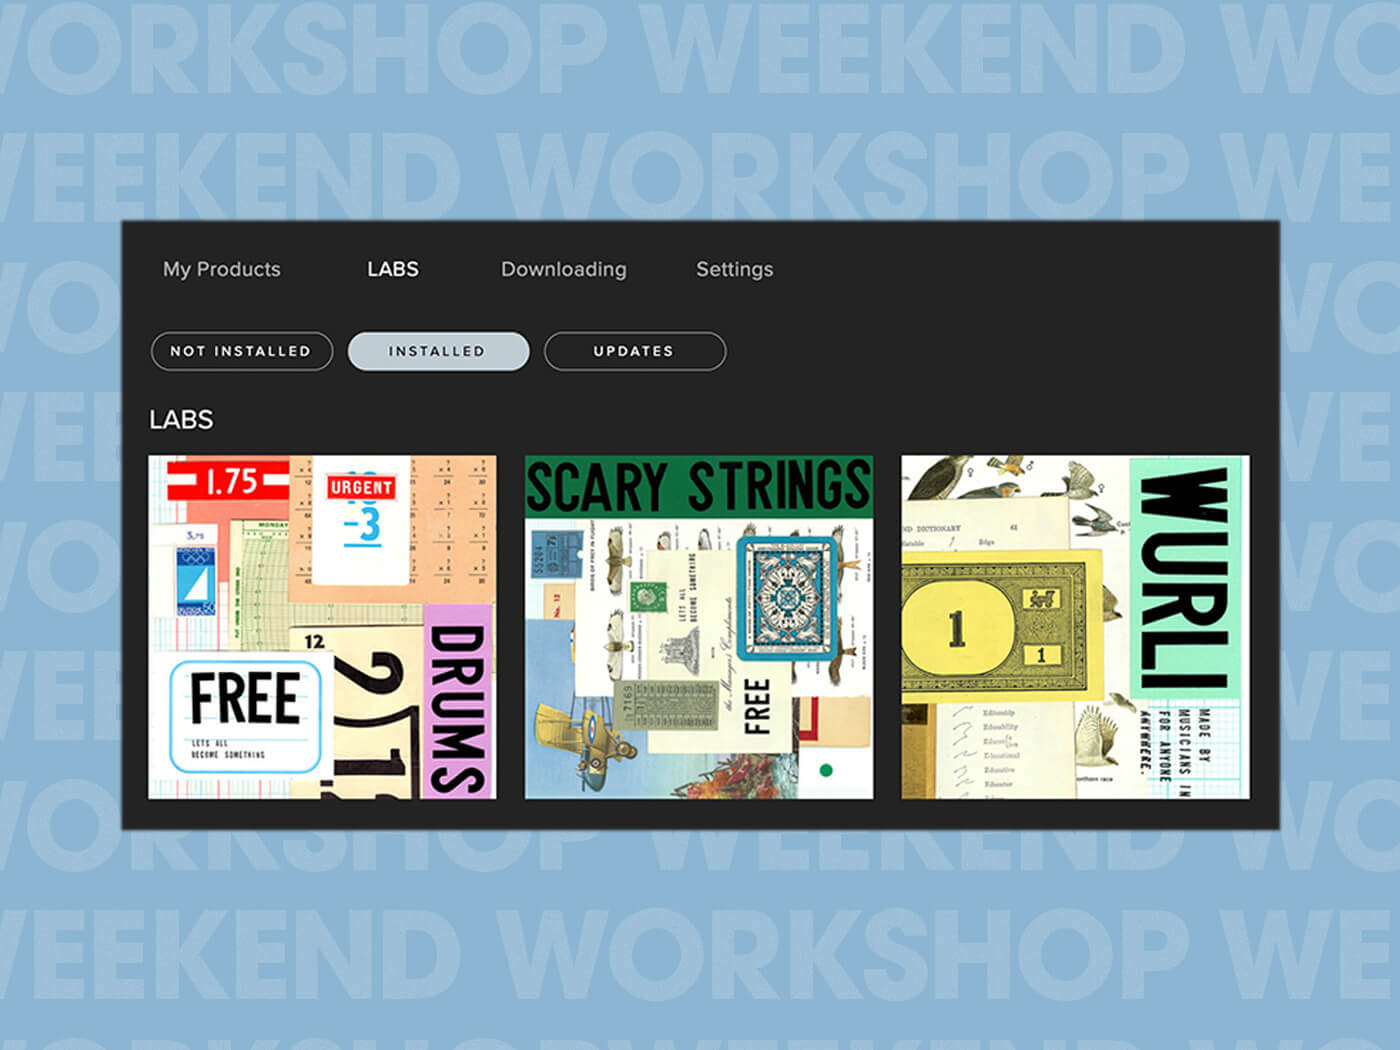
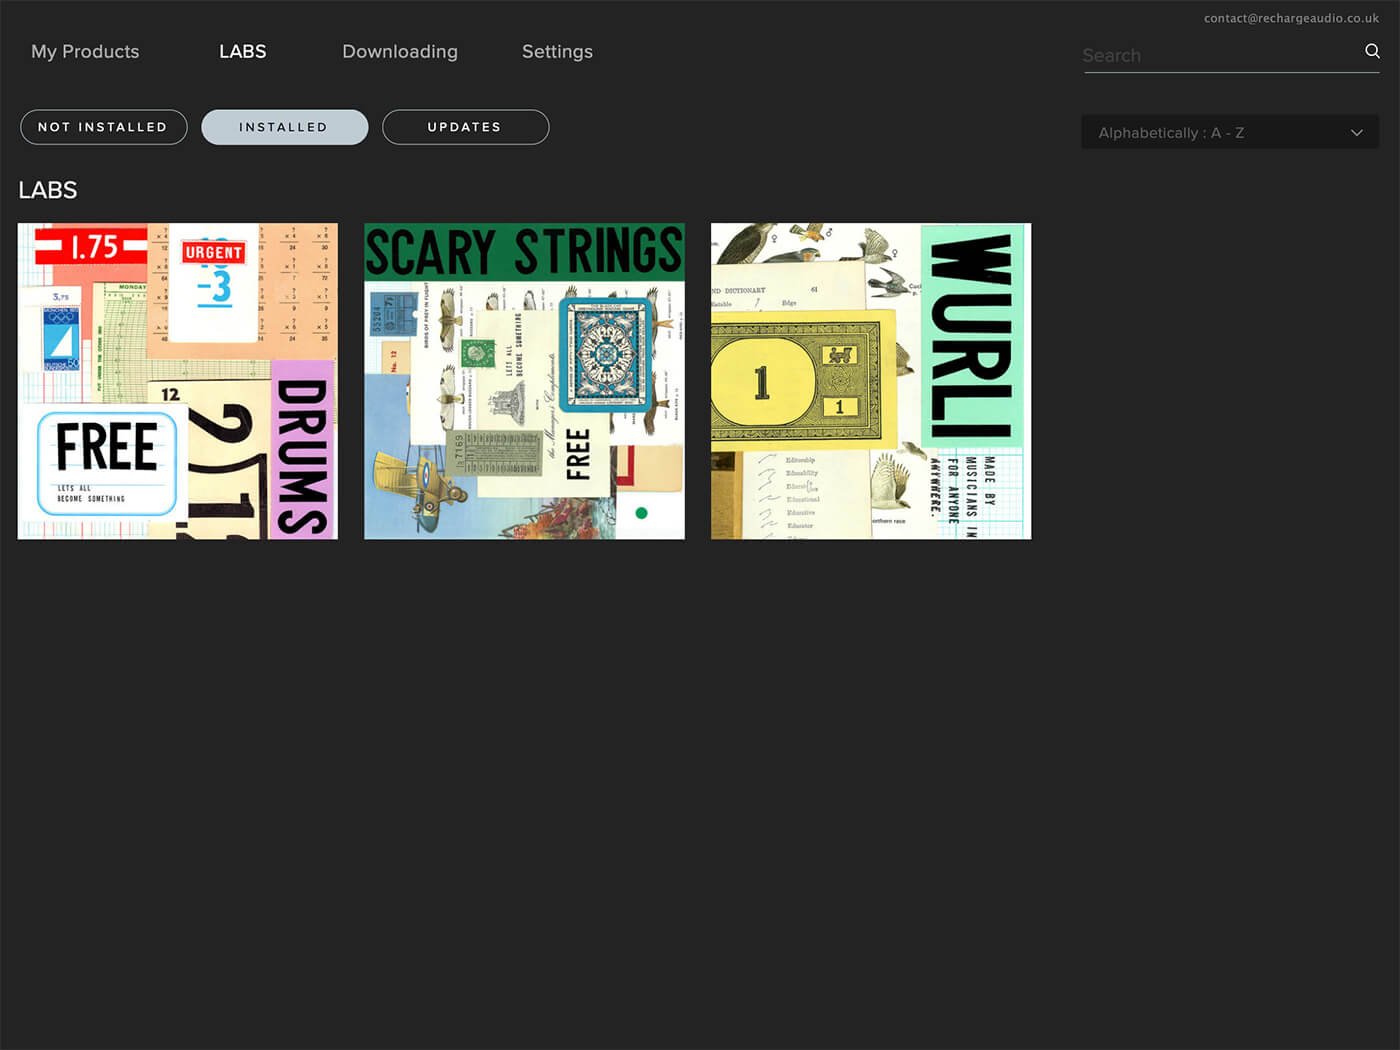
- Spitfire Audio LABS, available free, here.
- Klangheim IVGI and DC1A3, available free, here.
- Vinyl crackle/noise samples
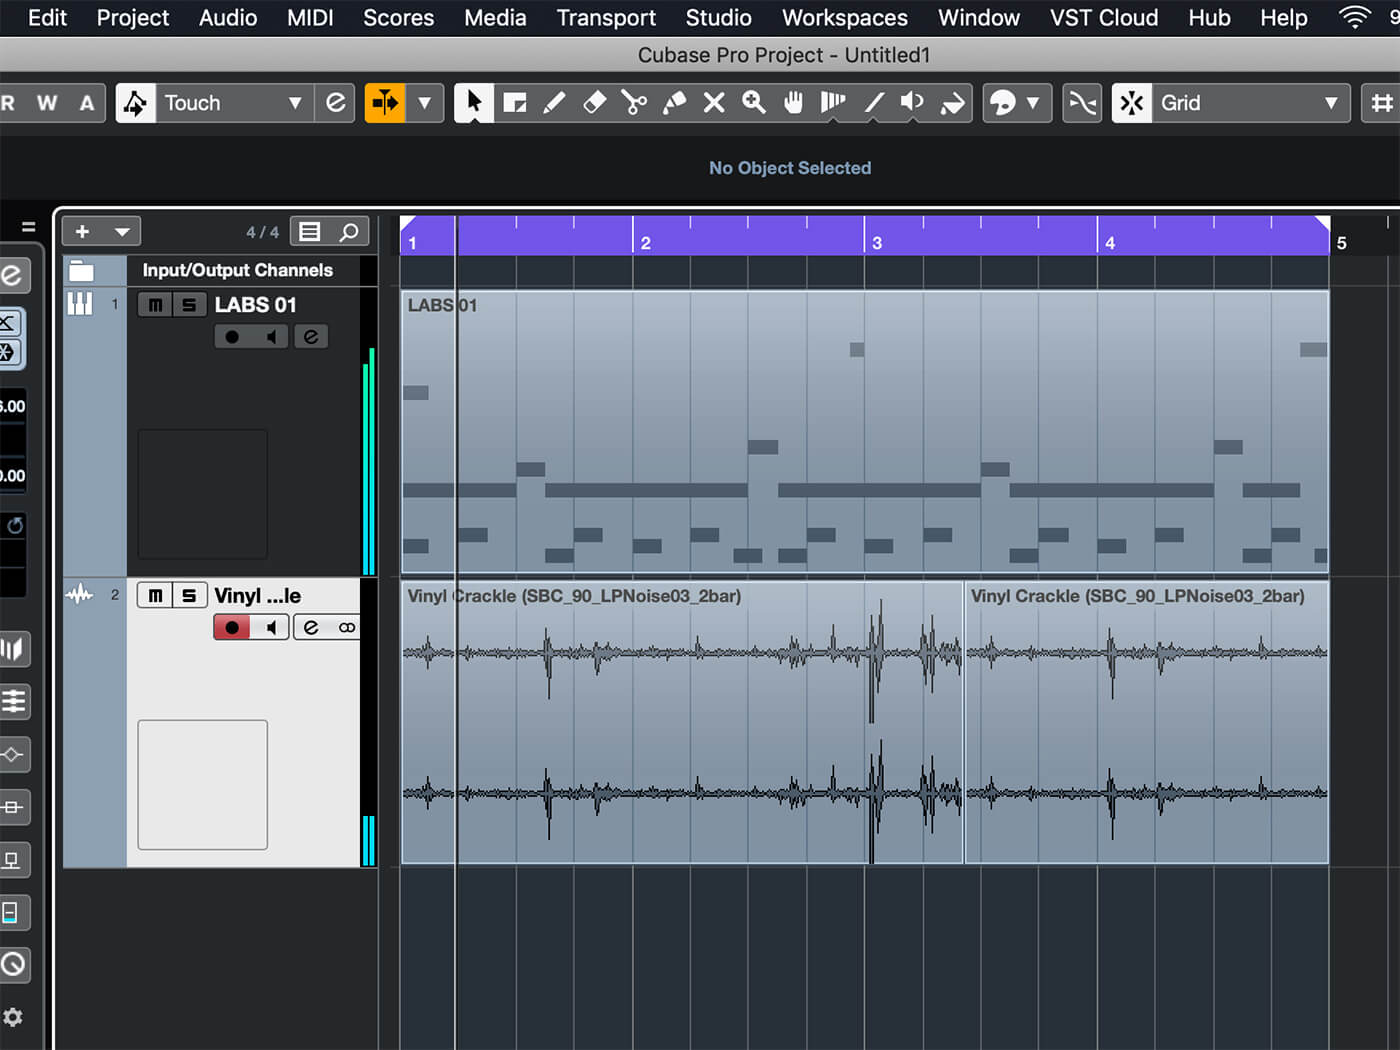
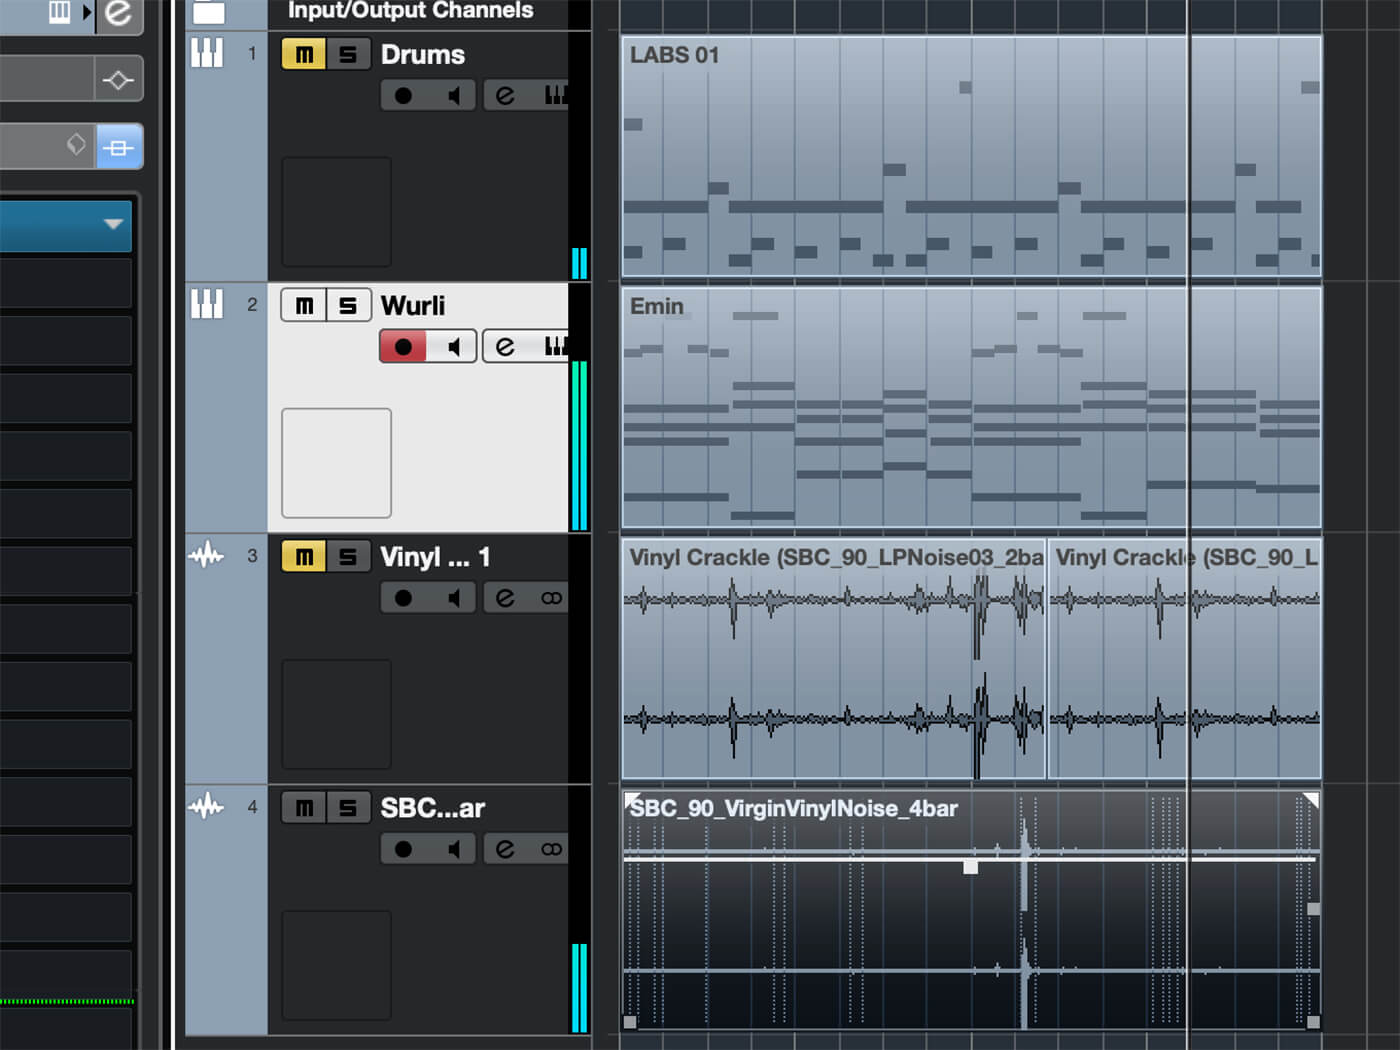
First, you’ll need to install Spitfire Audio’s LABS; this is a fantastic, free ROMpler that offers access to a variety of excellent sounding soundbanks sampled from real instruments. Once installed, open the Spitfire app, navigate to the LABS tab and install the Drums, Scary Strings and Wurli instruments; we can use these to create three lifelike individual loops that can be sampled individually, or collectively, when making a track.
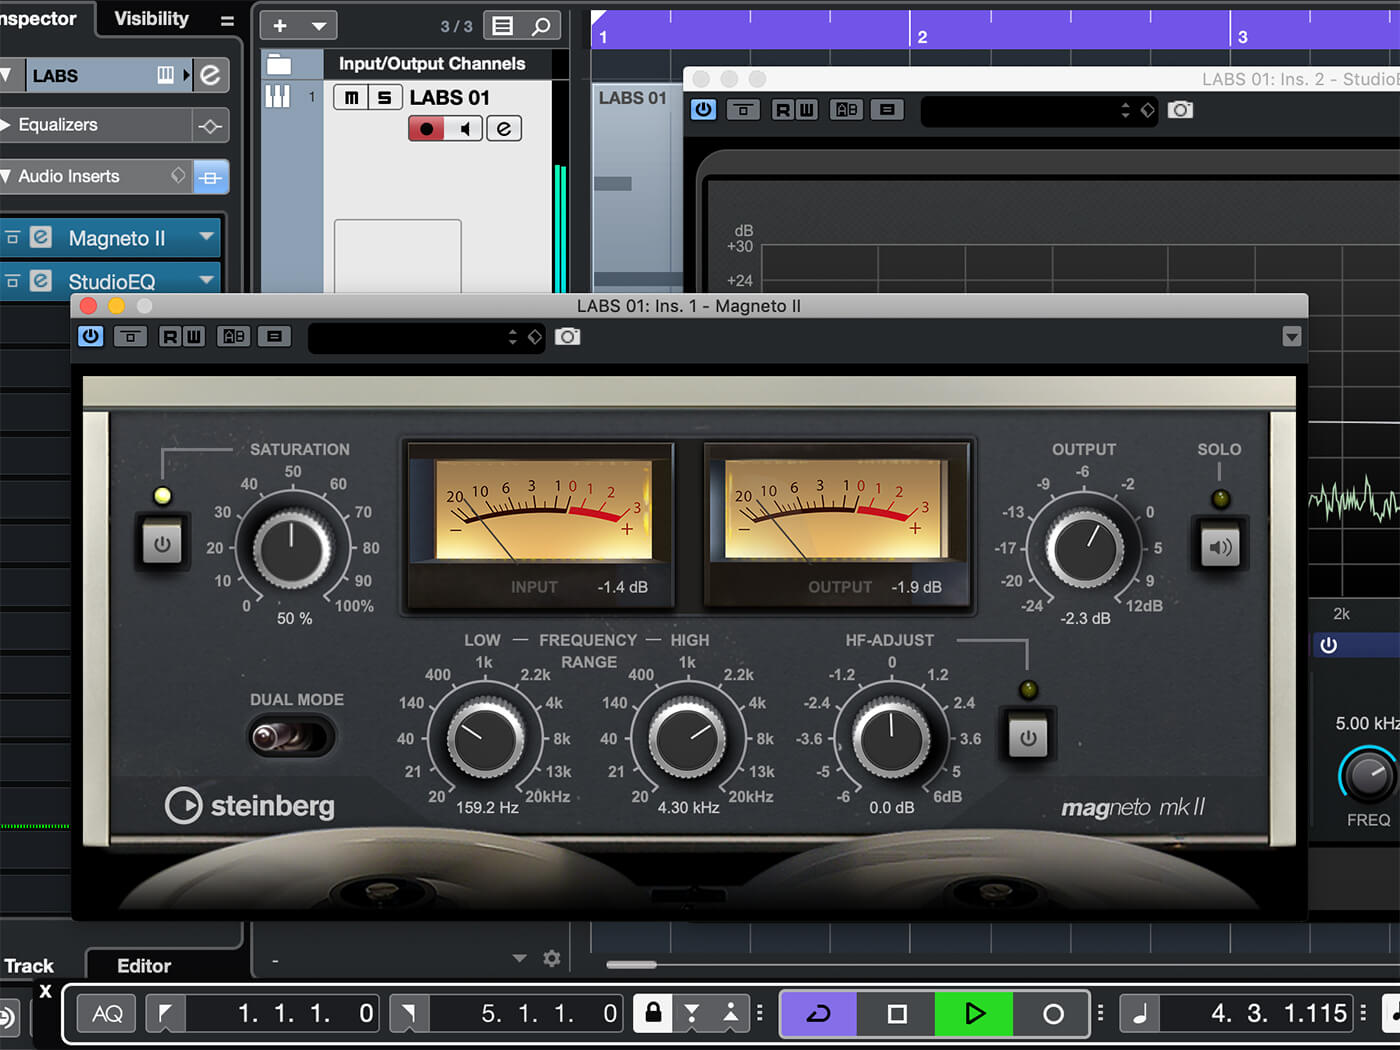
While you’re at it, install Klangheim’s IVGI and DC1A3 – these plug-ins provide us with vibey saturation and compression we can use for colour and tone.
1. Drum break
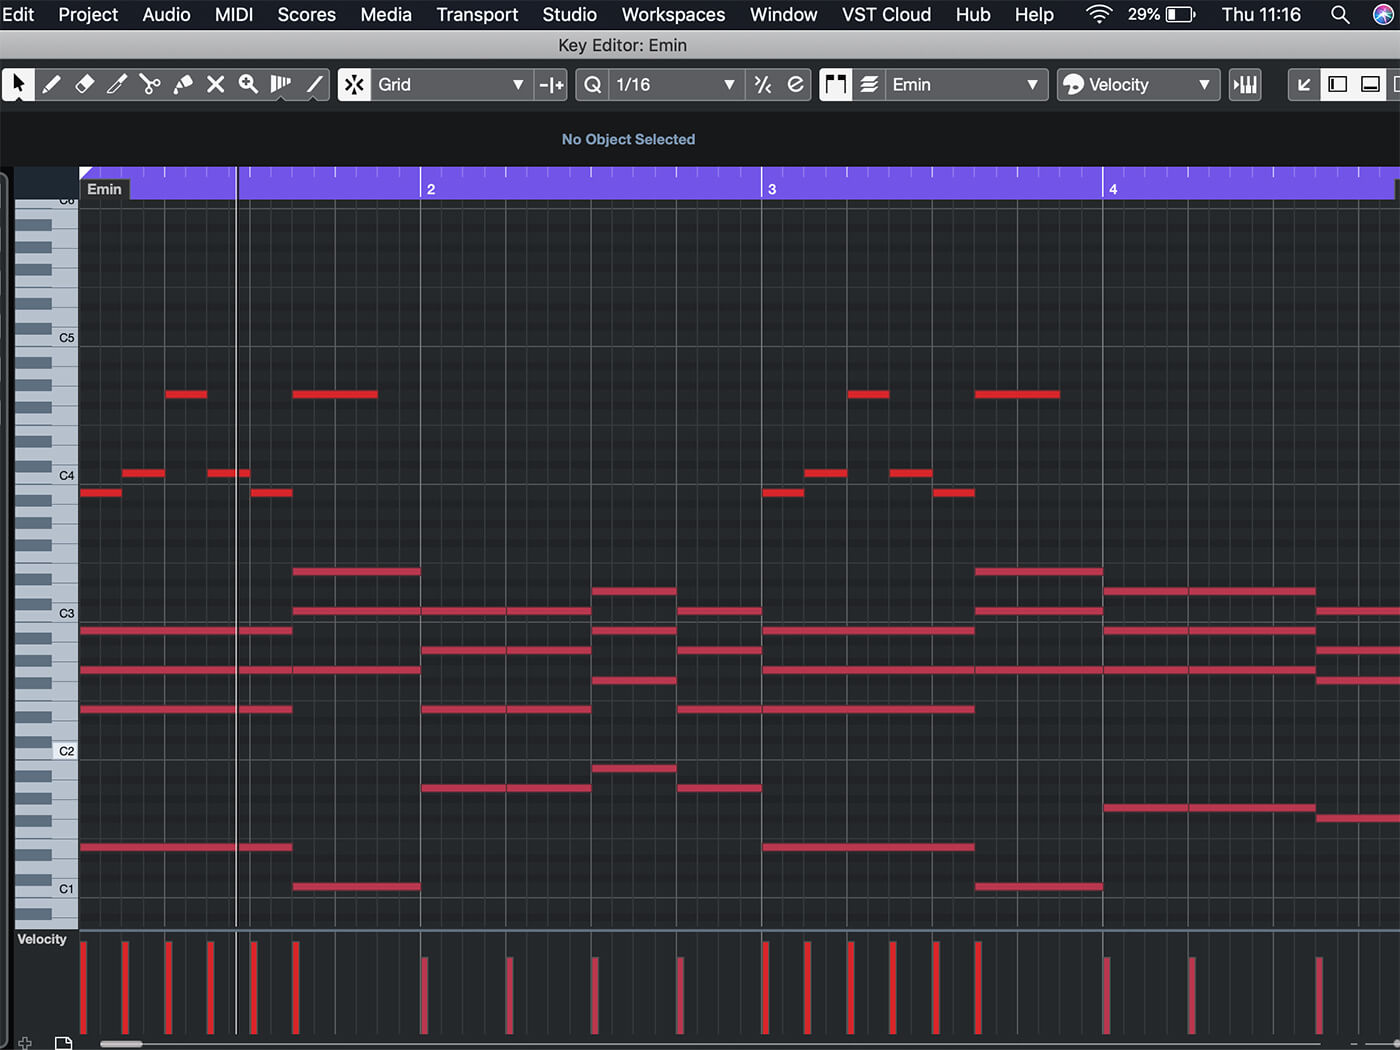
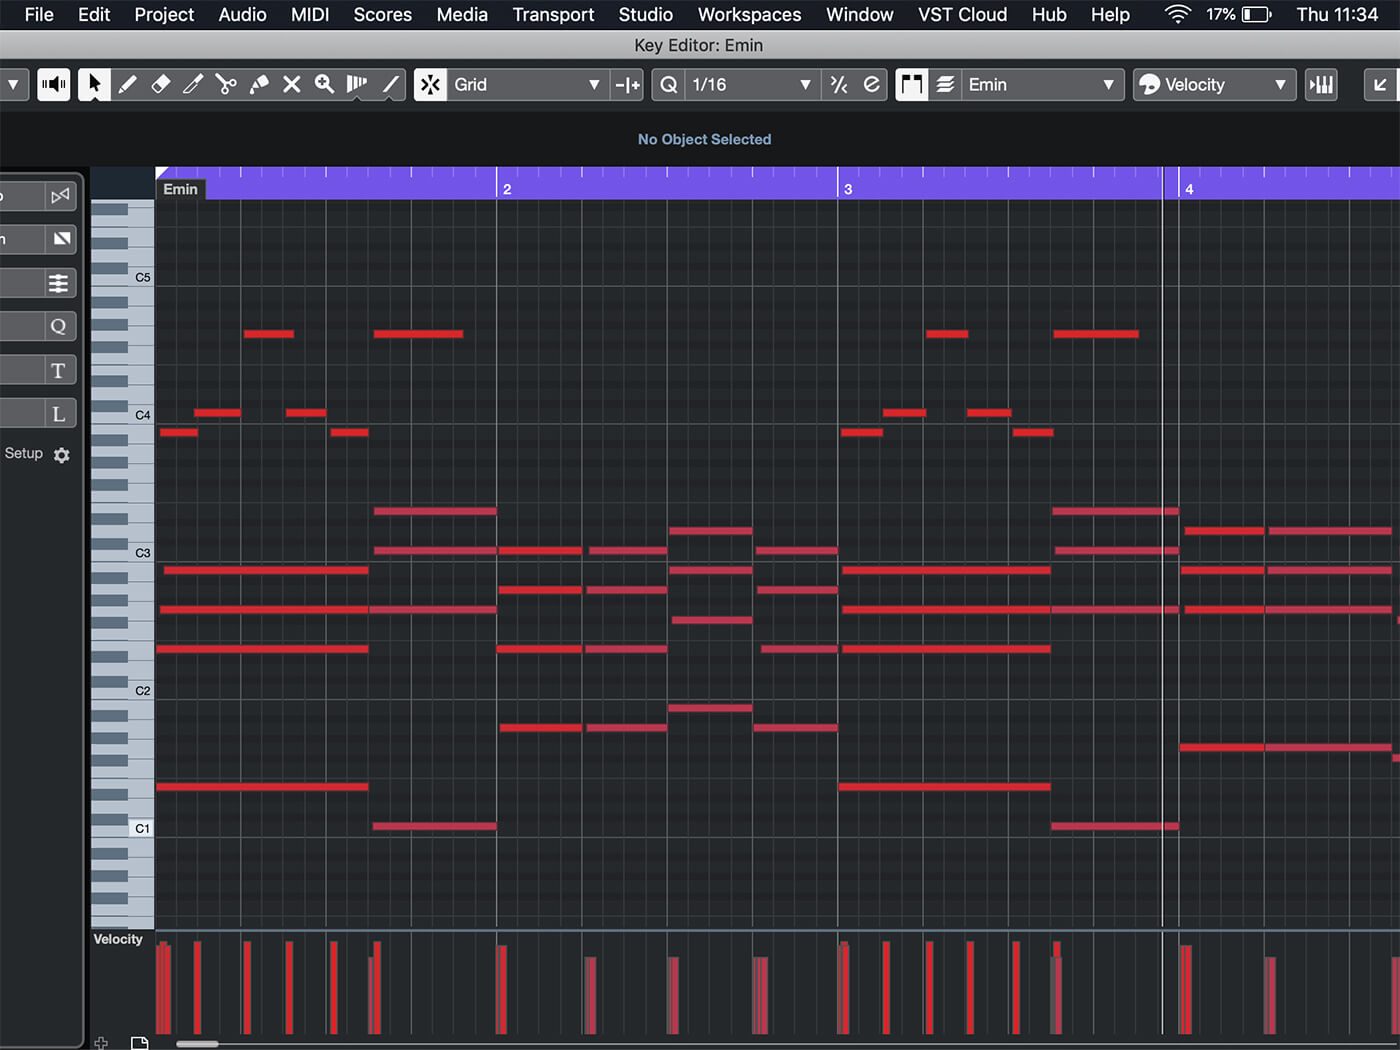
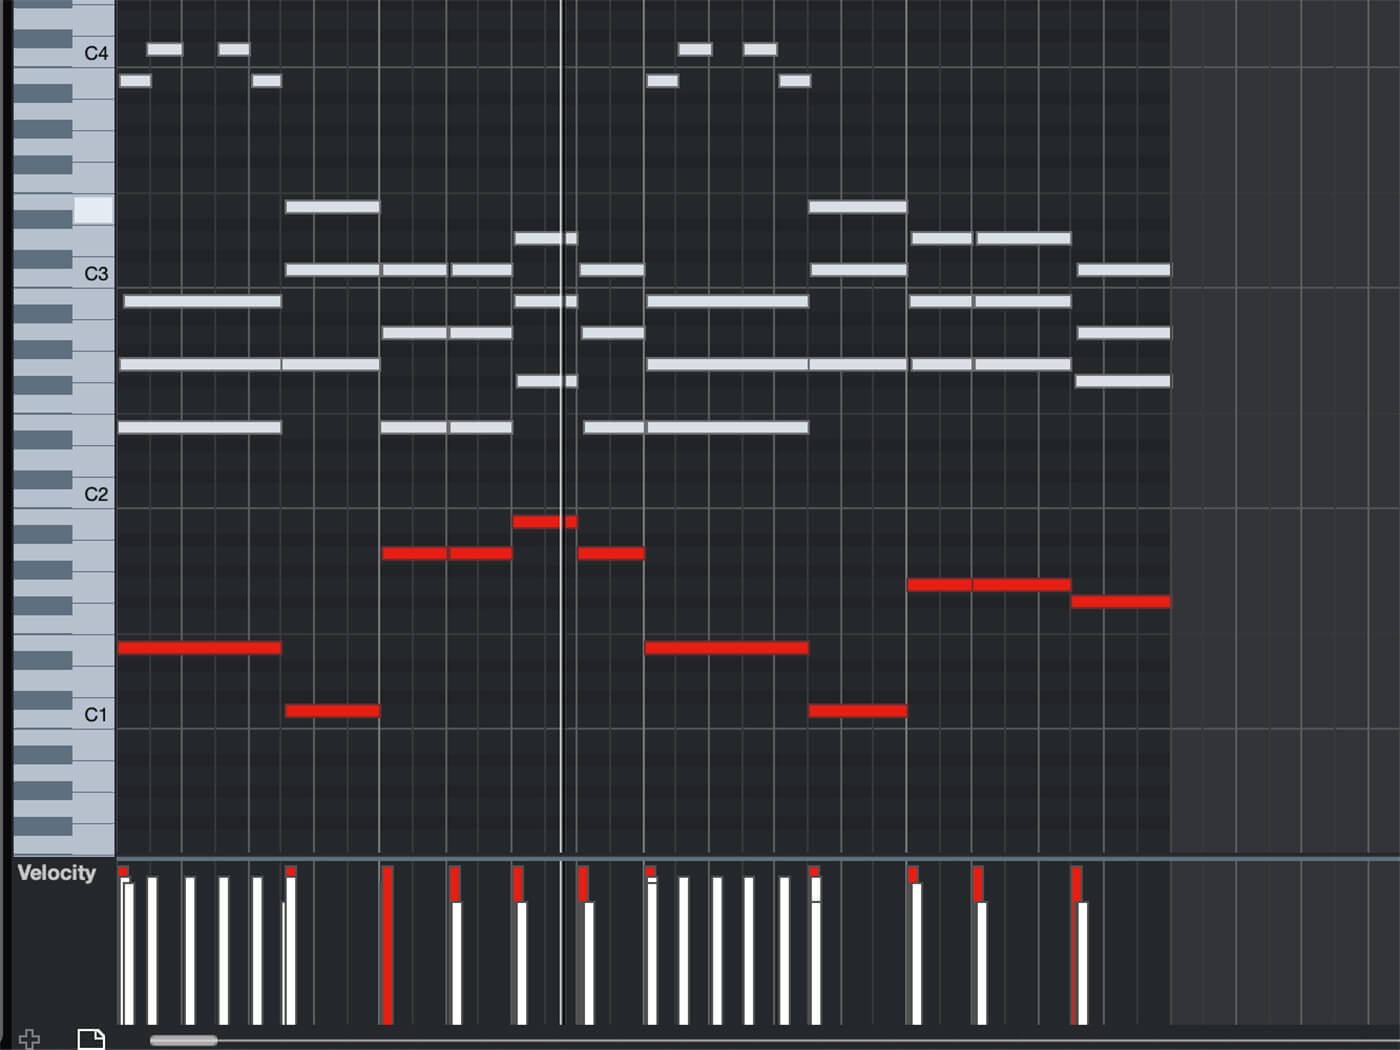
Let’s start by making a drum break over four bars, with our DAW’s BPM set to 115. This tempo is pretty flexible if you’re time stretching the finished samples later on, as it’ll slow down to hip-hop tempo or speed up to house/garage tempo without the time stretch algorithm creating too many unwanted artefacts.
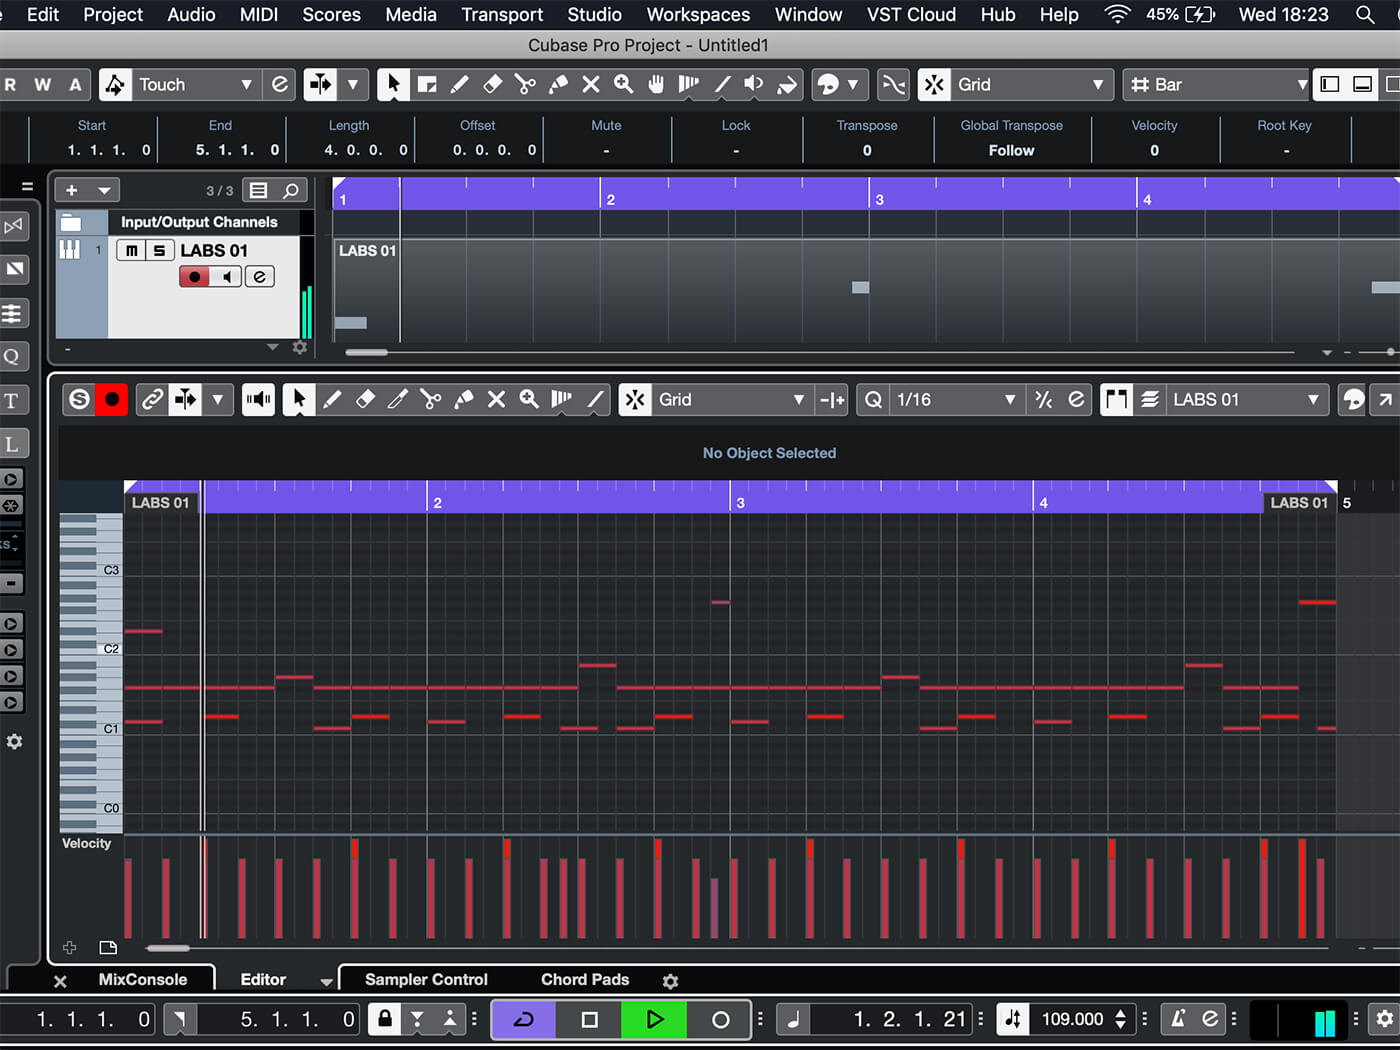
We’ve drawn in a simple four bar break on the piano roll, with a slightly different sounding kick on the offbeat adding a live feel, and the snare’s velocity pushed up higher than the rest of the drums to increase its volume. A simple 1/8th note closed hi-hat, with the hat on beat 3 of every bar as a partly closed, or open hat drives the break along nicely. We’ve also used two slightly different snare fills at the end of bars 2 and 4, again adding a slightly more live feel.
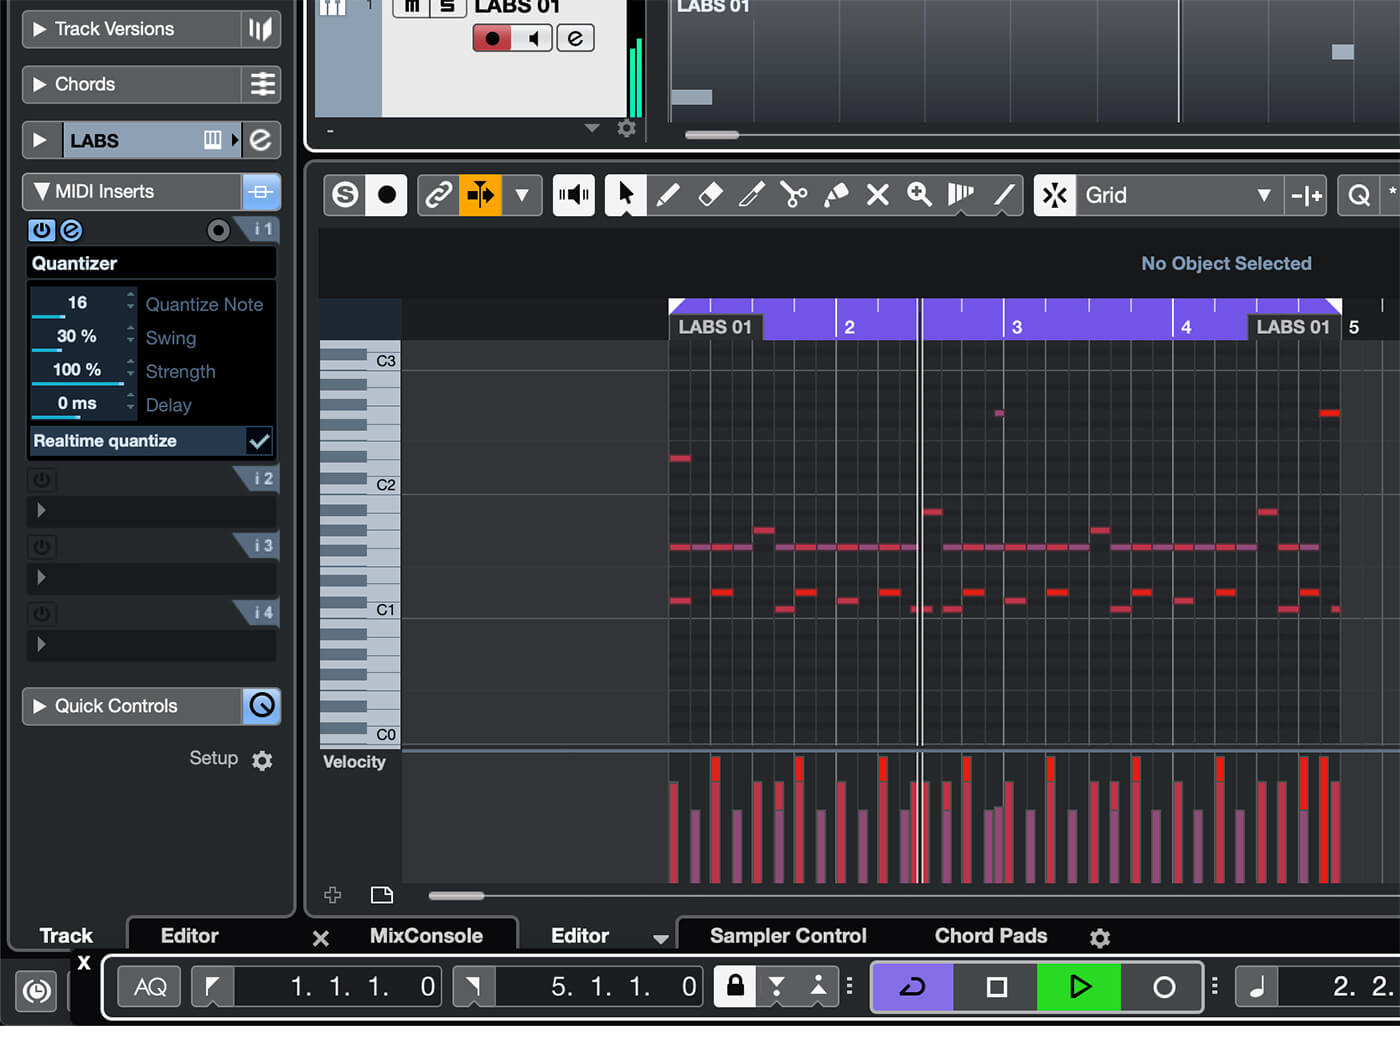
To make the break sound more lifelike, we’ve tweaked the velocity of each offbeat hi-hat, so it’s a little softer than the hats on beat. The final touch is to add a little swing so that the snare fills and kick on 16th notes are slightly loose; we went for 30% swing. Another way you can add groove to a programmed drum break is by using a groove template; you can either create your own from a drum break of your choice, or use one that’s included with your DAW.
A little processing will give the break a more authentic, retro sound. We’ve used Cubase’s built-in tape saturation plug-in to give the drums a darker, more glued together feel. There are various free and premium saturation plug-ins out there, too, and your DAW may also have some options. There’s a low-pass EQ filter placed after it to remove the high frequencies above 15kHz. This filter further reduces the shiny tone of the source audio. Chaining the two plug-ins together in this way creates a similar signal path to that used when recording back in the days of analogue studio kit, for added realism.
To complete the effect, we’ll layer some surface noise sampled from vinyl underneath the break. We grabbed ours from the free Bandlab Scratch & Cut Vinyl sample pack, but you can record your own from a piece of wax, or pick some surface noise you like from a royalty-free sample website. We’ve turned down the noise sample a bit, so it blends into the break more effectively.
2. Organ Riff
Now we’ve laid down the drums, we can build on these with some keys. A second instance of LABS, with the Wurli DI preset loaded, gives us a fantastic sounding Wurlitzer organ as a source sound. You can either play in a riff using a MIDI keyboard, program something using your DAW’s piano roll, or alternatively use our pre-programmed MIDI part as a starting point (download it here).
The MIDI riff we’ve programmed sounds good, but is pretty static at the same time, because the notes are rigidly quantised. So, we’ve subtly moved the start of certain notes ahead, or behind the grid with the snap turned off, giving a more realistically played sound.
We’ve also increased the velocity of the first chord on each bar a little, to give a more dynamic feel to the riff.
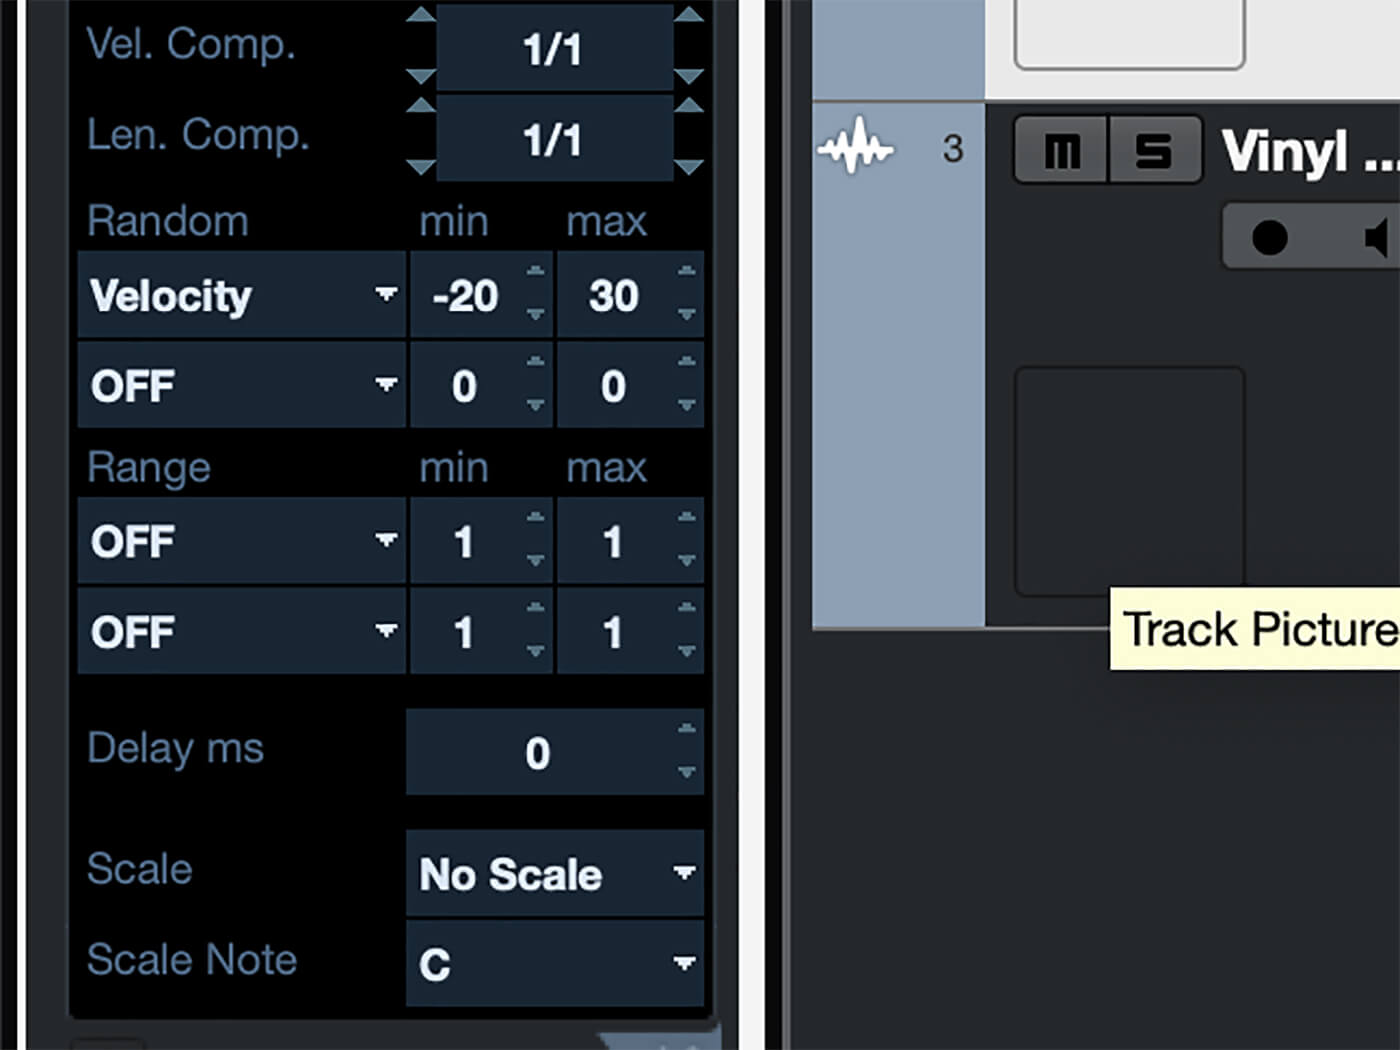
Another way of adding extra feel is to use one of your DAW’s bundled MIDI plug-ins to randomise the velocity of each note that is played. We’ve set ours so that the velocity will be randomised by 20 points either way, adding to the live feel that we’ve already created.
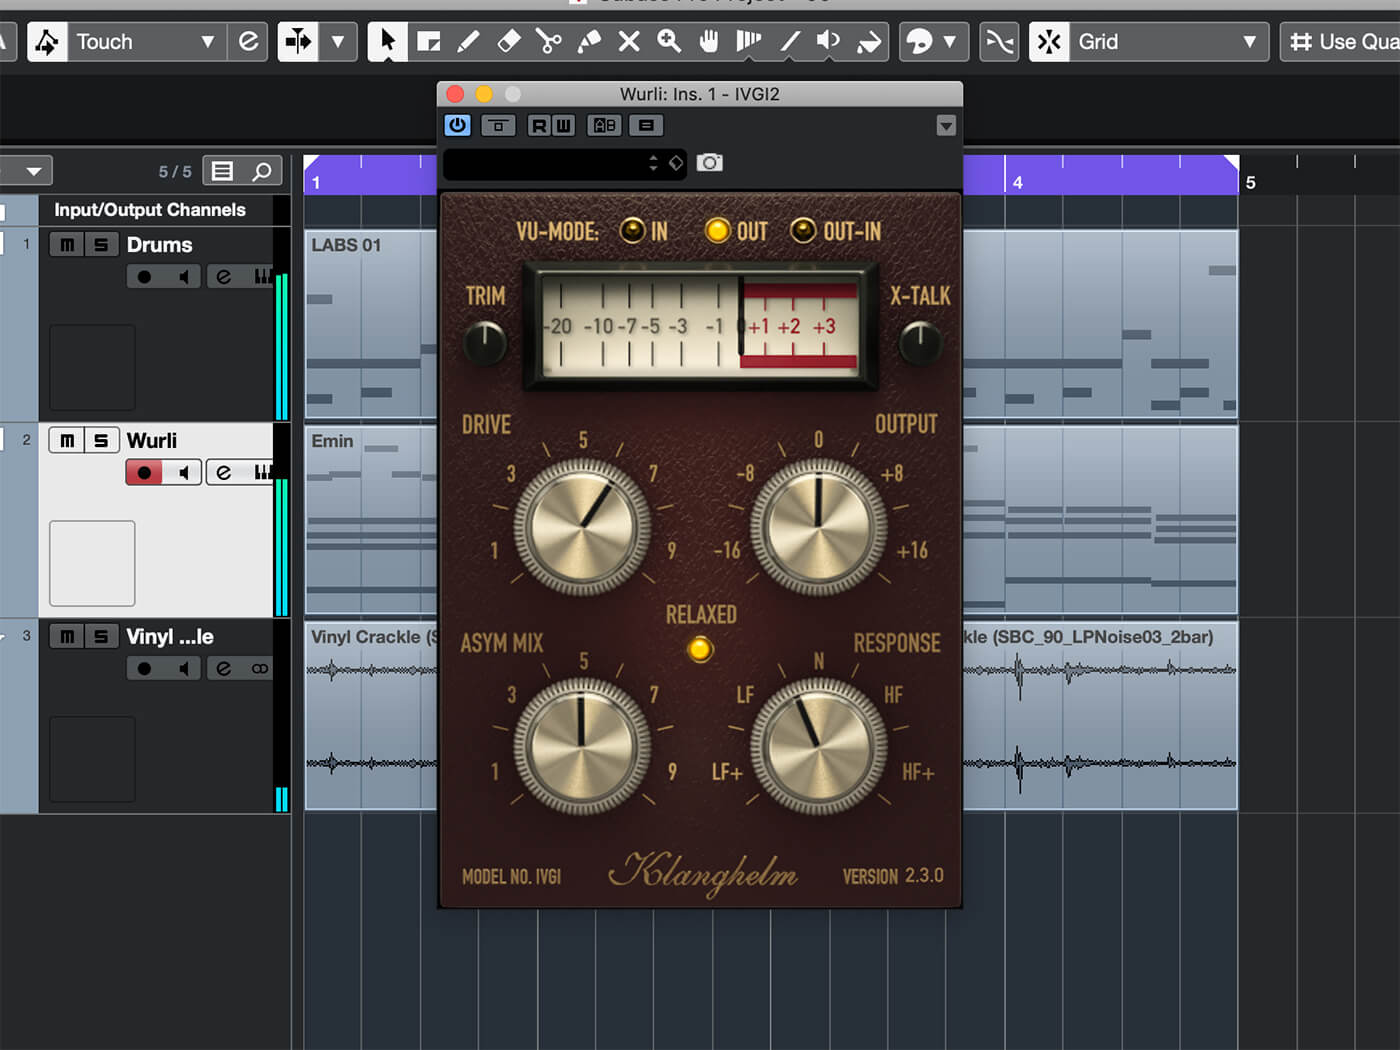
A splash of saturation will enhance the classic tone and feel we’re after nicely. Klangheim’s IVGI is perfect for this job, as it not only sounds convincingly vintage, but is also highly tweakable. We’ve pushed the Drive amount to 6, and switched in Relaxed mode to dull the mid and high frequency harmonic distortion slightly. Setting the Response dial to around 11 o’clock further shapes the sound by reducing the high frequency response of the saturation, for a more vintage tone.
To finish this sound off, we’ve added some more vinyl surface noise layered behind it, this time taken from a brand new, unplayed record. Using a different noise sample from the one used for the drums will give the keyboard sample a more unique overall sound, making it feel like it’s sampled from a different record.
3. String Bass
Some bass tones, courtesy of LABS’ Scary Strings instrument, will round off our set of samples nicely by adding some weight and depth to the keys. We’ve started by copying the MIDI clip from the organ we made earlier onto the strings channel, then muting all of the notes except for the root notes of each chord.
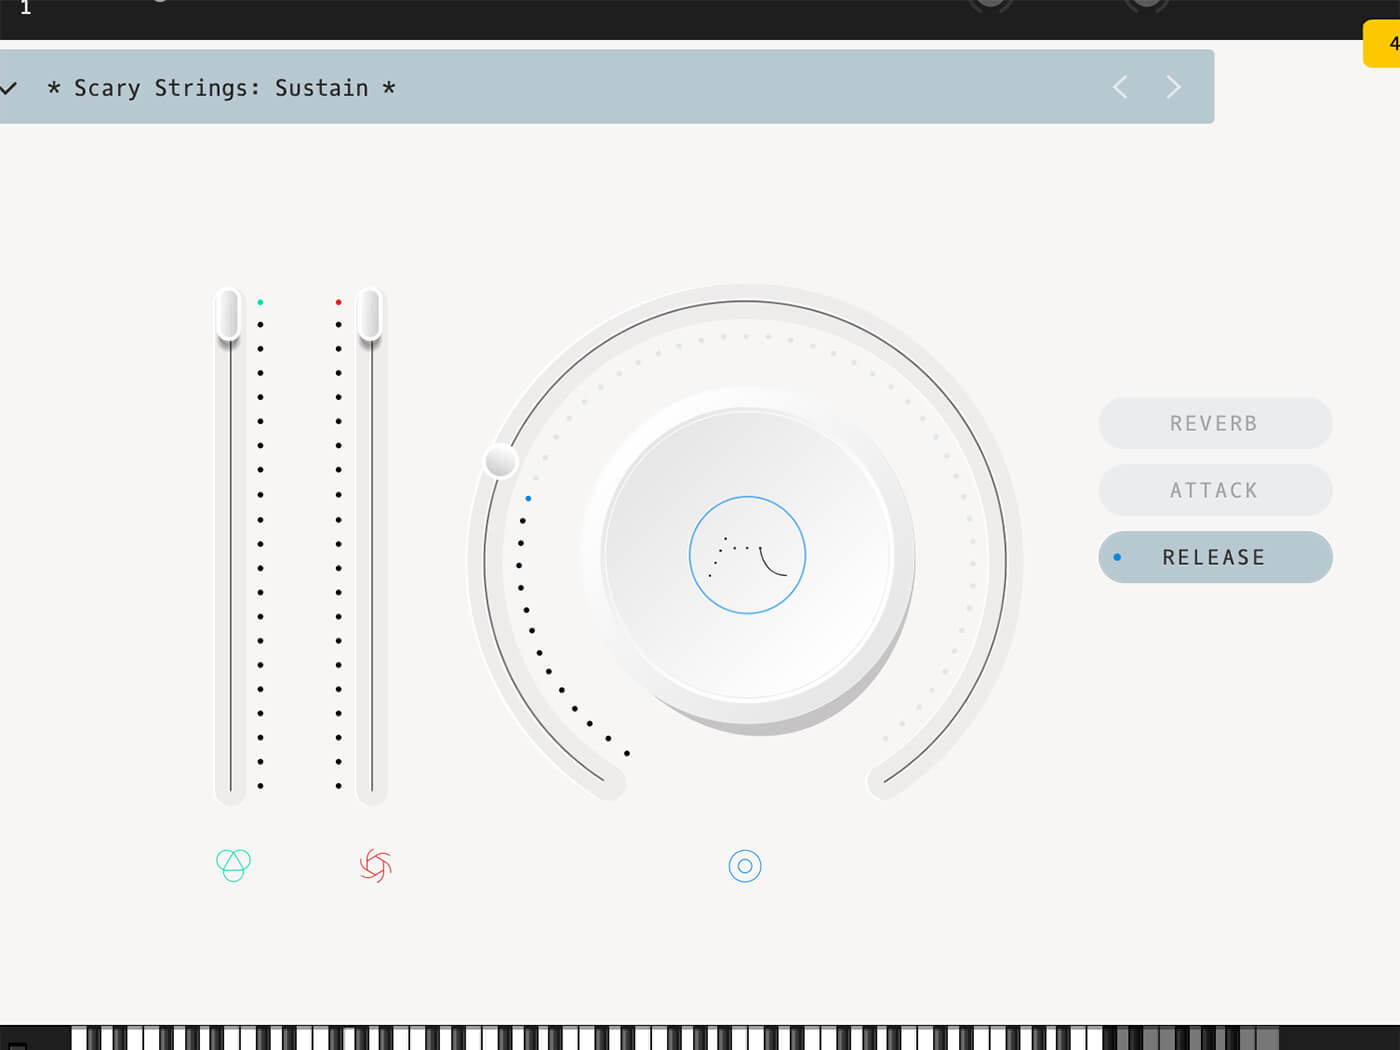
As the LABS instruments are comprised of multisamples played at varying levels of intensity, increasing the velocity of the root notes to 127 makes the strings sound like they’re being played more forcefully. We’ve chosen the Sustain preset as a starting point, and we can tweak the preset to make it more suitable for our needs.
Next, reduce the Reverb amount (far right) to around 10%; this makes the strings sound more direct, without them sounding totally dry. Clicking the button in the centre of the Reverb dial lets us adjust the attack and release times as well. We’ve set the Attack time to around 5ms, and Release to roughly 200ms so that the strings have a more immediate start, with less of a long tail. The strings sound rather quiet, so we’ve pushed up LABS’ output volume to 400% to boost the volume.
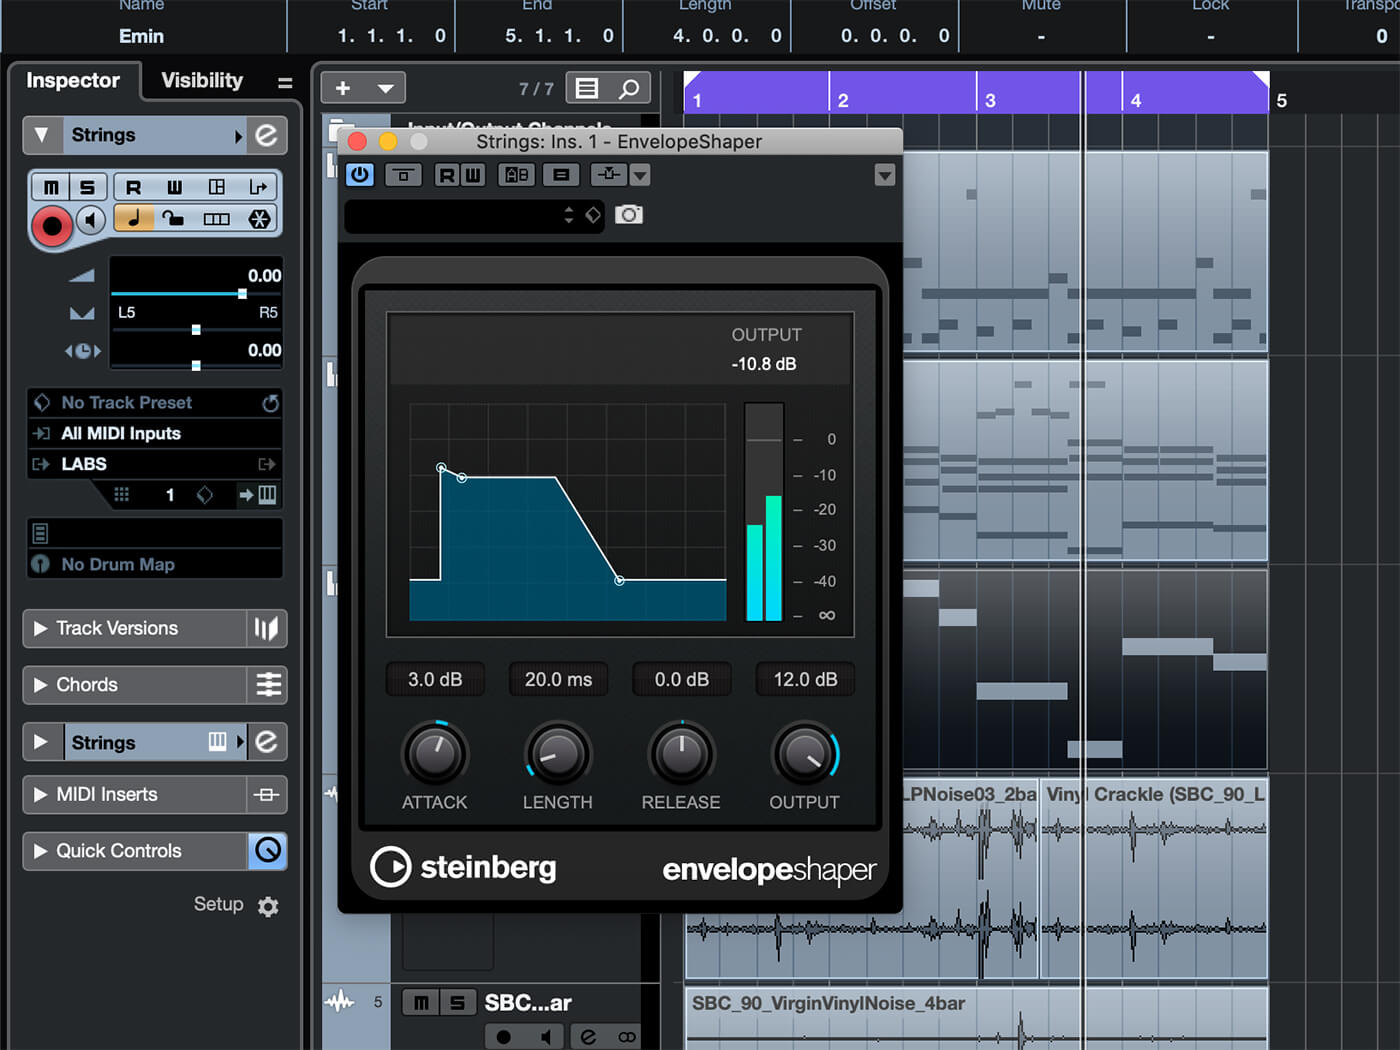
Now we’ve shaped the strings in LABS, we can use some plug-ins to beef them up. Our DAWs envelope shaper can be used to embellish the attack with a 3dB boost, with an extra 12dB of output gain pushing the strings up in the mix even more. As the string section in LABS is a stereo recording, we’ll use our DAWs stereo combined panner to bring the left and right channels more into the centre of the stereo spread, increasing mono compatibility whilst providing a more solid low end.
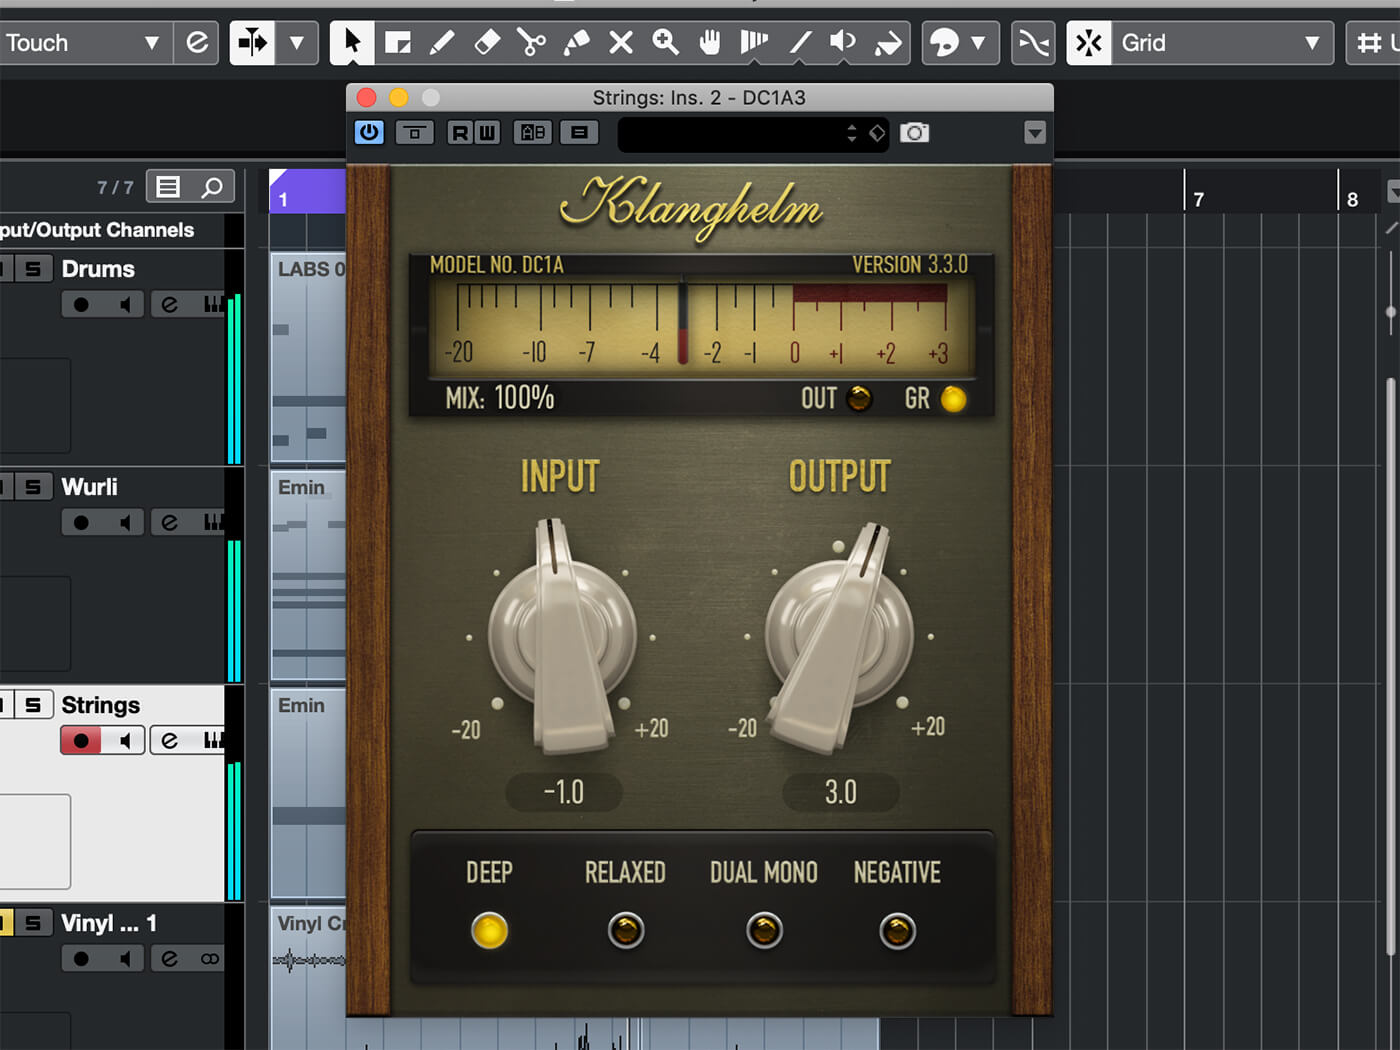
A touch of compression from Klangheim’s DC1A3 will reduce the dynamic range, bringing up the background noise present in the strings for added atmosphere. We’ve set the Input to -1, and the Output to 3 to drive the compressor, whilst balancing the volume of the wet and dry signals. Hitting the Deep button activates the sidechain high pass filter, stopping the low frequencies driving the compressor excessively.
We’ve finished this sound off by using an EQ low shelf to boost the bass below 300Hz, with a 5kHz low pass filter subtly reducing the high frequencies, making the strings more mix ready. A third vinyl crackle sample, turned up by 6dB, adds extra vibes and a dusty, freshly sampled feel to our strings.

As well as being great for making lifelike dusty loops to sample later on, the techniques we’ve run through can be repurposed to make anything from classic sounding synth parts, through to stolen sounding house or techno loops. We can’t wait to hear what you come up with!
Share your results and tell us what tutorials you’d like to see in the MusicTech Creator Community on Facebook.
Check out more Weekend Workshops here.