Weekend Workshop: Glitch-hop bass design with Vital
Create five bass sounds to add heft to your tracks.

Different genres of electronic music require different approaches to production. Some rely on composition to create the characteristics that define genres, while others lean heavily on sound design. Glitch-hop, like most bass music, sits firmly in the latter camp. When it comes to bass design, we’re looking for powerful, exciting sounds. This often means taking the most complicated route possible, processing and resampling over and over, so it’s nice to find a single plug-in that offers the creative potential we need.
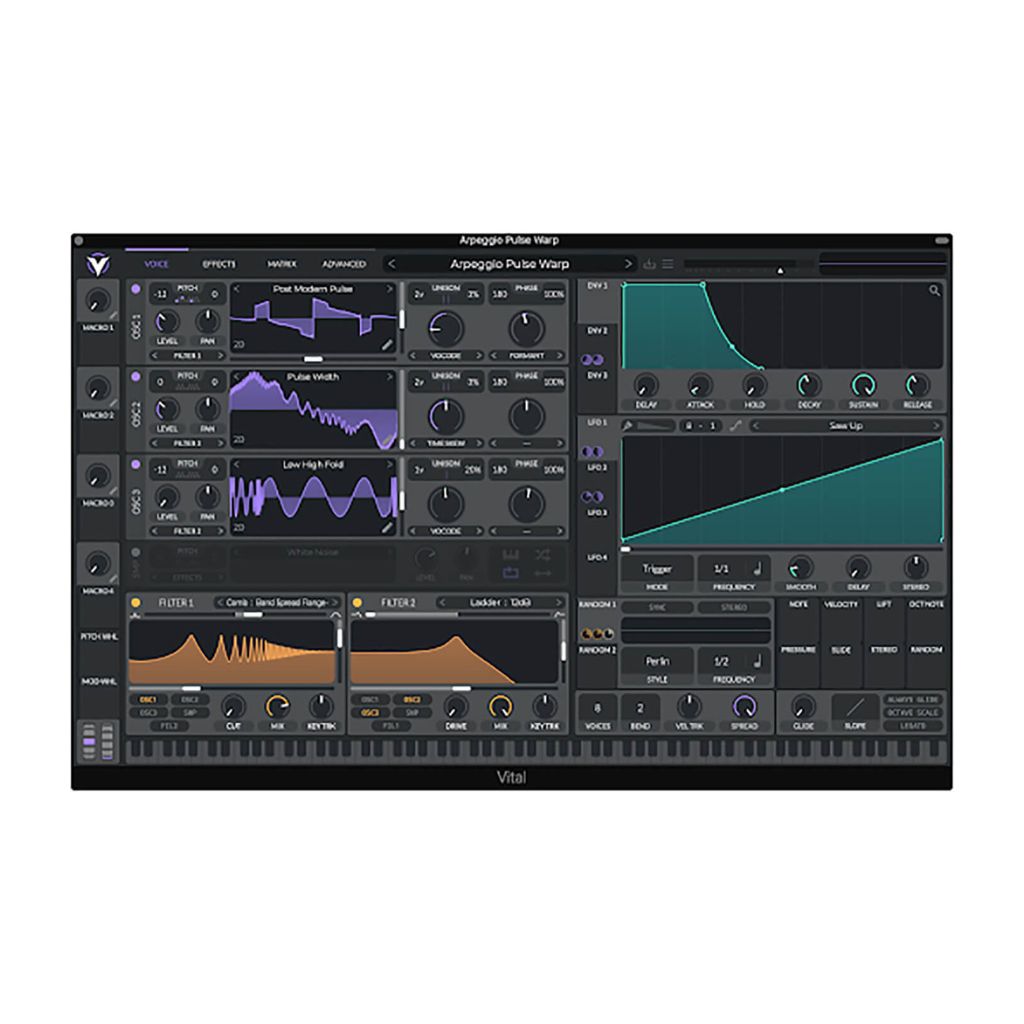
In this Weekend Workshop, we’ll create five bass sounds with the Vital spectral warping wavetable synth from Vital Audio. While these sounds are right at home within the glitch-hop genre, the techniques used will help you create bass sounds in other genres and show off the creative possibilities Vital offers. We’ll also take advantage of Vital’s effects to shape our basses further and add some polish.
Released in November, Vital is a wavetable synth that sets itself apart by offering spectral morphing, a synthesis method rarely seen in paid soft synths, let alone free ones. Vital offers three wavetable oscillators and a sample source, along with drag-and-drop modulation. It allows you to modulate any parameter using the nine available modulation sources. Combined with the comprehensive effects rack, Vital is a truly all-in-one soft synth for sound designers. While the free version limits the number of included wavetables and presets, the plug-in retains its full capabilities. Vital is available for Windows, Linux, and macOS, in VST, VST3, AU and LV2 formats.
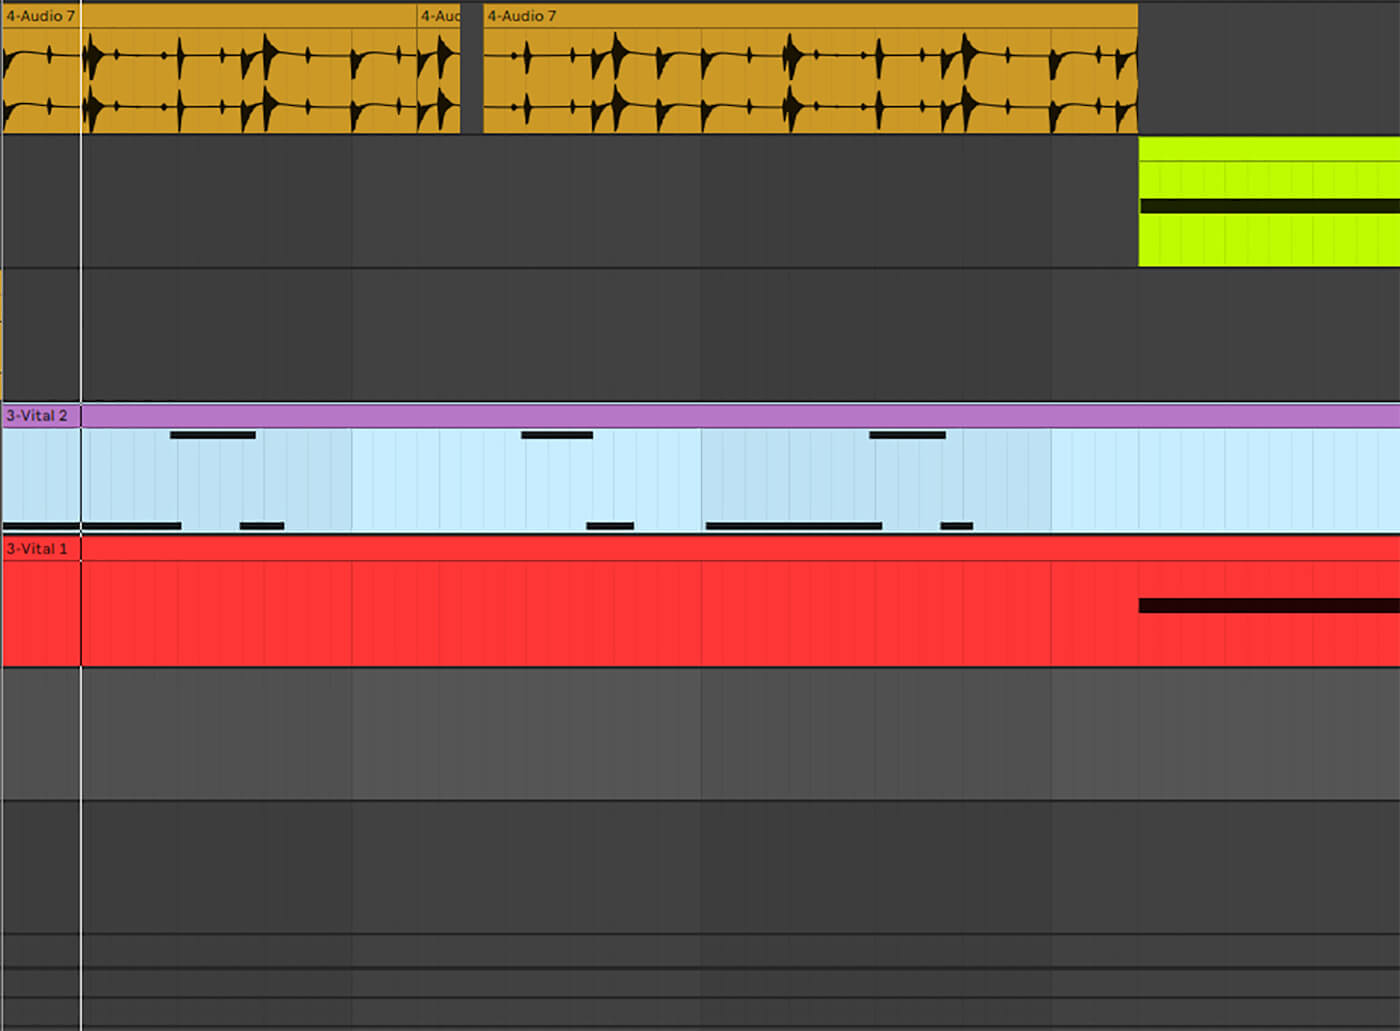
You can expect the following sort of result:
What you’ll need:
- A DAW
- Vital, which you can find here
1.Getting around Vital
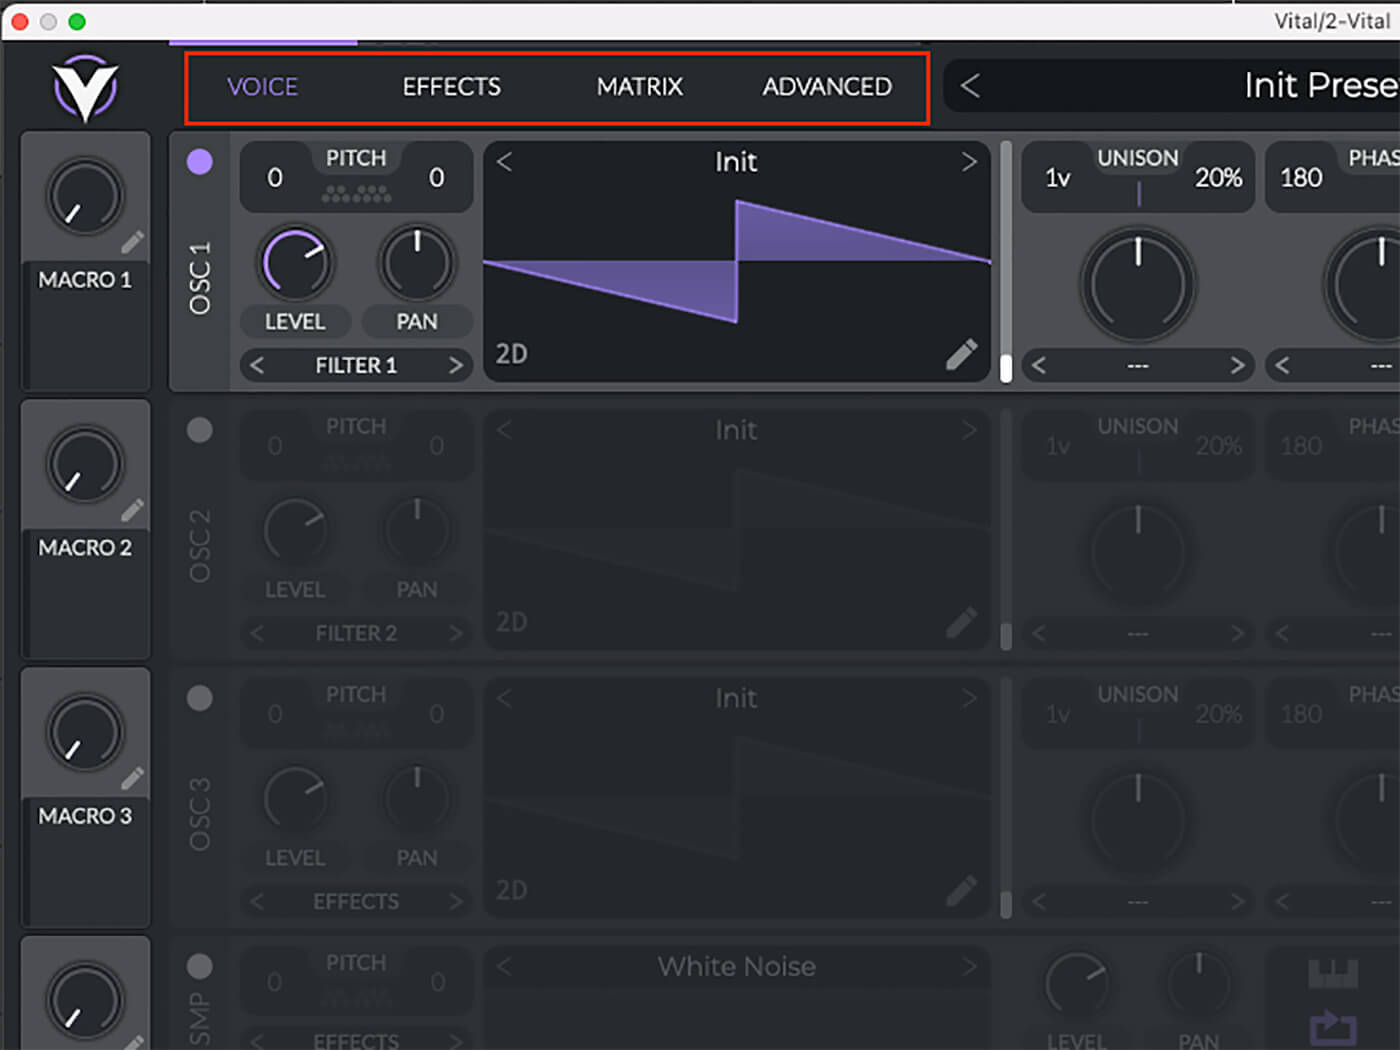
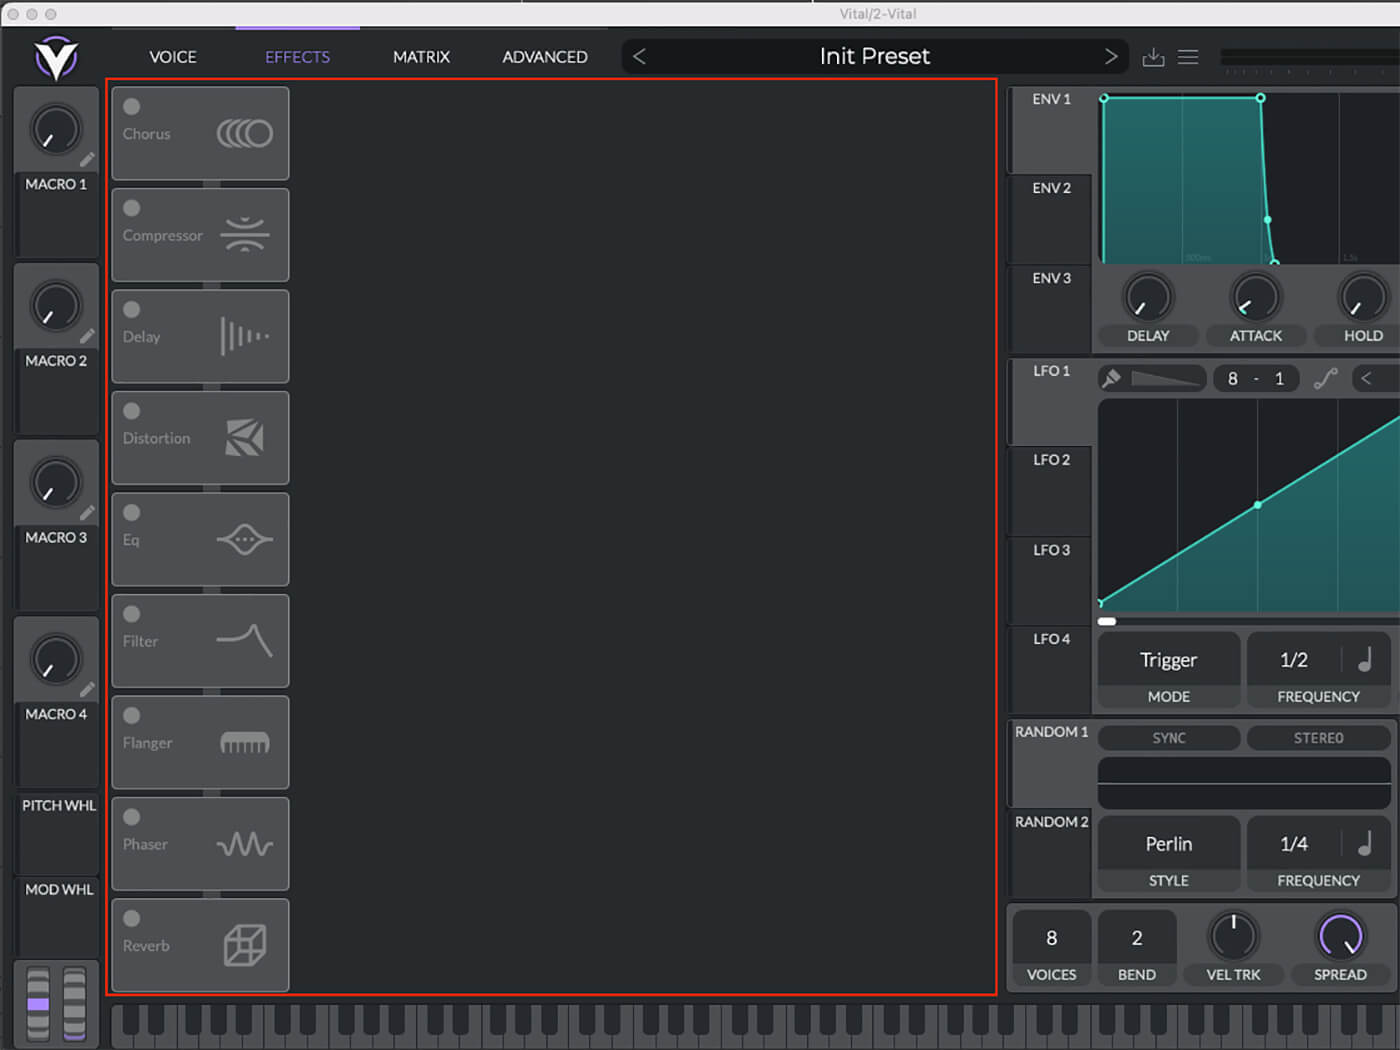
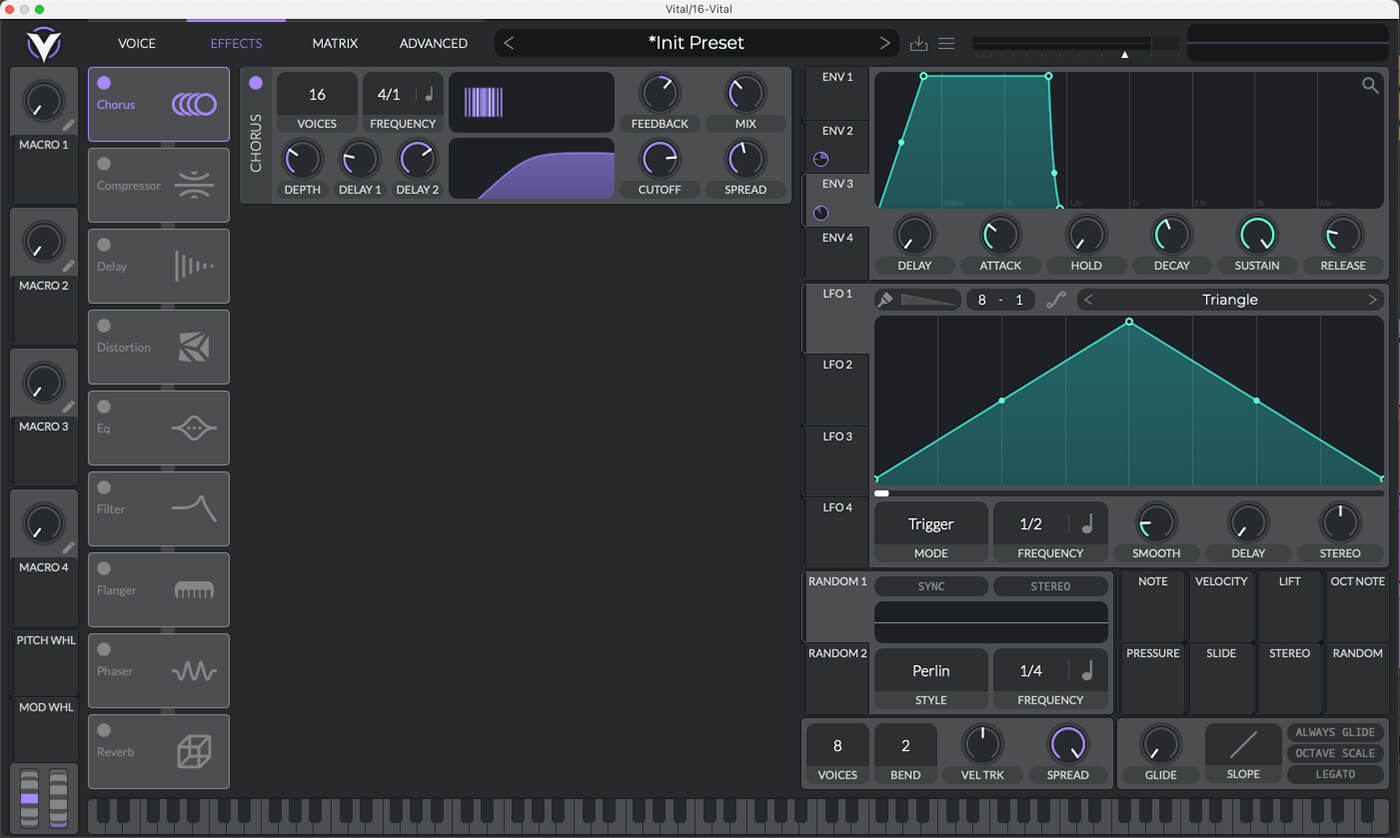
For quick navigation, there are tabs along the top of Vital’s interface to switch between its three views and to access advanced settings. The voice tab lets us configure Vital’s four sound sources and filter section, while the effects tab gives us access to Vital’s nine effects.
The Matrix tab provides a typical modulation matrix as an alternative way of configuring modulation and lets you quickly see all of your active modulations in one place – much like Serum.
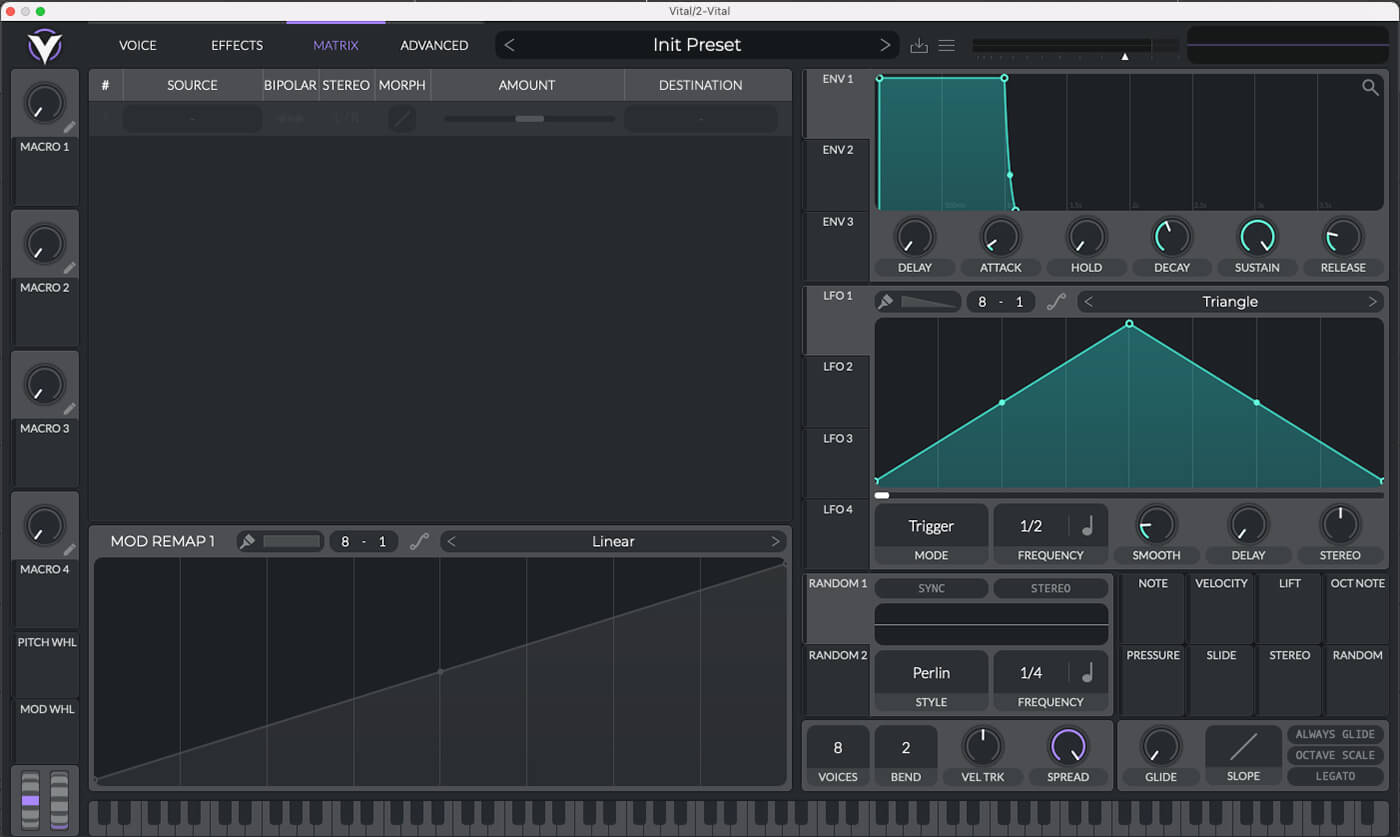
With the UI split roughly down the middle, the modulation sources and macros remain easily accessible when switching between tabs; this makes it quick to apply modulation and switch back and forth between editing the effects and the sound sources. Having everything available within one or two windows ensures that the UI doesn’t sap your creativity.
2. Fundamental Bass
Glitch-hop’s bass lines are much different than what you might find in other electronic genres. Instead of being made up of a single sound played across different notes, we need to build a groove made up of multiple sounds. Glitch-hop uses silence to create tension, and many of the sounds are designed to cut off abruptly. For the most part, we are continually cycling between these sounds to build a groove and play off the drum part, but there is usually one bass sound that is consistent throughout. We’ll start by designing this fundamental bass sound and then fill in the gaps with our remaining sounds.
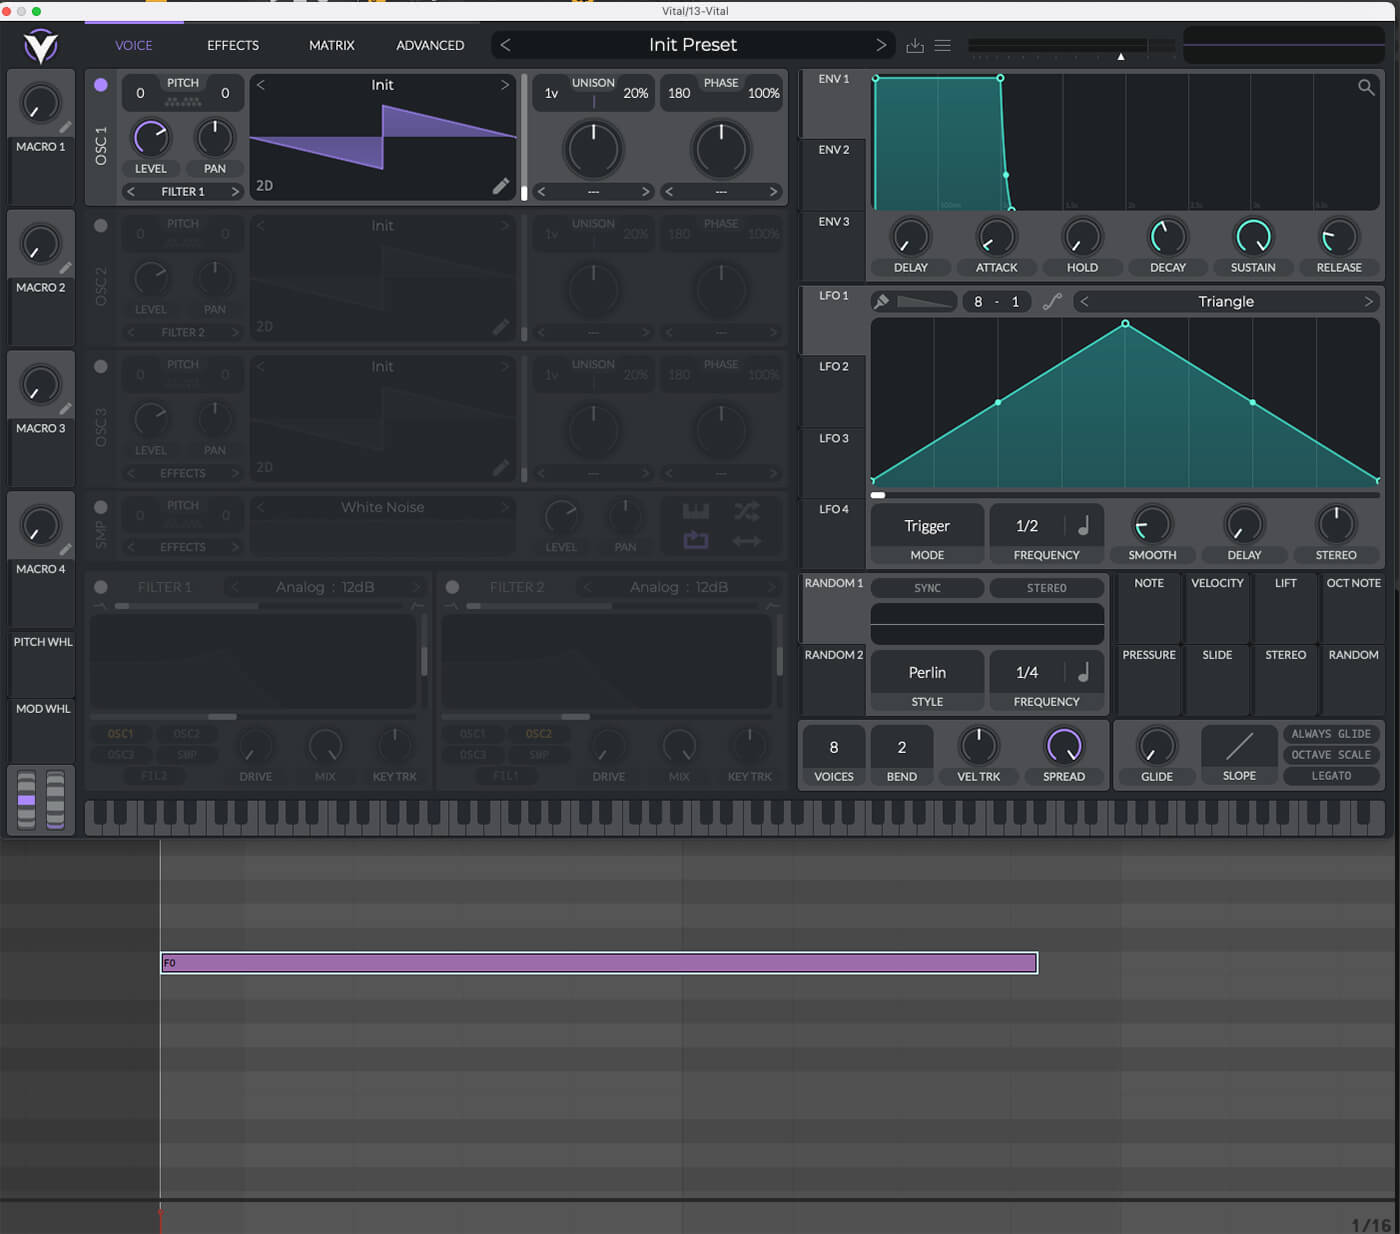
Load up an instance of Vital and lay down a single MIDI note record the key’s root notes. In this case, we’ve put down an F0 note spanning half a bar. We can loop the section while making changes to our sound before coming up with the final progression.
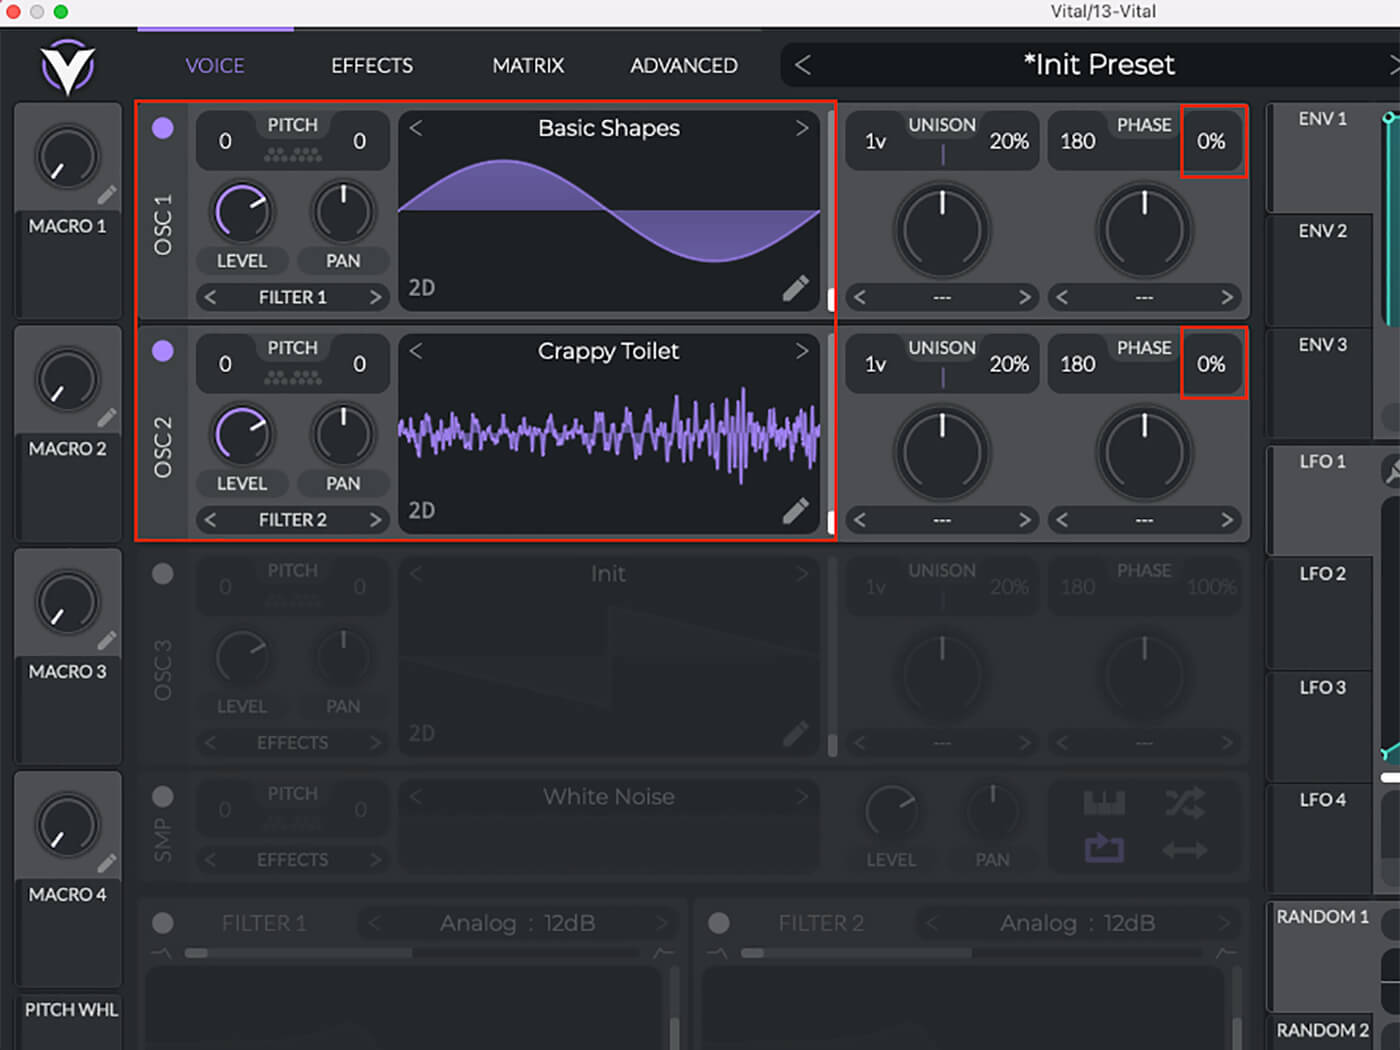
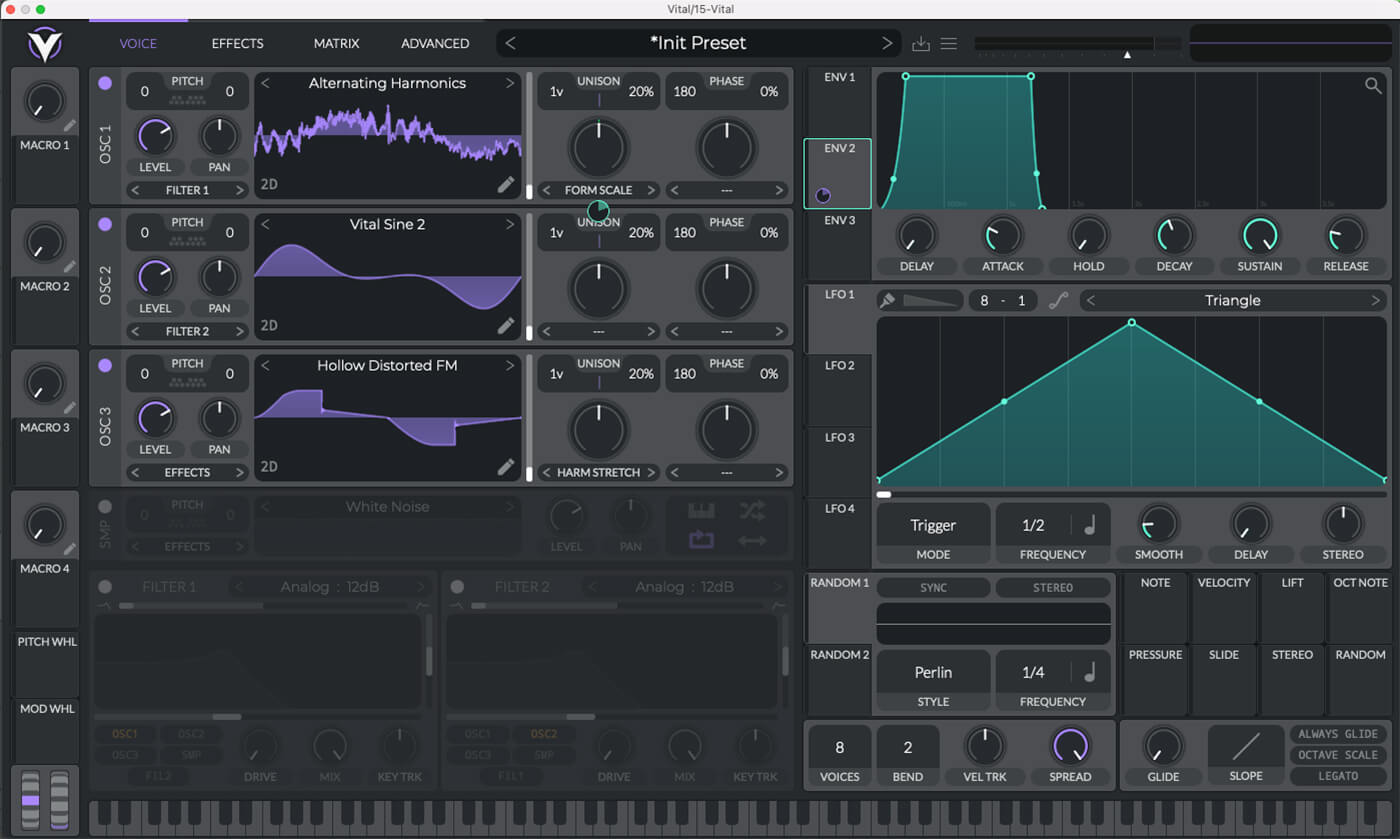
For all five sounds, we’ll create, there will be a solid sine sub, or similar, for us to build on. Our first sound will have two oscillators, so enable these. For the first oscillator, select Basic Shapes and turn down the phase randomness to zero. This will ensure the oscillator always starts at the same point for consistency. For our second oscillator, we’ve gone with the charmingly titled Crappy Toilet; turn down the phase randomness here as well. Let’s see how it sounds before we add some morphing and modulation.
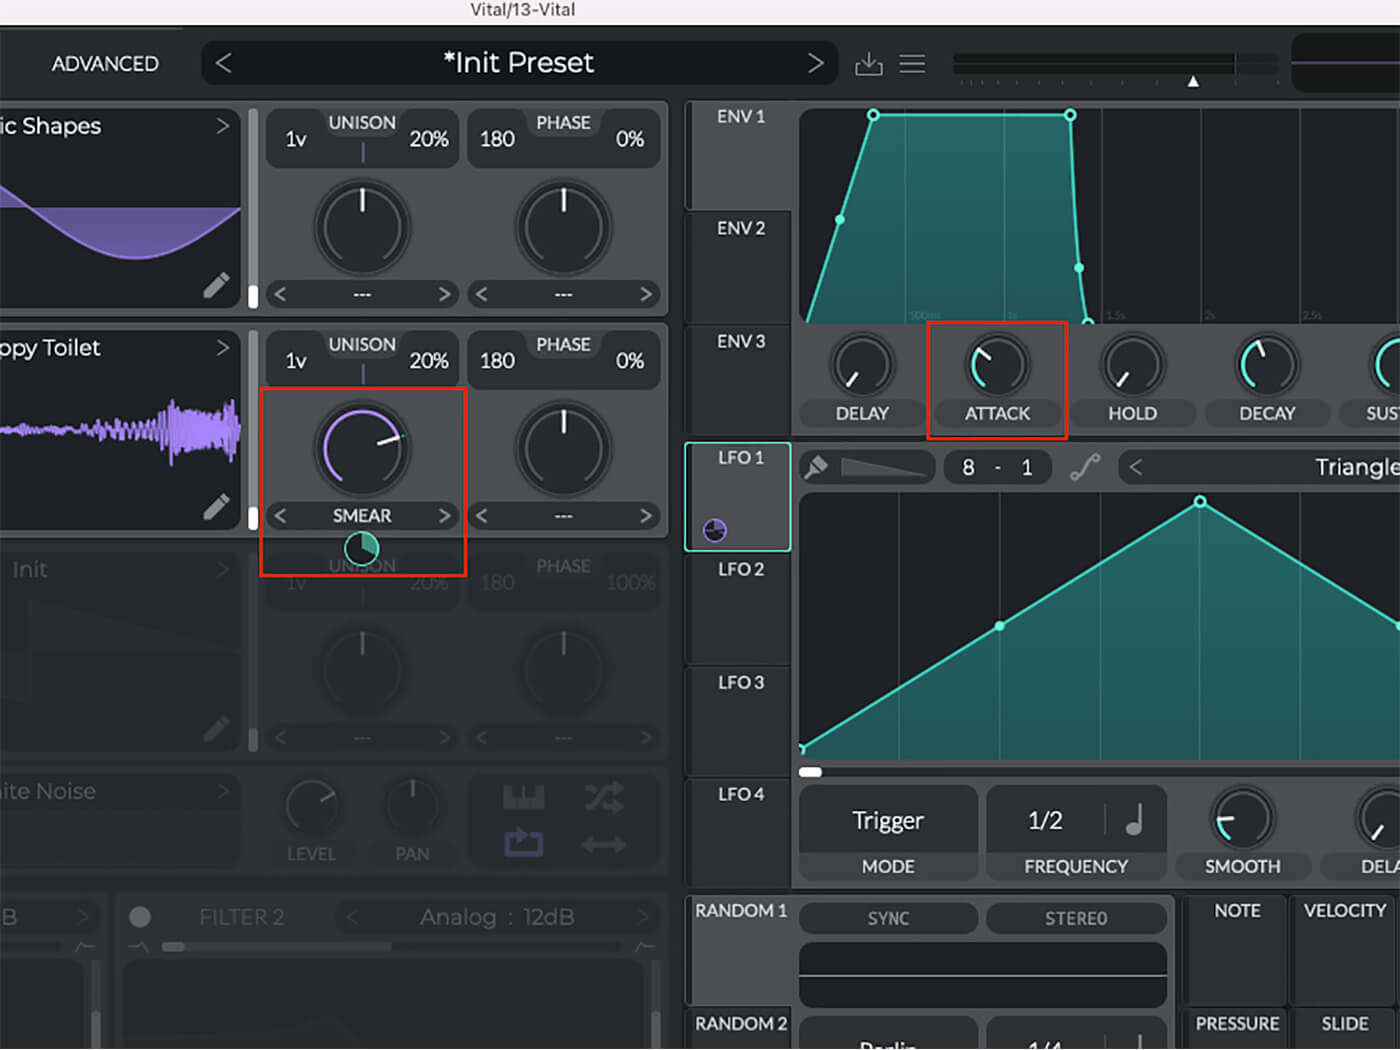
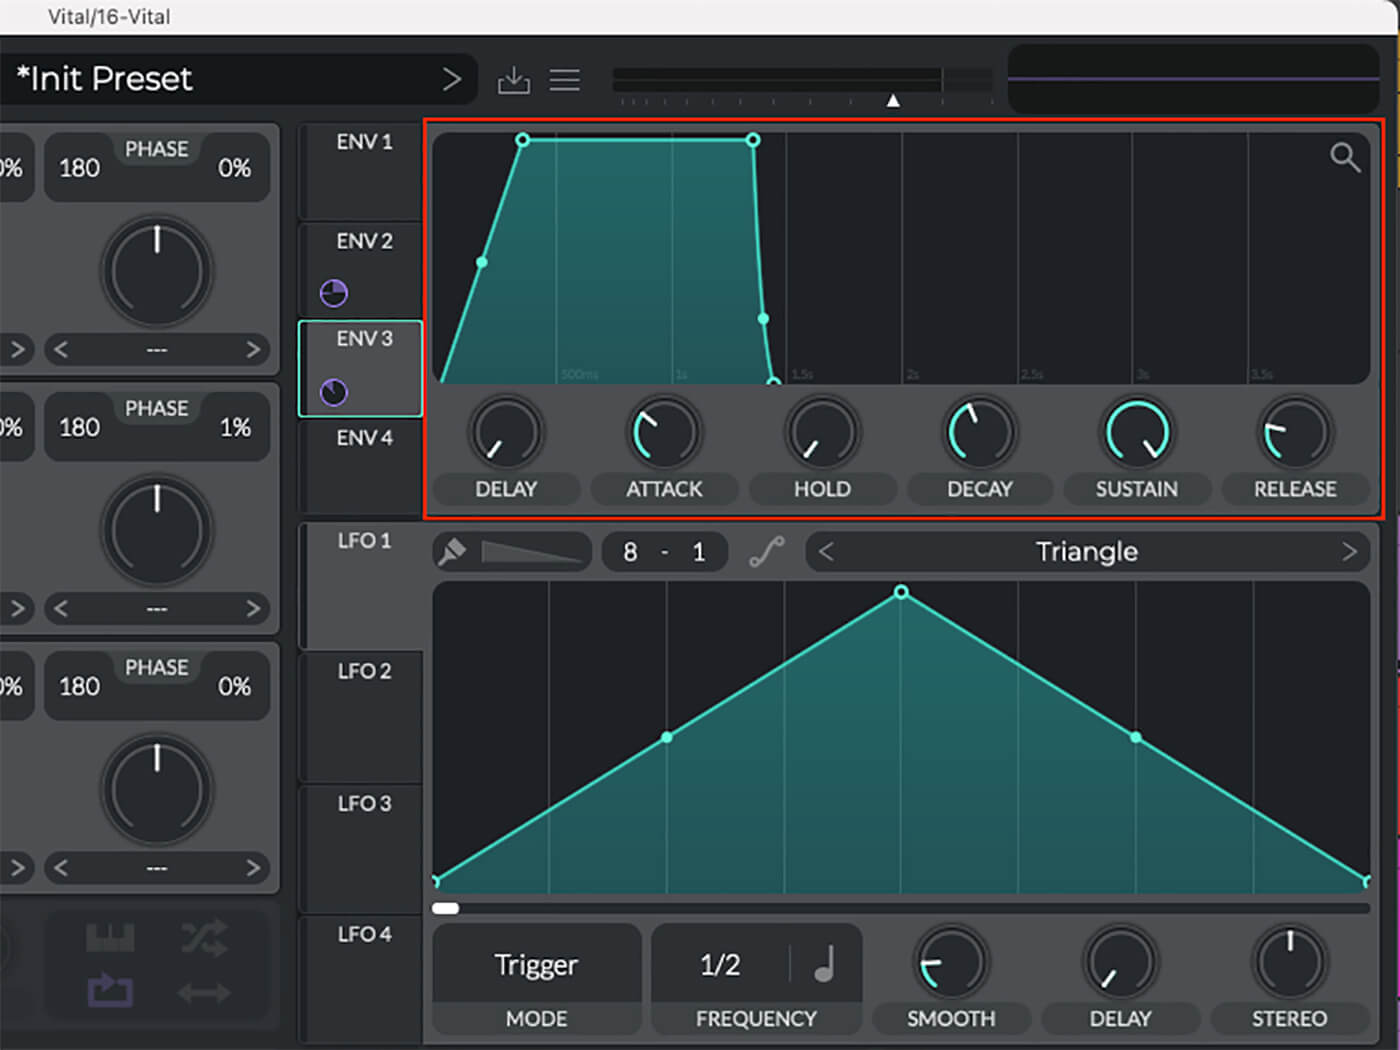
From the first drop-down under oscillator two, enable the ‘smear’ morphing type. We’ll add some movement to this using one of Vital’s LFOs. Click on the first LFO, drag it over the smear control and bring up the modulation amount to around 0.327. Hovering your mouse over any knob will display the modulation amount for the selected modulation source. Before we move over to the effects tab, increase the attack of envelope one to around 0.35 seconds; by default, the first envelope is mapped to volume.
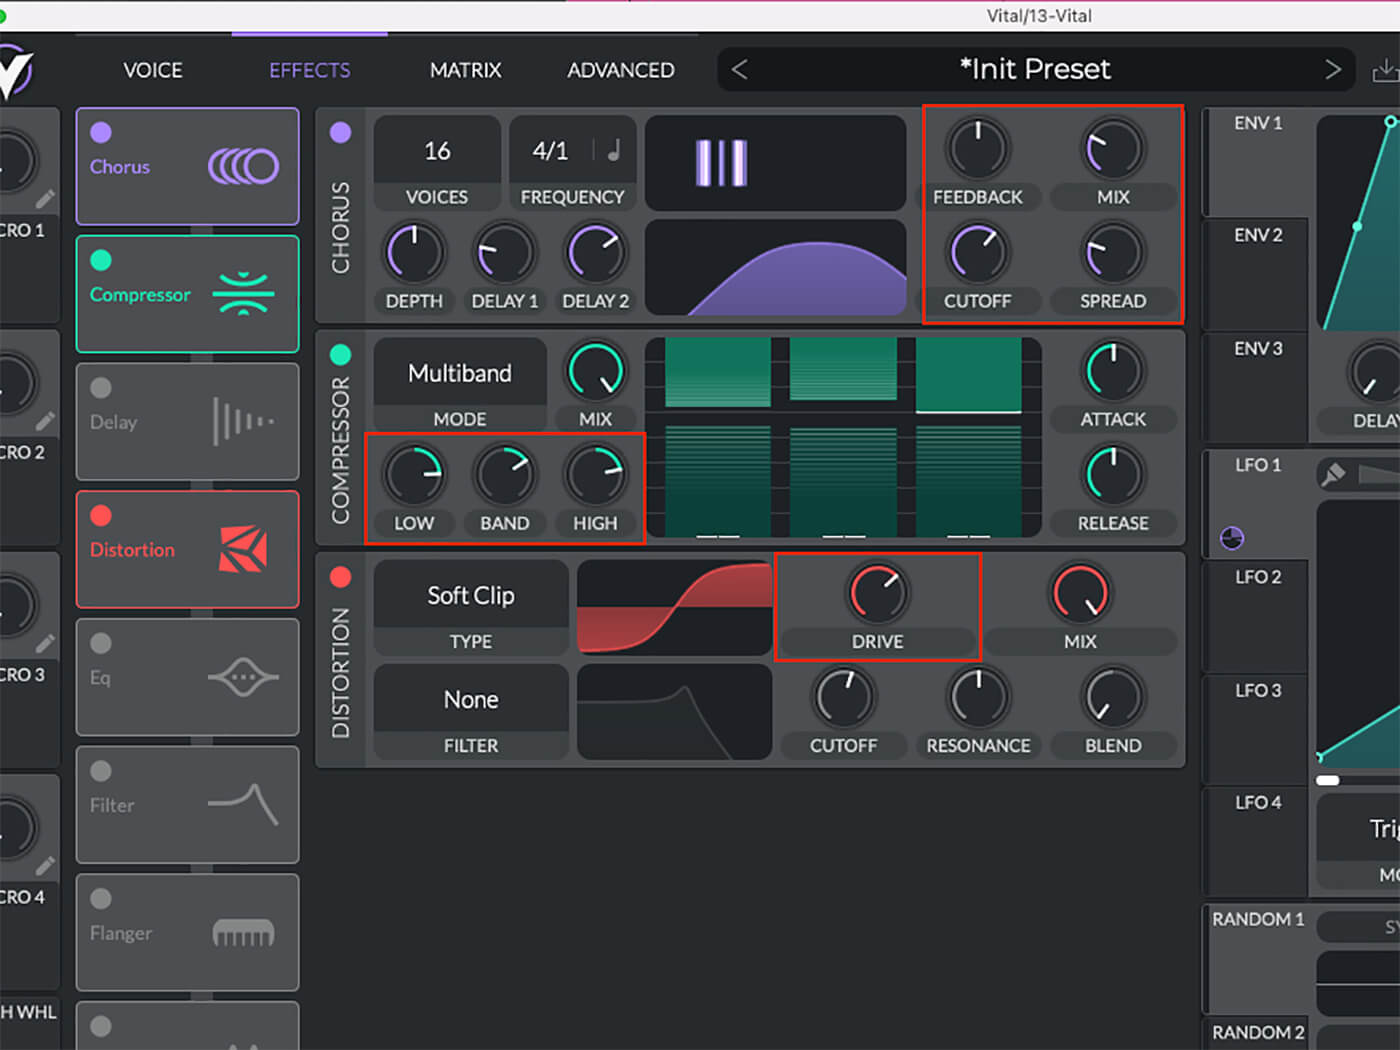
Moving over to the effects tab, we can start by enabling and configuring the chorus to add some stereo width. Set the spread to around 0.25, mix at about 30 per cent and cutoff to 90. Then we can bring the feedback down to zero.
Now we can enable the compressor and distortion. We’ll leave the compressor at the default settings but bring the low control up to taste to add some more presence in the sub region. For the distortion, we’ll use soft clipping and bring the drive up to around 9 dB.
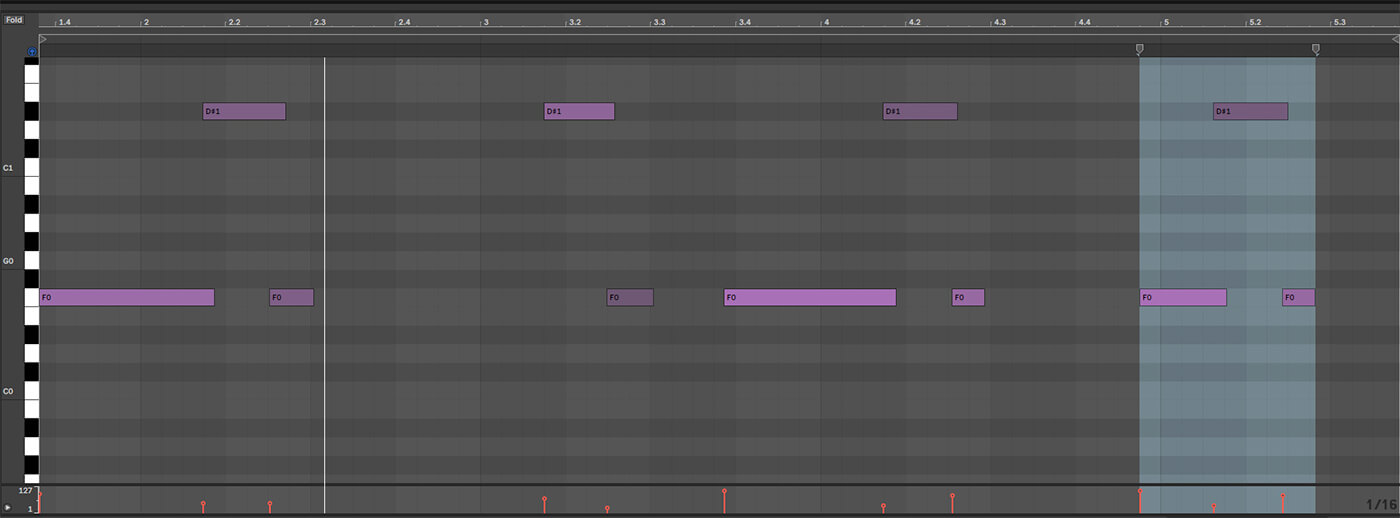
Now we can record a simple bassline across four bars, making sure to leave some space in the part for the other sounds we’re creating later. You’ll want to have at least a basic drum beat going when doing this; our bass needs to play off the drums.
3. Filling out the groove
Our remaining four sounds will be used to fill out the rest of the bassline, and give our loop the glitchy characteristic we’re looking for. Create a new instance of Vital and copy the same single note MIDI clip we used when designing our first sound.
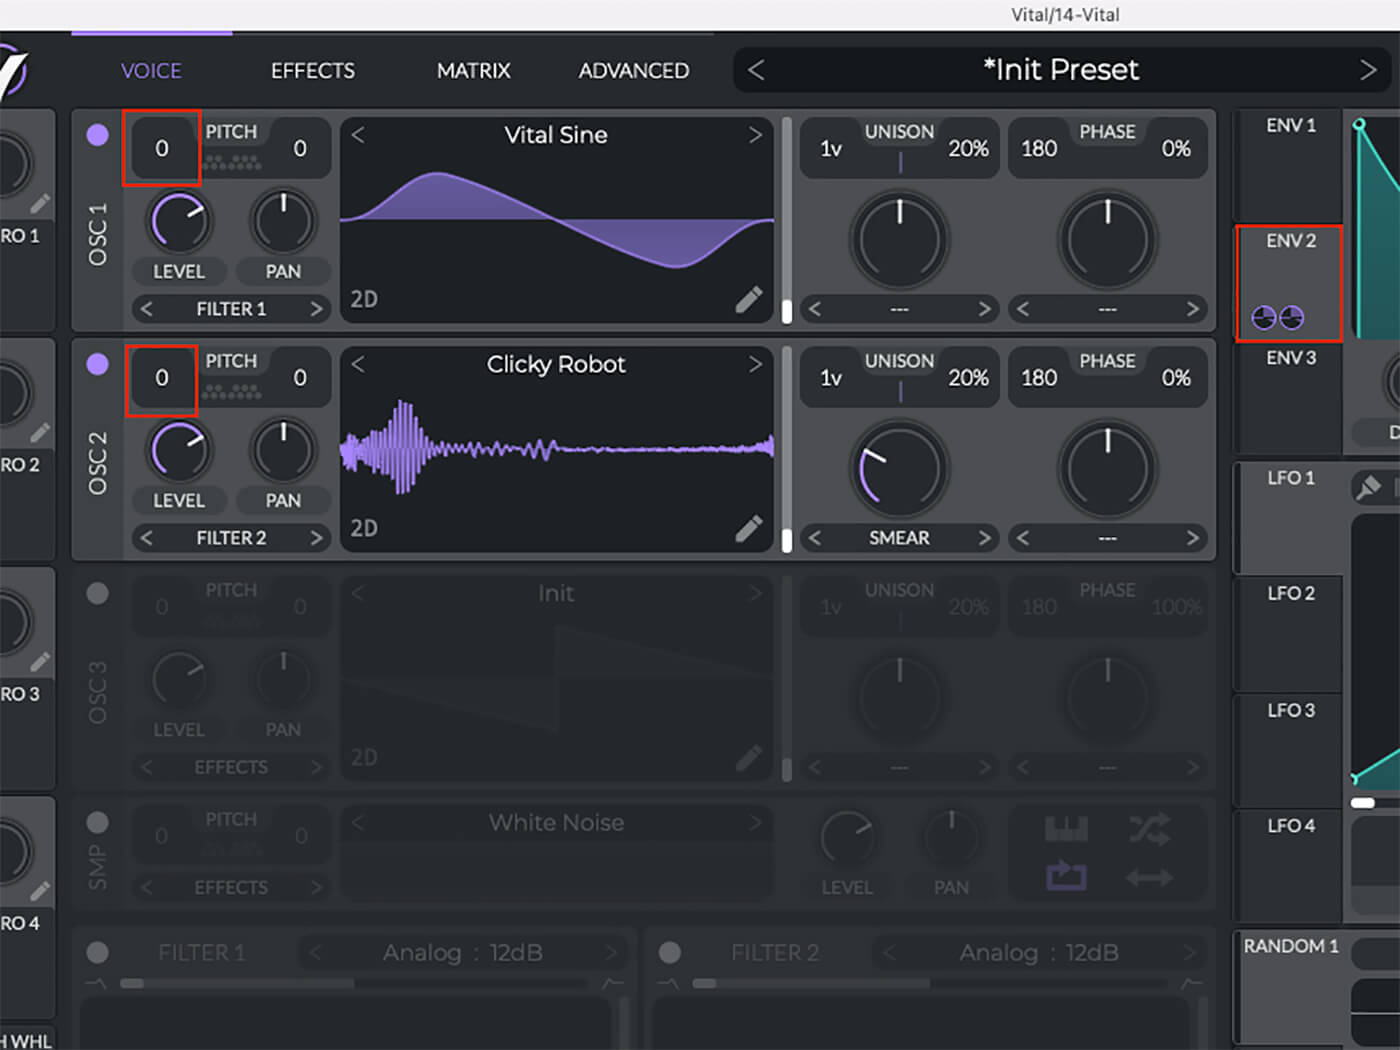
This time for oscillator one, we’ve gone with Vital Sine2, but you could use the basic sine wave again and get a similar result. For the second oscillator, we’re using Clicky Robot as our wavetable. Set phase randomness to its minimum value on both oscillators. It helps to experiment with different wavetables throughout the process. Doing so maintains any modulation that you might have configured and can produce surprising results.
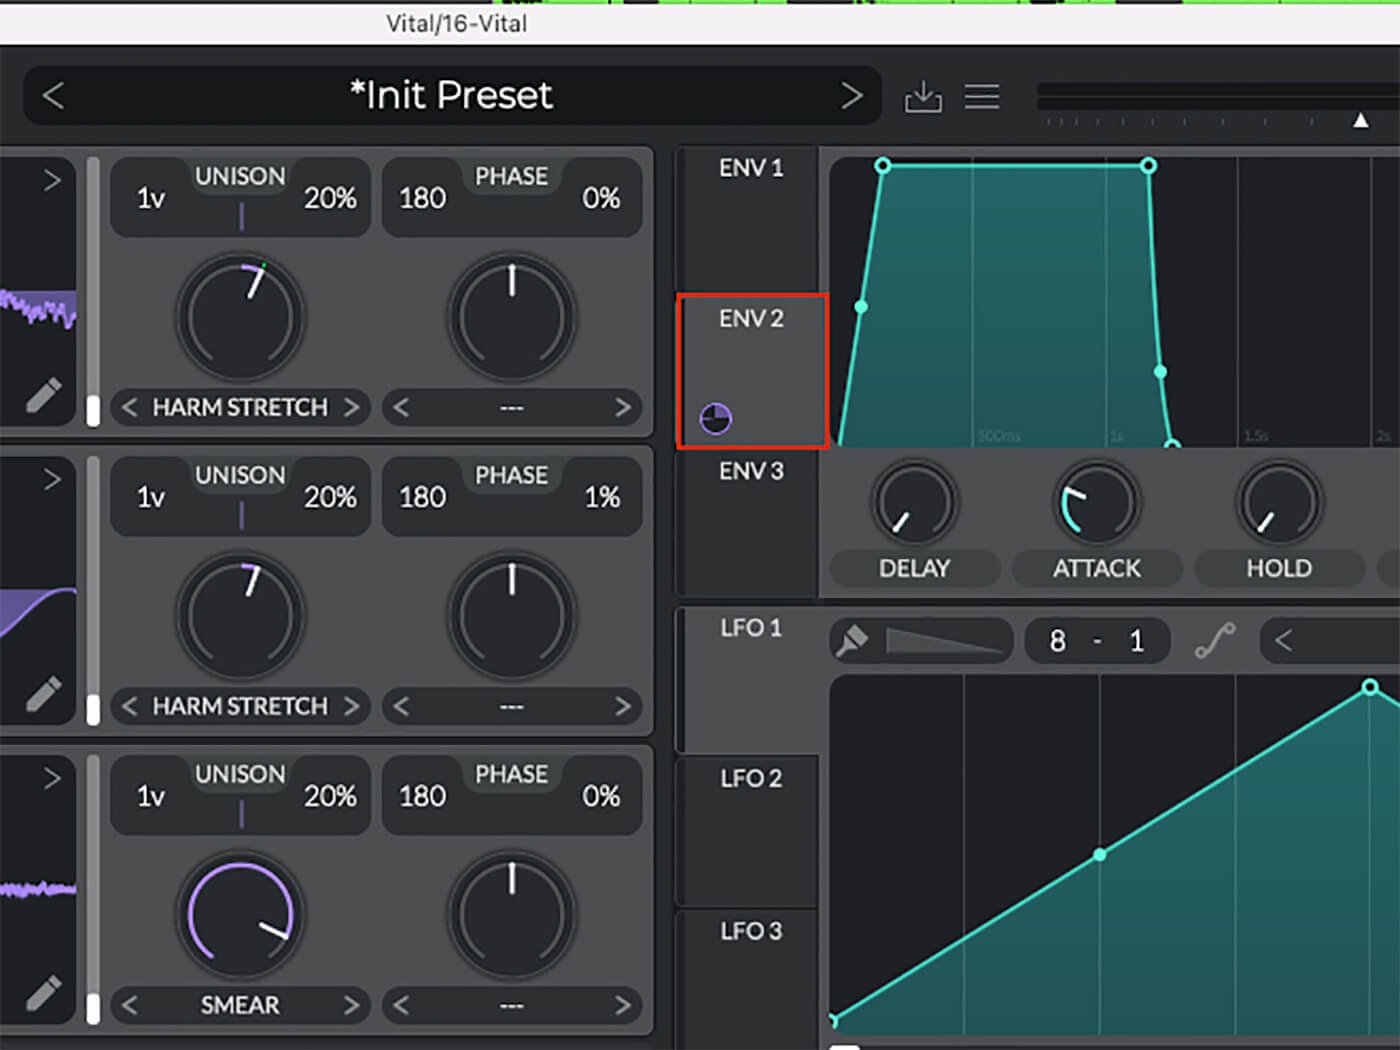
We’ve chosen the smear morphing type again, but this time we will be using an envelope to modulate it; set the value to about 28 per cent. Configure the second envelope as a simple AD type by turning down the sustain. Assign it to the coarse tuning controls of both oscillators and adjust the depth to around 31. Now we can change the decay to taste; we want a reasonably long pitch drop that’s reminiscent of an 808 bass.
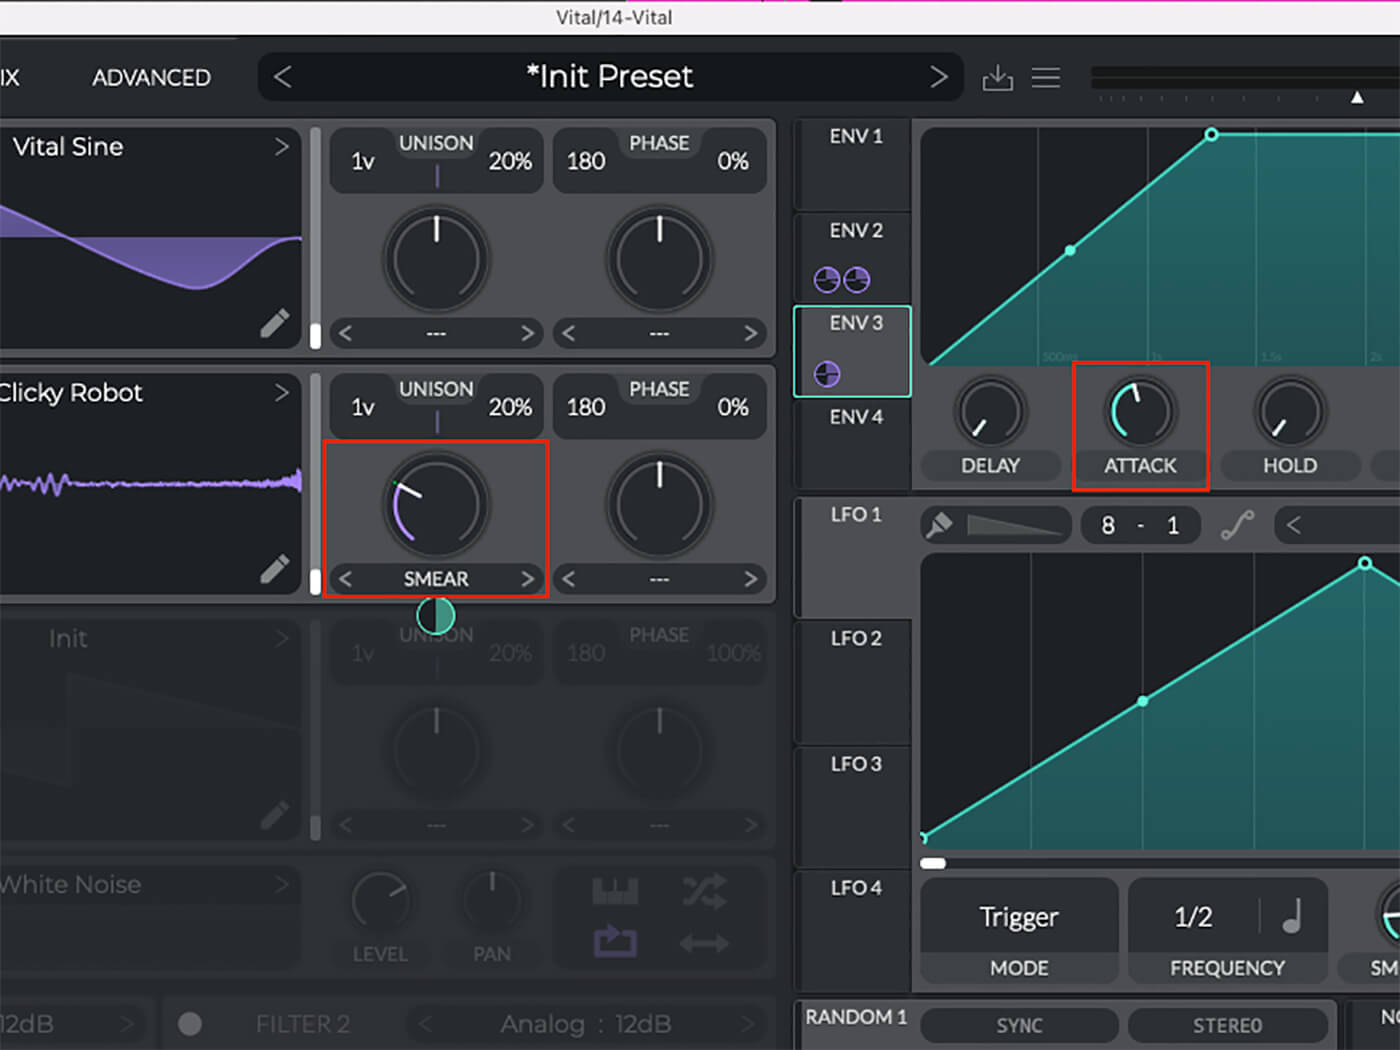
Now let’s set up a third envelope; this will control the smear parameter to add another layer of movement. We want the modulation to last about as long as our pitch envelope, so increase the attack to around 1.3 seconds and drag the envelope onto the smear control. Set the depth to 0.5. Here’s how that should sound.
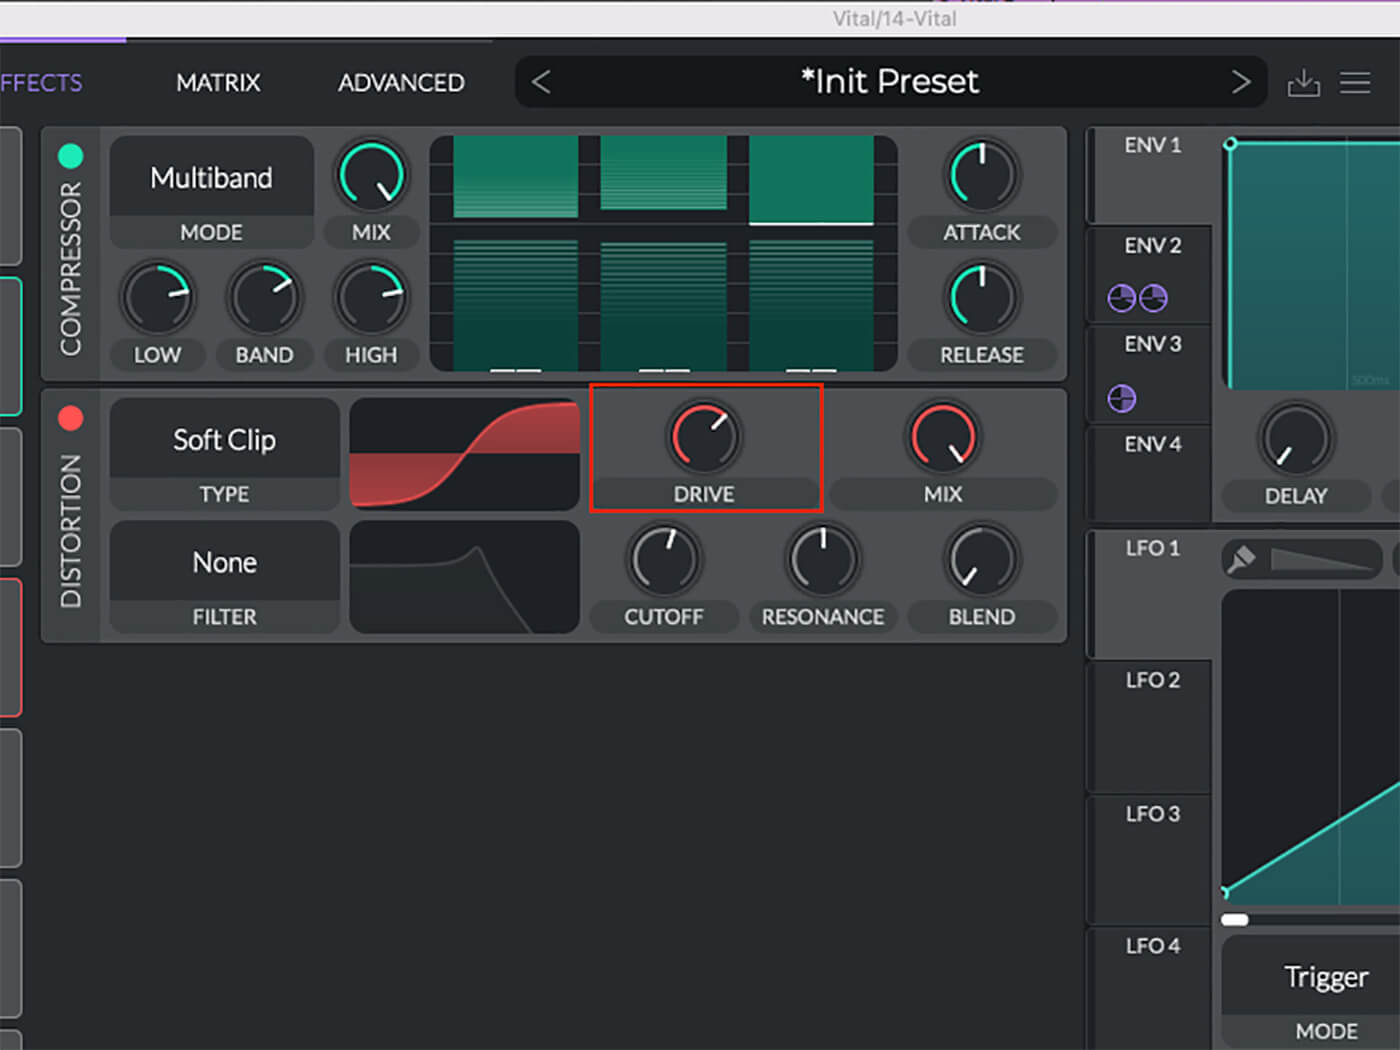
Over on the effects tab, we’ve kept things pretty simple, enabling just the compressor and the distortion. We’ll leave the compressor at its default settings, but for the distortion, use the soft clipper again and keep the mix at maximum. Finally, bring the drive up to around 9 dB.
Now we can find a place in our loop where this bass will work. We’ve tweaked the last bar of our first bass sound to make room for the second sound at the end.
For our third bass, we’re going to take advantage of all three of Vital’s oscillators. We’ll configure our wavetables, making sure that our second oscillator is set to Vital Sine2 to cover our low end. Two wavetables that sound good together for our first and third oscillators are Alternating Harmonics and Hollow Distorted FM. Set the morphing type to formant scale for the first oscillator and harmonic stretch for the third; set the level on both to around 65 per cent. Next, we will set up envelope two with a short attack, dragging the middle point down to add a slight curve. Assign this to the formant scale with a depth of 0.19. We’ve also slightly increased the attack of our volume envelope to 0.27 seconds. Here’s the result.
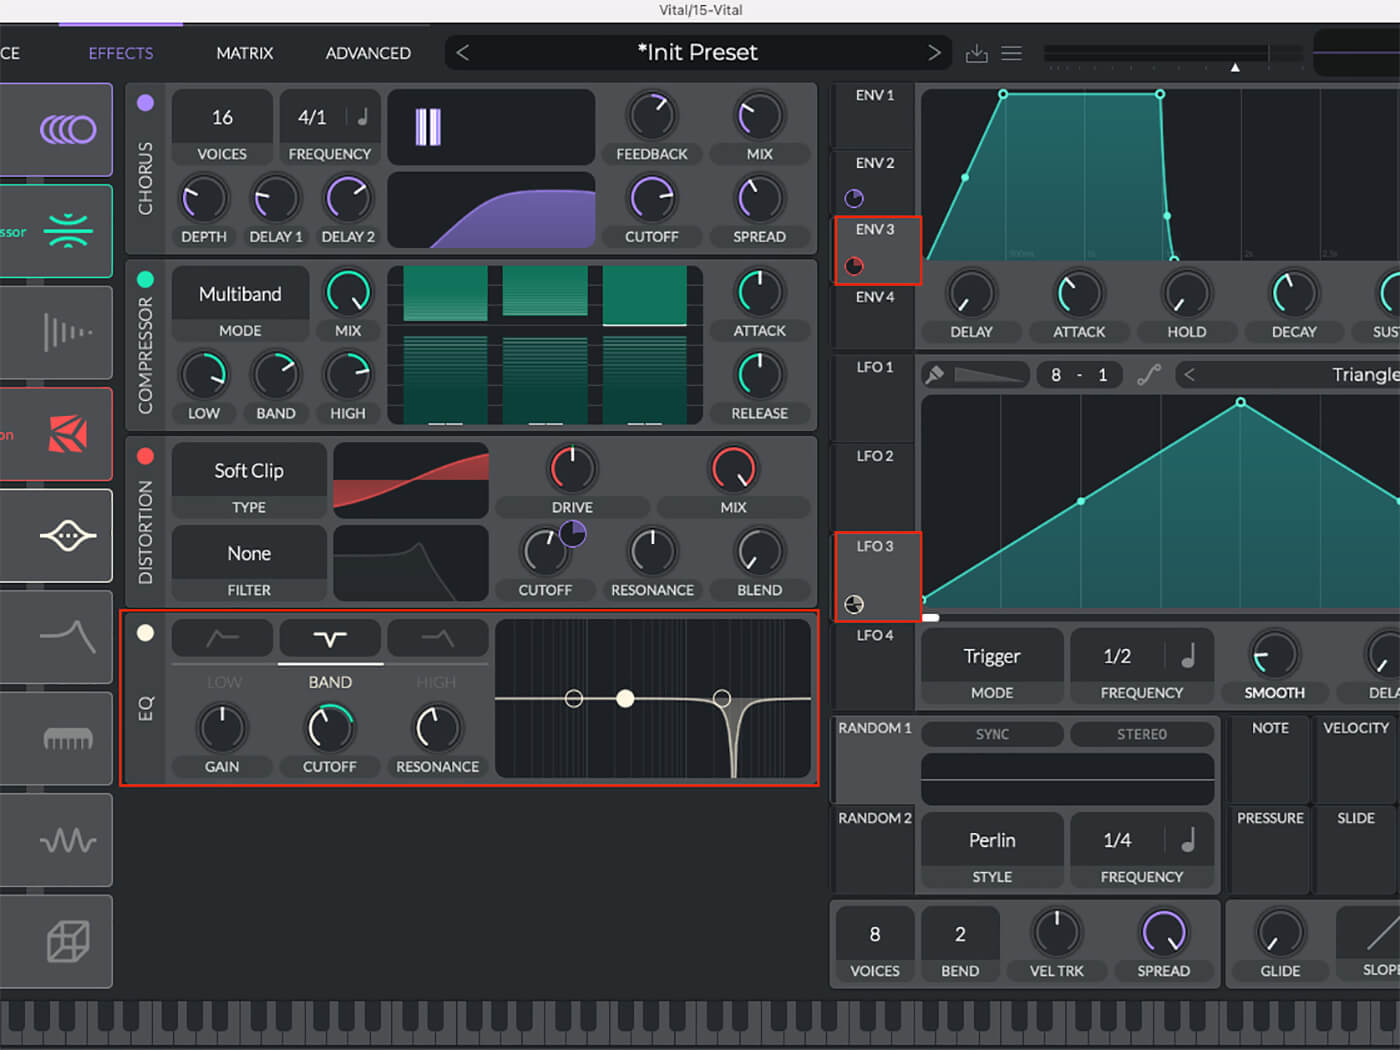
Like our first sound, we’ve enabled the chorus, compressor, and distortion, but this time we’ve also enabled the EQ. We’ll set this to a band-pass and modulate the cutoff frequency to add more movement. Let’s bring down the cutoff a bit and drag over LFO 3; adjust the depth to around 50. We finish off our sound by modulating the drive of the soft clipper. Let’s use our third envelope for this, with a depth of 14. Now set the attack to 0.5 seconds, so that our sound gets more intense as it progresses. We can slot this into our groove in a few different places.

Let’s load another instance of Vital and copy our single note MIDI event to the new track. Enable all three oscillators and select the wavetables. We’re using a sine wave for our second oscillator again, but this time we’re using Vital Sine for some variation. We’ve used the harmonic stretch morphing type to slightly square it off, adding additional harmonics and changing our low end’s character. For our other two oscillators, we’ve gone with Stabbed and Flange Sqrowl, using harmonic stretch and smear respectively. We’ve increased the smear depth almost entirely and slightly bumped up the harmonic stretch control. To give the sound some movement, use the second envelope with a fairly short attack to rapidly increase the depth of the morphing on the first oscillator. Here’s the result.
Use envelope three to bring down the smear amount on oscillator three. Let’s set the attack to around 0.3 seconds and then invert the depth and set it to -0.119.
This time we’ll only enable the chorus to give our sound a pleasingly wide stereo image. We’ll bring up the cutoff frequency and depth, and then adjust the spread and mix to taste. Now we can fill in some more sections of our bass line and check out how it’s sounding.
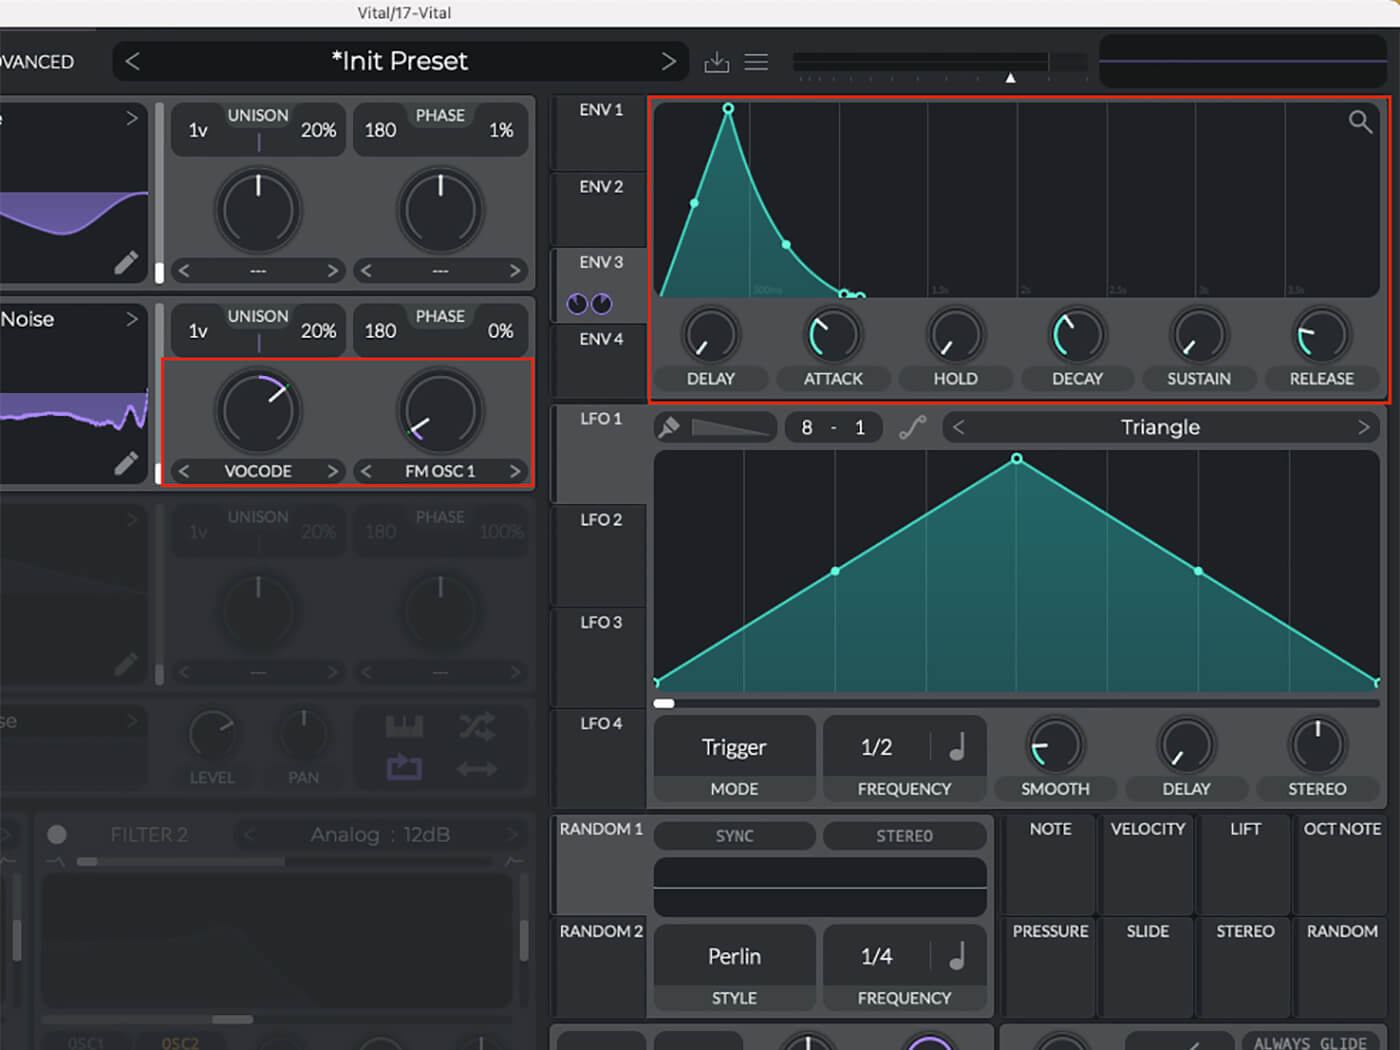
Our bass part is starting to come together, but we still have one last sound to design to finish it off. Let’s enable two oscillators and select Vital Sine for the first, and Thank u False Noise for the second. We’re going to be using the second oscillator to frequency modulate (FM) our first; set the depth to six per cent, we’ll be modulating this with envelope three. We can select the Vocode morphing type and then drag envelope three over to modulate. We want the FM amount to decrease after our envelope peaks, so let’s set an inverted value of -0.118. Set the vocode modulation depth to around 0.119. Now we can adjust our envelope shape; drop the sustain and adjust the attack and decay parameters.
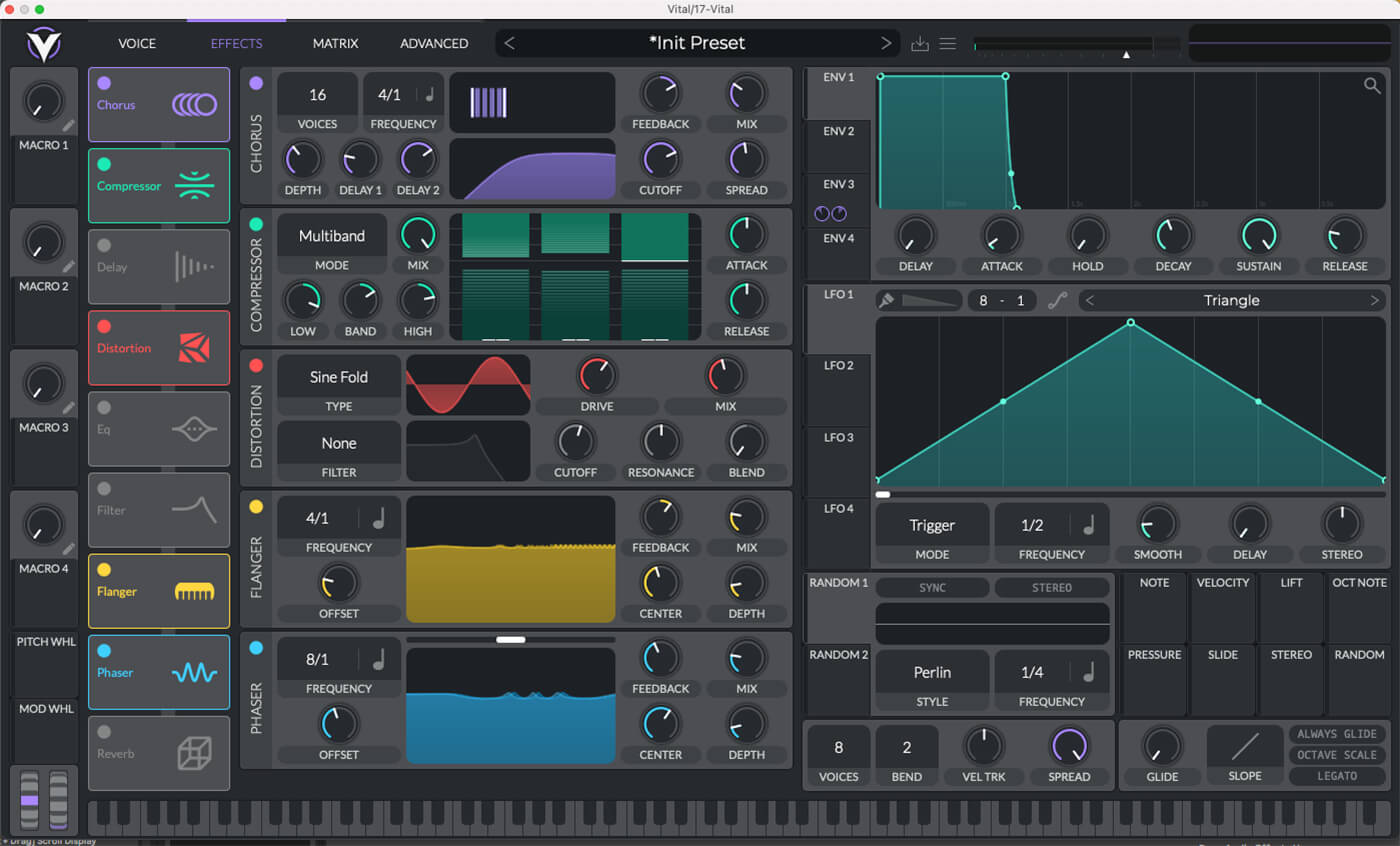
Finally, we can turn to our effects. We’ll configure our chorus, and then enable the compressor to fatten up the bass by adjusting the low band. For the distortion, we are going to try something a little bit heavier. Let’s select Sine Fold and bring up the drive. This type of distortion can get overwhelming quickly, so you’ll want to bring down the mix amount to compensate. Now we can add more stereo movement with the flanger and phaser effects. When stacking stereo modulation type effects, it works best if you keep them fairly subtle; keep the mix and depth low so that the effects complement each other. With high mix settings, you can start to get phase issues, and it will sound thin and lifeless, not something we want for our bass part.
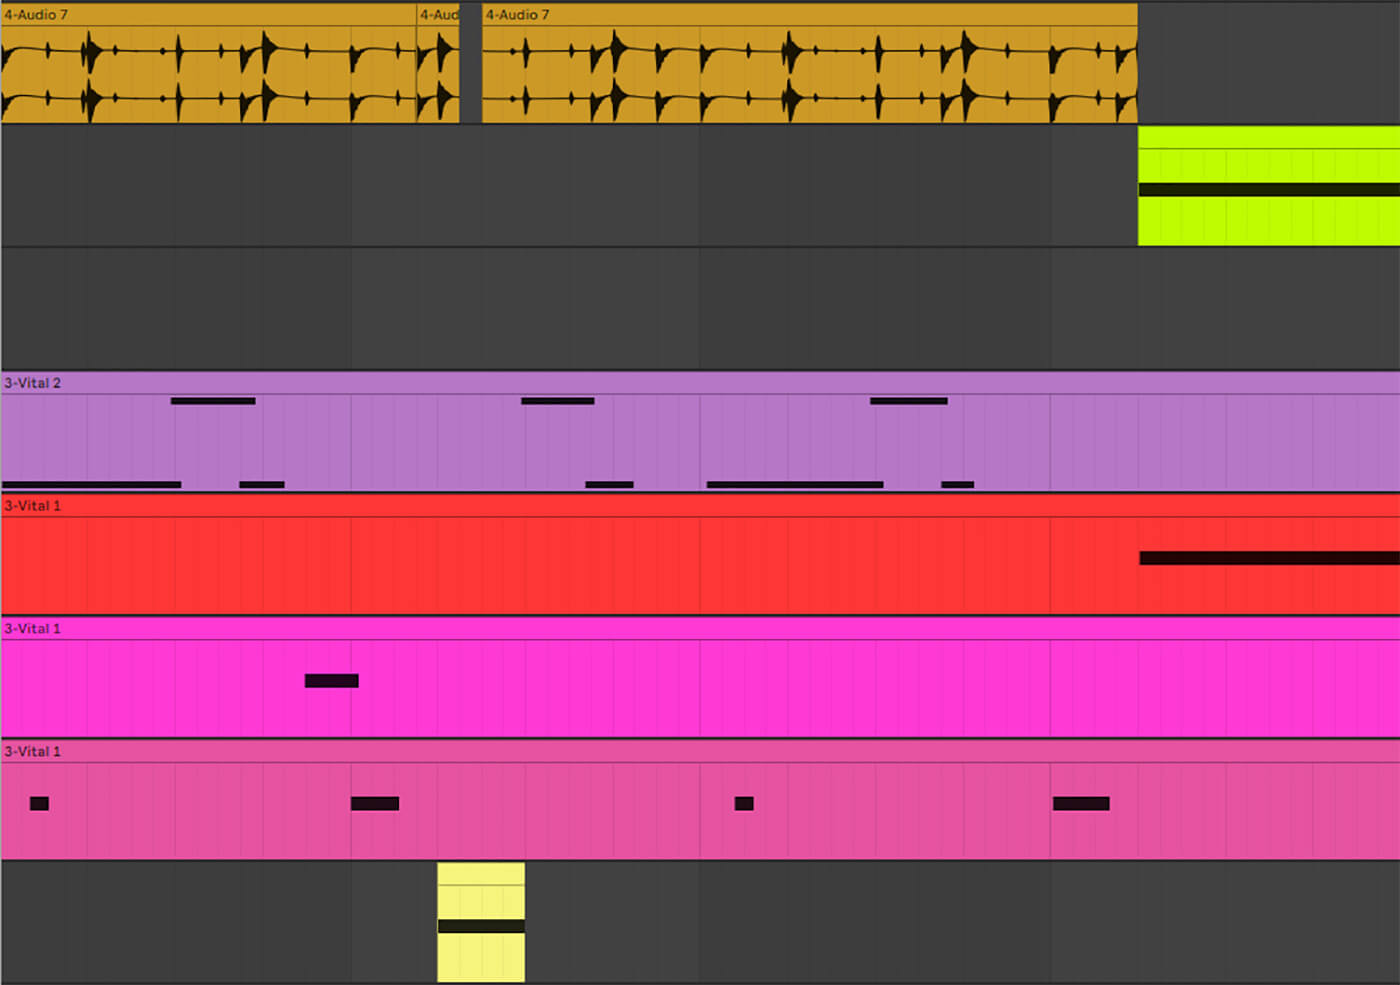
Now that we’ve finished our last sound, we can slot it into our bass line, taking care not to overcrowd; silence can be a good thing. Let’s hear our finished bassline.
There you have it; Vital is an incredibly versatile synth, capable of producing professional sounds for even the most complex genres.
Share your results and tell us what tutorials you’d like to see in the MusicTech Creator Community on Facebook.
Check out more Weekend Workshops here.