Weekend Workshop: Make risers and downlifters with Odin 2
Add drama to your electronic tracks by building your own transitions.
Building and releasing tension is a massive part of what makes music so exciting. There are many ways to change the energy of a track, but risers, swells, and downlifters are most common in electronic music. When combined with changes in dynamics, timbre and instrumentation, these can be a great way to transition to a drop or go from a relaxed intro to an intense build-up.
In this Weekend Workshop, we are going to be using The Wave Warden’s Odin 2, along with SocaLabs Mverb 2020, to design two transitional effects. We’ll start our sounds off with Odin 2, add some automation in our DAW of choice, and then finish them off with some lush reverb.
Odin 2 is a free polyphonic softsynth offering a variety of different synthesis techniques in a three oscillator setup. As a follow-up to 2016’s Odin 1, Odin 2 doubles the number of voices to 24, dramatically expands upon the modulation matrix, and adds additional effects; the UI has seen a complete overhaul as well. And, while Odin 2 is still in its beta phase, we didn’t encounter any bugs or hiccups throughout this workshop. Odin 2 is available for both Windows and Mac in VST and AU formats, with new features being added frequently.
Mverb 2020 is SocaLabs’ take on the original Mverb ‘figure-of-eight’ reverb plug-in by Martin Eastwood Audio. It provides the same high-quality sound of the original but has been updated with SocaLabs signature UI. It has also been updated for 64-bit platforms, which is excellent news if you are running MacOS Catalina, and it’s available across all platforms, including Linux, in VST and AU plug-in formats.
Here’s what we are going to be creating:
Audio14-Both sounds with automated reverb
What you’ll need:
1. Understanding Odin 2
Let’s start by loading a MIDI track and inserting an instance of Odin 2. The first sound we are going to be creating is a big, washy riser. This will lead into our second sound, creating a quick build and release of energy. Let’s open up Odin 2 and have a look at the interface.
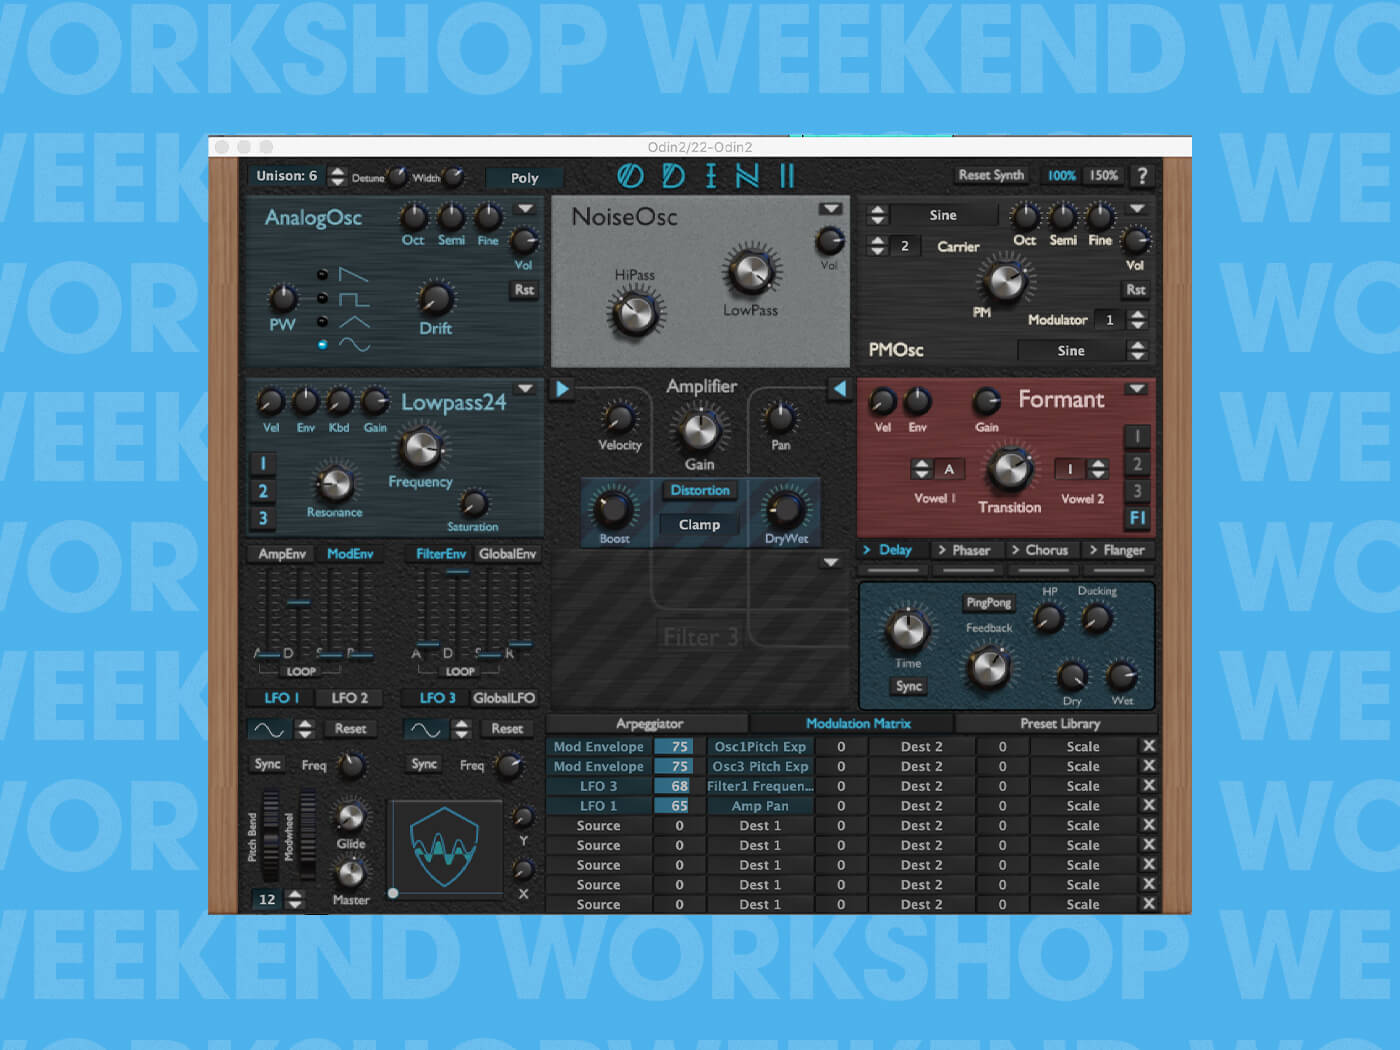
Odin 2’s signal flow follows from top to bottom, starting with the three oscillator sections. We can optionally send the signal through two filters, into an amplifier section, a third filter, and then finally, through a small effects chain consisting of four different effects. The filters can be routed in several different ways which we will touch on once we start designing our sounds.
To the left of our third filter, we have all of our modulation sources. Our three LFOs are independently assignable, but we only have one envelope that doesn’t have a default routing. Just below our LFOs, we have pitch and modulation wheels, glide settings, and a master volume knob.
The last section at the very bottom is our modulation matrix. Here we can assign any of our modulation sources to up to 18 destinations.
2. Make it rise
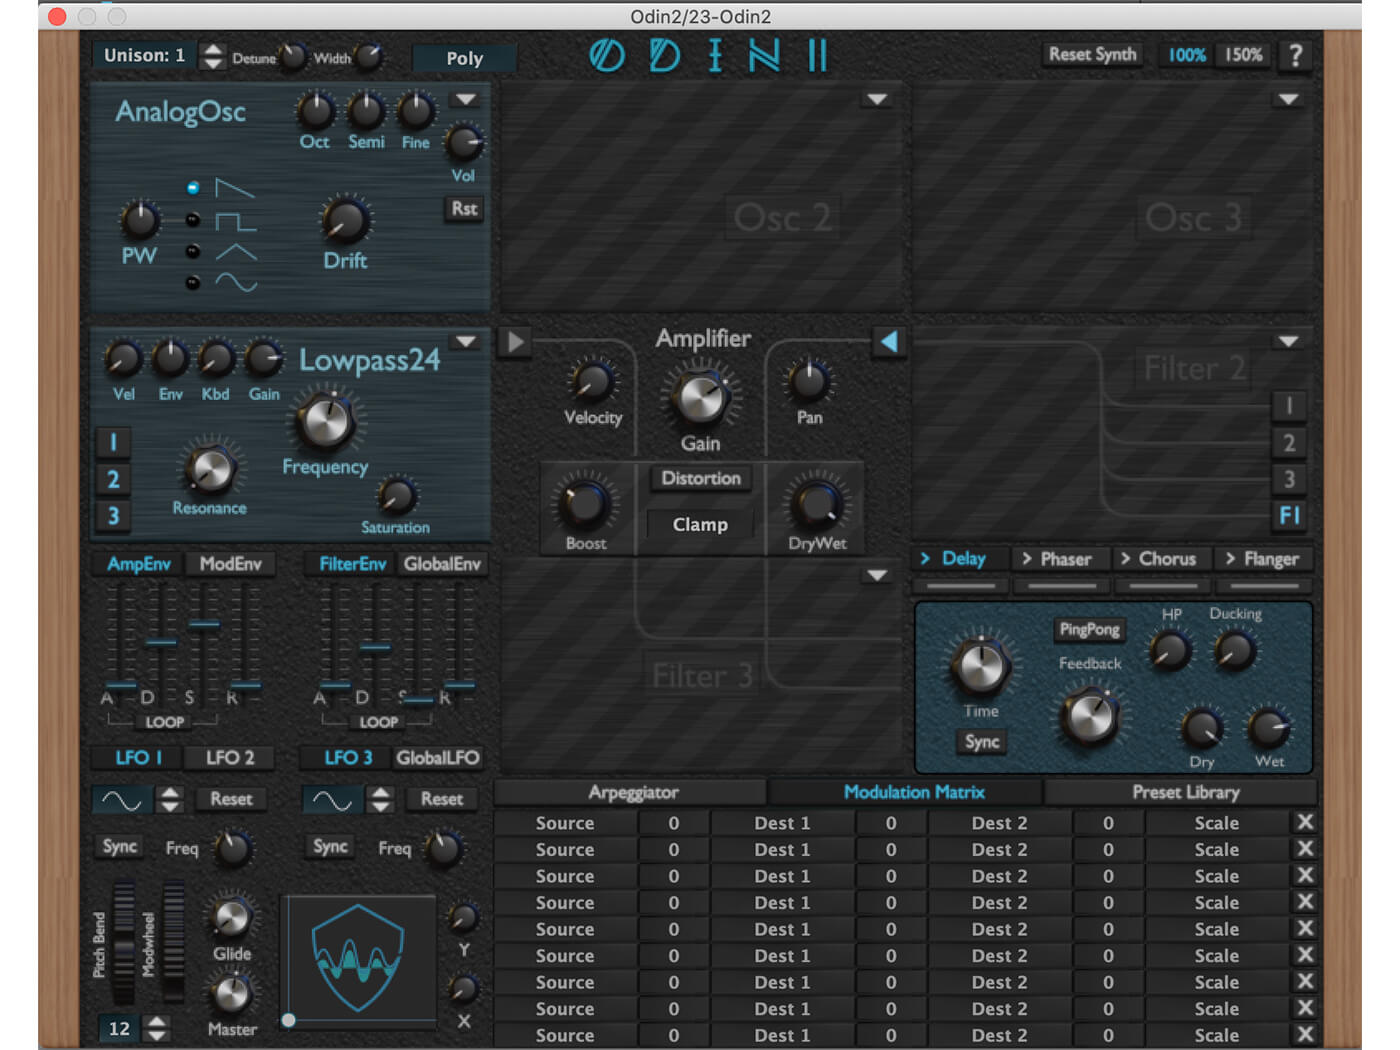
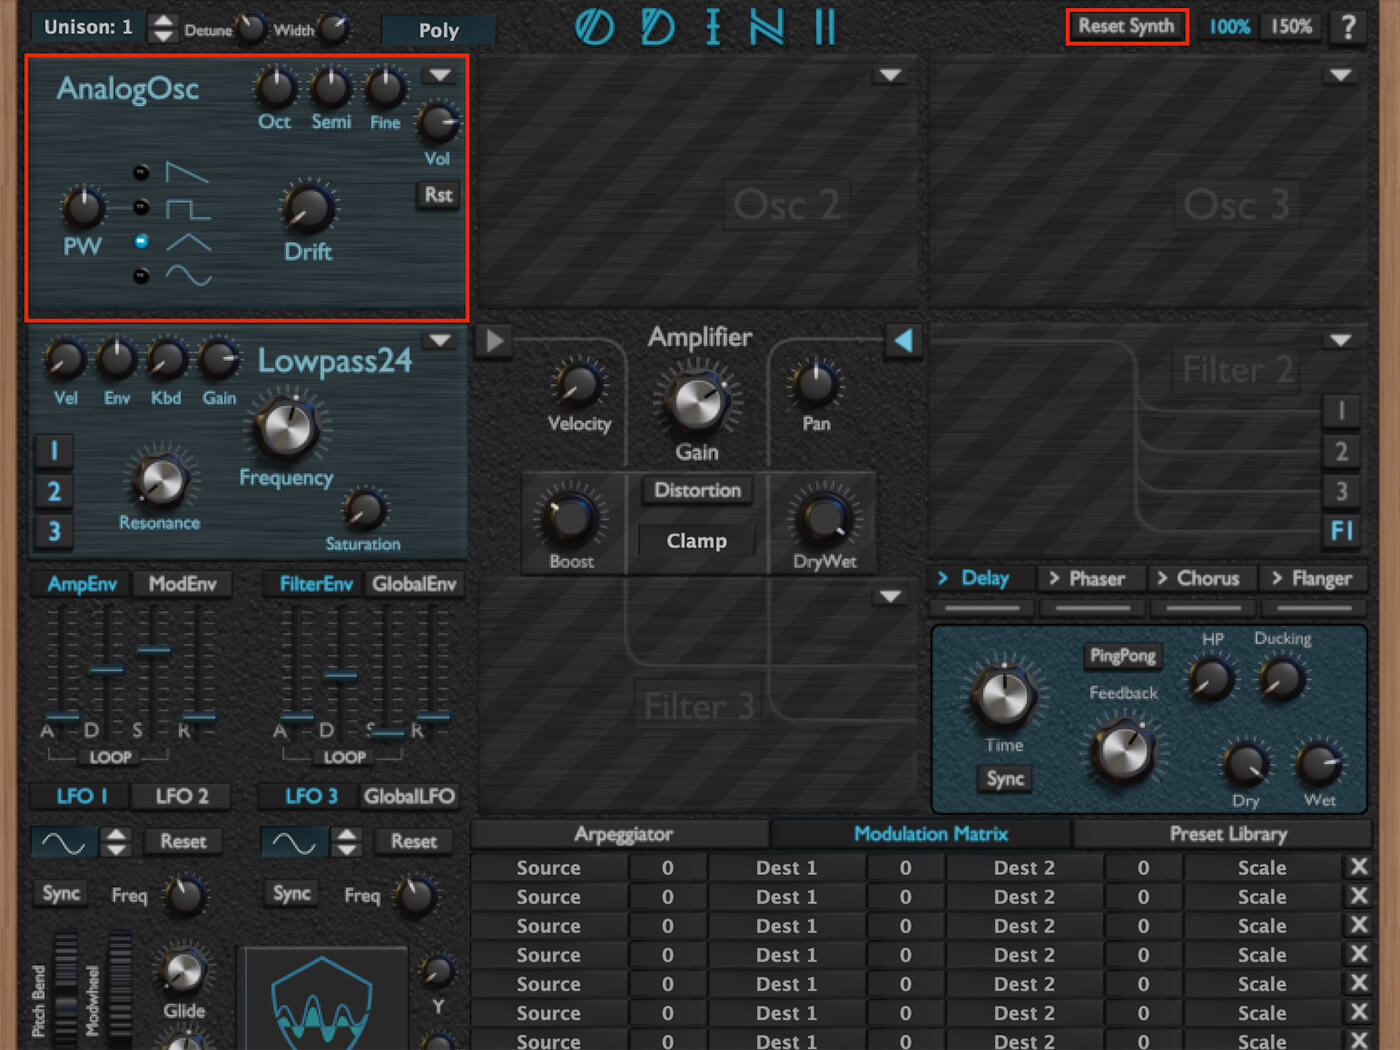
We can start by loading the initial patch using the reset button at the very top of the interface. Then we can choose our first oscillator. Odin 2 allows us to mix and match oscillator types between the three available oscillators in a similar way to other softsynths, such as Massive. We can choose from eleven different synthesis types. We are going to keep our first oscillator set to ‘AnalogOsc’; this is a virtual analogue oscillator featuring four basic waveforms, basic tune controls and pulse-width modulation for the square wave. For this sound, we are going to go with a triangle wave. Let’s plonk down a six bar D2 note, and we should hear a very basic tone.
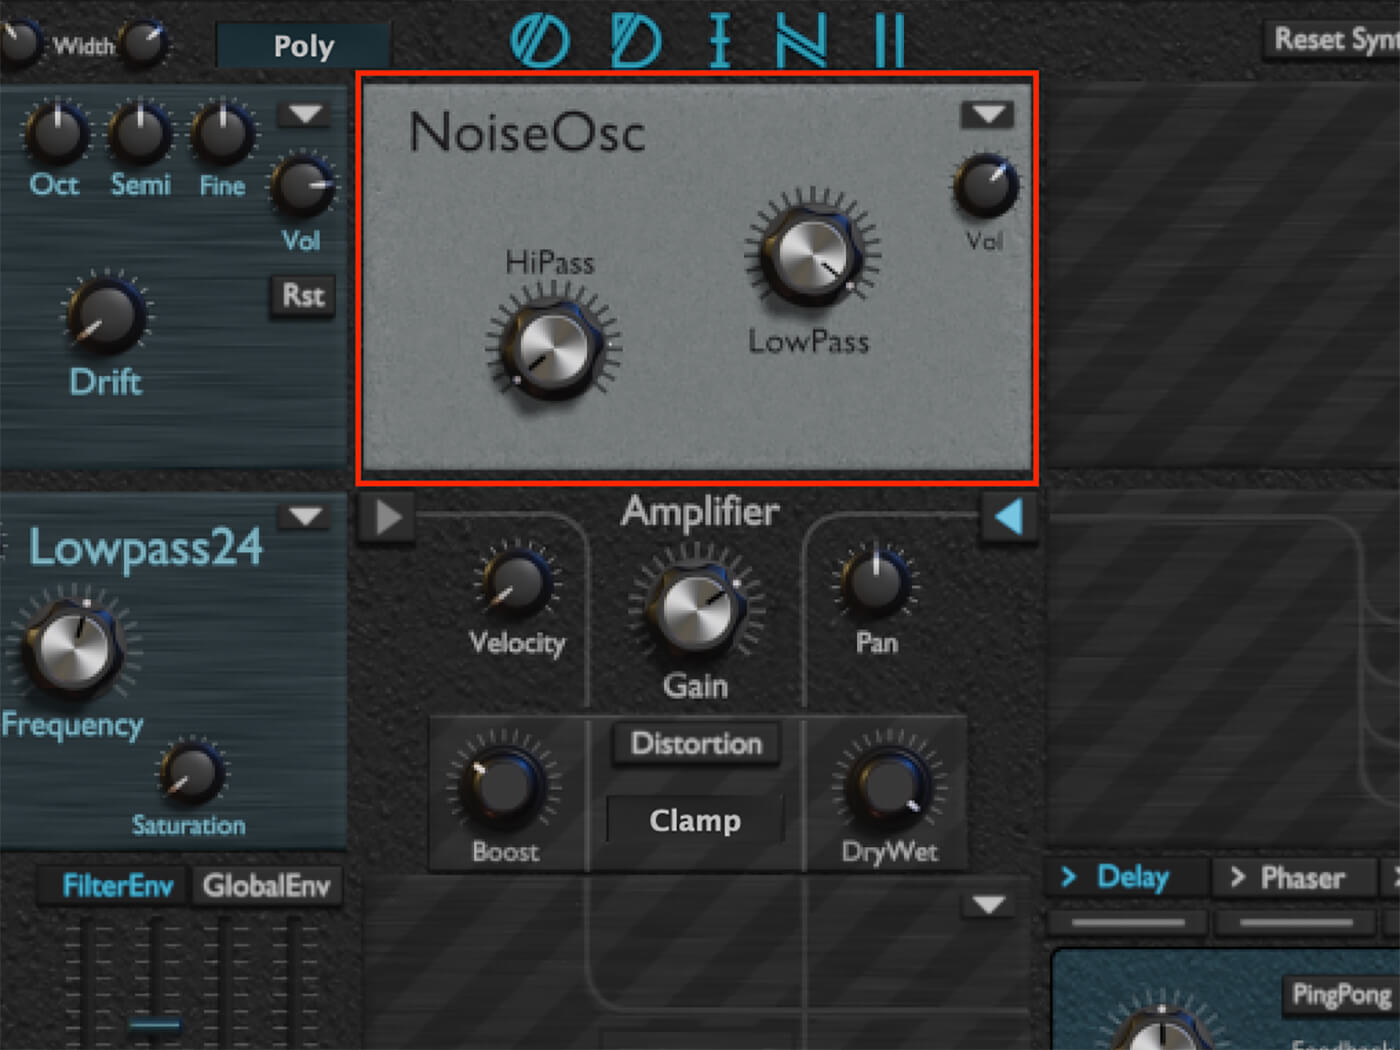
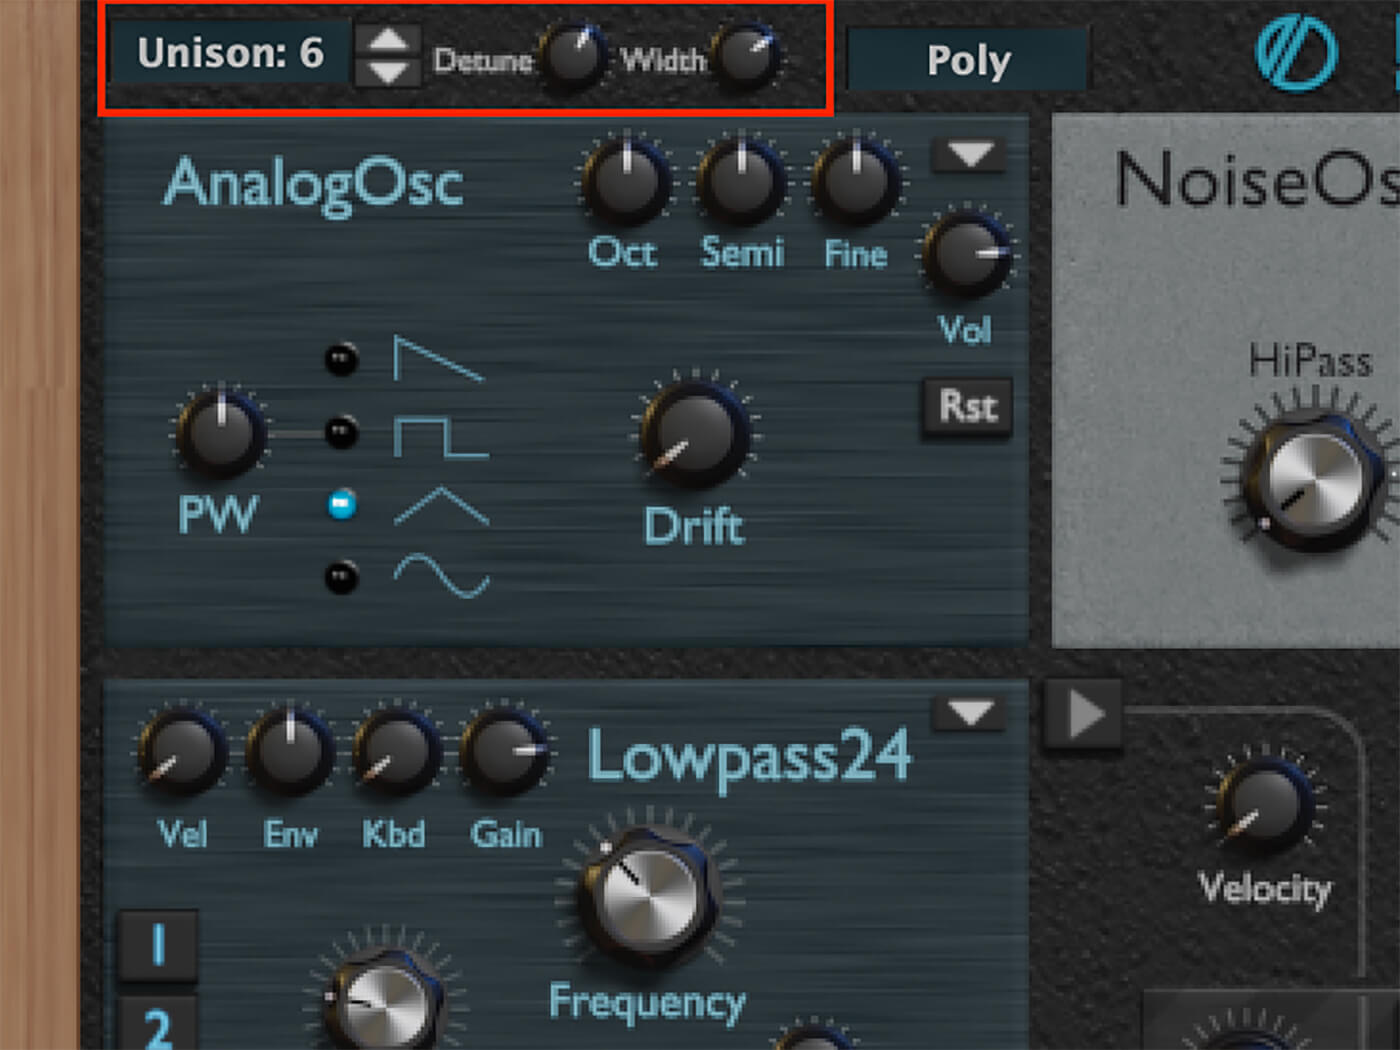
Head over to the second oscillator and set it to ‘NoiseOsc’. This gives us a white noise generator with low- and high-pass filter controls. We are going to leave both of the cutoff parameters at their default settings and take the volume down to around -12 dB.
For now, we have a loud and noisy triangle wave, which isn’t particularly useful. Once we start introducing filters and adding some automation, our sound will begin to take shape.
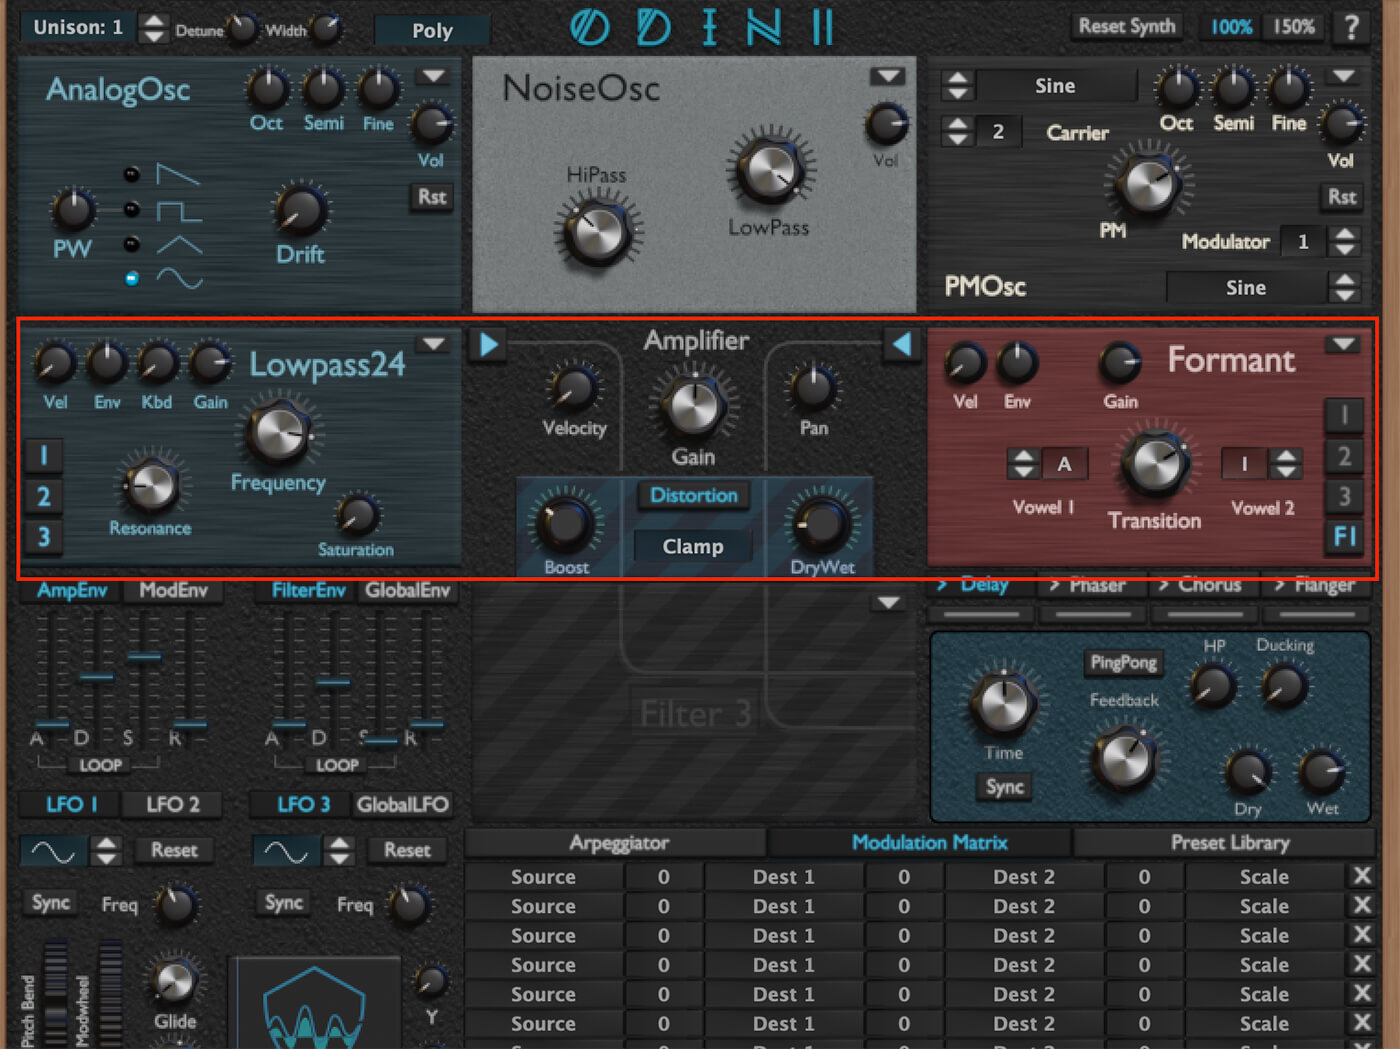
Now that we’ve set up our oscillators, let’s move on to the filter section. We are only going to be using two of the three available filters for our sound. We’re going to leave filter one set to the default low-pass filter, but we will bring the cutoff down to around 288Hz. We are also going to bring up the resonance to 0.2.
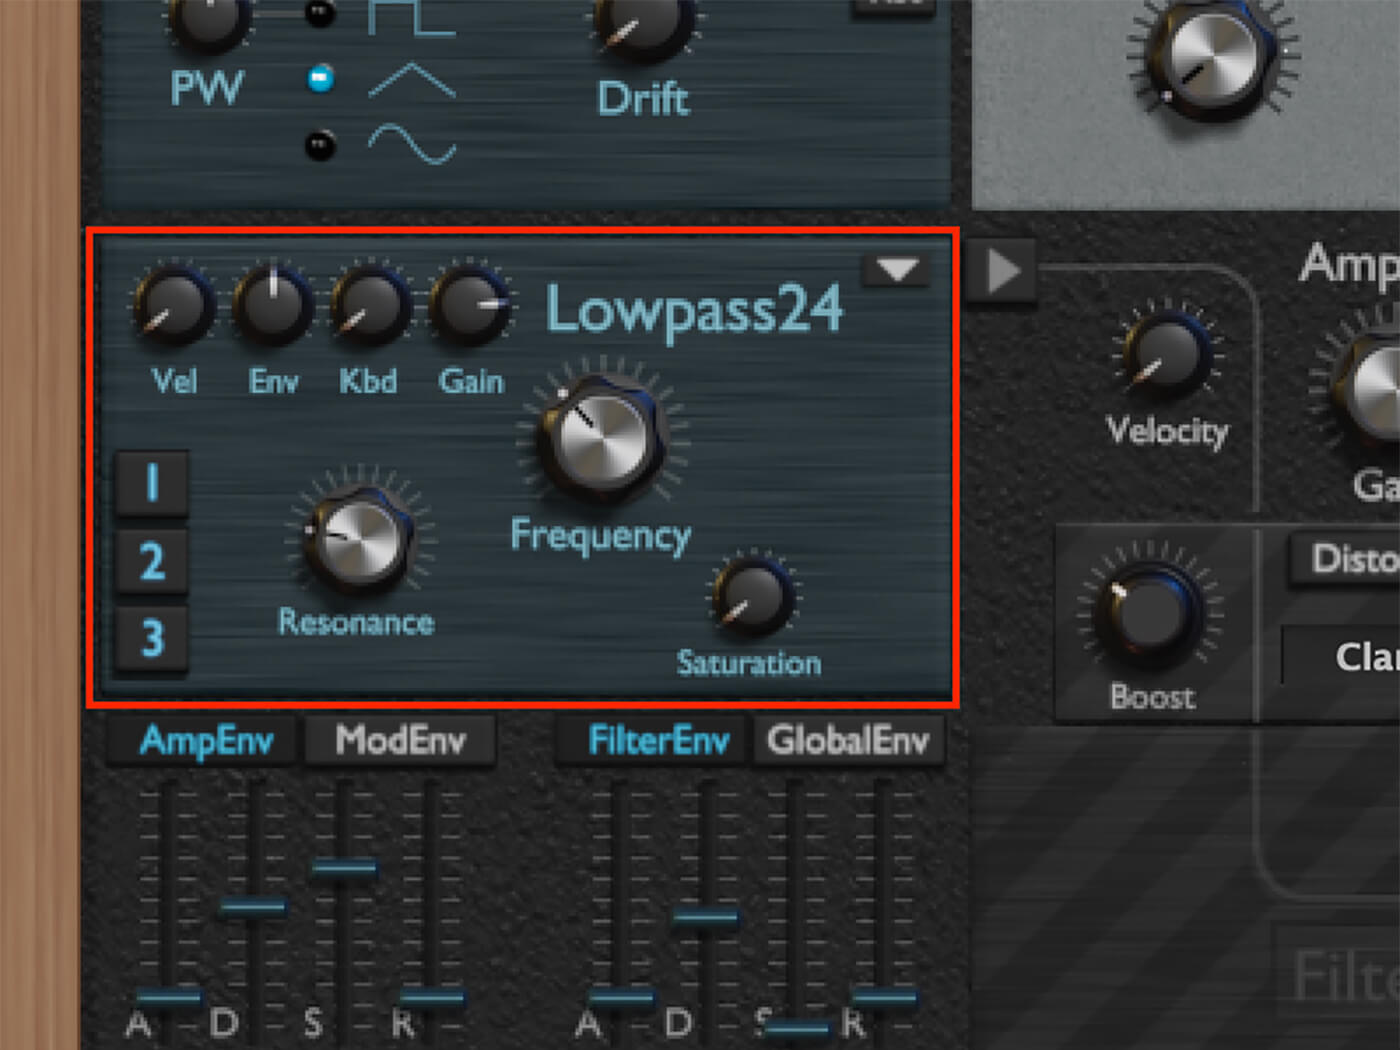
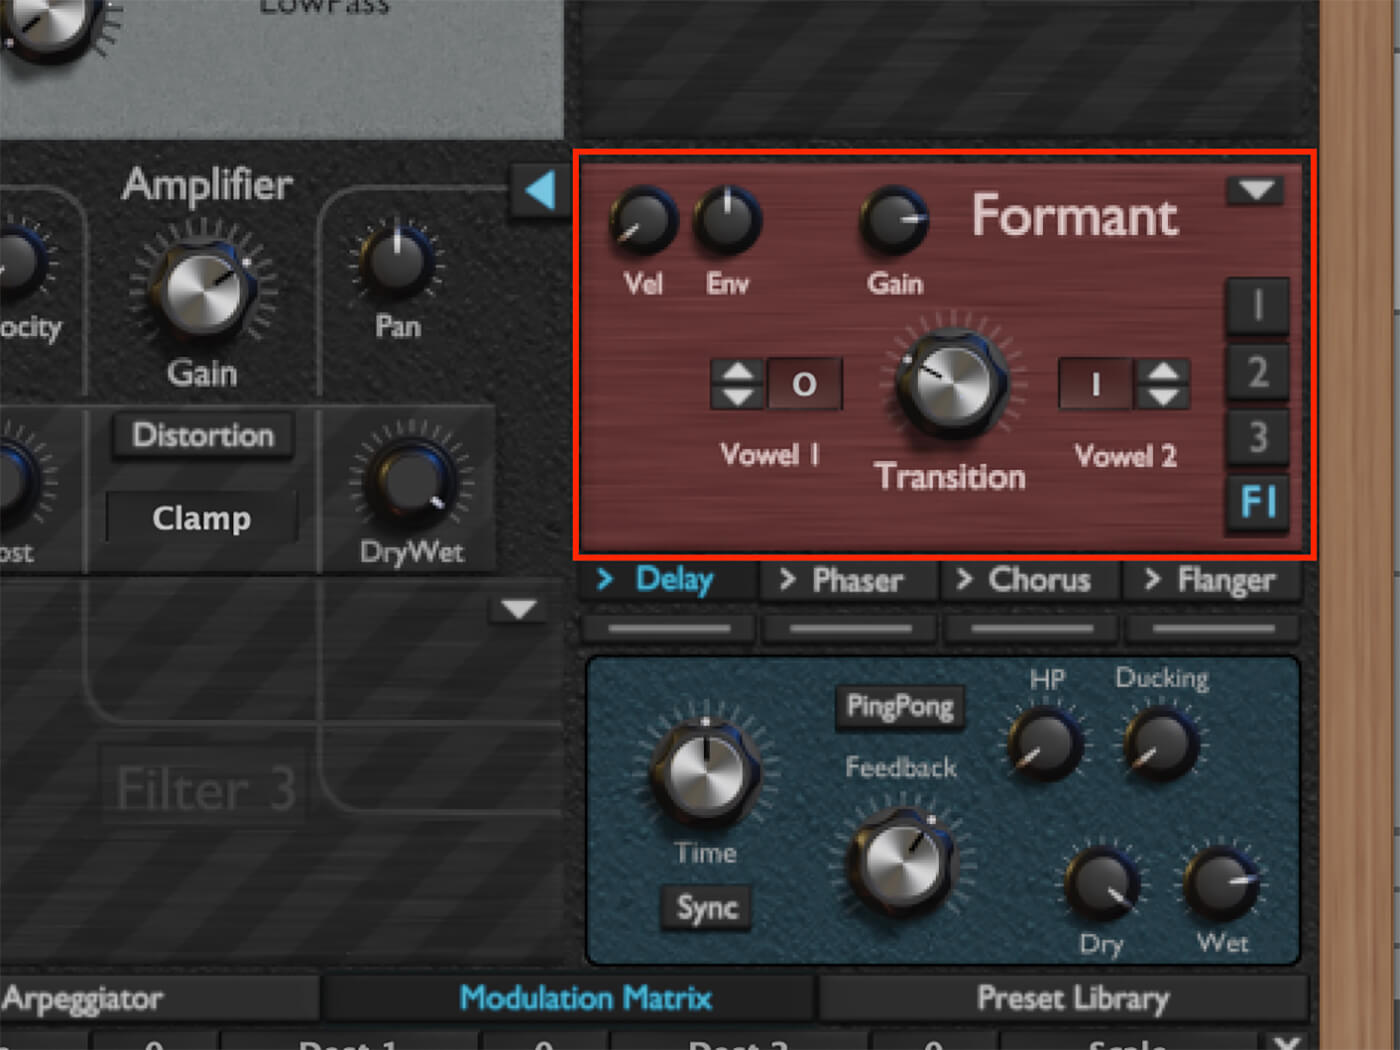
We’ve now almost completely removed the noise from our sound, and we’re left with a slightly grainy version of our triangle wave. Let’s turn our attention to our second filter; we are going to choose the formant filter from the drop-down. Let’s change the first vowel to ‘o’ and bring the transition up to around 0.250. This will bring up the pitch of our formant and change the harmonic content. Once we start automating parameters, the vocal characteristics of the filter will become a lot more apparent.
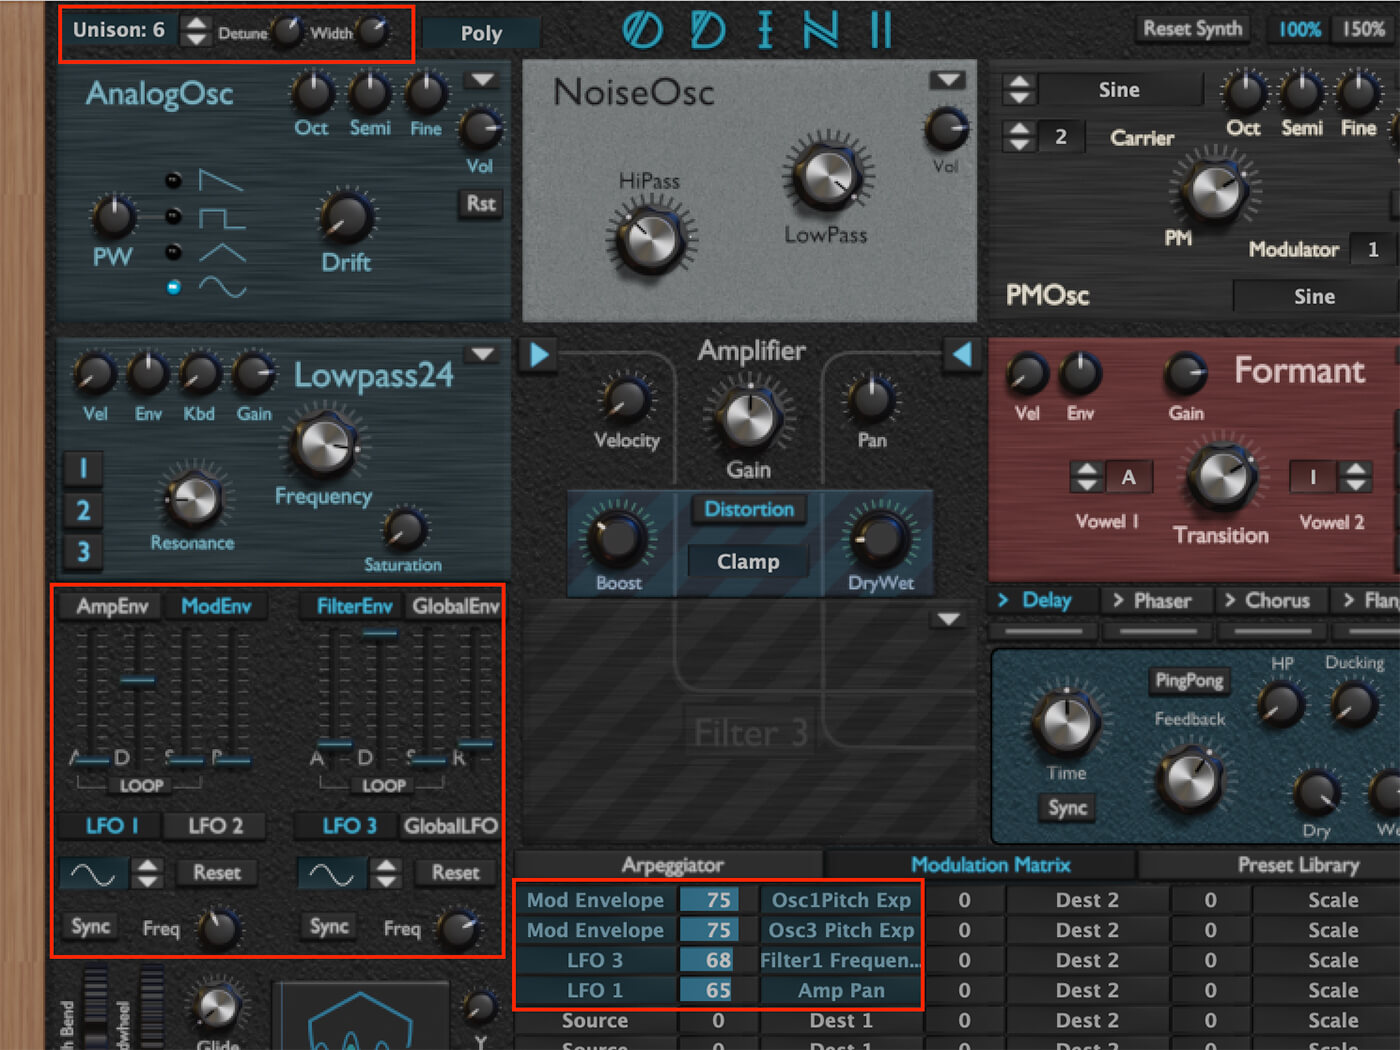
Before we move onto our modulation section, we are going to increase the number of voices to six and detune them a little bit. We can also increase the width a touch. This will give us a nice wide stereo image and a subtle beating effect between the voices.
Now we can start adding some modulation to our sound. For this sound, we are only going to be using two of the available modulators. First, we are going to be setting up our envelope; we’ll be applying this to a few different parameters. Click on ‘ModEnv’ and drag the release and decay to their minimum. Then we can bring the attack up to its maximum of ten seconds.
We’ll be applying this modulation to the oscillator’s exponential pitch, filter one’s cutoff frequency and the formant transition. We can set these up with the drop-down menus in the modulation matrix. Since Odin 2’s modulations are bipolar, and we want the pitch of our triangle wave to drop over time, we will set the modulation amount to -89. We also want to open up the filter, so we will set the depth here to 85. Finally, we want the pitch of the formant to increase over the length of the riser; we will set the depth to around 90.

Let’s add our second modulator; this time we will be using one of Odin 2’s four LFOs. Let’s use LFO 3 and set the rate to around 3.3Hz. We will leave the waveshape on the default sine setting. We’re going to be modulating the gain of the formant filter and the cutoff of filter one. We’ve set the depth on both to 85; this will give us a nice wobble effect. Different rates will work better depending on our project tempo since we don’t have the LFO synced.

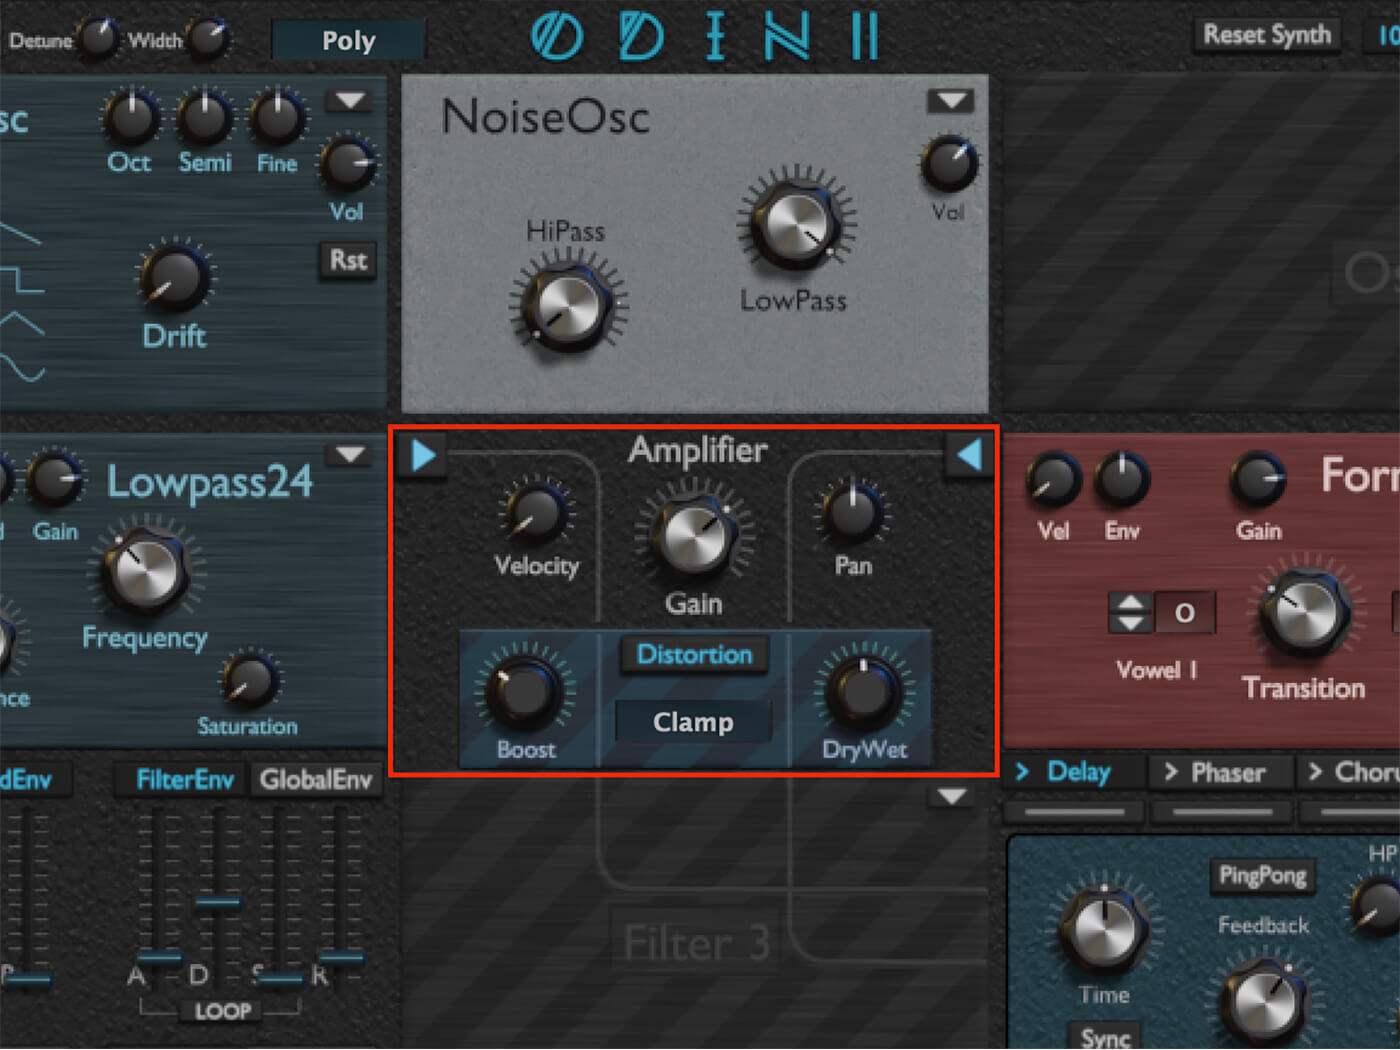
By default, only filter two is routed through the amplifier section. Let’s beef up our sound by enabling filter one’s amplifier routing. Clicking the arrow in the top left corner of the amp section will send the signal through the gain and distortion stages. Let’s enable the distortion and bring down the dry/wet control to the halfway mark. This will add an edge to our sound without getting too unruly.
Let’s check out our finished sound. We will still need to add some reverb, but we want to get our second sound designed first.
3. Make it fall
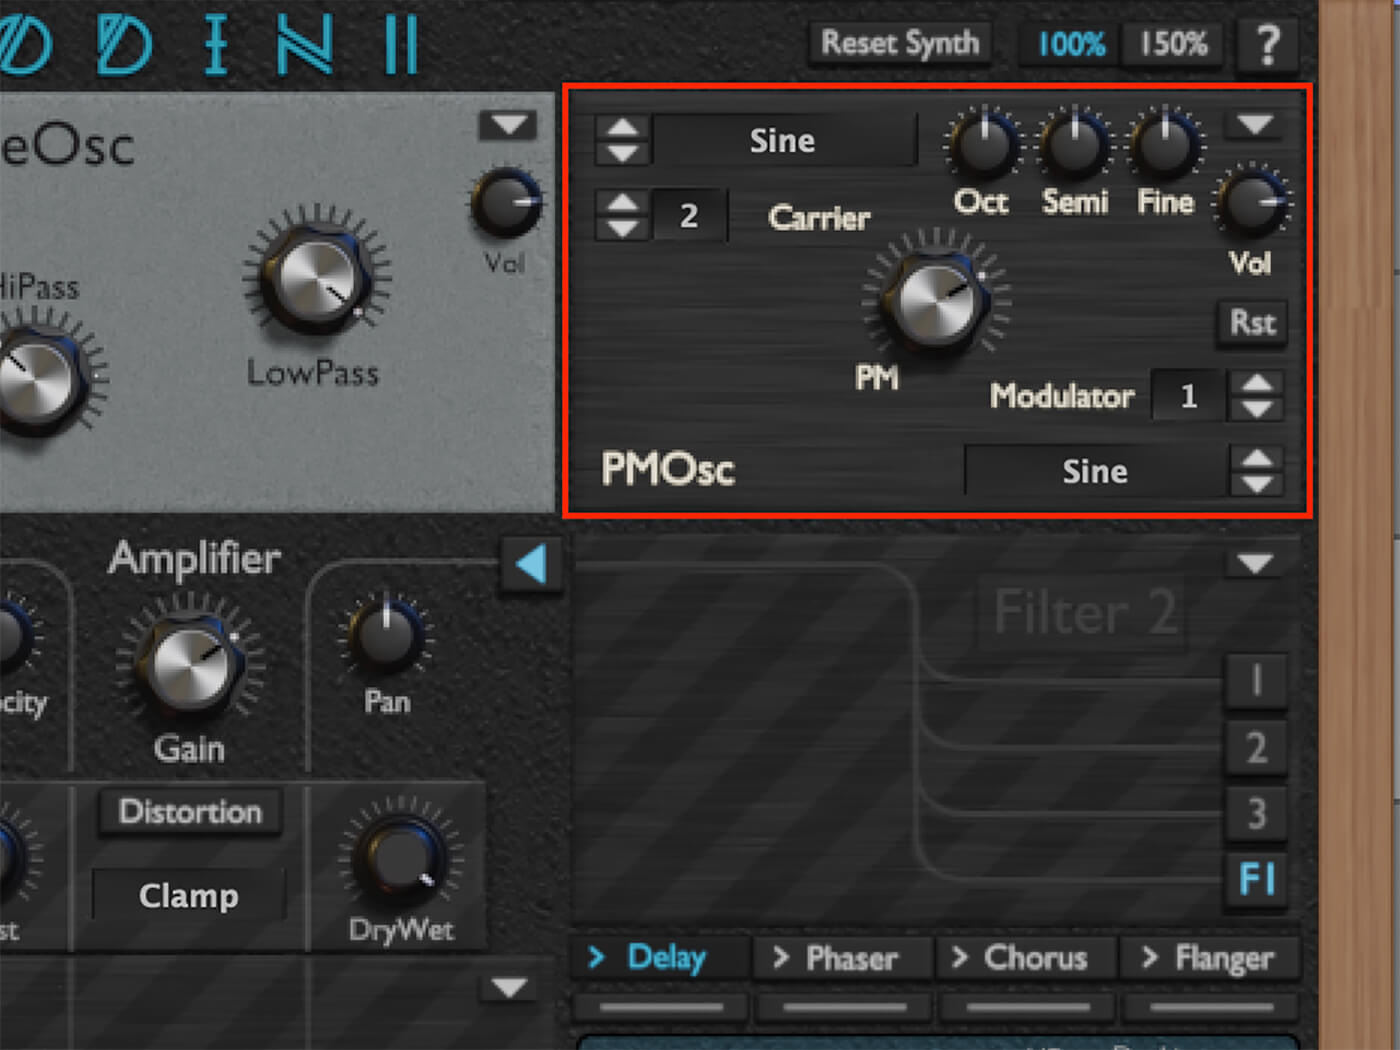
Now we can start creating our downlifter. For this sound, we are also going to use the analogue and noise oscillators, but we will be enabling Odin 2’s third oscillator as well. Let’s choose ‘PhaseMod’ from the drop-down and start tweaking the parameters. We are going to bring the carrier oscillator’s ratio up to two and then dial in a modulation depth; we’ve gone with 0.730. If we go back through our first two oscillators, we’ve made a couple of changes. This time we’ve set the high-pass filter on the noise oscillator to around 300Hz. We’ve also gone with a sine wave for our analogue oscillator instead of a triangle. Let’s lay down a D1 note this time and see how it sounds.
Moving down to the filter section, we’ve decided to use the same two filter types as the first sound, but we’ve configured them very differently. With the formant filter, we’ve kept the default vowel selection but have increased the transition parameter to around 0.730. For the low-pass filter, we will set the cutoff to 12kHz. We can also bump up the resonance to about 0.150. This will give us a wide, open sound as the starting point for our automation.
We routed filter one through the amplifier section again to add some extra weight to the sound. This time we’ve made the distortion a bit more subtle with a low dry/wet mix, and we’ve decreased the gain to -8dB. We now have a very noisy bass sound.
We are going to use the same two modulators as our first sound, plus a third. For our envelope, we are going to set the attack, sustain, and release times to their minimum, with a decay of around two seconds. We will set the initial value for LFO three’s rate to around 22Hz; this seems fast, but we will be automating it later. We are also going to be using LFO one, so we will set the rate to 1Hz.
Now we can configure our modulation destinations. Our envelope will be modulating the exponential pitch of oscillators one and three; we’ve set the depth of both to 75. LFO three is modulating filter one’s cutoff with a depth of 65, while LFO one is modulating our ‘Amp Pan’ with a depth of 68. The last thing we are going to do within Odin 2 is to set the number of voices to 6, and bump up both the detune and width parameters.
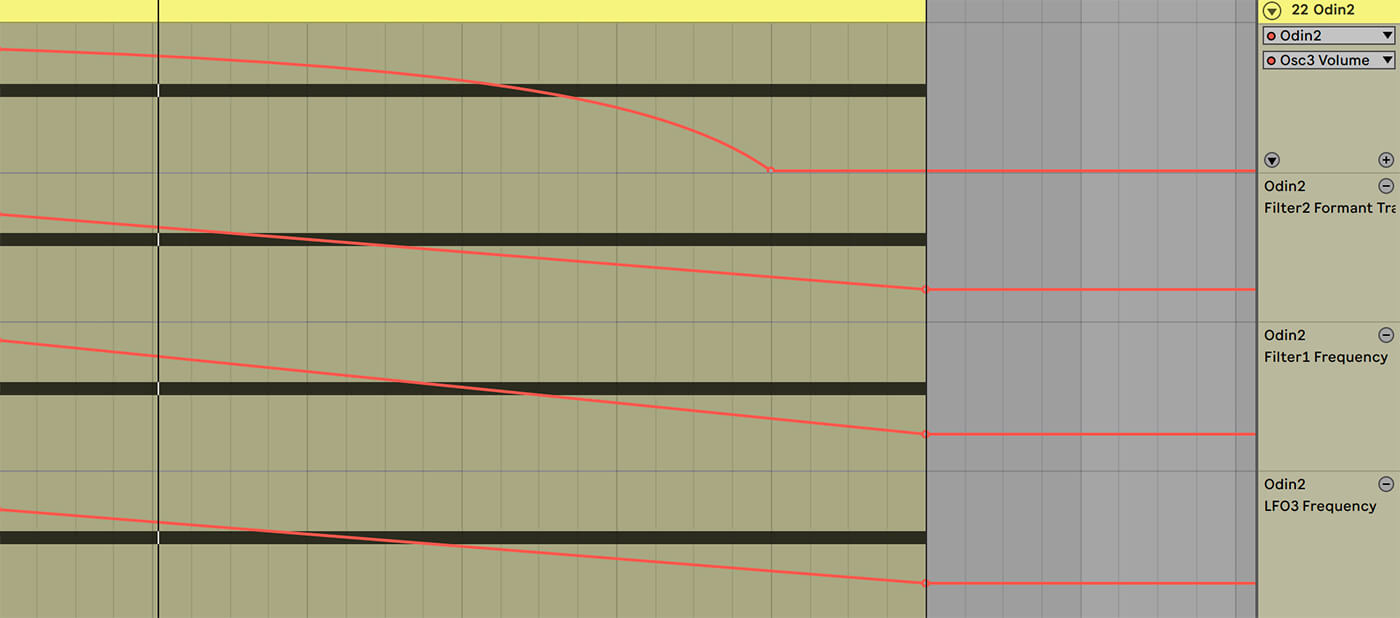
While our sound is starting to take shape, we are going to use our DAW’s automation to give it the last movements it needs to be an effective downlifter. We are going to automate four of Odin 2’s parameters, ‘Filter1 Frequency’, ‘LFO3 Frequency’, ‘Osc3 Volume’, and ‘Filter2 Formant Transition’. We are using Ableton, but these parameters can be automated in your DAW of choice.
We use our filter frequency to control the volume and frequency content of the entire sound over our six bar note. We have the cutoff going all the way down to 80Hz. We’ve then automated oscillator three’s volume so that the last bar contains only the sound of the first oscillator and our white noise. We’ve added a curve to the automation, but you can try it without and use whichever you prefer. Modulating LFO three’s rate helps release tension by slowing down our cutoff modulation over the course of our sound. By the end of the automation, our LFO rate is sitting at around 0.12Hz. We wanted the pitch of the formant to decrease at a different rate than oscillator three. We’ve decided to automate the transition since Odin 2 has only one modulation envelope available; the transition parameter finishes at 0.21. Let’s check out how it sounds with all of our automation.
4. Wash it out
While reverb is most often used to create a sense of space, it can also be used creatively to change the energy of a song – especially through the use of automation.
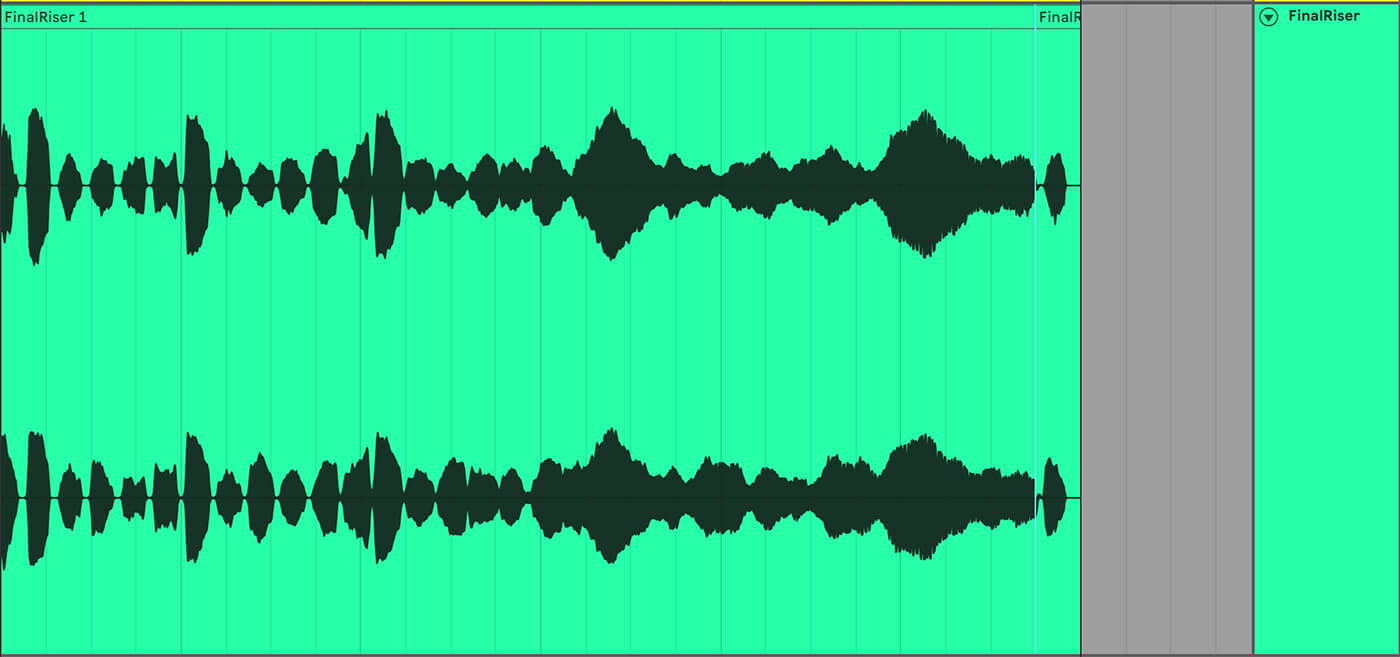
Before we take a look at using SocaLabs’ Mverb, we’ll want to bounce both sounds to audio. This gives us more freedom to slice or reverse them later to fit into a track better. Because the maximum attack time on our first sound still wasn’t long enough for our six bars, our modulation resets before the sound finishes. To get around this, we want to slice off that last section of the sound.
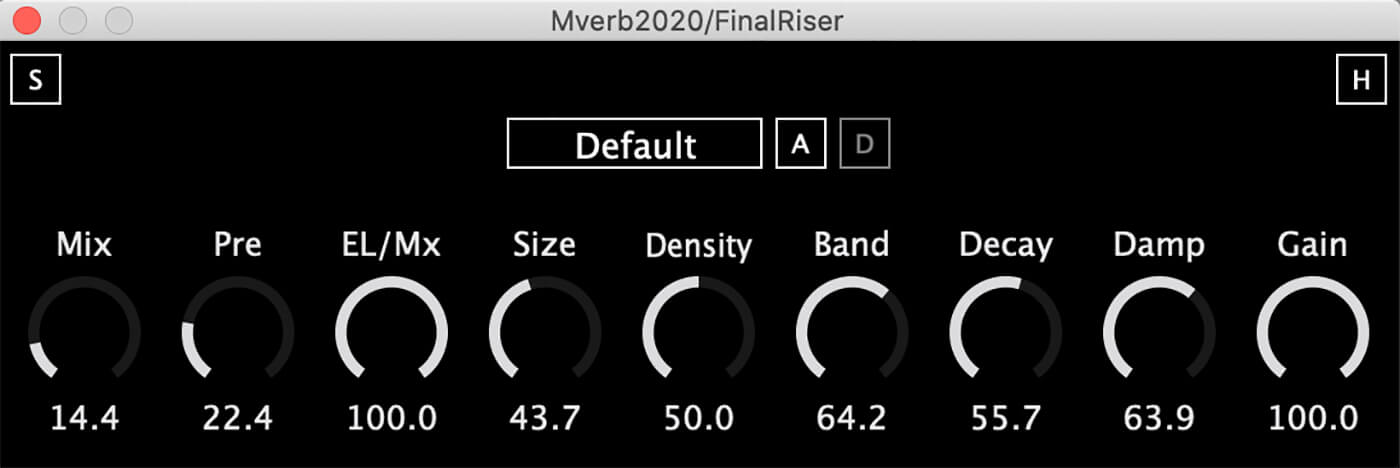
Once we have both sounds on their own audio tracks, we can load an instance of Mverb to each of them. For this example, we will be using the same reverb settings on both of our sounds, but we encourage you to experiment with the settings to achieve different effects. We can start by bringing the mix down to around 14 and then adjusting the rest of the parameters to taste. We’ve reduced the predelay, size, band and damp parameters while increasing the decay time slightly. This gives our sounds a nice sense of space.
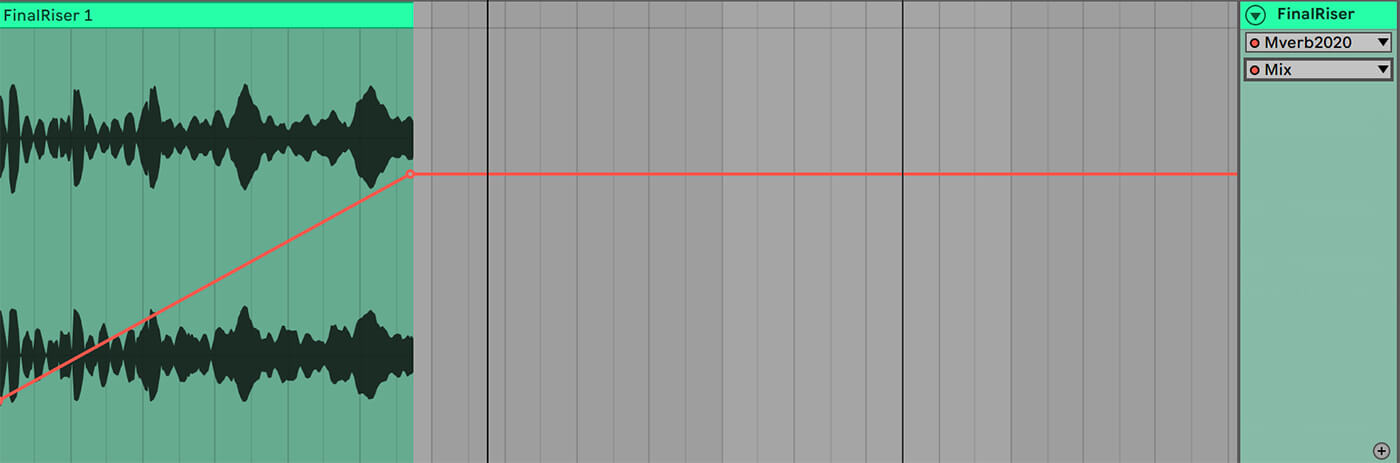
As a final step, we are going to be automating Mverb’s mix parameter for our first sound. This can work well when combined with an automated high-pass filter on other instruments in a track. Our mix parameter ends at around 66 per cent, producing a nice washed out sound before transitioning into our downlifter.
We’ve created two great effects using Odin 2 and Mverb, but sometimes it can be challenging to imagine how they might fit into a track. We’ve taken our two effects and used them to transition between an intro, a build, and a drop so that you can hear them in the context of a song. For our second sound, we have duplicated and reversed it so it could be re-used as a riser. The reversed version also overlaps and cuts off the original version so that it fits better in this track.
Let us know how you get on, share your results and tell us what tutorials you’d like to see in the MusicTech Creator Community on Facebook.
Check out more Weekend Workshops here.