Weekend Workshop: Practice your sound design by recreating synth patches
Reproducing a professional patch from one synth in another can seriously up your sound design chops and help familiarise you with new instruments.

The fundamentals of synthesis are pretty consistent. Whether you’re using a classic hardware synth or a modern, bells-and-whistles software supersynth, many – although of course not all – of the same concepts apply.
In this Weekend Workshop, we’re going to practice recreating a patch from one synth using an entirely different synth, trying to get as close to the original as possible. But why?
An exercise like this helps us with two things: Firstly, it forces us to compare parameters on synths and experiment to find sonic solutions, giving us insight into sound design in general, and the parallels between two synths. Secondly, it’s a brilliant way to get to know a new synth.
What you’ll need
- A DAW
- Two soft synths – we’re using Serum and Massive X, but the same principles apply for most synths
1. The Setup
We’re going to select a preset from Xfer Records’ Serum, from its factory library, and try to recreate it from the Init state of Native Instruments’ Massive X. Both synths, of course, have very different capabilities, but we’re not expecting to be exact here – just to get as close as we can.
The Serum patch we’re using here is PL Metachord [FP] – a relatively easy feat to clone since it’s a quick, plucky sound. You can choose whatever sound you want with the synth you choose.
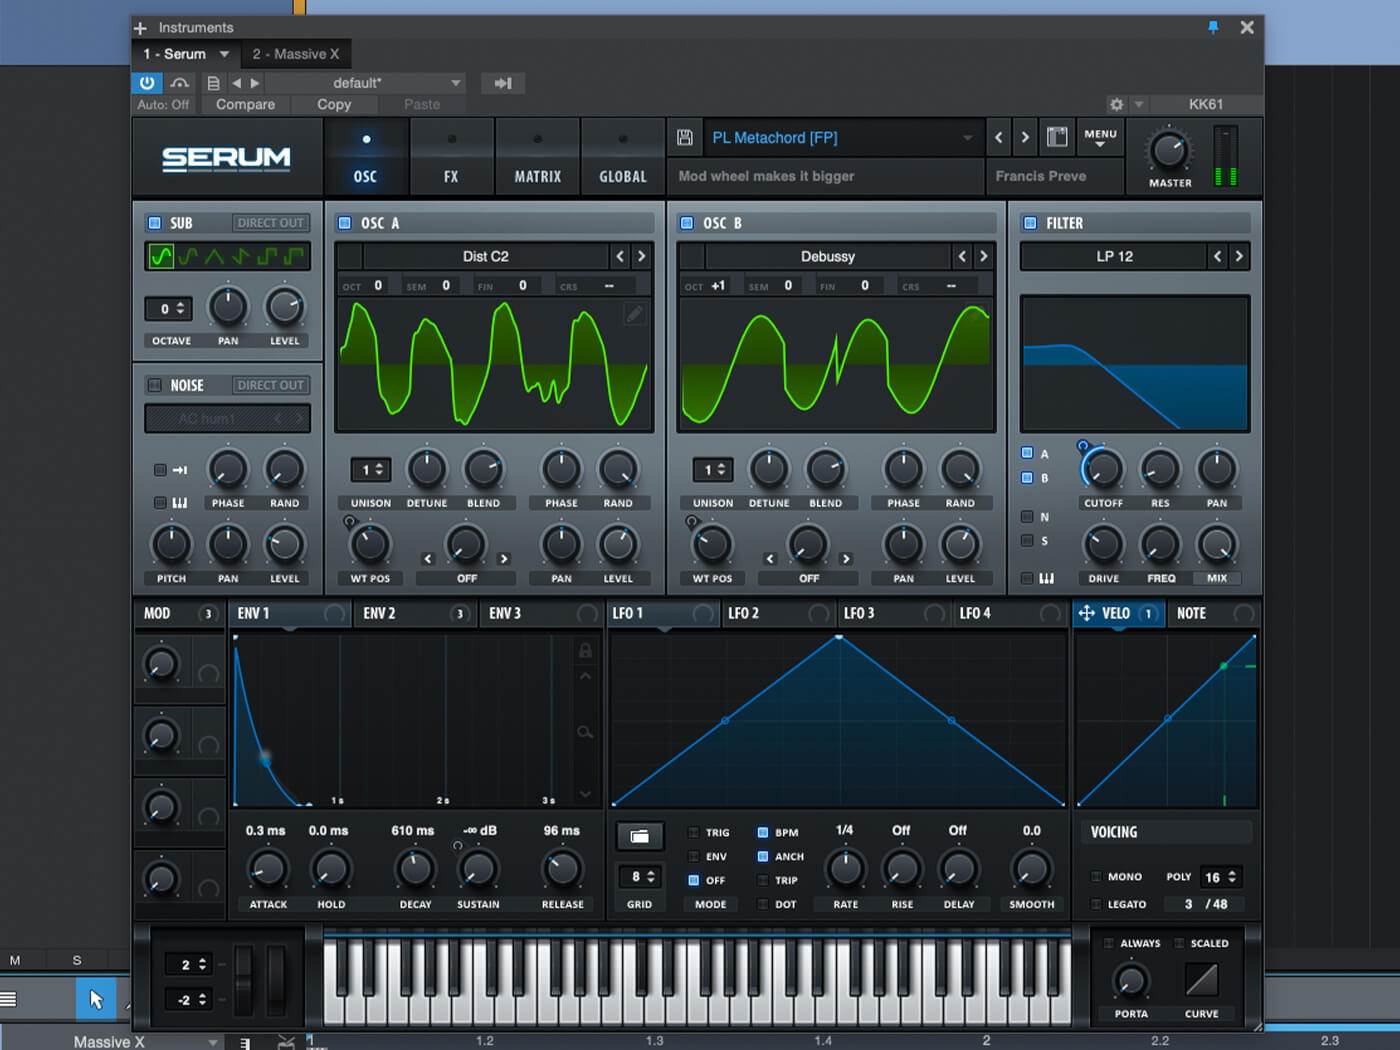
Serum’s visualisation features won’t exactly stand in our way here, as the animation and wavetable displays will give us plenty of insight into how the patch works from the start. A true, use-your-ears approach would be to ensure that you can’t see what’s happening in one synth while you recreate it in the other, and so we’ll shut down Serum right at the start here.
2. Tricks and Techniques
Listen to the two synths in sequence and together at different points in time – different approaches will have different advantages, so mix it up a little. Try panning one left and the other right and playing them together for a great mono comparison. Do remember that this won’t help you analyse the stereo properties of each patch, though.
If necessary, try switching the effects off in the source synth, giving you a simpler match to make of the raw sounds only. If you need an extra helping hand, bypassing filters can also help you get your sonic bearings as you go forward.
3. Getting the timing right

We’ll listen back to the two synth patches playing the same MIDI pattern together to start to notice what we need to change. Obviously, at this point, there’s a lot. You’ll hear the quick pluck sound from Serum layered with the initialised saw wave patch from Massive X.
We’ll leave the oscillator waveforms as they are for now, and instead turn our attention to the amplitude envelope of the sound. Getting the timing right first will help us to get the right oscillator setup later.
To get Massive X to make a more pluck-like sound, we reduce the amp envelope’s Sustain to nothing, effectively removing the Release from the equation, and tinker with the Decay parameter until the sounds have the same amplitude onset and character.
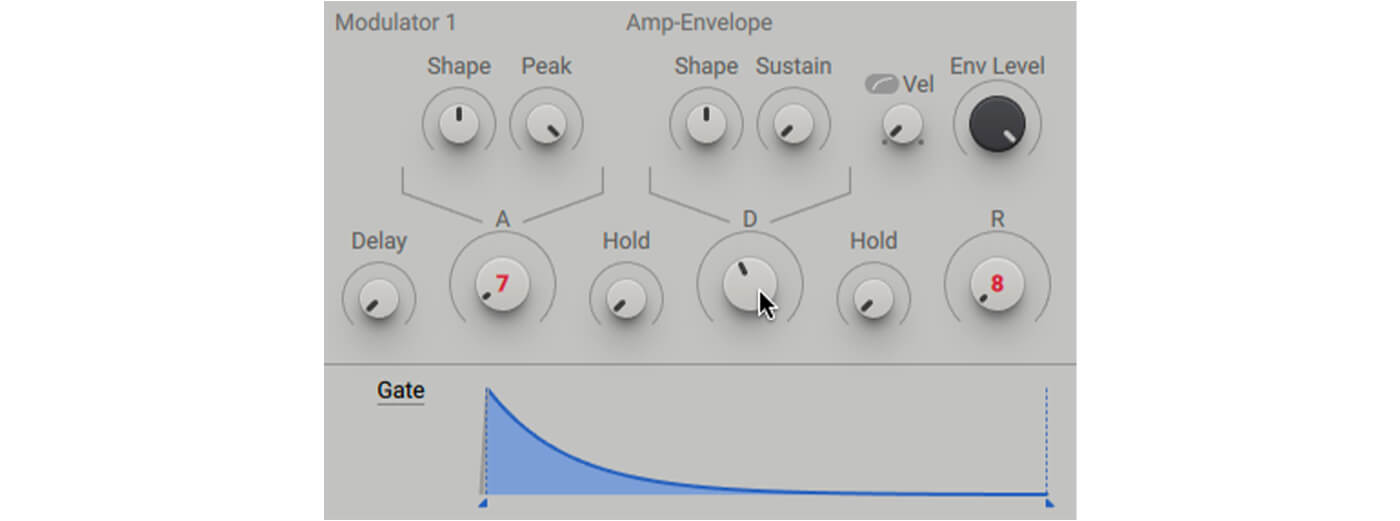
It sounds as if the original Serum patch has a bit of delay on it, so it’s likely we’ll have to revisit this decay time a little later. For now, the timing is OK and it’s onto the oscillators.
4. Finding the oscillator tone
Is our Serum pluck sound created using a filter envelope, or a particular oscillator tone? There’s only one way to find out, as we start auditioning oscillators and oscillator pairs inside Massive X to try and get as close to Serum’s sound as we can. We keep our ears out for higher-frequency options that can be reduced to a similar pluck with the filter envelope later.
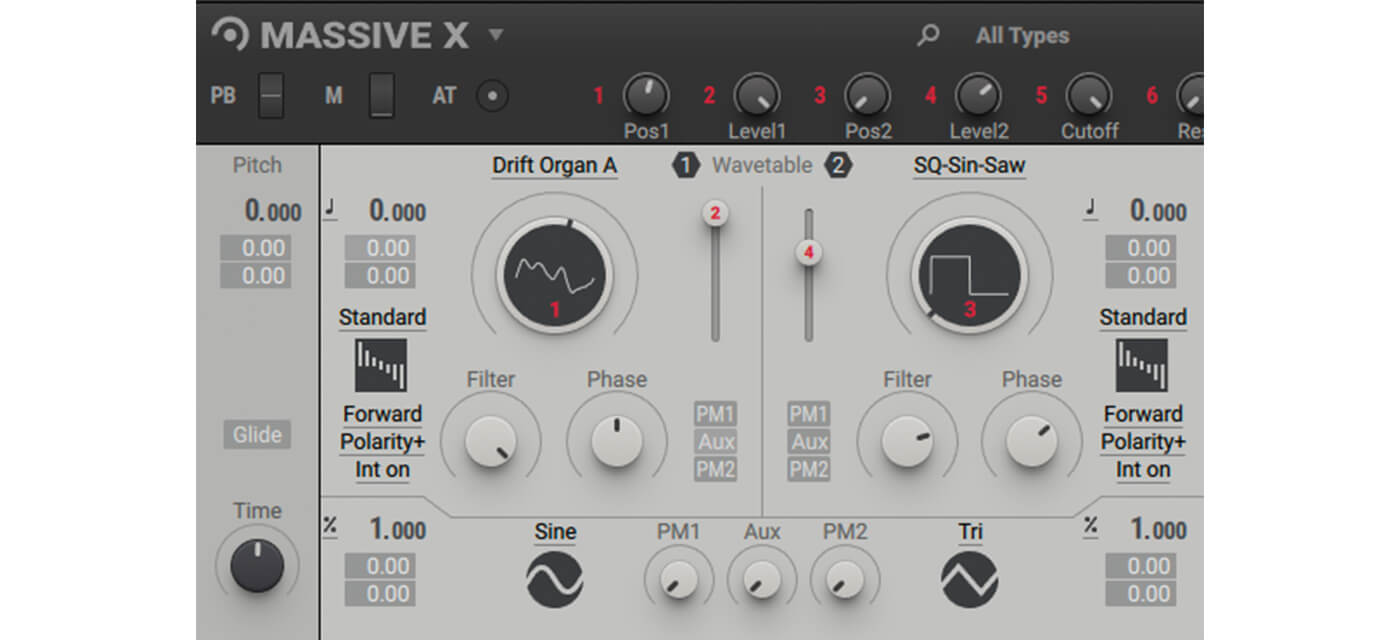
An organ sound in one oscillator works well, but the Serum patch (heard first in the example below) has a high-energy tap at the start of each note. We’ll start trying to recreate it by blending in a square wave oscillator, and modulating that next.
5. Comparing two sounds
Already, we have some very similar sounds, so to compare them on top of each other, we’ll pan one left and the other right to listen together. We can’t get much control over the patches’ stereo properties like this, but we’ll bring them back to the centre later.
From here, our original sound is on the left and the recreation will happen on the right.
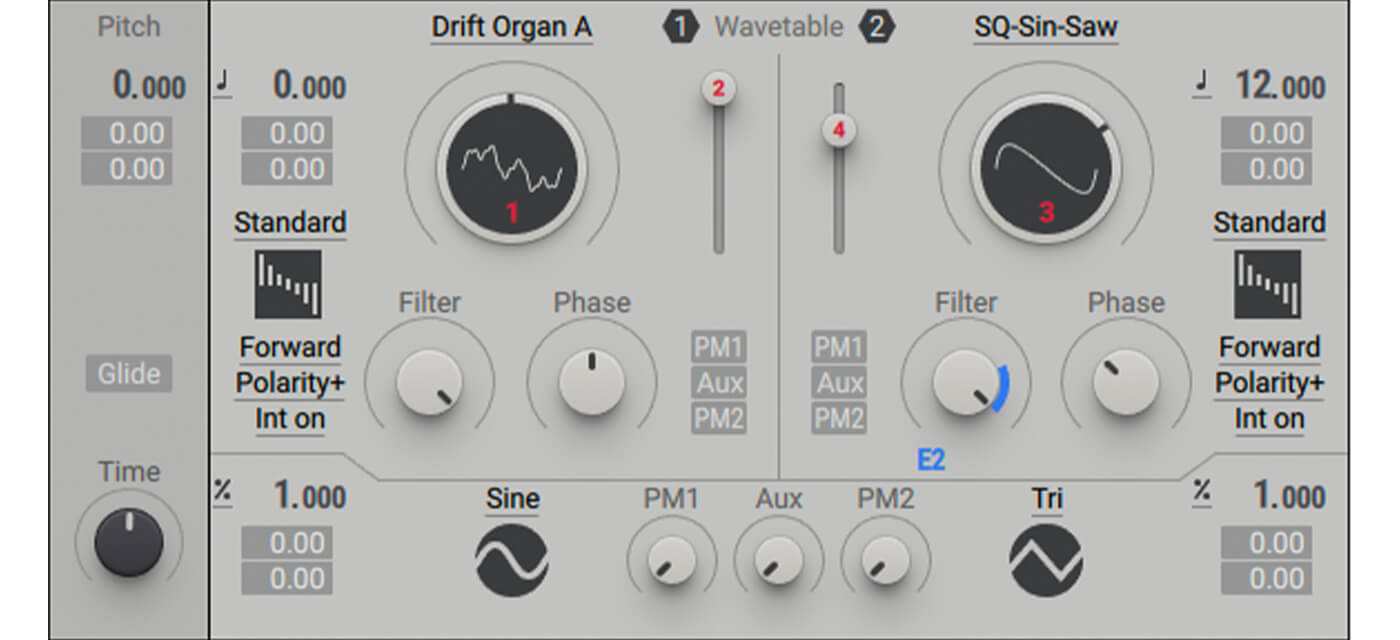
Let’s start to refine that square wave transient to get the right attack on our new sound. We activate an envelope over the filter to modulate it, and we increase the oscillator’s note pitch to +12.
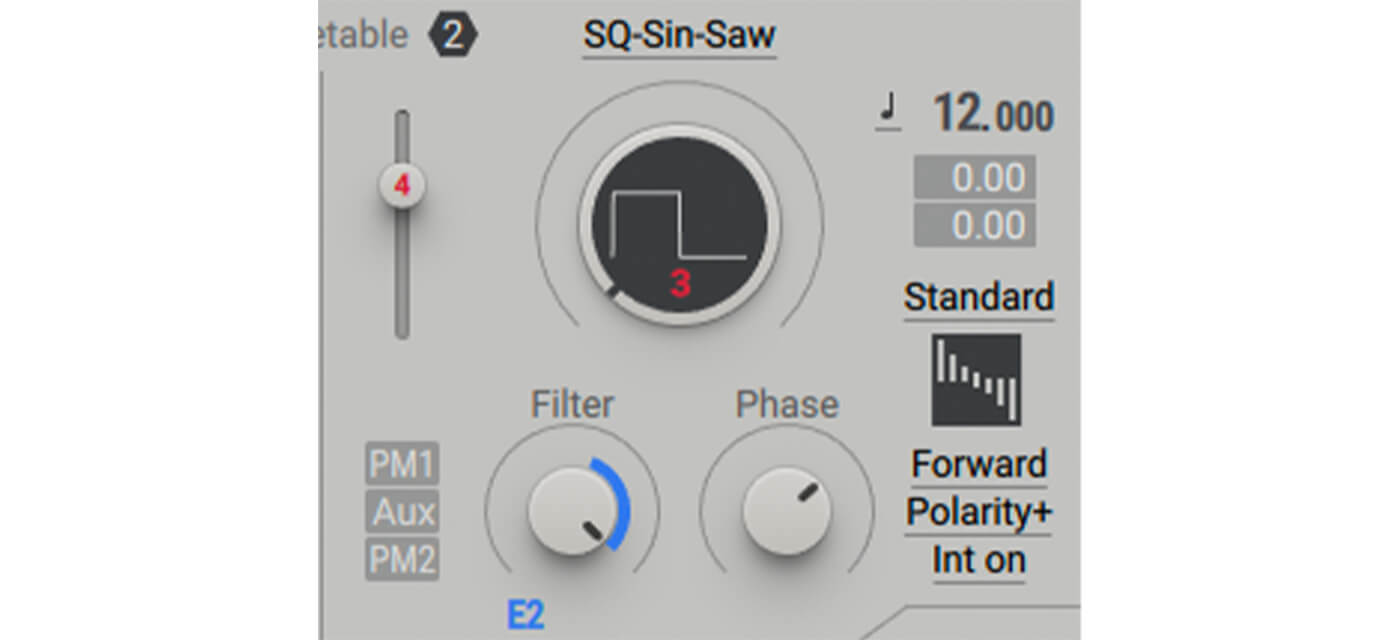
The filter movement seems reasonable, but the square wave may not have been the best candidate for the layer. We try another sound to get a more appropriate oscillator tone, this time choosing the SQ-Sin-Saw oscillator and dialling in a tone that’s somewhere between a sine and a saw wave. We mess with the Filter Envelope amount too, to get closer to the original sound.
6. Adding effects
There’s plenty of refinement still needed to reach the tone of the original patch, and one obvious addition is some delay. Serum’s delay is running at 1/8 speed with a fair amount of feedback, and it’s pretty easy to add this in Massive X using the StereoDelay module.
With the Feedback and Mix controls tuned right, we can get closer to the Serum patch’s delay sound, but actually this exposes a couple of problems with our patch. For one, as predicted, the amp envelope decay needs to be reined in; also, our own patch is still sounding slightly dull.
Here our own patch plays second, after the original Serum patch…
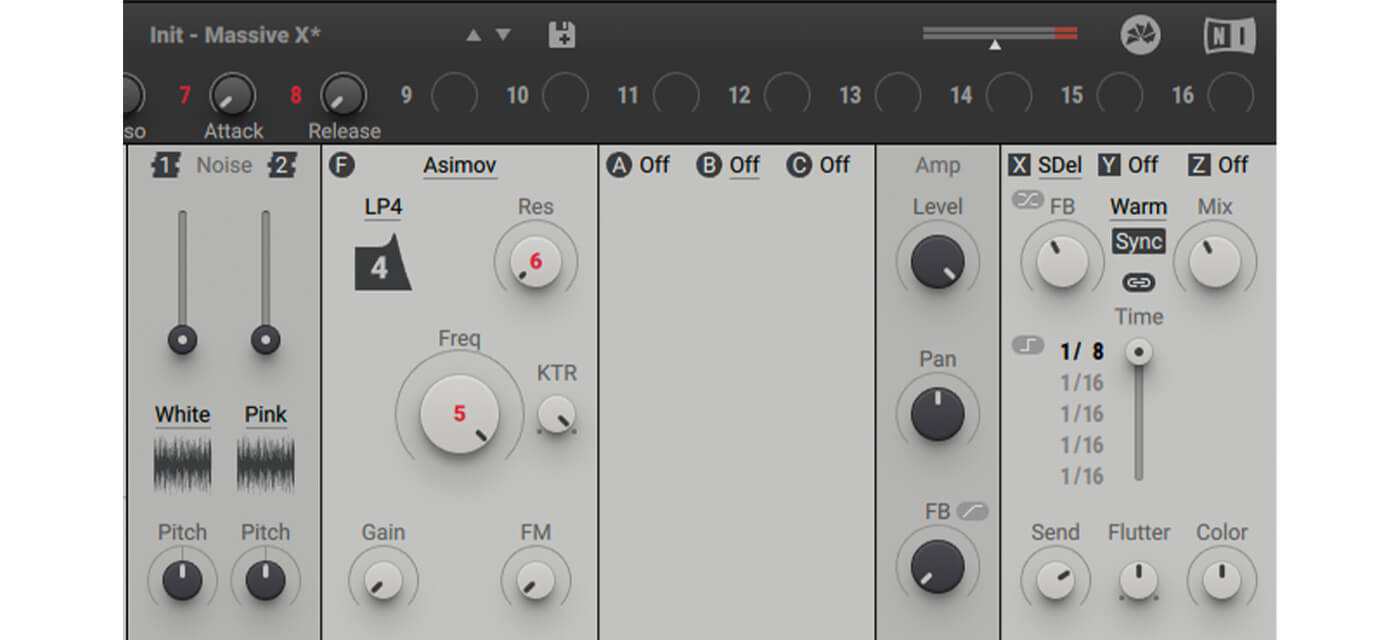
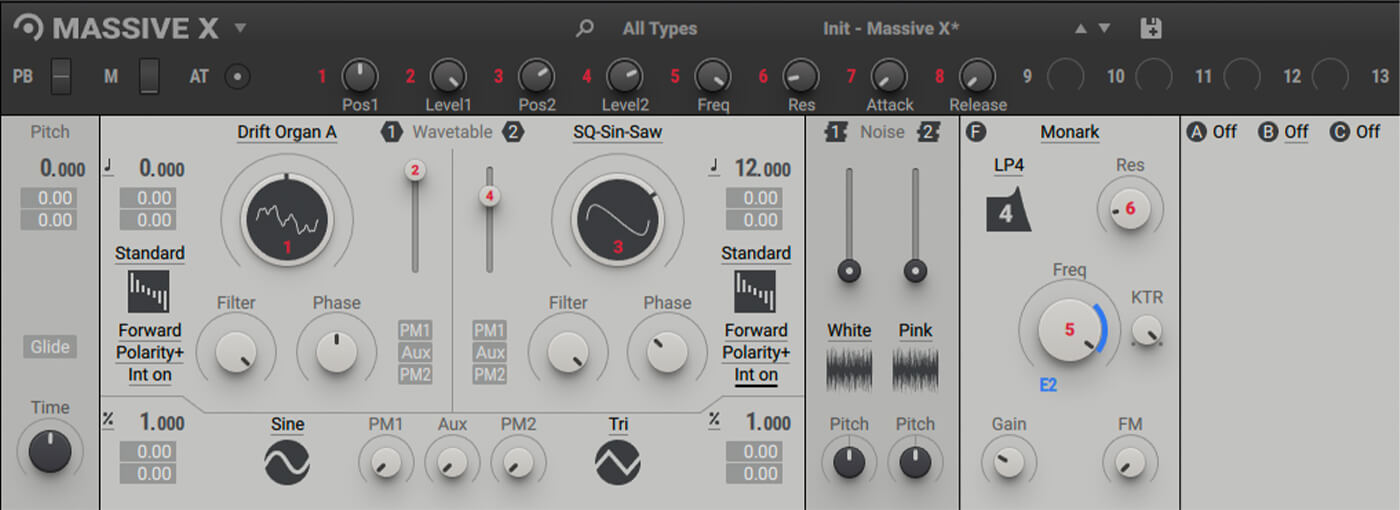
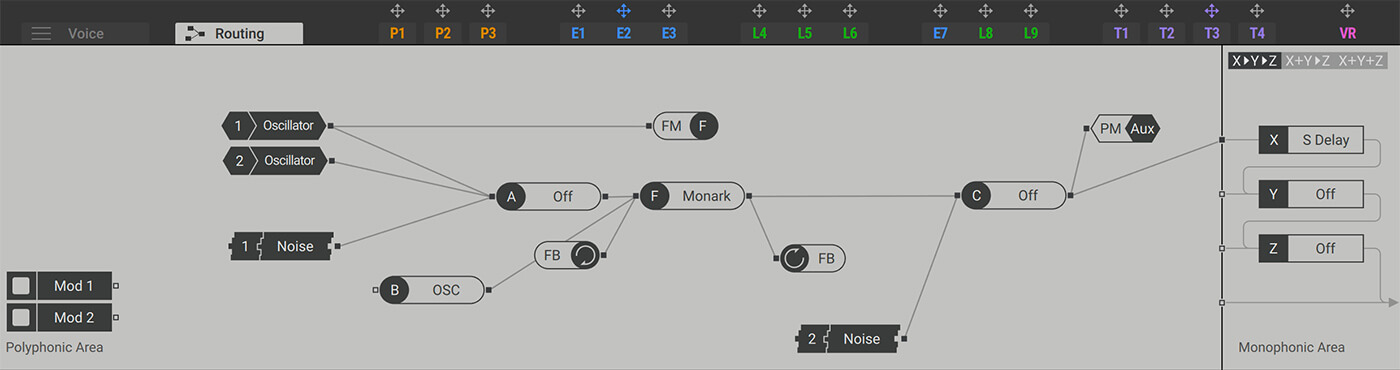
After reducing the amplitude decay time, we make some changes based on what seems lacking. First of all, we replace oscillator 2’s filter envelope movement with Massive X’s main Filter unit, zapping down over both oscillators. We modulate it down with the same envelope signal as before.
We choose the Monark filter type, and add both some Resonance and Gain. This brightens the sound and adds attack and resonance, which all seemed lacking before. It seems that using a filter over both oscillators was the best policy here.
7. More Adjustments
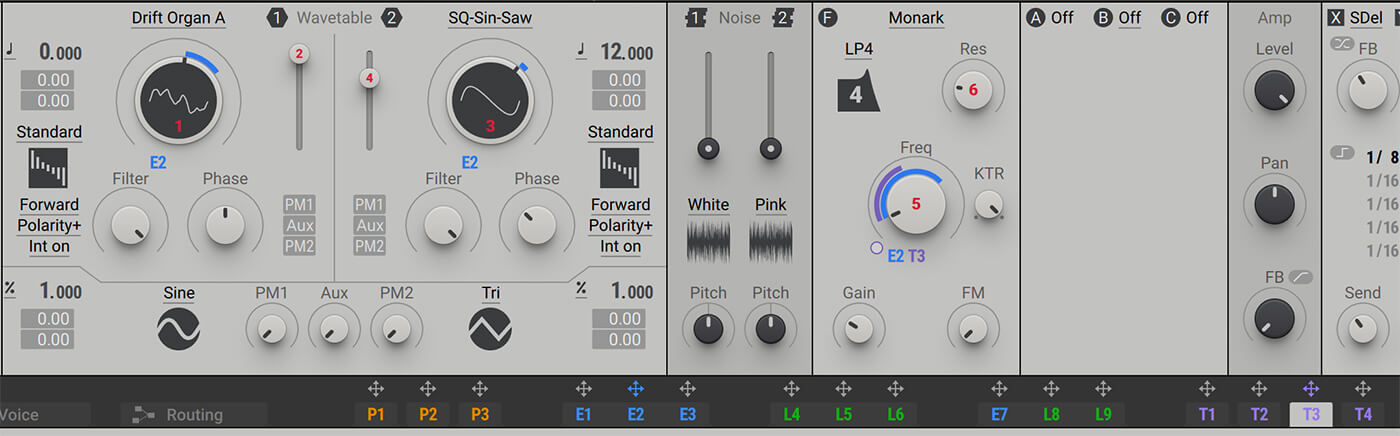
We make a few more tweaks to the setup as it is, messing with the filter modulation and finally remembering to make our Massive X patch velocity-sensitive using the T3 Tracker modulator as well.
The sound still isn’t quite as high-energy as the Serum original, despite messing a lot with the filter and its modulation. Perhaps the energy was never present in our oscillator choices to begin with, and maybe they should be warmed up a little.
8. Think about the sub
We return to the Serum patch and have a look at what’s going on. The filter movement and sounds are pretty similar, although in Serum, the envelope modulates the wavetable position as well. We add some of the same modulation to our own sound in Massive X, which works alright but still doesn’t bring the sound any more upfront.
There’s also a sub oscillator in Serum, which, once seeing it, becomes immediately obvious to the ear. The underlying tone gives the pluck more weight, and lets the oscillators we’ve been crafting act as a crisp, top layer.
We dial in Massive X’s OSC using one of its effects slots and route it into the main signal path. Next, we introduce some distortion, rather than combing through wavetables to try and approach the sound achieved by Serum.
It sounds like…
At this point, the sound of our Massive X patch is much closer to the original Serum patch, considering how we started out, but it’s a cheap imitation which shares some of the same qualities but won’t fool anyone. However, as it turns out, that wasn’t the point of this exercise…
At the start of this article, Massive X wasn’t a synth I’d spent much time with. Other than loading up some presets and making occasional tweaks, I couldn’t say I was au fait with it. Now, after intentionally trying to recreate a simple patch from another synth using Massive, I’ve been forced to work things out and get to grips with the synth’s operation.
Along the way, I’ve learned things like velocity sensitivity, adding a sub oscillator, messing with routing, filter selection, delay and more. Without having had this practice session, I wouldn’t have needed to come to terms with the control set and would still be none the wiser about Native Instruments’ flagship synth. Thanks to the patch recreation session, things have moved on.
It’s a great way to get to know a new synth and help you develop your sound design skills too.
Happy sound designing!
To share your Weekend Workshop creations, head over to the MusicTech Creator Community Facebook Group.