Weekend Workshop: Master subtractive drum synthesis with TAL-NoiseMaker
Make five analogue-style percussion sounds with this great-sounding free softsynth.
Weekend Workshop Drum Synthesis TAL-Noisemaker
If you’re like us, your hard drive is chock full of drum samples. Instead of spending hours searching for the perfect percussion sounds, though, why not make your own? It’s surprisingly easy to do, and you’ll have the added benefit of being able to tweak and tune them to the key of your song.
For this Weekend Workshop, we’ll be using subtractive synthesis and the freeware soft synth plug-in TAL-NoiseMaker. You may remember TAL-NoiseMaker from a recent Weekend Workshop on designing transitions. This time, we’re going to make five percussion sounds, from kicks and snares to hats and zaps. The result will sound a bit like this:
You can download the patch and MIDI files here. If you’d prefer to use a different instrument, almost any subtractive synth (hardware or soft) with white noise and a pitch envelope will do the trick.
What you’ll need:
- A DAW
- TAL-NoiseMaker, a free softsynth available in AAX, AU, and VST formats for Windows and macOS
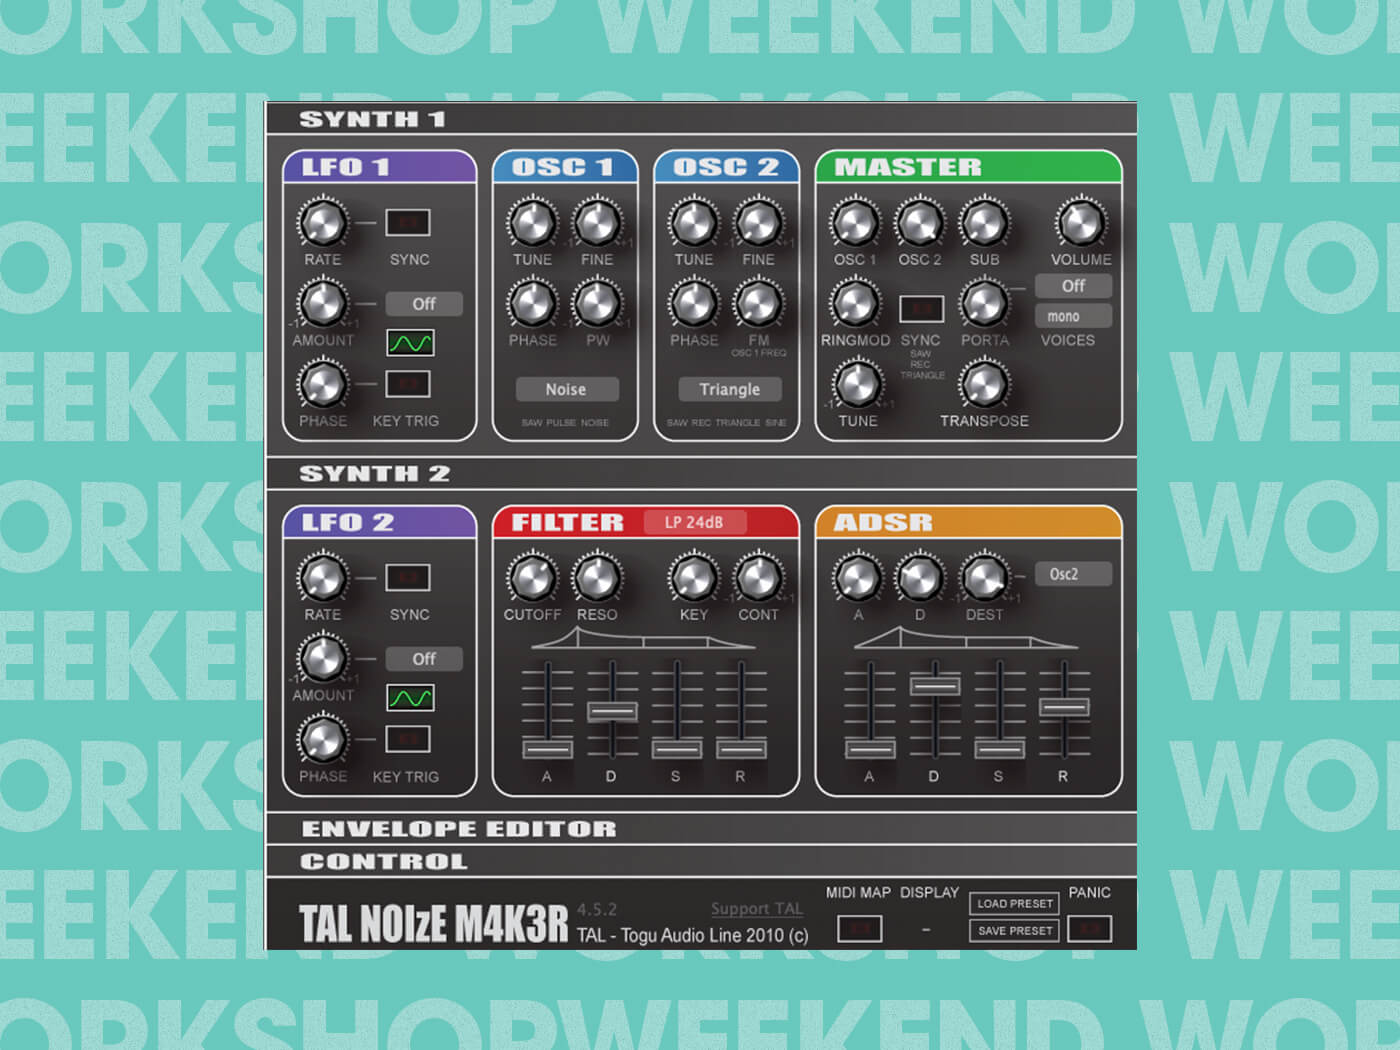
1. Programming closed hats with white noise and FM
Start by loading an instance of TAL-NoiseMaker on an instrument channel in your DAW. Next, call up the MIDI file ‘Closed Hats.mid’. The initialised patch is a bass so we need to make a few changes before we can hear anything suitably hat-like.
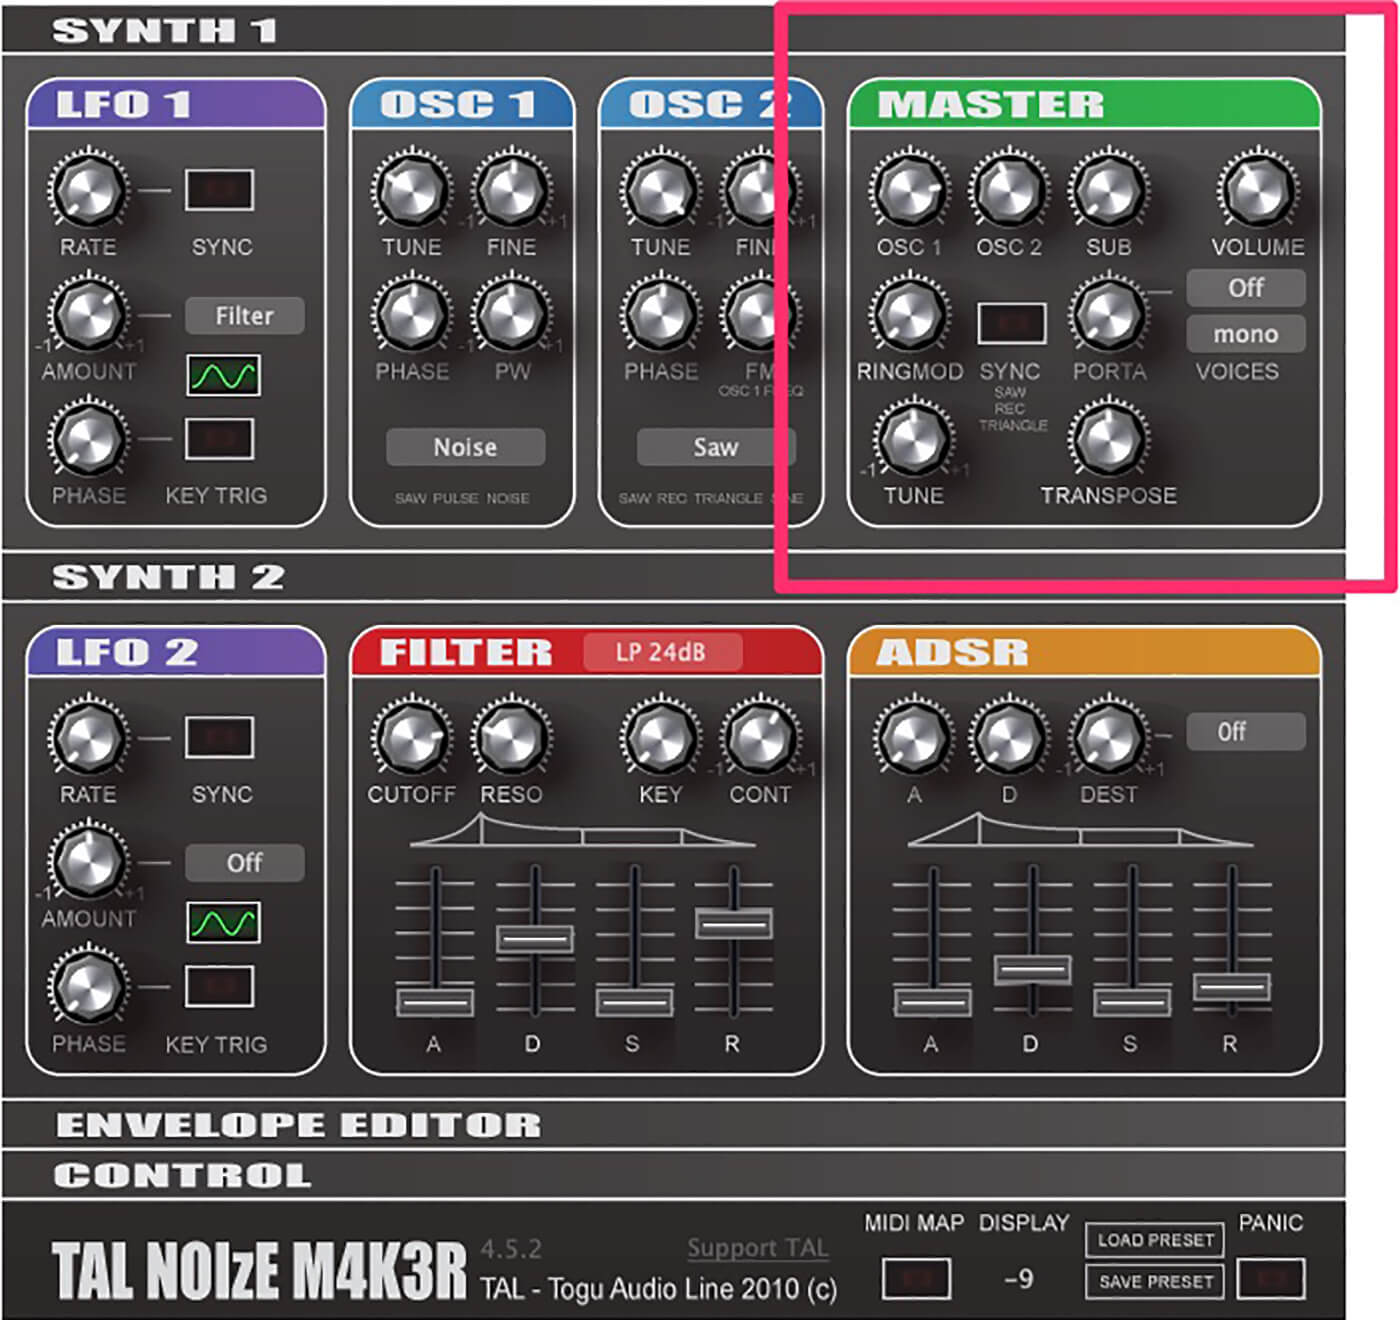
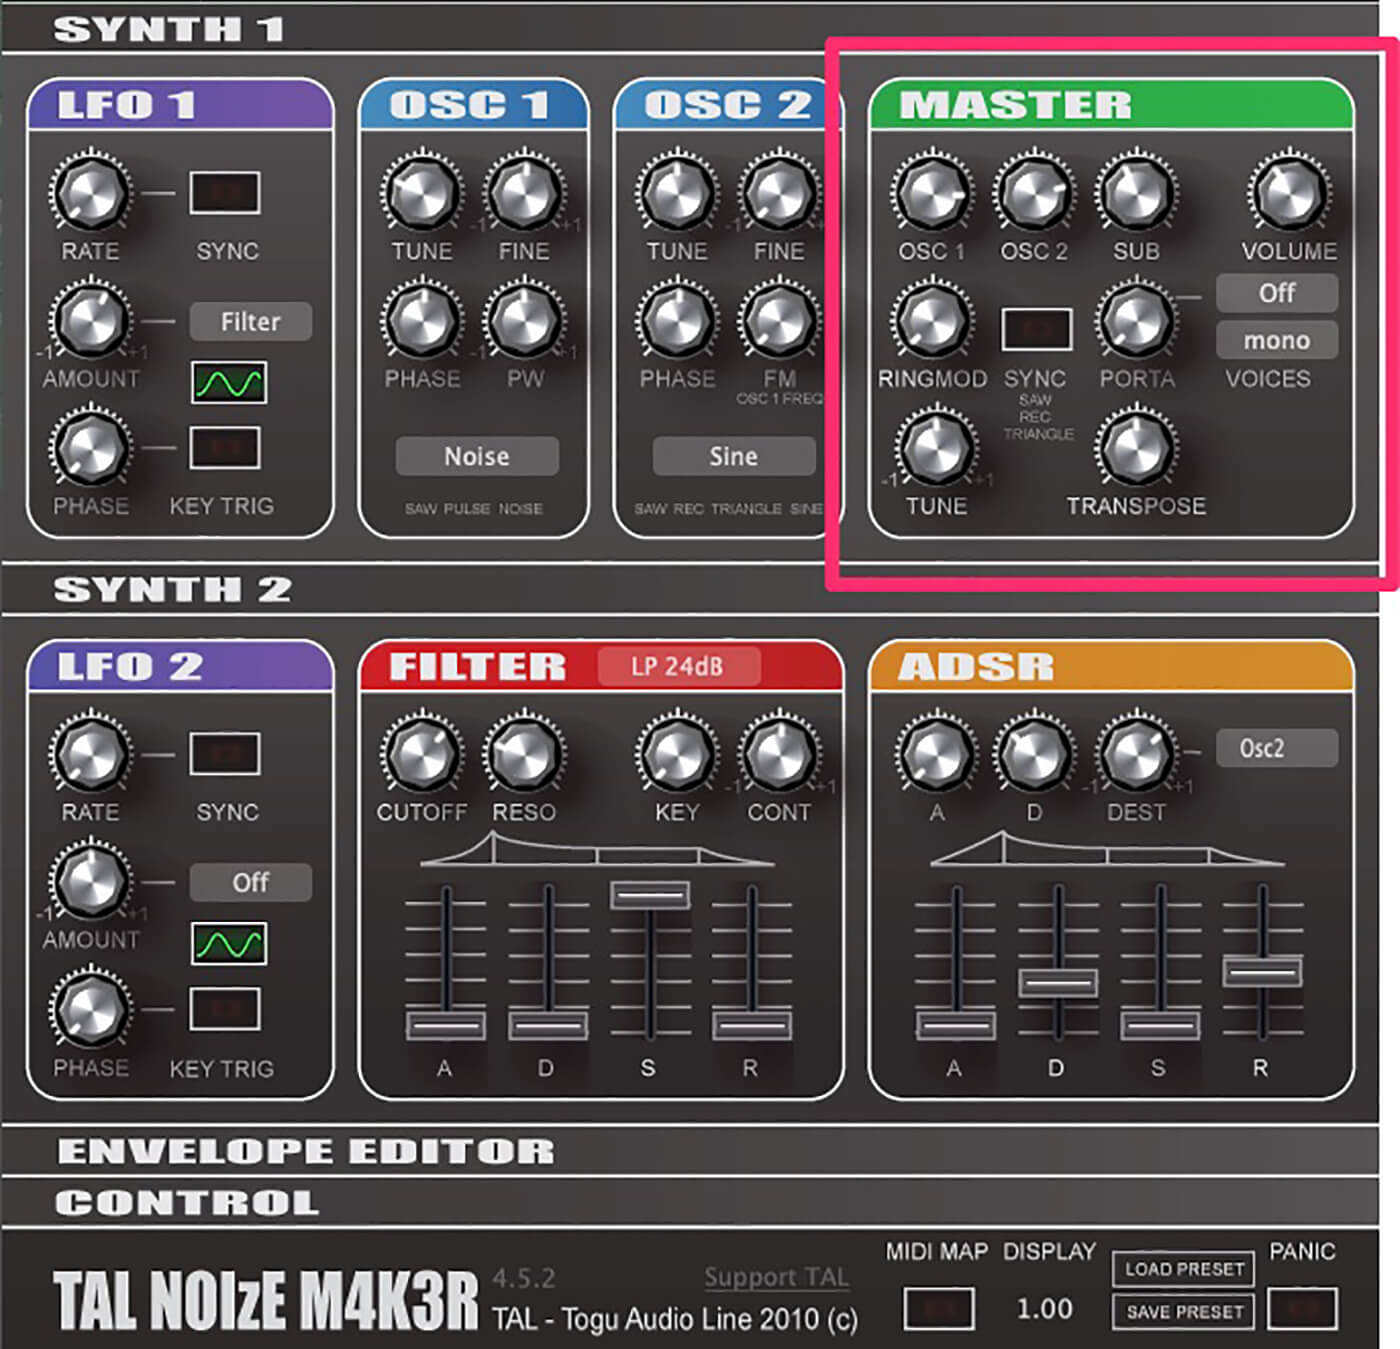
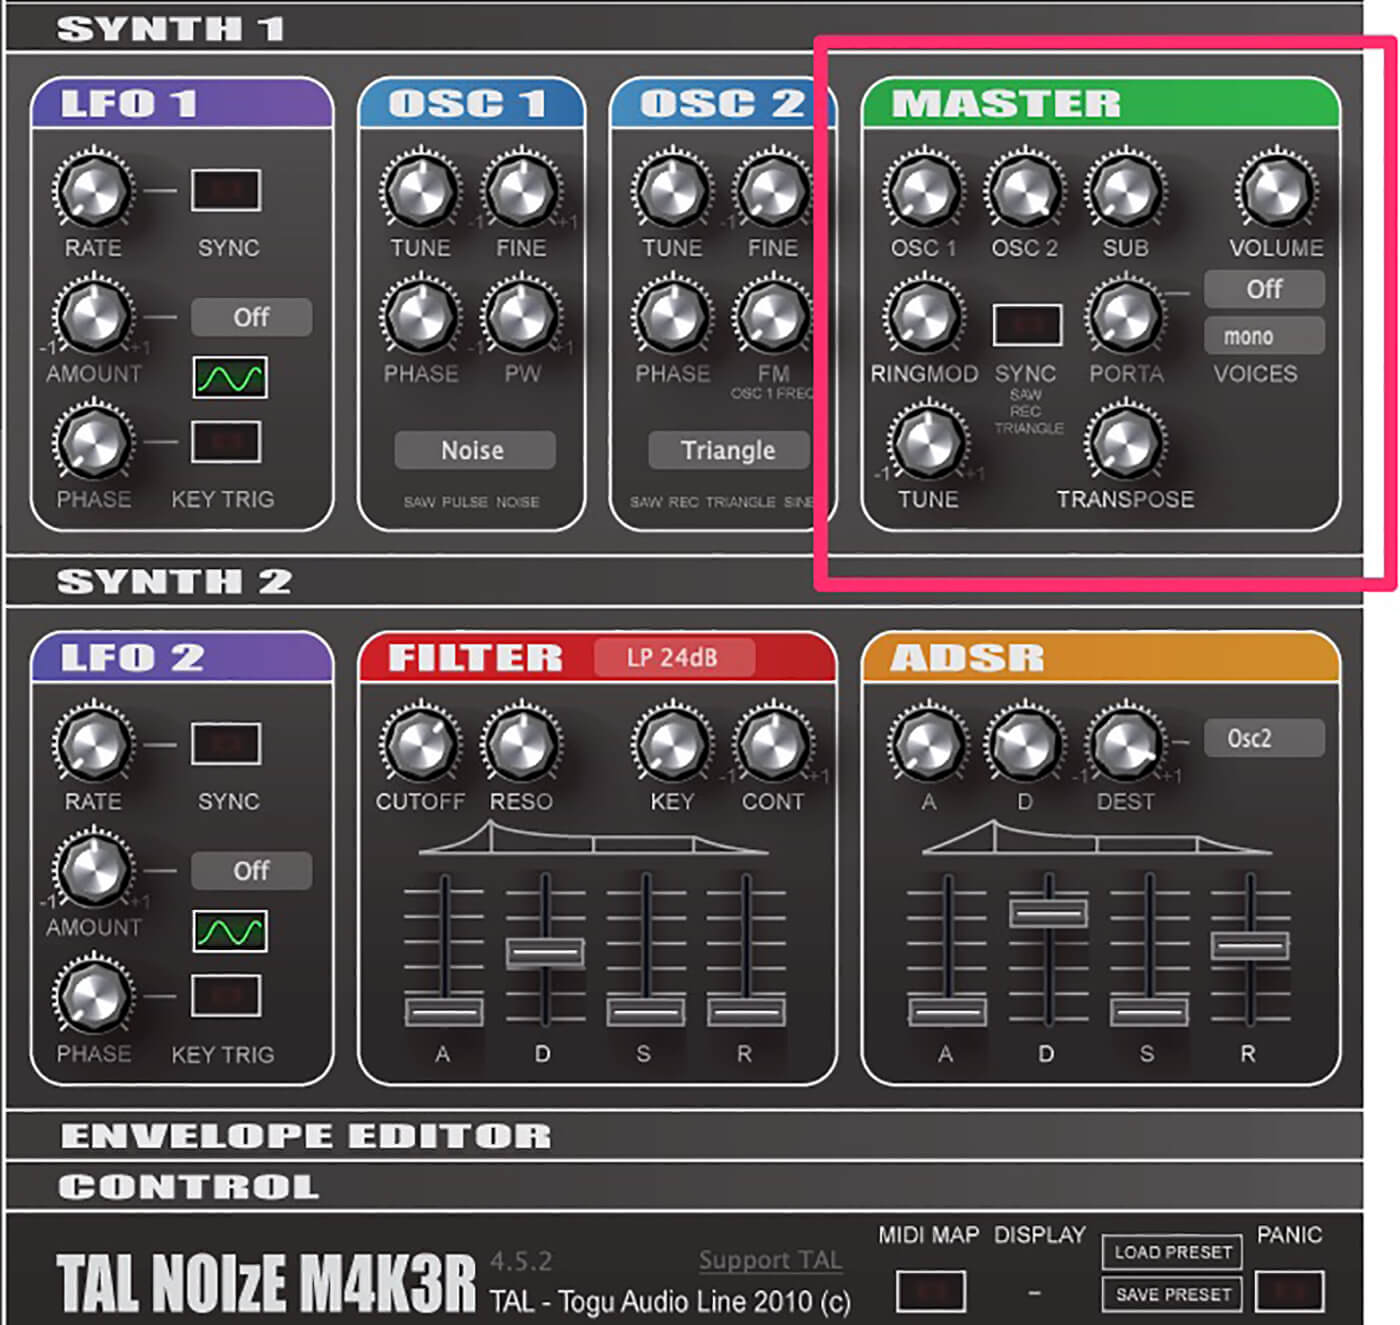
First, in the Master section, turn down the Sub, as we won’t be using any low frequencies. Turn up Osc 1 just a tiny bit and bring up the volume of Osc 2 to around -17 dB.
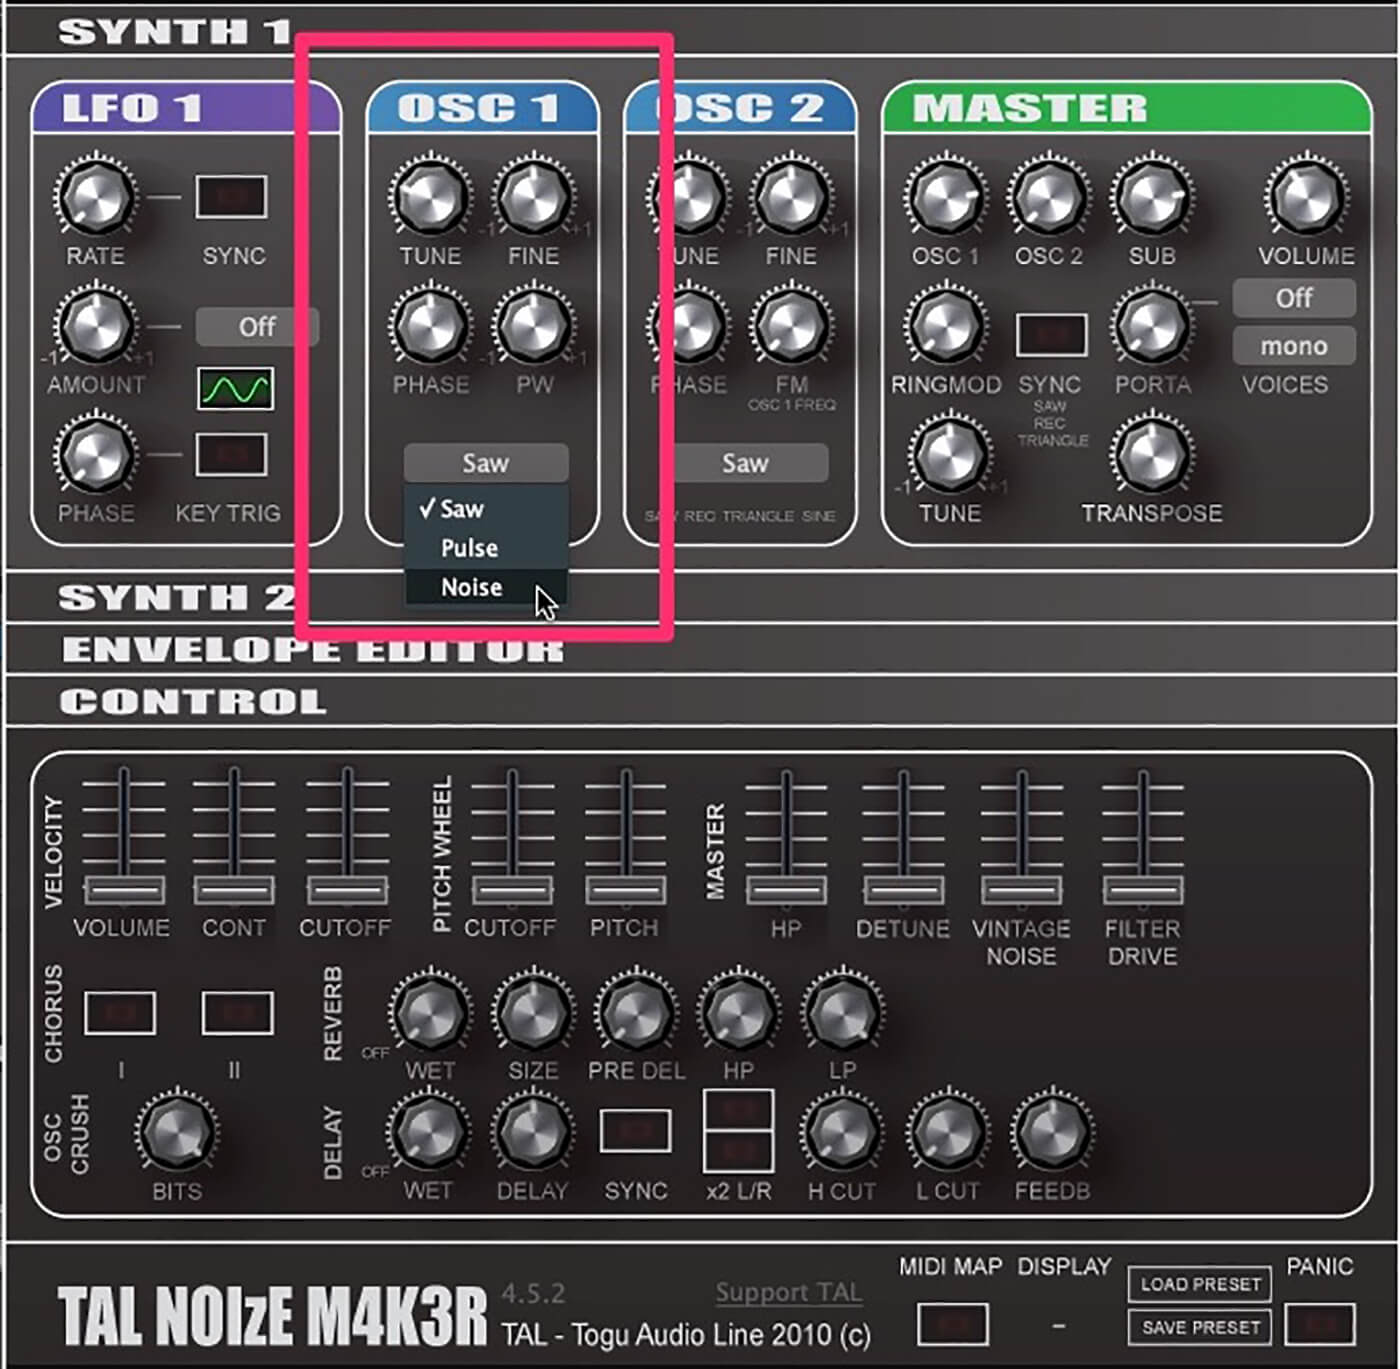
Our main closed hat building block will be white noise, so change the waveform setting on Osc 1 to Noise.
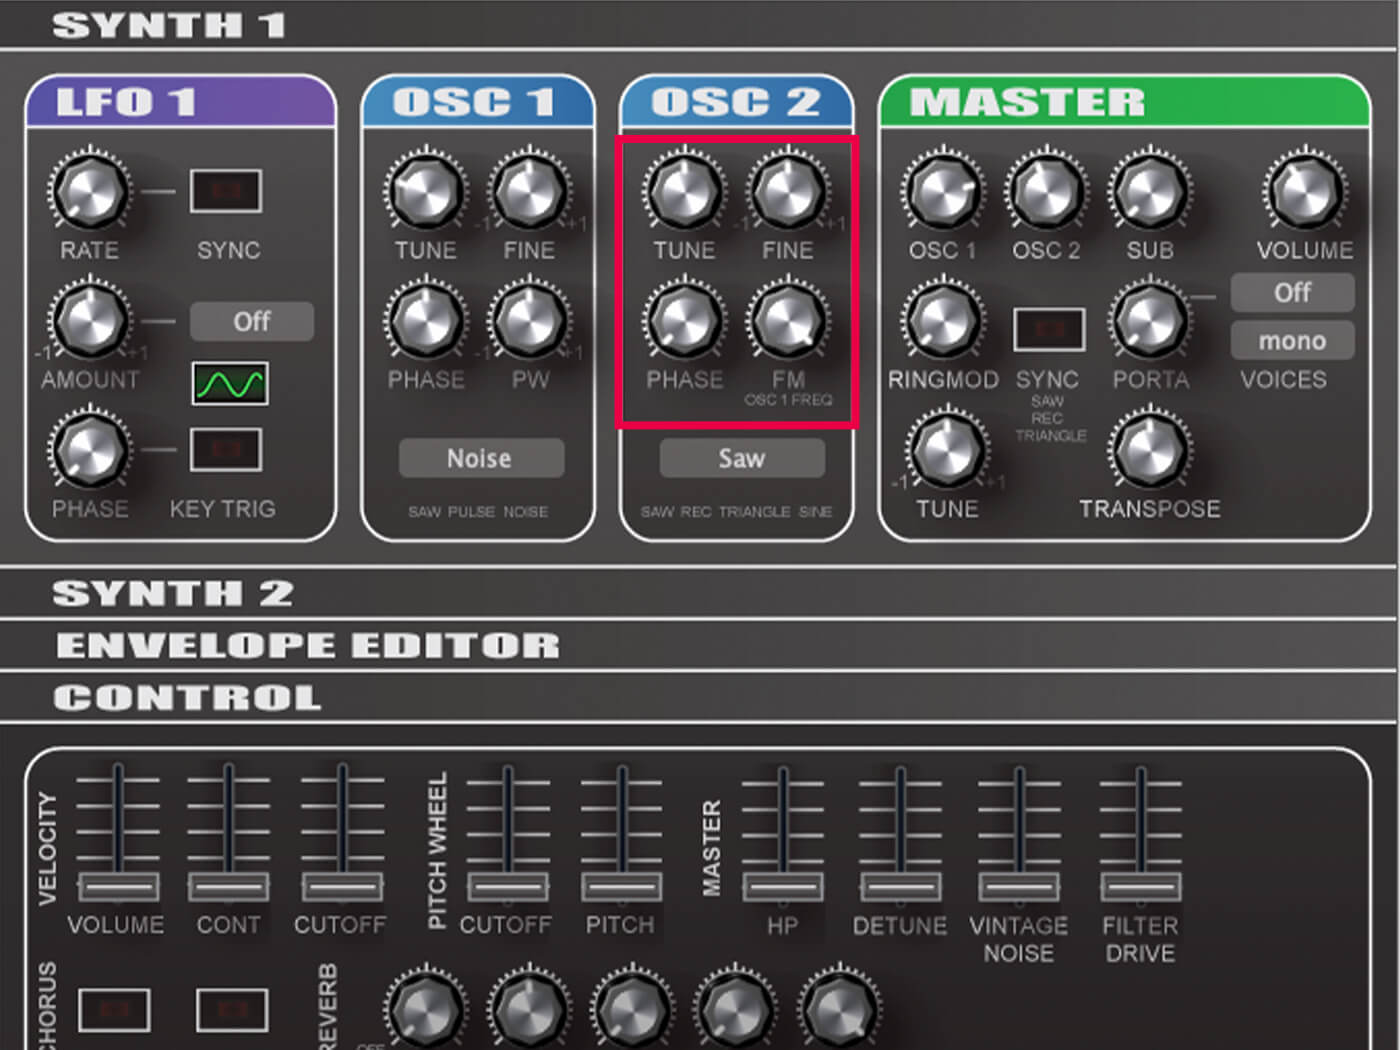
Early subtractive synthesis made do with just noise for hats, but thankfully TAL-NoiseMaker has frequency modulation (FM). We can use this to add metallic, inharmonic content. Crank up the FM in Osc 2 to maximum, and do the same with the Tune to create a ringing layer for under the white noise.
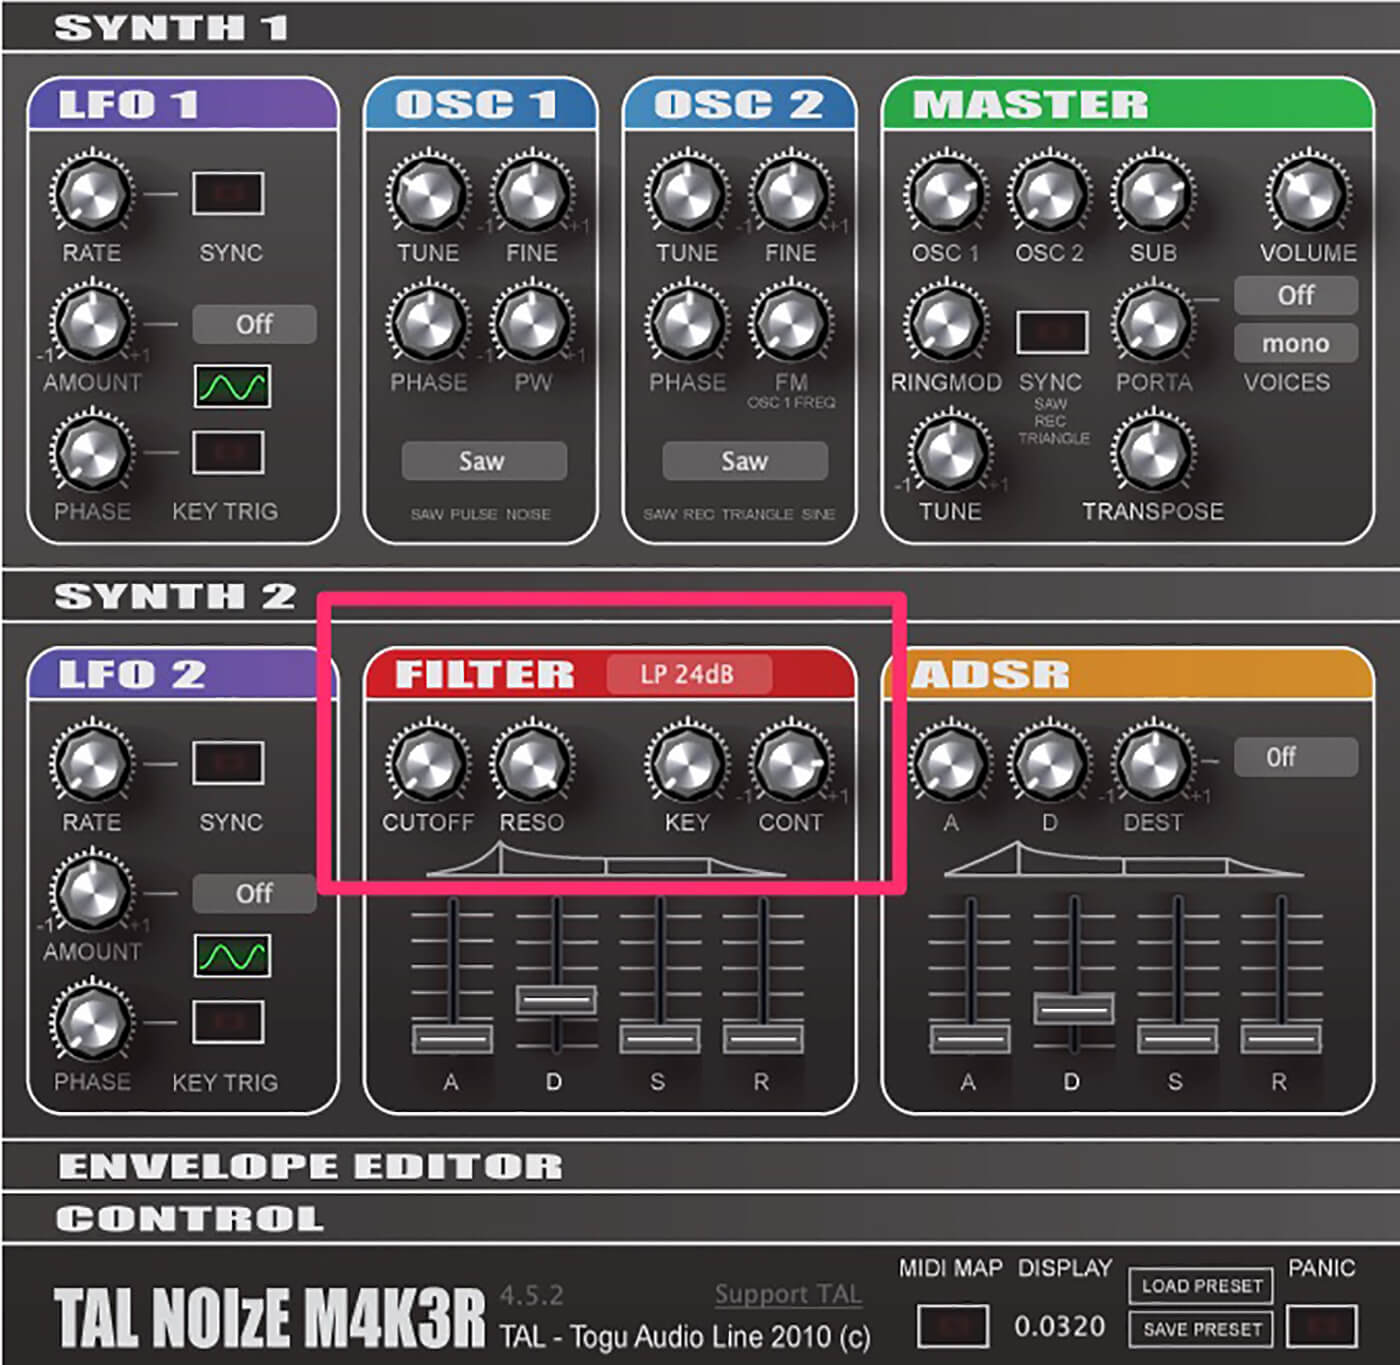
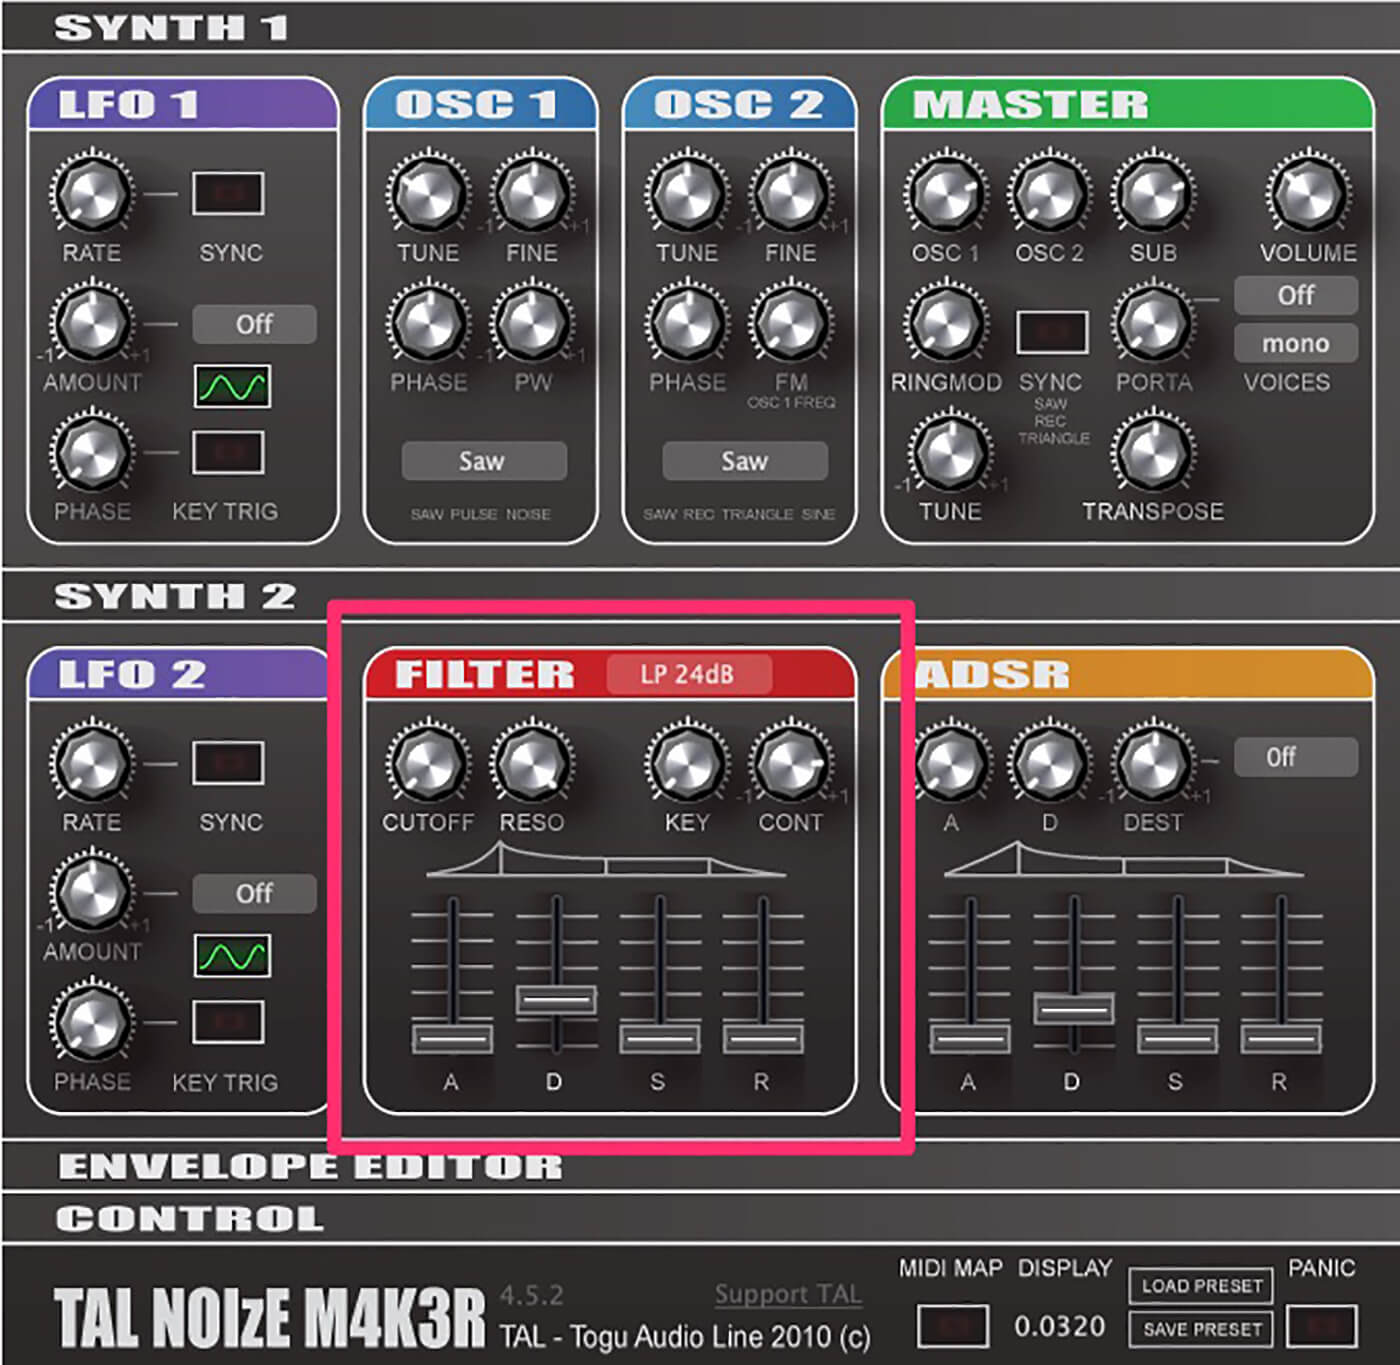
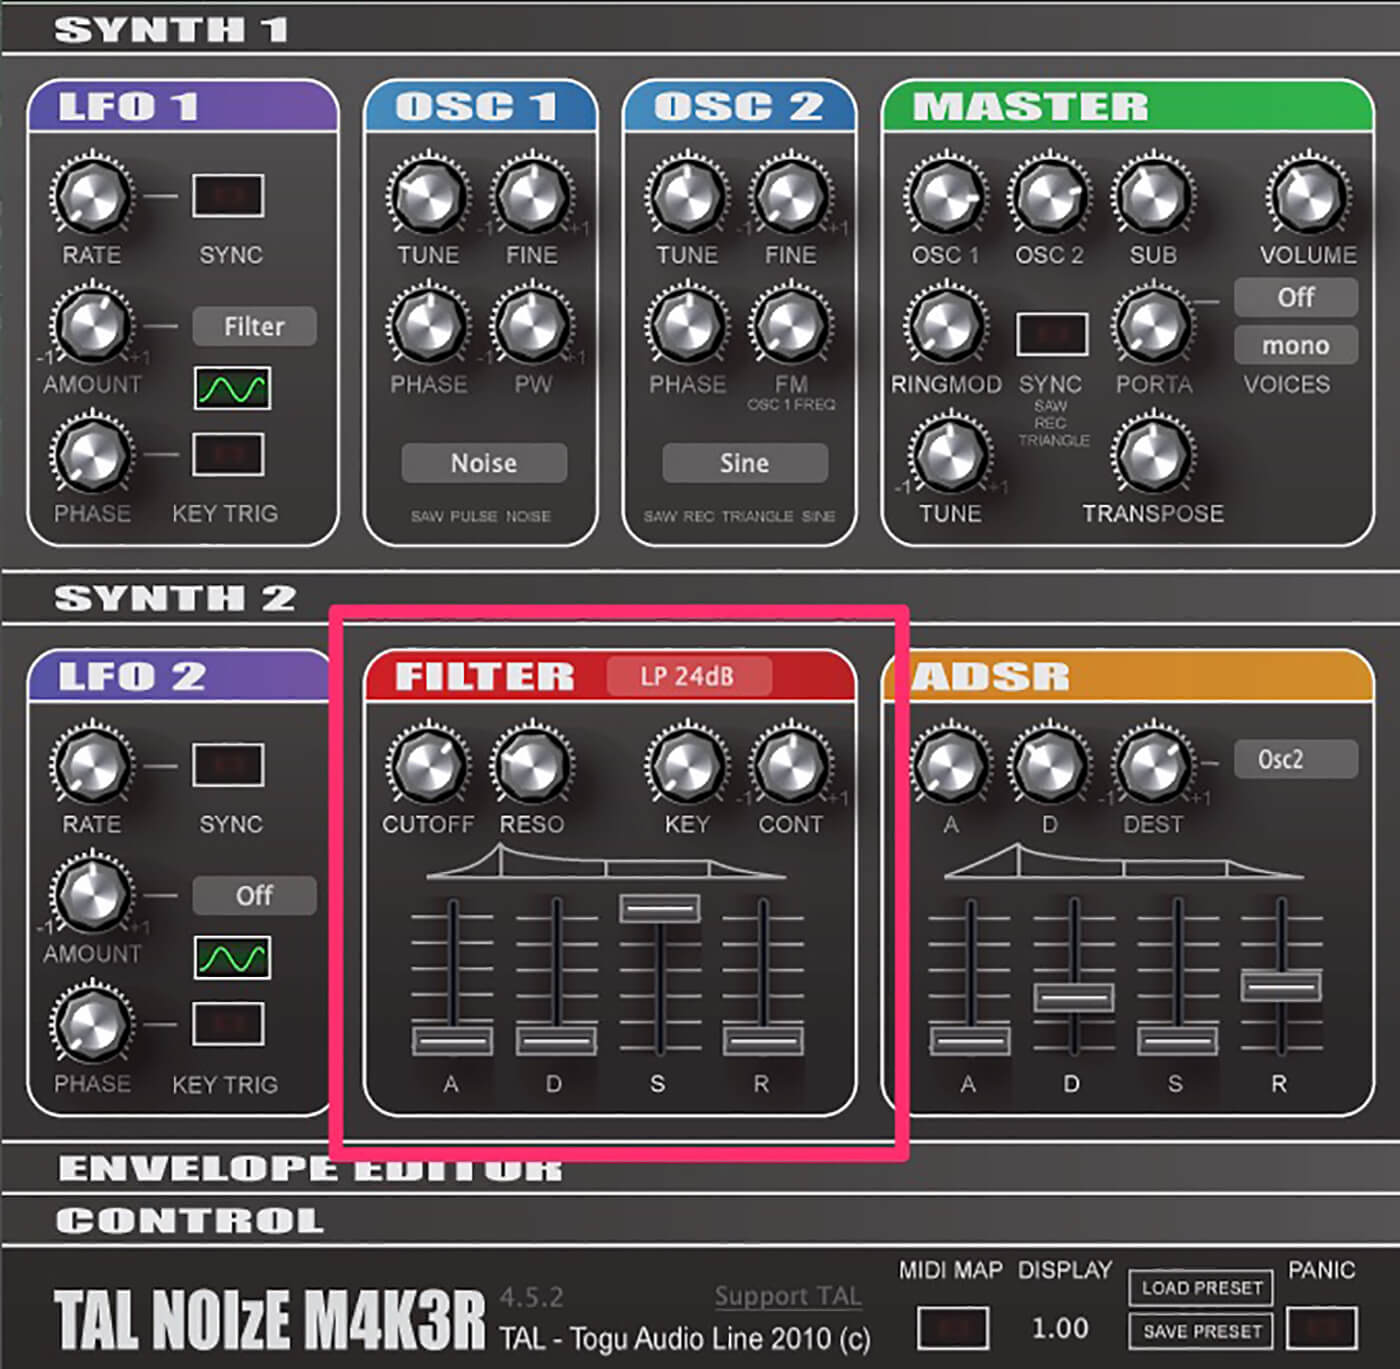
It’s a little bright so let’s use the filter to tame our hat. Click on the Synth 2 section to reveal the Filter controls if they’re not already visible. Turn the cutoff down to 0.80 and the resonance up to about 0.25. That’s more like it. We want our filter to open and close in a more percussive way, so bring up the Filter decay (D) to 0.50, sustain (S) down to zero, and release (R) to 0.60. Lastly, turn the Contour knob (labelled ‘Cont’) to 0.25 to allow some of the envelope to affect the filter. It still sounds like bursts of static so let’s address that next.
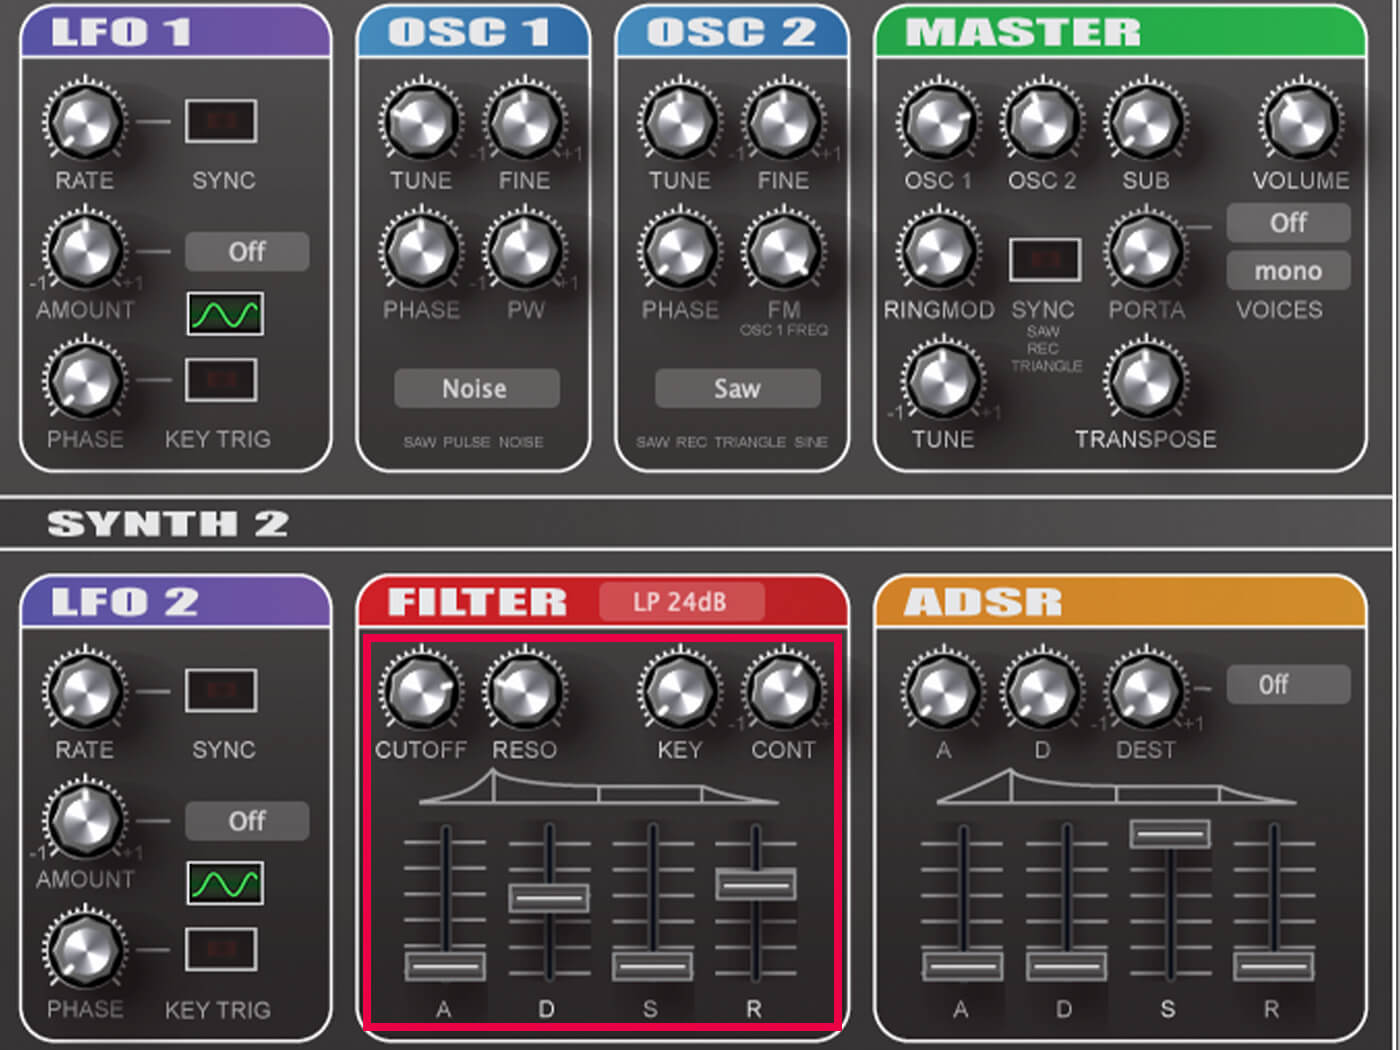
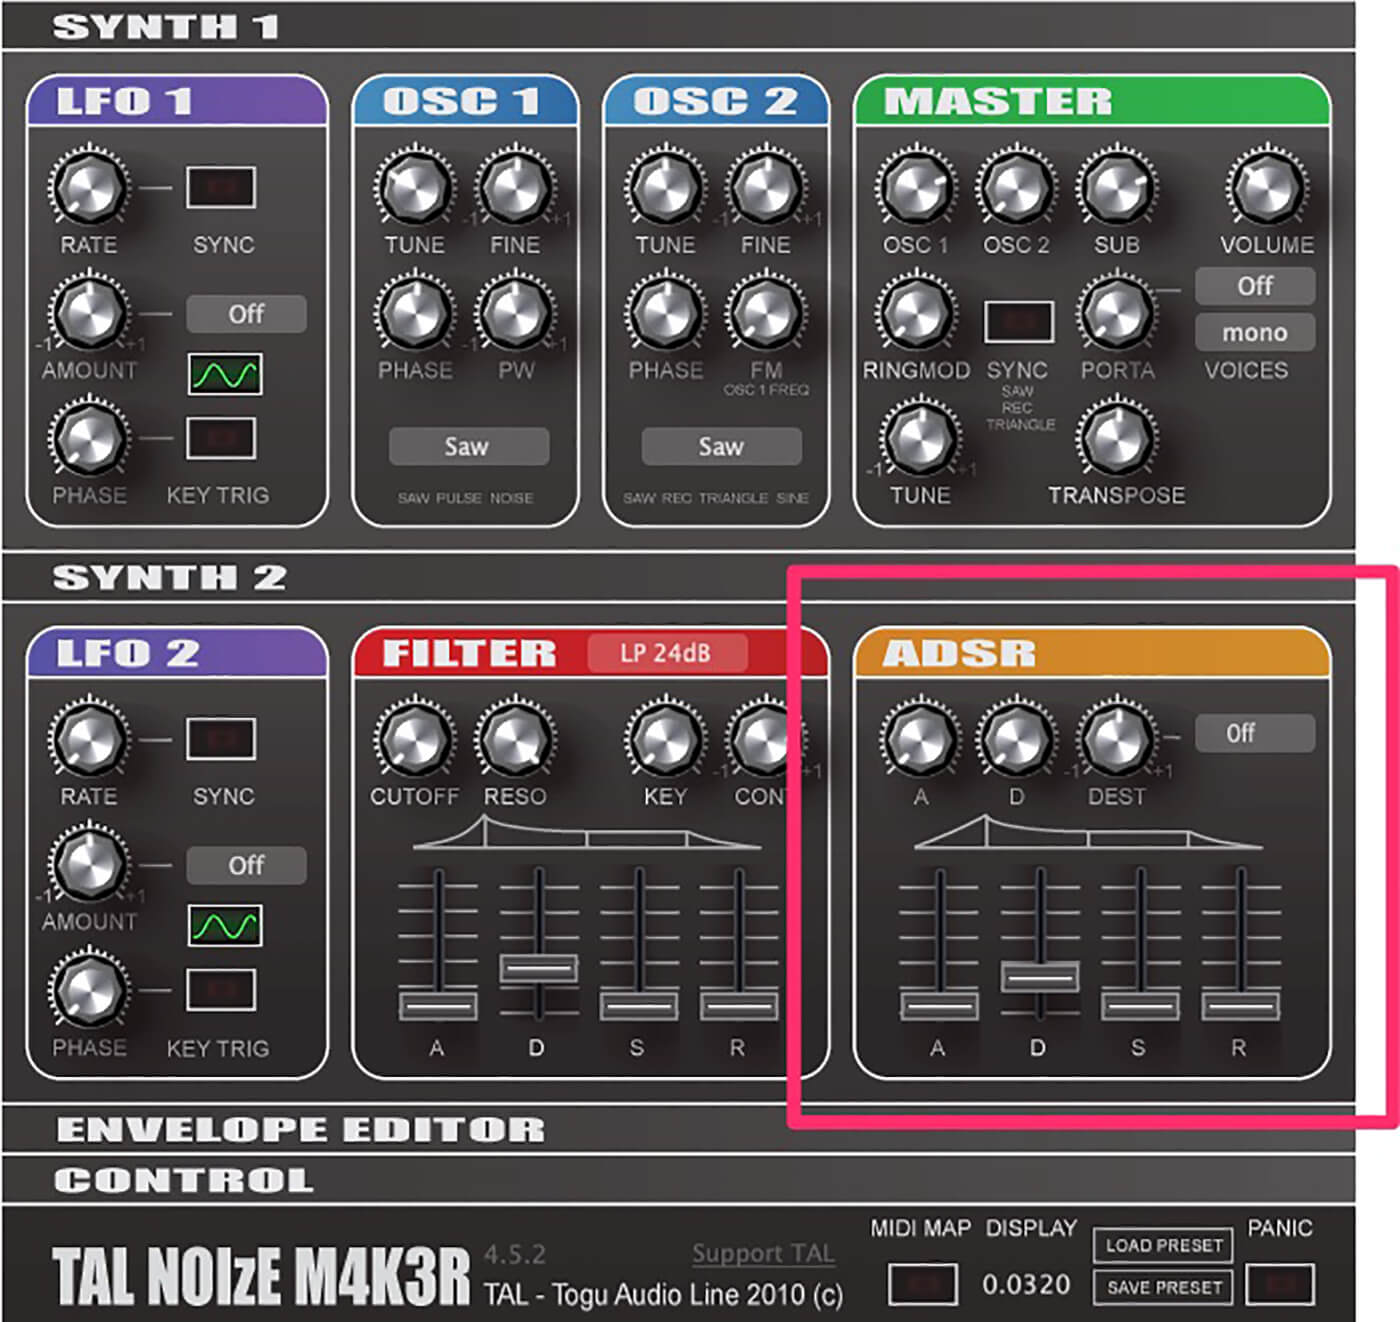
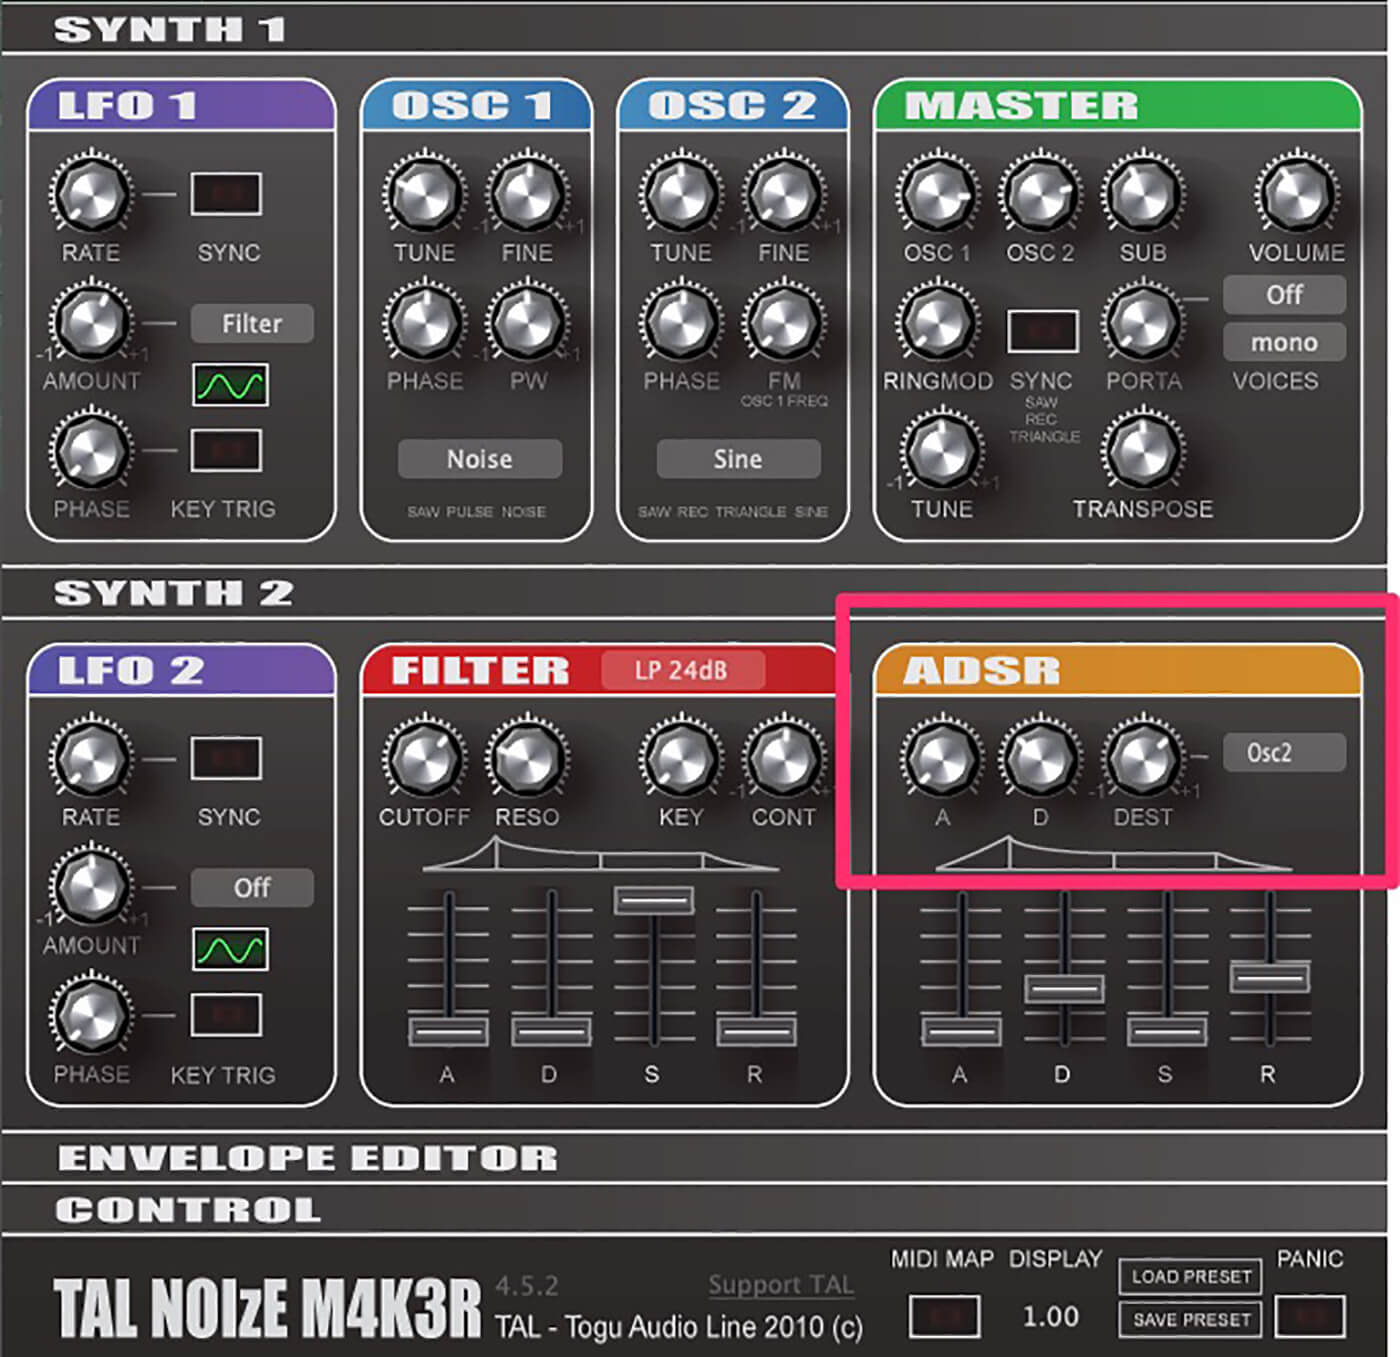
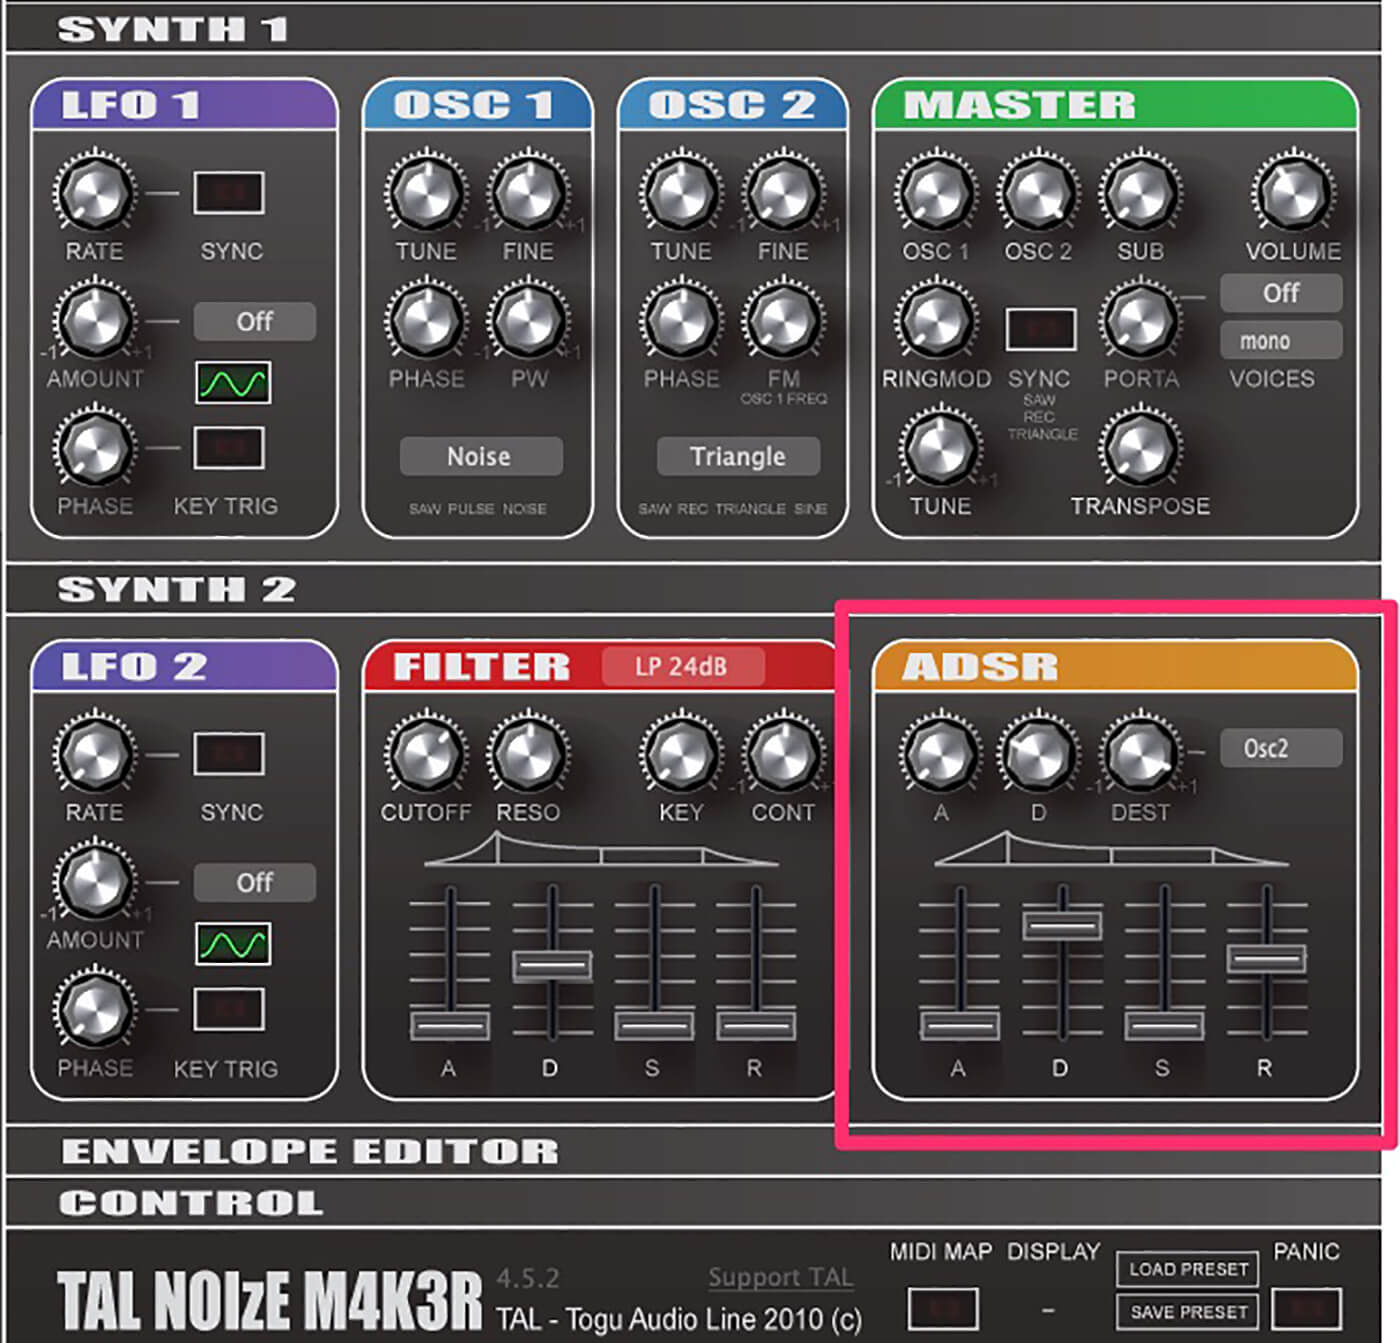
And now the key to good drum synthesis: the VCA. Percussive sounds have only decay and release with no sustain. In the section marked ADSR, bring the sustain all the way down, turn up decay to 0.25 and release to about 0.10. Ladies and gentlemen, we have hats.
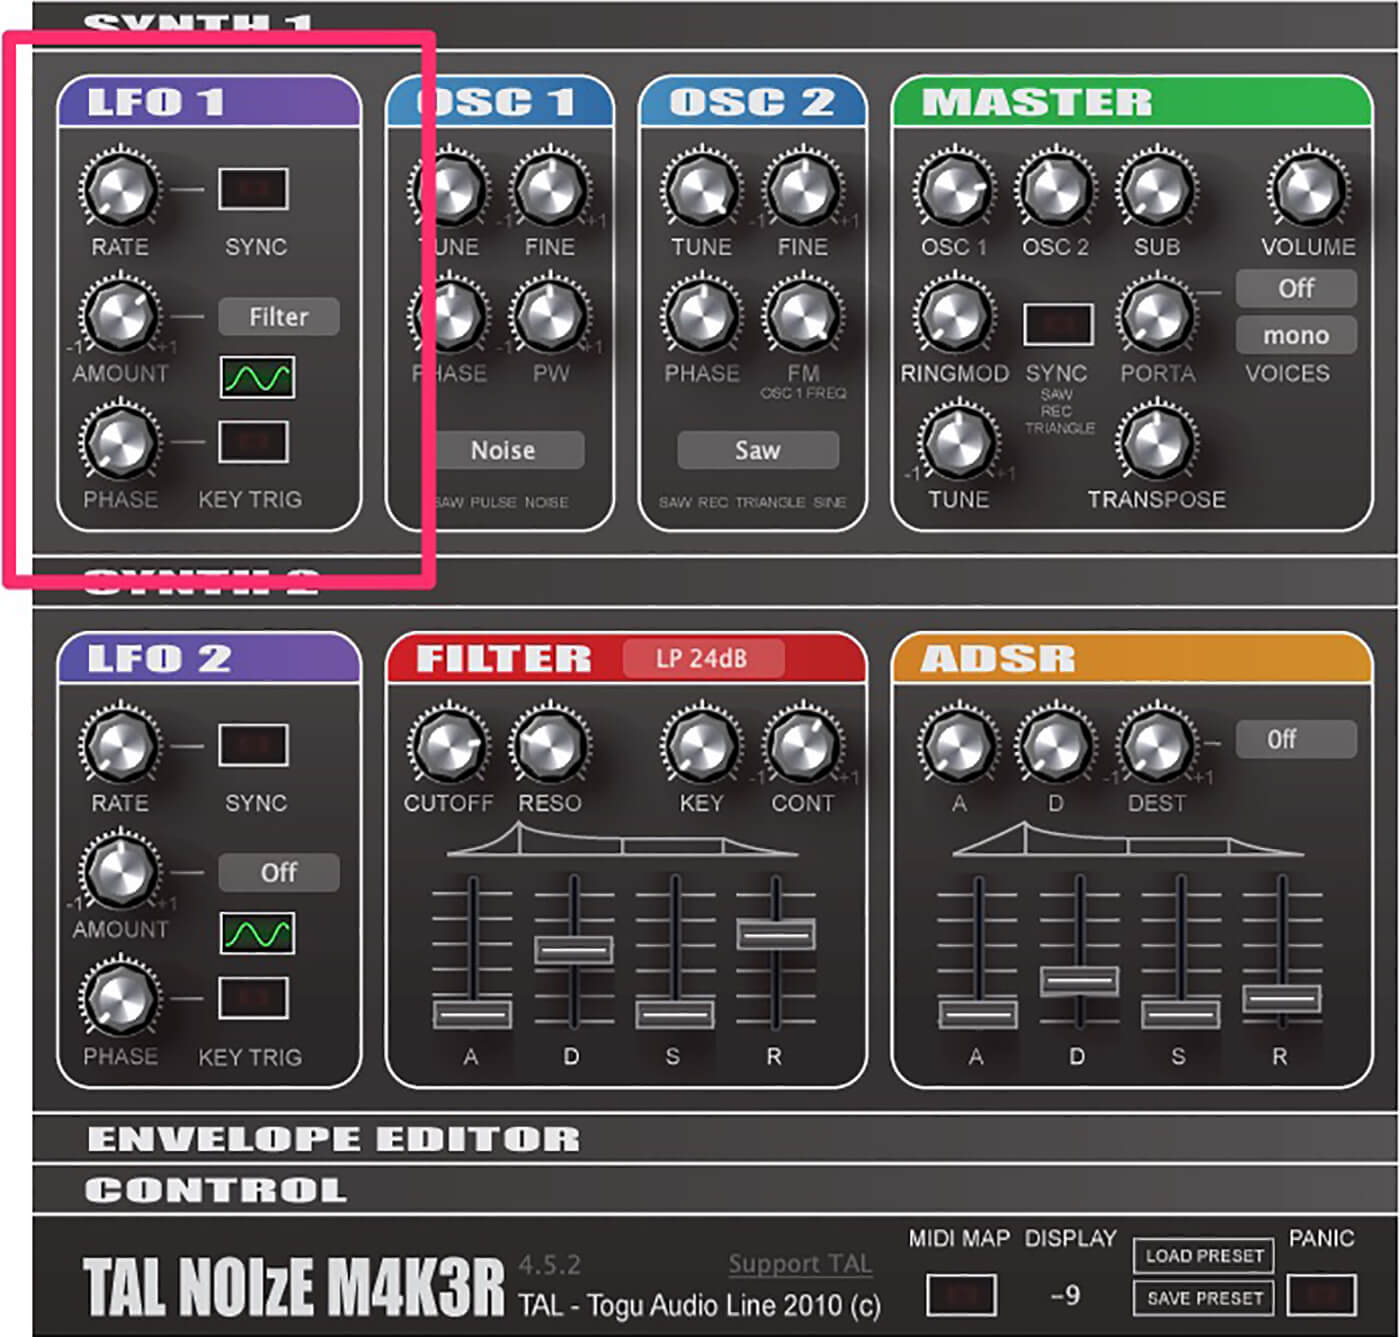
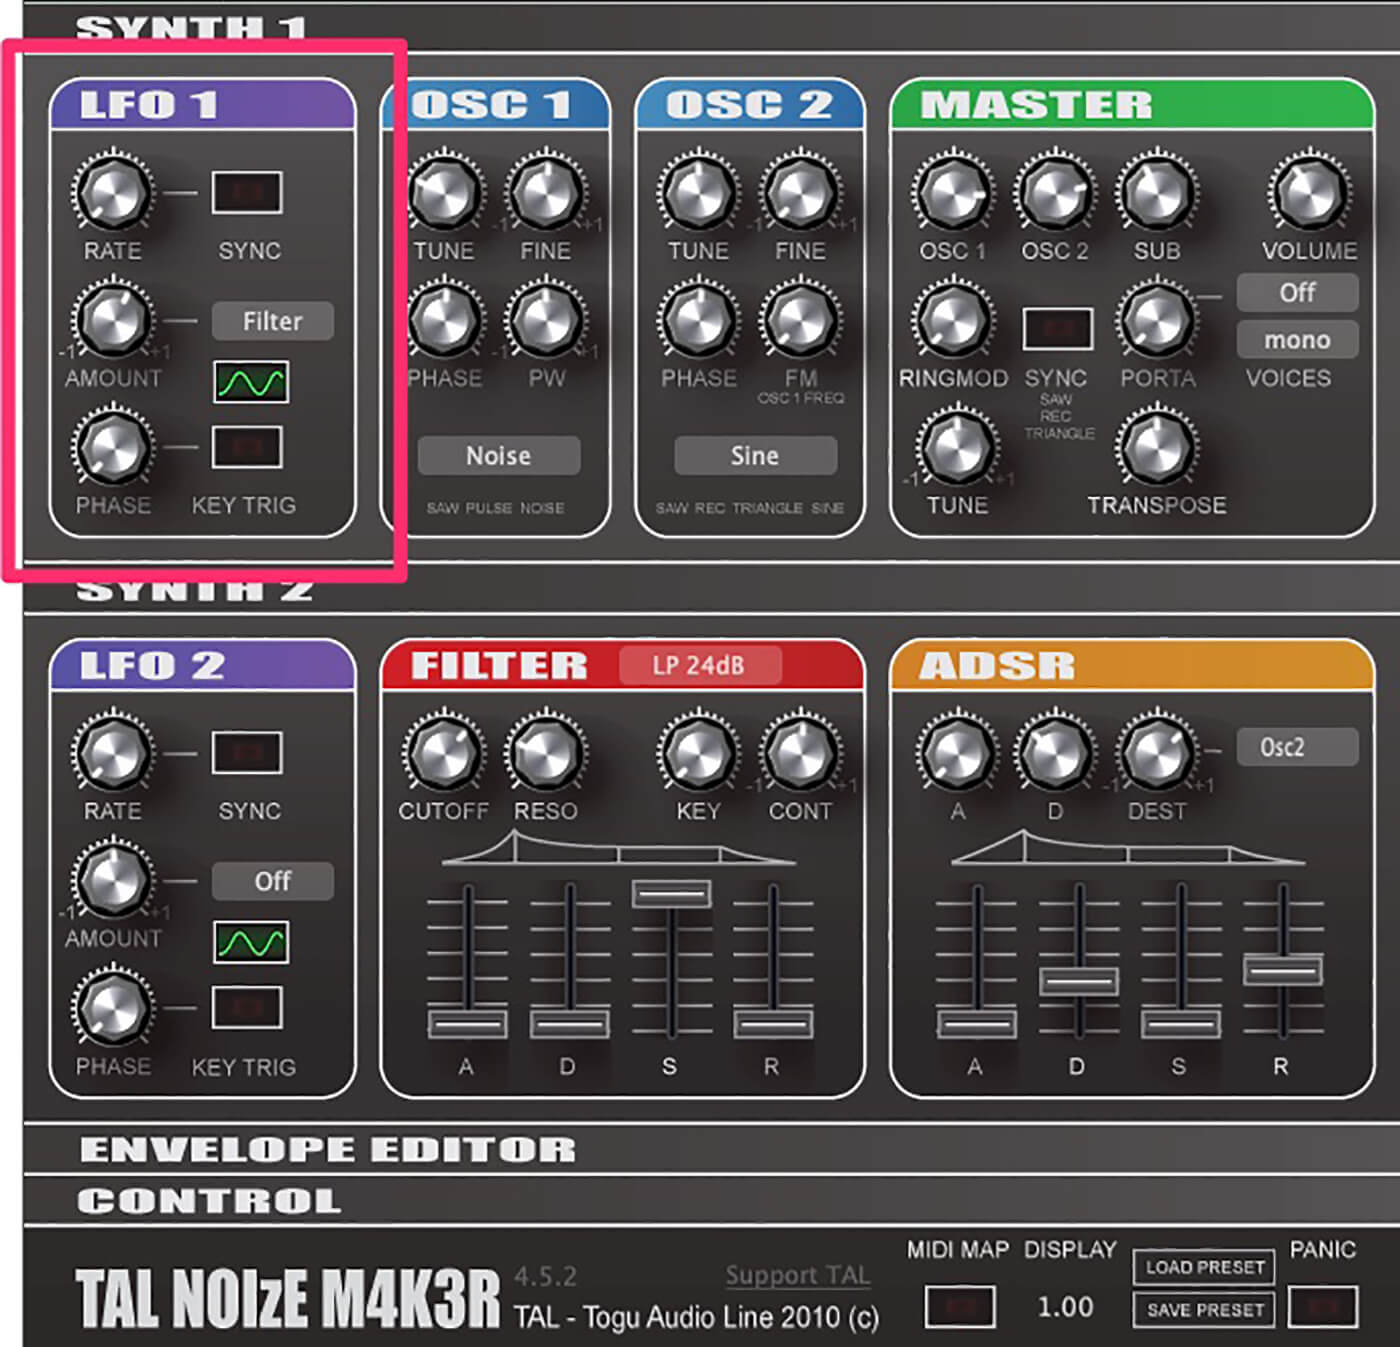
To keep our new hats from sounding too robotic, add a touch of movement to the filter cutoff with LFO 1. We’ve gone with the slowest rate, with an amount of 0.05, just enough to add some life.
Lastly, save your creation as a preset, as we’re going to use it as a starting point for our next sound.
2. Tweaking the envelope for open hats
With most of our heavy hat lifting already done, we can make a few small adjustments to extend our closed hi-hat into an open hi-hat. Put TAL-NoiseMaker onto a new track, import Open Hats.mid, and load the Closed Hat preset from the first part.
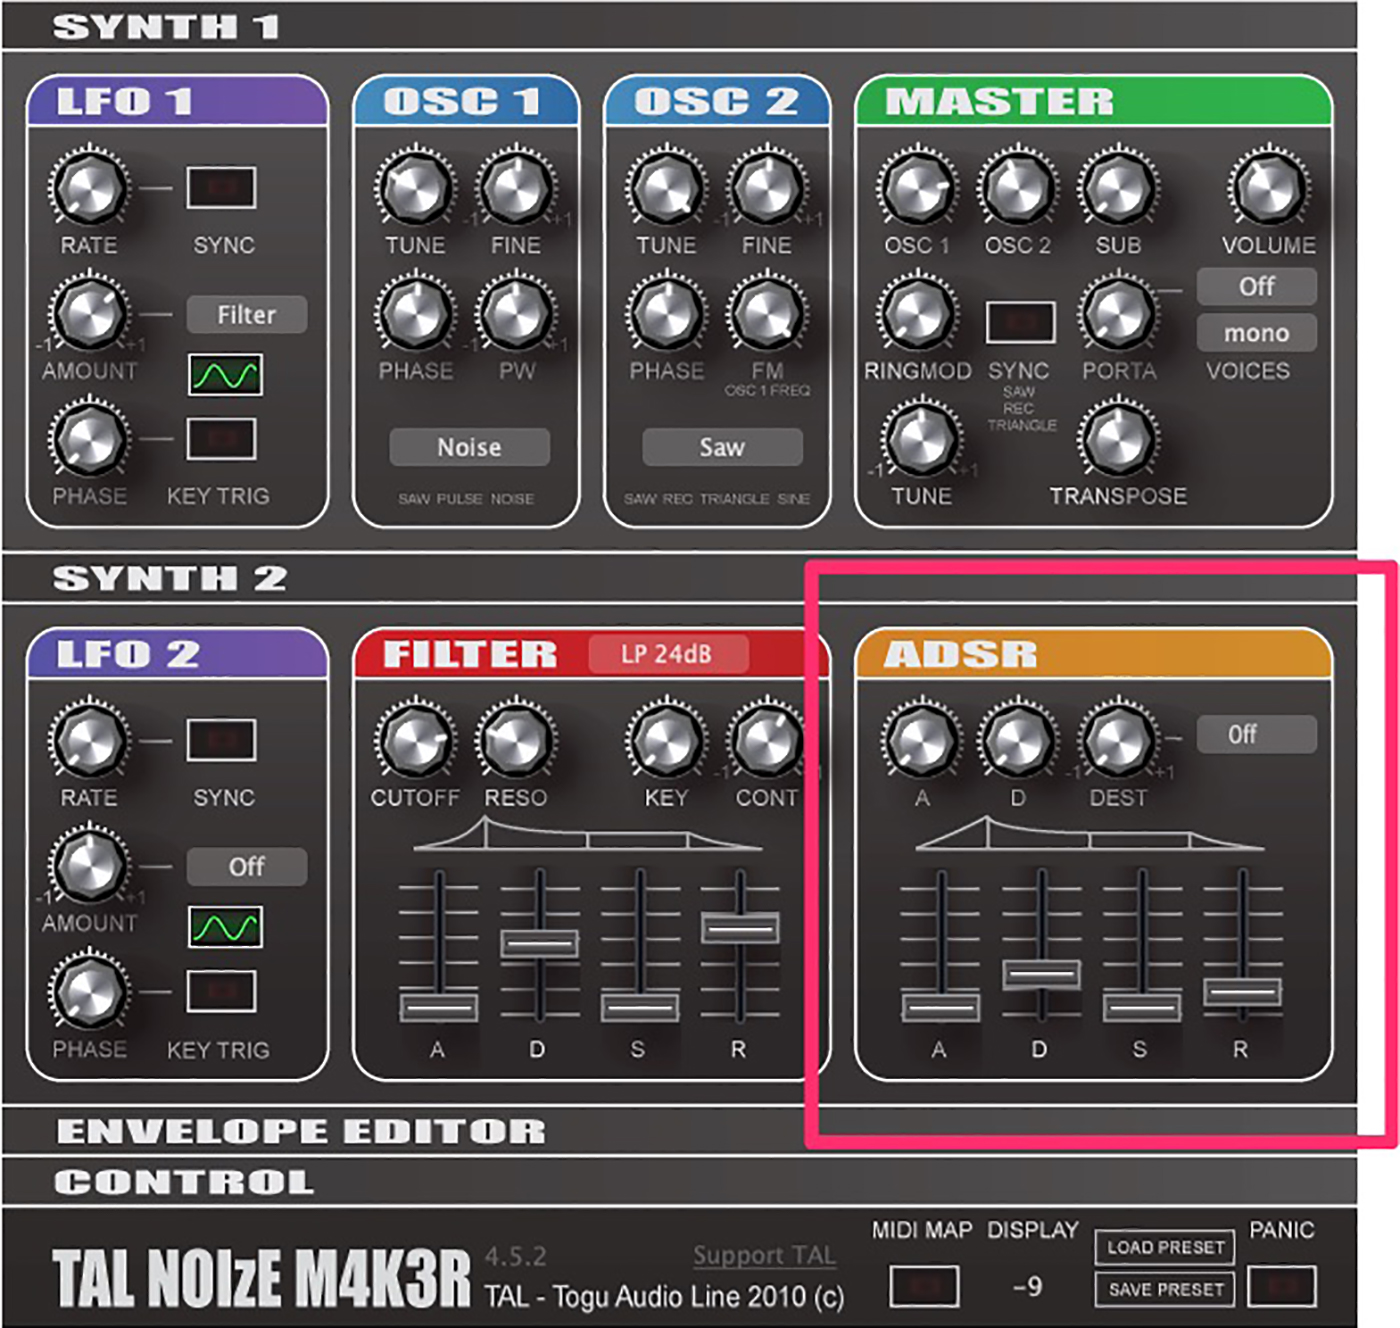
As mentioned before, the key to good drum synthesis is the envelope. As open hats have a longer decay, extend the Decay in the ADSR section to around 0.35. You can also open up the Release a little as well. A setting of 0.30 sounds pretty good.
One of the benefits of synthesising your own percussion sounds is you’re completely in control of all the parameters. Should a song require longer open hats (or even shorter), it’s just a simple matter of making adjustments to the envelope. Extend the decay and release even more for cymbals.
Feel free to experiment with the balance of white noise and frequency modulation as well. Turn up Osc 2 (FM) in the Master section for more metallic, TR-808-style hats and cymbals. Don’t forget to save your creation as a preset as well.
3. Zapping the filter
Next, let’s use the filter to knock out some zaps, as made popular by Kraftwerk and electro artists in the 1980s.
Load up a new instance of TAL-NoiseMaker as well as ‘Zaps.mid’. We can start with the initialised patch. Ignore the oscillator and mixer sections, as we’re going to use the filter itself to generate our zaps.
TAL-NoiseMaker features a self-oscillating filter. Click on the Synth 2 section to reveal it. Turn the cutoff down to zero and the resonance up all the way. It doesn’t sound like much right now, just a sad, little click.
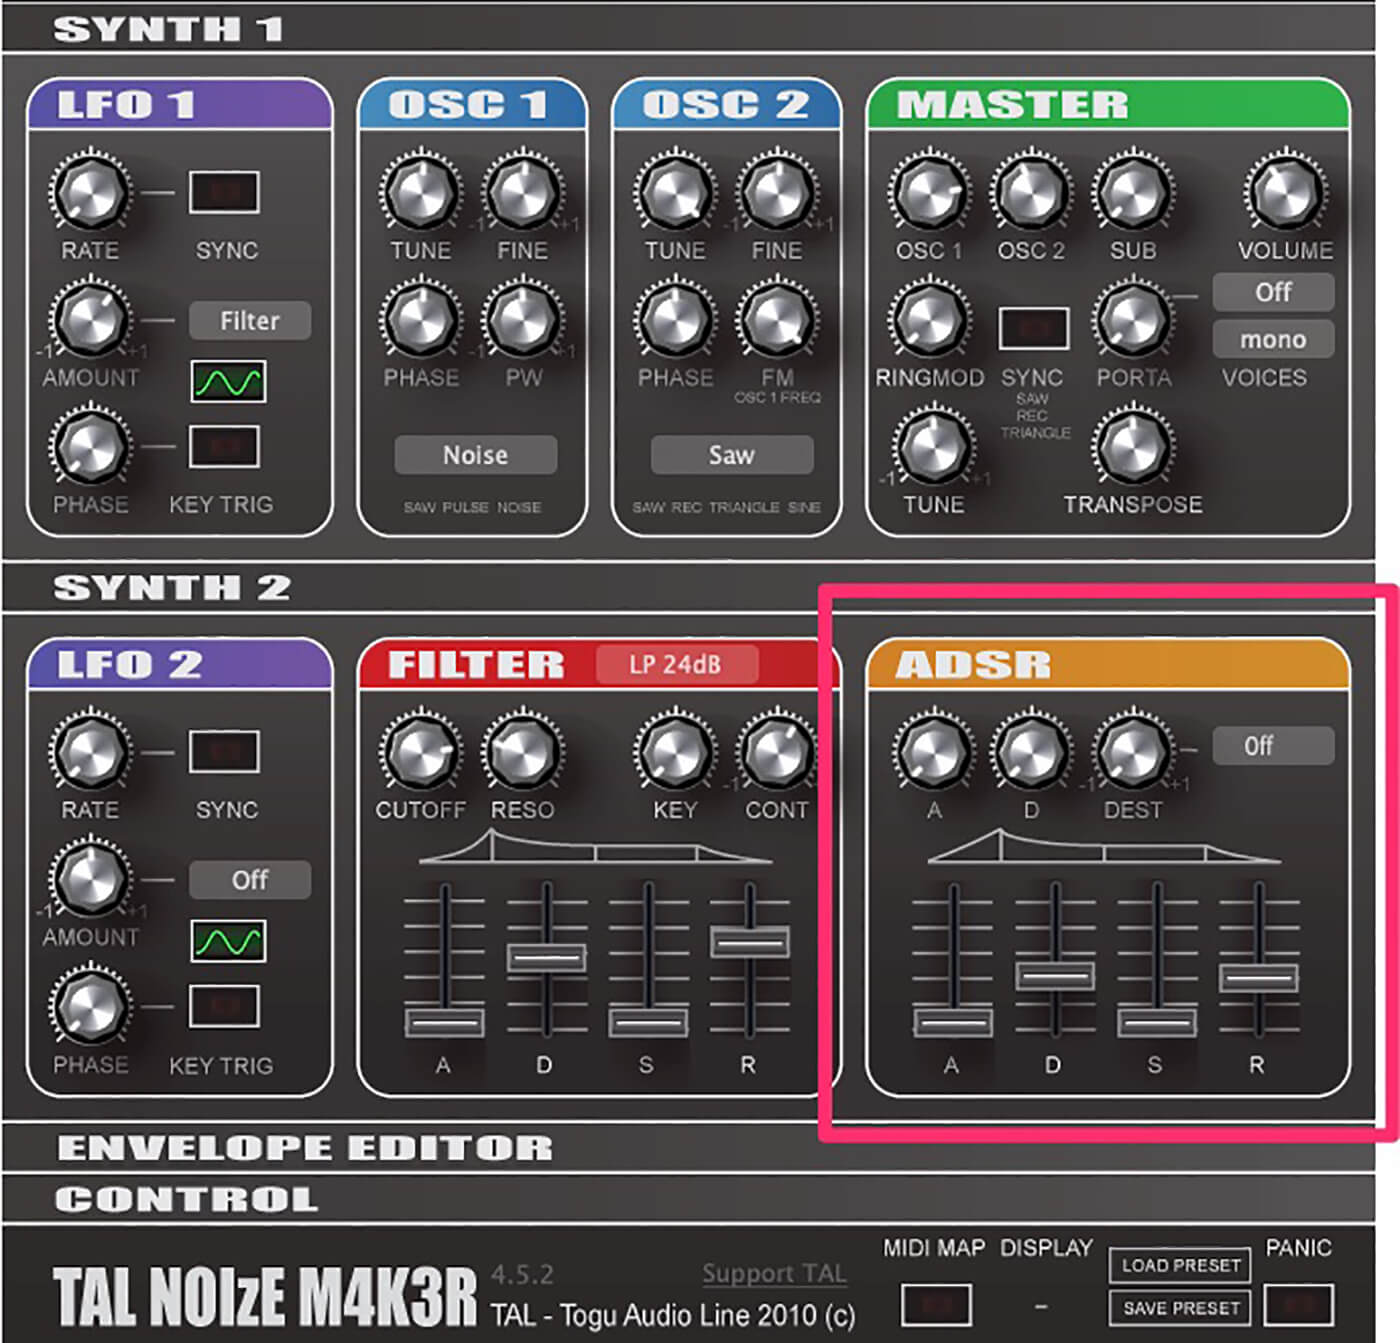
Envelope to the rescue. Turn the filter sustain down all the way and bring up the decay to 0.30. Turn the Contour clockwise until you get a setting of 0.60 to let that envelope through. Better, but it needs some volume shaping.
Over on the main ADSR, turn the sustain down to zero and bring up decay to around 0.25. You should hear a sharp zap. Play around with envelope settings on both VCA and filter until you have something that works for you. Be sure to save it as a preset.
4. Using a pitch envelope to make a snare
So far, our drum synthesis has seen us primarily use white noise and inharmonic frequency modulation shaped by a VCA. For the final two drums —snare and kick—we’re going to employ a second VCA envelope, this one linked to oscillator pitch.
Put TAL-NoiseMaker on a new instrument track. We’ll start with the initialised patch and Snare.mid.
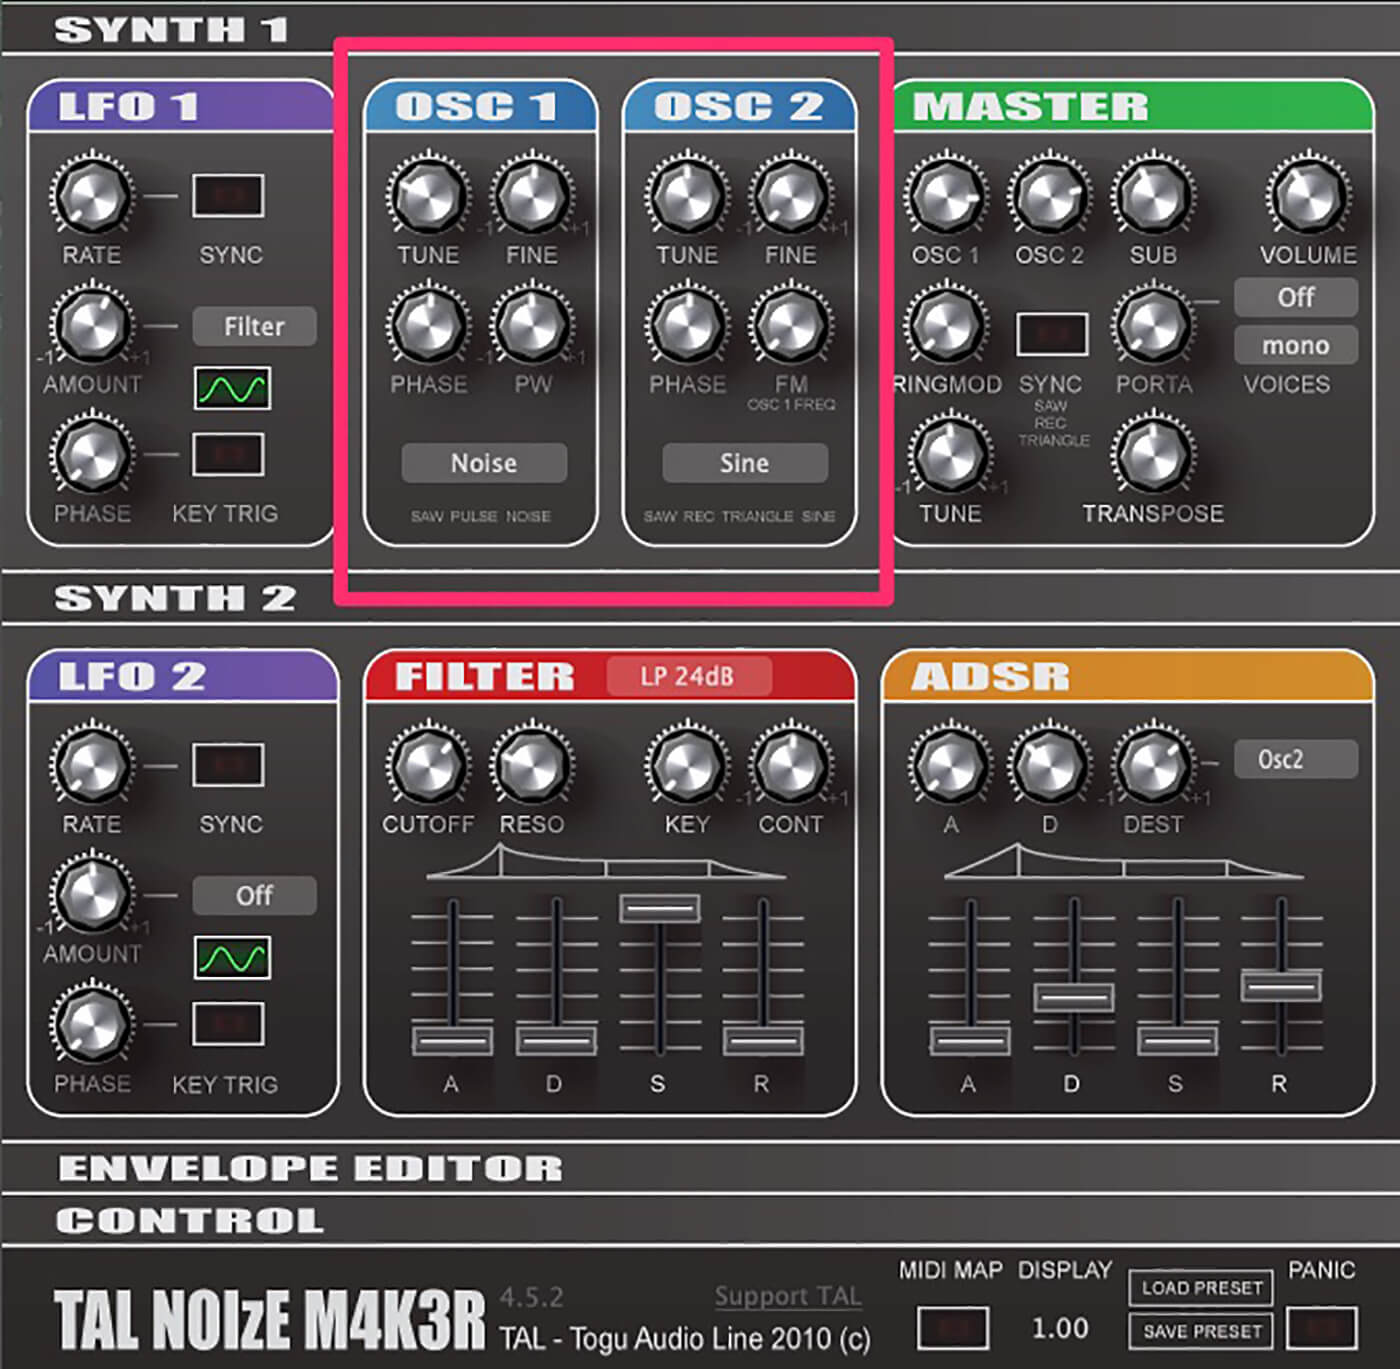
Snares tend to have two main sound components: the body of the sound, which comes from striking the top head, and the rattle, which vibrates on the bottom. Let’s use two oscillators to recreate these sounds. Set Osc 1 to Noise (to approximate the rattle) and Osc 2 (the head) to Sine. Turn Fine tuning on Osc 2 down to -1.0 for more body.
In the Master section, let’s create a nice balance of our two sounds. Set Osc 1 to -4.5 dB and Osc 2 to -6 dB. Lastly, let’s add a little weight with the Sub dial. A setting of -18 dB feels right.
Let’s use the filter to shape our tone. Click on Synth 2 and bring the Cutoff down to 0.65 to dull it a bit, and increase resonance to 0.25 for a little bite. We can leave the filter envelope as is.
Let’s add some LFO to modulate the filter cutoff. As with our hats, a slow rate and a small amount can help it feel a little more alive. It doesn’t sound like much yet, but it’s getting there.
Next, let’s turn our attention to the ADSR section. Set the VCA envelope to broadly similar settings as the open hats: a decay of 0.30 and release of 0.40, with zero sustain. Nice and snappy.
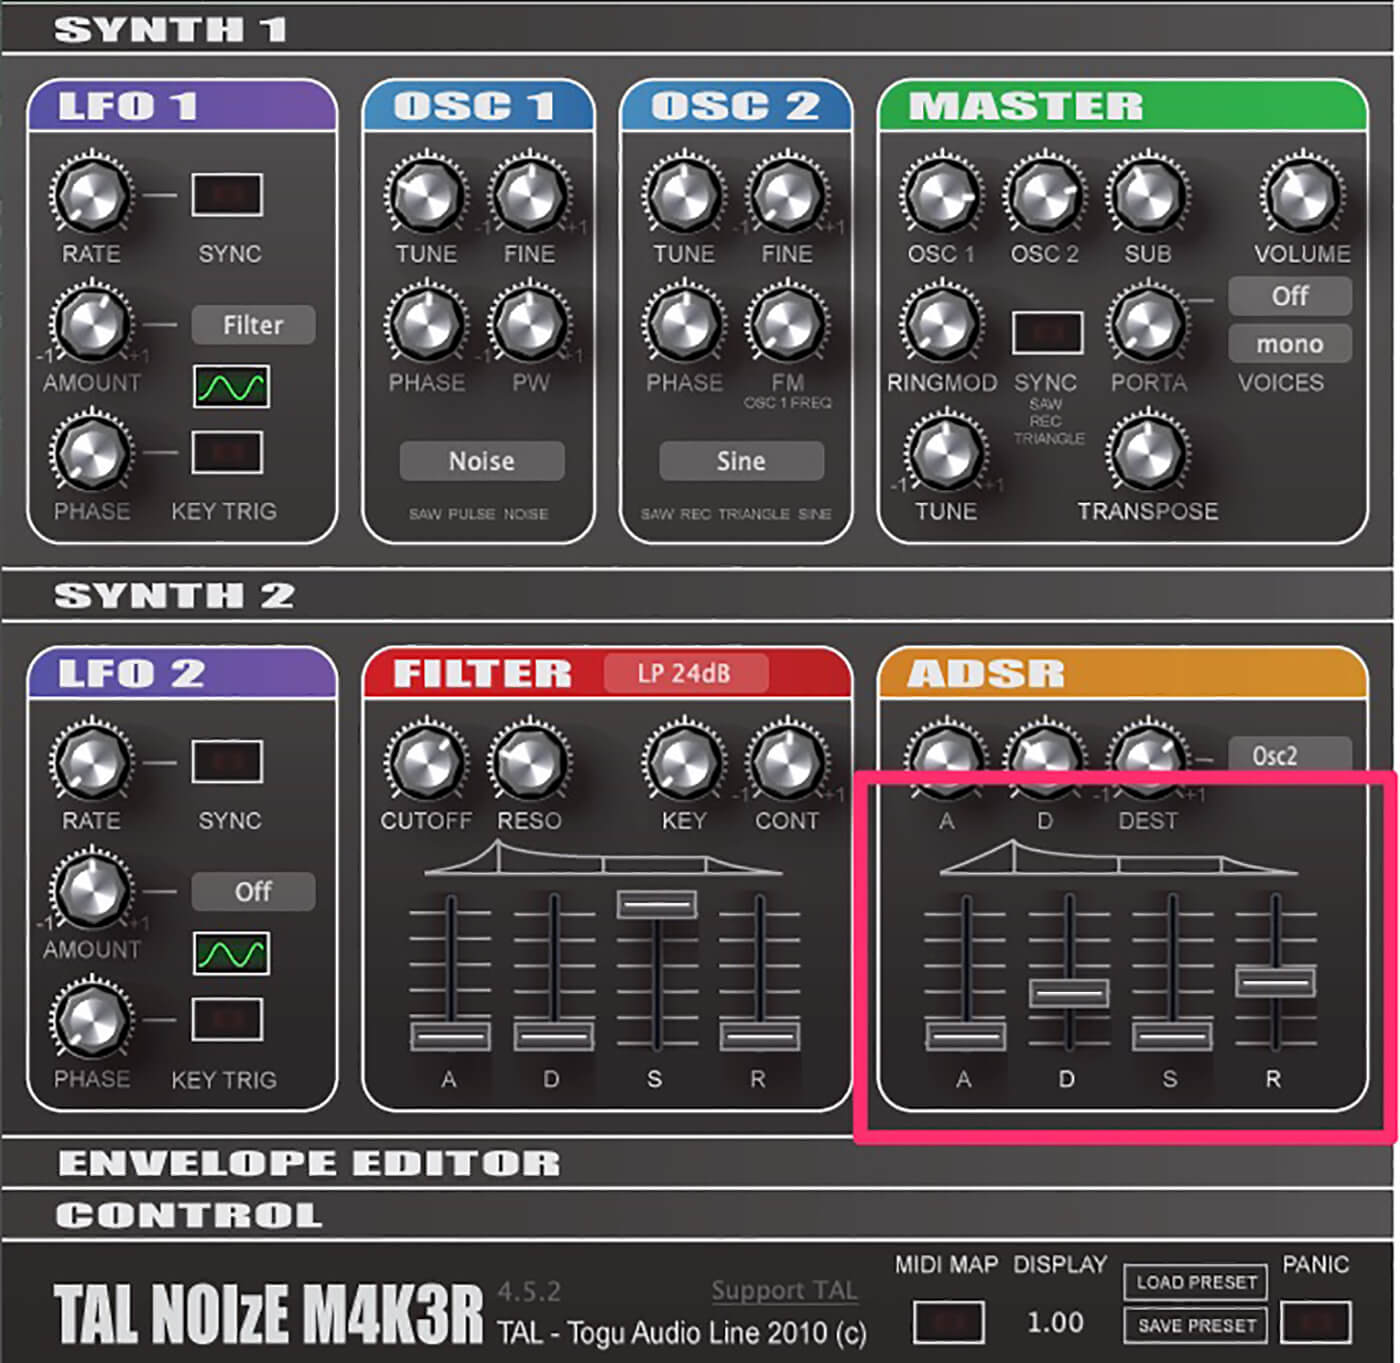
For a more convincing snare sound, we need to bring the second envelope into play. TAL-NoiseMaker has an additional AD envelope above the main ADSR one. It’s simple but thankfully it’s all we need to get the job done. Turn up the decay to 0.35 on this and destination amount to about 0.05, and lastly assign destination to Osc 2. You should hear a short pitch dive from oscillator 2 when a note sounds.
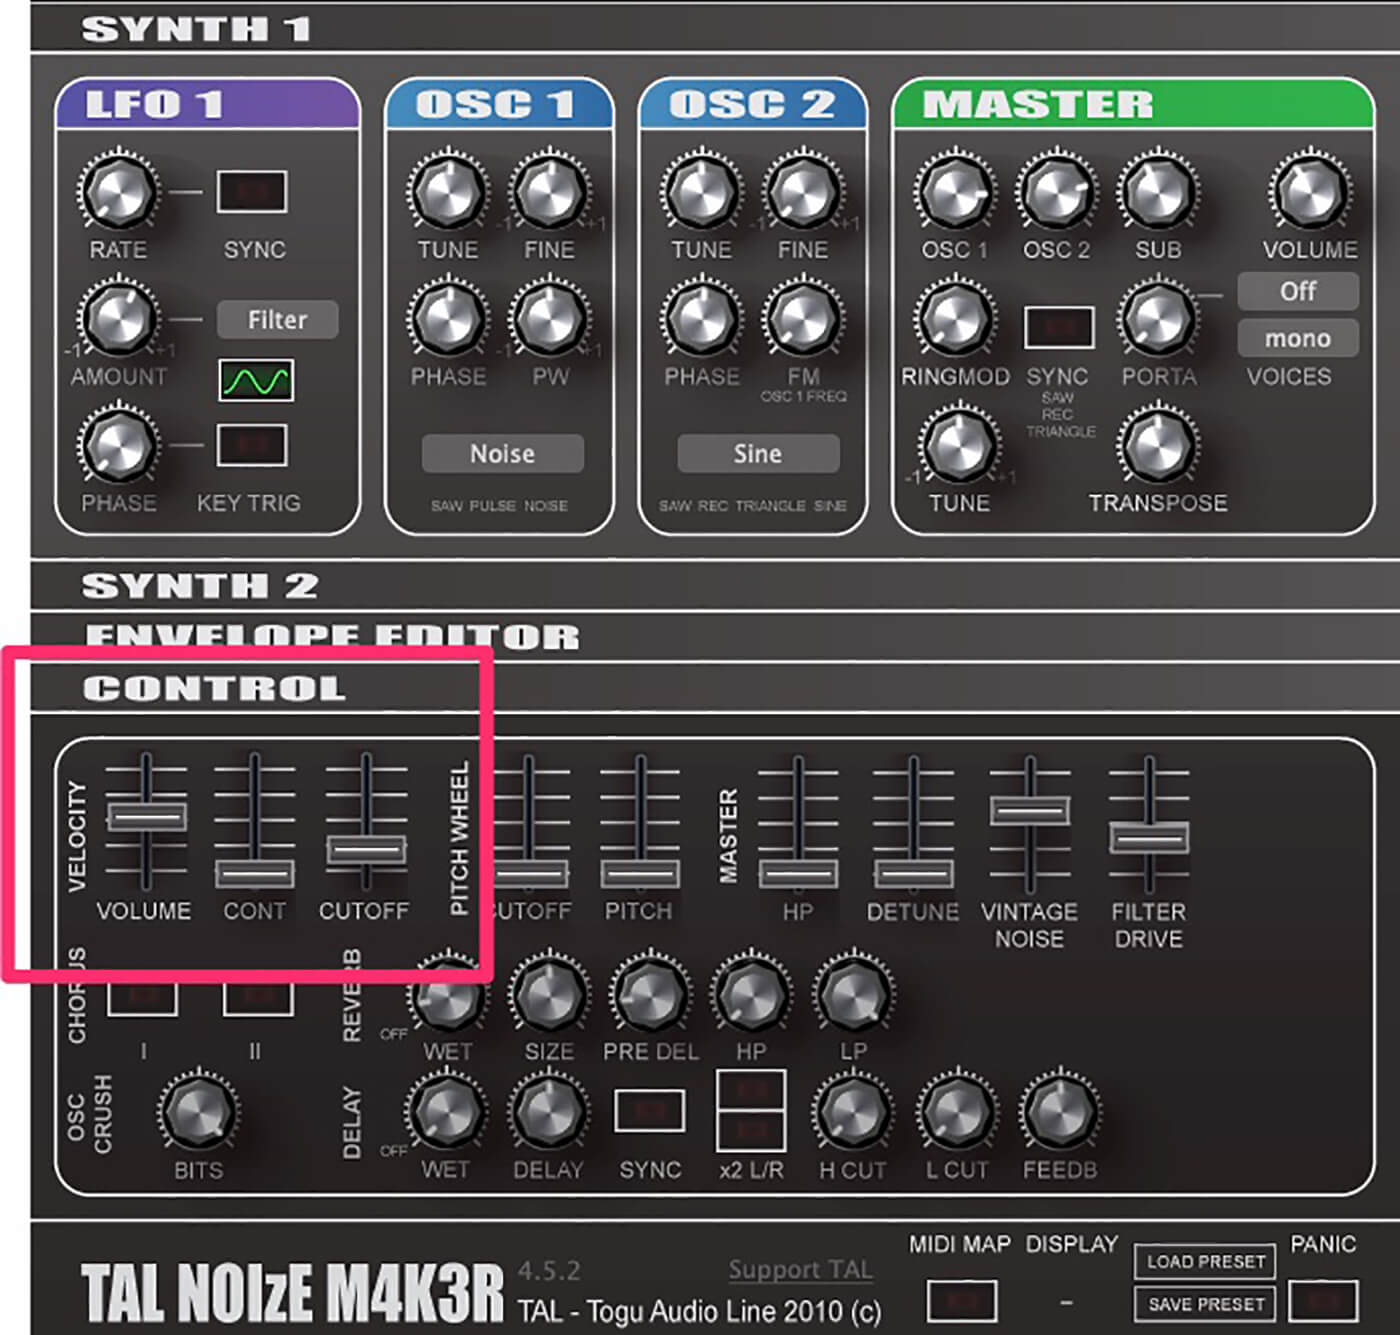
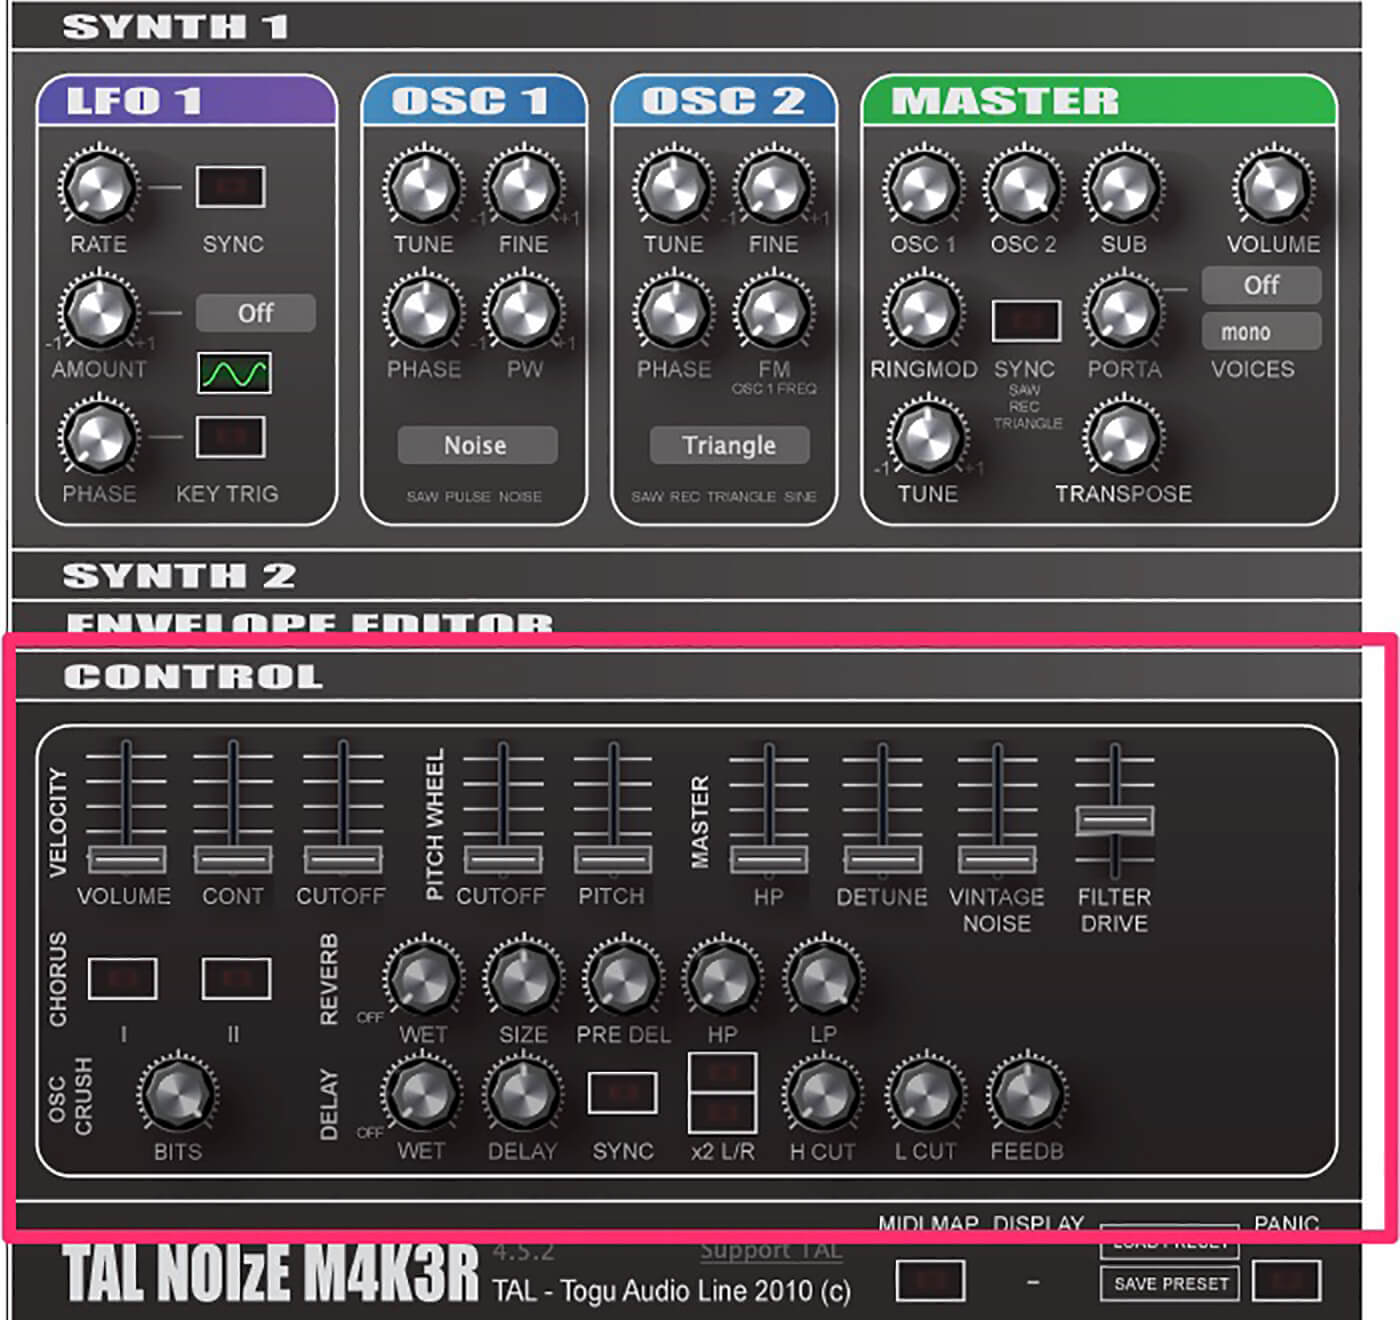
Let’s use velocity controls to vary our snare sound. Click on the Control panel (bottom of UI) to gain access to TAL-NoiseMaker’s effects section. In the Velocity section, push up Volume to 0.55 and Cutoff to 0.20. Now the snare will be louder and brighter depending on how hard you play.
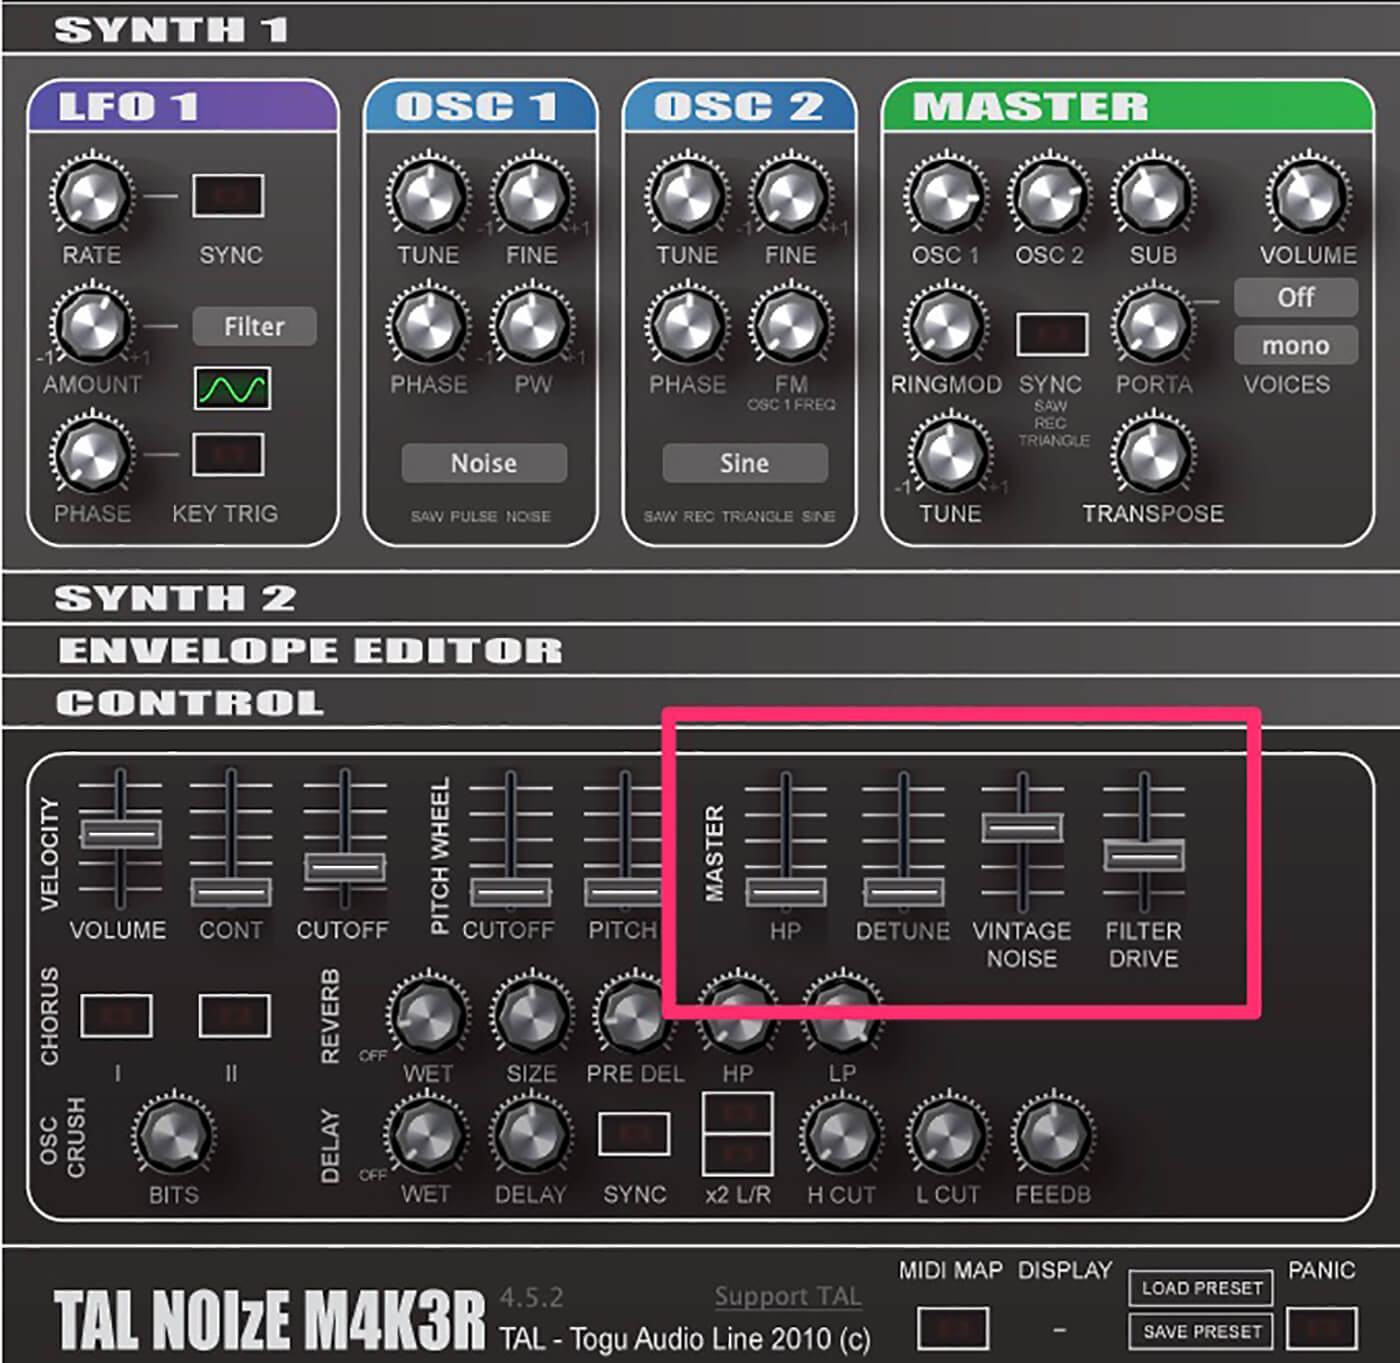
Let’s add a little character to our snare as well. In the Master section, turn up Vintage Noise to 0.60 for some grit, and Filter Drive to around 0.33 for a little distortion. A touch of Reverb finishes things off. Finally, let’s save this patch as Snare.
5. Dropping the boom
Our beat could undoubtedly do with some low-end weight. Let’s make an 808-style boom to use as a kick.
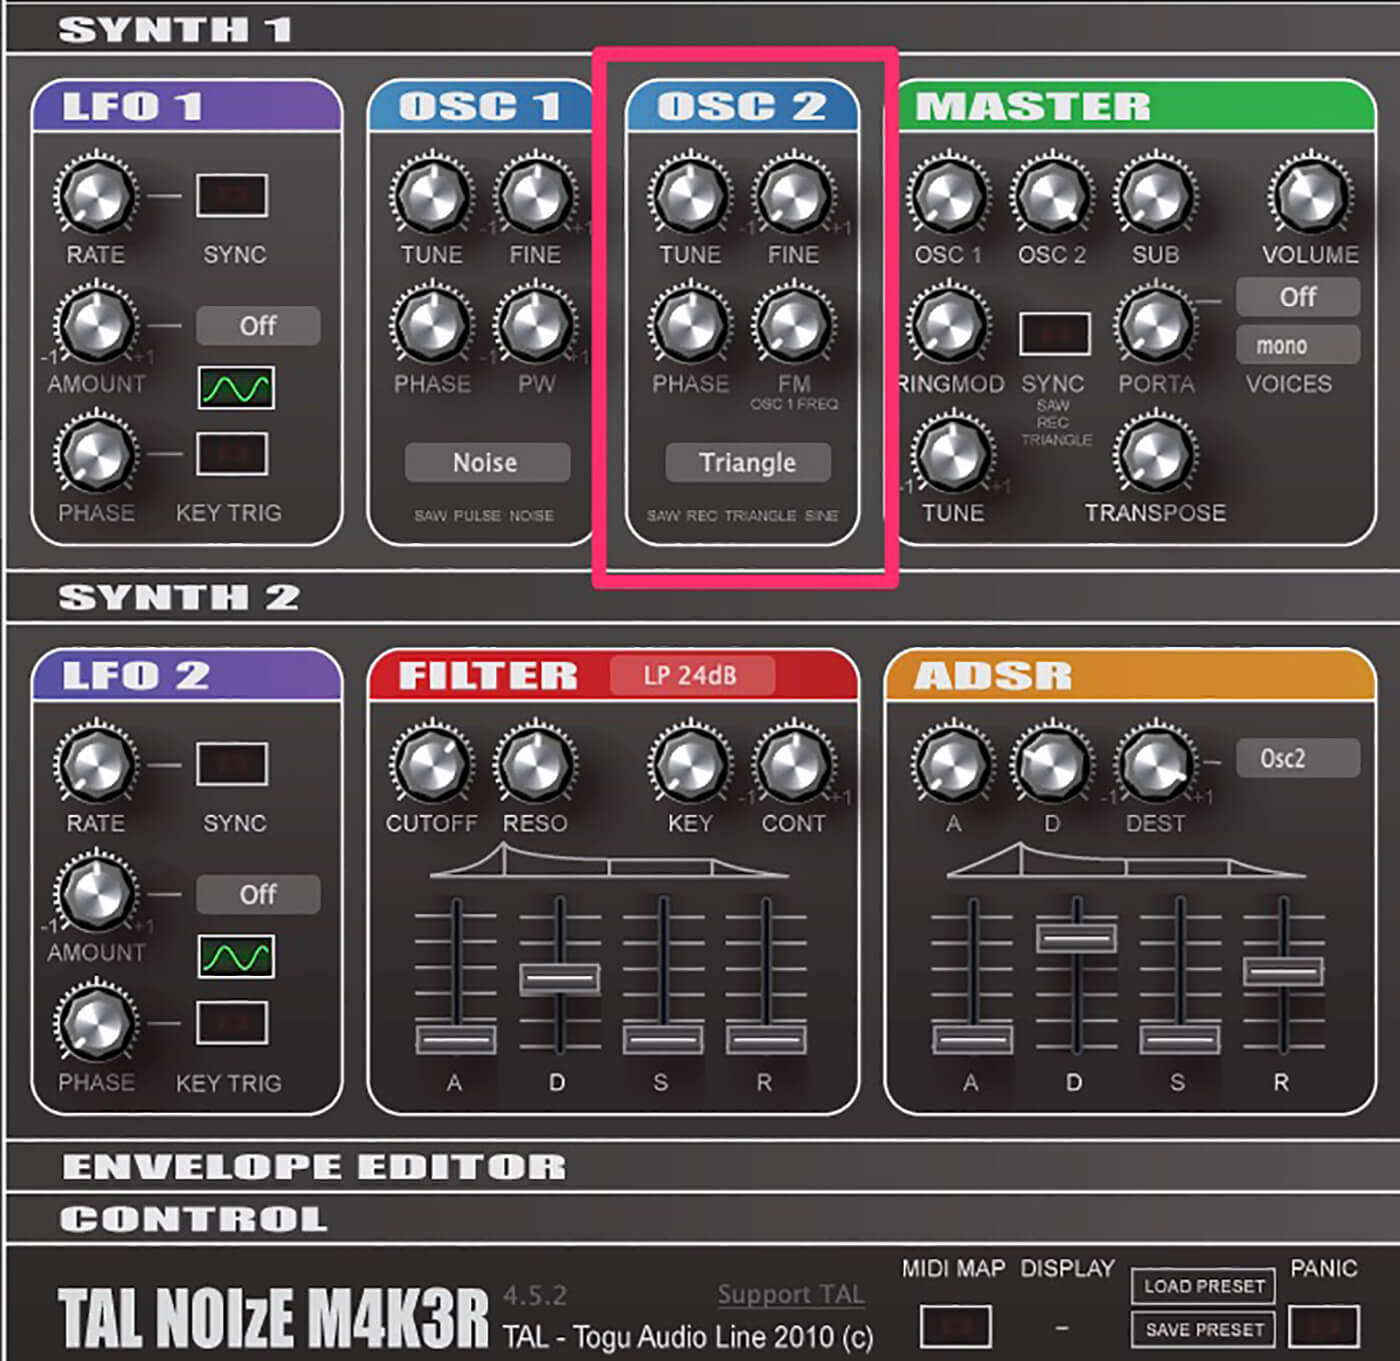
Start by putting TAL-NoiseMaker on a new track and loading Kick.mid. Recall the Snare patch we just made as well. First, let’s zero out all of the settings in the Control section. Don’t forget to turn off the reverb. Set Osc 2 to Triangle wave and leave the Fine tuning control where it is. (Note that a sine wave would work too but Triangle offers beefier harmonics.)
In the Master section, turn Osc 1 down to zero and crank up Osc 2. We don’t need any Sub so turn that down. Next, transpose everything down to -12. We have the makings of a kick.
Click on Synth 2. On the Filter, leave Cutoff where it is at 0.65, turn resonance to half-way, and be sure and turn off LFO 1. We don’t want to make anyone seasick with a wobbly kick.

In the ADSR section, crank up the Decay to 0.75 and Release to 0.50. We need that second envelope again. Turn down decay to 0.25, and bring up the destination knob to 0.60 for a real, boomy pitch dive.
Lastly, engage the Control section and apply some Filter Drive to fatten things up. About 0.40 should do the trick.
If you’d like a shorter kick, play around with the decay and sustain settings. For a more pronounced ‘click’, add more filter resonance.
6. Mixing
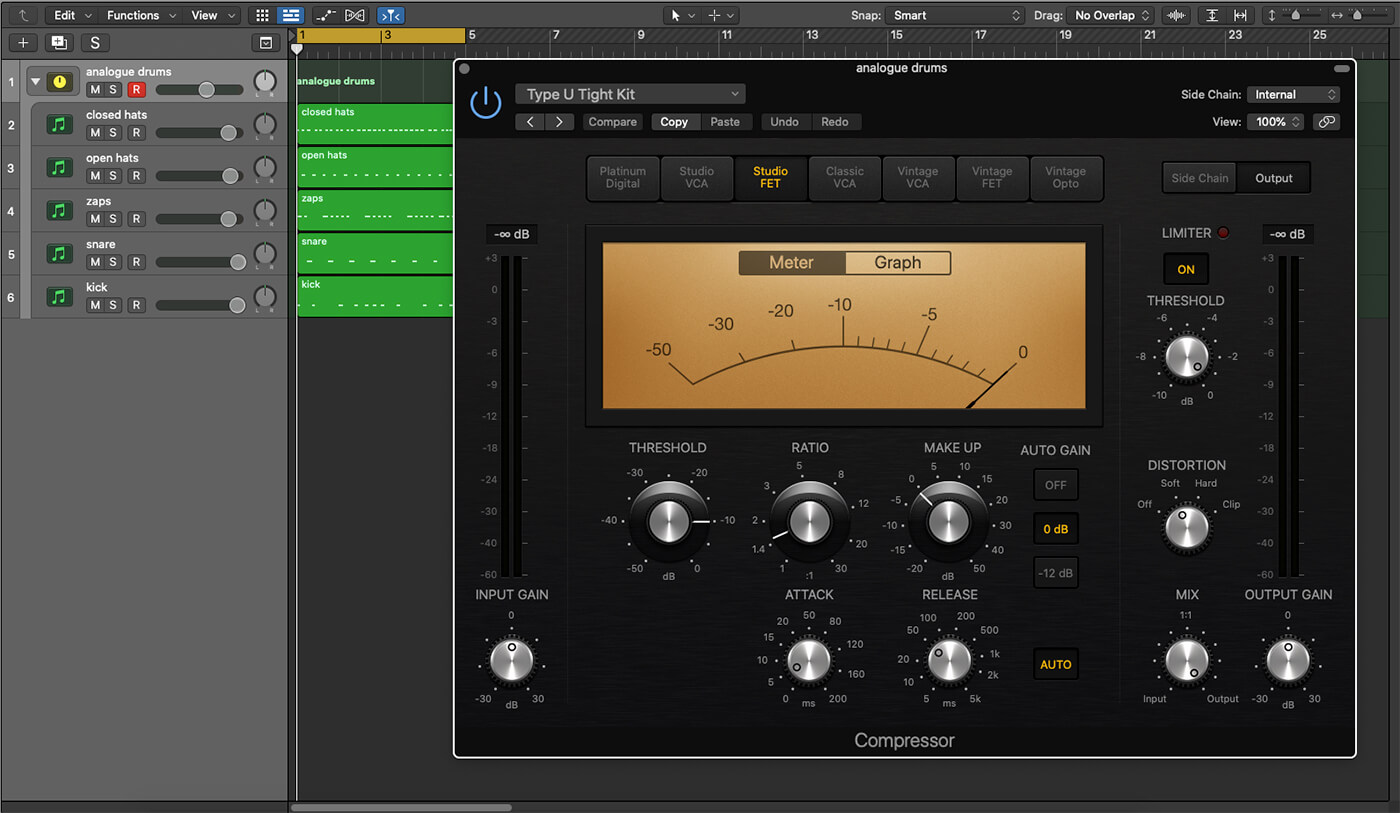
Finally, use your stock DAW plugins to add compression. We recommend heavy compression on the kick and snare, and some drum bus compression to help glue everything together.
Here’s our full beat with compression applied.
Now that you’ve got all your elements, you can preserve your sounds as NoiseMaker patches or export them out as one-shots for use in other projects.
Happy beat making!
Let us know how you got on with this workshop and share your drums sounds and patches with the MusicTech Creator Community Group on Facebook.
Check out more Weekend Workshops here.