Weekend Workshop: Vintage sounds with Surrealistic MG-1 Plus
Create surreal keys and bass with Cherry Audio’s Surrealistic MG-1 Plus.
cherry audio surrealistic MG-1 plus weekendworkshop hero
There are a ton of multi-sampled instruments available that allow you to emulate just about any classic keys, from a Rhodes electric piano, to a baby grand. Some of the best examples of these sampled libraries let you tweak every aspect of the sound. These are your only options when looking for the most realistic instruments, but sometimes it can be more inspiring to build a close approximation from scratch.
In this Weekend Workshop, we’re going to show you how to use Cherry Audio’s MG-1 and Blue Cat’s Chorus to make mellow keys to add an organic feel to any track. We’ll also show you a couple of tips to make your chords sound more natural. Finally, we’ll create a bass to compliment the chords and see how it all sounds in the context of a track.
Cherry Audio has modelled the Surrealistic MG-1 Plus on an analogue synth built by Moog and sold by RadioShack in the 80s as the Realistic Concertmate MG-1. While the Surrealistic MG-1 launched as a paid plug-in, it is now available for free for Windows and macOS.
Blue Cat’s Chorus is one of seven free plug-ins available in Blue Cat Audio’s second rendition of the freeware plug-ins pack. The Vintage Chorus is capable of a wide range of chorus effects and is particularly good at creating a wide stereo image. It is available for Windows and macOS in AAX, AU, VST and VST 3 formats.
Here are the sounds we’re going to be making this time:
What you’ll need:
- A DAW
- Cherry Audio’s Surrealistic MG-1 Plus, which you can find here
- Blue Cat’s Chorus, which is available for free, here
1. Navigating the MG-1 Plus
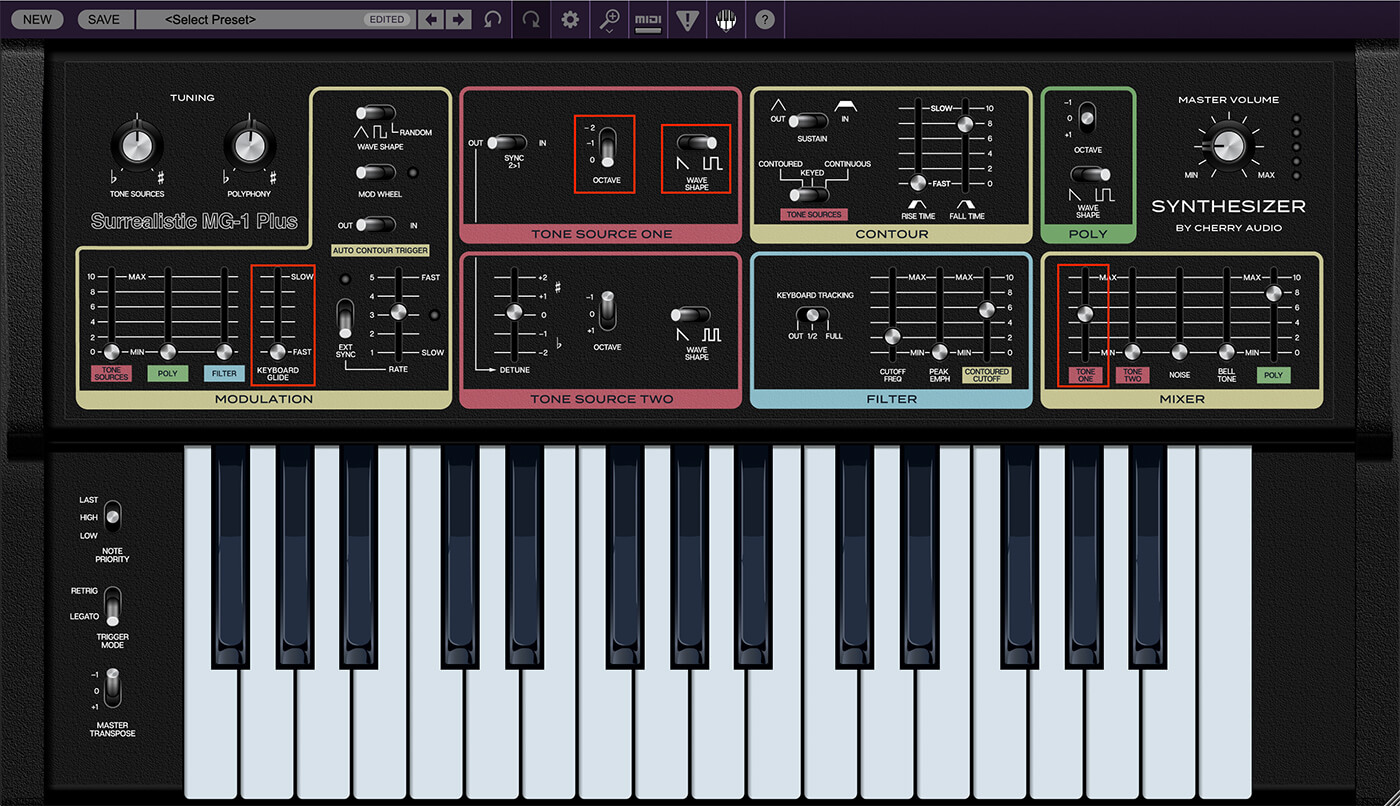
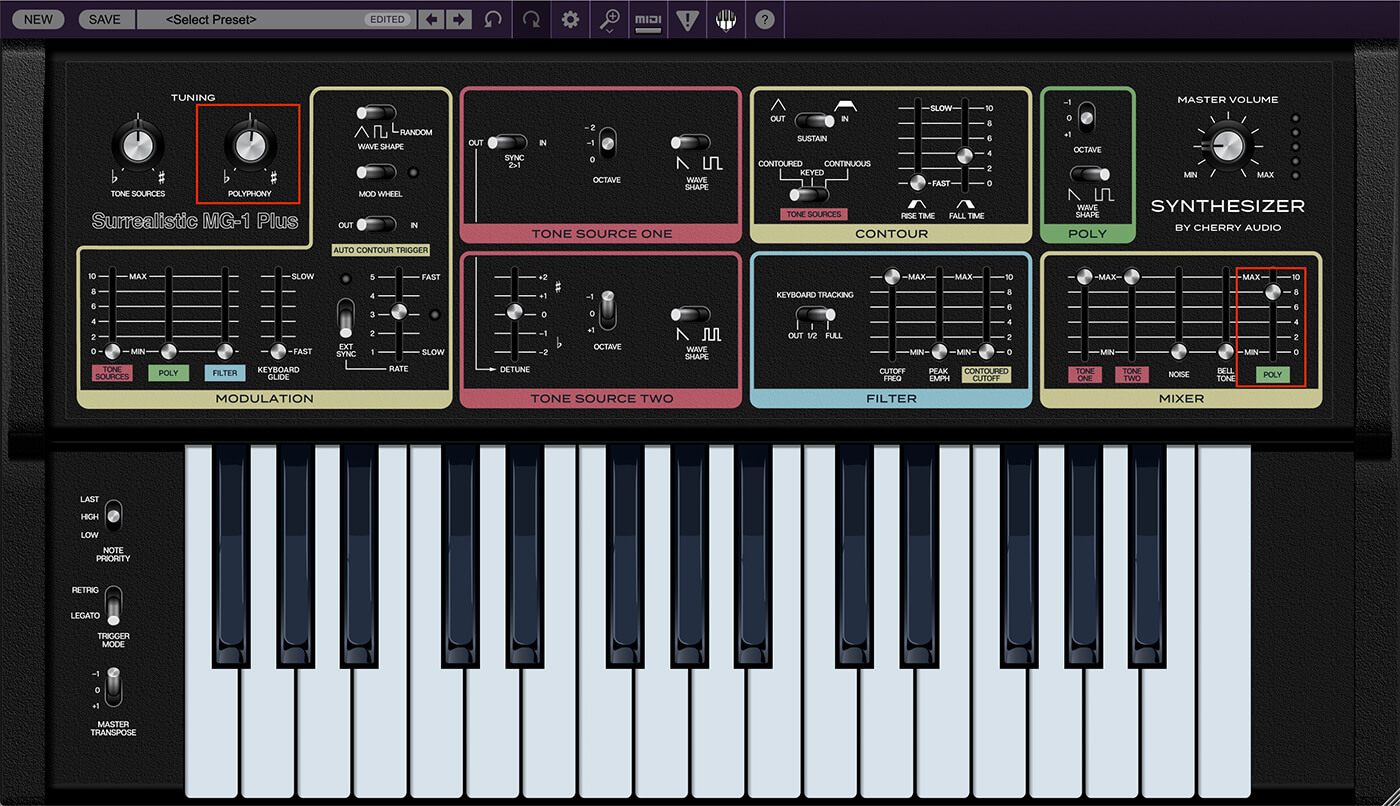
We can start by creating a MIDI track and loading an instance of Surrealistic MG-1 Plus. If you compare the interface to the original hardware synth, you’ll notice a few small differences – this is where the ‘Plus’ comes in.
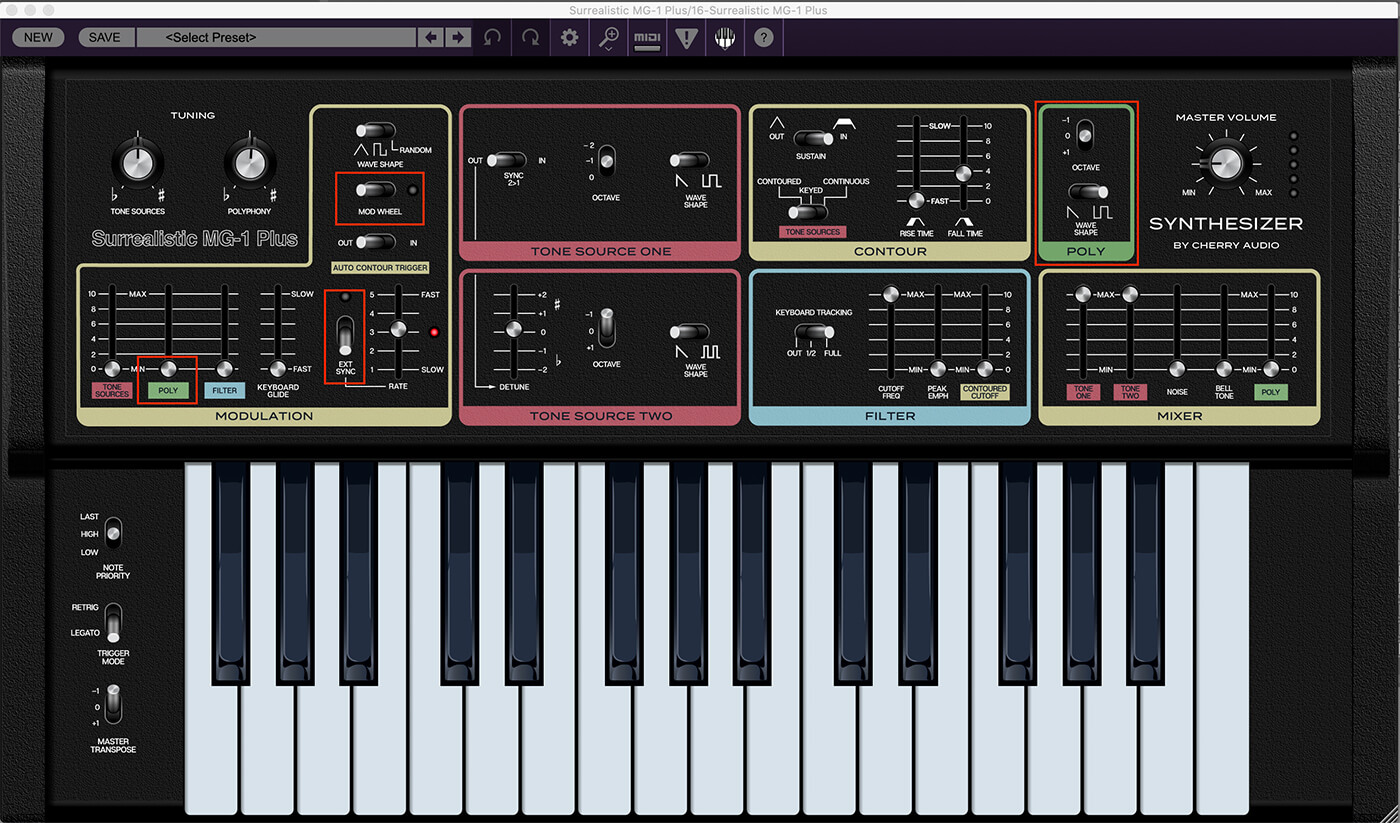
Cherry Audio has added a couple of extra features to the original synth to make it more useful. In the modulation section, they’ve added a mod wheel and the ability to add modulation to the polyphonic voices. This, along with the added octave and waveform switches, can make the polyphony a lot more useful.
The polyphonic voices operate independently from the two available sound sources, which gives you the ability to mix them, and modulate using the built-in LFO with different depths for each. For quick navigation, each function of the MG-1 is separated by colourful outlines, something Moog still does for much of their hardware.
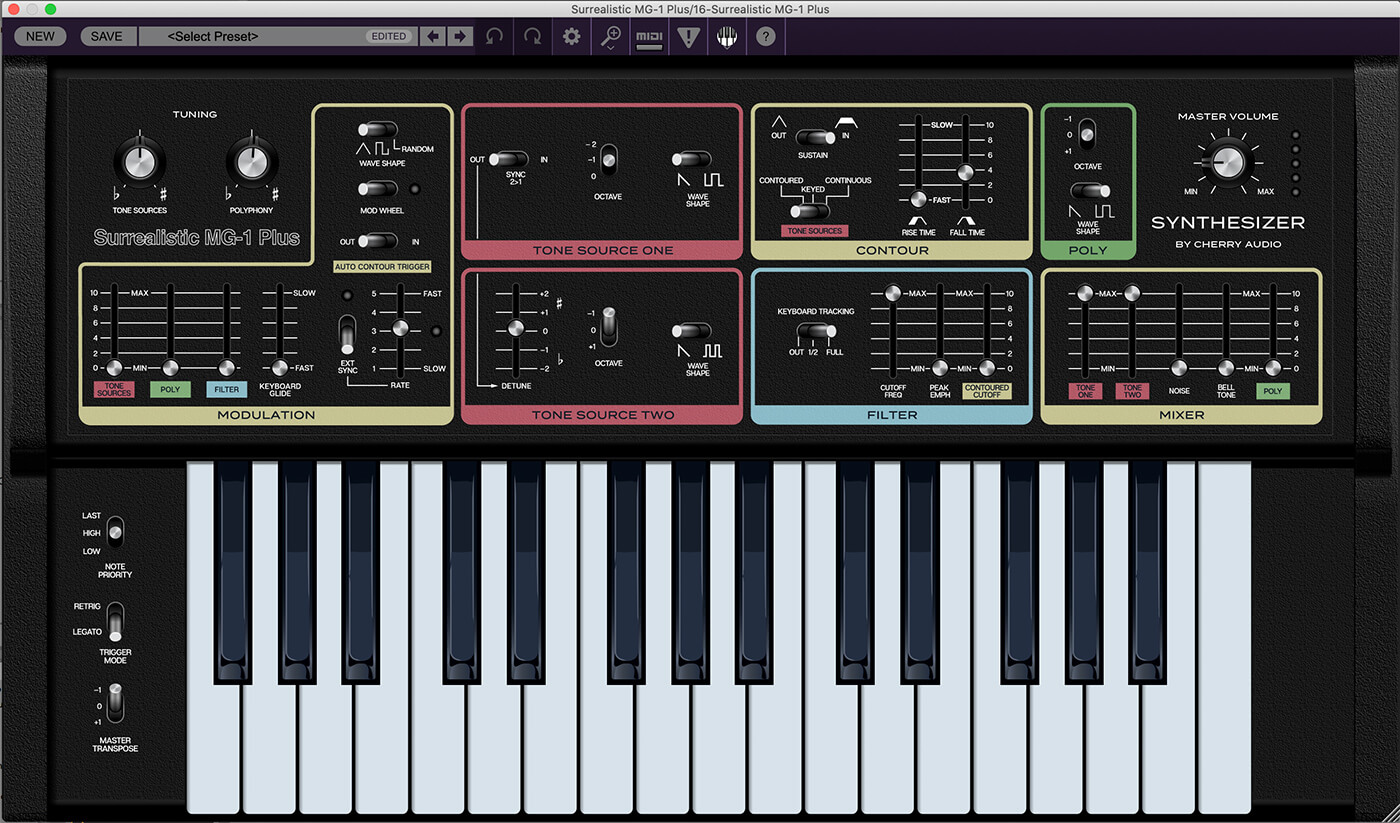
The MG-1 provides two oscillators with octave switching and two selectable waveforms. The oscillators are tuned together above the modulation section, but oscillator two provides a detuning slider. Oscillator sync is available with a toggle switch in the first oscillator section. The envelope provided by the contour section is a simple AD type, but offers basic sustain control via a toggle switch. Below that, we have the low-pass filter, which has key tracking and filter modulation. To the right, we have our mixer, which includes a white noise generator and a ‘Bell Tone’ slider. The latter acts like ring modulation, adding inharmonic content to the sound, making it perfect for percussion. Lastly, we have the master volume control, which can come in handy to balance the final mix of all the audio sources.
2. Designing keys
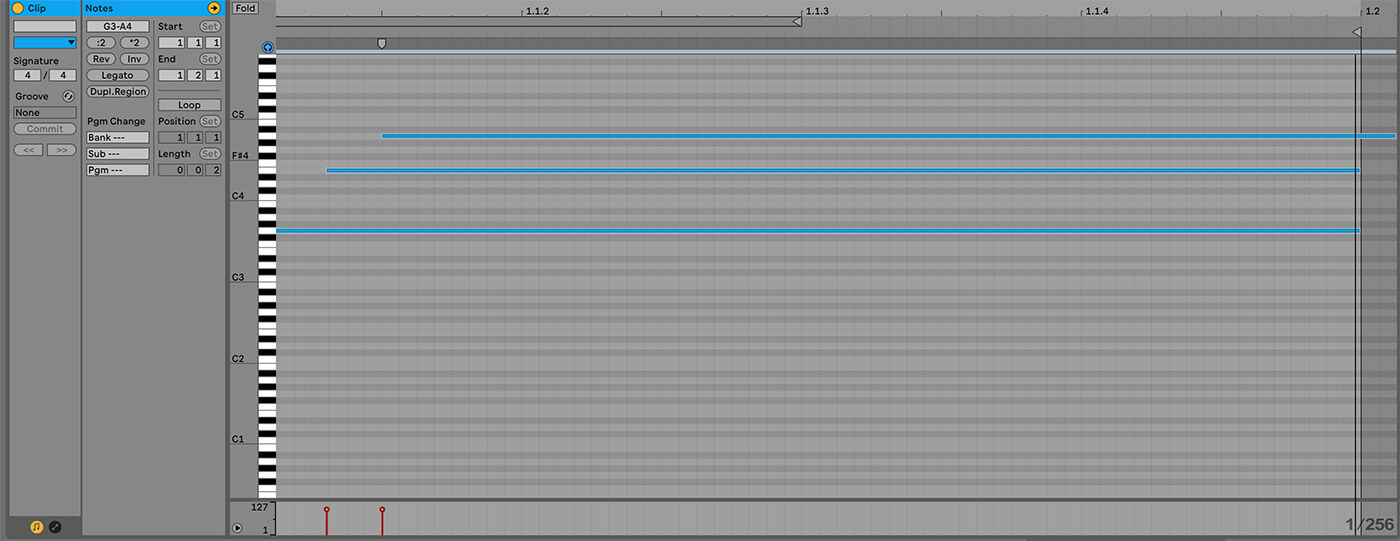
Since our MG-1 will primarily play chords for this sound, we can start by creating a MIDI event and programming a simple half bar chord. You’ll notice that the notes have been offset slightly to give a strummed effect, making the chords sound more natural. Let’s hear it with the default patch.

Right now, we’re only hearing a single voice gliding through the notes, at the glide rate set in the modulation section. Since the two main sound sources of the MG-1 are monophonic, we need to bring up the polyphonic voices in the mixer. For now, we are only going to be focusing on the poly section, so let’s also turn down the main sound sources. We’ll also make sure the poly voices are using a square wave, with the octave switch in the centre position.
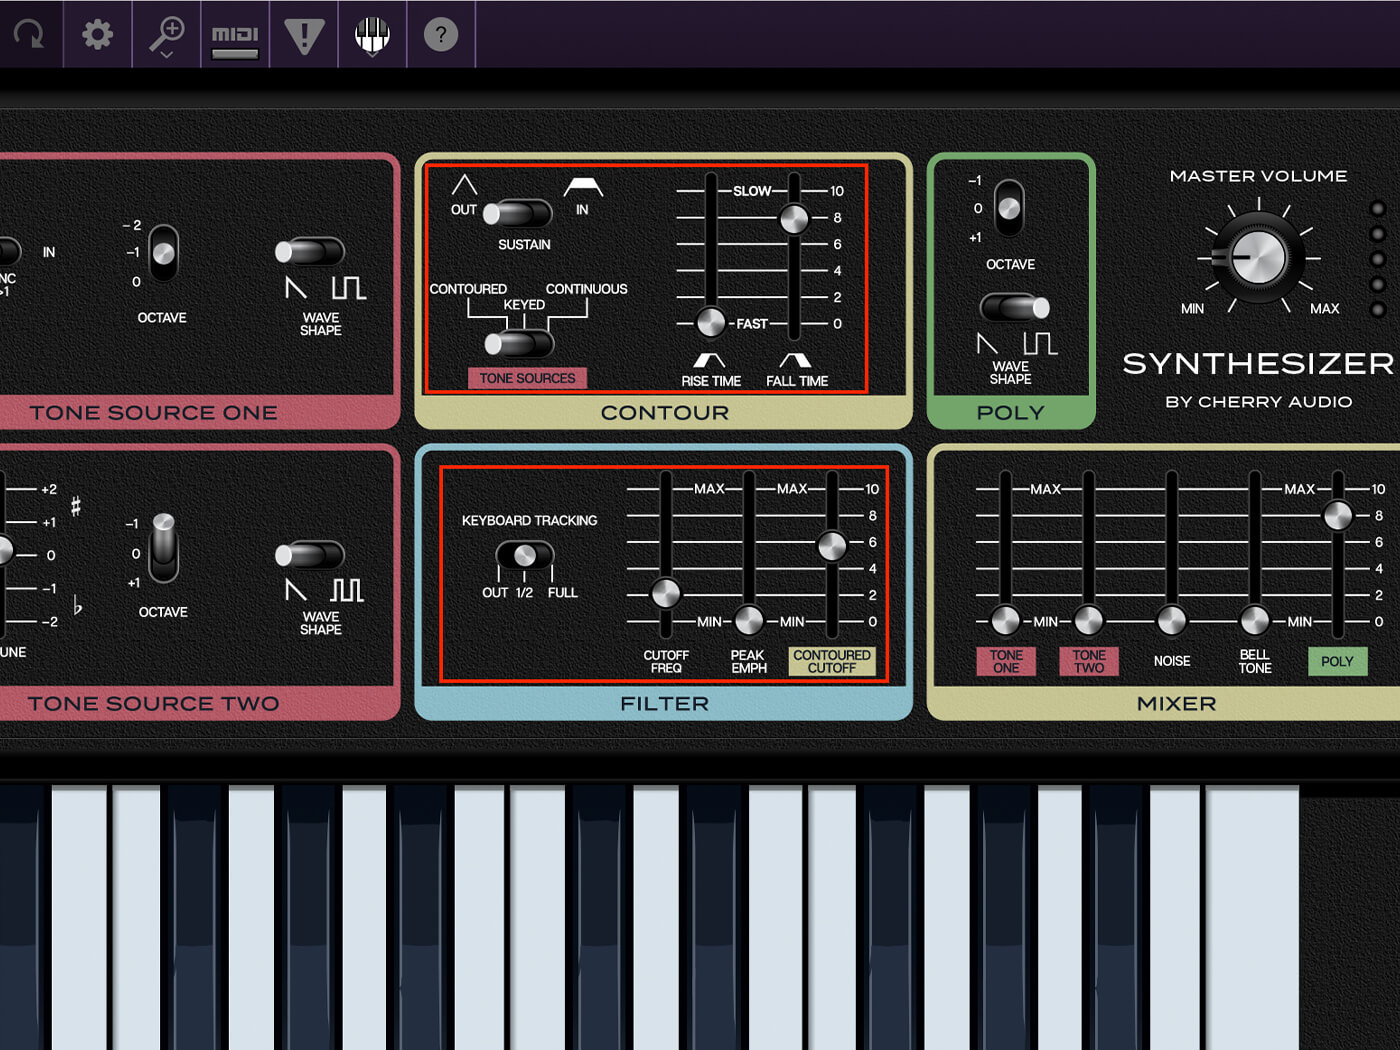
We’ve now successfully played a chord, but our sound is far too bright and lacks the dynamics we want. Let’s turn our attention to the contour section and make some adjustments. The ‘Tone Sources’ toggle switch allows us to change how the contour section affects the main oscillators, if at all. We want to set this to ‘Contoured’ for when we bring in a tone source later. ‘Keyed’ causes the VCA to behave like an on/off switch, while ‘Continuous’ allows the oscillators to drone; neither of these behaviours will work well for our sound. We can leave the attack at its default setting, but we want a fairly long decay; we’ll set the fall parameter to around eight. We also want to set the sustain switch to ‘Out’ to disable it.
Now we can adjust our filter. We want to create a darker, mellower sound, so set the filter cutoff to around 30hz. This seems extremely low, but if we set the ‘Contoured Cutoff’ value to about 60 per cent, we can get the filter to open up with our volume envelope, while removing a lot of the brightness. Lastly, we set the filter key tracking to half.
To add a bit more warmth to our sound, we’ll bring in the first of the two tone sources. We can bring the pitch up one octave and switch the wave type to a square wave. Adjust the mix to taste; we’ve gone with 50 per cent. One thing you’ll notice is that the attack now has an interesting pitch movement to it. Since the tone sources are monophonic, the oscillator plays through the notes of the chord sequentially. Glide is always on, with the rate set in the modulation section.
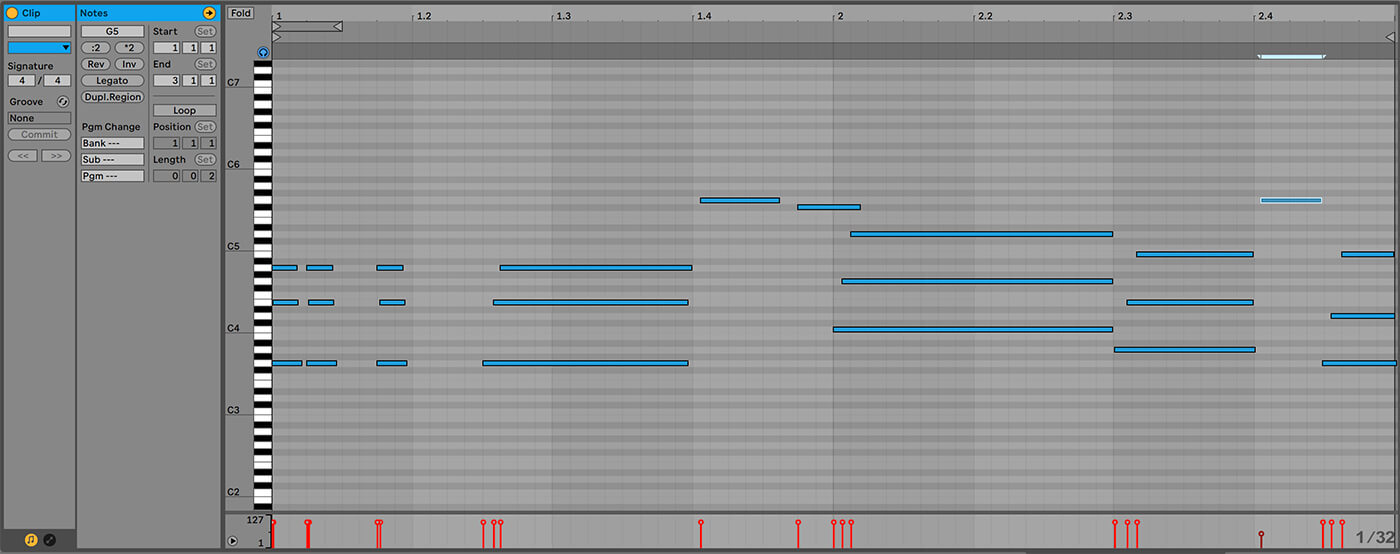
Before we add our Chorus effect, we can finish writing our chord progression. We want something a bit funky, reminiscent of the riffs typically played on a classic Rhodes. For this example, we’ve expanded our MIDI event to cover two bars, and offset all of our notes in each of the chords, except for the three short stabs at the beginning. We’ve also made some micro timing adjustments to humanise the progression.
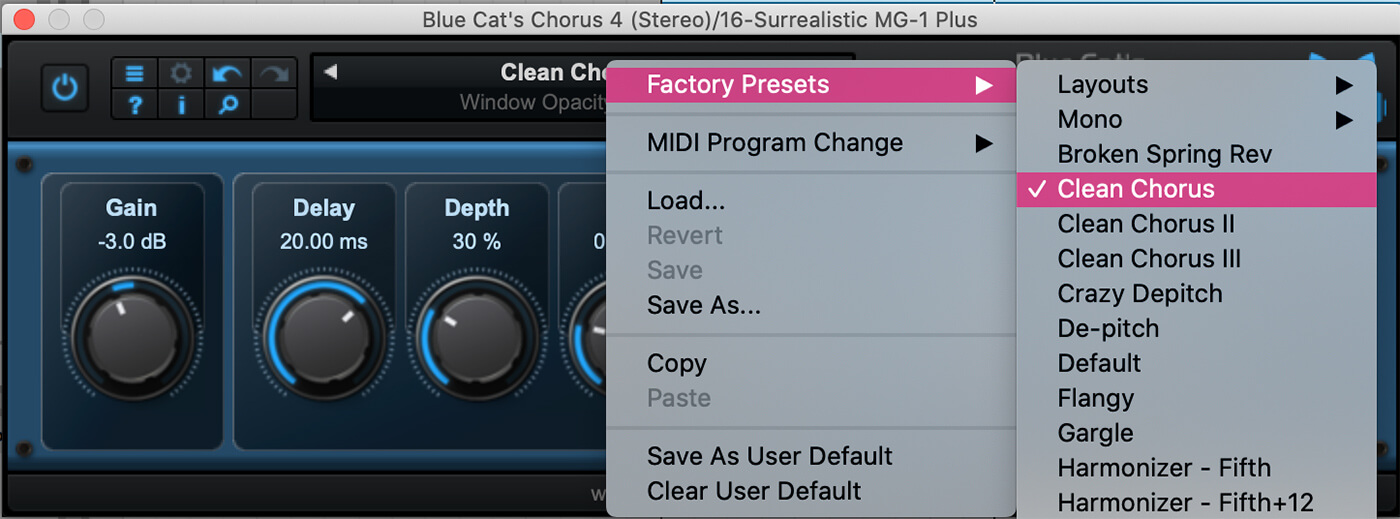
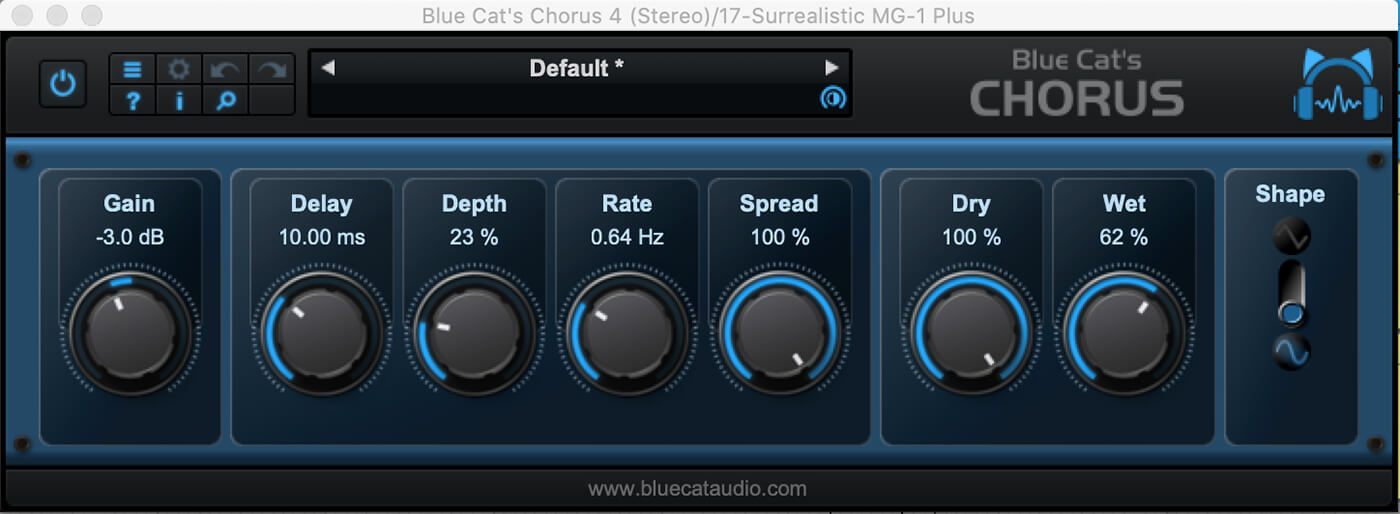
To finish off our sound, we can add an instance of Blue Cat’s Chorus effect. It’s worth taking advantage of the preset browser to find a good starting point to add some width to our chords. We’ll choose the first ‘Clean Chorus’ preset and then tweak the settings.
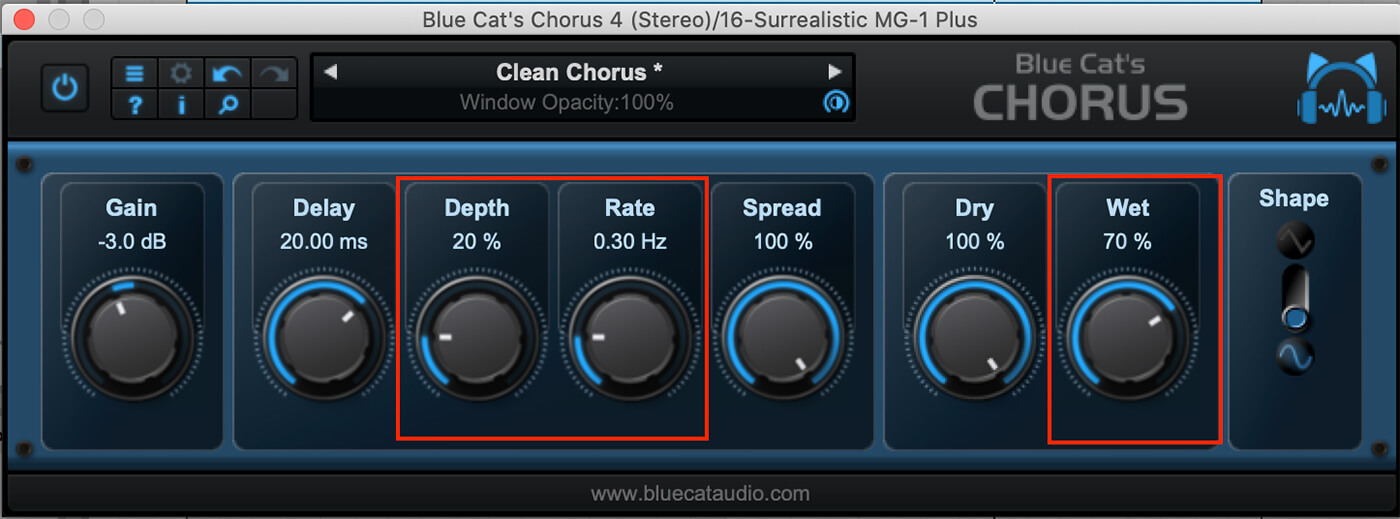
We’ve widened our stereo image, but the modulation has introduced an undesirable wobbling effect. Let’s bring the modulation depth down to around 20 per cent and then drop the rate to 0.30 Hz. We can then reduce the wet level to 70 per cent to bring back some of the dry sound and finish it off.
3. Making the bass
Now we can start designing a bass sound to complement our chords. The bass sound we’ll make won’t be playing a typical bass line. It will be used as a part of a longer bass phrase; this will make a lot more sense when we listen to everything in the context of a track.
Just like our keys, we are going to bring in our poly voices. While we won’t be playing any chords, we can detune the poly voices to create some interesting movement. Adjust the poly tune knob to around 0.10. We can then bring up the poly slider to approximately 80 per cent. We’ve put down a short three-note pattern; let’s hear it.
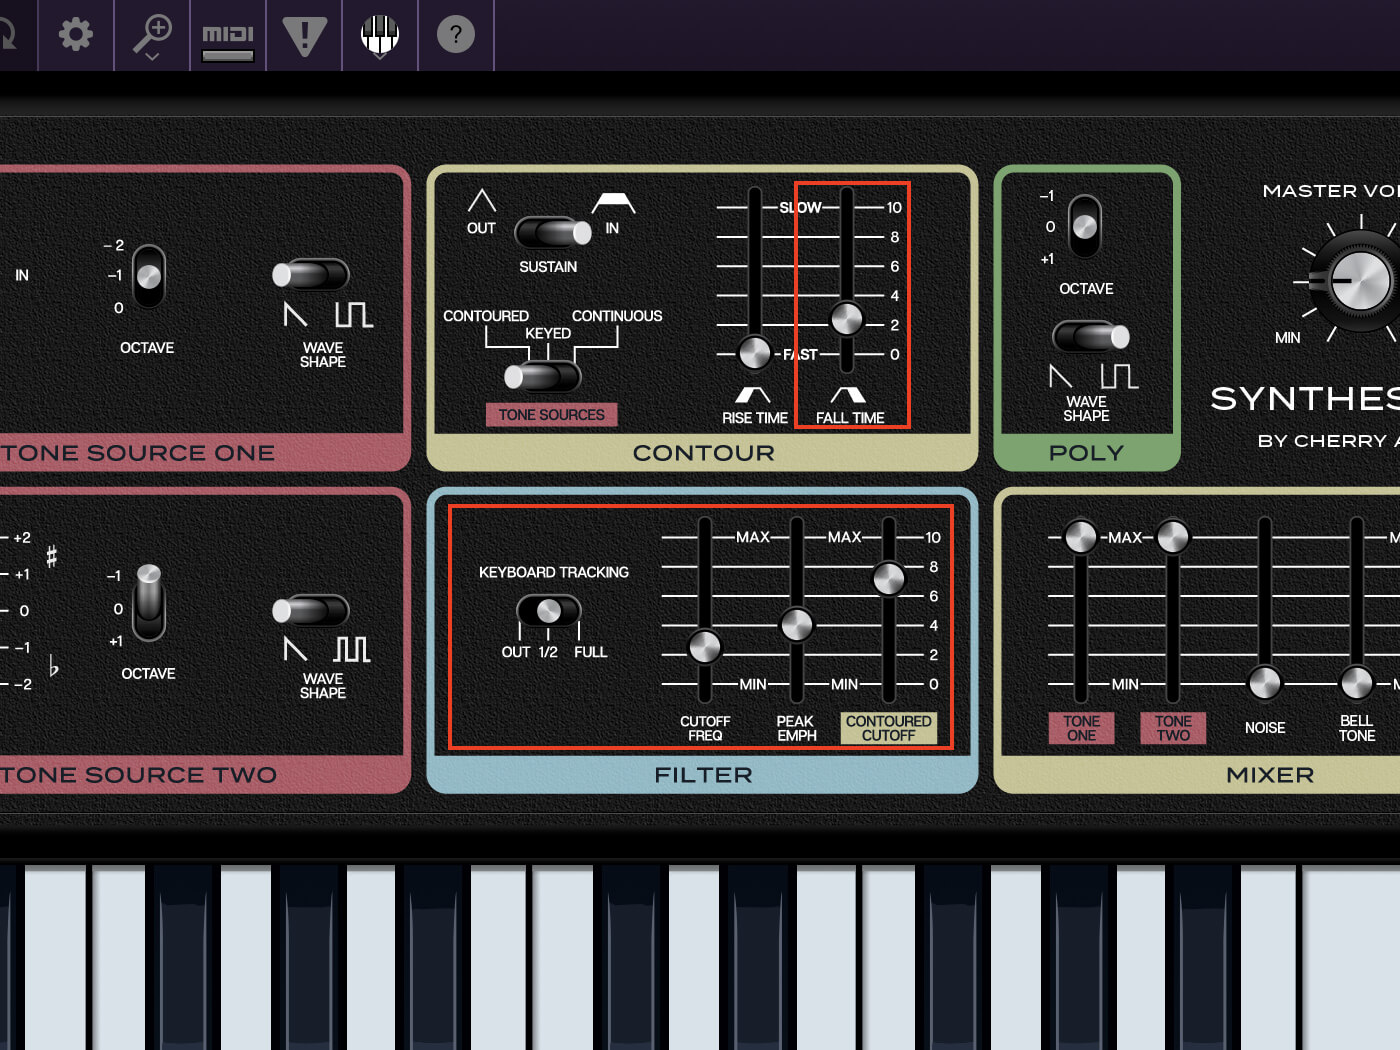
Let’s start adjusting our envelope and filter. We want a sustained sound so we’ll leave the switch in the ‘In’ position but shorten up the fall time to around 300ms. We will bring the filter cutoff down to 50Hz and then have it open with the envelope. To achieve this, set the depth to around 70 per cent. We will also set the key tracking to half. The MG-1’s filter adds a lot of character to the sound when we bring in some resonance. Set the peak emphasis (resonance) to around 60 per cent and check out how it sounds.
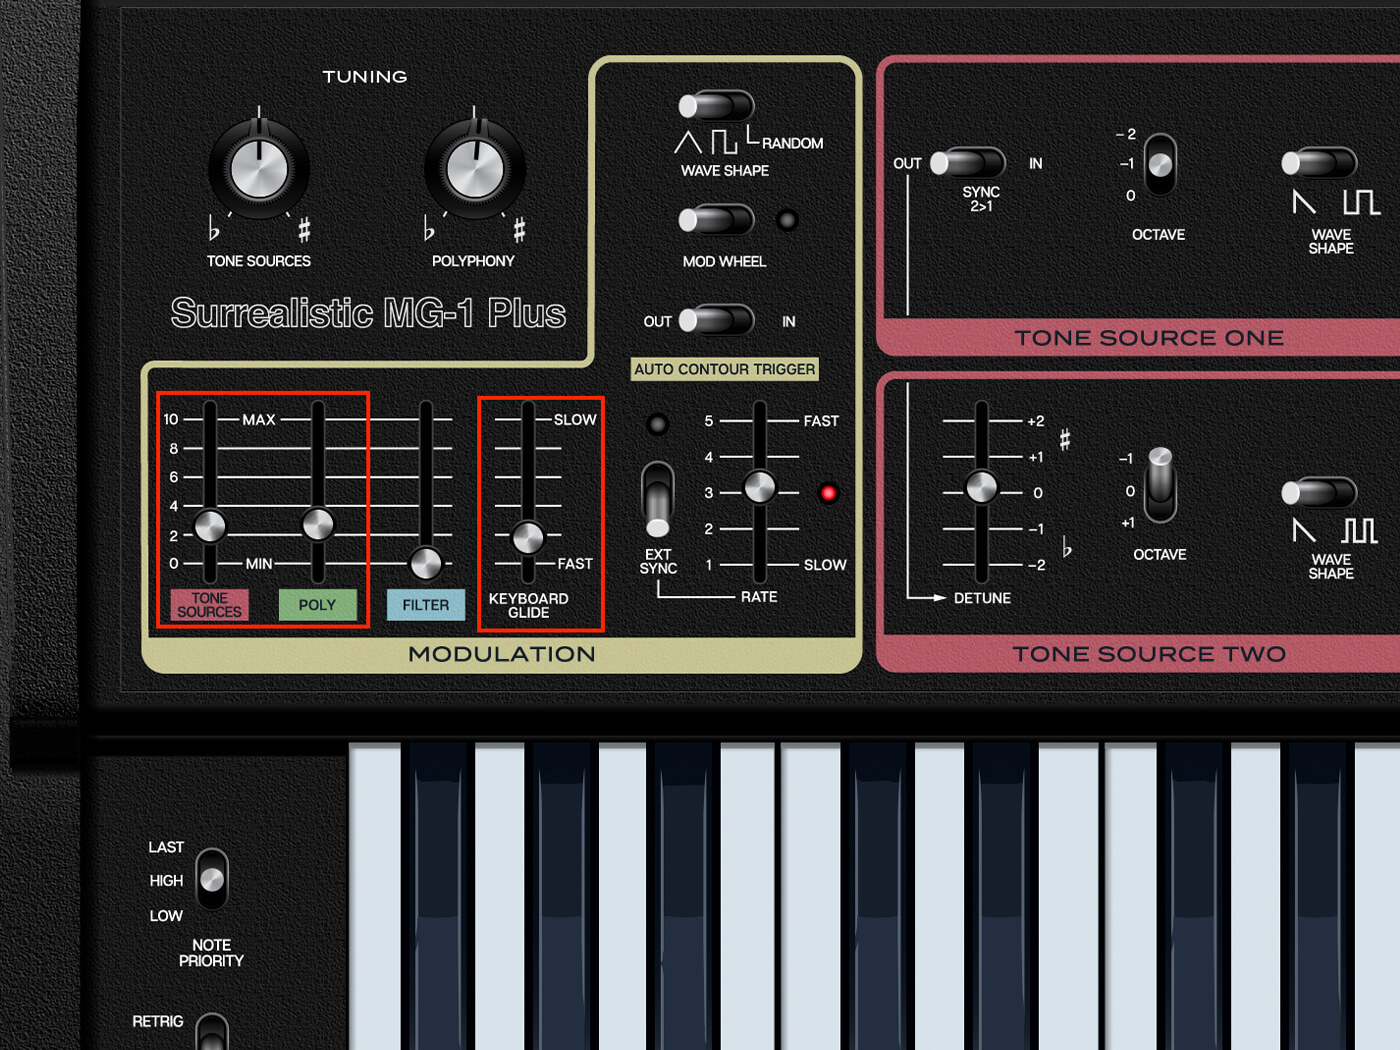
The last thing we’ll look at on the MG-1 is the modulation section. We can add some movement to our sound with just a few tweaks. We’ll start by decreasing the glide time by bringing up the slider to around 0.7. Since the poly voices don’t glide between notes, a slightly slower glide time on the two tone sources introduces some subtle but audible beating.
This adds character, but too much and the entire thing sounds out of tune. We can finish it off by adding some vibrato to both the tone sources and the poly section. Let’s set both to around two per cent. You will have noticed by now that the values in the tooltips don’t quite scale properly with the slider positions. This isn’t an issue as long as you go by one or the other and make sure it sounds right to your ears. We also encourage you to experiment with the LFO rate. Our tests showed the default setting worked well for this sound, but different rates can produce exciting results.
Once again, we will use Blue Cat’s Chorus to process our sound. This time we’ve started from the default patch to create an effect that adds some width and modulation for our bass sound. We’ve increased the rate and then brought the depth and wet level down to find the right balance.
These sounds both clearly demonstrate the versatility of the MG-1 and that vintage synth design still has a place in modern music. We’ve only used one effect to process these sounds, but you can take both much further with additional processing. In the context of this track, we’ve added some reverb to our chords using Eventide’s Black Hole pedal, and some compression and distortion to our bass. We’ve also had some fun with micro edits on both the bass and chord progression to create a new arrangement.
Share your results and tell us what tutorials you’d like to see in the MusicTech Creator Community on Facebook.
Check out more Weekend Workshops here.