Weekend Workshop: Visualise saturation, clipping and compression
See what your processors are doing with this free oscilloscope and monitoring plug-in.
The saying goes that you should mix with your ears and not your eyes. While we agree that the ears should cast the deciding vote in any mixing decisions, there are plenty of tools to guide you towards optimum results. Specifically, compression and other dynamic processes can be particularly hard to hear, especially when you’re starting, so it can be useful to visualise the audio to understand what’s going on.
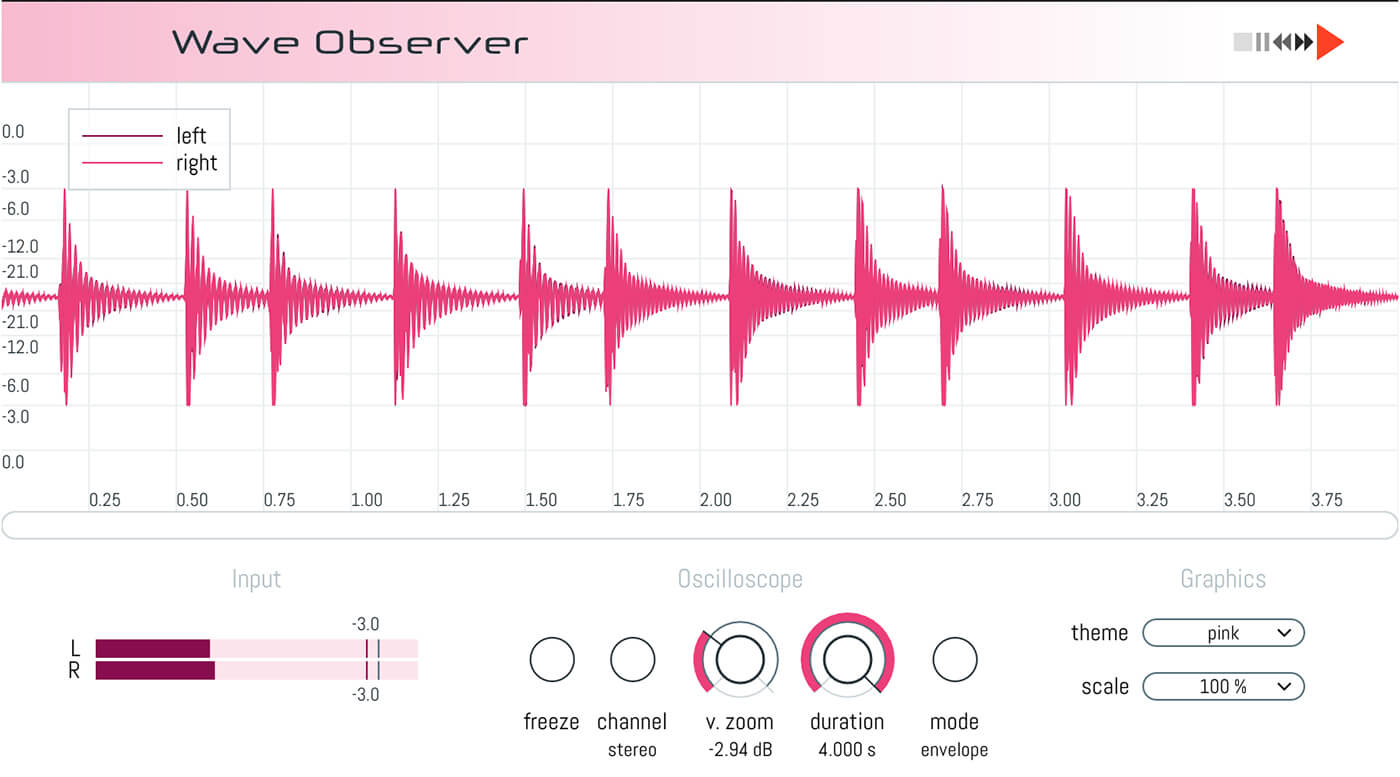
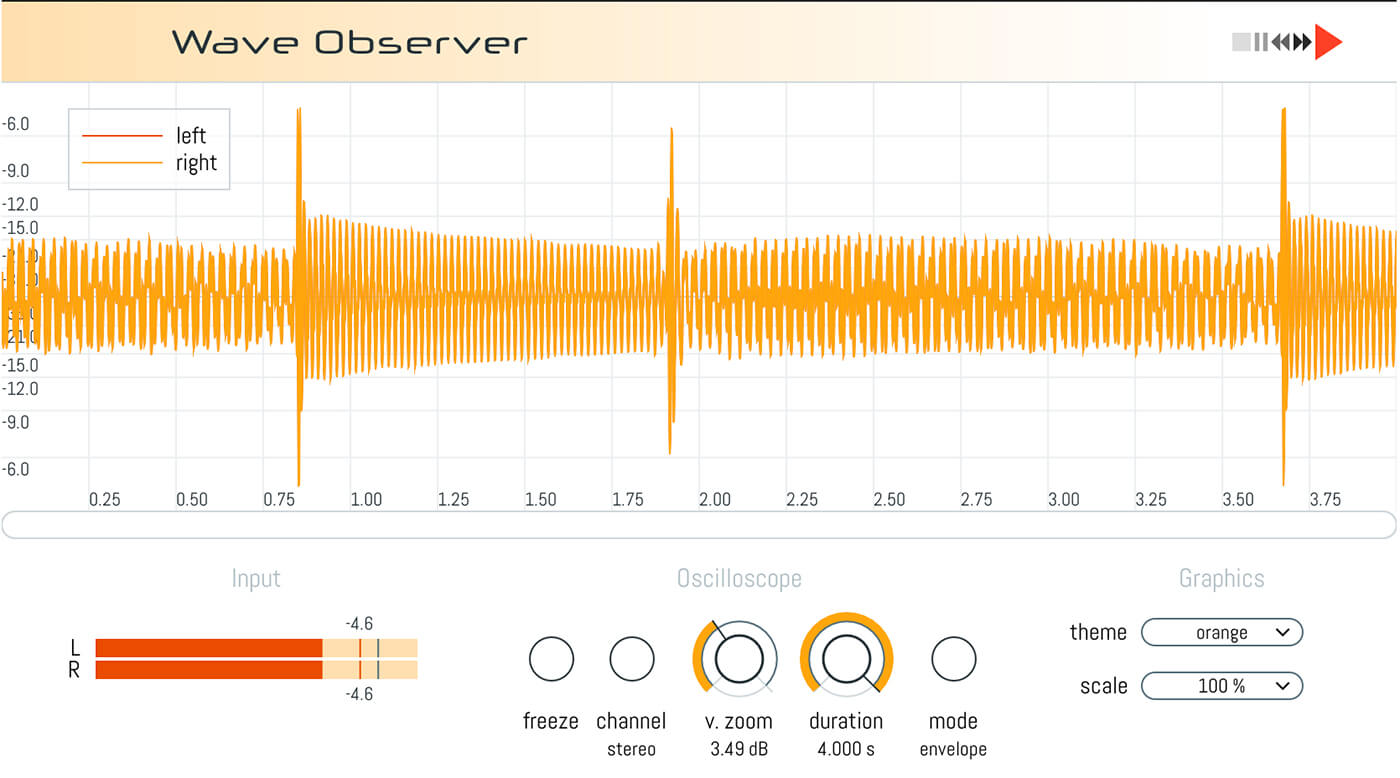
Wave Observer is a new free oscilloscope and monitoring plug-in that visualises incoming audio and features two observer modes. The Waveform mode is ideal for synth-based sound design and has a stabilisation algorithm that fixes a single waveform to the screen. However, we’re more interested in the Envelope mode for this workshop, which offers long sweep times and is well suited to analysing the shape of envelopes and dynamics.
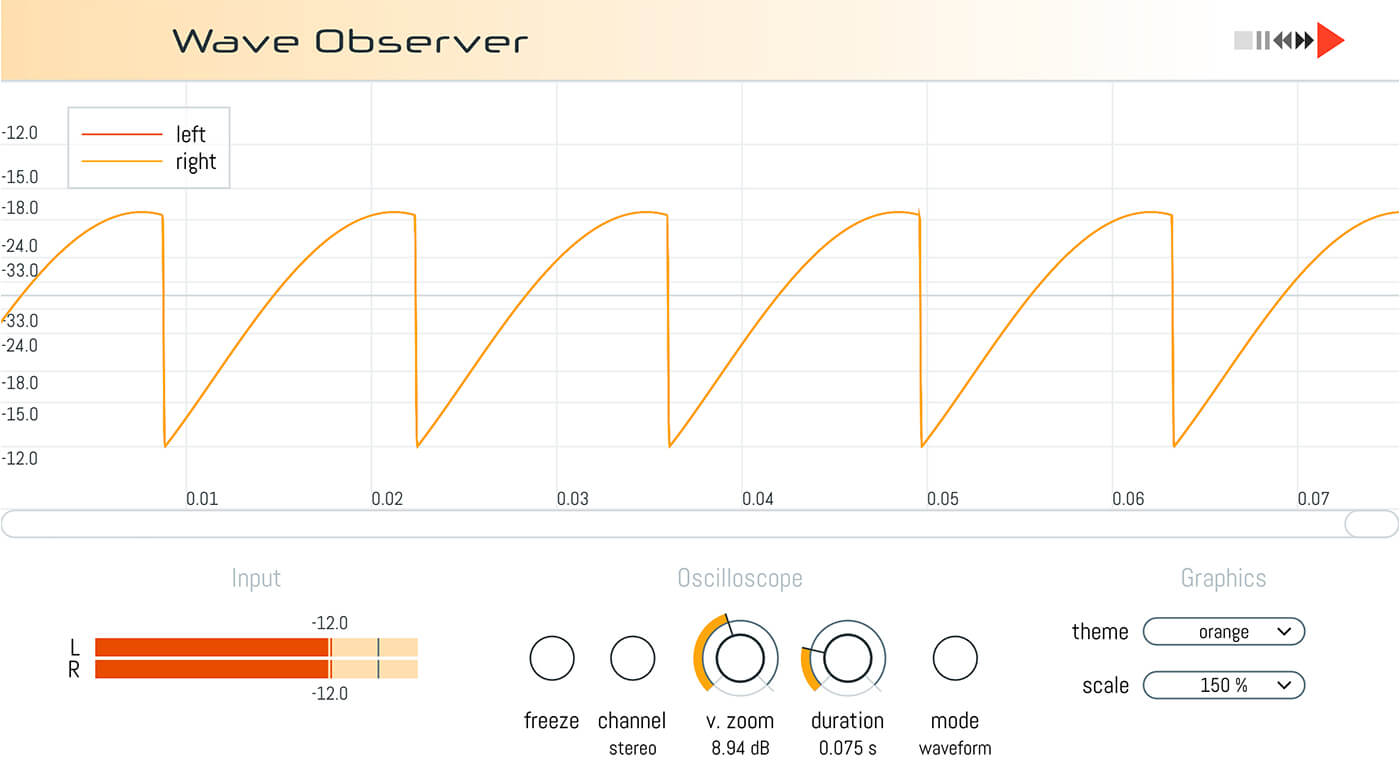
On top of that, Wave Observer lets you view the left, right or stereo input, freeze the screen for closer inspection, and zoom vertically and horizontally to get the best view of the waveform. The GUI is also scalable, with four colour options on offer and sports a built-in peak meter.
We’re going to be using this useful visual tool to help with a range of mixing tasks.
What you’ll need:
- A DAW
- A selection of audio loops/tracks
- Press Play Wave Observer, available here.
1. Fattening a beat using distortion/saturation
Distortion and saturation are underappreciated alternatives to compression for controlling dynamics. Dialling in just the right amount can thicken a sound and tame peaks without some of the time and volume-based manipulation you get with a compressor. However, distortion plug-ins aren’t generally known for their visual feedback, so this is a great place to start using Wave Observer.
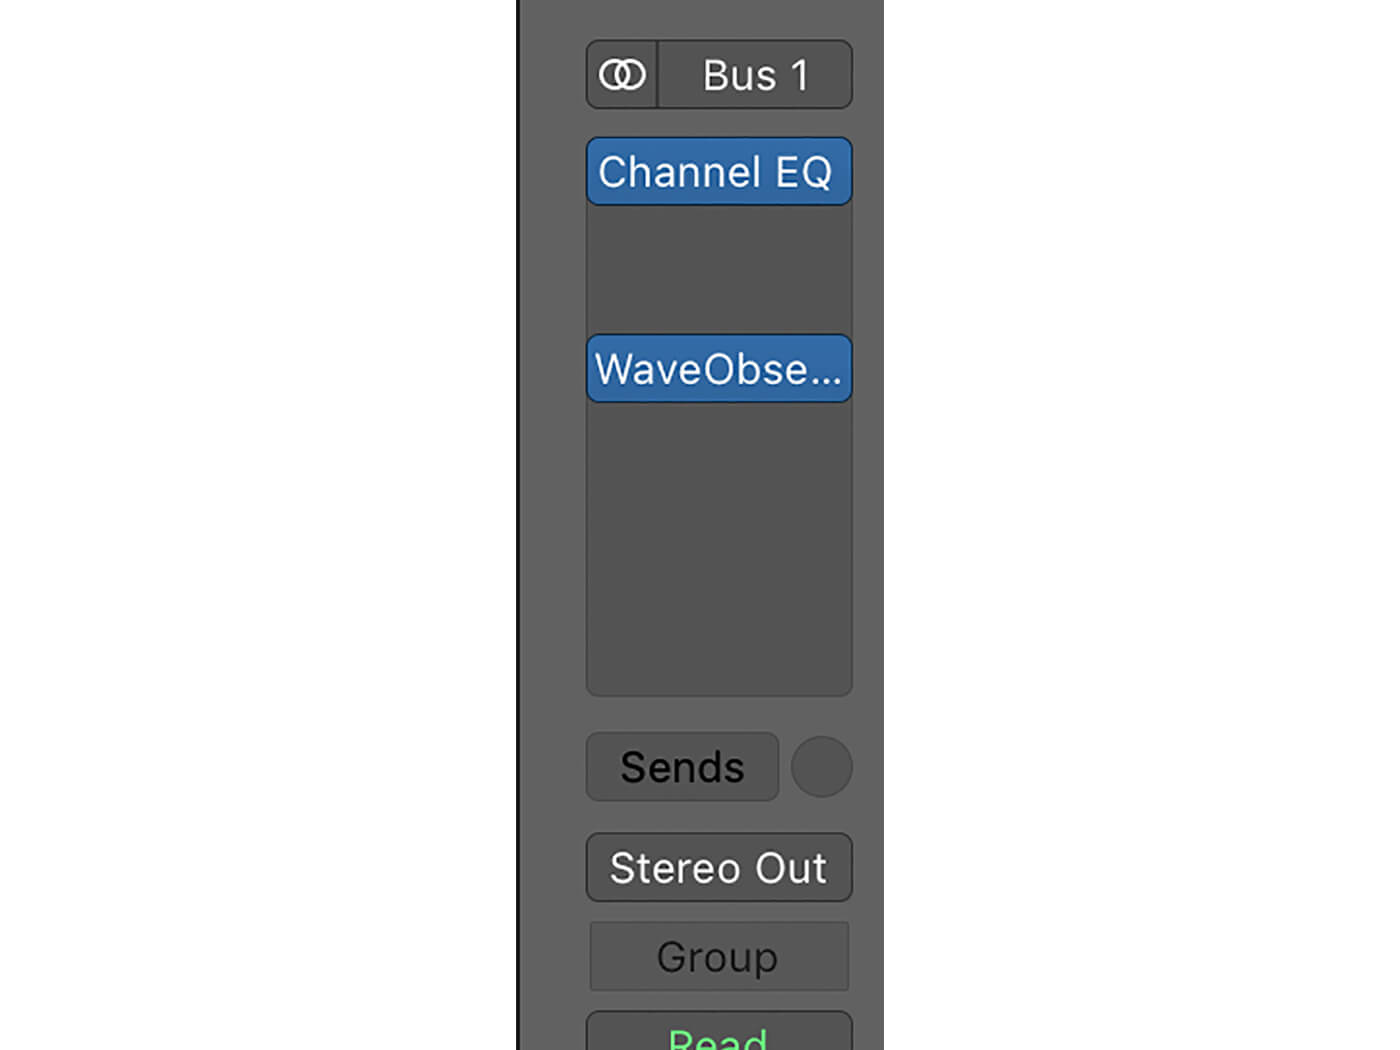
We’re going to process a drum bus, but you can use any transient heavy material like a drum loop or percussive instrument part. First, place Wave Observer as the final plug-in on the channel.
Next, increase the duration parameter to four seconds and set the vertical zoom so that the waveform fills the display. We can now see the stereo output of the drum bus. This is another bonus of a plug-in like this, as it allows us to visualise the summed waveform of multiple tracks, so you can get a better idea of how transients look when they’re stacked together.
Now try adding a simple saturation or distortion plug-in. We’re using Logic’s simple but effective Overdrive. Turn up the tone, so the sound is not filtered, then volume-match the output, so it sounds like the same volume when bypassed and engaged. This is essential as it allows us to see (and hear) how the plug-in is affecting the audio without being biased by volume. It will also help us to see how much headroom we’ve gained by taming the peaks.
As a general rule with Logic’s stock Distortion plug-in, start with the output at -3dB and the drive at 0dB, and pull down the output 1dB for every 1dB of drive added. The plug-in does have a level compensation button, but it’s quite frankly useless.
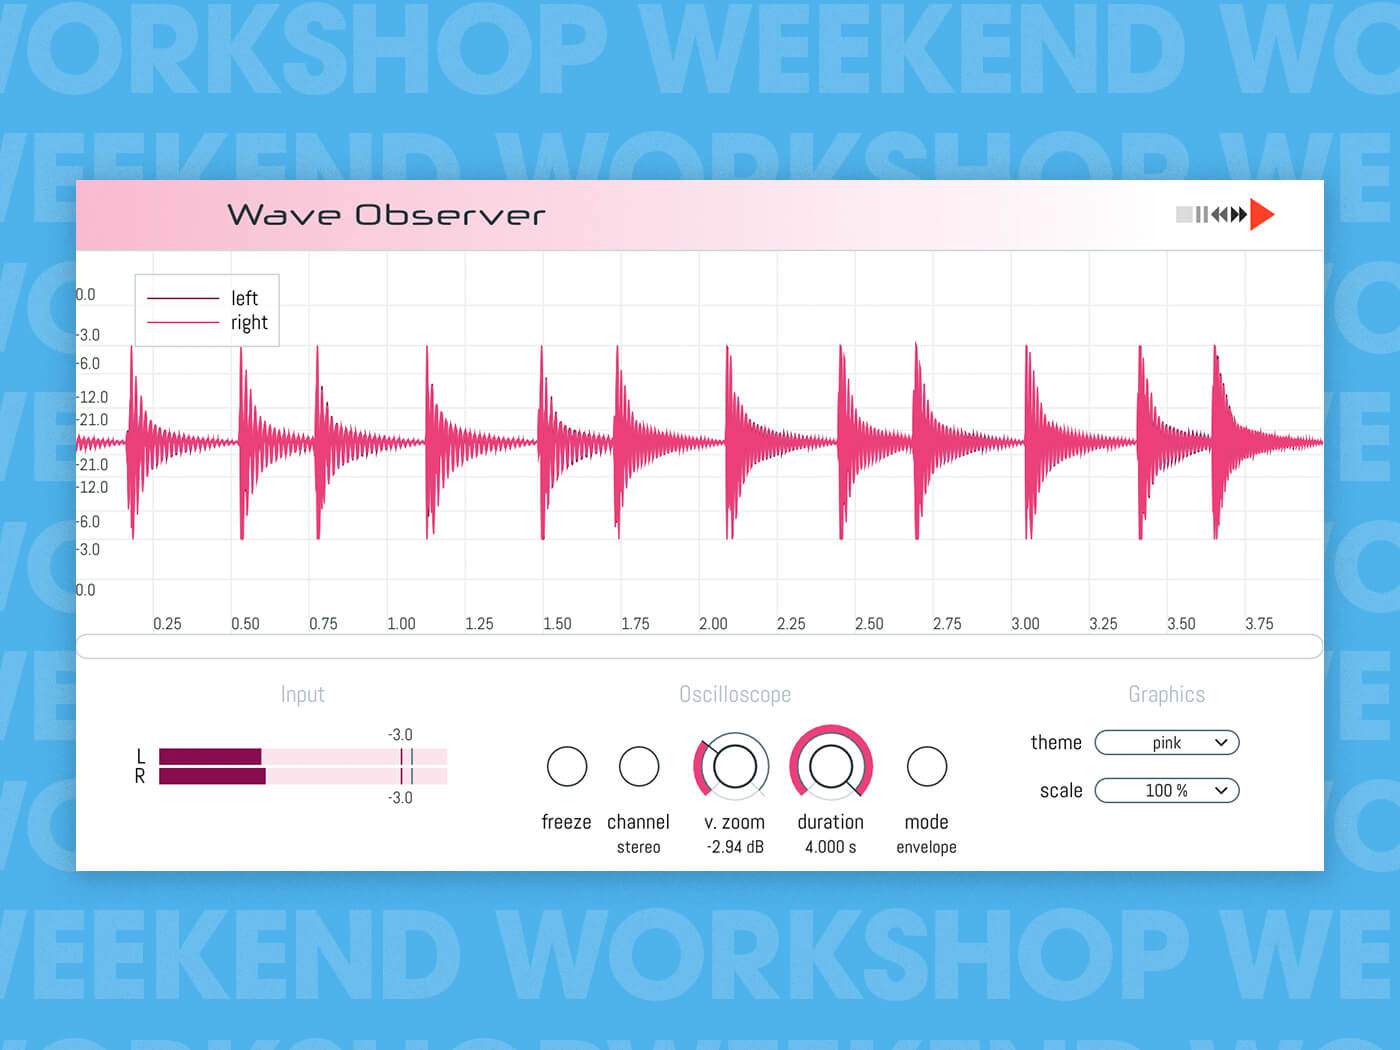
Let’s start by over-cooking the distortion with 20dB of drive to see its effect on the waveform.
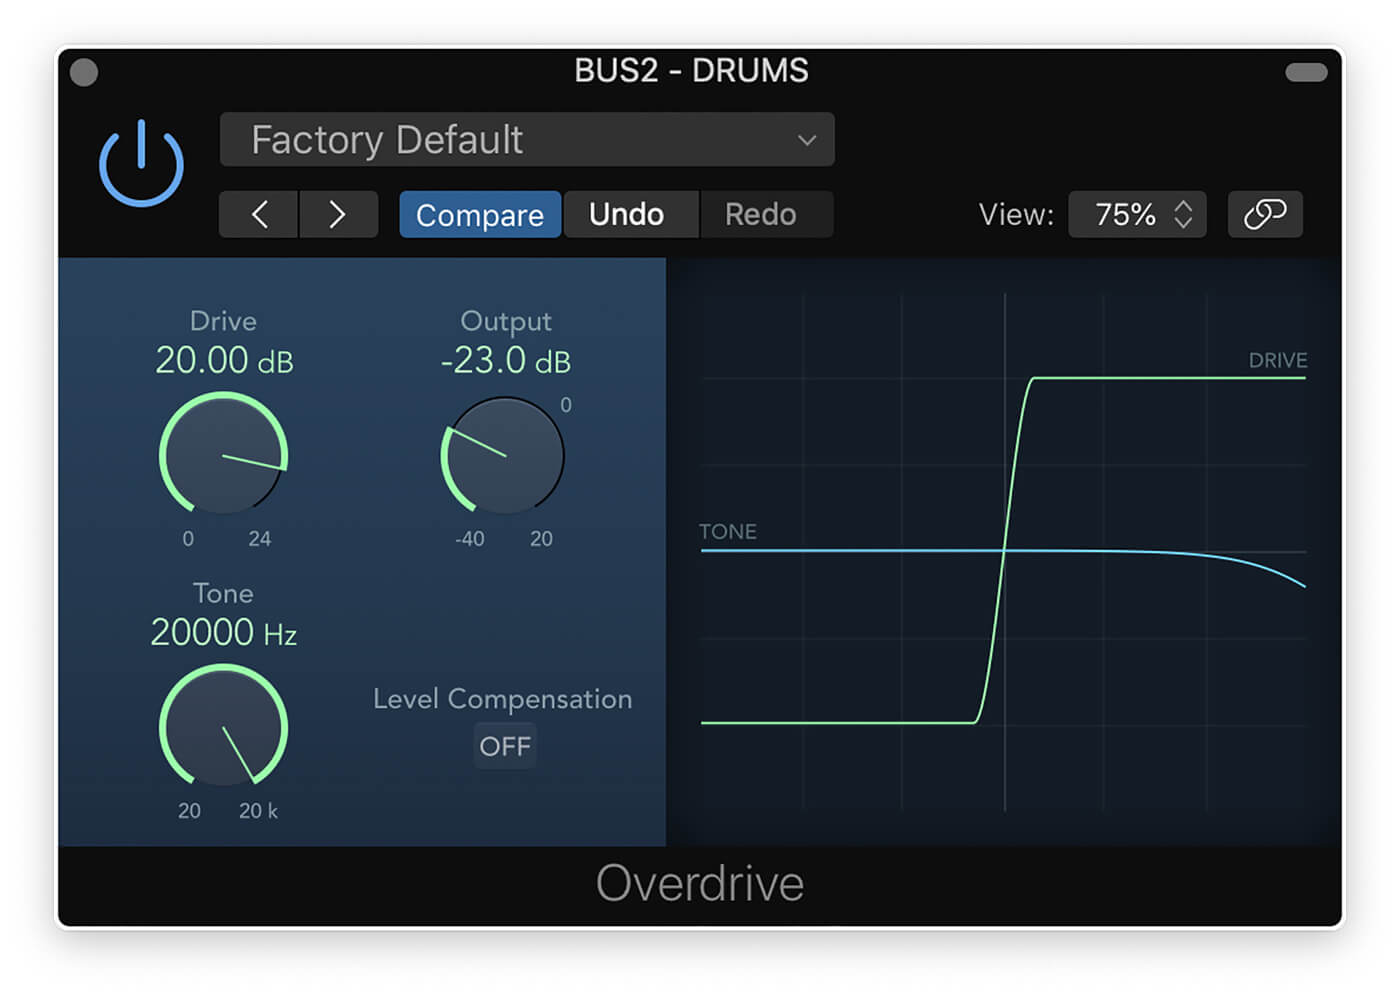
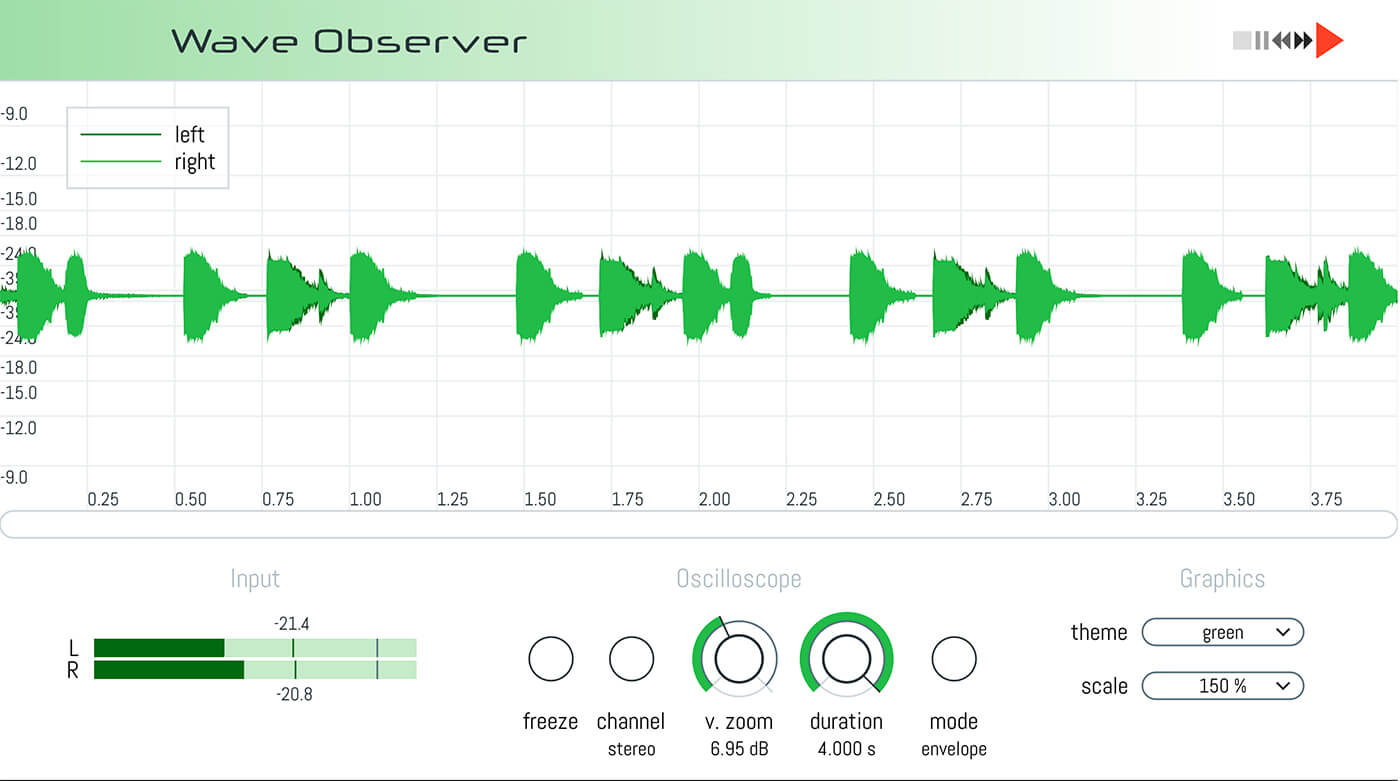
Here you can see that the distortion has squashed the transients dramatically, and the result is a crunchier beat with less punch and definition. However, a look at Wave Observer’s peak meter reveals we’ve gained a massive 11dB of headroom. This allows us to turn the drums up much louder without causing as many issues at the mastering stage.
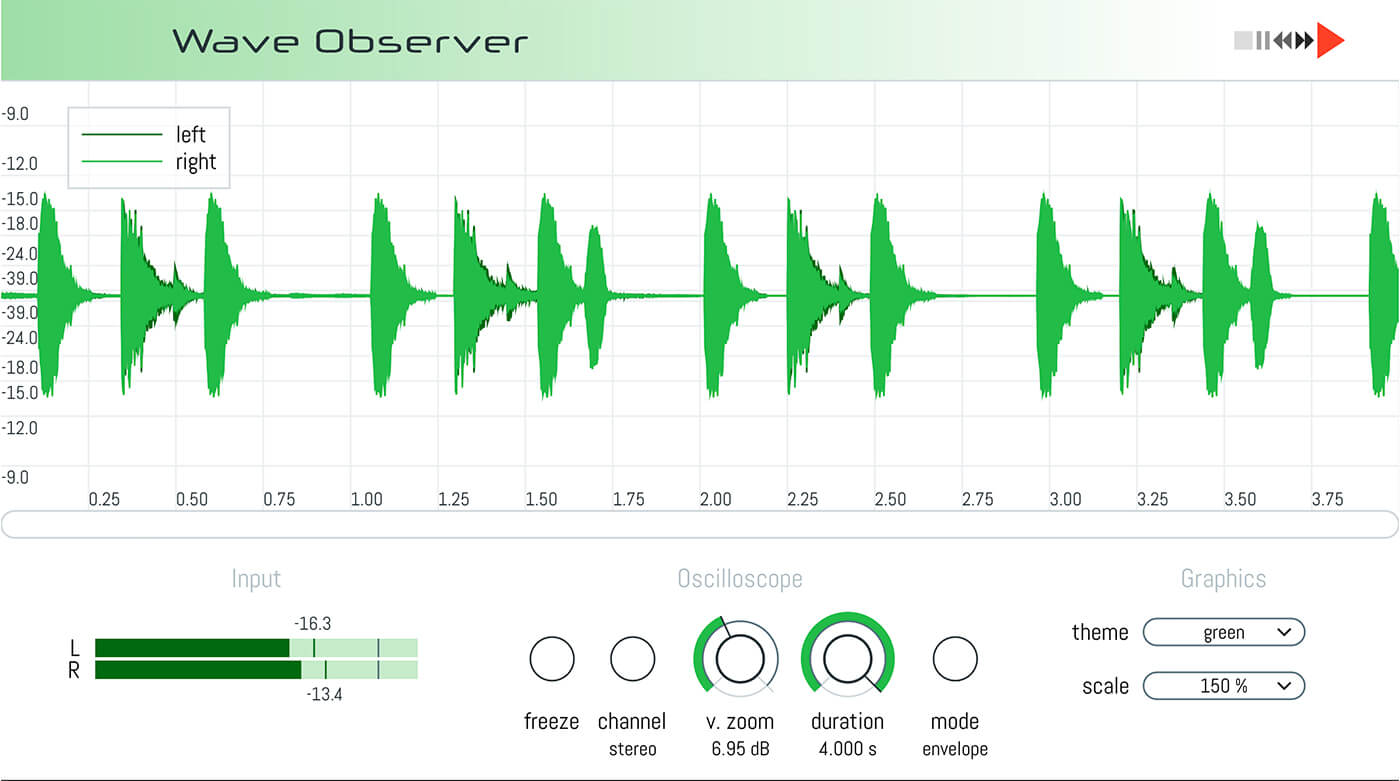
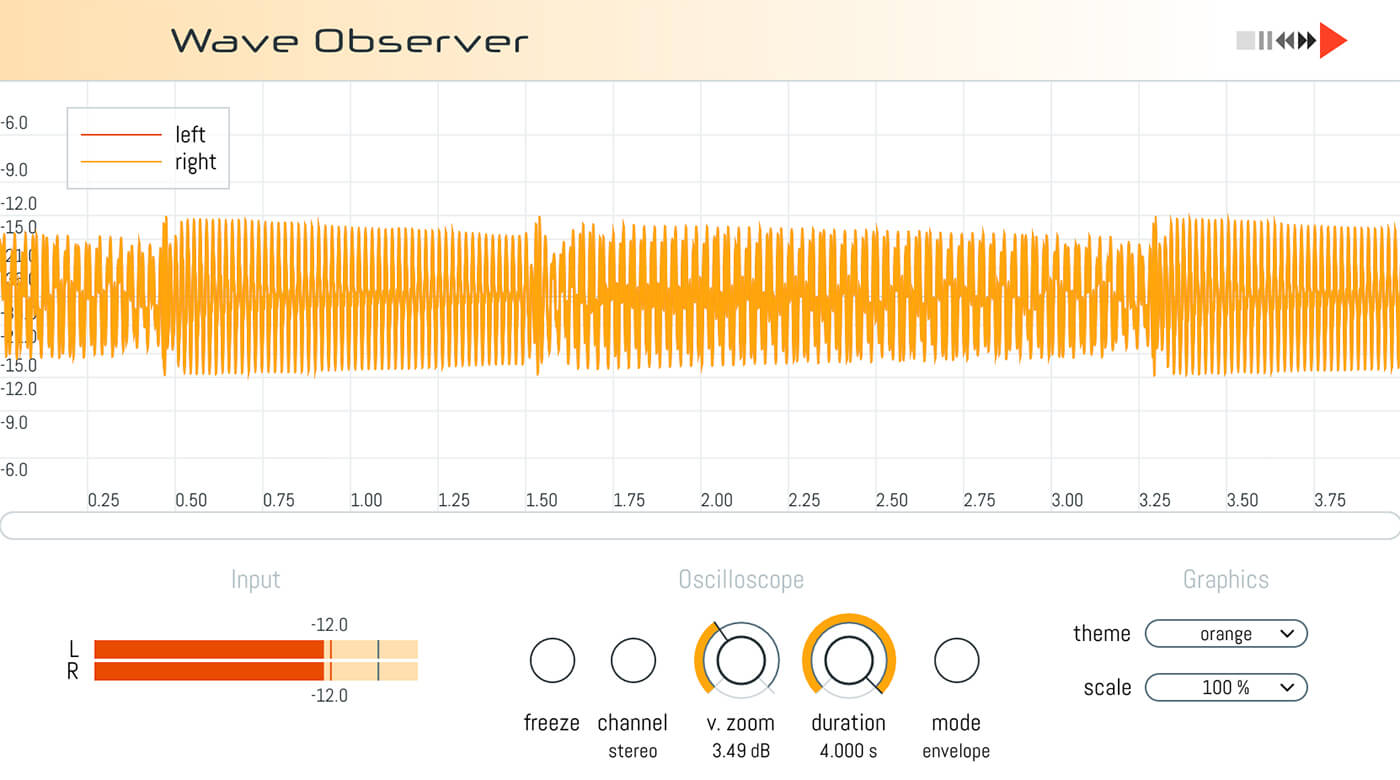
The trick now is finding the optimum value where we’re gaining headroom without damaging the drum part’s punch too much. For this example, with around 11dB of drive, we can see that the extreme peaks are lower, and the variations have become more consistent. Sonically, the drums still have some punch to them, but we’ve gained around 4dB of headroom.
You can use this technique on multiple parts to claw back some headroom for your final master. Different distortion and saturation plug-ins will give slightly different results. Tube and tape saturation are perfect for this type of processing.
2. Using clipping to tame short volume spikes
To rein in shorter transient bursts transparently, you can use clipping. Like saturation, clipping is a great way to shave off unwanted peaks without resorting to using compression and limiting, which can sometimes let very short transients through if the processor isn’t capable of reacting fast enough.
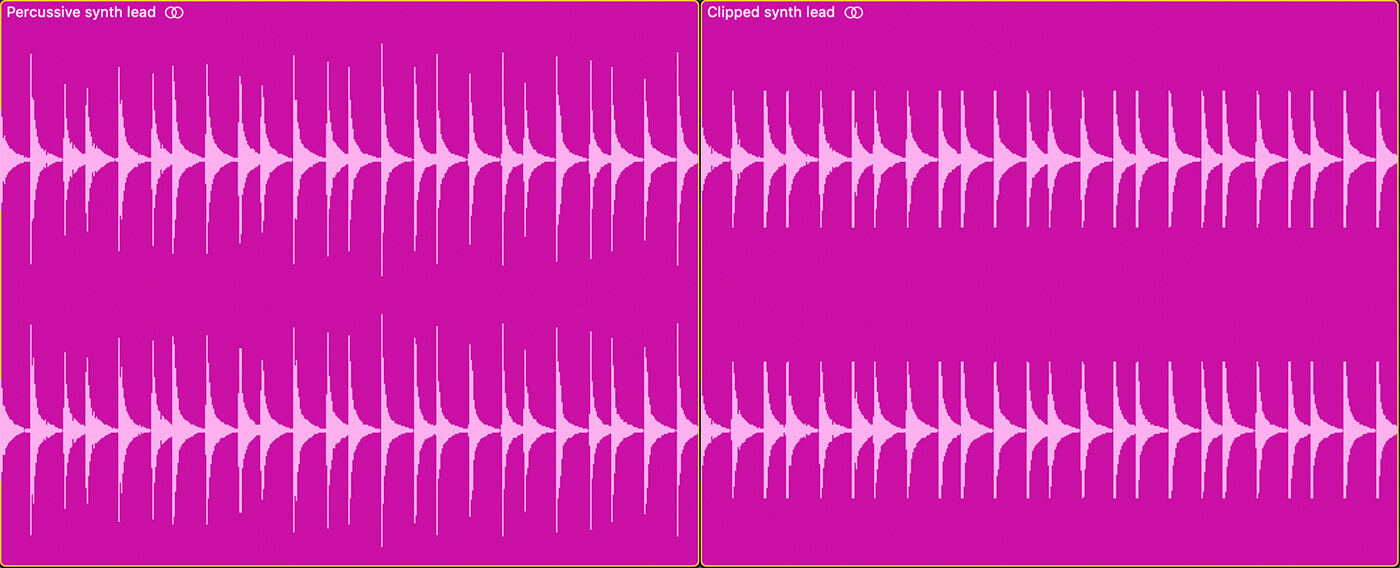
Here we have a very percussive lead synth part, with excessive transient spikes that could cause trouble down the line.
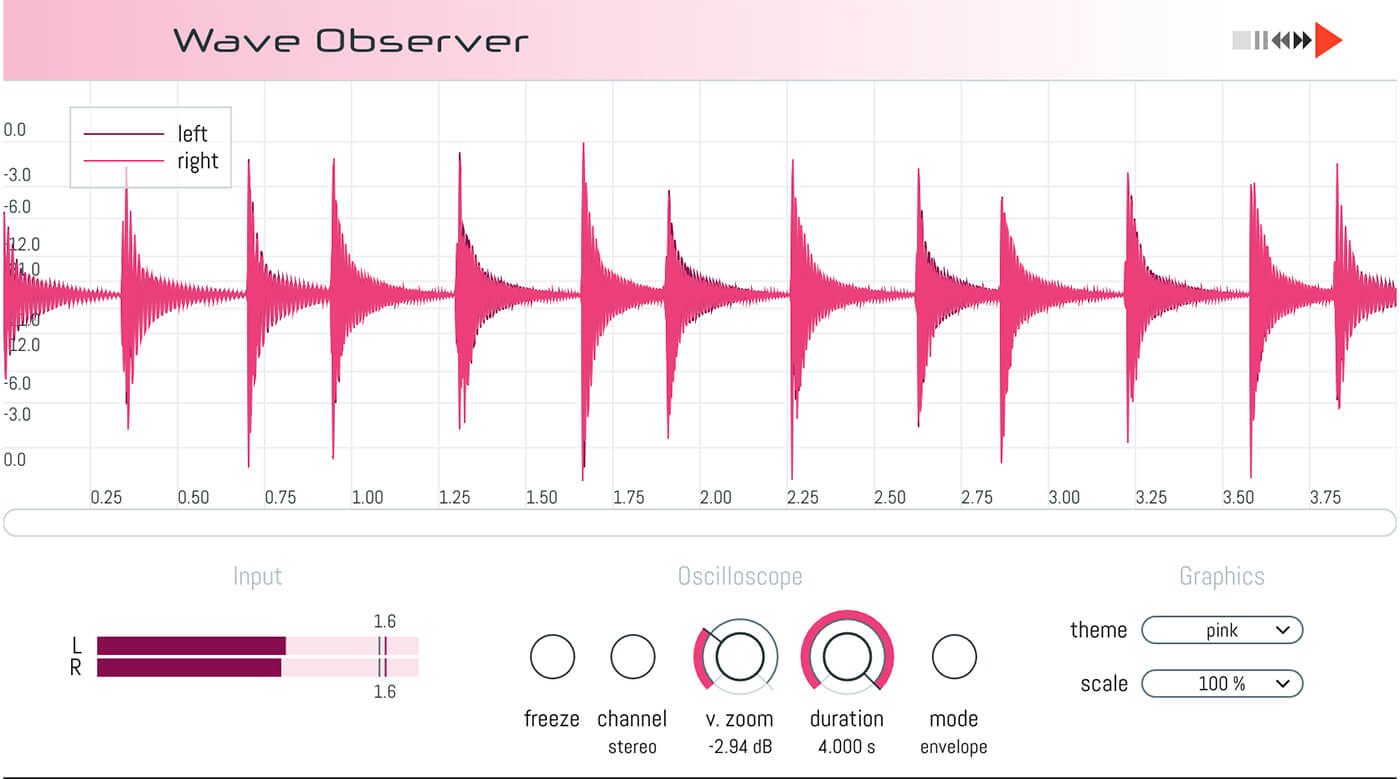
We’re going to use the clipper in Logic’s Bitcrusher to help reduce the peaks, but any clipping plug-in that allows you to lower the ceiling threshold will do. Once opened, you’ll need to edit the default preset by turning down the drive to 0dB, and upping the resolution to 24-bit. This resets the plug-in, so it’s letting the audio through cleanly.
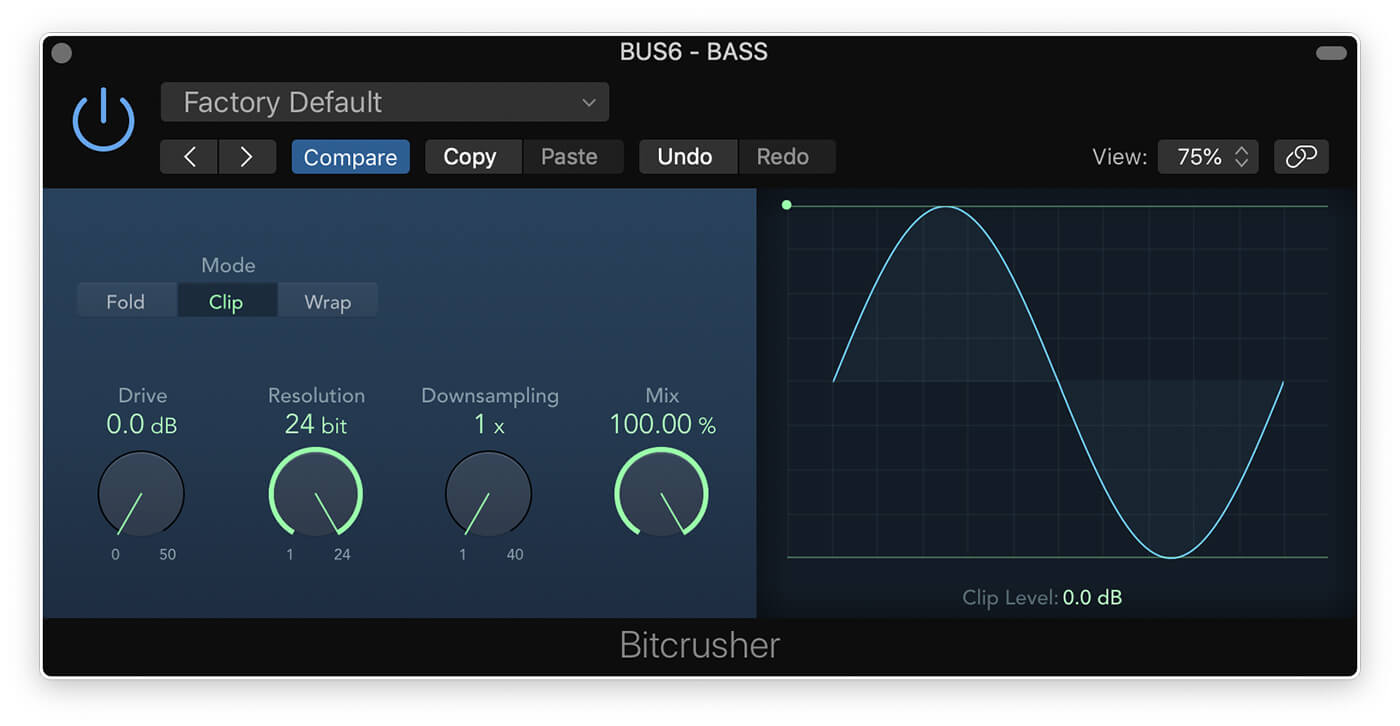
We can then slowly pull down the green Clip Level line on the right until we see the sharp peaks disappearing from the Wave Observer window.
As before, if you go too far, then you’ll start to hear the audio break up and distort, so the sweet spot is where it’s practically transparent. With this in mind, hopefully, you won’t be able to hear much of a difference in the audio file, but we’ve gained an additional 5dB of headroom.
Your ears are the best tool here, but having a visual aid can help you make quick adjustments. Here are the two waveforms side by side.
3. Extending bass note sustain using compression
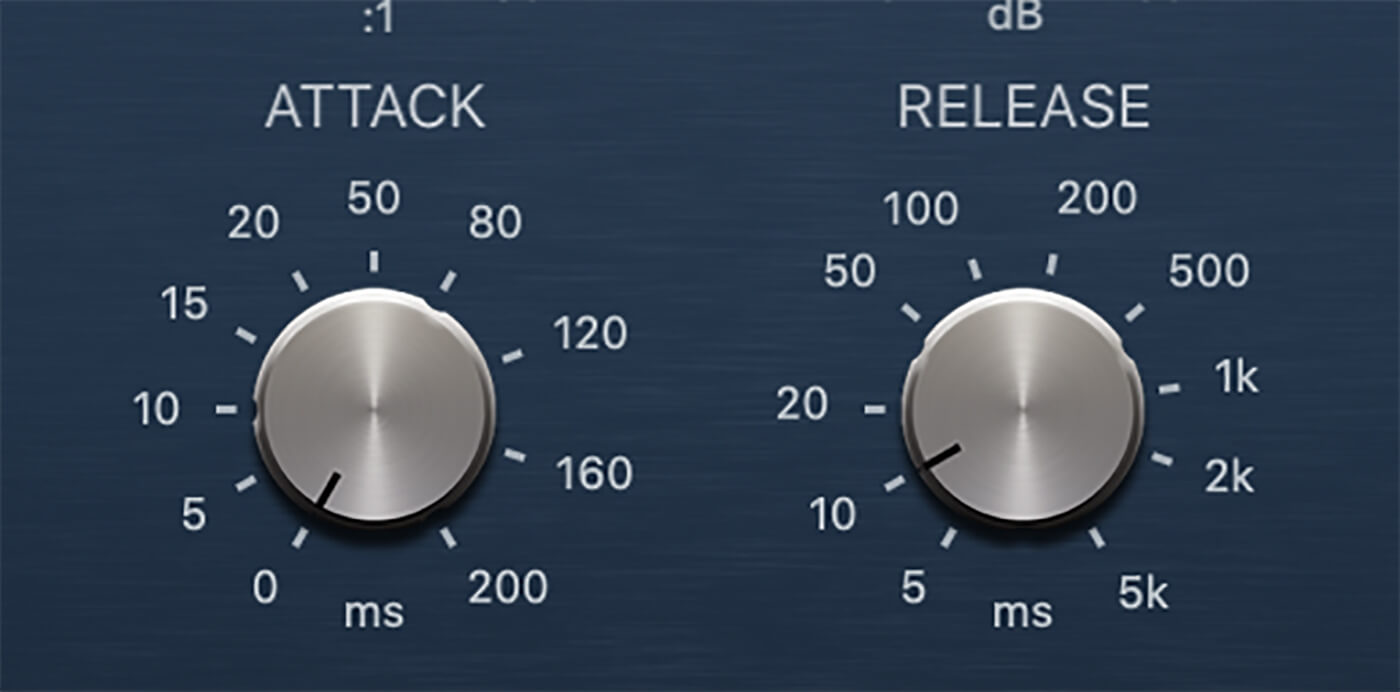
Getting to grips with compression is one of the hardest tasks for any producer. Visual aids can be beneficial because they help our brains make sense of what they’re hearing, and then hone in on it. This is particularly true for setting attack and release times on a compressor.
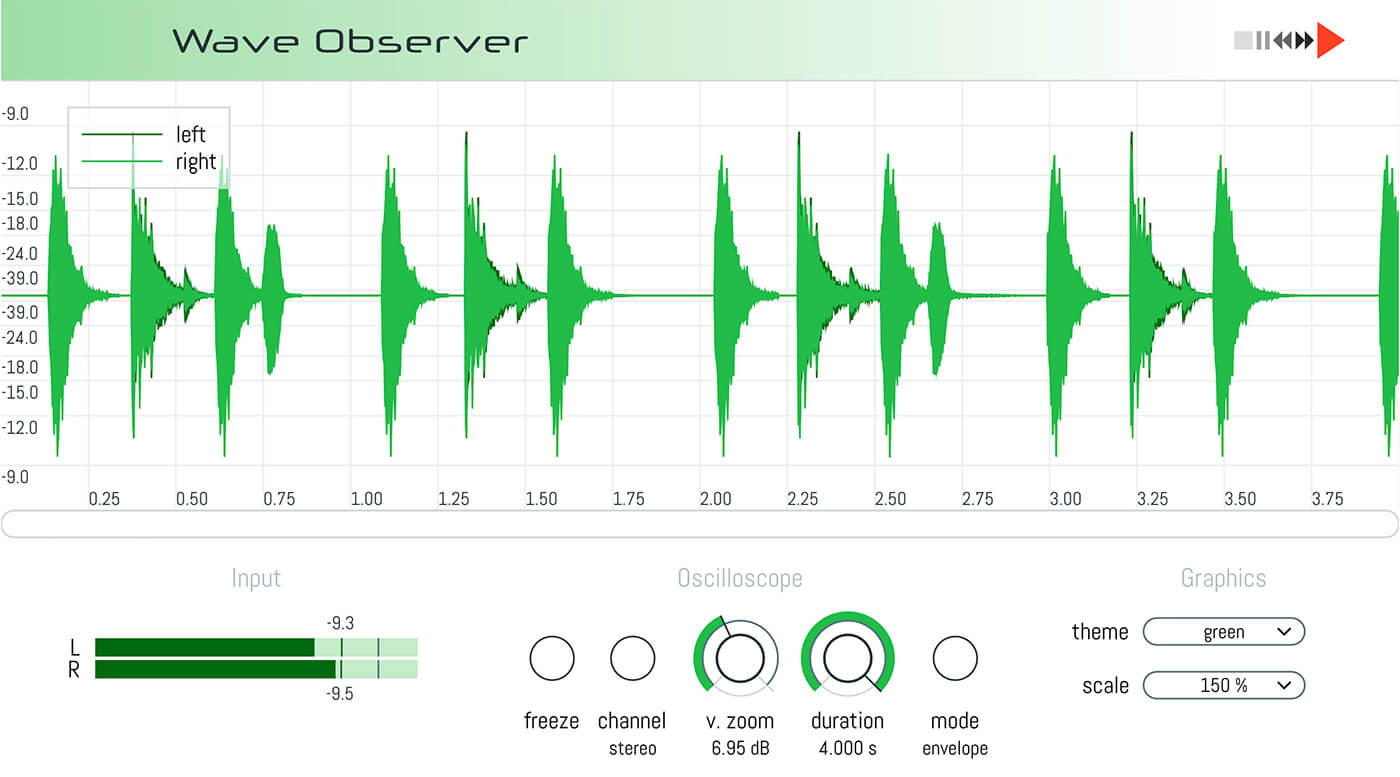
Here we have a saturated 808 style bass part with a hard, pronounced attack that slowly fades away.
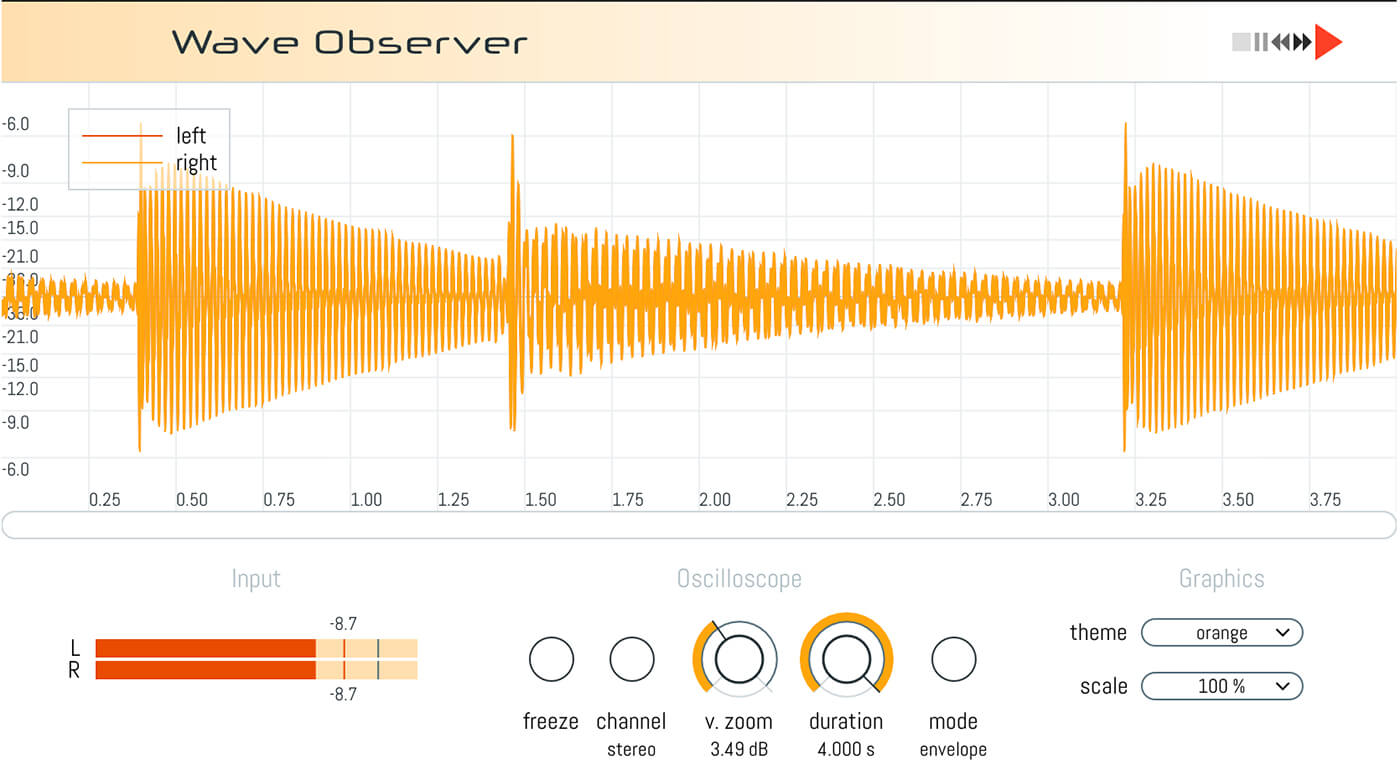
Let’s say we want to make the tail sustain a little louder and flatten the overall dynamics. We can use a compressor with some visual feedback such as the one built into Logic to help dial in some settings. The gain reduction graph shows a good shape for the compressor’s recovery, and the tail is certainly a little thicker.
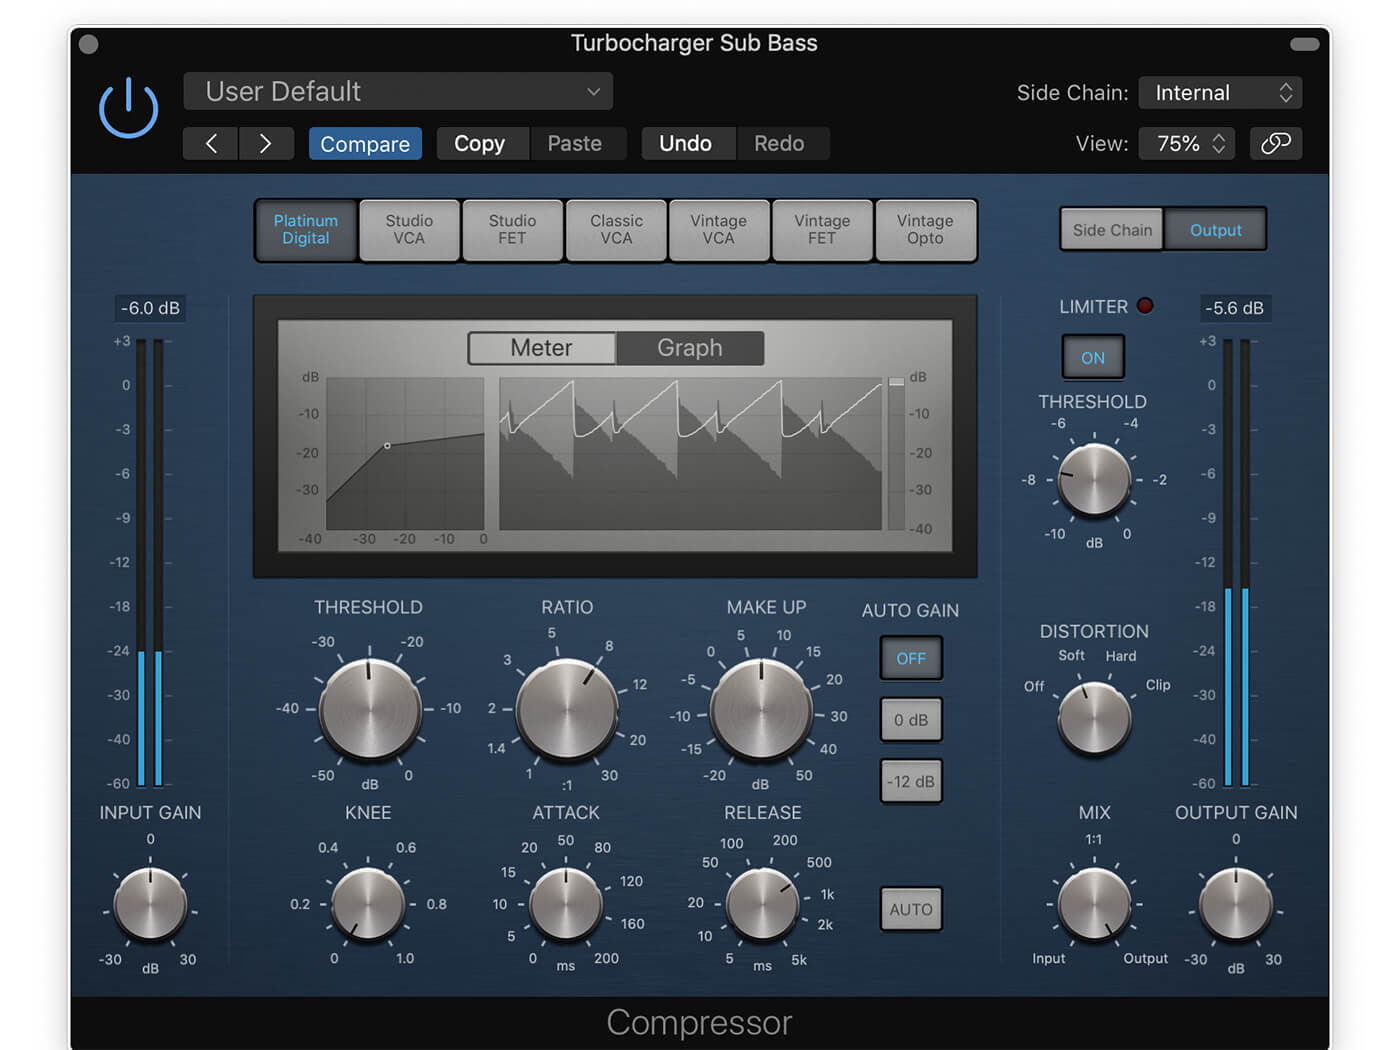
However, the settings for the attack and release could be better. By looking at the Wave Observer window, we can see that the initial transient hit is too strong and the recovery on the second hit dips a little before evening out.
To help fix this, we can make the attack much faster so that it catches the transient, and we can also make the release faster so that the volume recovers quicker. We now have a bass with much flatter and more consistent dynamics across the two notes.
We might have gone a bit too far, here. The bass is now sounding too flat and has lost some punch. Thankfully, Logic’s compressor has a mix dial that lets you do parallel compression; a 50% mix gives us the right blend of the two.
4. Other tools to try
Visual feedback in plug-ins is continually improving as processors become more capable of rendering high fidelity, real-time graphs. Companies like FabFilter and iZotope are well known for their excellent GUIs with clear and precise visuals. You might already have plug-ins that show waveforms in this way, in which case you could potentially use them purely for their metering whilst adjusting other effects earlier in the chain.
If you don’t have an oscilloscope or plug-in with a waveform visual, Wave Observer is an excellent free way to add this to your toolbox. A special mention should also go to s(M)exoscope by Bram@smartelectronics, which is another free, free oscilloscope plug-in available at armandomontanez.com.
The idea is to use these techniques to get results faster, hone your focus, and increase your understanding of how each process is altering your sound. Then over time, you’ll no longer need them because you’ll know what to listen for.
So grab a copy of Wave Observer, load up your favourite saturator, clipper and compressor, and see if you can gain a deeper understanding of what it can do.
Happy metering!
Share your before and after audio and tell us what tutorials you’d like to see in the MusicTech Creator Community on Facebook.
Check out more Weekend Workshops here.