What’s New in Pro Tools 2018
Avid’s decision to provide smaller updates to Pro Tools – but more regularly – means it’s time for Mike Hillier to give us a run down of the software’s latest and greatest enhancements Avid’s policy of regular and smaller upgrades to Pro Tools, rather than large annual upgrades, has certainly been paying off. Where previously […]
Avid’s decision to provide smaller updates to Pro Tools – but more regularly – means it’s time for Mike Hillier to give us a run down of the software’s latest and greatest enhancements
Avid’s policy of regular and smaller upgrades to Pro Tools, rather than large annual upgrades, has certainly been paying off. Where previously we would have to wait a full year or more to see which of the most popular new feature requests had made it to the latest version, we’re now being given regular updates.
This gives Avid the ability to focus on the details that really do improve the Pro Tools workflow for users, rather than having to invest time in one or two big ticket items that the company can flag up in press releases and reviews.
The flip side of this is that many of these new features go unnoticed by many users, so in this workshop we’re going to take a look at the features added to the latest version of Pro Tools 2018.7.
What are you looking for?
Many of us now have huge numbers of plug-ins, and within the Dynamics or EQ folders there are often pages and pages of plug-ins to scroll through to find the one you want. We can’t count the hours we’ve lost over the years looking for one specific plug-in that for some reason or other wasn’t where we expected.
Similarly, on larger projects, it can sometimes be difficult to find the right buss to send a track to. To speed up this process, Pro Tools 2018.7 has incorporated a search function into the plug-in and buss menus.
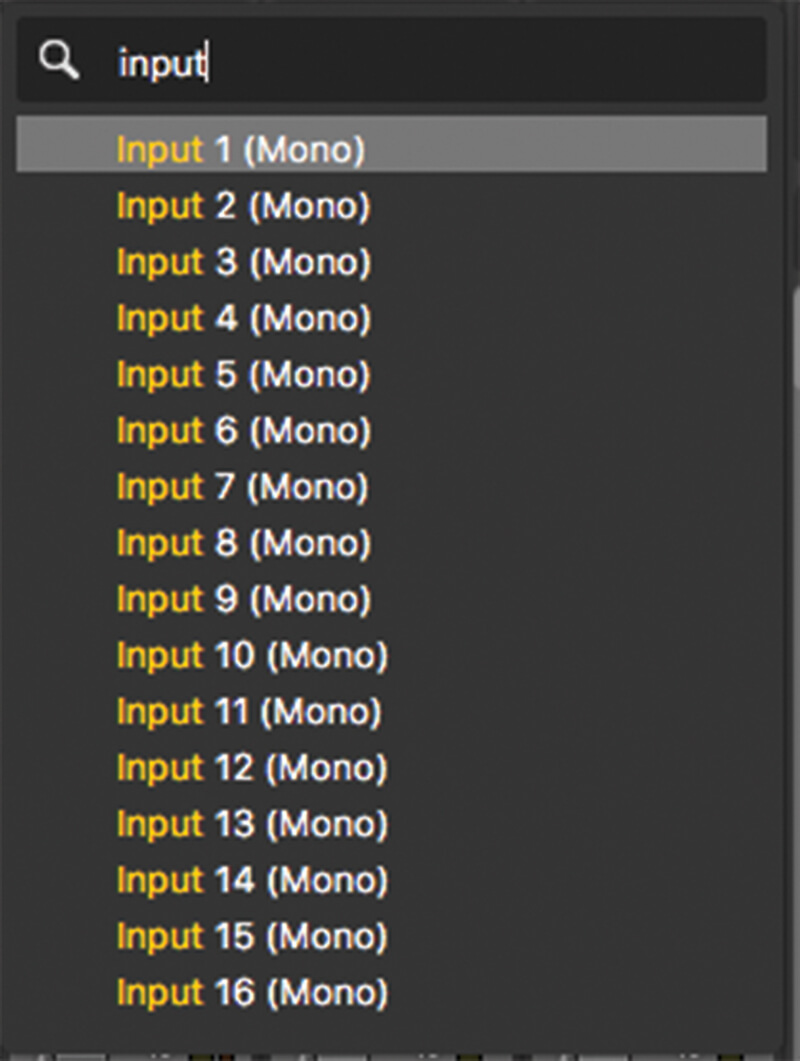
Click on a plug-in slot, Input, Output or Send and start typing and Pro Tools will instantly show the appropriate options, including not only plug-ins and busses, but also any saved preset plug-in chains.
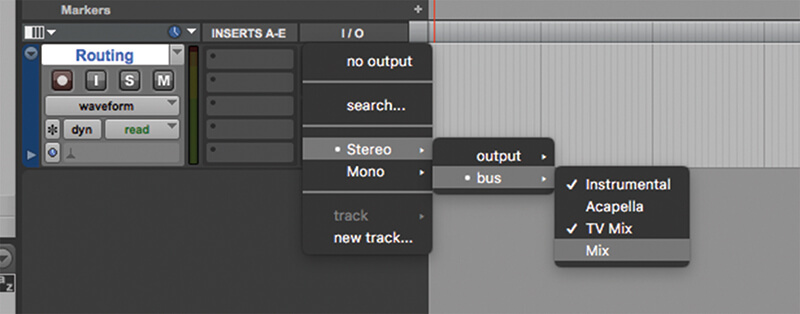
With Sends and Outputs you can route to multiple locations at once, creating, for example, outputs to multiple different mix busses for running Instrumentals, Acapellas, TV Mixes and the Main mix all at once. You can search for multiple routings by clicking [TAB] from the search menu.
You can also route to multiple outputs or busses by holding Start (with Windows) or Ctrl (on a Mac) while clicking on options in the Send or Output lists.
Keep in the groove
Relative Grid mode is a powerful, if often under-utilised tool, which lets you edit audio while maintaining the relative grid position. With Absolute Grid mode engaged, moving an audio or MIDI clip will snap the clip to the grid, which has its uses, but aligning everything to the grid can ruin a performance.
A good musician will play in the pocket, perhaps a little ahead or behind the grid. With Relative Grid mode engaged you can edit freely while knowing that if you move the clip it will always maintain its position relative to the grid. This feature has been in Pro Tools for a long time, but has been given a new lease of life in Pro Tools 2018.7, with the ability to now copy and paste clips while retaining relative grid position.
In practice, it works like this. You use Tab to Transient to edit a clip, and the edit comes, say, 20 samples before the grid. If you then copy that clip, move to another grid point and paste the clip, the clip will be pasted 20 samples before the grid point rather than at the grid point. This works for both audio and MIDI clips, and can also be used inside the MIDI editor for copying and pasting MIDI data.
Better latency features
Pro Tools 2018.7 also improves Low-latency Monitoring mode. This mode was designed to allow users to use the low-latency hardware monitoring features on their interfaces while recording in Pro Tools. It would mute any record-enabled channels so you would only hear the low-latency if you routed the input to the output in your interface mixer.
However, this would only work with channels routed to Outputs 1&2, but with this latest update, can now be used with all output channels.
Furthermore, Avid has added a preference to enable Send effects routed from record-enabled channels to persist when low latency monitoring is turned on. With this preference engaged, Pro Tools will continue to mute the channel outputs, but any send effects routed from the record enabled channel will continue to send audio to the appropriate busses, enabling you to hear the direct signal from your interface routing, and the send effects from Pro Tools all at once with no latency issues getting in the way. Avid continues to update Pro Tools ‘little but often’ so we’ll keep you abreast of all the latest updates as they happen.
What’s New in Pro Tools 2018: step-by-step
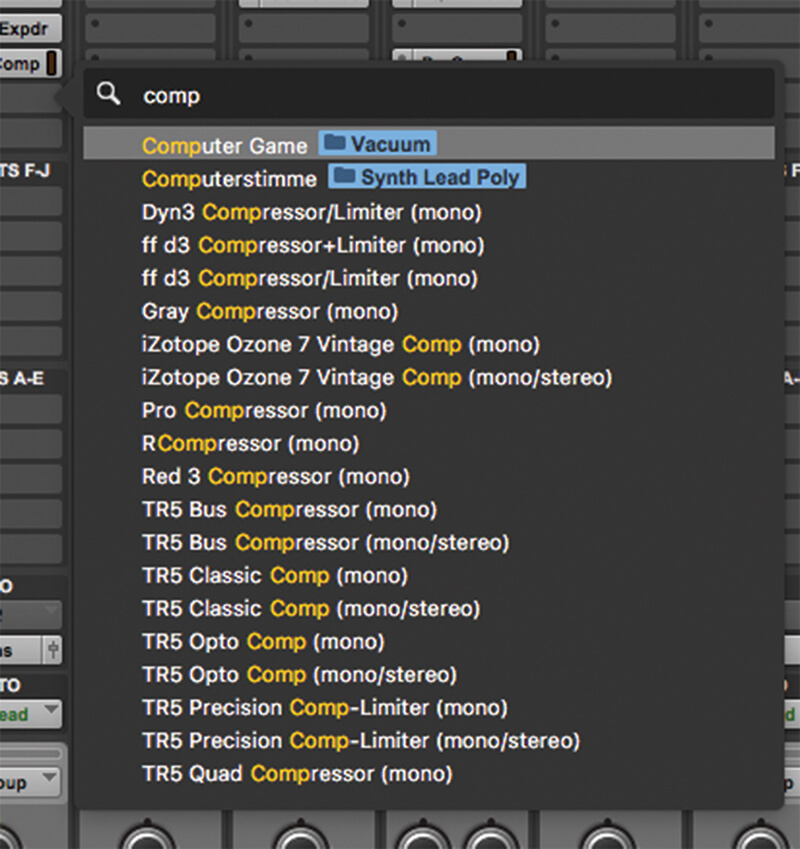
1. With the new search function in the latest Pro Tools, simply click on an empty plug-in slot and start typing. Pro Tools will automatically filter through your plug-ins and presets.
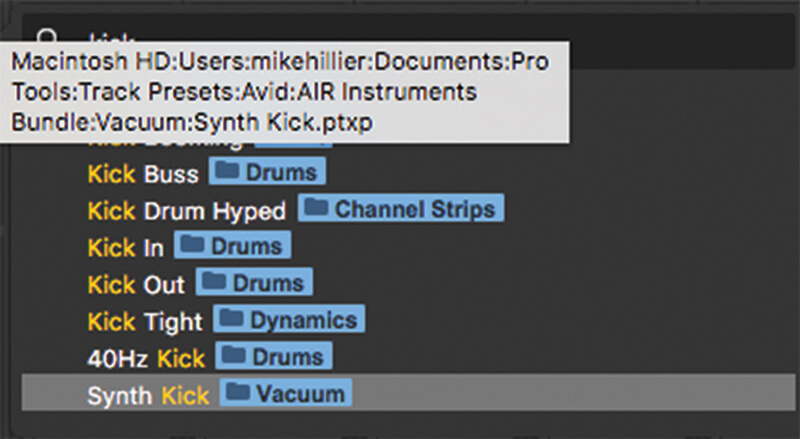
2. From this list you can add a plug-in quickly, or you can search for preset channel strips, which will then load all of the plug-ins and routing saved in the preset.
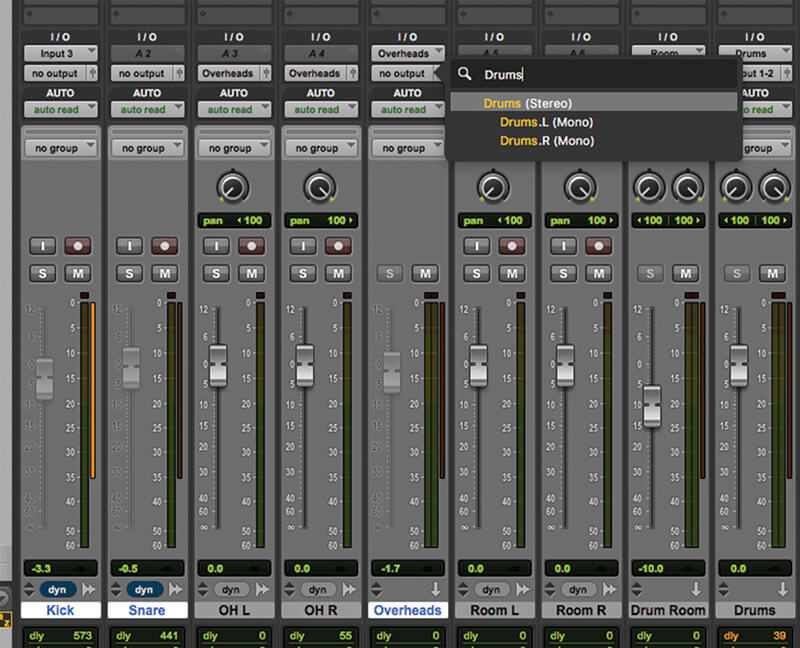
3. Then, simply click on an unassigned Send, Input or Output and you can route directly to any of your physical I/O, or buss I/O routings.
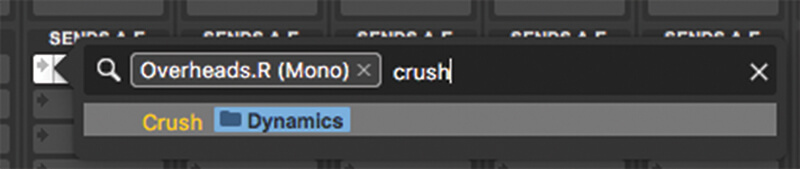
4. When routing Sends or Outputs you can route to multiple locations at once. To do this, press [TAB] after clicking on the Send or Output. This allows you to search for additional routing options.
5. You can also route to multiple Sends or Outputs by holding the Start (on a Windows machine) button or the Ctrl (on a Mac) button when clicking on the Send or Output.
6. These processes can be done to multiple channels at once using the modifier keys Alt (Windows) or Option (Mac) to do to all channels, or Shift+Alt (Windows) or Shift+Option (Mac) to do to selected channels.

Low latency Monitoring mode enables you to use the hardware monitoring in your audio interface to route audio, without also hearing the delayed audio in Pro Tools adding a slapback echo. You can engage Low Latency Monitoring from the Options menu.

7. The Edit Window Toolbar menu will now stay open when you click on it, enabling you to select and deselect as many Toolbar options as you want to see in your window.
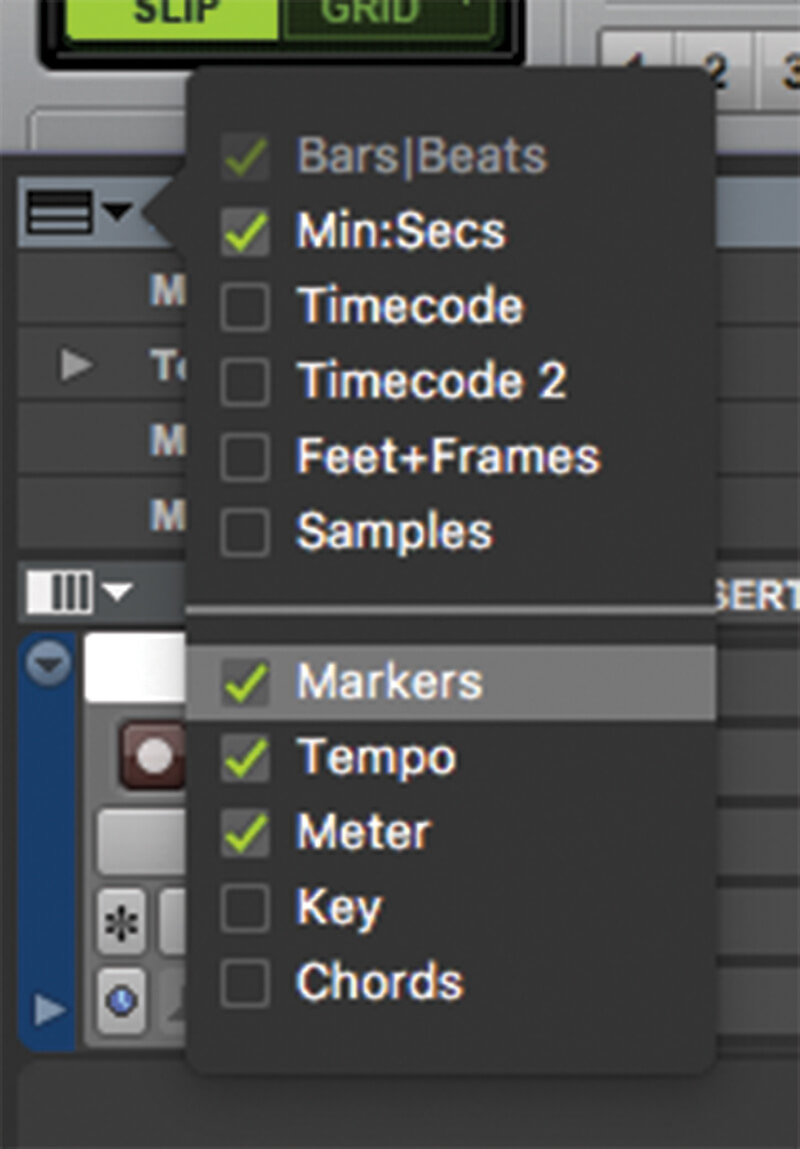
8. Similarly in the Edit Window, the Ruler will now also remain open when you click, again enabling you to select as many Rulers as you want in your window.
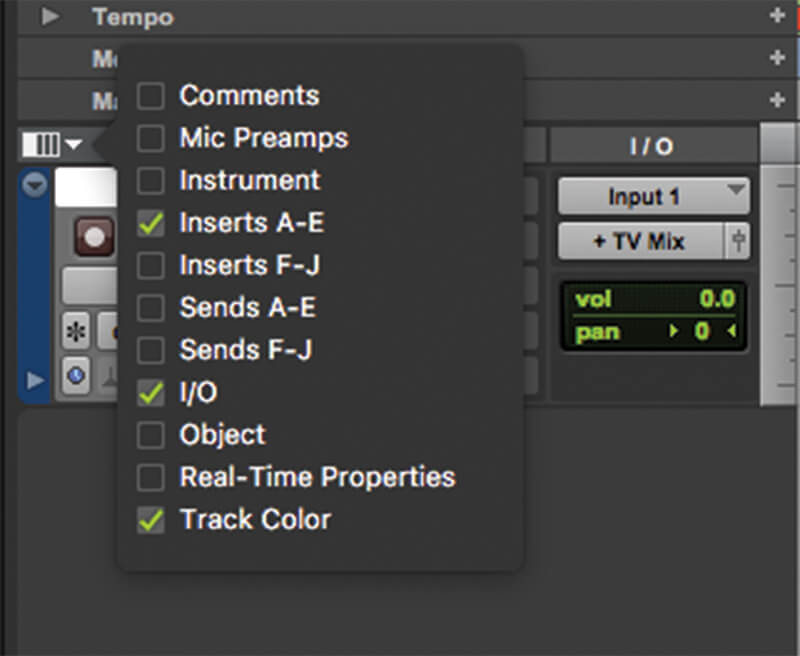
9. Finally on the Edit Window the view selector will also remain open. All three of these Edit Window menus now uses tick boxes and remains open until you click away.
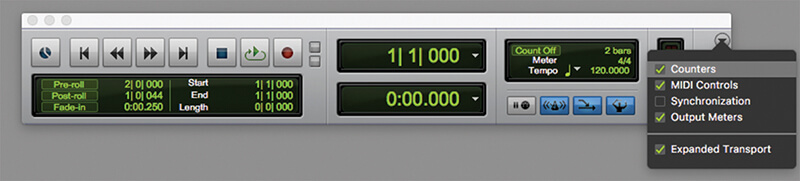
10. The Transport window (opened from Window>Transport, or pressing Ctrl+[1] (Windows) or Cmd+[1] (Mac)) can also be set from a drop-down tick-box menu, which will now also persist when you click on new options.
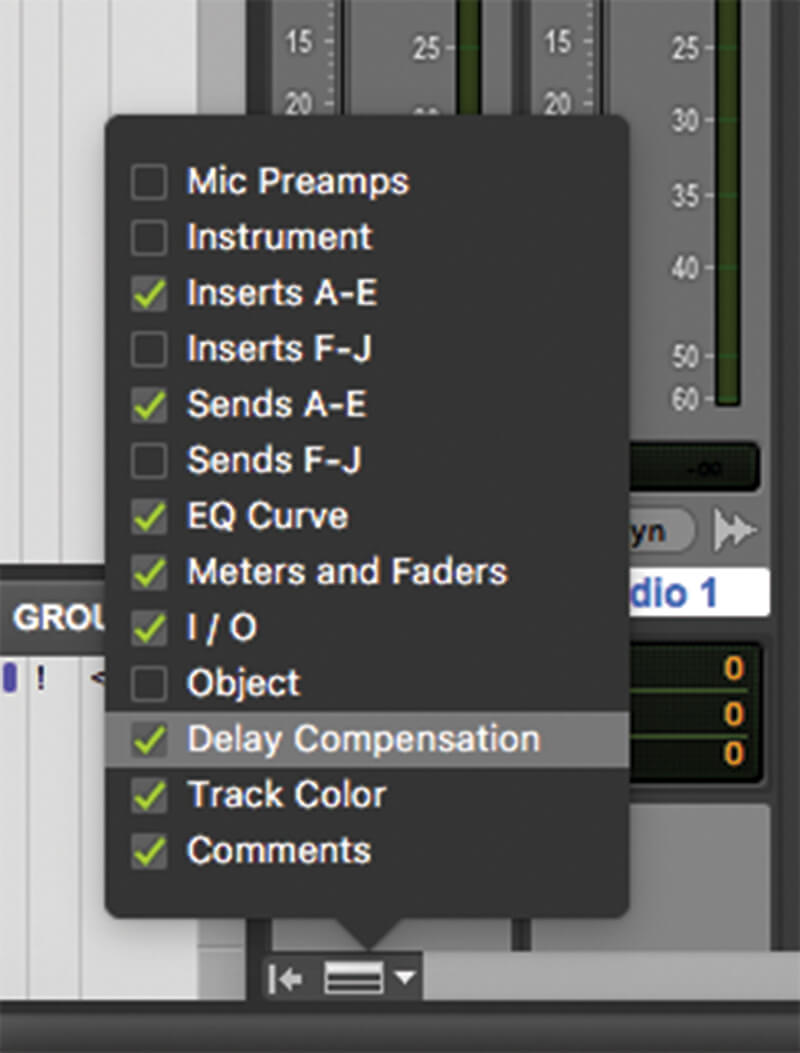
11. You will see that in the Mix window the Mix Window View settings menu now opens in this same manner.
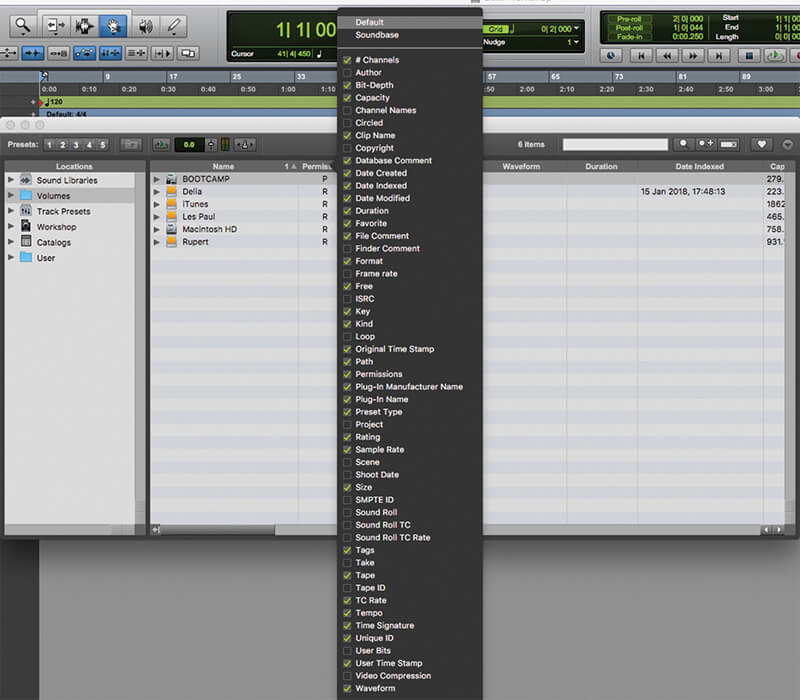
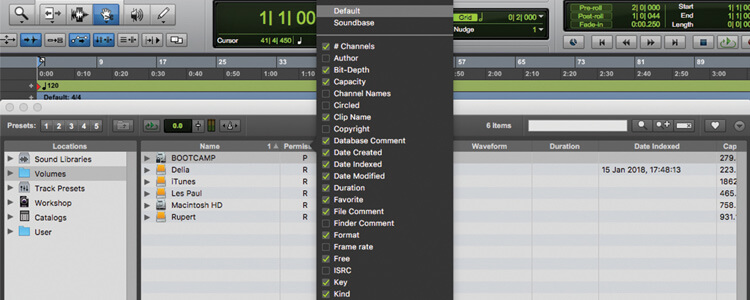
12. The last menu bar to gain persistence in this manner is the Workspace browser Column View setting.
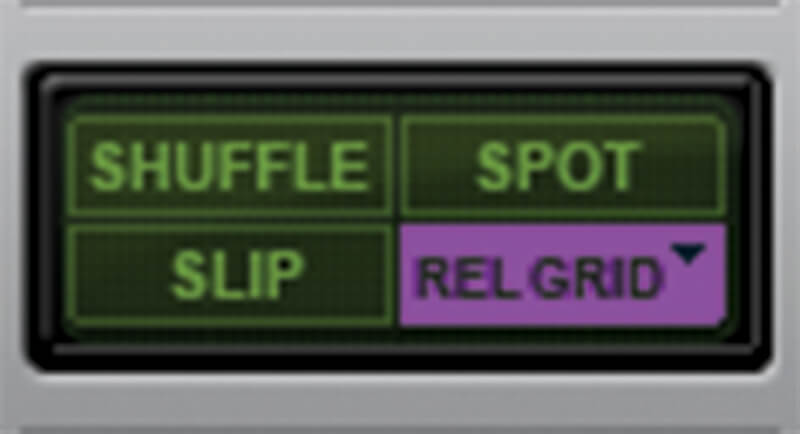
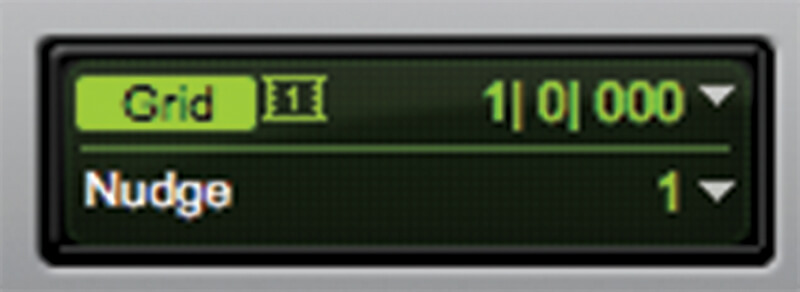
13. You can get to Relative Grid mode by pressing F4 twice or clicking on the Grid Mode button twice.
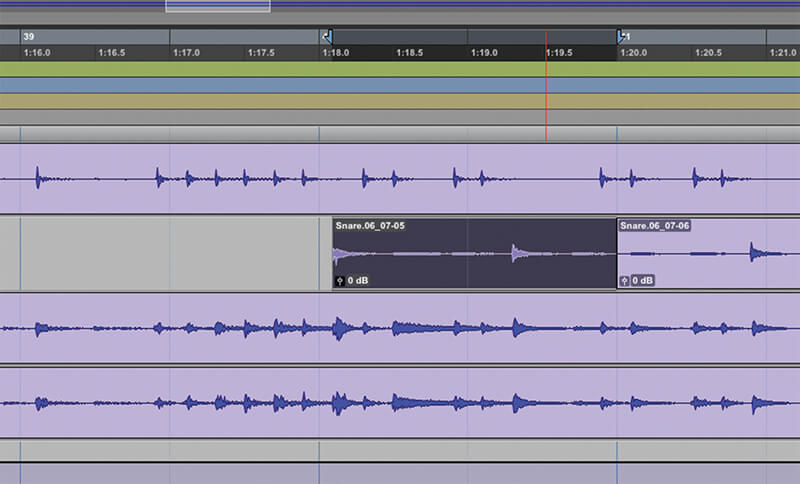
14. Use Tab To Transient to find an edit point that follows the natural groove of the performance – and not the grid – and cut out roughly a bar.
15. Copy the edited clip and paste it onto another area of the mix. Even if the timeline is on a grid point, the pasted audio retains the relative position to the grid.
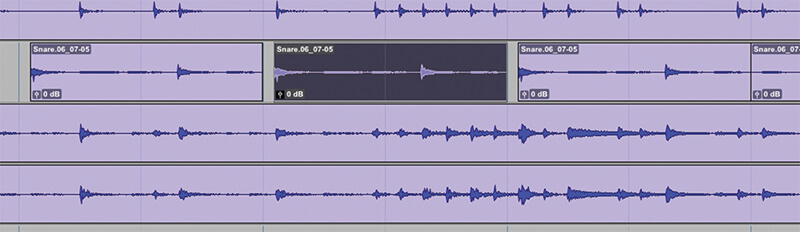
16. Pro Tools remembers the offset relative to the grid size that was applied at the time the clip was copied.
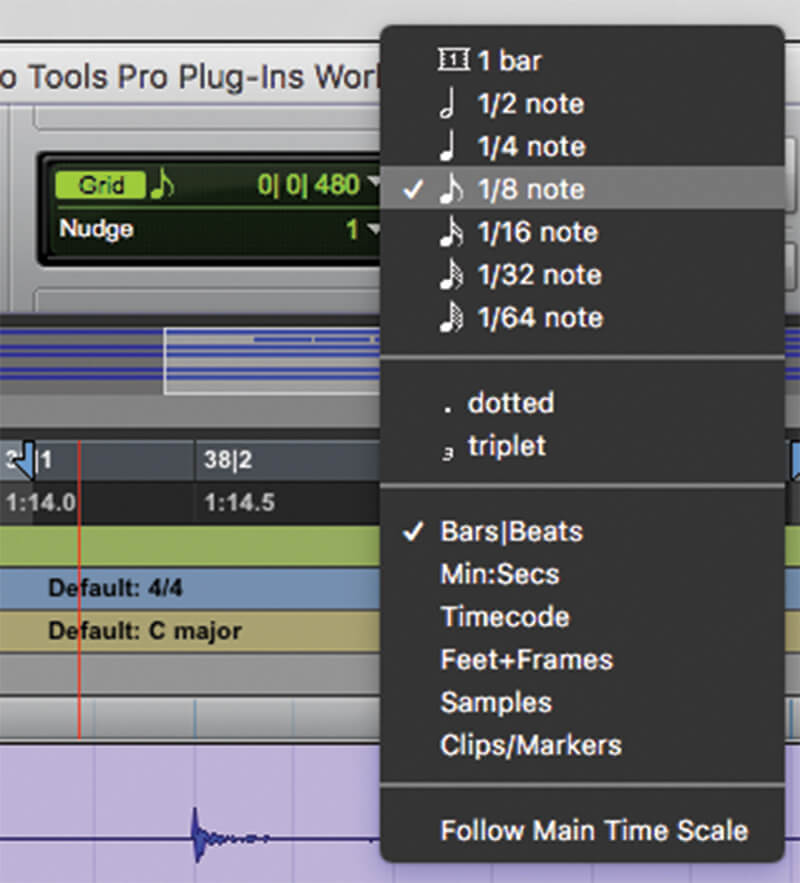
17. You can then change the grid size. Enabling you to maintain the offset relative to one grid when pasting relative to another.

18. With a new grid size, paste the clip again and the offset to the new grid position will be the same as the offset against the grid that was engaged when the clip was copied.