Logic Pro X: The Beginner’s Guide – Part Two
Andy Jones continues his beginner’s guide to Logic Pro X with a look at Project Settings and Adding Tracks… 3. Project Settings At this stage it’s worth looking at some of the global parameters for your new Logic Template project. As well as setting options like the Global Sample Rate, here you can also configure […]
Andy Jones continues his beginner’s guide to Logic Pro X with a look at Project Settings and Adding Tracks…


3. Project Settings
At this stage it’s worth looking at some of the global parameters for your new Logic Template project. As well as setting options like the Global Sample Rate, here you can also configure things like your metronome, your tempo, project key and other aspects of Logic production that you might want to set up as standards in whatever projects you use in the future. Set it up once, right here and right now, and you’ll never have to bother with it again.
One very neat option next is to set the track up you’ve created as a specific instrument type. In Logic you can add preset effects and other parameters onto tracks so if, for example, you want to record an external guitar onto the audio track we’ve created, select it from the library and the preset will add typical effects that acoustic guitar recordists might use when recording that instrument. It’s very useful and we’ve chosen the synthesiser option for ours.

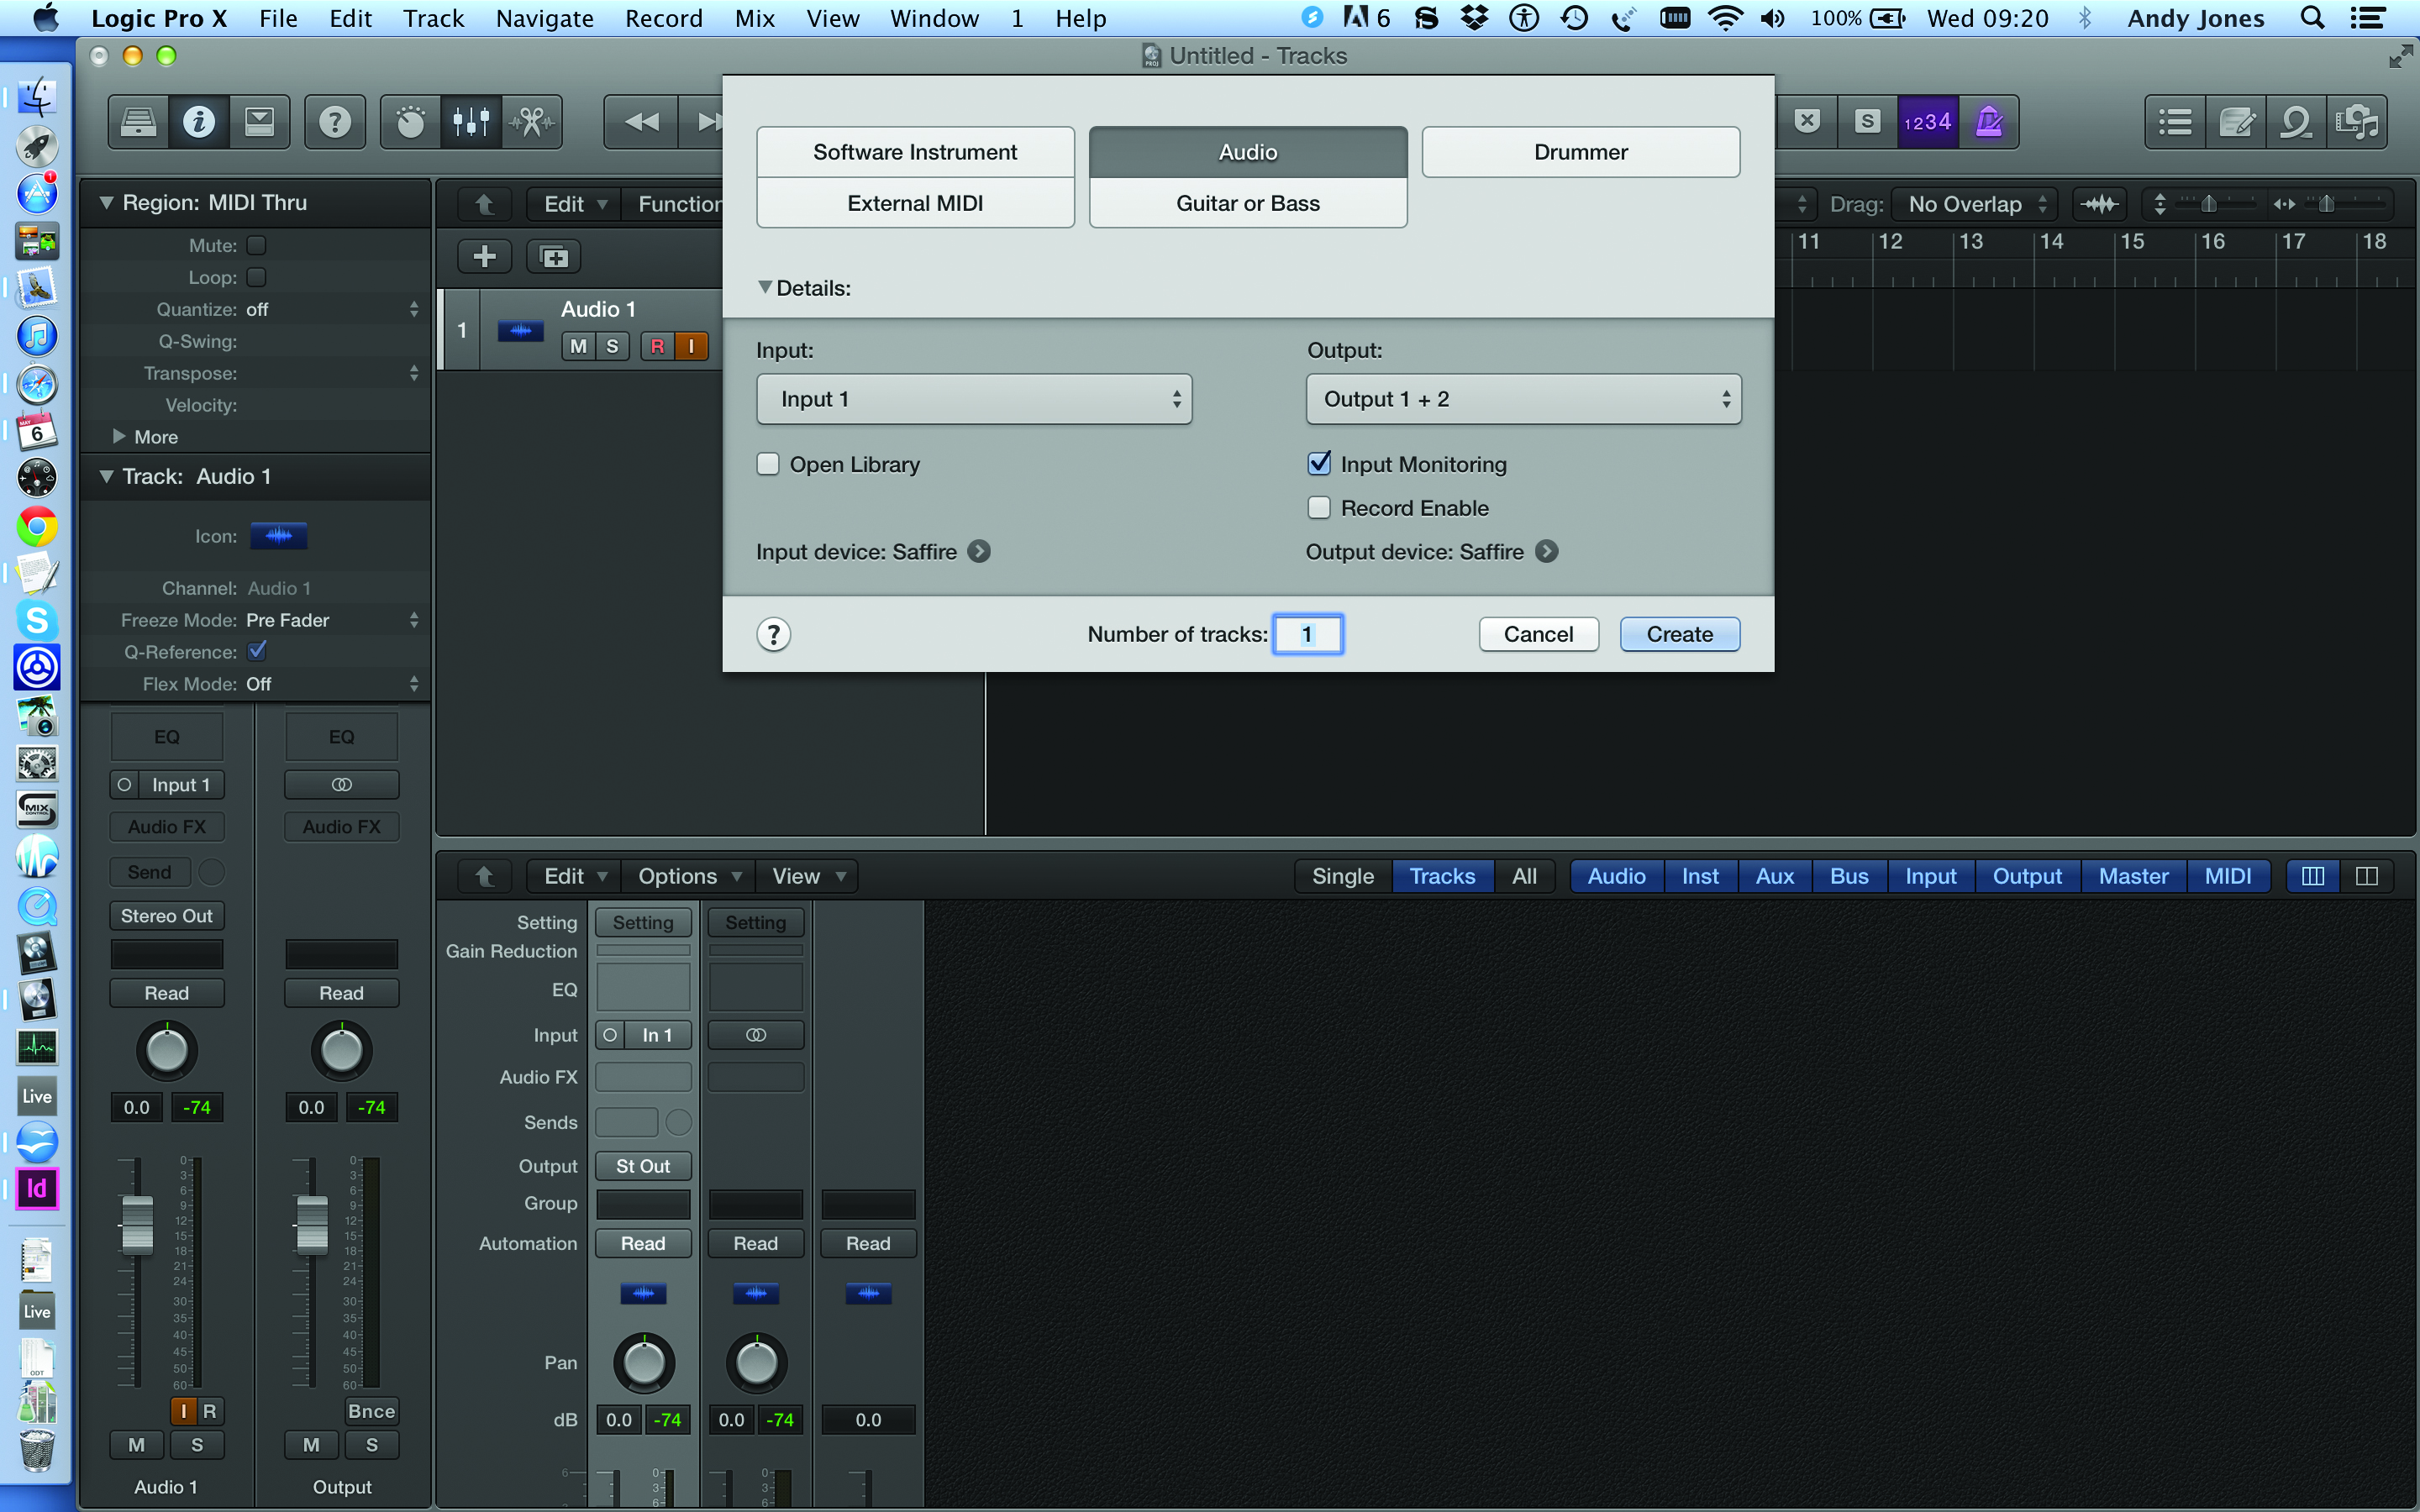
1: For the start of our project we should check Global Project Settings by opening up the File > Project Settings menu. We’ll go to the Audio option and select 48kHz as our Project Sample Rate.
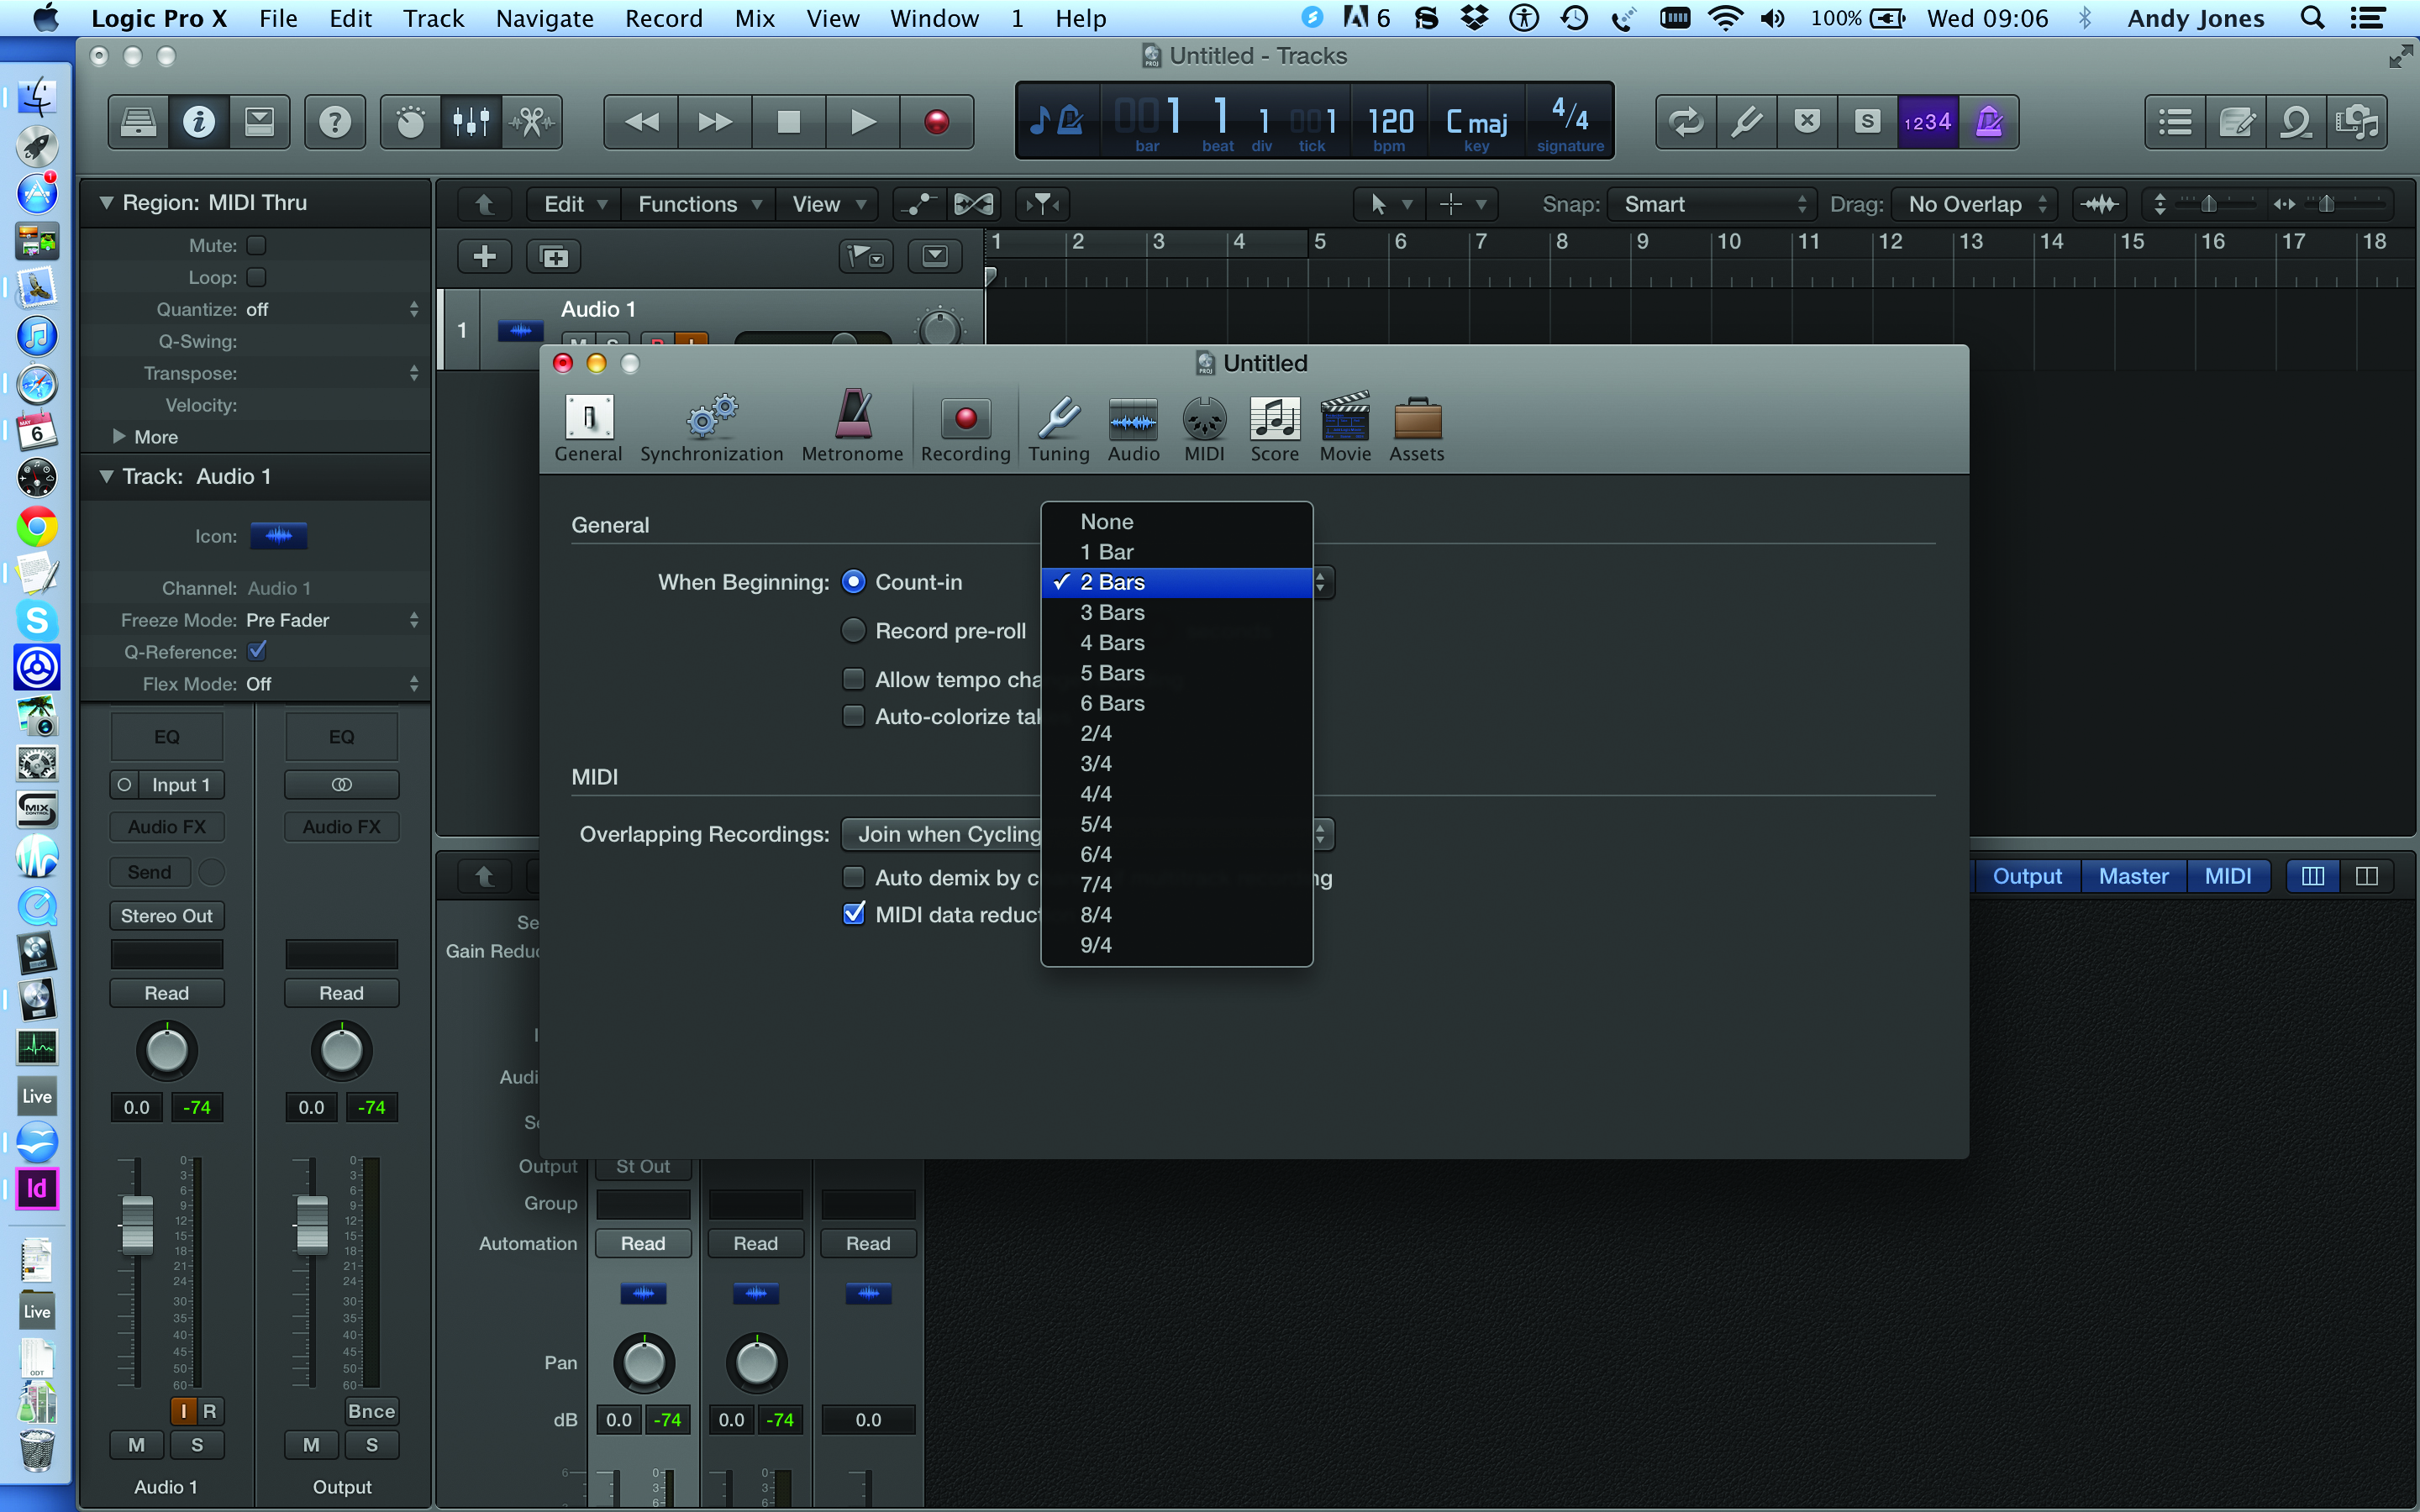
2: There are several other options you can edit in Project Settings including Metronome clicks and the Count-in For Recording. We like 2 bars so have set it accordingly
3: As we are recording audio on this track we can now set it up with effects from a standard list of supplied presets in Logic. Hit the library icon to show a list of instruments and channels strip settings.
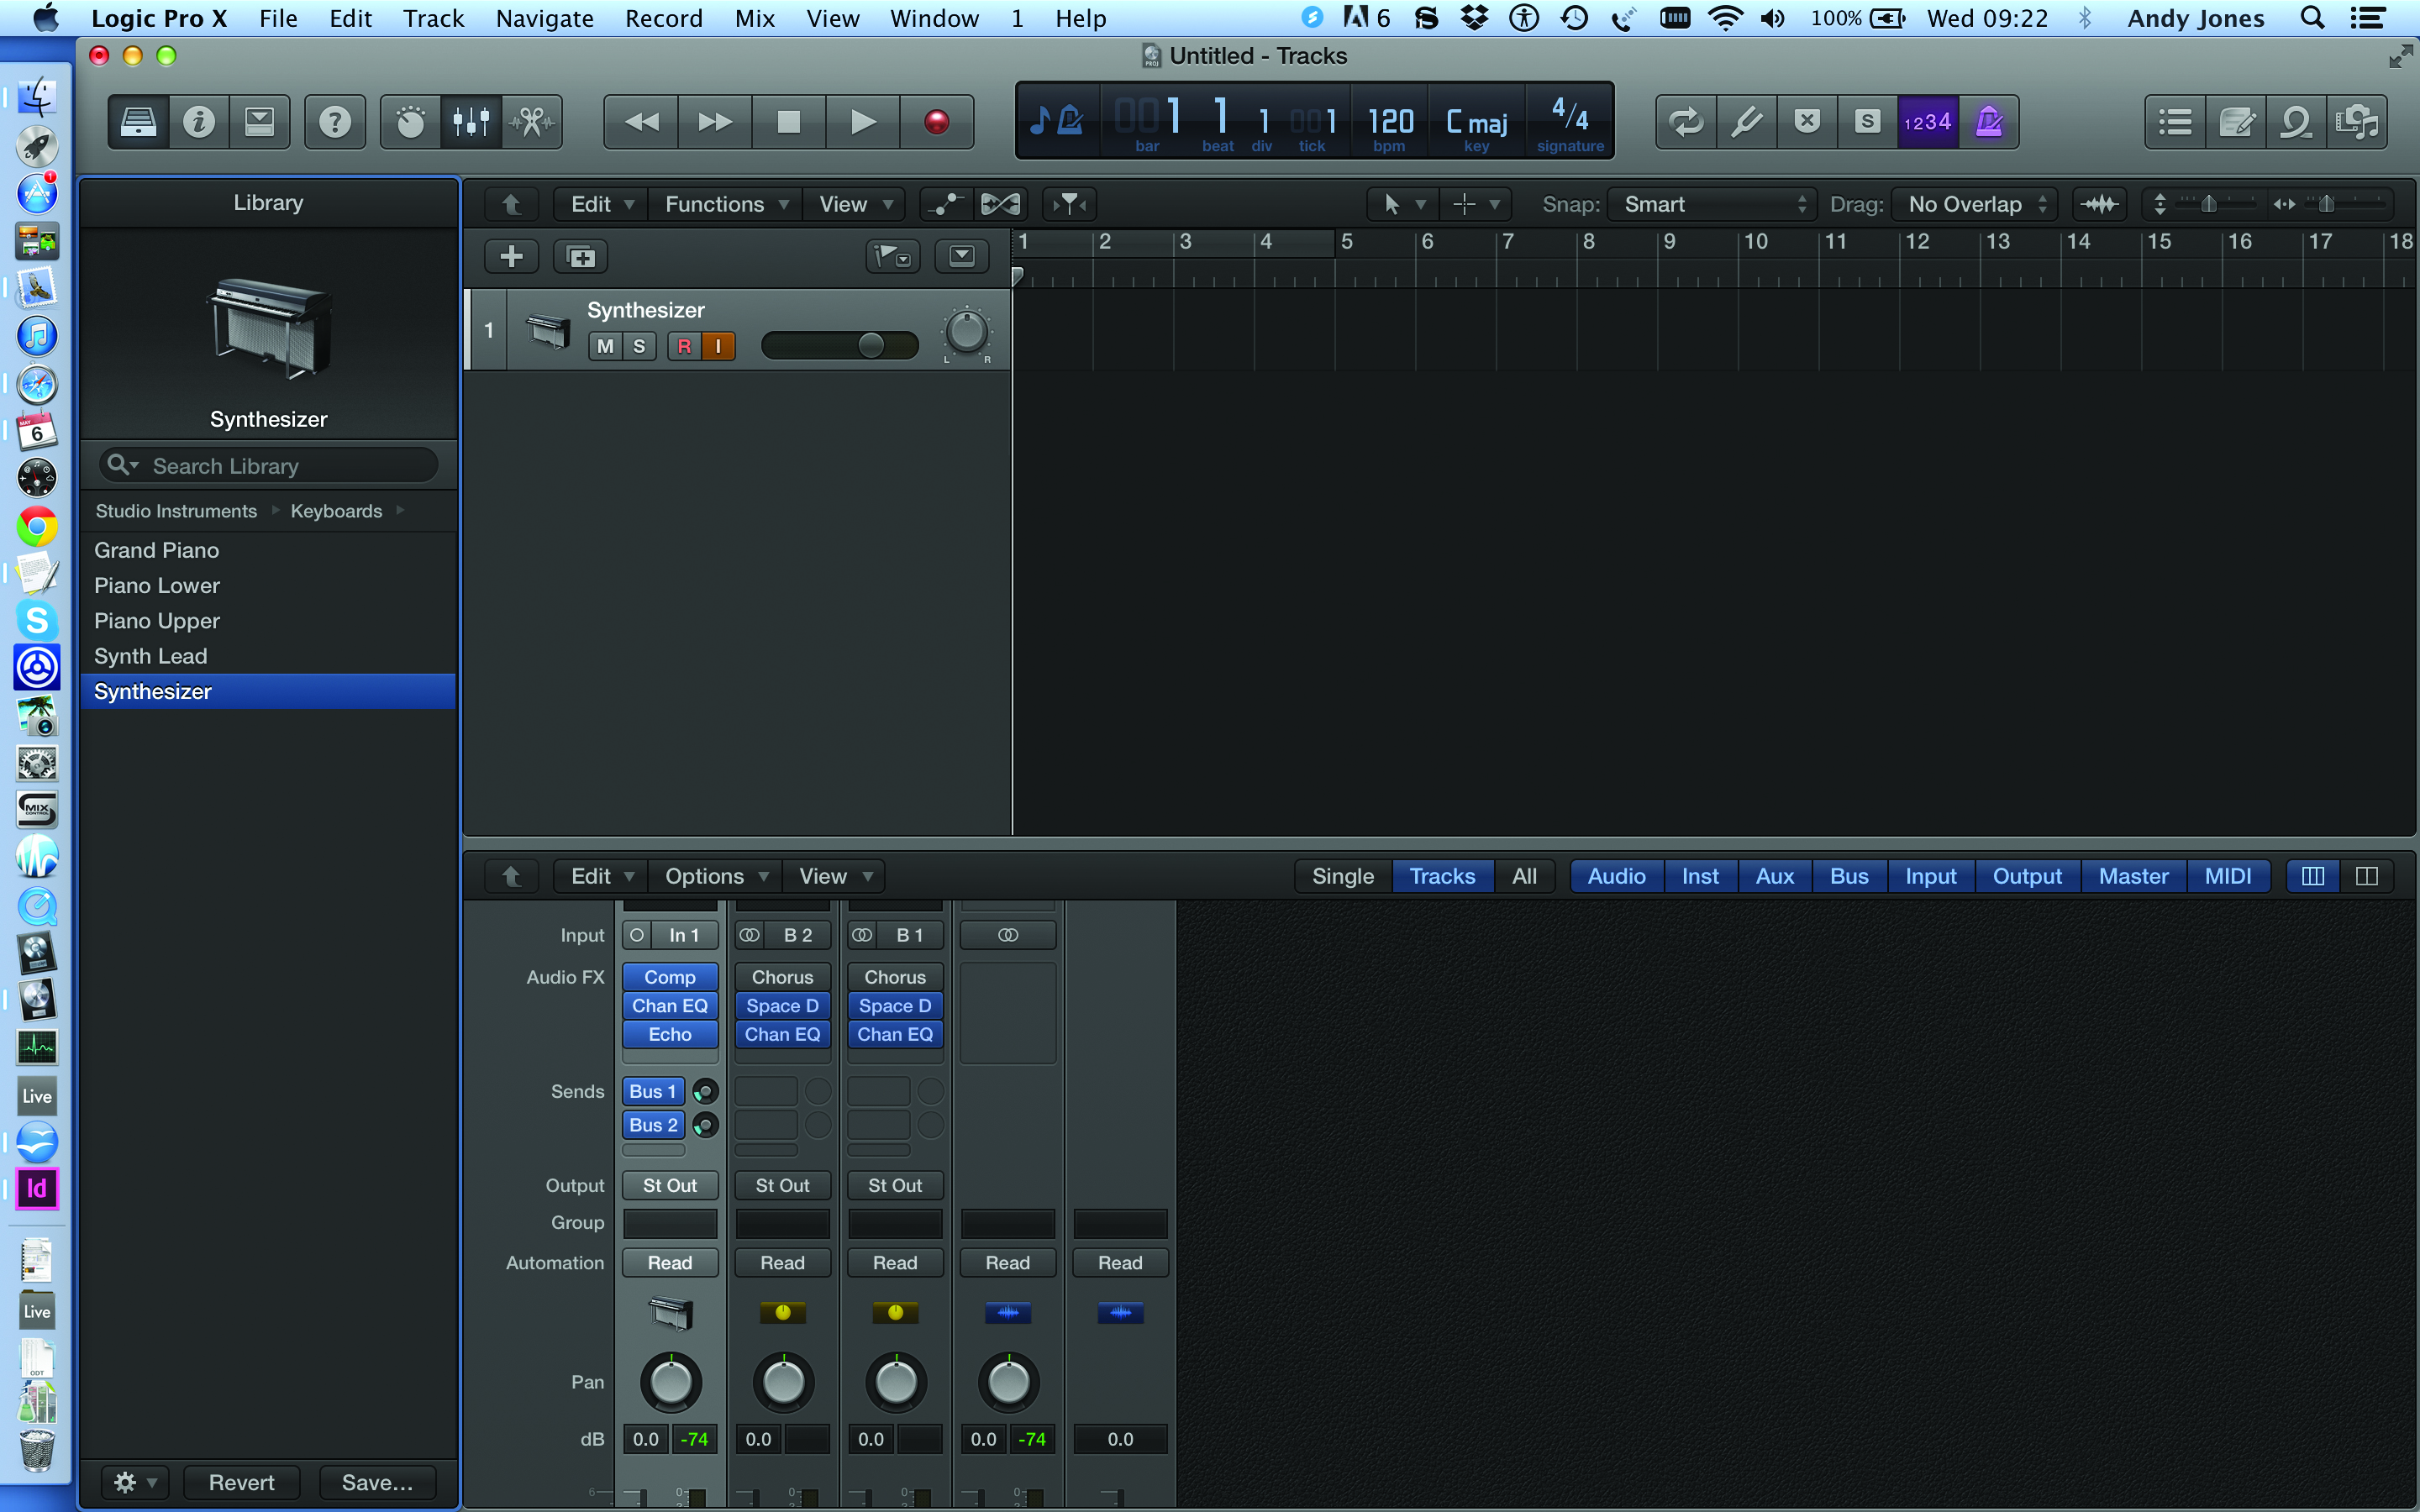
4: As we’ve got a synth plugged in to channel 1’s input we choose synthesizer from the library presets which then adds a selection of commonly used effects to that input channel.
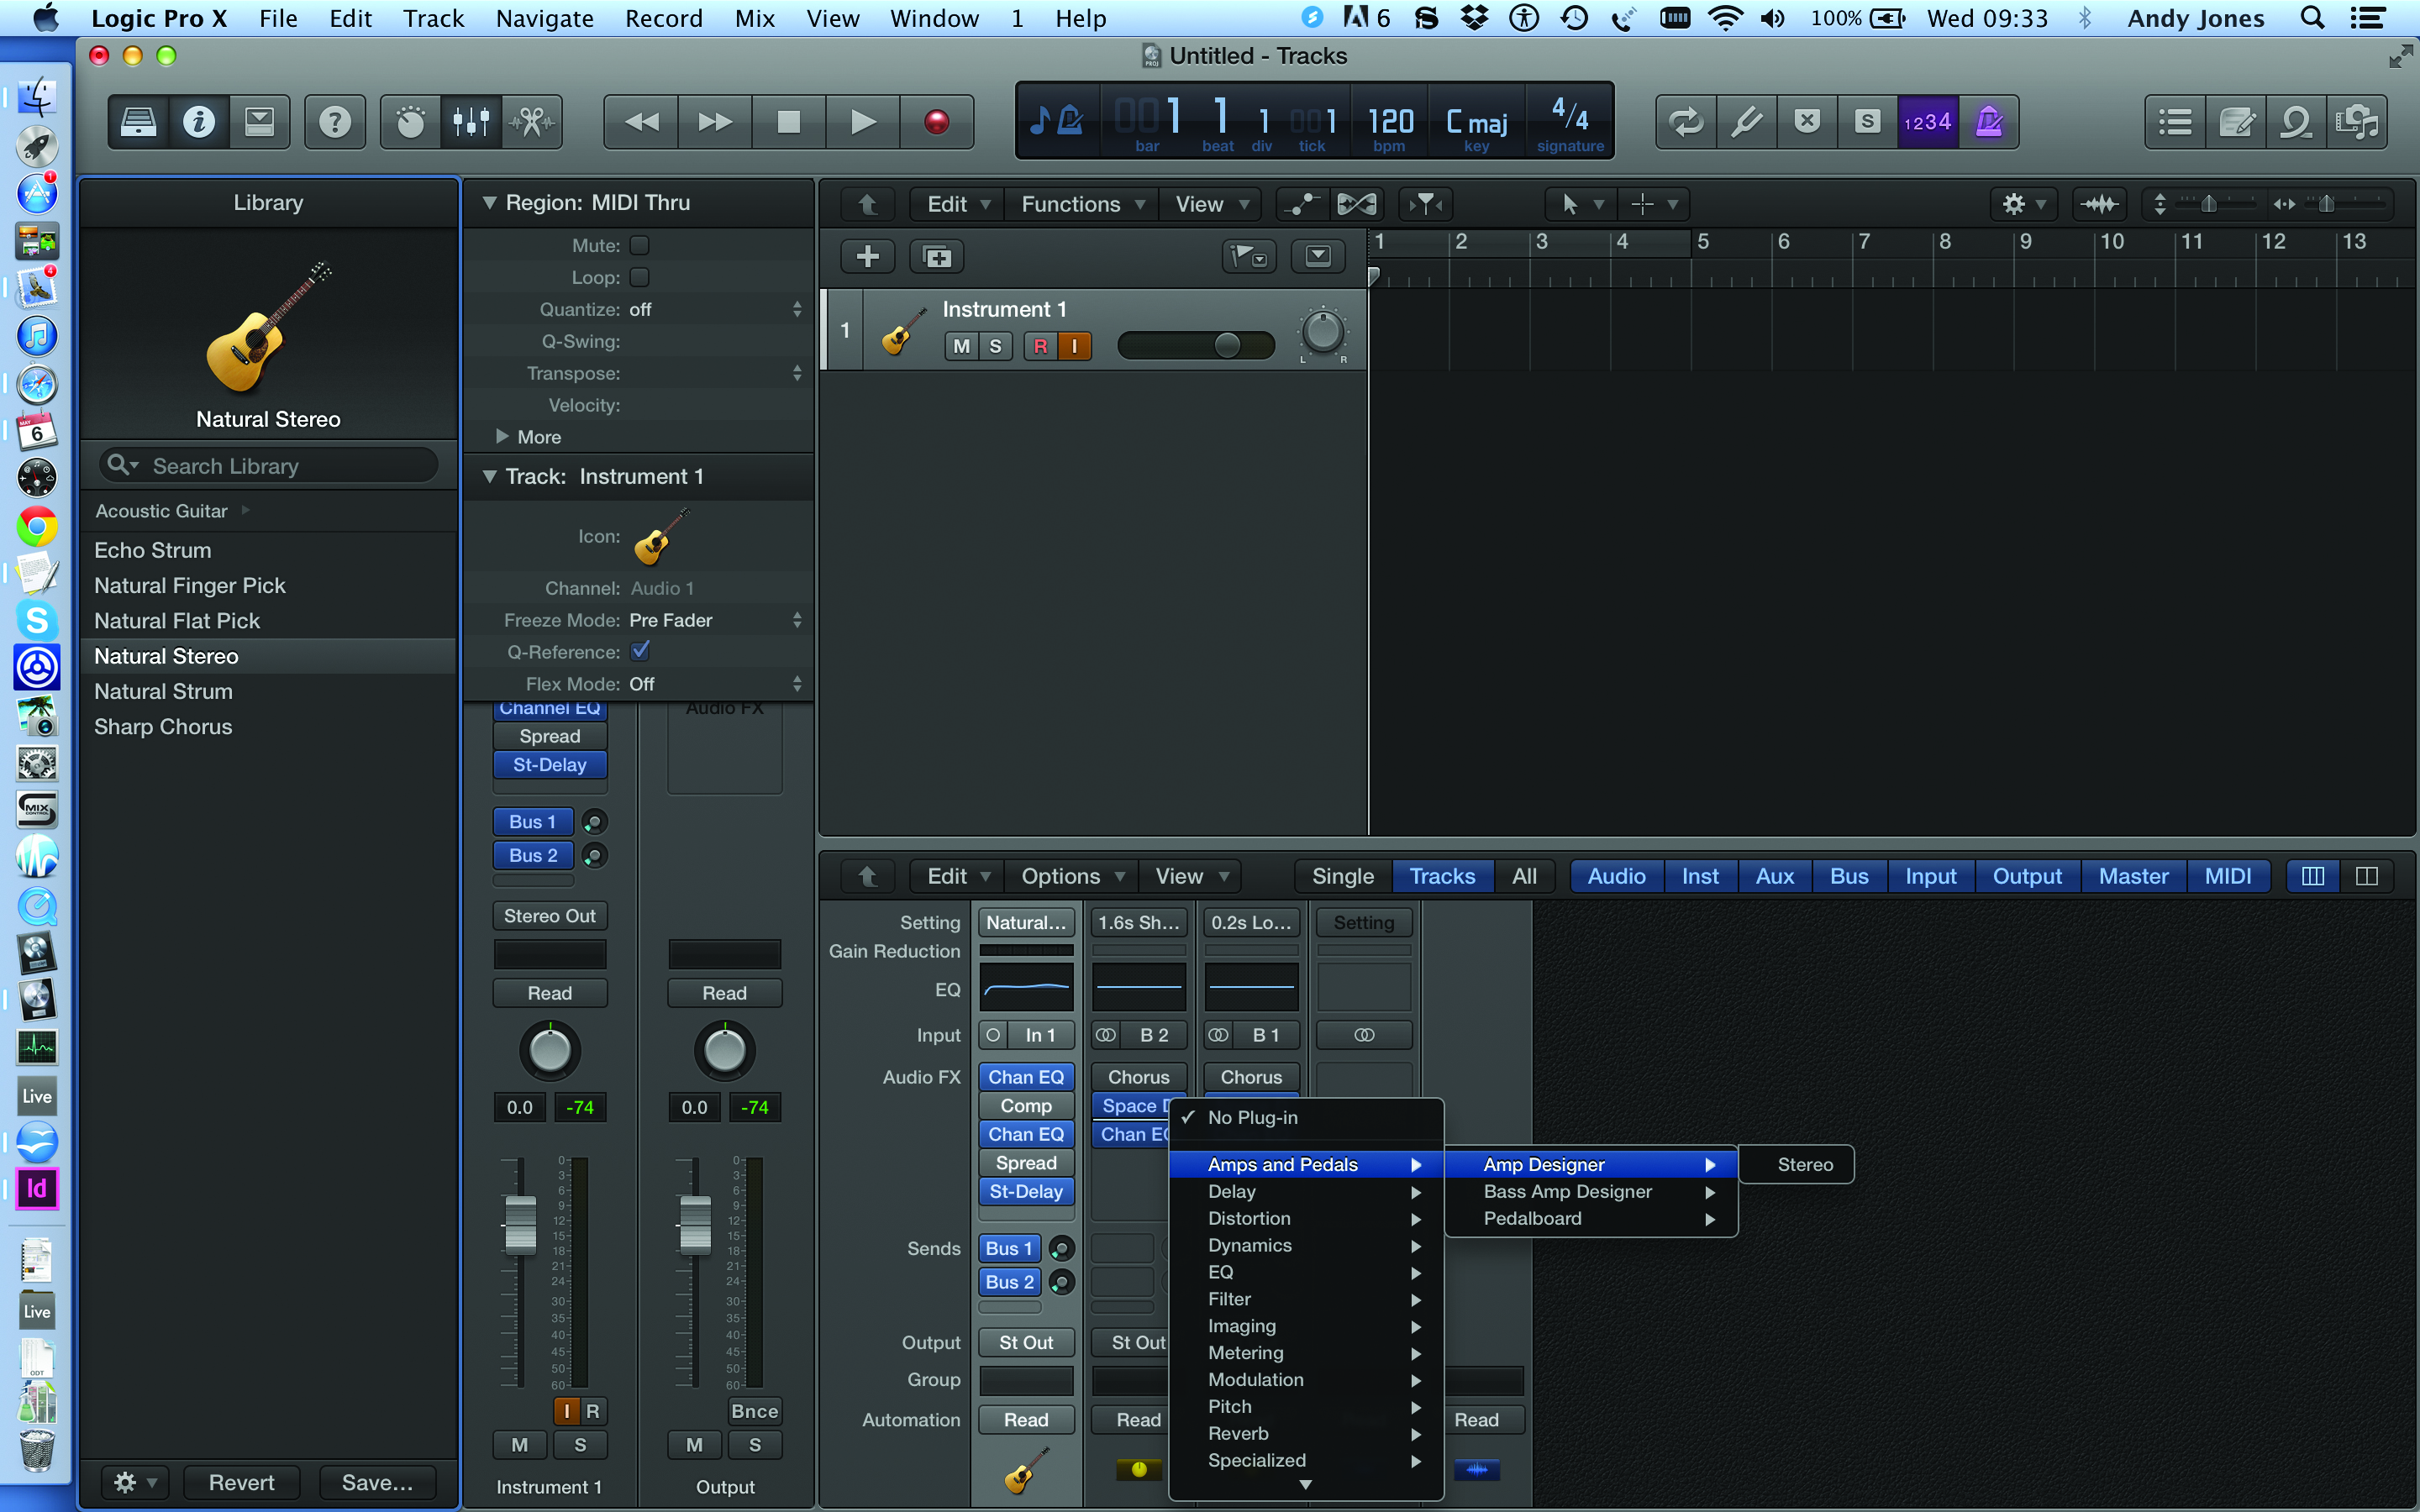
5: Choose Stereo Acoustic Guitar, for example, and Logic adds some delays and a gentle EQ. It’s a fast way of setting a Project up and you can easily come back and edit the effects later as shown.
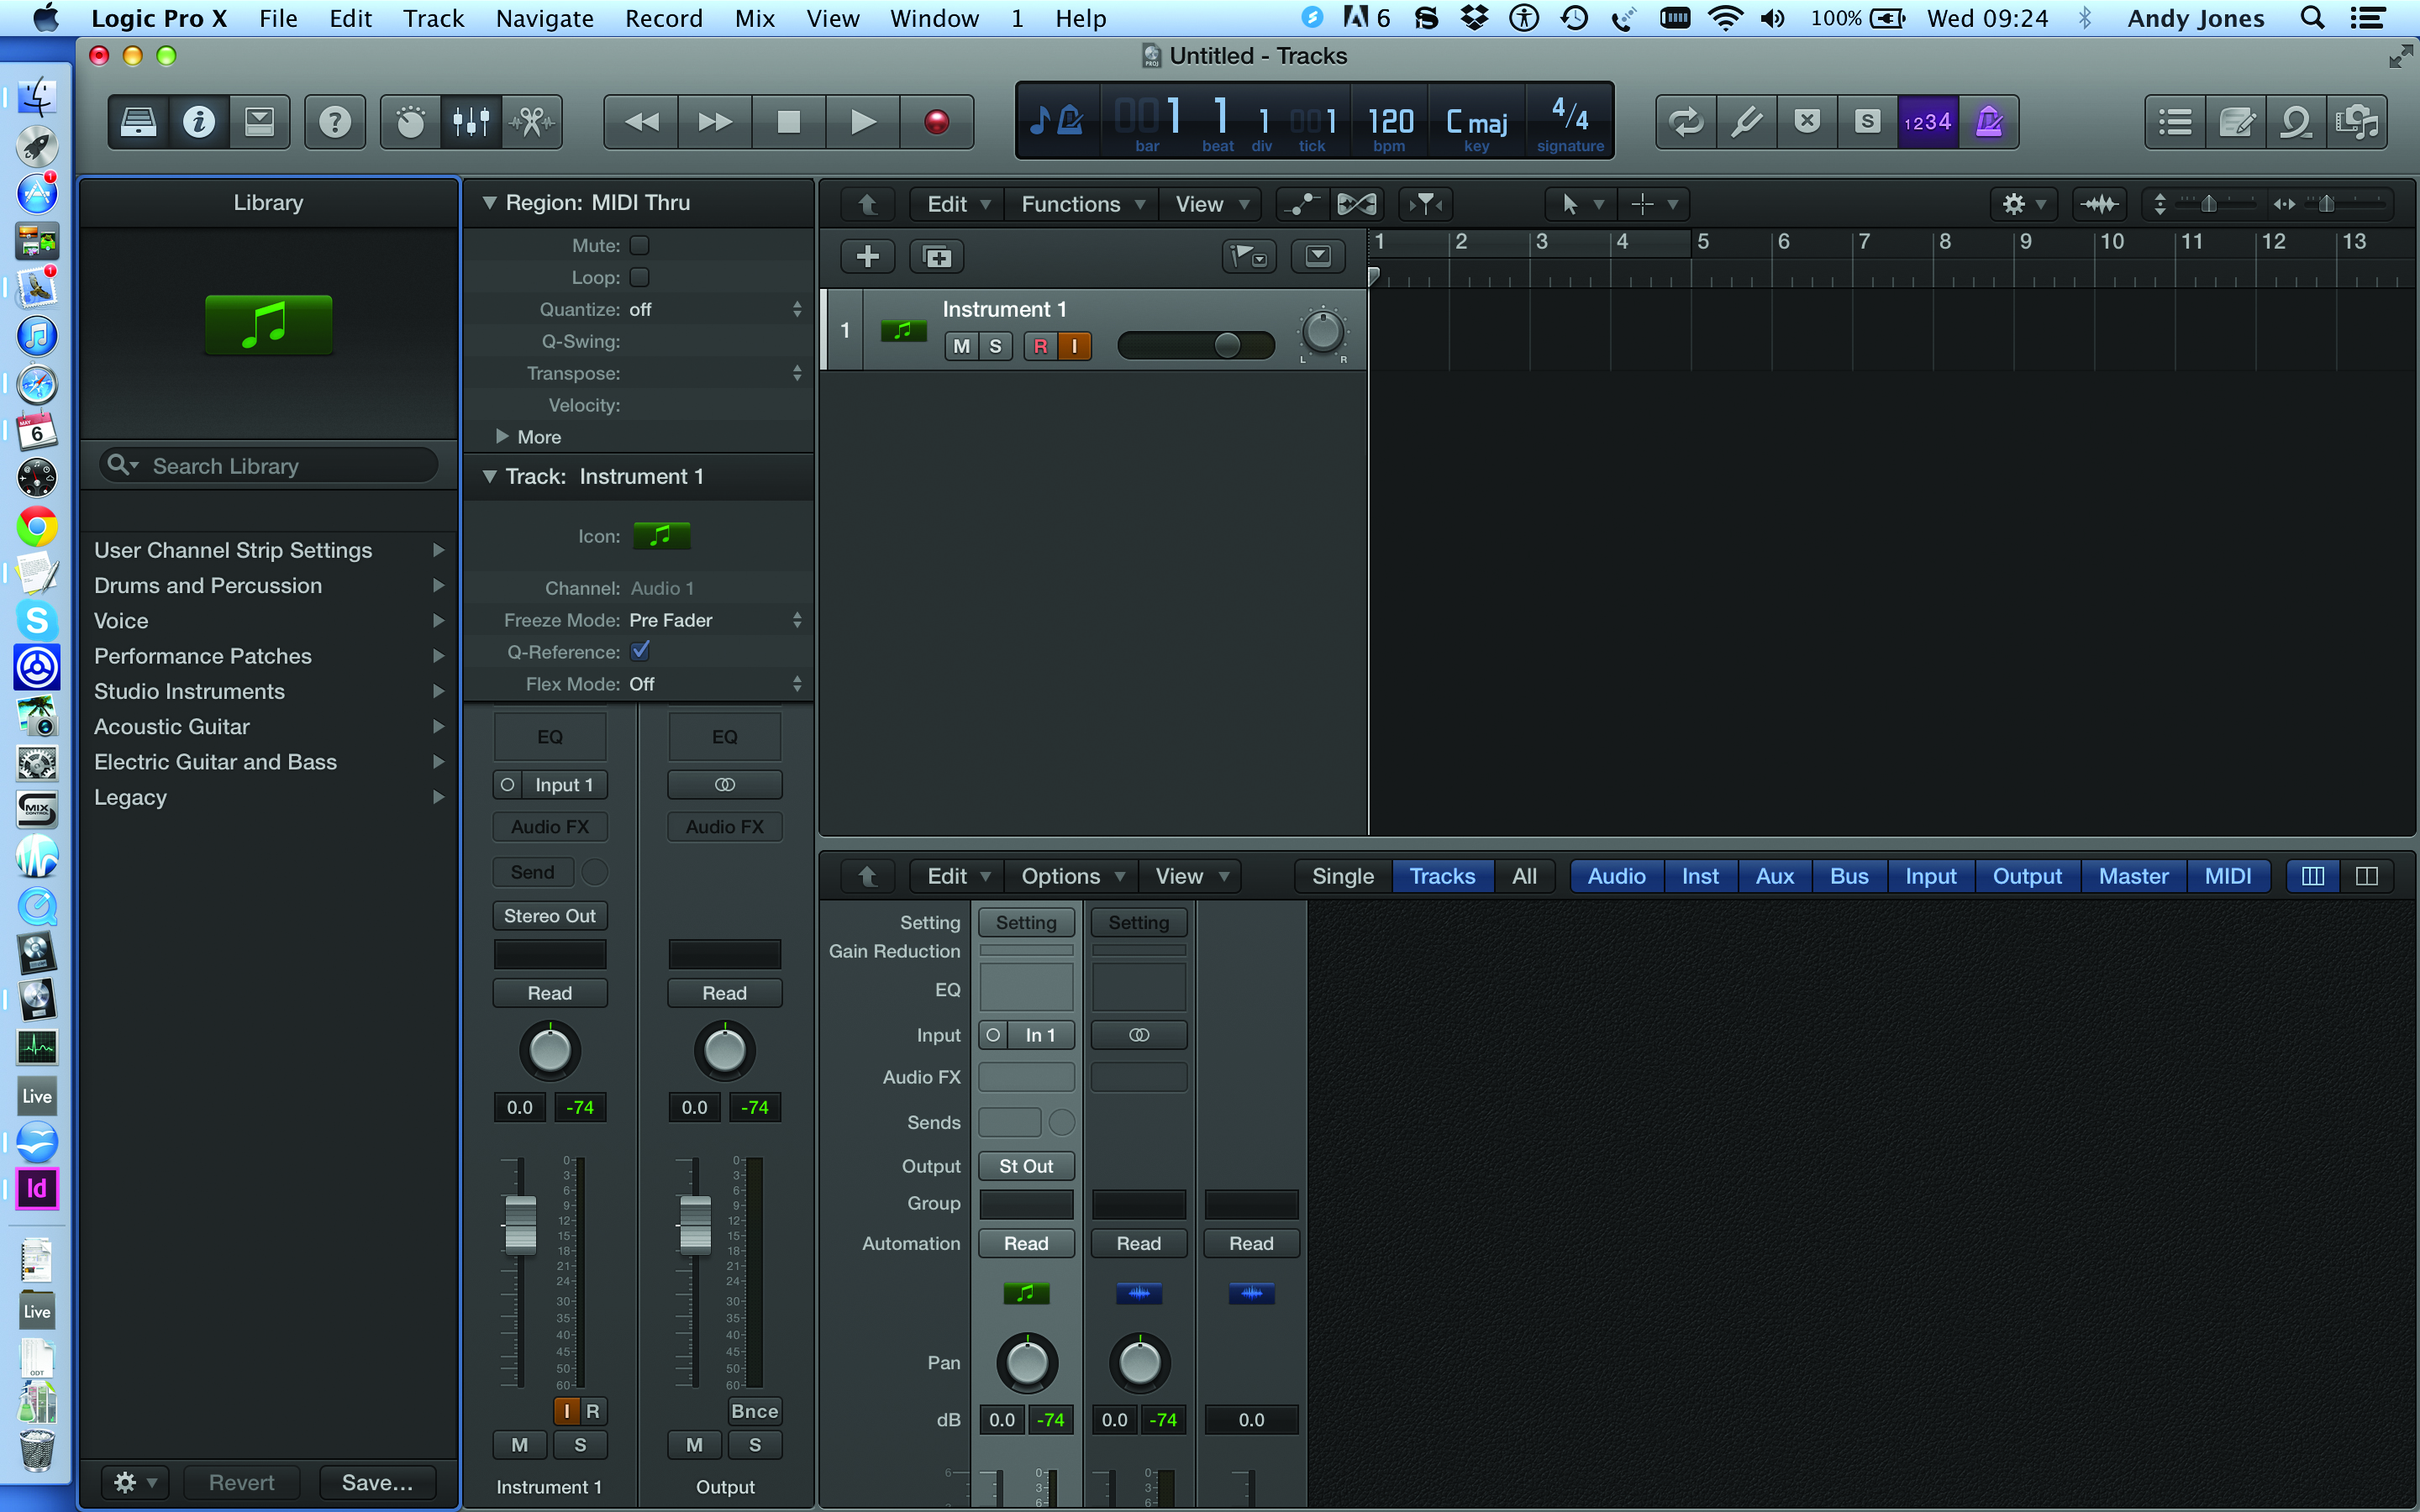
6: Now we’re going to add more tracks. You can simply add with the + icon as shown which will take you back to Step 6 and allow you to choose track type.
4. Adding Tracks in Logic Pro X
Now we get to the final stage of the main Template Project build where we add tracks and flesh it out so it becomes a song framework that you can load every time and one that will be ready for those inspirational moments when you just want to make music quickly.
First up you can add other audio tracks either to record external instruments on or to load other audio in (samples and so on) from your hard drive. These can be created from scratch or you can copy existing tracks (but make sure to adjust the input channel if you are recording instruments into different inputs on your interface).
Then it’s time to add software instrument tracks which enable you to load in your virtual instruments and sound libraries. Again the beauty of setting these up now is to save time later and to make sure all of your favourites are on hand when you load in your Project Template file.
We’ve also listed another speedy method of quickly copying those favourite effects configurations. So if you like Logic’s presets for the audio track set-up, as explained earlier, you can quickly copy these effects settings to any tracks you set up, audio or otherwise.
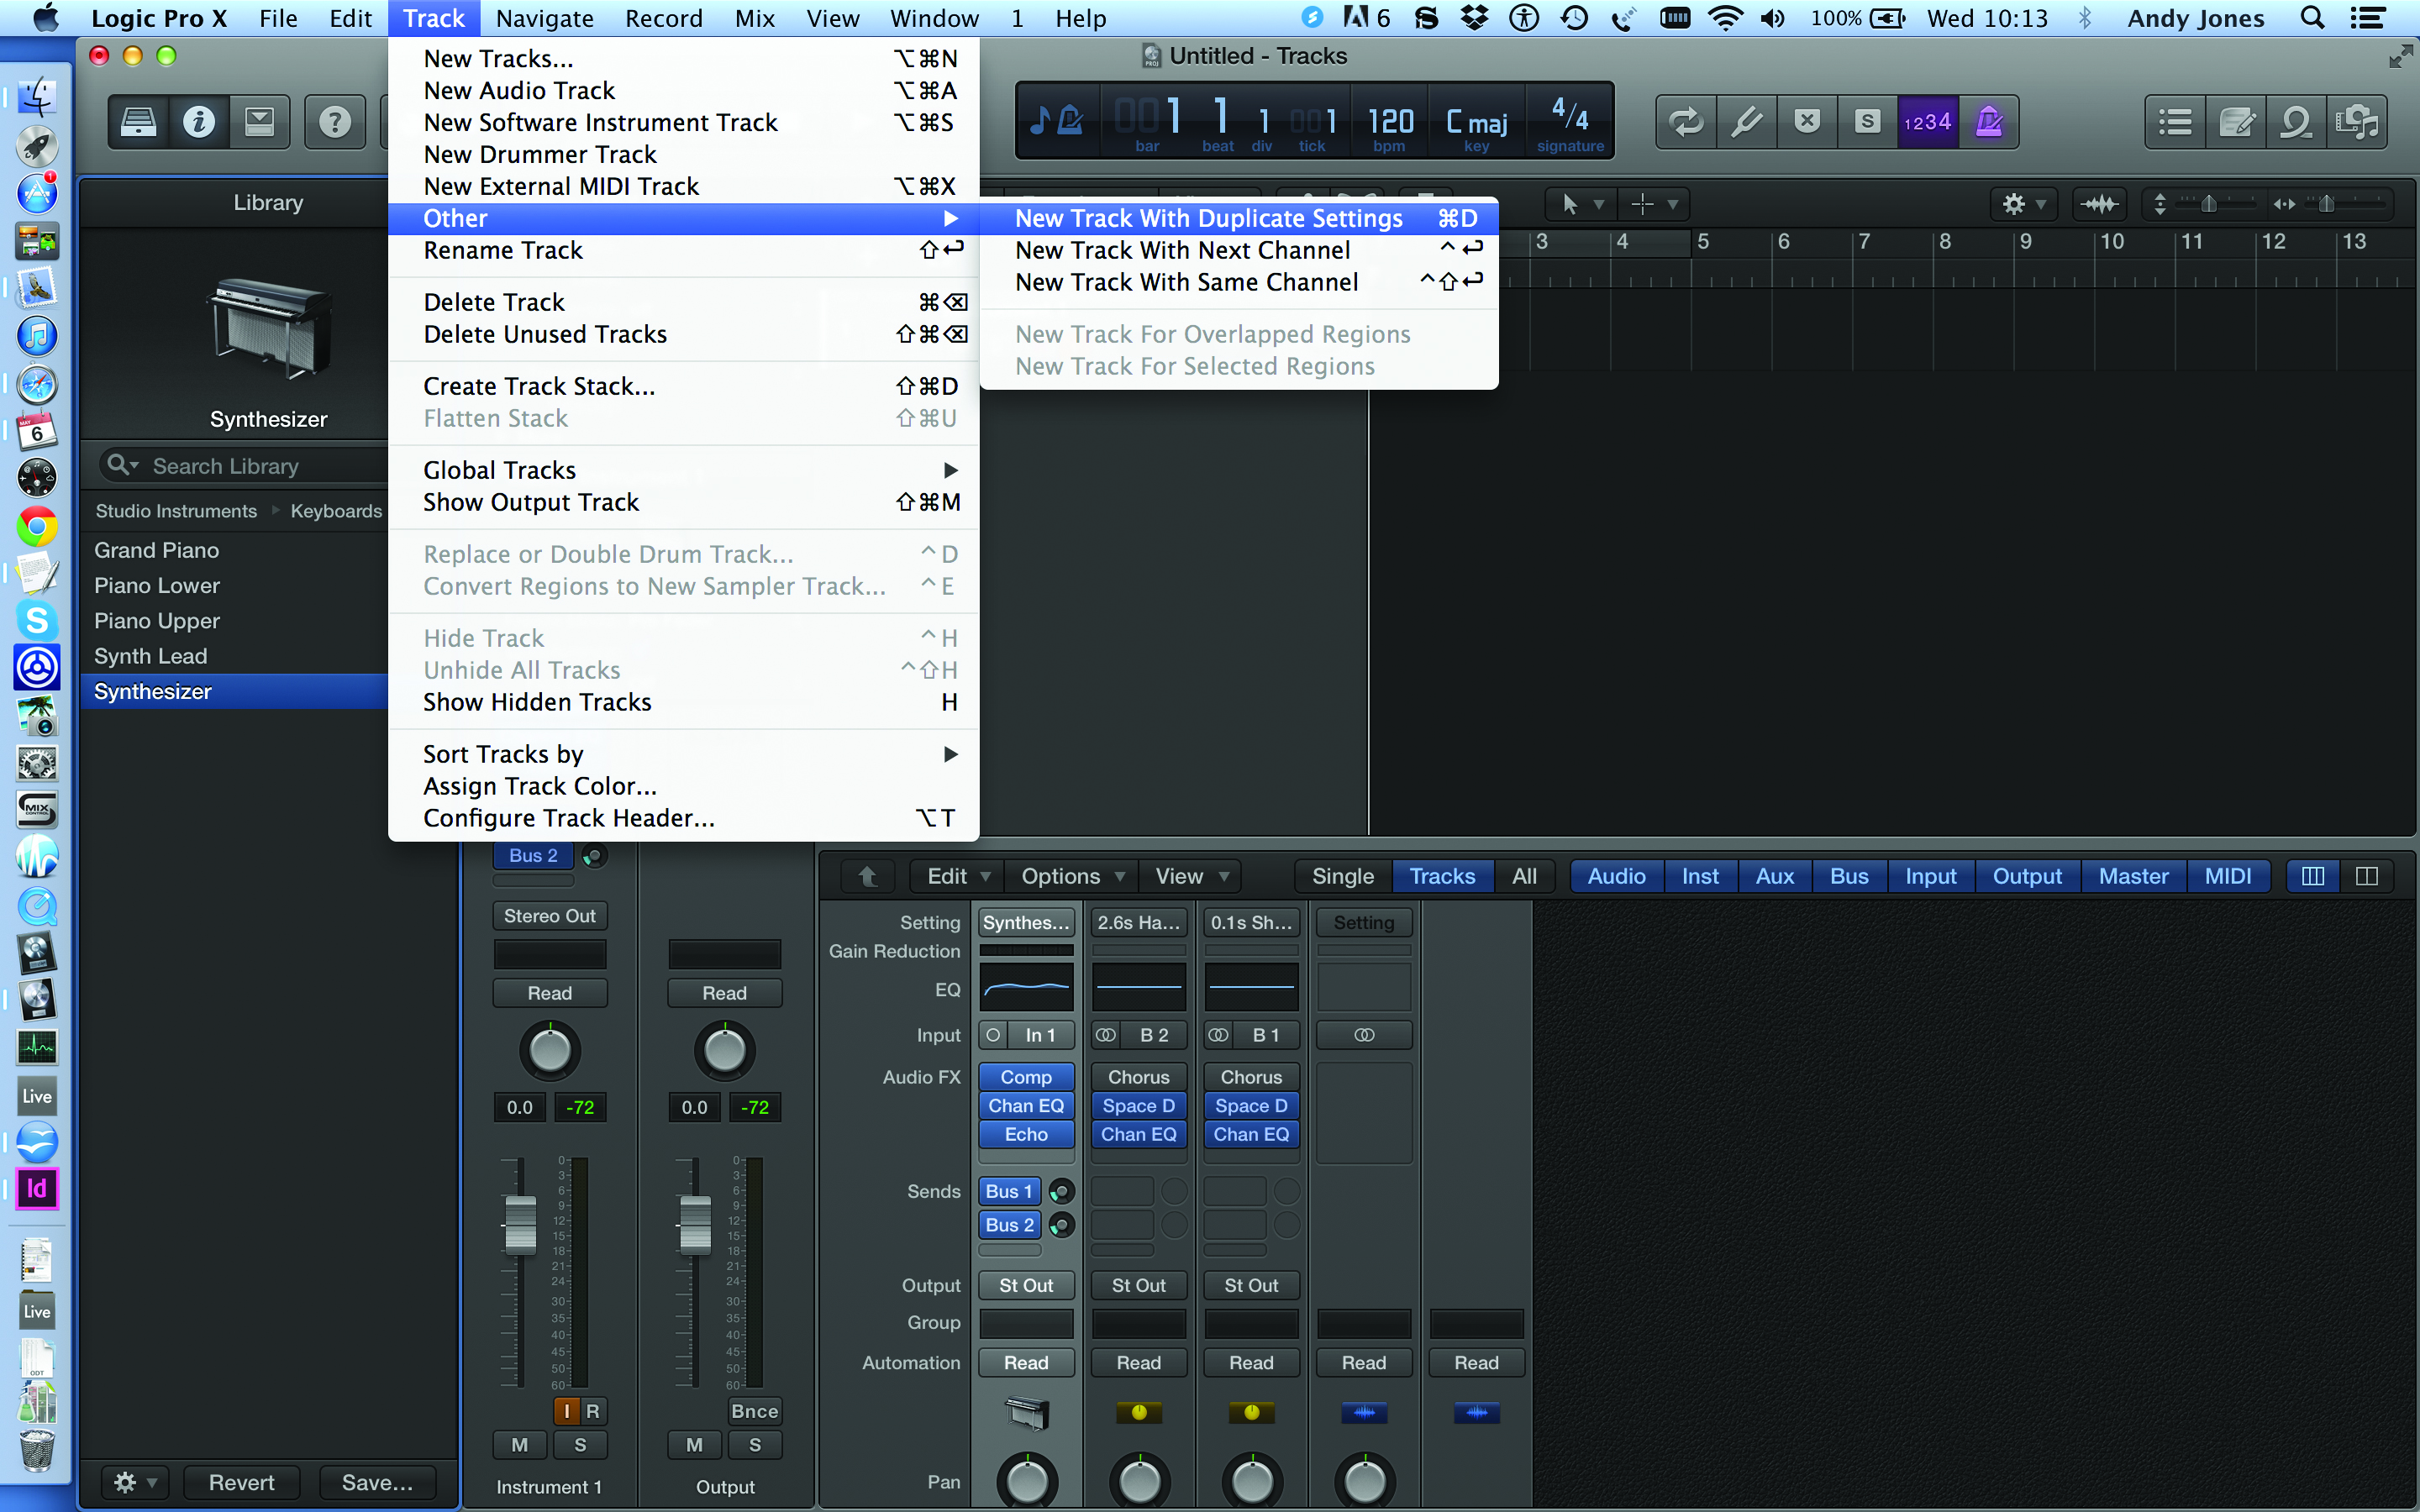
1: When adding tracks repeat Step 6 on p42. Better still, if you are adding similar audio tracks then select Other > New Track With Duplicate Settings (Cmnd>D) to add a track with the same properties
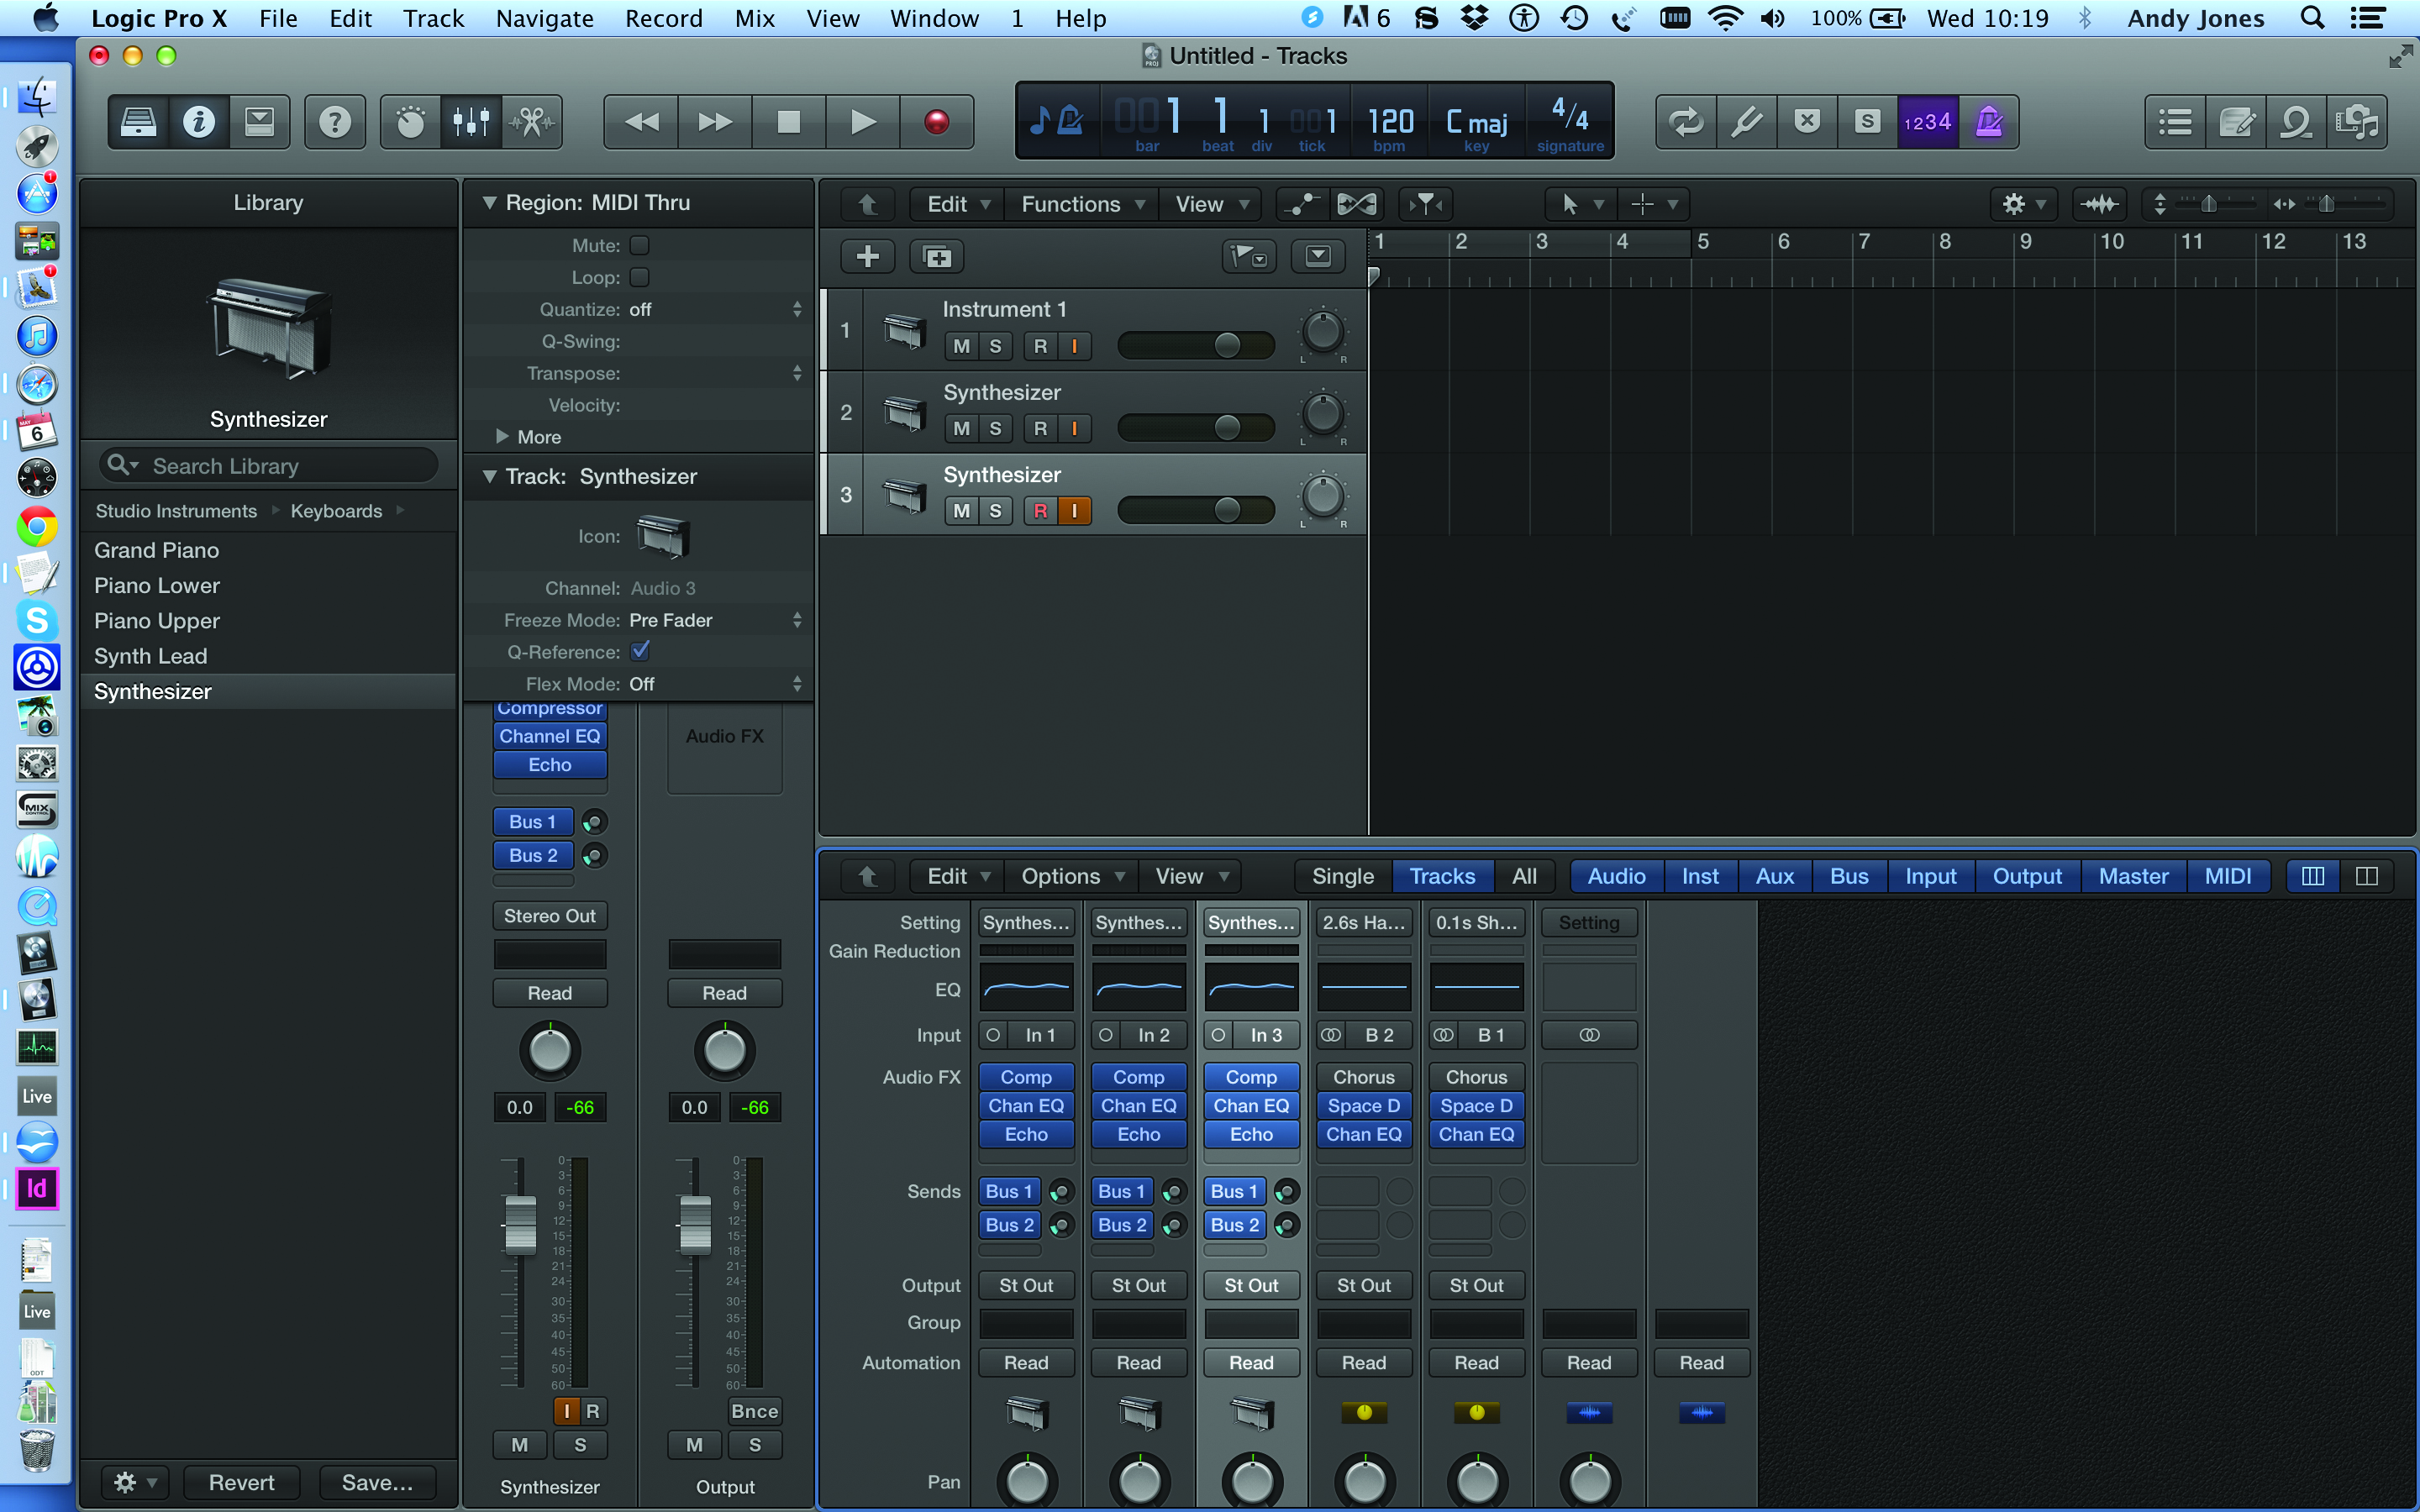
2: You can quickly create a project of tracks with similar properties. We’ve set three synth audio inputs up for a multi-instrument session. The only thing we’ve had to change is the i/p channels: 1 to 3.

3: We can now quickly add tracks that can carry audio for all of the band either as standalone audio tracks or as recording tracks. Here we’ve added vocals and guitar. Make sure you rename each track.
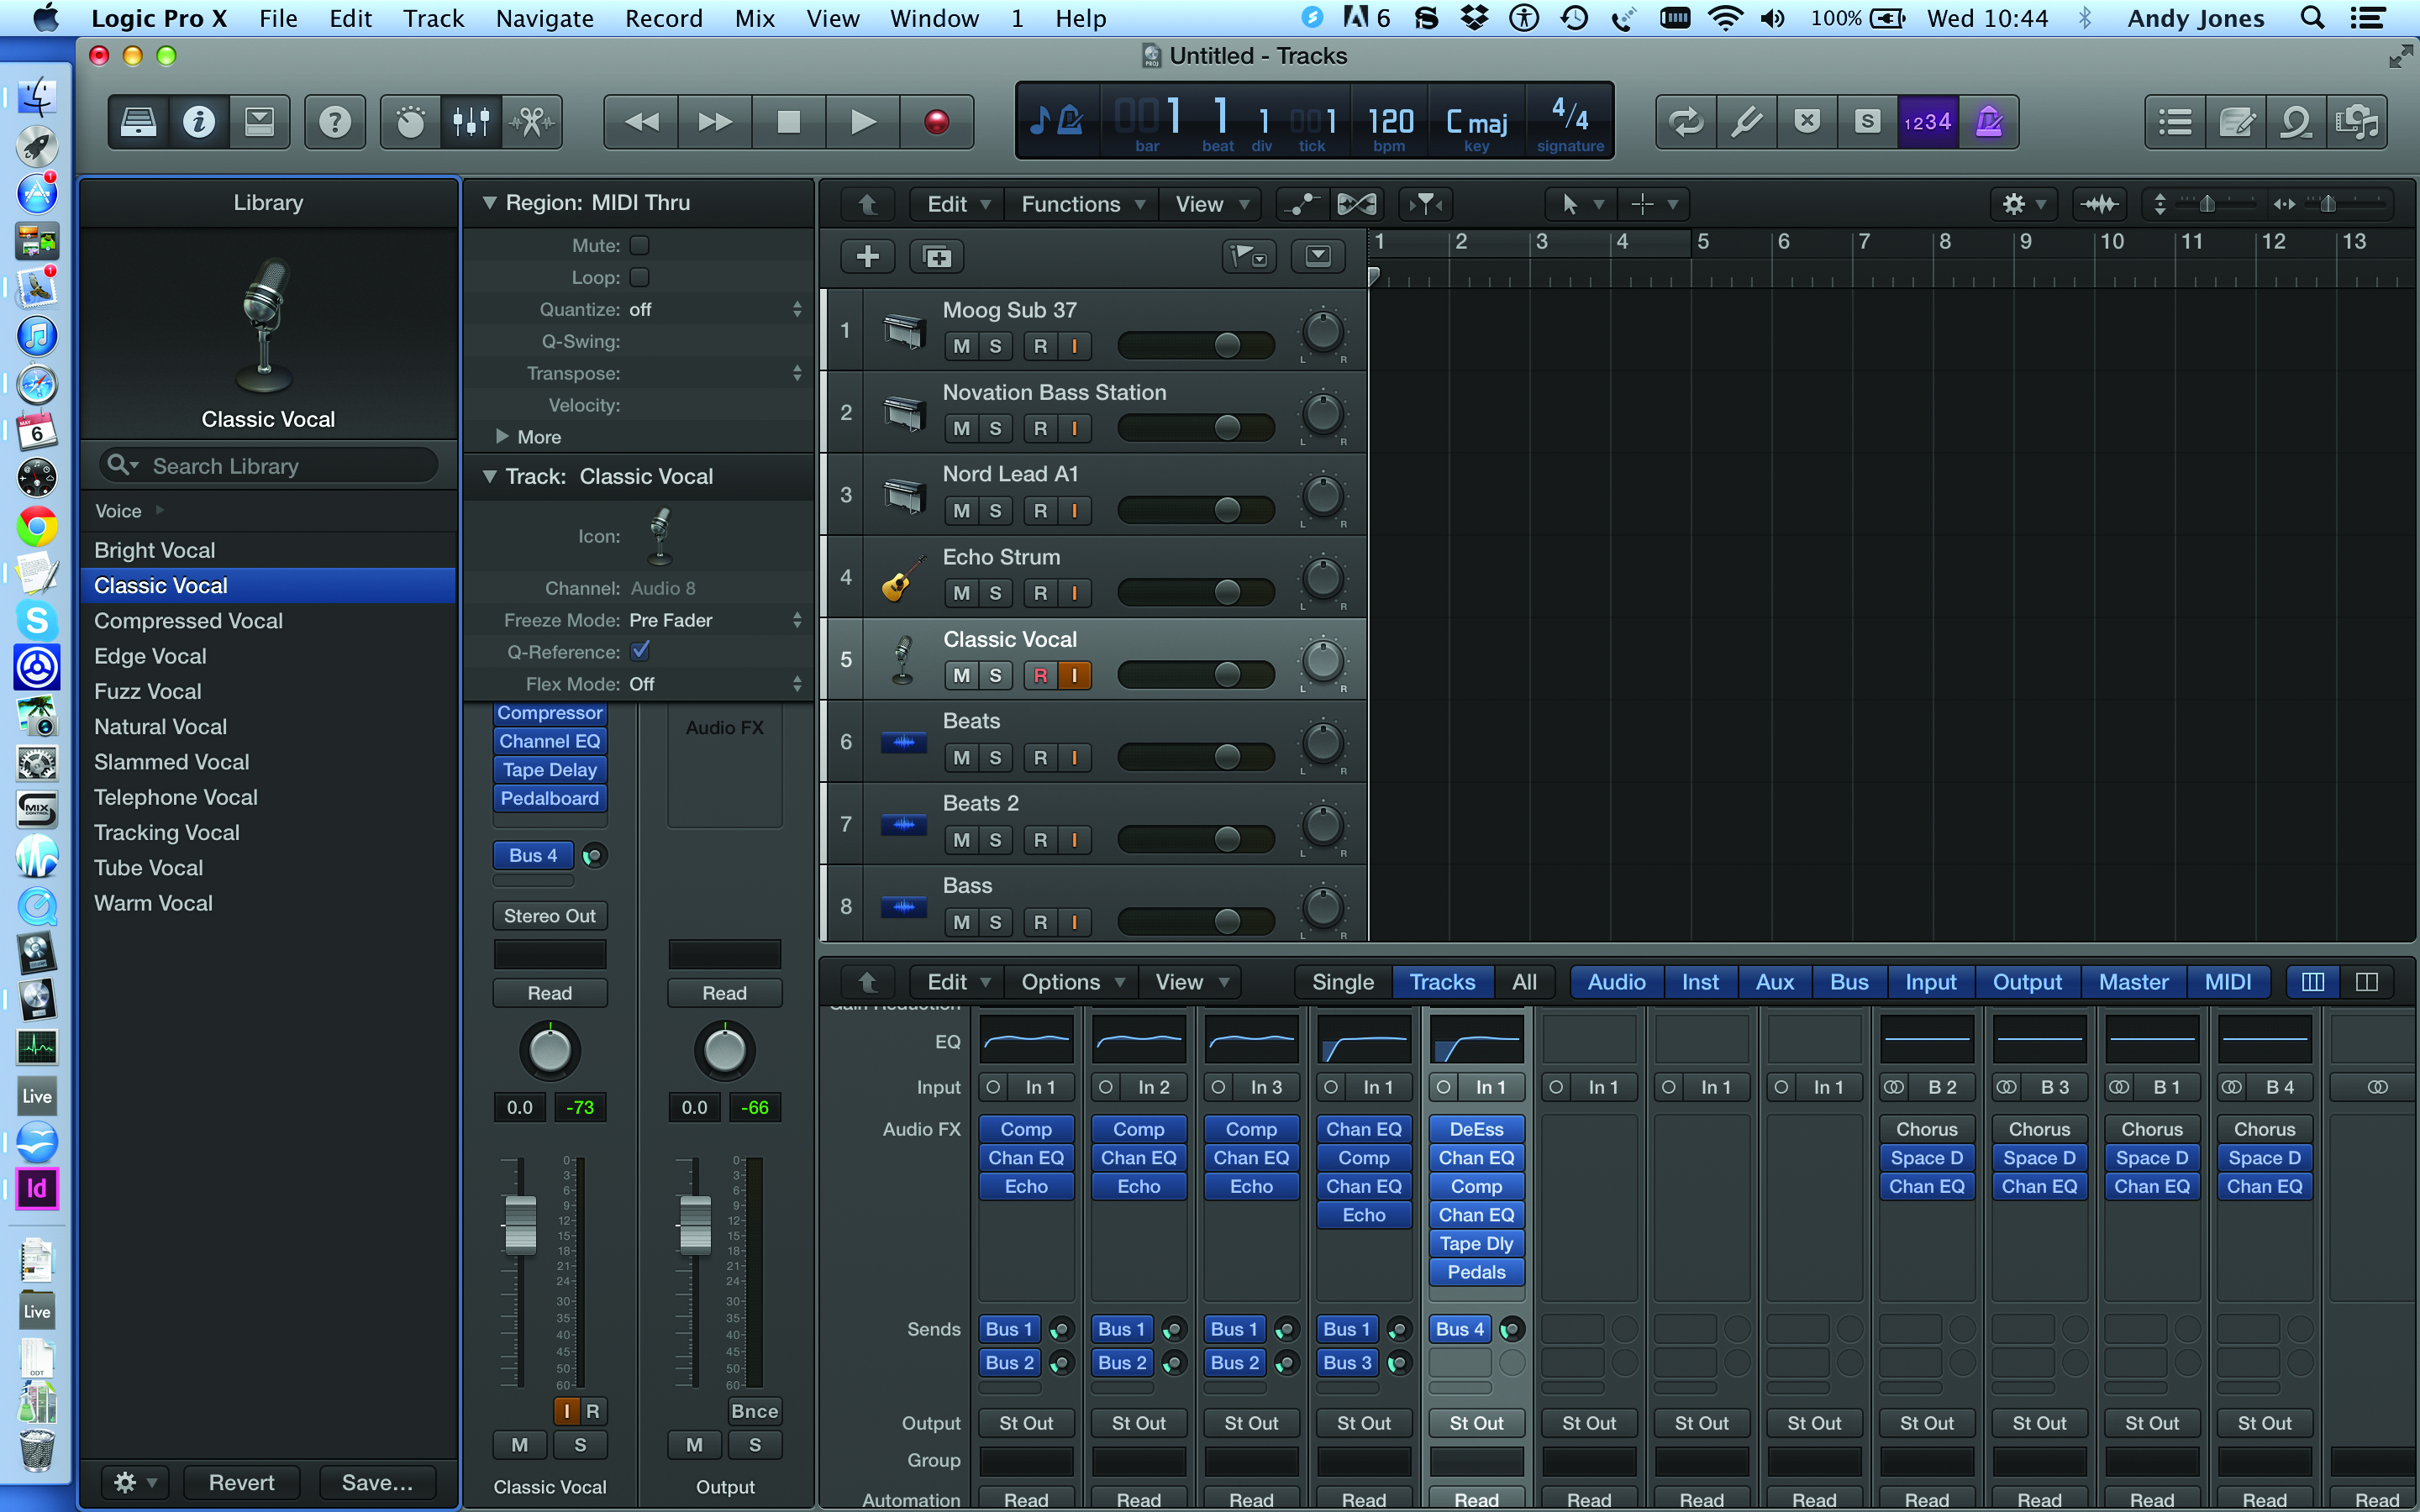
4: Once you are happy with all of your recording tracks add some standard audio tracks to load samples or other audio you might have on your hard drive like beats or basslines.
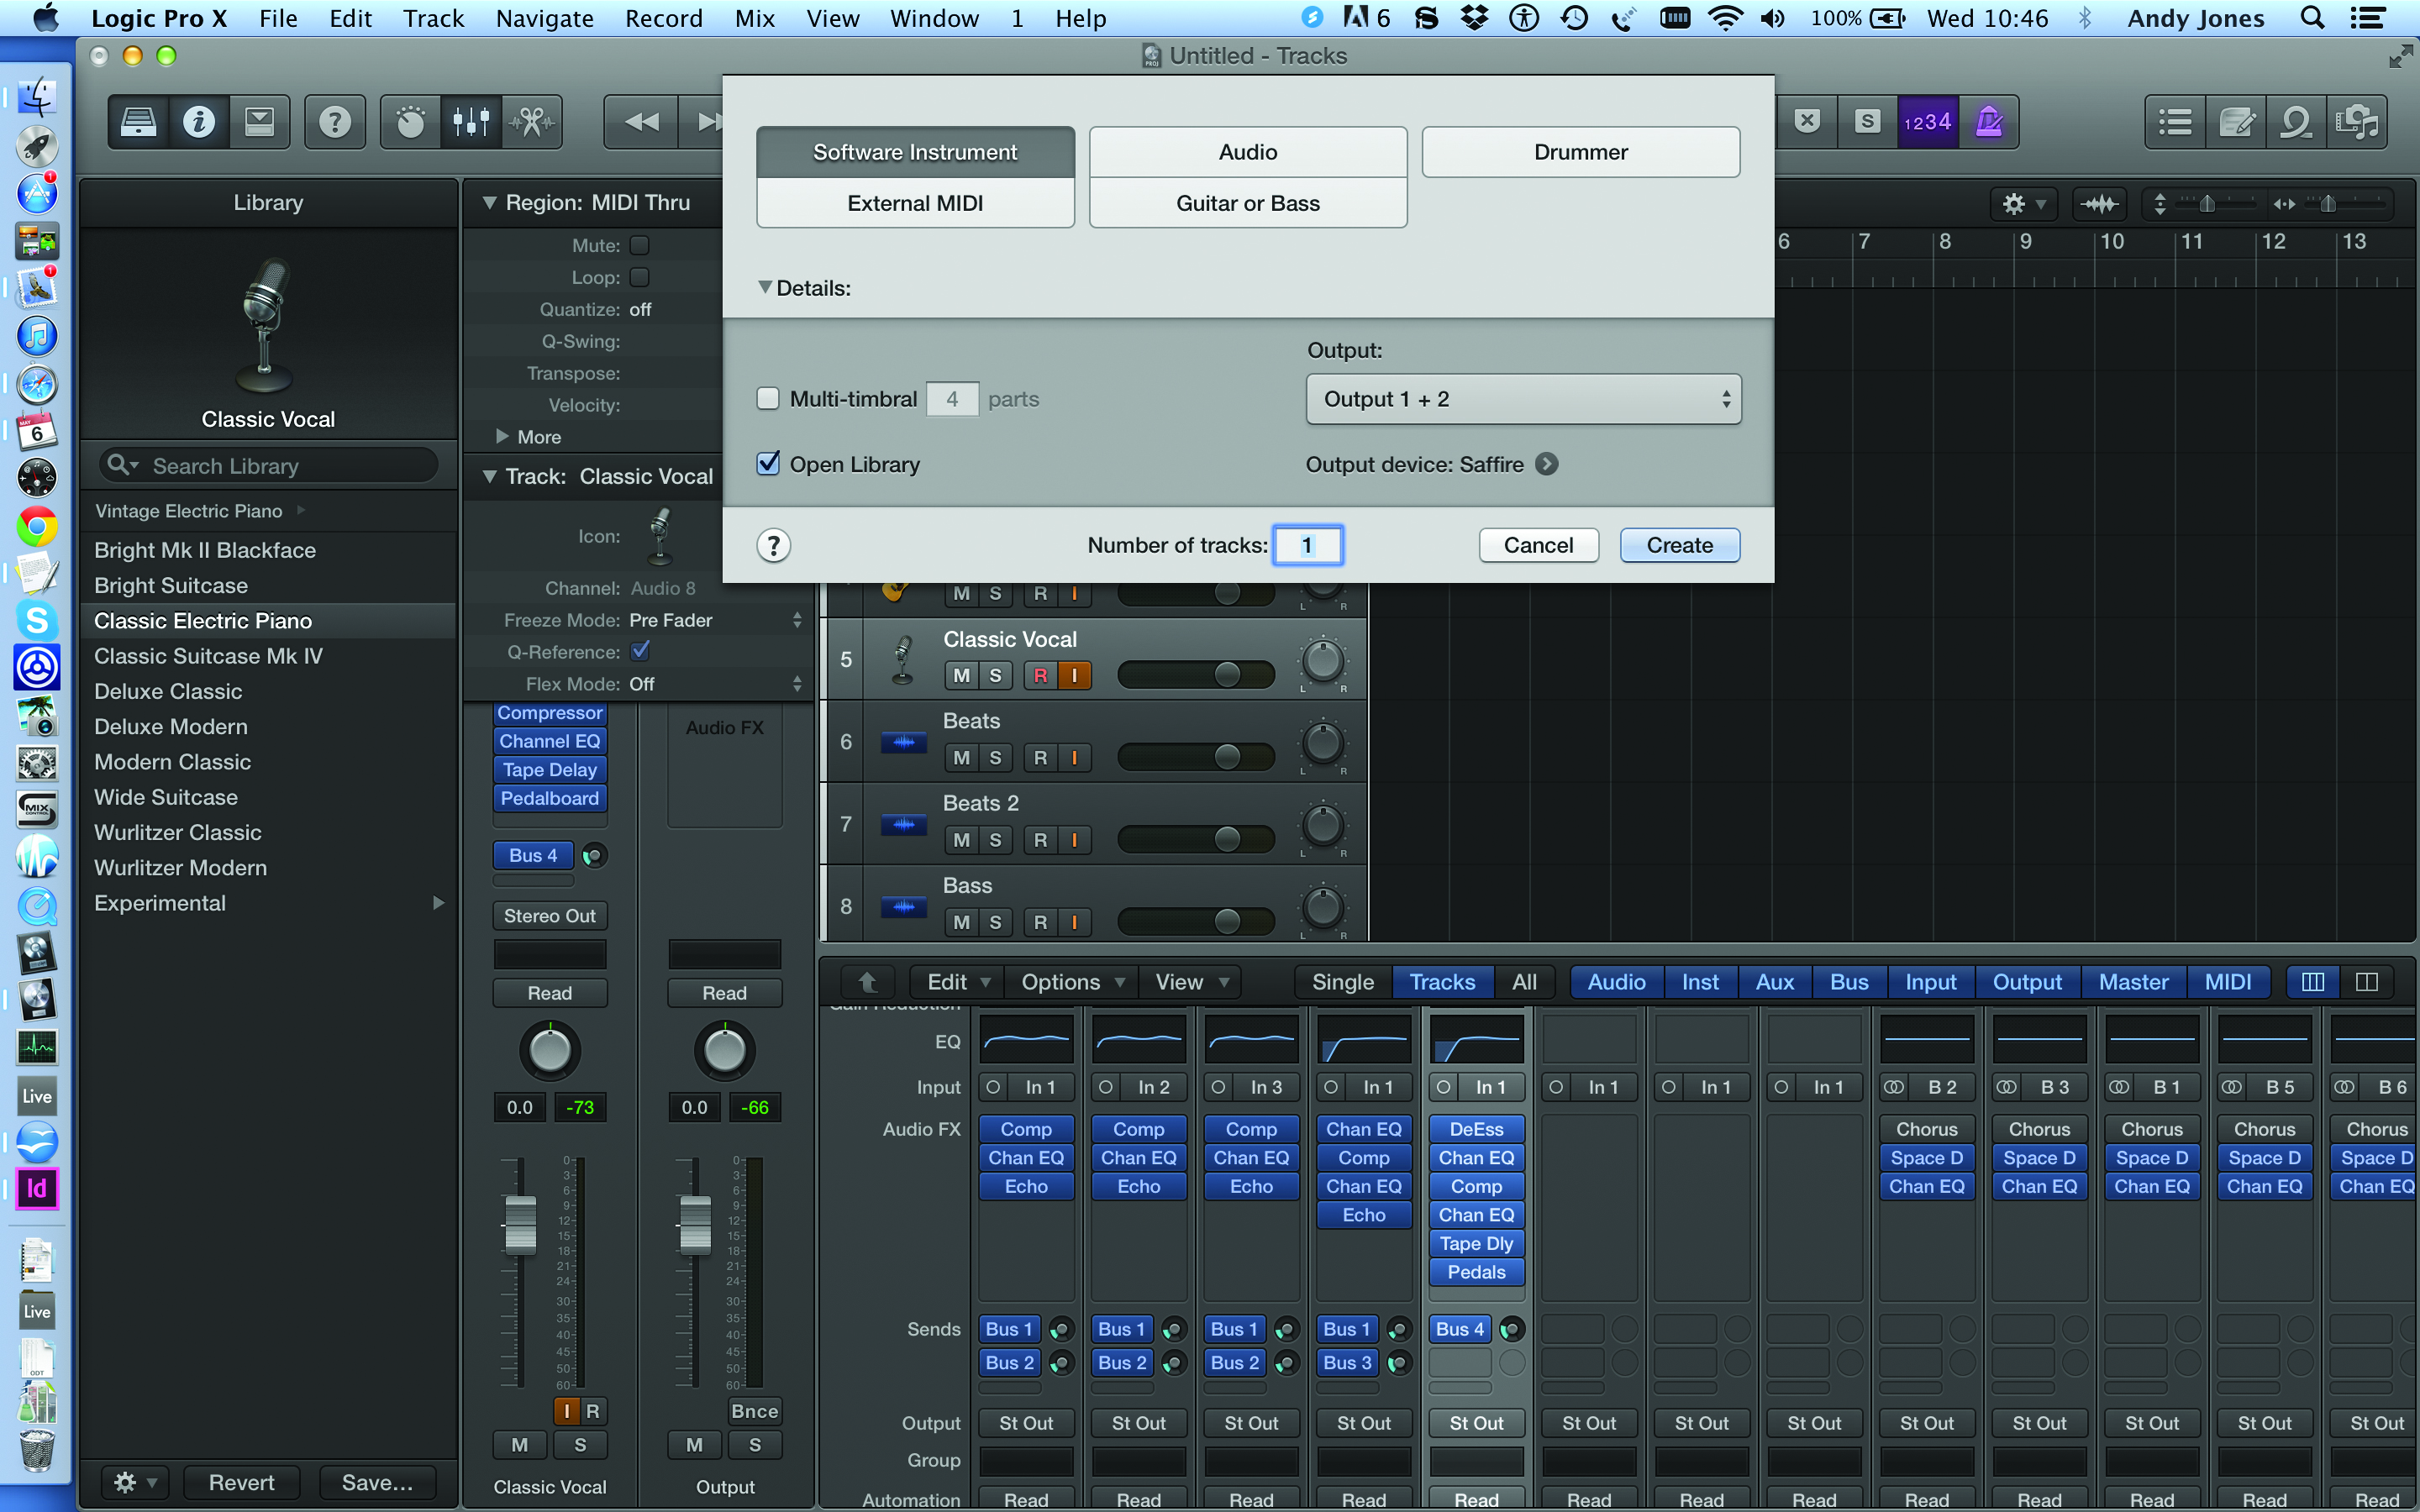
5: That’s the audio side of the project sorted with both audio recording, audio playing and the interface set up. Now time to add software instruments. Press + and select the Software Instrument tab.
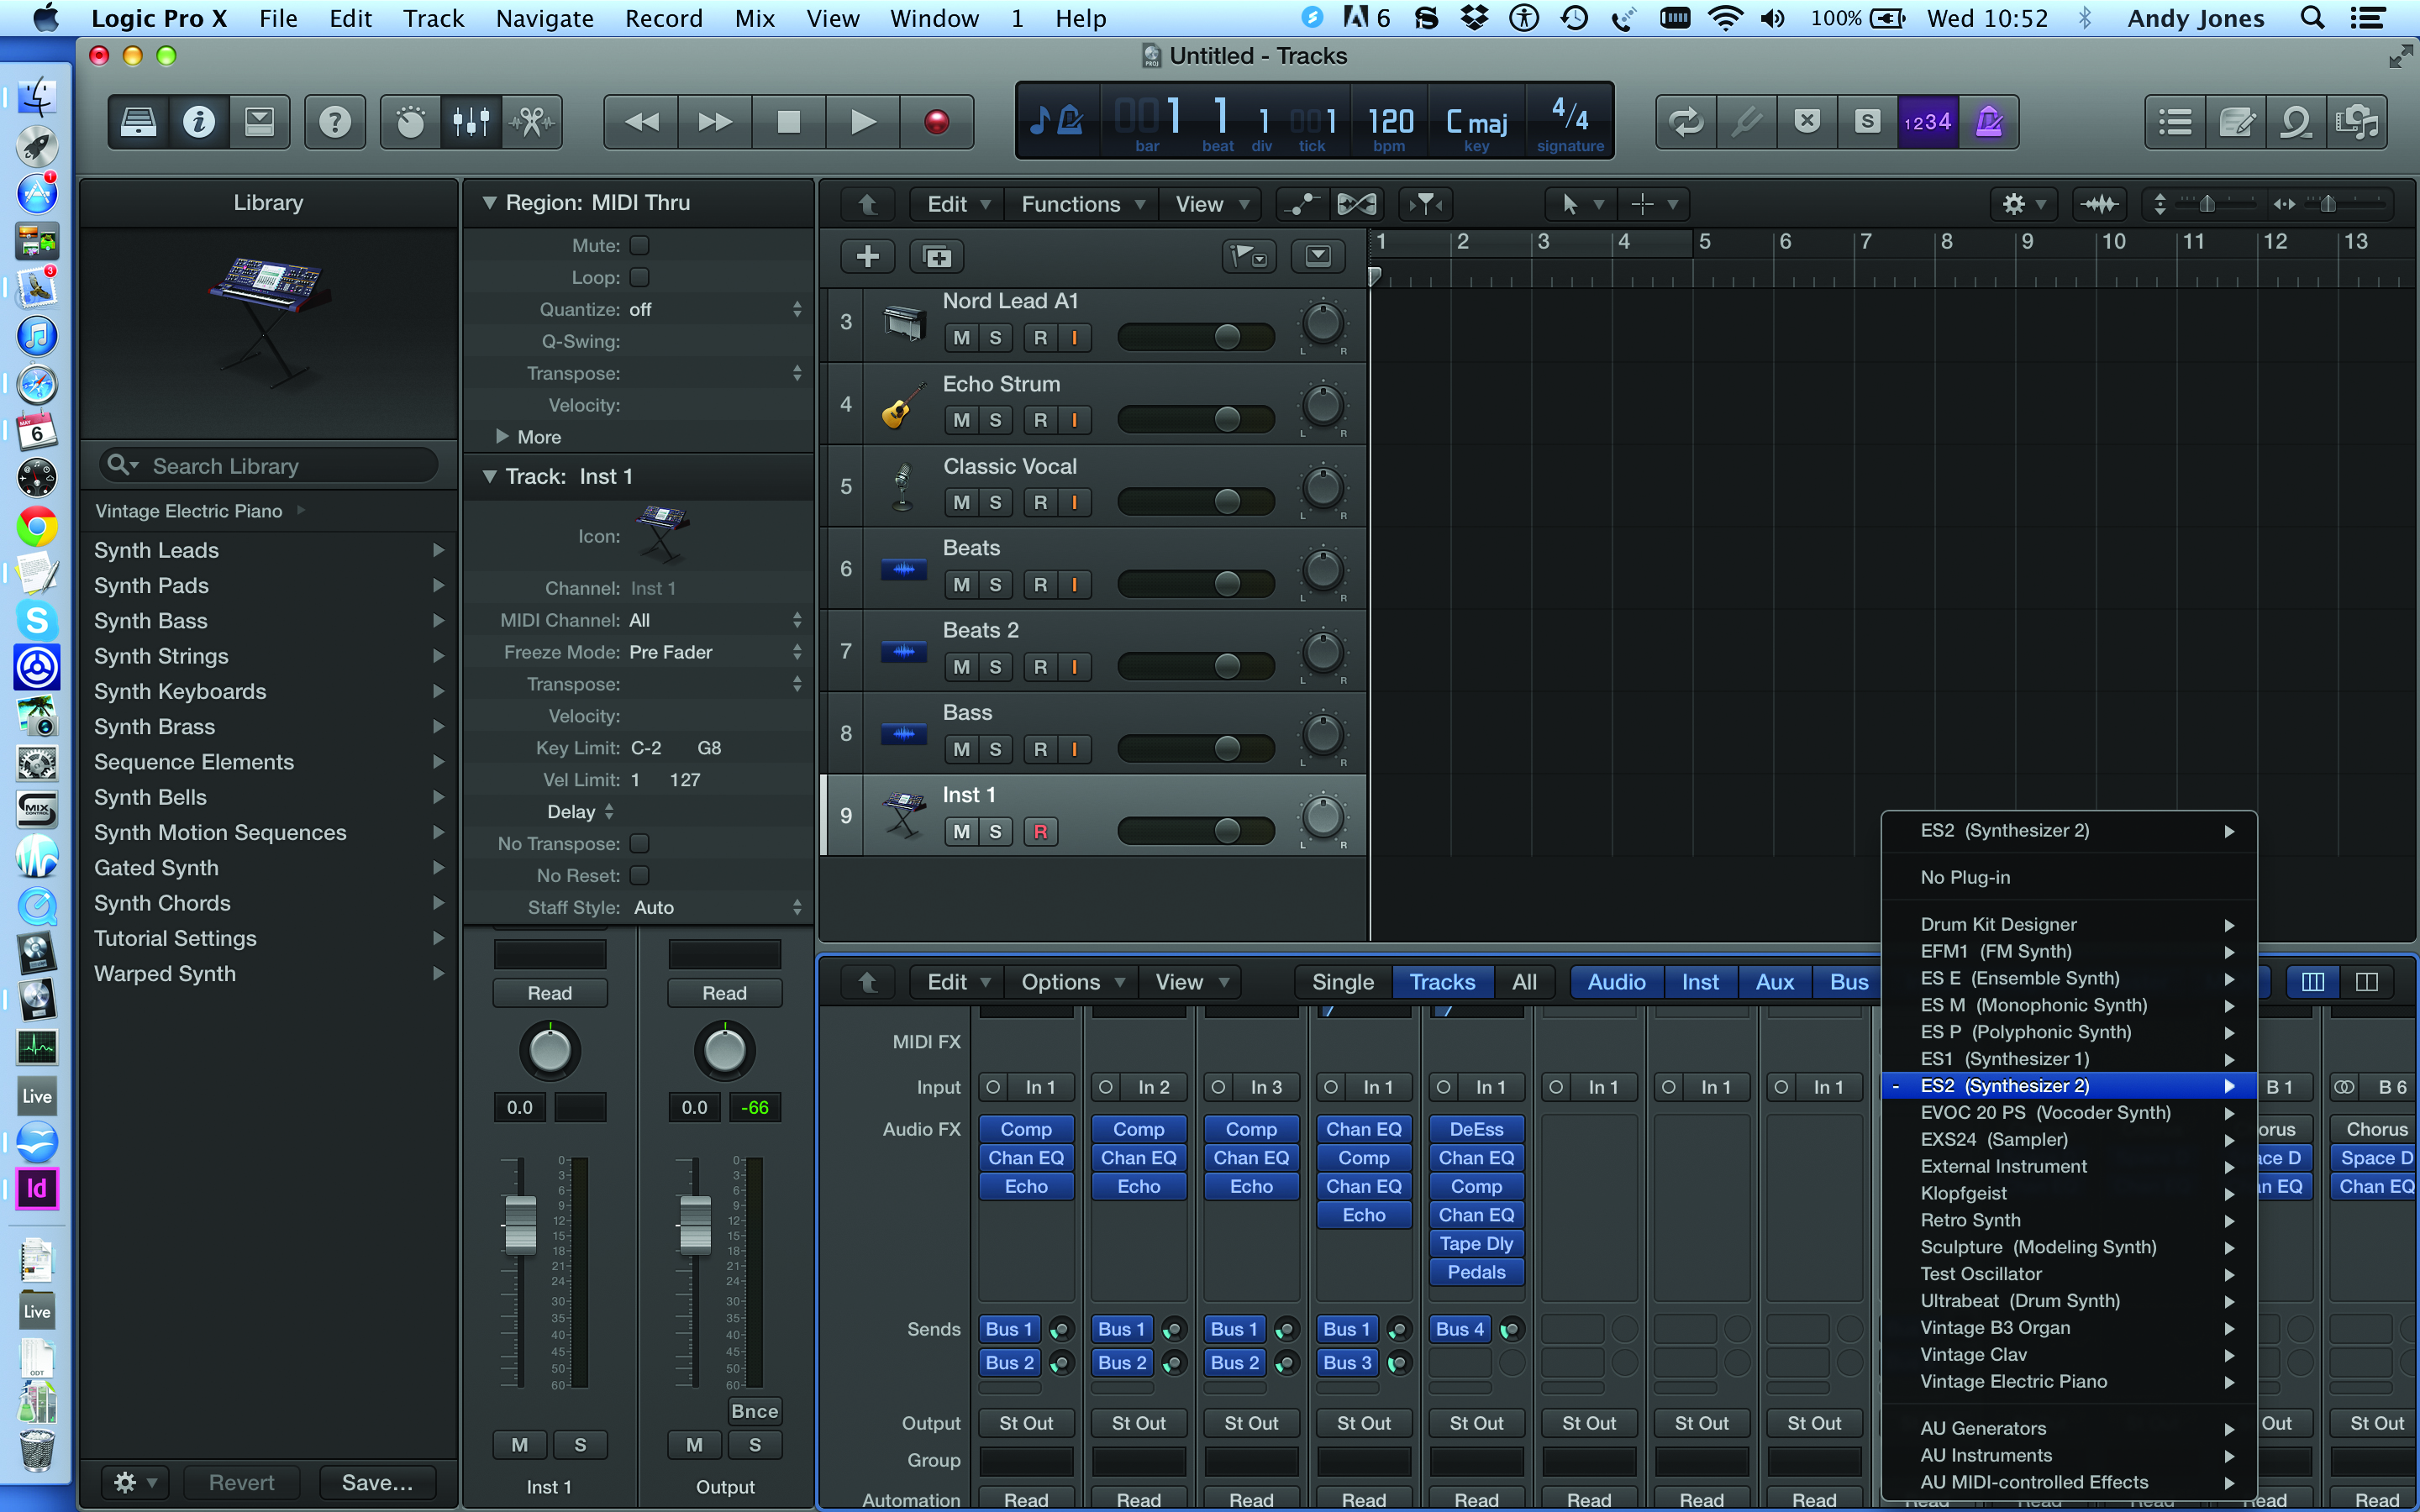
6: An electric piano will load as a typical software instrument. To change it you can simply select the instrument in the mixer and select an instrument from your collection. Here we have ES2.
Click Here To Continue
This tutorial is endorsed by Point Blank. With courses in London, online and now in LA, Point Blank is the Global Music School. You can study sound to picture on their Music Production Diploma courses, with pro industry tutors.
