In this tutorial, you will learn how to build a basic synthesiser, just using an input/output and an oscillator. We’ll be providing the foundations for you to add important functions such as an envelope and filters in the next few tutorials.
To start, create a new patch page, following the instructions in the last guide. Then, we recommend that you use the comment tool to write the labels ‘input’, ‘oscillator’ and ‘output’ at the top of the patch. These will act as headers and will help you understand what part of the patch is doing what.
The Input
Building the input ensures that you can connect your MIDI controller to the patch, then convert the MIDI numbers to a frequency value, or pitch. You’ll need to make it so all the values are in Hz – this will make it a lot easier to work with going forward.
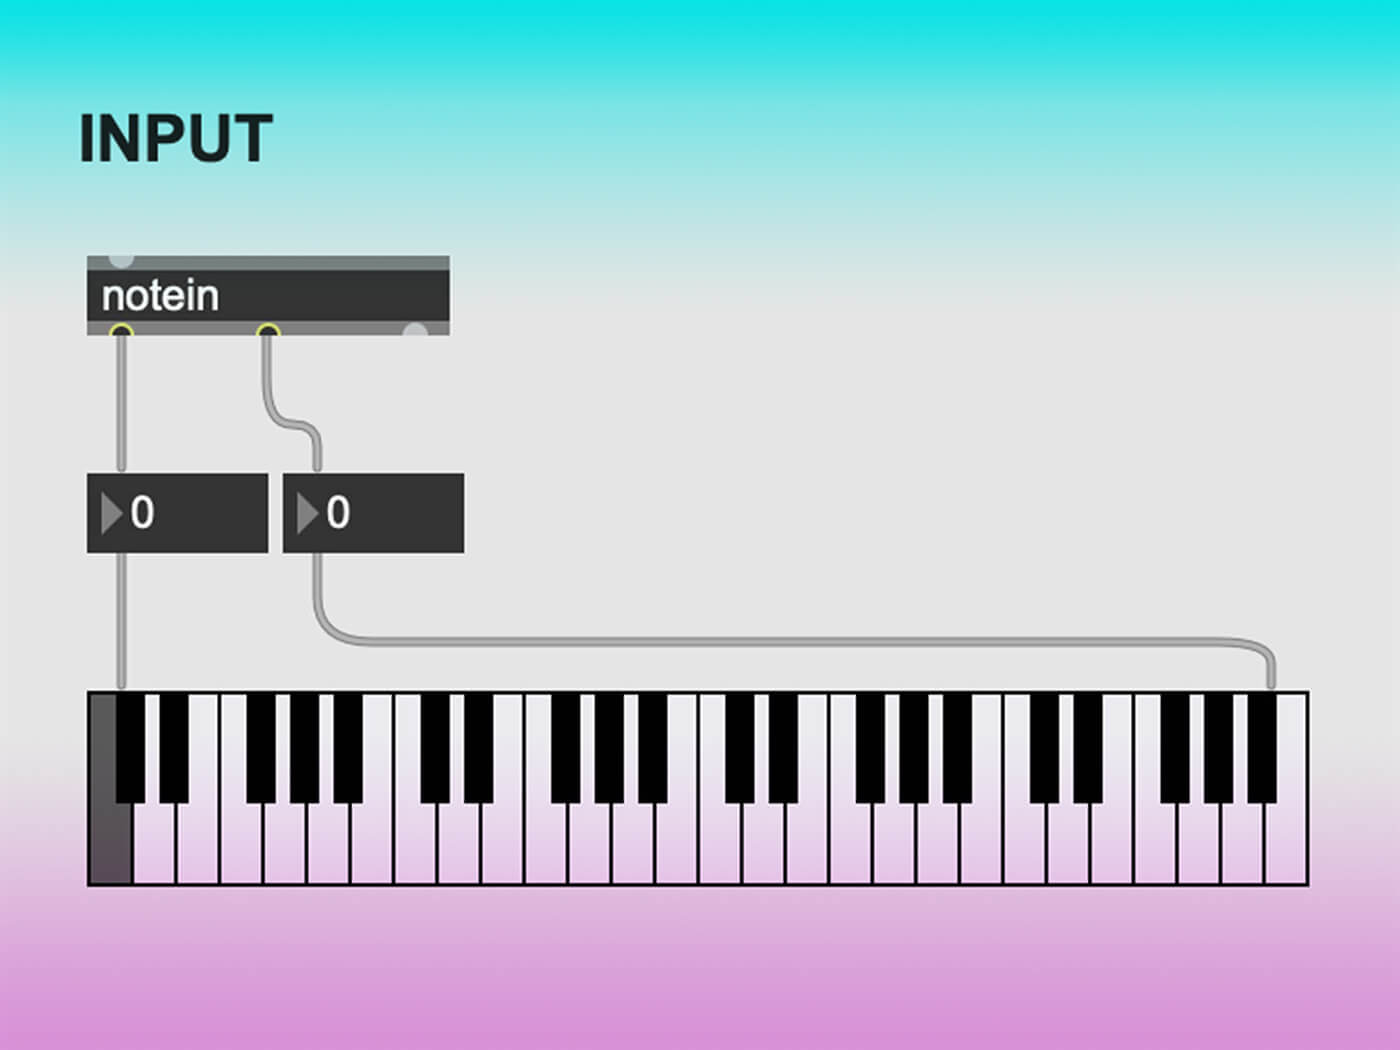
Firstly, add the object ‘notein’ – this receives MIDI note messages. If you hover your mouse under the outlets of the object, they’ll read Pitch, Velocity and MIDI channel.
So that you can can see which MIDI data is coming in from your MIDI keyboard, connect two ‘Number’ objects to Pitch and Velocity.
Next, create the object ‘Kslider’, which will provide a visual representation of what key you are pressing on your MIDI keyboard. Connect the bottom left inlet of the Pitch number to the top left inlet of the Kslider, and the bottom left inlet of the Velocity number to the top left inlet of the Kslider.
It should look something like this:
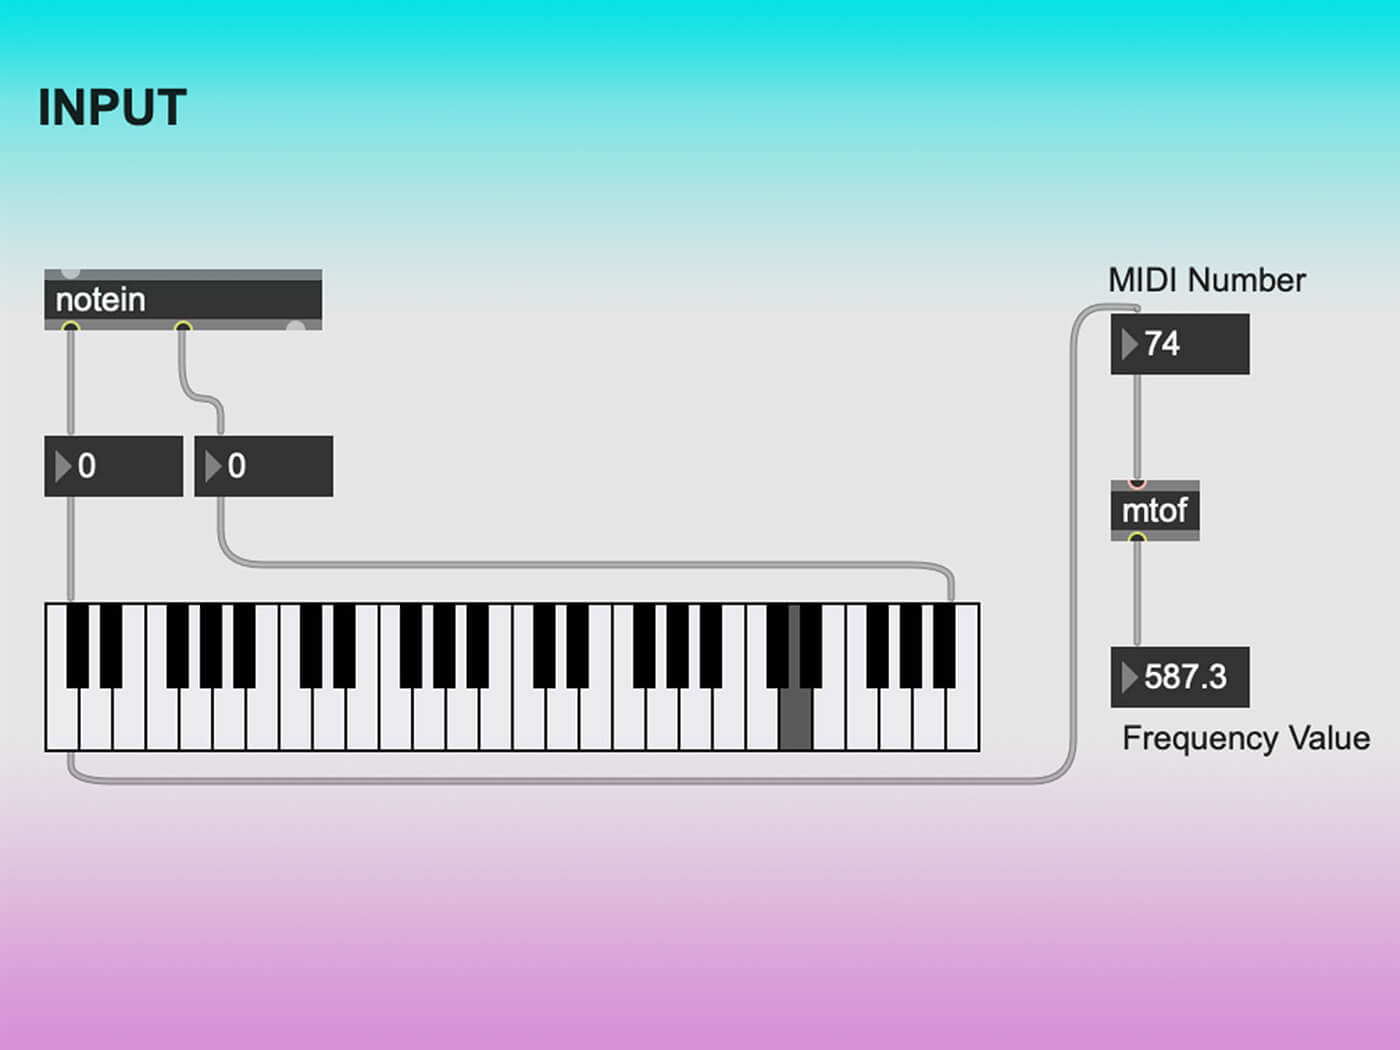
The next step is to convert the MIDI data to frequency values. You can do this simply through the object named ‘mtof’, which you will need to connect from the bottom left inlet of the ‘Kslider’.
A top tip here, to make it easier to see what ‘mtof’ is actually doing to the signal, is to add a number box to the wire above the ‘mtof’ object, and a floating number below.
Your finished input should look like this:
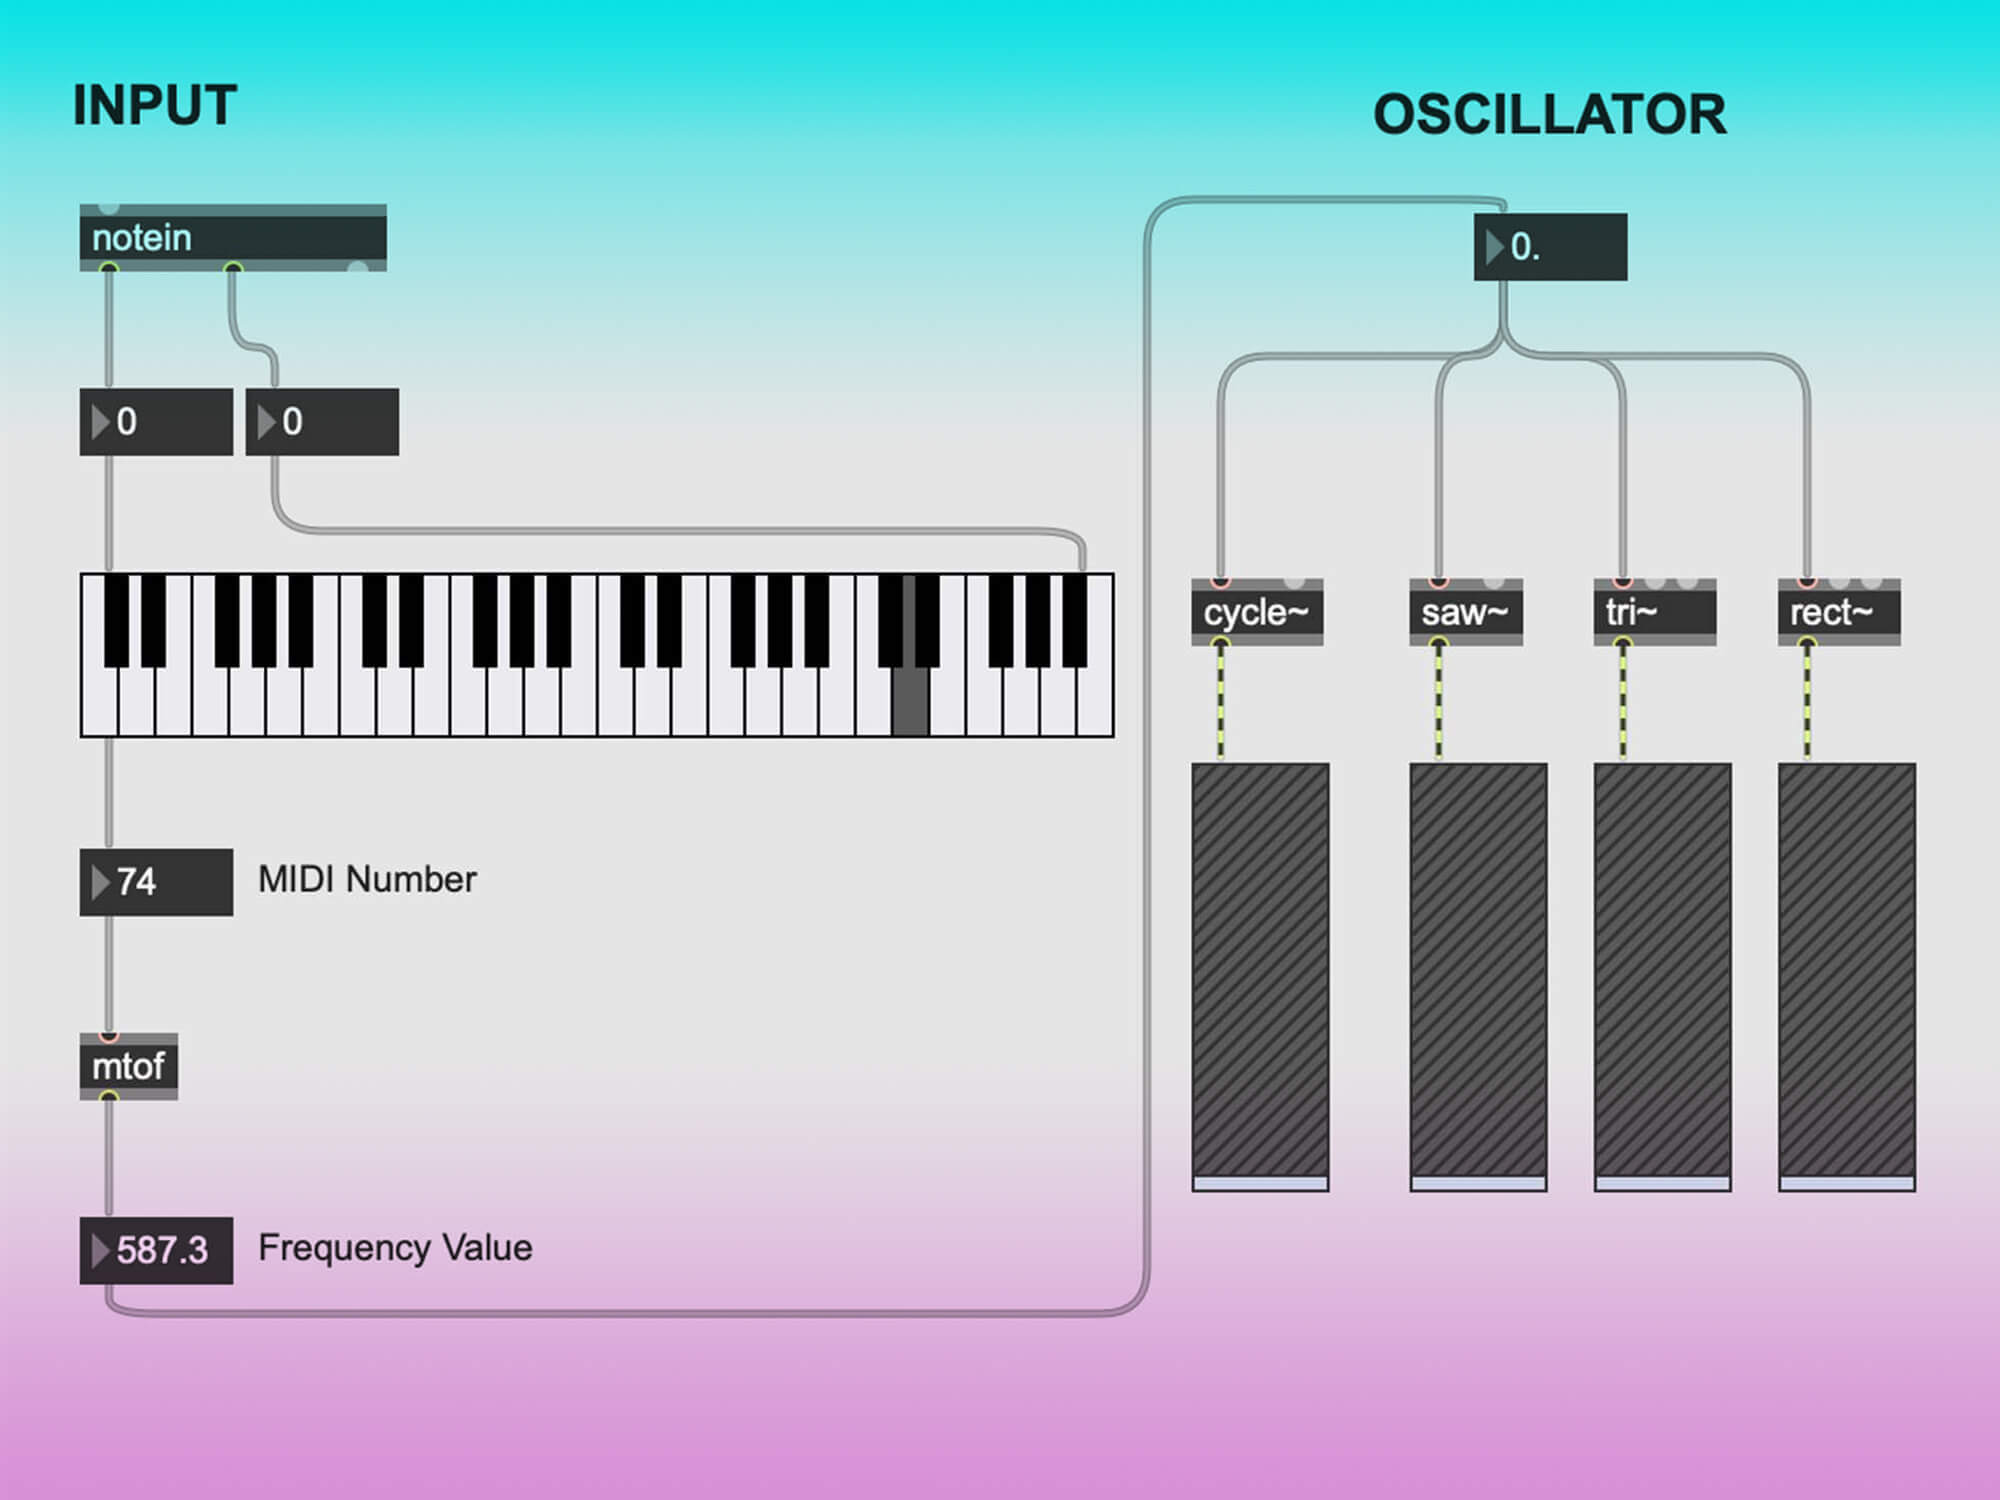
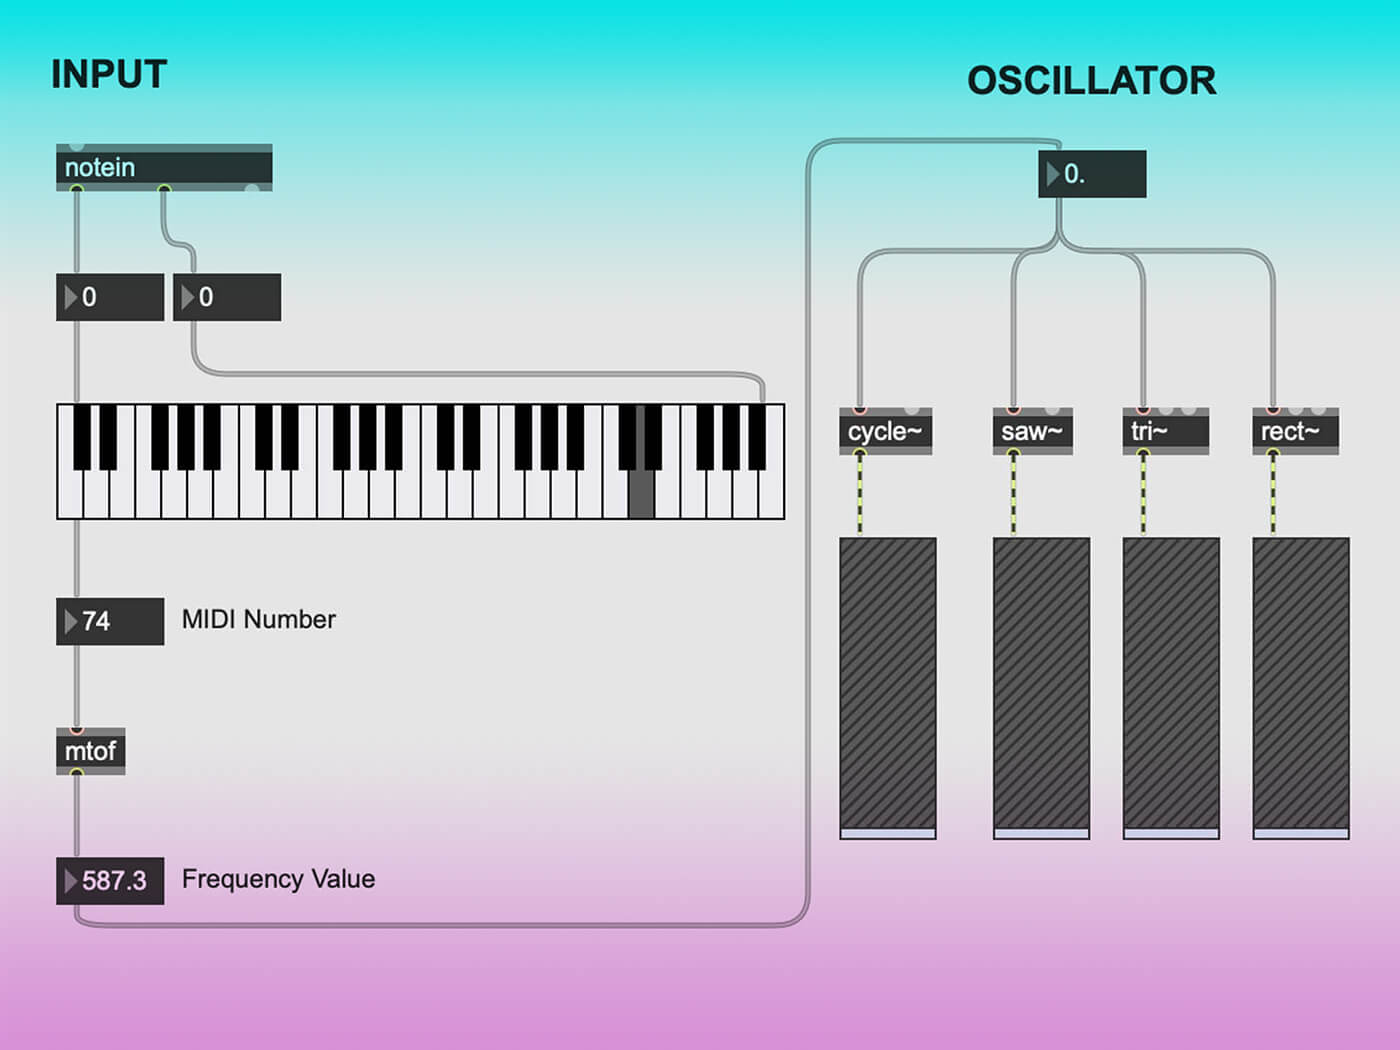
The Oscillator
Now you’ll find that your MIDI Keyboard is controlling the patch but isn’t triggering any noise. This is where the oscillator (and the output) comes in.
An oscillator is made up of a series of waveforms. Commonly, this will include a sine wave, triangle wave, square wave, and sawtooth wave. Luckily, Max MSP has objects that produce these different sound waves, so we simply need to put them into the patch and set them to the desired level using a gain slider.
This is where synthesizers can differ depending on which sound waves you employ. We’ll be using a blend of all four so we can create presets (which will be discussed in tutorial five) to change the levels of each sound wave.
Under the Oscillator heading, create four objects: cycle~ (sine), tri~ (triangle), rect~ (rectangle), and saw~ (sawtooth). This is how the synth will generate sound. However, to control how much of each wave you’re hearing, you will need to attach a gain slider, using ‘gain~’ to each sound wave object, using the bottom outlet.
If you are ever confused about the purpose of an object, you can hold down alt/option and click on an object. A help tab will pop up and give you all the information you need.
In order to make the connection between the input and the oscillator simpler and less messy, you can use a floating number object both after the ‘mtof’, and before your sound waves, so that the connection between the input and oscillator is one wire, rather than four.
This is what the finished input and connected oscillator should look like. However if you are using a different sound wave configuration, don’t worry if yours looks different:
The Output
So that you can hear the lovely sounds being created by the oscillator, you need to build and attach the all-important output.
Understandably, if you just attached the gain sliders straight to an output object (‘ezdac’), it would be very loud – there are four different signals being output, after all. To mitigate this, you’ll need to find a way to attenuate the signal before it reaches the output. There are two ways to do this.
First, you can multiply all four of the signals by 0.5, which will cut the volume in half. To do so, you need to create the object ‘*~ 0.5’, and connect all four of the gain sliders to it from their bottom left inlets. You can use either the left or right top inlet of the multiplication object, but just so you can add the envelope on to it in the next tutorial, it will be best to attach them to the right inlet.
Secondly, create two more gain sliders to control the left and right audio channels. You need to connect these to the bottom of the multiplication object using the respective outlets and inlets. The volume of the attenuated signal can now be controlled before it is output to our speaker.
As this is a monophonic synthesiser, you need to join the right and left audio channels by connecting a wire between the bottom right of the left audio channel gain slider to the top left of the right channel gain slider. When you control the left channel, the right one should move too.
Now you’ve attenuated the signal and added in a volume control, connect it to an output object, using ‘ezdac’. Once it has been put into the patch, join the left outlets of the gain sliders to both the left and right inlets on the ‘ezdac’ objects to ensure that both the left and right channels sound monophonic.
Another top tip from us: You might find that the wires are not as neat as you might want. To get them in order, you need to press ctrl/command +A to highlight the patch, and then press ctrl/command + shift + Y.
You’ll find that, even though you are no longer holding down a key, it still plays out, but don’t worry. This is why, in the next guide, we will be building an envelope that controls how long a note plays for.
You now have a basic but functioning monophonic synthesiser. Feel free to have a tinker with the oscillator, adding as many sound waves in whatever combinations you like.
If you haven’t downloaded Max MSP yet, you can access a four week trial on Cycling74.com