Logic Pro X Tutorial: Become a Power User Part 3 – Creative Audio Manipulation
Dicing-and-slicing audio can be a creative and rewarding experience thanks to a range of features found in Logic Pro X. Mark Cousins picks up his scissors in the latest Logic Pro X power user tutorial… Manipulating audio in creative and often extreme ways has become a cornerstone of modern music production, whether it’s radically re-slicing […]
Dicing-and-slicing audio can be a creative and rewarding experience thanks to a range of features found in Logic Pro X. Mark Cousins picks up his scissors in the latest Logic Pro X power user tutorial…
Manipulating audio in creative and often extreme ways has become a cornerstone of modern music production, whether it’s radically re-slicing a drum loop, cutting up a vocal or glitching a synth line. Using features and processes that were originally designed to subtly fix a performance, we can now ‘dice-and-slice’ an audio recording into a radically new form, often with a completely different musical purpose. And while it is possible to use third party plug-ins to create some of these effects, it’s also worth noting how adept Logic Pro X is in this particular application, boasting a range of features that speed up the process while still giving you plenty of creative input.
In this tutorial we’re going to explore a number of different ways in which we can manipulate an audio region in Logic Pro X. We’ll start with the process of rendering a file from a virtual instrument, which is essential if you want the part to have a ‘cut-up’ aesthetic. Of course, your starting point could be an existing audio recording, but I find that some of the most interesting and unusual effects come from virtual instruments being moved into the audio domain. Once we’ve rendered the file, we’ll look at a number of different slicing techniques using audio regions, transient markers and the EXS24, producing cut-up and glitch effects that are down to sample-level accuracy.
Looked at from another perspective, this month’s tutorial also highlights Logic Pro X’s ability to move musical information between the domains of MIDI and audio. For example, a part that might begin life as a bog-standard audio recording could end up being sliced and triggered via MIDI from the EXS24, while a virtual instrument could end up being printed as an audio file so that it can receive some dramatic slicing treatments. Being able to work dynamically between these two domains – MIDI and audio, in other words – is one of the most important skills any contemporary music producer can have, so it’s great to know you have the flexibility of a DAW like Logic Pro X at your fingertips.
Cutting Up Audio
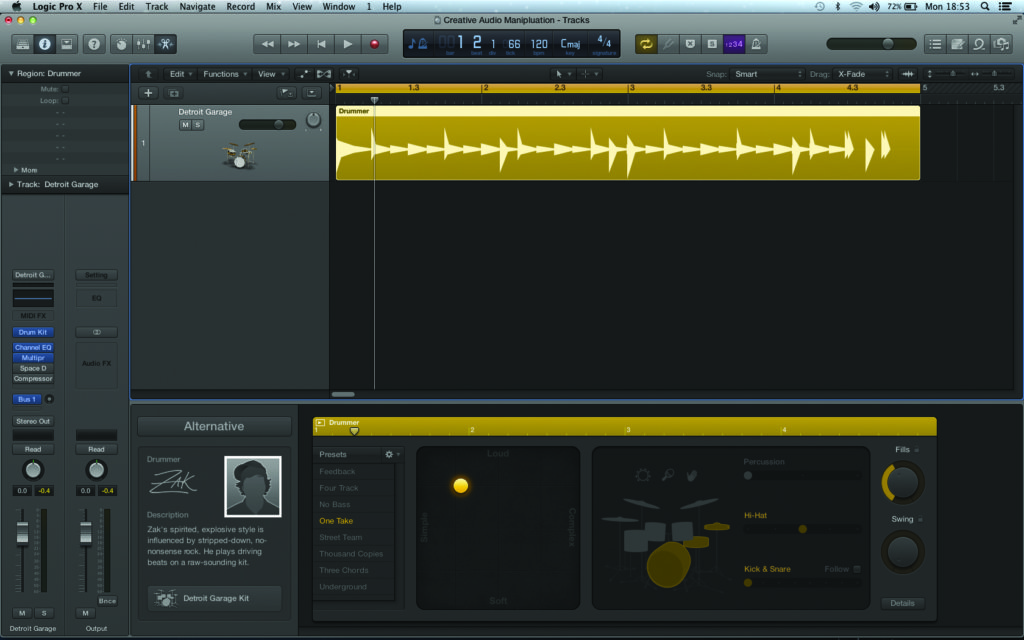
1: In this example we’re starting off using a basic rhythm track created in Drummer, although, of course, you can use any source as your starting point, whether it’s an acoustic guitar part, a vocal line or a sequence created with a virtual instrument. The key point is that we’re intending to ‘slice-and-dice’ the audio in some shape or form.
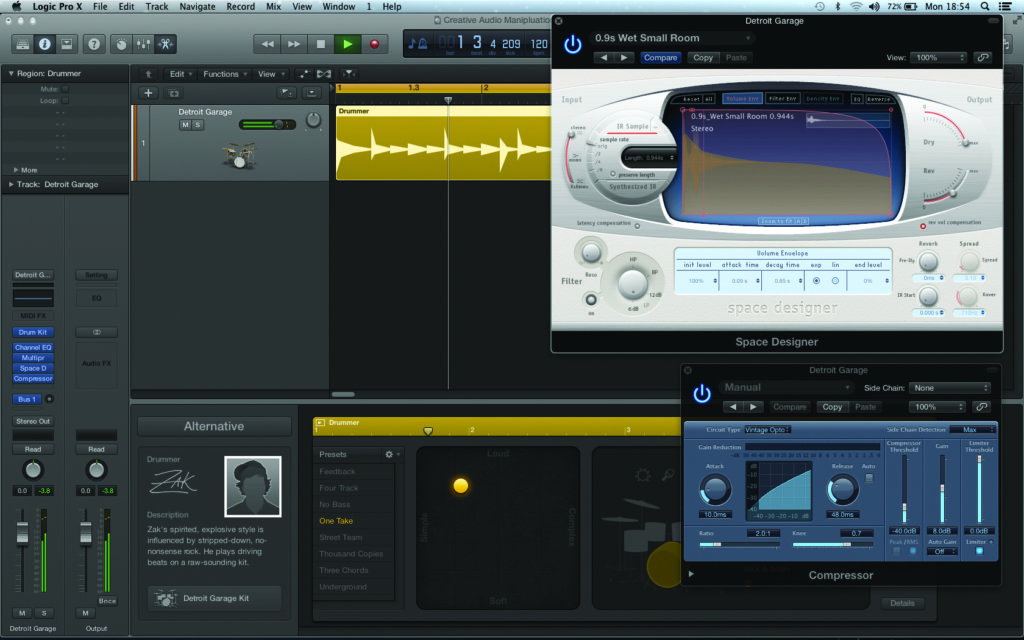
2: If you’re intending to cut up the audio, it’s often interesting to apply some additional effects that are printed into the audio file. Arguably the best effects to use are compression and reverb as their body-enhancing qualities tend to make the edits stand out – we want the part to sound cut-up rather than discretely edited.
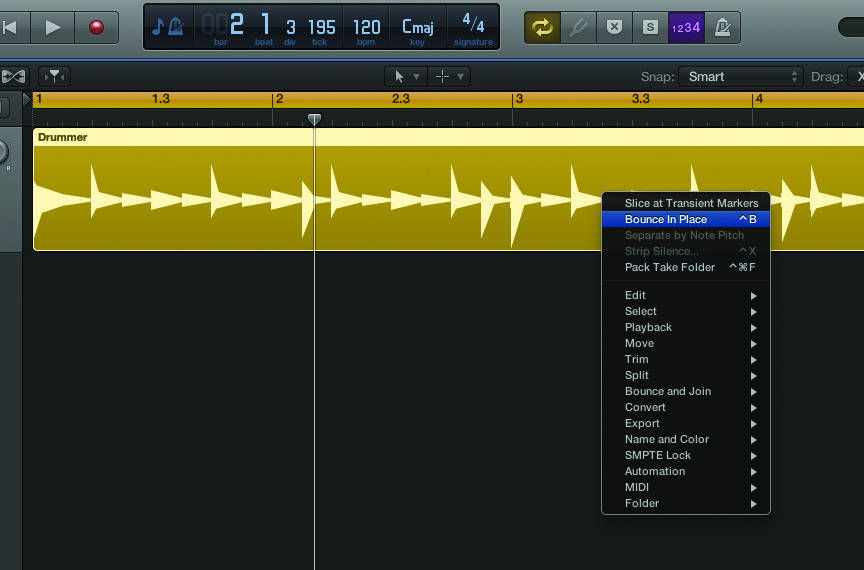
3: To render the file, try [Ctrl]-clicking on the region and then selecting the Bounce in Place option from the contextual menu. The accompanying dialog will present a number of options that relate to how the region is bounced. Ensure that the Bypass Effects Plug-ins isn’t checked so that the additional plug-in effects are written into the resulting audio region.

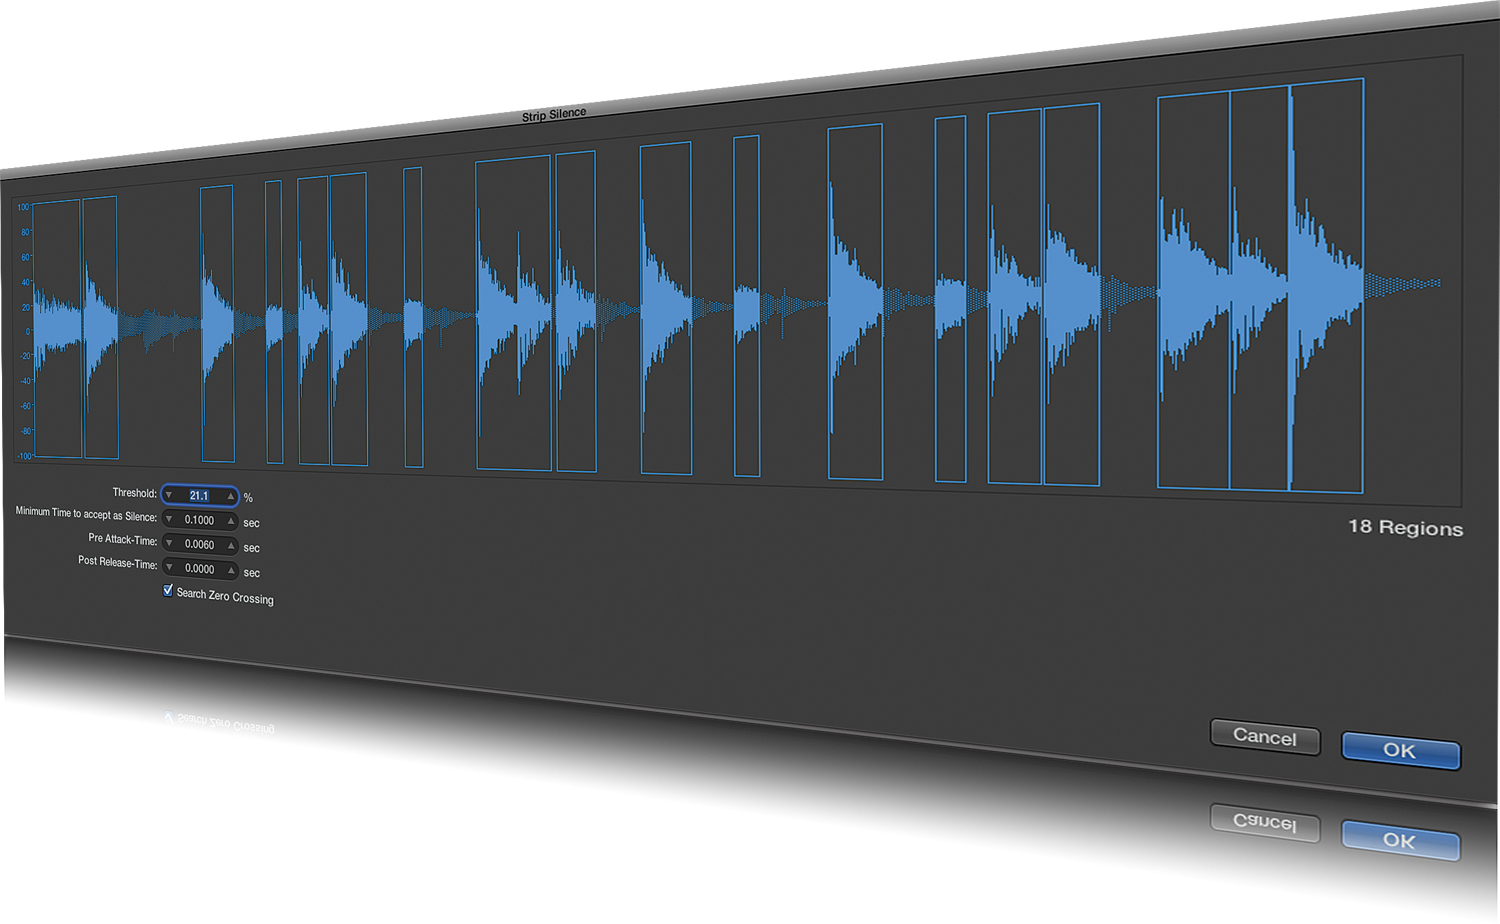
4: Now that we’ve rendered the file we need to think about slicing it up. Of course, you could do this by hand using the Scissors tool, but you can also use the Transient Markers feature to do this automatically. To see the current Transient Marker assignment, open the Audio File Editor and select View>Transient Editing Mode.
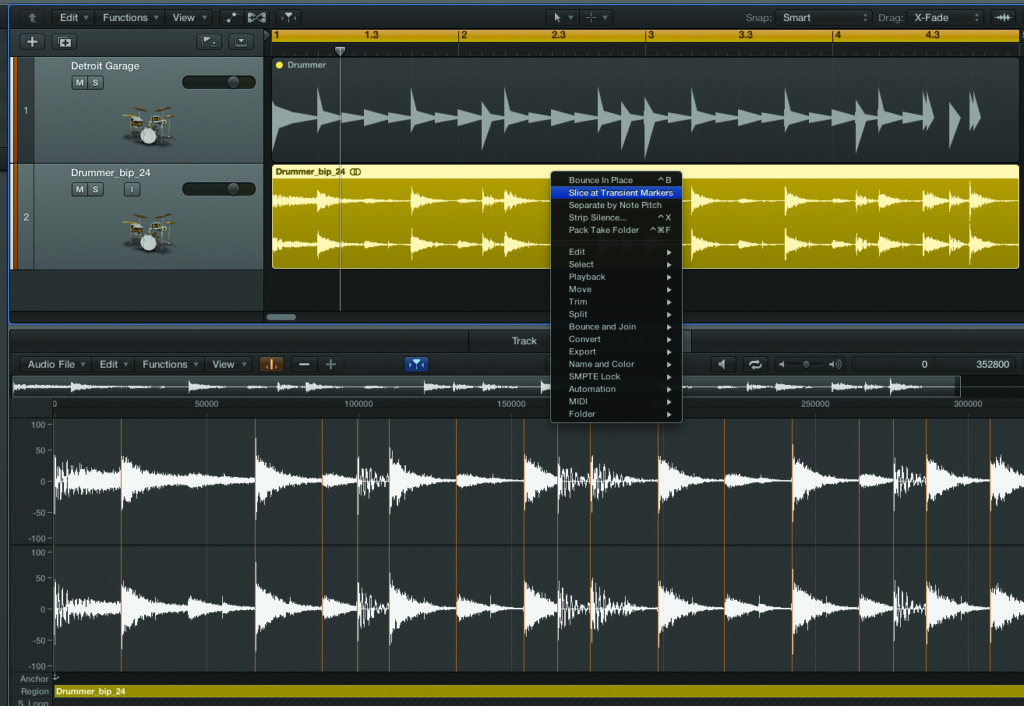
5: You can adjust the number of Transient Markers using the + and – icons in the Audio File Editor. Once you’re happy with the number of transients, try [Ctrl]-clicking on the region and selecting Slice and Transient Markers from the contextual menu. The region will now be edited in accordance with the Transient Markers, with each Marker setting a new region.
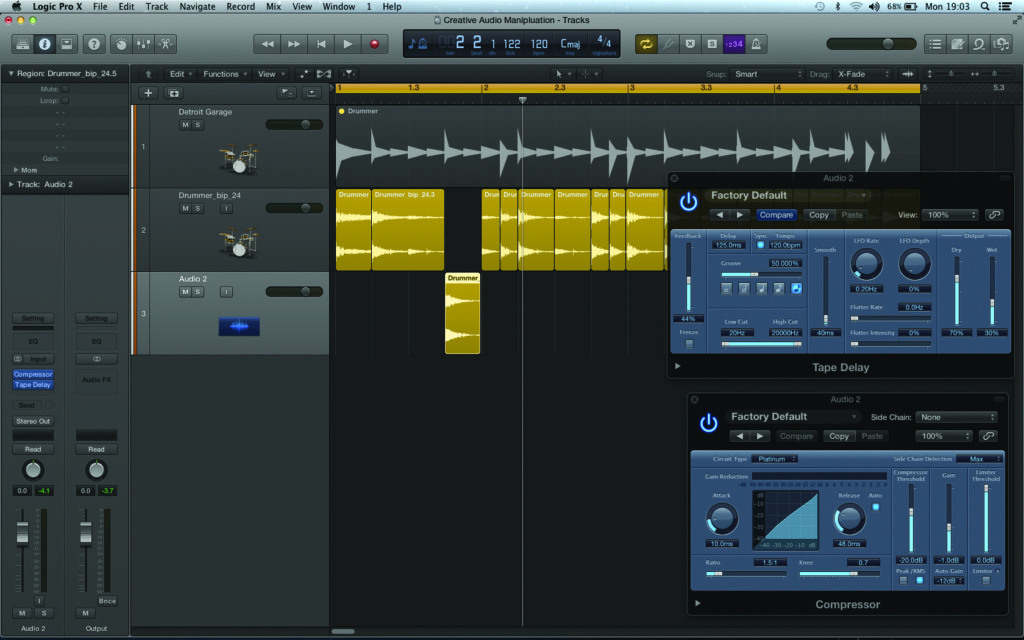
6: Once the region has been edited you can start getting creative with the slices. Of course, the regions can be rearranged, duplicated and resized as you see fit. Another interesting technique involves copying selected regions onto a new track and applying a unique effect to the slice, such as delay, compression or bitcrushing
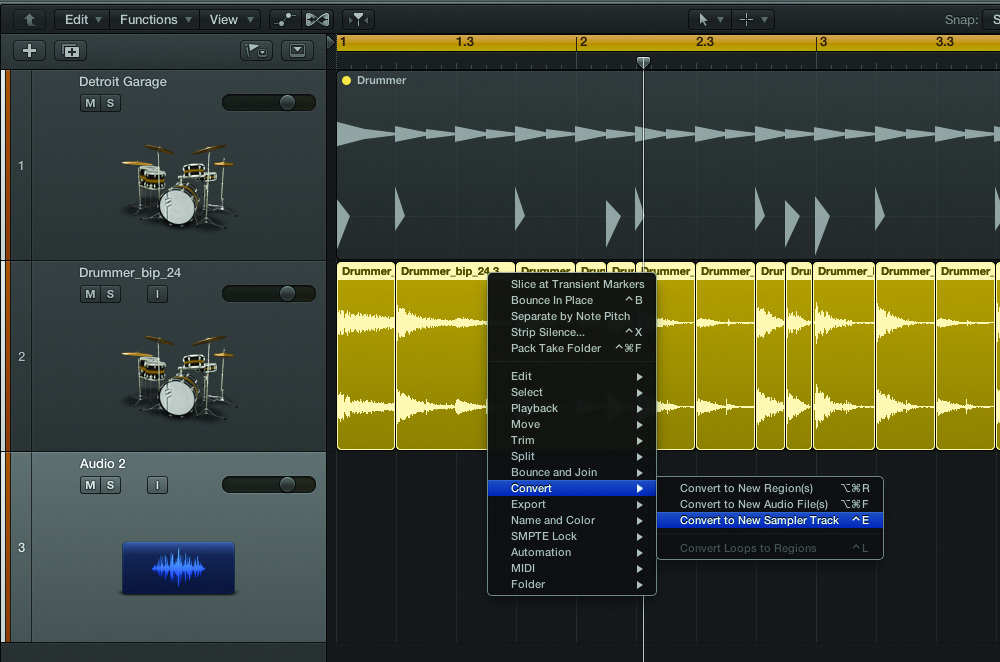
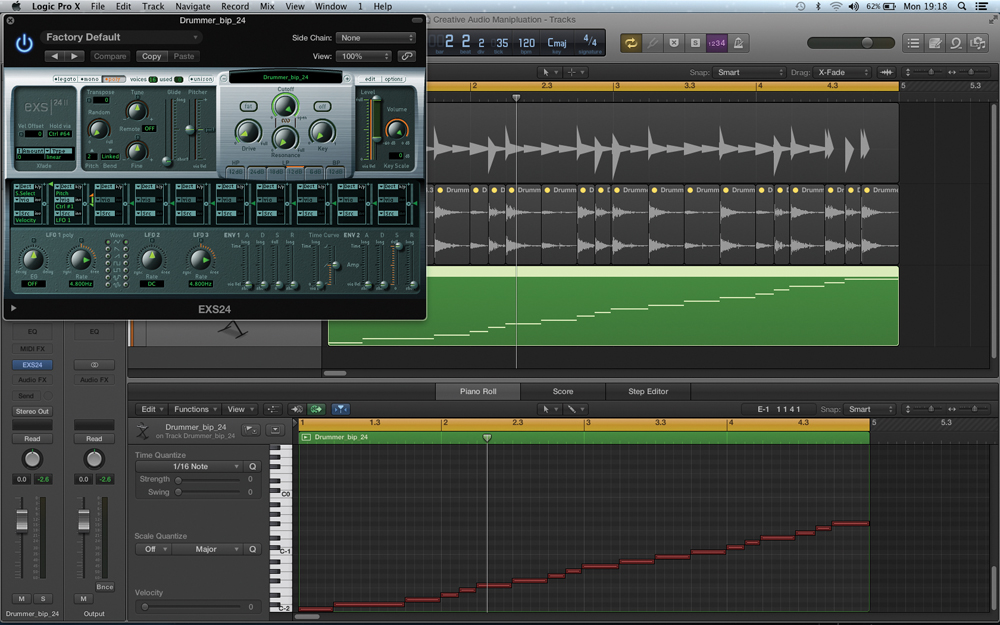
7: Turning almost full circle, we can also use the contextual menu item Convert>Convert To New Sample Track to turn the region into a time-sliced EXS24 instrument. The advantage with this is that you can explore a range of dramatic treatments that go beyond what you can achieve using audio editing alone, including reversed slices and glitch-type loop effects.
8: In the dialog for the Convert to New Sample Track feature, make sure that you select the Regions option in response to what Logic should create zones from. The result will be a new EXS24 instrument, as well as a new MIDI region with the slices triggered by MIDI. Try playing the loop by hand or experiment with retriggering effects with the sequence data.
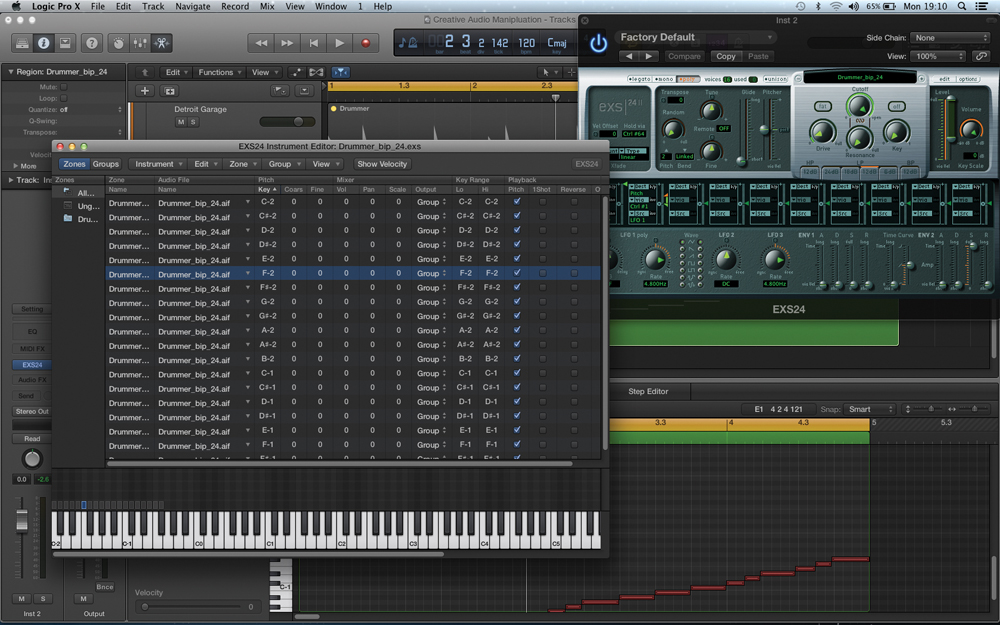
9: To start manipulating the data you could choose to exploit some of the front-panel controls on the EXS24, including shortening Envelope 2 (which is used to control the amplifier), re-pitching the loop, and using the filter. Some of the most interesting results, though, come from delving further into the EXS24 Instrument Editor, which can be accessed via the Edit button.
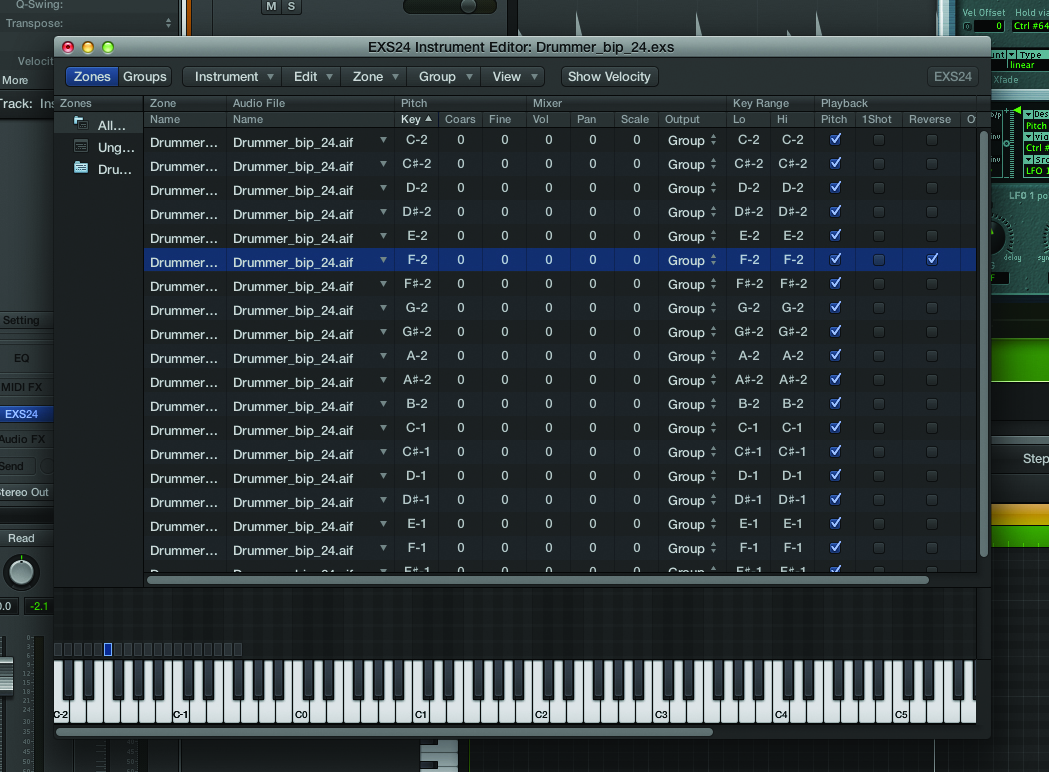
10: Inside the EXS24 Instrument Editor you’ll see the zones displayed as a list of sequential sound files. Each zone has its own set of parameter values, including tuning, volume and pan position for each slice. A useful feature is the ability to reverse the zone – this is a great effect when triggered on one or more zones within the loop.
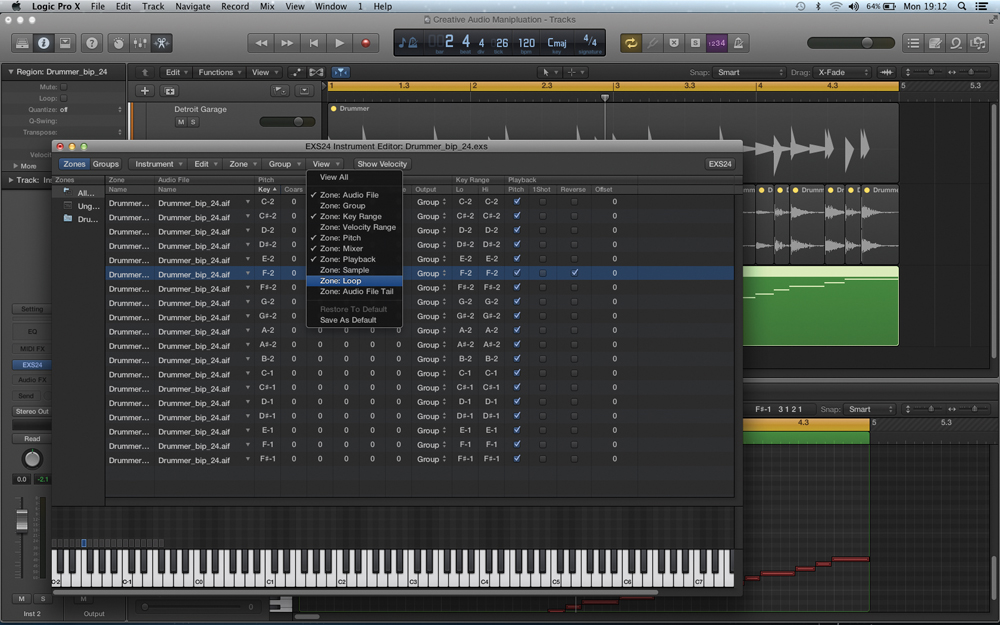
11: For glitch-type sounds it’s also interesting to experiment with sample looping. The loop sounds similar to the effect of the slice being retriggered to a 1/32nd division, although this time you can use even smaller divisions. By default, though, the loop parameters aren’t visible, so you’ll need to use the menu item View>Zone:Loop to see the current looping assignments.
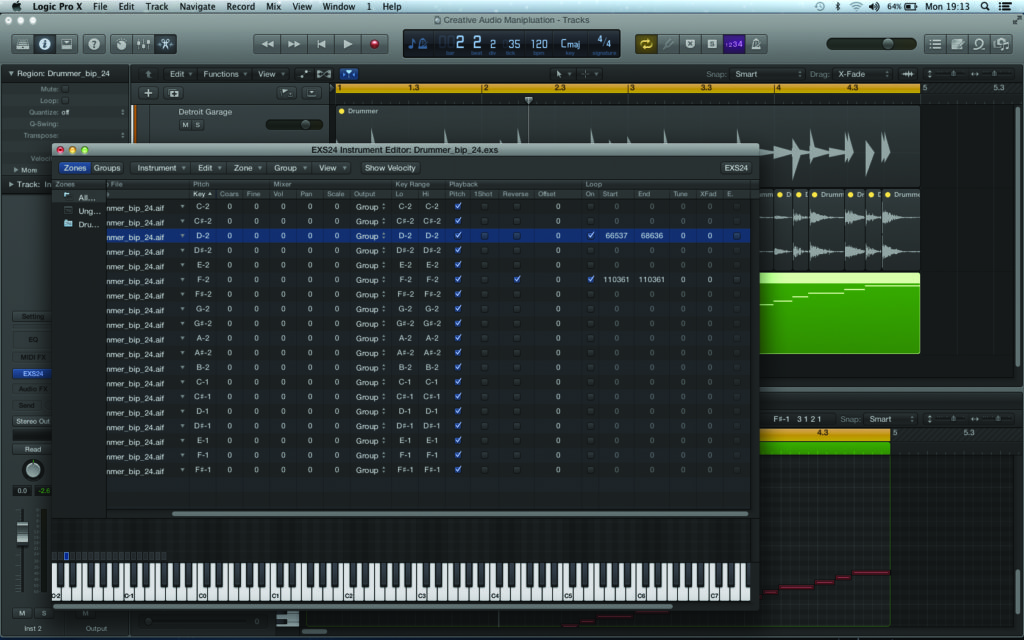
12: With the loop parameters active, you can start to explore some glitch-like effects. Once active, you can set the duration of the loop using the start and end parameters. Short loops take on an almost tuned quality, while longer loops (achieved by increasing the end point) sound almost as if the slice is tripping over itself.
