Drum Sound Design Tutorial
From big beats to a minimalist drum section, there are numerous techniques you can draw on when it comes to creating your own drum sound. Liam O’Mullane shares his favourites.
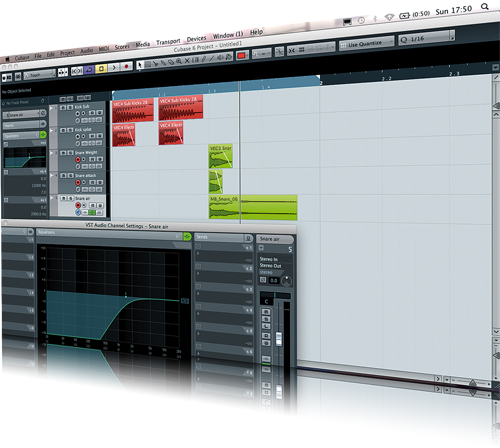
 Layering in Cubase 6
Layering Considerations
Remove Excess Frequencies
Nearly all untreated drums will need a certain amount of frequency trimming, but the amount will depend on the size of drum sound you’re after. This is a decision that directly relates to the space you’re giving them in the context of your overall mix. A live drum kit will need a lot of low end removing from most microphones to eliminate rumble and lower-frequency mud. In the case of overhead or cymbal mics, the amount of low–upper-mids to remove can be quite significant. All sounds need their own space to live in, and depending on how much the sounds overlap each other, you may have to remove more frequency content to prevent the overall sound from becoming too dense.


Frequency trimming with Sonalksis SV-517MK2
Exaggerating Peaks
Any decent-quality drum sound sample will have one or more resonant frequency peaks. These can be easiest to spot using a spectral analyser. Certain styles, such as the low-end 180Hz thud on modern heavy electro snares, require you to exaggerate these peaks. A general low-end boost with an EQ will make the lower frequency louder but also potentially make the snare too dominating in the bottom end of the mix. Instead use a parametric EQ set to a narrow width (Q) and then boost the specific frequency of the resonant peak.
More Layering Considerations
In contrast to the strategic layering illustrated in Tip 1, simply putting two or more random samples together will in most cases yield some less-than-pleasant results. But by applying a few phase-based tricks you can make the most out of them. First pay attention to the direction of each layer’s phase. Phase can be flipped via your DAW’s mixer channels, by a plug-in, or by choosing ‘flip phase’ from the audio-editing options. Assess which phase direction sounds better (or worse!) as you introduce each new layer. Next explore slightly offsetting each layer by tiny movements in time. As different parts of the sample move in and out of phase you can determine which positions work best for the sound you’re creating


Advanced layering in Cubase 6
Sound Masking
If you’ve got a lot of drum parts playing various rhythms in a programmed pattern, try muting one sound or another when they play at the same time. This can help to reduce sound masking, which happens when too many sounds play at the same time and cover similar frequencies. Your pattern can still sound busy if that’s what you want, but strategically removing sounds when too many double up will help to retain a certain level of sonic definition.
ADSR And Envelopes
If you’re using a sampler you’ll be able to shape the amp Attack, Decay, Sustain and Release of each sample. The attack stage is often overlooked, but it can turn an overly bright or brittle drum hit into something a lot more rounded and fat-sounding. Just slowly increase the attack time until the tip of the drum transient is softened. If you need to create a tighter, snappier sound, use the decay time while the sustain value is set most or fully at its minimum. This lets the decay control how long a much louder transient is heard for. The release time is useful for a natural drum sound, giving a natural decay at longer values. However, a low release time will let you control the playing duration per drum sound by the length of a MIDI note triggering it, enabling you to program shorter stutter-like sounds one minute, then longer, more natural-sounding hits the next.

Modifying the Attack, Decay, Sustain and Release
Gate or Edit
If you’re working with a multitrack drum project it’s easiest to set a gate to mute any unwanted bleed in a recording. This is the quickest approach but it’s hard when the dynamics and speed that the drums are being played at varies throughout a track. Editing the hits individually is time-consuming, but it gives you a lot more control over where the mutes occur and you can use envelopes to fade things in and out smoothly.
Improving Transients With Compression
A compressor has a variety of uses when it comes to drum sound-shaping. This Tip involves applying extreme compression with a high ratio and medium threshold settings. Without any make-up gain enabled, this will make the drums very quiet. Raise the attack time to deliberately let a slither of full-volume drums pass through uncompressed. This will add a new transient to the drums; adjusting the attack time will let you shape this transient differently.
Trialling Different Sounds
It should go without saying that it’s a good idea to trial different sounds together when first creating your drum sound. Sample choice or kit choice (for a real drummer) can have a big impact on how suitable a drum sound is for a given track. With sample-based drums, don’t be afraid to swap out sounds at the mixdown stage. As your mix gets busier through its evolution, you may find that changing your kick and snare choices at the end will transform your final mix for the better.
Gate Shaping
Gates can be used for drum-shaping in a way that always sounds different from the other methods discussed. Set the threshold high enough so that the gate starts to open with each hit of the drum. Then you can explore using a quick attack and no hold time for a sharp start to a drum, with a ramped-down fade that is controlled via the release or decay parameter. The other option is to set a short release time and use the hold time to create a classic ‘gated’ effect with an on-and-off volume change.
Synthesising Kicks and Toms
The kick and the toms are the simplest of drum sounds to synthesize. Any synthesizer that lets you modulate the oscillator’s pitch with an envelope can be used for this job. This might be hardwired as a pitch envelope, or you may have to manually route this modulation. After choosing a subtle tone – like a sine or triangle wave for the oscillator – create a very fast attack shape on the pitch envelope. With the sustain down, use the decay to shape an almost instant pitch drop. Now explore how strong this modulation needs to be to get the kick sound you’re after. The pitch at which you play the oscillator is the main difference between this sound being a kick or a tom (also explore setting longer decay times for higher tom sounds).


Synthesising kicks and toms using Massive
Working With Found Sounds
If you want to create a truly unique-sounding collection of drums, grab a portable recorder or run a microphone from your audio interface and get into the kitchen. There are so many potential sounds with the character of plastic, wood and metal. These can be hit with a wooden spoon, a metal spatula and so on to generate more tones. Shakers and rattles can be created by putting dried foods such as rice and pasta into bowls and pans as well.
Pitch Modulation To Samples
A short but sweet trick to really get snap from your drum samples is to use a pitch envelope on samples. In the same way as synthesising kicks, create a rapid pitch descent using the decay time with a low sustain and attack settings. Experiment to find the right amount of modulation and the most suitable decay time.
Synthesising Ride Cymbals
A synthesised ride cymbal is very different in texture from a real cymbal, but its tone has become iconic over the years (with a big helping hand from the Roland TR-909). All you need is an FM-based synth to get the required metallic tones. Start with a square wave oscillator pitched up from middle C by 24 semitones, then set the FM modulating oscillator to 44 semitones and start applying the modulation amount to the first oscillator until you start to hear a bell-like sound. Next bring in two more square waves and set their pitches to sound harmonically musical. Detune them to get their tones to pulse against one another, then shape the transient of the ride using a low sustain, long release, short attack and short decay time on the amplitude envelope.


Synthesising ride cymbals with Massive
Utilising Sample Triggering
If you’re working with recorded drum tracks but need a more rigid level of intensity from certain sounds like the kick and snare, drum replacement is worth exploring to either augment or replace these sounds. Logic, Pro Tools and Cubase all offer drum replacement tools, and third-party options are available as plug-ins. This is the simplest way to get consistent power from your drums with minimal effort in terms of sound production and editing.
Working With Grooves
Although a drum groove won’t have a direct impact on the production sound for drums, the correct use of velocity when programming is certainly a large contributing factor to the finished production sound. If you use accenting to make different drum elements sound louder when playing together, you can further imply the desired rhythm and feel, making those particular parts in the beat sound much more powerful. The timing and feel of a groove is also worth exploring as a well-produced drum track might still sound like it’s lacking something if the timing is sterile. Without paying attention to the groove, you might unnecessarily start to mess with your drum sound when it’s really not the cause of any problems.
Reverse Sounds For More Vibe
A great way to get a push-and-push feel from your drums is to add some reverse sounds before they are played forwards. A tried-and-tested way of doing this is to add a reversed snare before it plays forward. But less is more, so try adding one before the fourth snare when played on the second and fourth beats per bar (the second snare in the second bar). This will give a nice push to the end of the drum pattern. You can add to this feature by minimising other sounds while the reversed sound plays. This adds further focus to the moment and makes the returning forward snare all the more dramatic.


Reversing sound in Cubase 6
Group Processing
When you pass all of your drum elements through a group channel you get much more than just control over their volume as a whole. You can add compression to get a much more gelled drum sound, or apply a transparent EQ to bring out important information as your mix starts to get busy. Pick a musical EQ, something like a Pulteq can give a very professional finish to a drum sound, adding elements of saturation for extra harmonic content.
Parallel Group Processing
Running a parallel channel from a group can work wonders, increasing the energy and density of a drum sound. A classic trick is to smash the parallel channel with a very hard compressor like a Urei 1176. With the attack and release at low settings, nothing slips through this compressor, meaning that you can really slam a signal through it. The output will be a flat and very noisy sound that you mix in below the original for a constant level of energy.
Synthesising Snares
The process of making a snare drum from scratch starts in much the same way as it does for a kick (Tip 12). With a subtle amount of pitch modulation and a higher oscillator pitch in general, you can create the sound of the top skin of the snare. The snare rattle needs emulating, which you can do with a noise oscillator. You’ll need to give it a dedicated amp envelope as it needs to sound for a short period of time for the attack portion, then stop while the top skin resonates. A high-pass or band-pass on the noise oscillator can help to add bite to the attack stage; passing the whole sound through a distortion will give more of an aggressive sound.


Designing snare with Alchemy
Choosing The Right Reverb
Your choice of reverb can vary widely. If you want a super-tight and upfront sound from a live recording, you might want to add a tiny amount of a small room setting. But the ambience in the recording (even in the driest of rooms) might already be enough. Larger reverbs have their place on drums if there’s space between each hit so the reverb can be heard. The stereo width of a reverb is also important. If you want a wide drum sound, a wide-sounding reverb will enhance your overall sound, but in many cases the drums might need to be in the centre of the mix so that other instruments can have space at the sides. In this instance you’ll either want to go for a mono reverb, or use a width tool to control how wide the reverb is.
Working Into Distortion
Distortion has its uses when crafting a drum sound. You can apply a tube-like saturation to a drum group for added volume, glue and intensity as newer harmonics are added and the dynamics are reduced. Another approach is to apply distortion to a group in parallel using a more extreme, hard-clipping distortion. Much like parallel compression, this will added a constant level of background information, increasing the perceived energy in your drums.
Delays And Programming
As delays have specific repeats after a sound they aren’t a great effect for adding ambience to drums. But since a delay is really a constant rhythm, they can be interesting to interact with. Try adding a delay to a percussion part and programming a few hits, then experiment with delay times until something really jumps out at you. For extra funk, set the delay time to MS instead of quantized values and go for around the same timing as before, but add a loose feel by not setting it precisely in time.
Treating Your Creation As New Loops
Many of you may have played with drum loops in the past and also sliced them up to re-edit their order and create unnatural silences between hits and so on. If you’ve created a drum beat that sounds great in terms of production but isn’t doing anything for you in your current composition, try treating it like any other drum loop. Render it to a mono or stereo audio file, then slice it up and program something new out of it. Turning your drums into a new format to interact with can really help you to move forward with ideas when you get stuck.


Slicing and dicing in Cubase 6