Ableton Live – The Ultimate Guide: Part One – The Inside Track
Ableton Live’s popularity continues to grow, and if you’re a recent convert and want to get a quick handle on it you’ve come to the right place, as Martin Delaney is here to demonstrate its power with this Ableton Live Guide… For This Tutorial You Will Need These Project Files Ableton Live has been around […]
Ableton Live’s popularity continues to grow, and if you’re a recent convert and want to get a quick handle on it you’ve come to the right place, as Martin Delaney is here to demonstrate its power with this Ableton Live Guide…
For This Tutorial You Will Need These Project Files
Ableton Live has been around for over ten years now, but sometimes it still feels like the new kid on the block, remaining fresh, innovative and deceptively simple to use. The Session View and warping are what make Live truly unique – the competition has had a decade to try and catch up, but still hasn’t really managed to.
Live keeps growing in popularity, too, with new users coming on board every year, so now seems like a good time to go right back to the start and write a guide that unearths the reasons for the software’s popularity while exploring the its hidden (and not-so-hidden) depths.
Live can be easy to learn and it’s a hell of a lot of fun, but it’s not a toy – this is a fully-functional tool for music creation, production and performance. You’ll see Live on stages and in studios around the world, and this series will explain why it has become such a force in the DAW world.
All in One
Live’s single window design contains all of the elements that you need to get going, and most of them can be shown/hidden by keyboard shortcuts to make the best of your available screen space. (Live also supports dual displays, where you can view Arrangement and Session Views simultaneously.)
The triangle at the top left of the screen toggles the Browser, which is where you need to be to load samples, instruments and effects. Other elements include the Mixer, the Overview, Sends, Return Tracks, In/Out View (signal routing) and the Detail View, which is where you’ll see either clip contents or instruments and effects.
The keyboard shortcut you need for all of these is alt-cmd followed by the appropriate letter for the element. So alt-cmd-m toggles the mixer, alt-cmd-i toggles the In/Out View, and so on (though it’s ‘l’ for the Detail View – I guess they ran out of letters!).
Just Looking
I’ve already mentioned the Browser, and on a day-to-day basis this is your one-stop shop for software instruments and effects and their presets, as well as audio sample content. Live will install with tons of content anyway, but you can add more at any time.
Of course you can record and program your own content, but Live Packs are a great way to gather more material. (They’re like Ableton-specific .zip files, and Live Packs from Ableton or other suppliers will install their contents directly into your Library, appearing in the Packs section of the Browser.) You can also create shortcut links to your own folders outside of the Live Library, which is useful if you like to keep your full-length songs in iTunes, for example.
Once you have a lot of material in there sometimes it’s faster to search for what you want instead of scrolling through huge lists and sub folders (as long as you have an idea of what it’s called).
For those times you can use Live’s search function, the Browser doesn’t even have to be open, just hit cmd-f and begin typing the name of what you’re looking for – the Browser will open, and a list of results will begin to filter itself as you type. Then use your keyboard’s arrow and enter keys to select and load the item you were looking for. Very fast way to get around!
As an Ableton Certified Trainer I spend a lot of time dealing with buying advice to do with soundcards and controllers. I don’t want to be a party pooper, but usually my advice is to wait as long as possible before choosing a controller, because your ideas about what’s right for you will change fast as you get to know Live. So for now, if you’ve got an old MIDI keyboard lying around, work with that to get started.
Switching Sides
Live isn’t only picking up new users, it’s gathering converts from other DAWs such as Logic, Reason and Pro Tools. If you’re coming to Live from another music application, even GarageBand, you’ll have to be patient while you undergo a period of adjustment. Live is like those programs in some ways, but very different in others, and it can be frustrating at first. But be patient, it’ll be worth it!
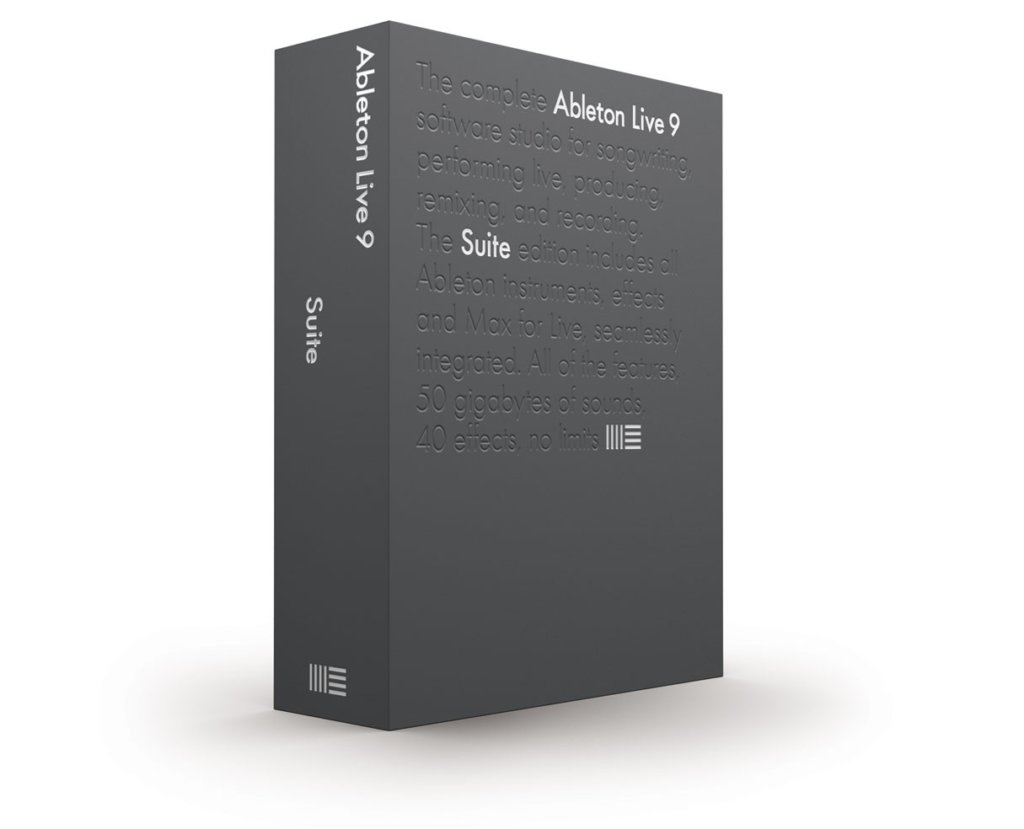
Live comes in three flavours: Intro, Standard and Suite (currently at version 9). Increasing in price, each version has different features, so check the handy comparison chart on www.ableton.com.
There’s an upgrade path, so if at any time you want to step up you needn’t pay to start all over again. Prices are also lower if you purchase the download versions rather than boxed discs.
Occasionally you’ll find other versions of Live bundled with third-party hardware such as keyboards and so on and branded with the manufacturer’s logo, so be aware that they might have different features as well.
This is mostly a thing of the past, as I believe Ableton has standardised these bundled editions. If you can’t decide which version you want, or whether you want to buy Live at all, download the demo and give it a spin – it’s fully functional for 30 days, effectively making it the Suite version.
Our Ableton Live Guide will take you through the simple process of configuring your controller and audio interface, launching your first clip, and programming your first beat. Have fun with these first steps – you’re entering an exciting world!
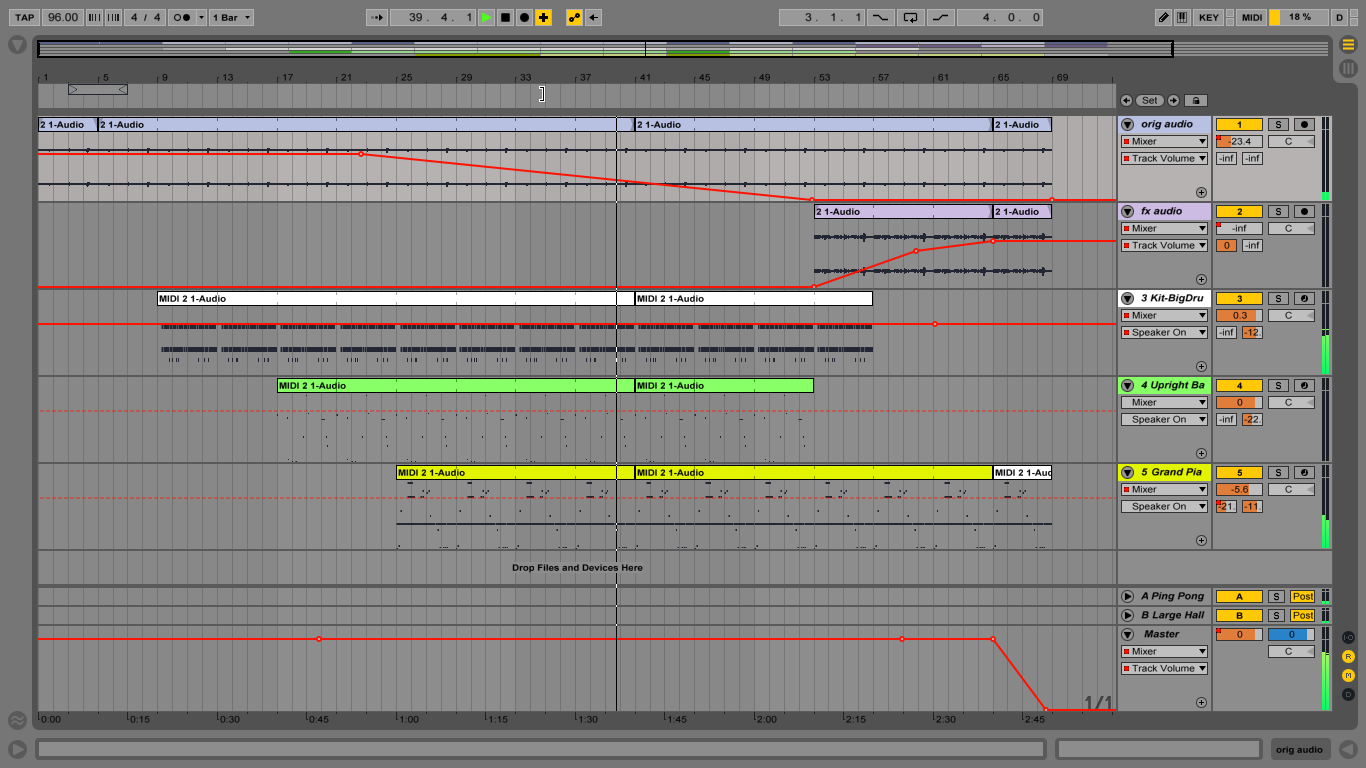
Focus On: Views
When you’re new to Live, the first thing that’ll trip you up is the Views. With other DAWs (digital audio workstations), there’s a timeline, where the music flows left to right from beginning to end, and that’s it. Live has that too – the Arrangement View – but the most unique thing about Live is the Session View, which is a vertically scrolling grid.
This busts you out of the timeline constraints so you’re free to improvise with the material inside the grid, ie, your clips. Actually, you can use both Views at once, for ultimate power, but we’ll talk about that another time…
Set Up Your Soundcard and Controller
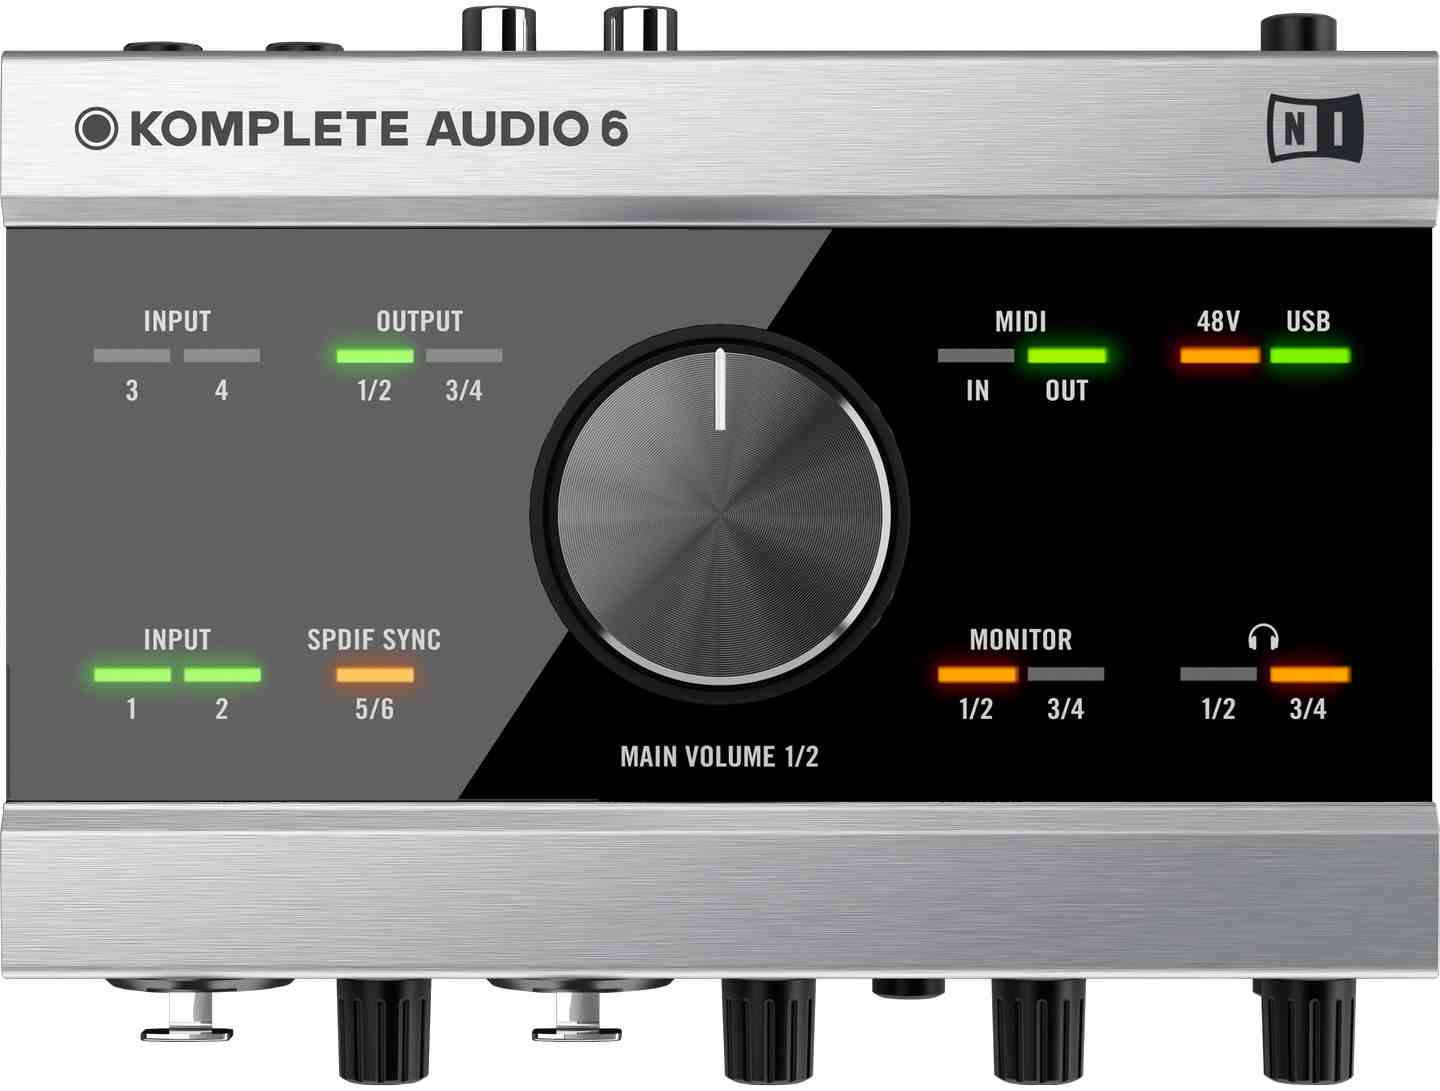
1: You probably have a MIDI controller and an audio interface (soundcard) that you want to use with Live. The specifics of setting them up varies according to which ones you have, but here are the basics.
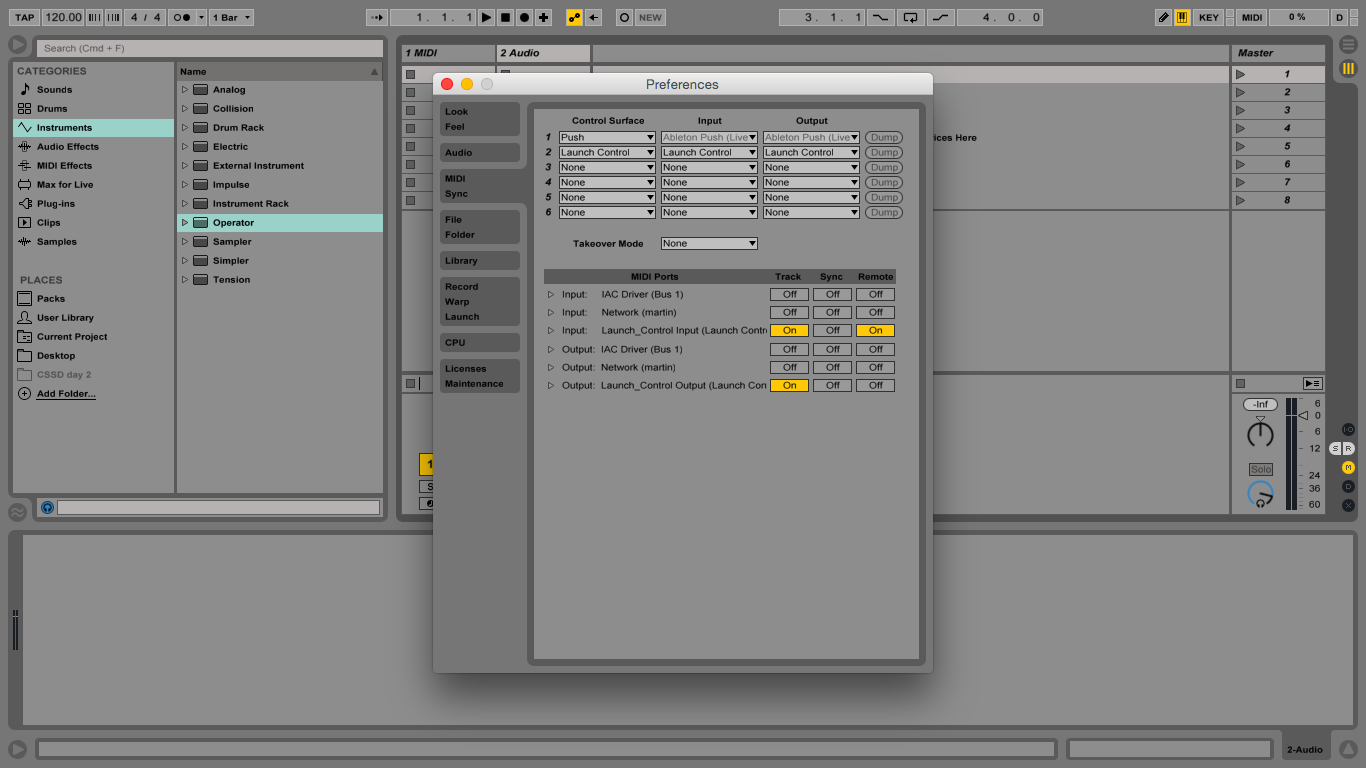
2: Connect your controller by USB. Install any drivers needed (most controllers are class-compliant, though), launch Live and go to Preferences/MIDI Sync. Select your controller as a MIDI input source for Track and Remote.
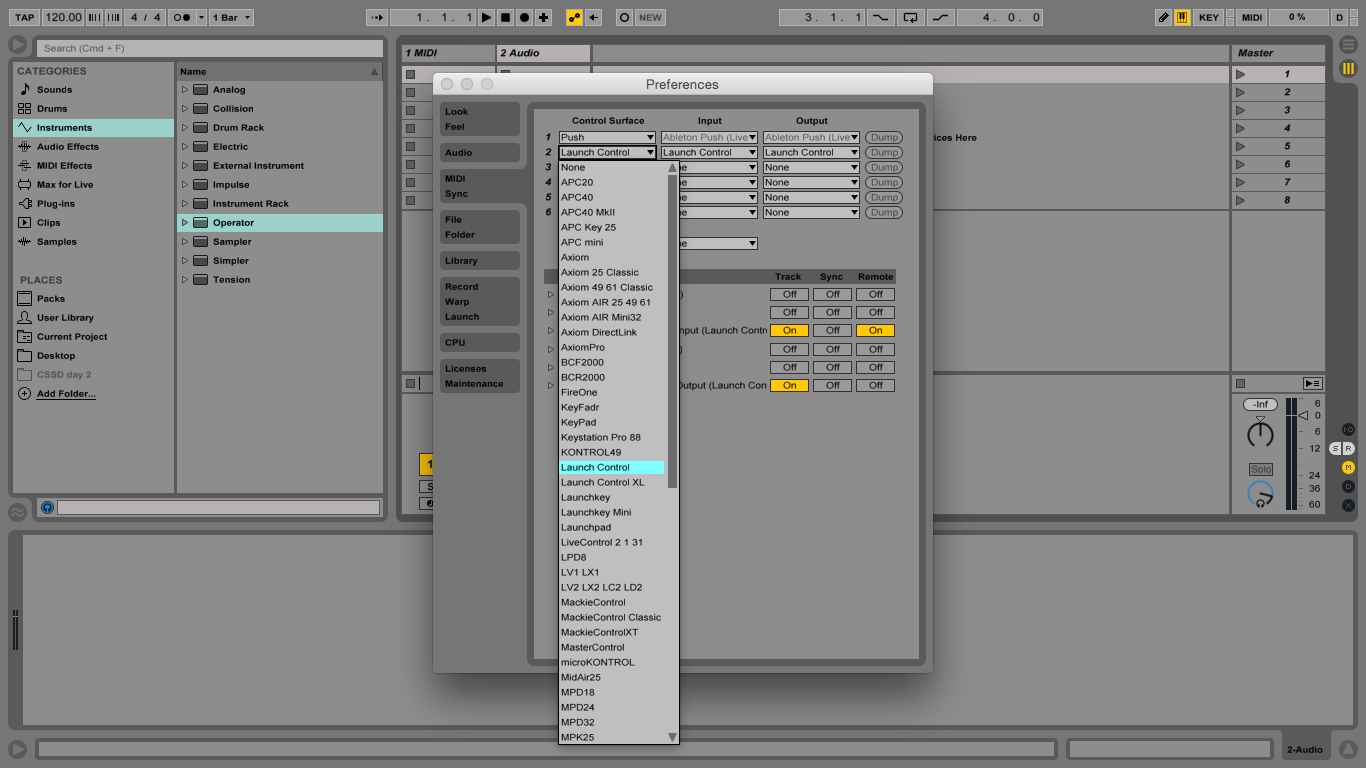
3: Click on the Control Surfaces list at the top – if your controller’s listed in there it will have a certain amount of built-in control over Live without you having to configure anything further.
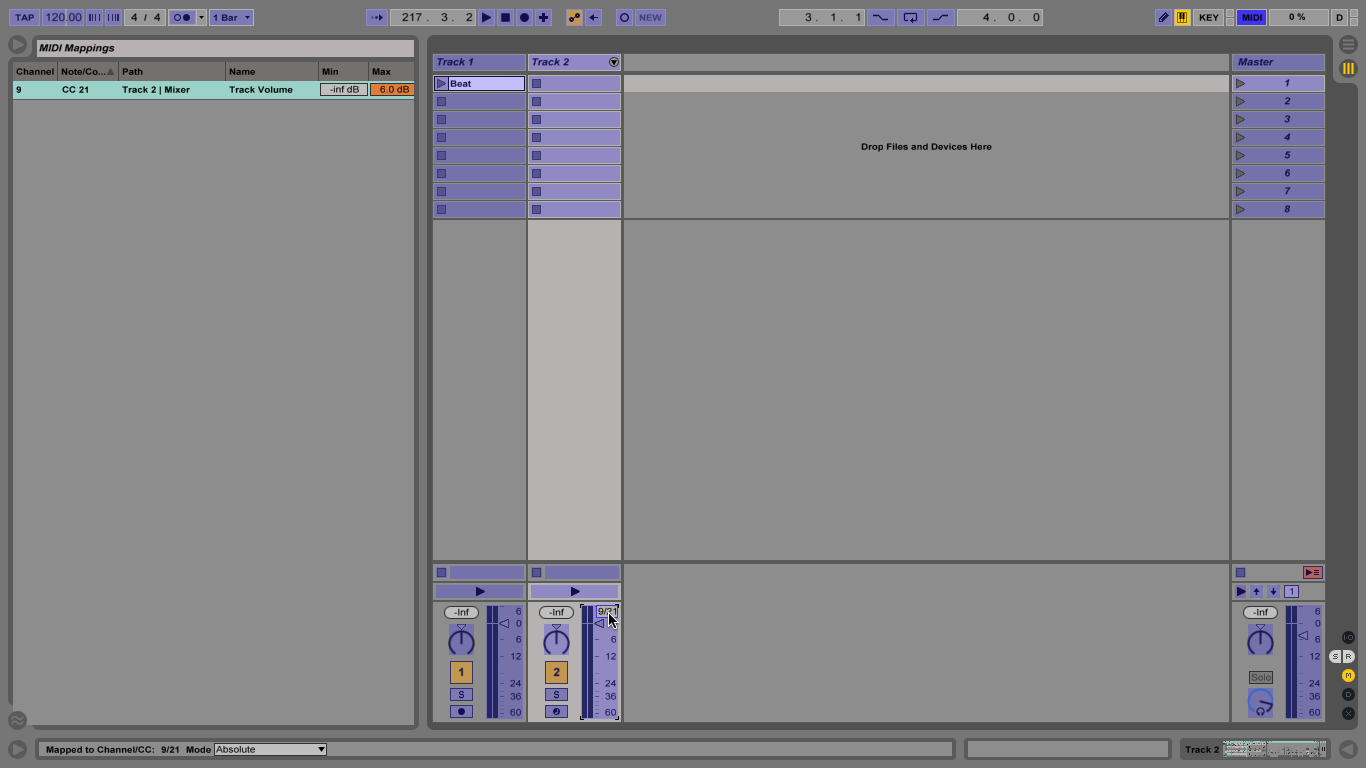
4: Close Preferences, and type cmd-m to enter MIDI Map Mode. Anything blue can be controlled by MIDI. Click a parameter then move a knob or fader on your hardware to assign it.
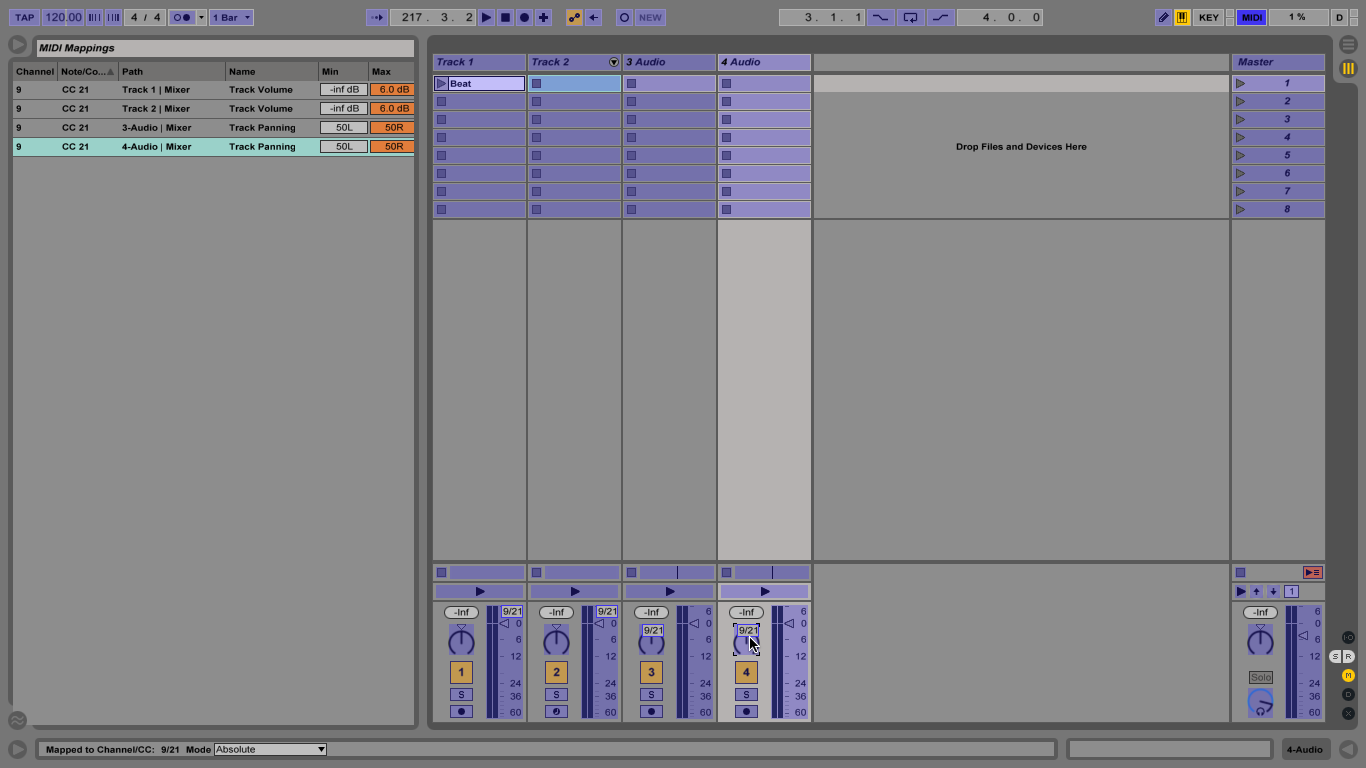
5: Use cmd-m to exit MIDI Map Mode when you’re done. Now when you move your hardware control the on-screen one moves too! You can assign one hardware control to multiple objects in Live.
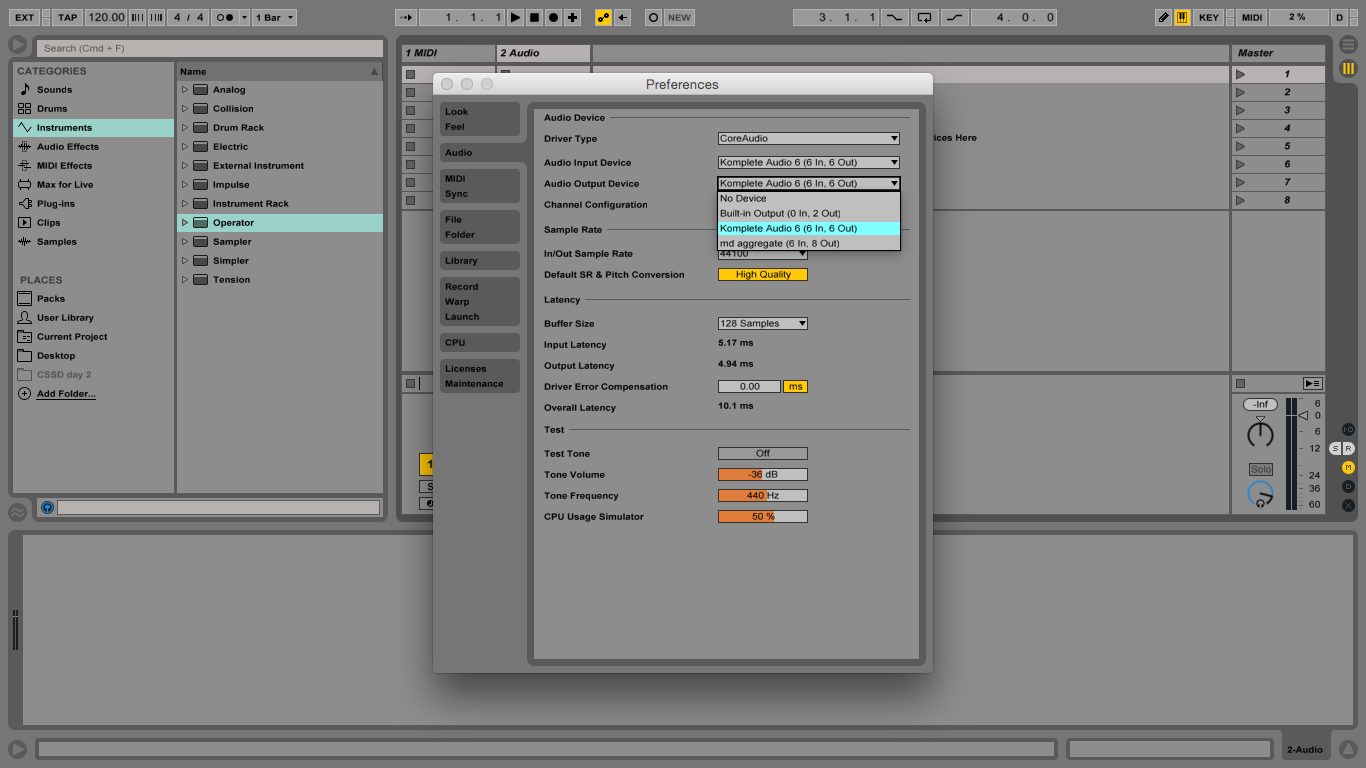
6: Connect your soundcard while your speakers are turned off, and install any necessary drivers. Open Live’s Preferences and select it as Input and Output device in the Audio tab.
Click Here To Continue

