Ableton Live Tutorial: Audio to MIDI Conversion and Back – Step by Step
Martin Delaney continues his tutorial which analyses the conversion of Audio to MIDI (and then back the other way) 7: There’s another version of the clip with delays; Live interprets these as extra notes, requiring clean-up unless we retain them as an effect. The delay repeats also affect how Live handles clip length. 8: The […]
Martin Delaney continues his tutorial which analyses the conversion of Audio to MIDI (and then back the other way)
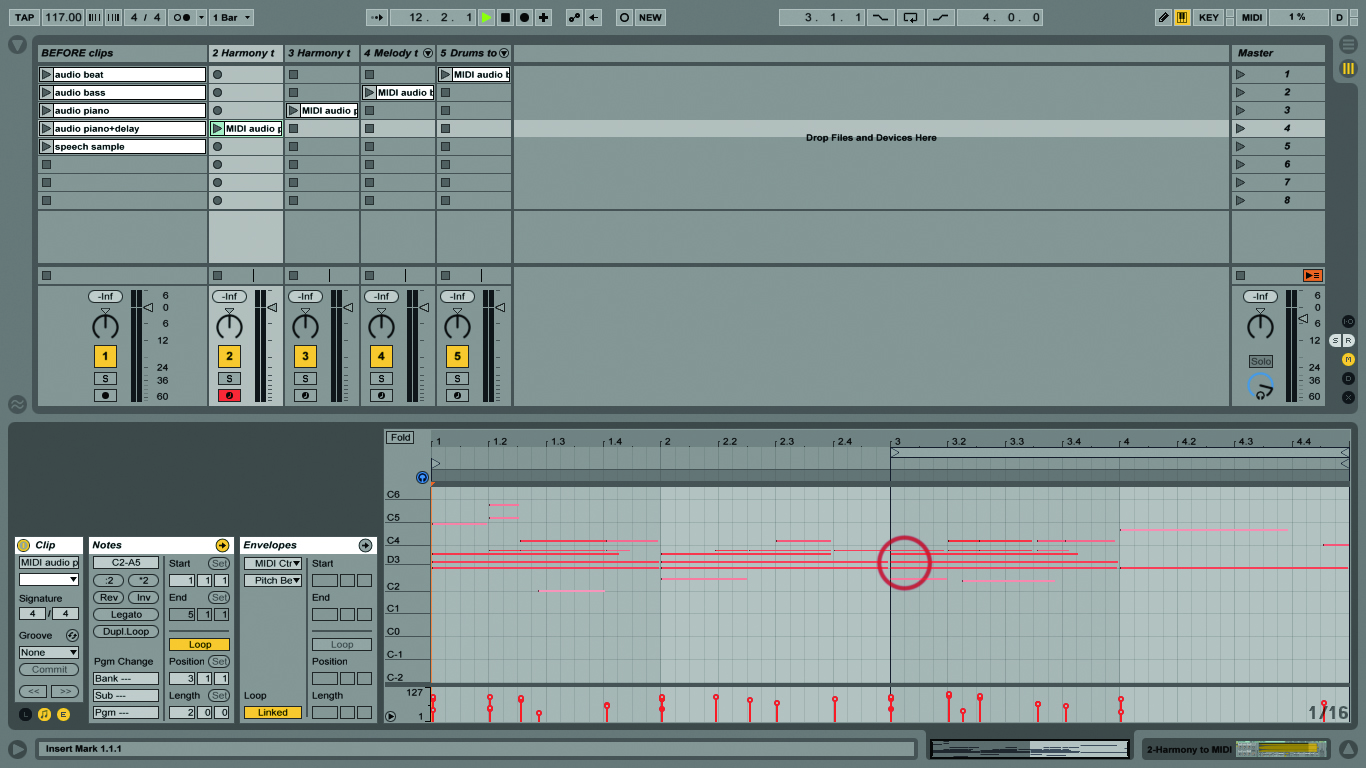
7: There’s another version of the clip with delays; Live interprets these as extra notes, requiring clean-up unless we retain them as an effect. The delay repeats also affect how Live handles clip length.
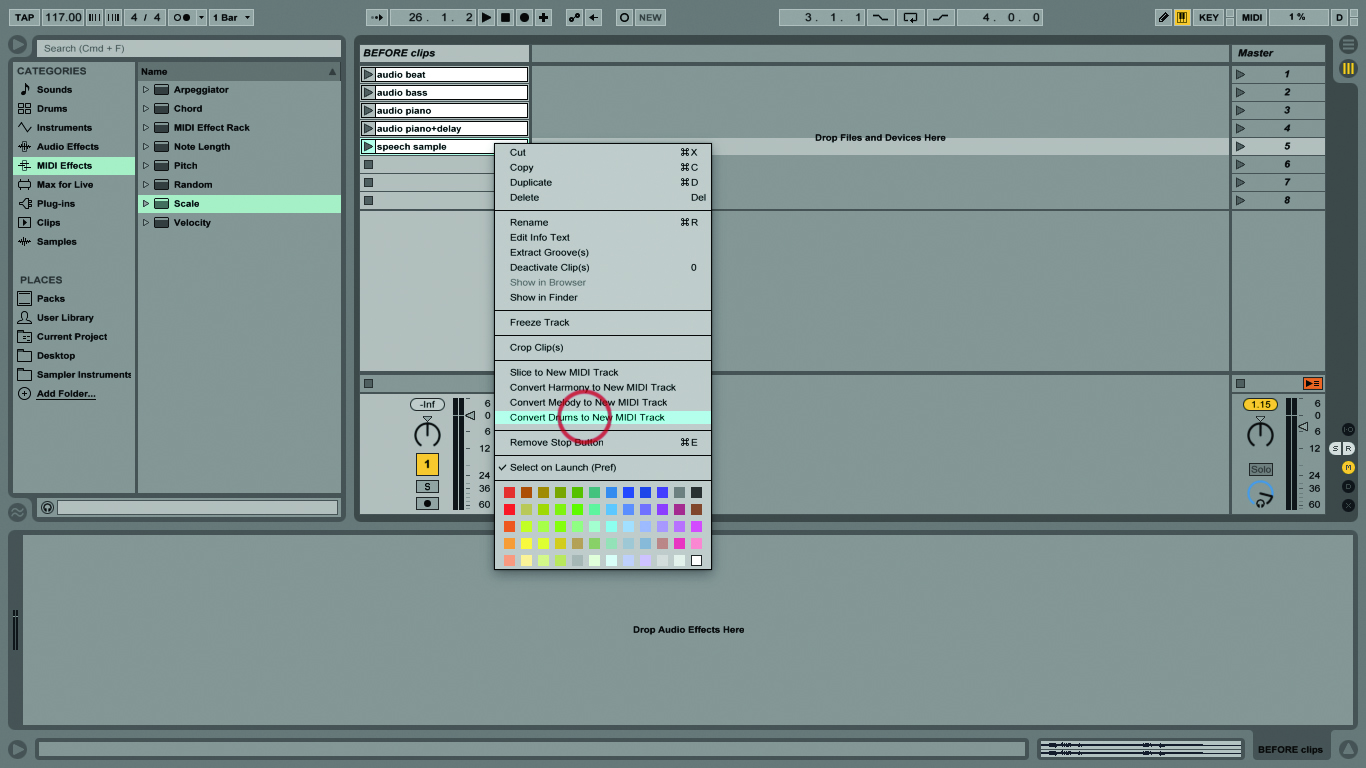
8: The speech sample is where things get extra-interesting. You can try all of those conversion options with a speech sample – it’s going to be weird either way. Let’s settle for ‘Convert Drums to…’.

9: Now you’ve got a frankly off-the-wall drum beat, which probably won’t fit so well. We can fix this. Find the Scale MIDI effect device in the Browser and load the ‘In C’ preset.
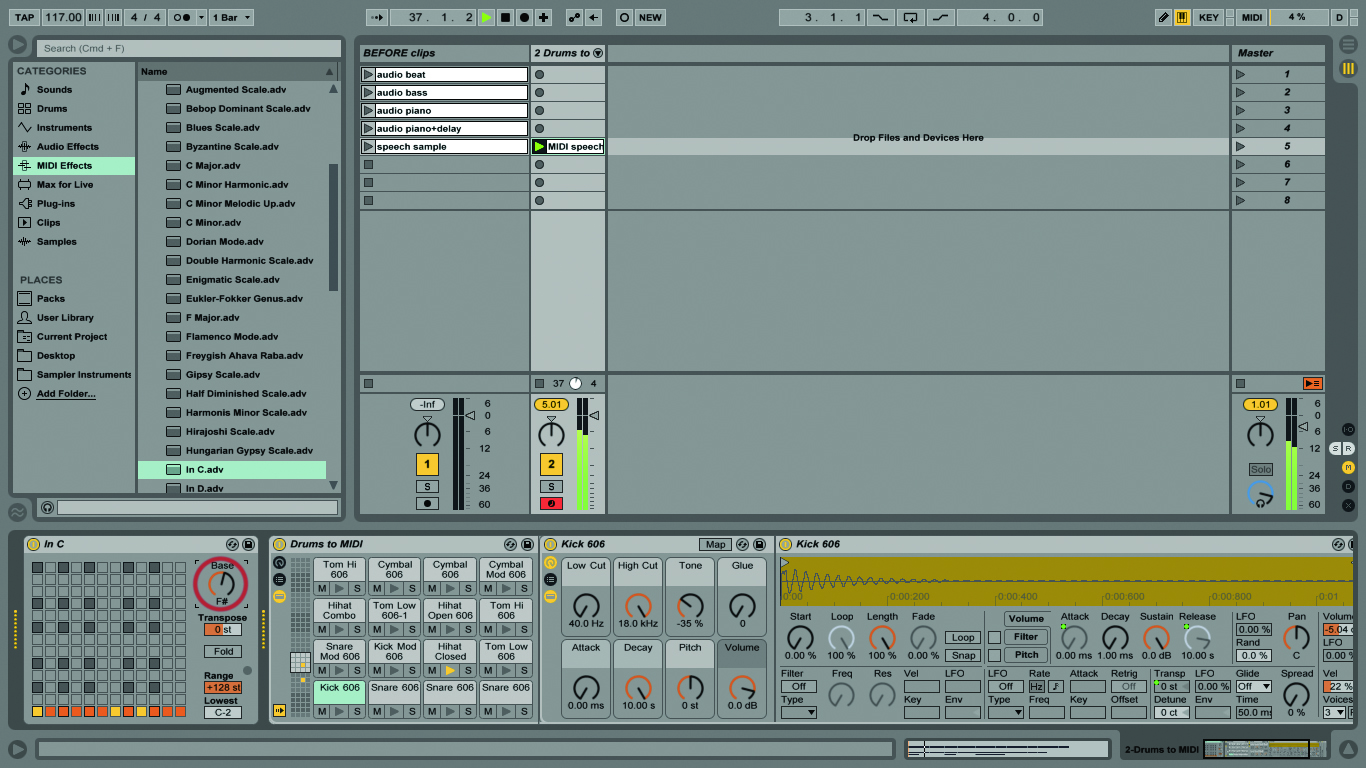
10: Play the clip. We don’t need a kick, though, so use Scale’s Base control to shift those incoming notes up to F#. You should now be hearing a hi-hat part. Quantize it to 1/16ths.
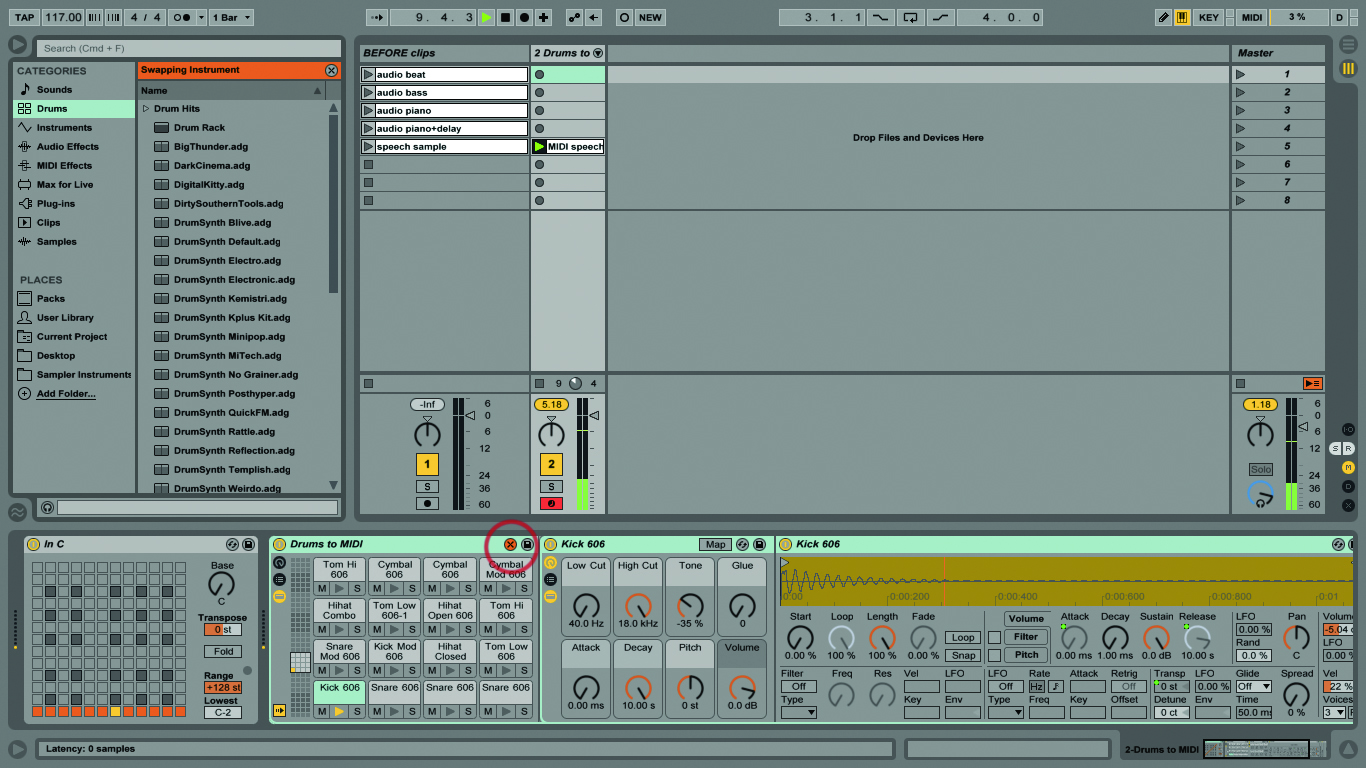
11: The Convert to MIDI commands load default instrument sounds, which is really helpful but you’re not supposed to stick with those. Load different sounds and experiment – that’s the whole point!
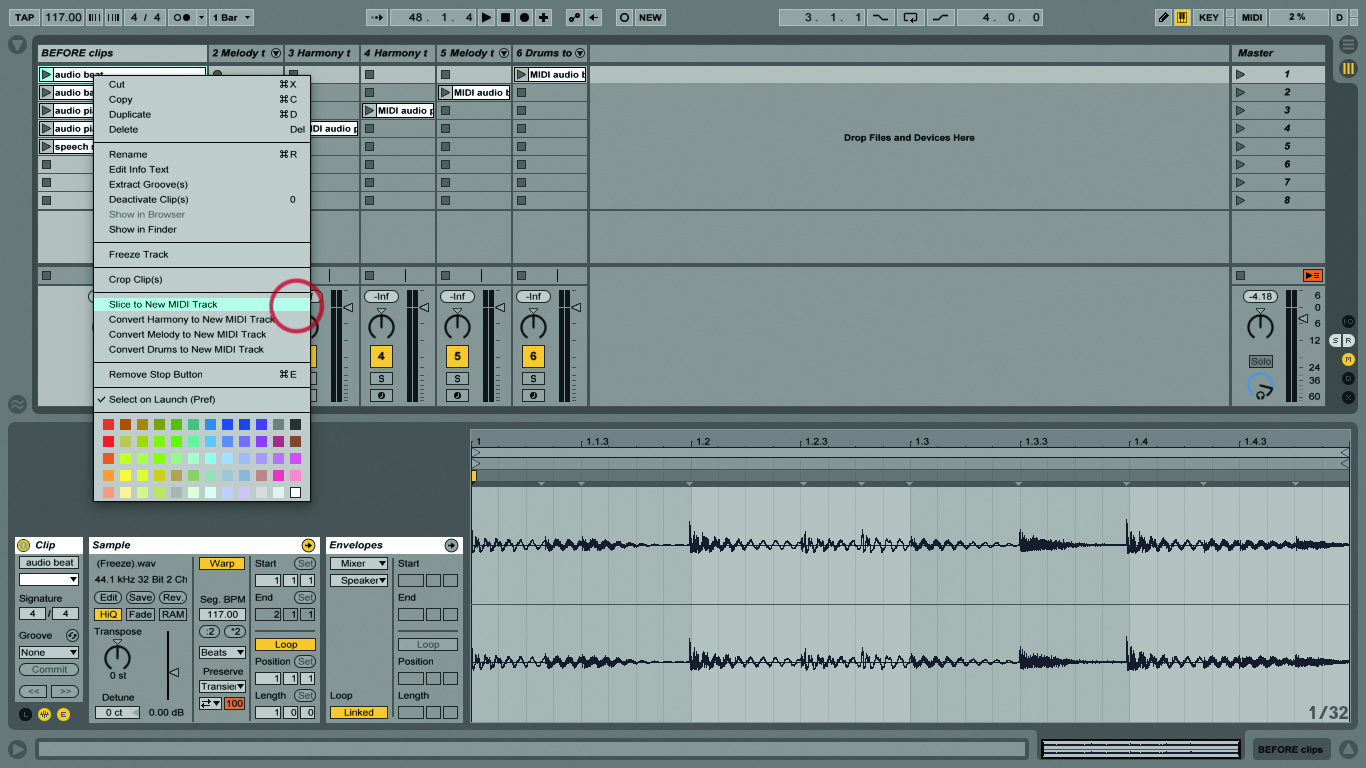
12: There’s another variation of these commands. We can also choose ‘Slice to New MIDI Track’, which relates to these techniques. Let’s try it with the original drum clip for more options.
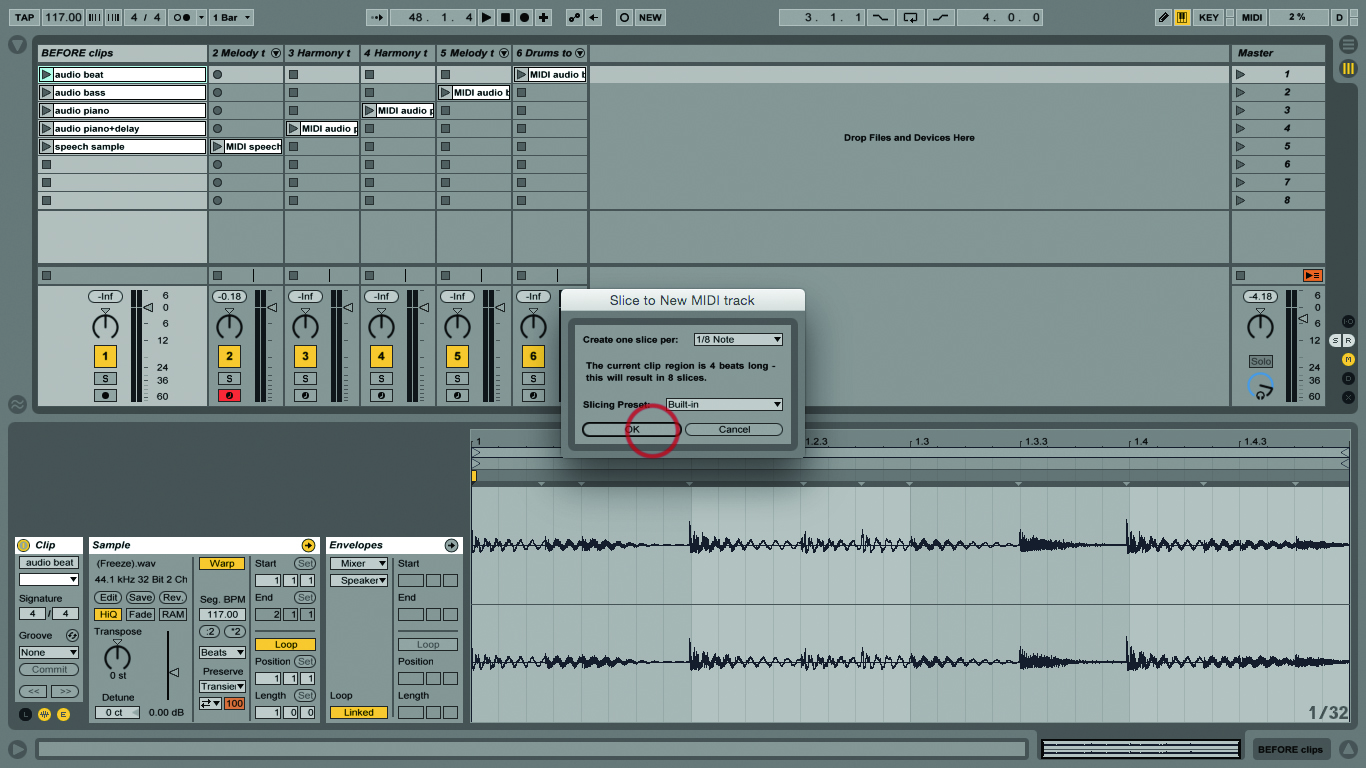
13: Choose 1/8ths for the slices. Tap Enter and another MIDI track appears. This time the audio remains with an instrument rack containing 1/8th note slices of the sample ready to trigger via MIDI.
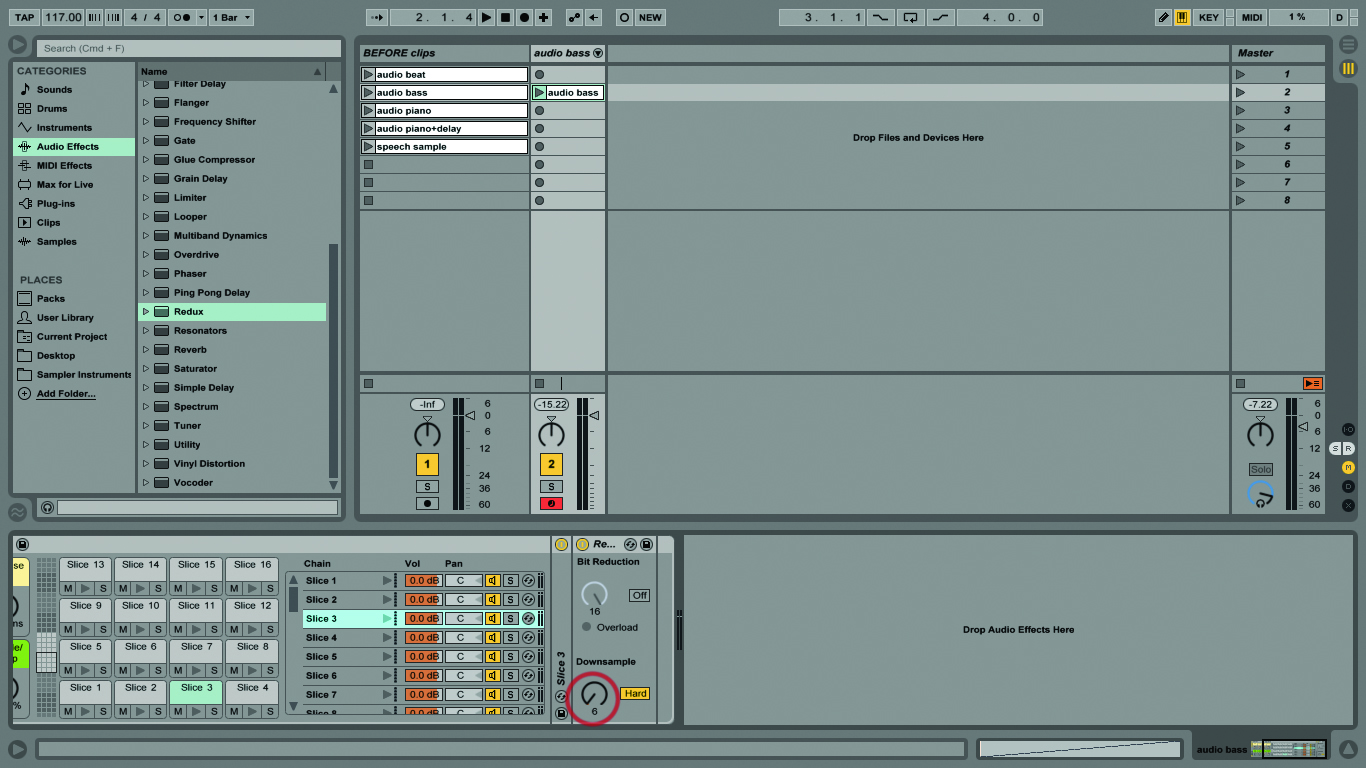
14: When we do the same thing with the bass part we can restructure the notes entirely, apply different effects to each note/chain if we want to – just drag the effect onto the chain.
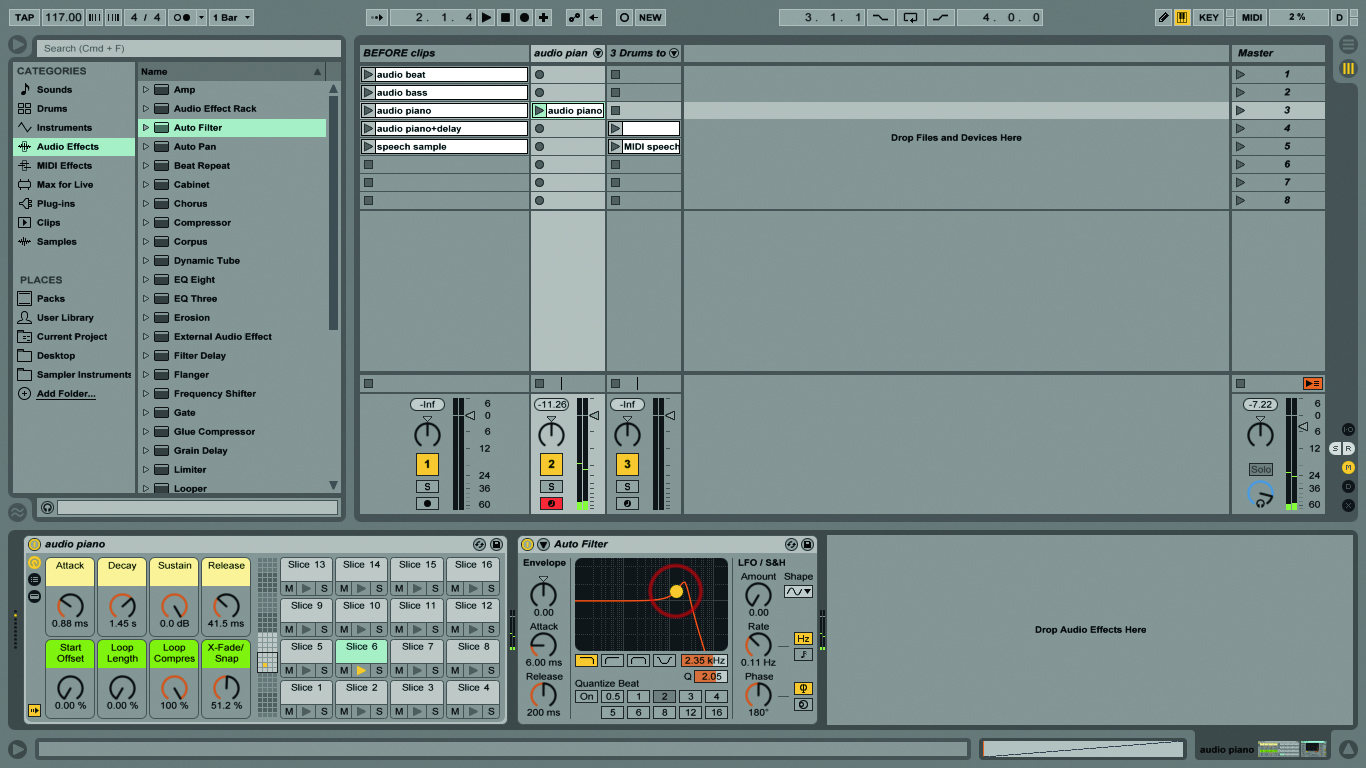
15: Slicing the piano part with the chords should give interesting results – you’ll get a chord on each key of your keyboard, good for a blatantly sampled chord sound. Add Auto Filter for extra cool points.
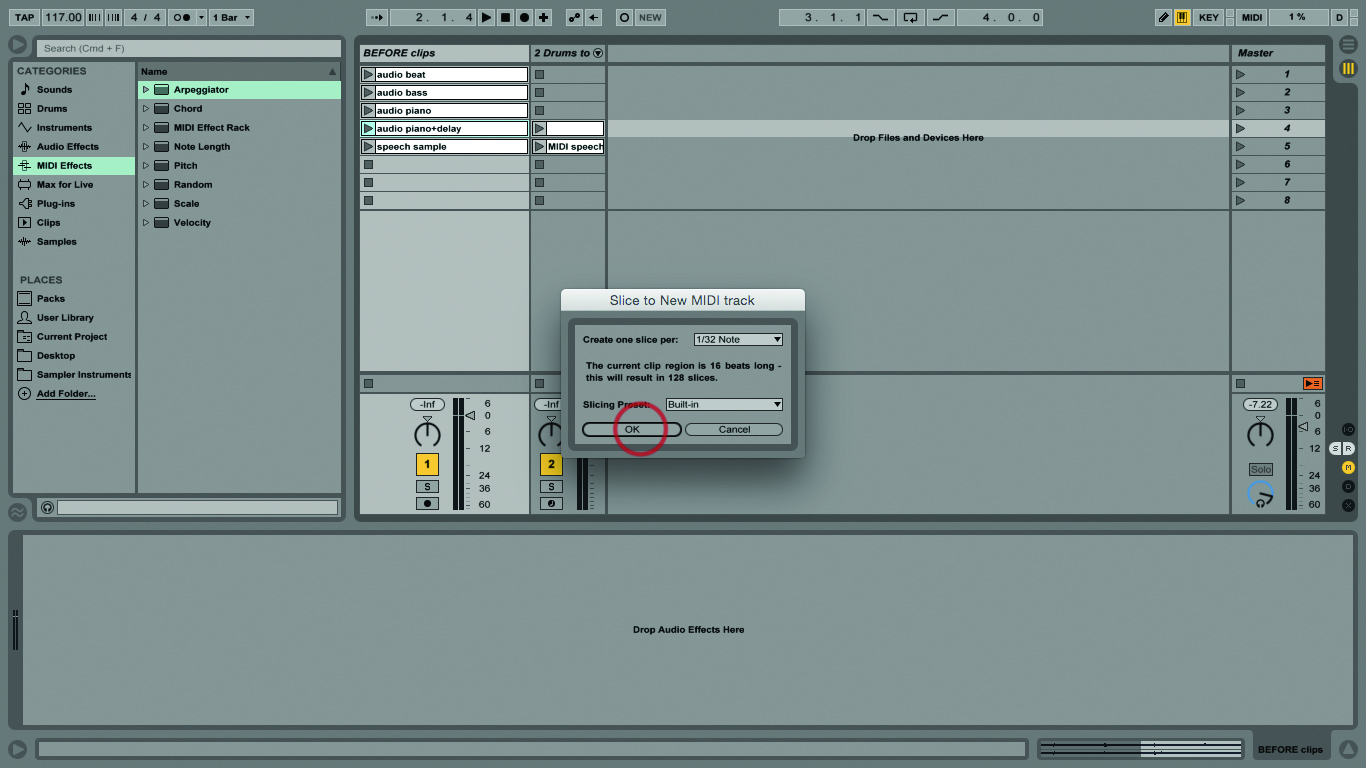
16: Try slicing the delayed piano clip with the note values at 32nds, for a more samply/glitchy vibe as you play it across your MIDI keyboard. You’ll get 128 slices.

17: Same thing goes with the speech sample. To me sliced speech always sounds cool with those short notes. Put an arpeggiator in front of it for a nice choppy rhythm effect.
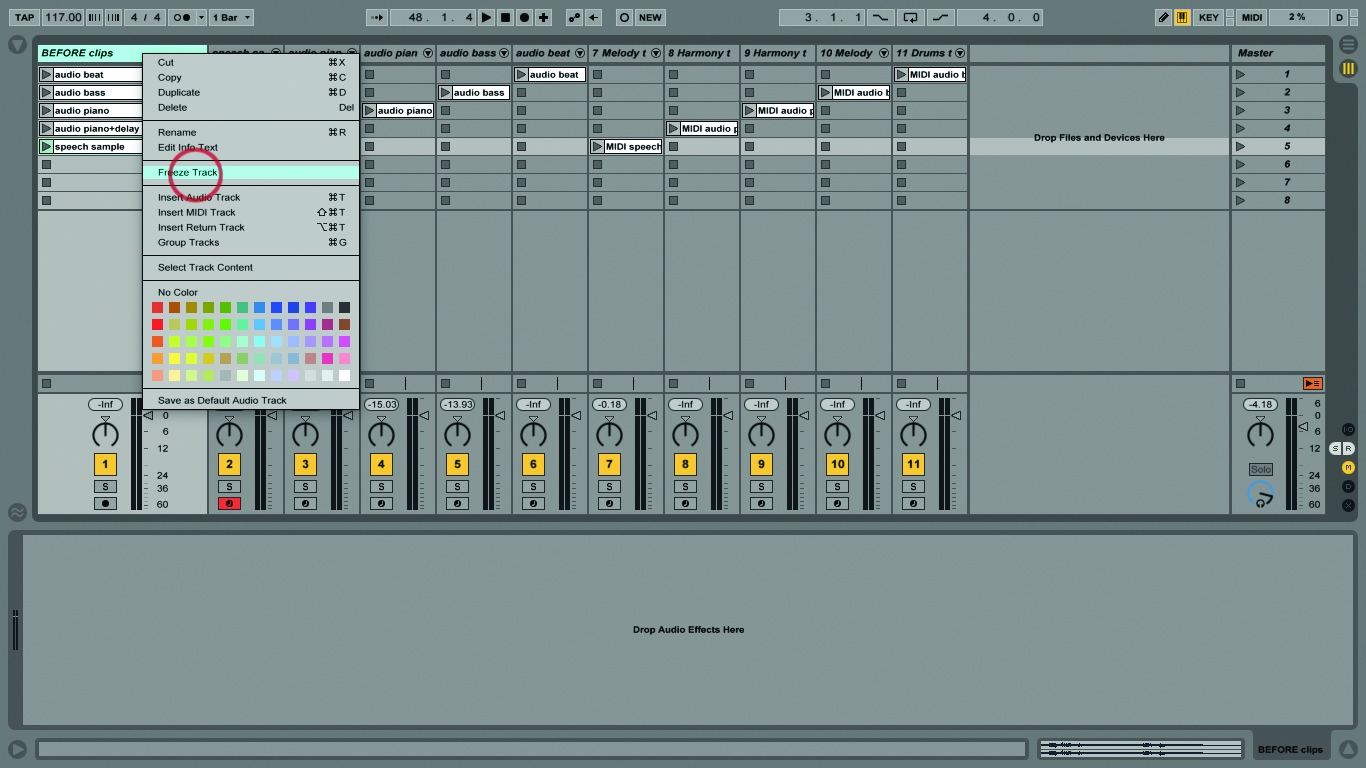
18: Our last command is actually two commands: Freeze and Flatten; use these on a MIDI track to convert everything in the track to audio clips, with instrument and effects baked into the samples.
