Ableton Live Tutorial: Become A Power User Part 10 – Mastering Tracks In Live
To close this Power User series for Ableton Live, Liam O’Mullane shares some Live-specific techniques that can be essential when it comes to mastering your own music… Well, this series has been quite a journey. We’ve covered a large range of best-practice for using many of Live’s unique features, and we hope you now have […]
To close this Power User series for Ableton Live, Liam O’Mullane shares some Live-specific techniques that can be essential when it comes to mastering your own music…
Well, this series has been quite a journey. We’ve covered a large range of best-practice for using many of Live’s unique features, and we hope you now have a handful of songs you’d like to polish-up and stick in that folder named Finished Tracks. But although the mastering process can be applied reasonably well through your own studio set-up with software we encourage you to consider outsourcing this process if you plan to release this material commercially. There are many reasons for doing this, with the core points being:
1. An experienced mastering engineer can offer a level of subjectivity you will never experience when you’ve also created and produced the music yourself.
2. A professional engineer will have a well-tuned room that makes it easy for them to spot problem areas in your mixes.
3. The quality level of the gear available at many traditional mastering houses is usually out of most people’s reach due to the high cost.

This last option is food for thought if you work 100% in-the-box, as it may be the only time your work has the chance to pass through an analogue signal path. This type of processing can help you get a more rounded tone and a greater sense of depth, which, as we’ve already mentioned, will be applied by someone with very experienced ears.
But paying out for mastering isn’t always an option, and although a full guide to mastering in Live is beyond the scope of this single sitting here, we will cover various techniques that make great use of Live’s unique devices. Although Live doesn’t offer much in terms of vintage emulation, aside from its SSL-modelled Glue Compressor, there are a few ways to enhance your masters with some analogue-style harmonic enrichment.
As you explore the dynamic, frequency, stereo-width and perceived depth aspects of your material when DIY mastering you will always start to hear what may have needed more attention at the mixing stage. You can then always re-visit these Live projects for correction, which provides an element of ear training required to improve your overall production skills. So even if you plan on outsourcing your mastering needs, a bit of DIY can be a great learning experience.
EQ, dynamics and saturation
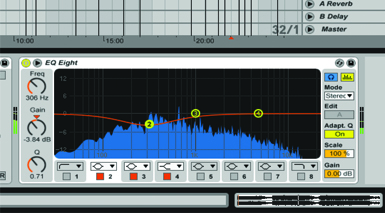
1: You’ll often want to restrict the extremes of the top and bottom ends. If there’s bass energy lower than the lowest note this can be limited using a x4 Low Cut filter. Removing this also helps achieve a slightly higher output level. Use a x4 or regular High Cut to restrict the top end and tame the very high frequencies, through to a more obvious roll-off around 15-16kHz for a cut-to-vinyl tone.
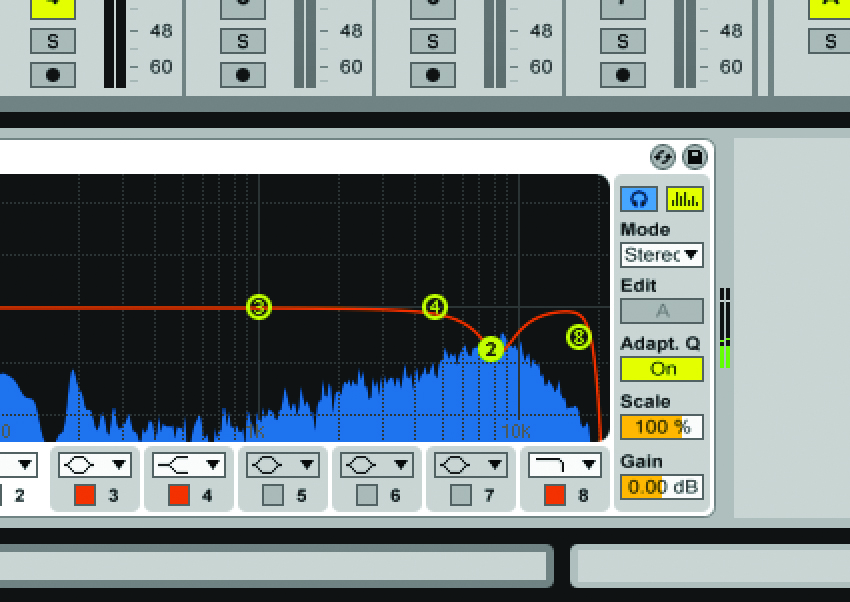
2: Narrow-band subtractive EQ can be useful if you have a build up of unpleasant resonances. Use a parametric (Bell) EQ with additive Gain and sweep the Frequency to hunt out the problem area, then use the Q control to choose a width that doesn’t boost more than the area needed. Reset the Gain back to 0dB and use negative Gain until the resonance is reduced enough so it’s no longer an issue.
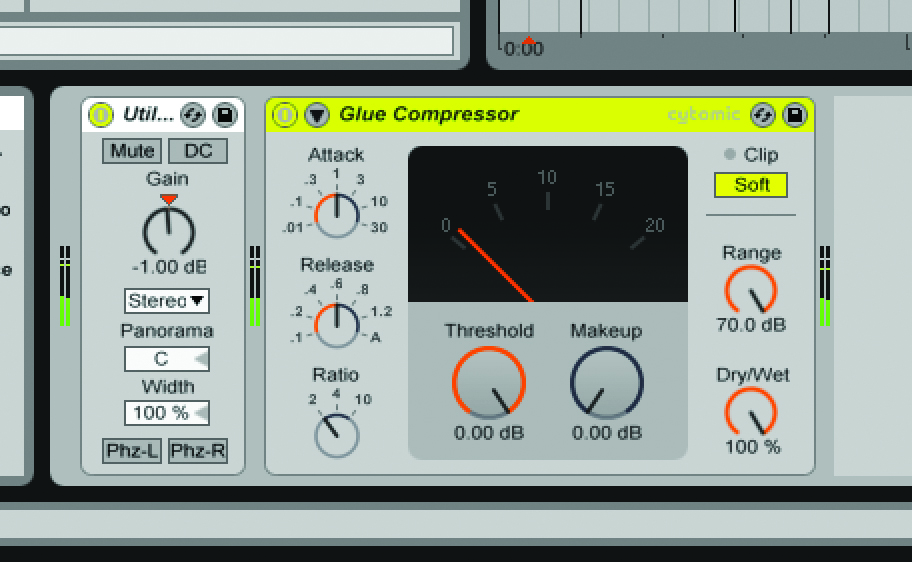
3: Although rhythmic, peak-based compression can be good to help bring out drum-track transients in your songs, to increase the body and energy of your song you might need a mild, non-rhythmic type of dynamic control. Live’s Glue Compressor is a good choice here – with a ratio of 2:1, and little to no Threshold applied, a few dBs of gain reduction can help your songs sound more glued together.
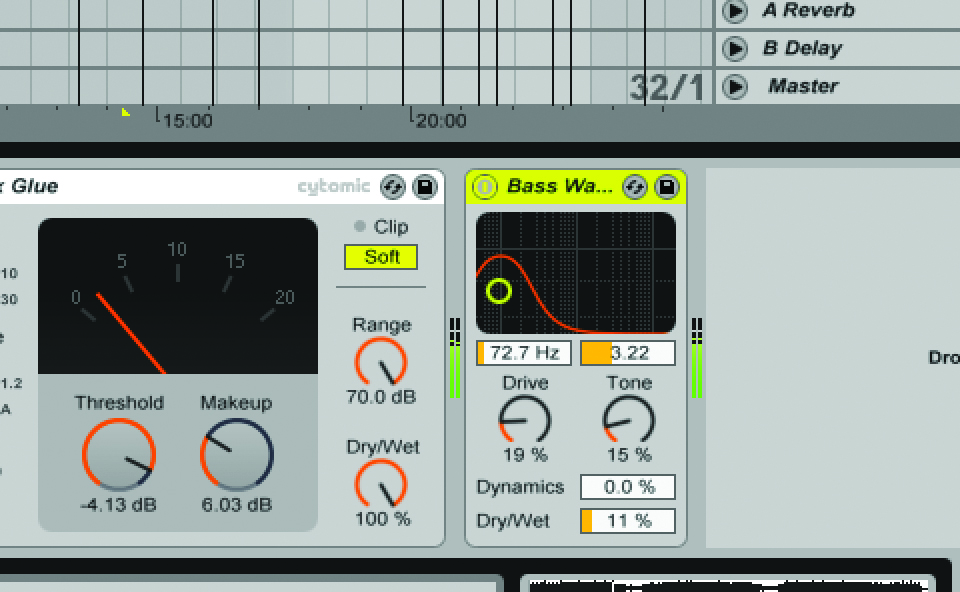
4: A simple way to firm up and thicken your bottom end is to use Live’s Overdrive device to add subtle distortion. Be very careful to use low Drive, Tone and Dynamics settings, as the signal can break up very easily at the cost of your audio quality. But with its Bandpass EQ set to focus purely on the low end, this device can add a really solid weight to your songs.
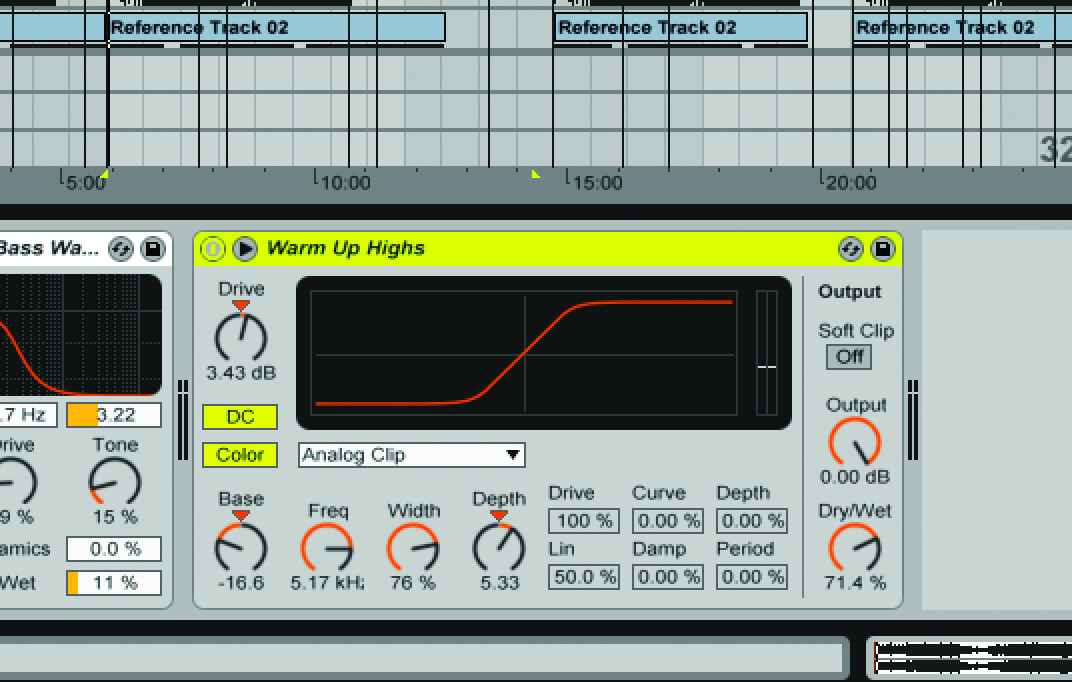
5: For harmonic enrichment in the top end, Saturator tends to do this job better than the often brittle-sounding Overdrive. The presets within Live’s library are a good place to start, with Hot Tubes and Warm Up Highs being our personal favourites. Remember to keep exploring the right balance of Dry/Wet while you work, as it’s very easy to add too much.
6: Corrective rebalancing of the tops, lows and mids can be made using High Shelve, Low Shelve and Bell EQs, respectively. Be careful to adjust the Gain level of the EQ when making either additive or subtractive adjustments so your levels stay at their optimum. Any mid-range adjustments are best made with a wide Q, so the overall balance isn’t distorted too much.
Width and depth
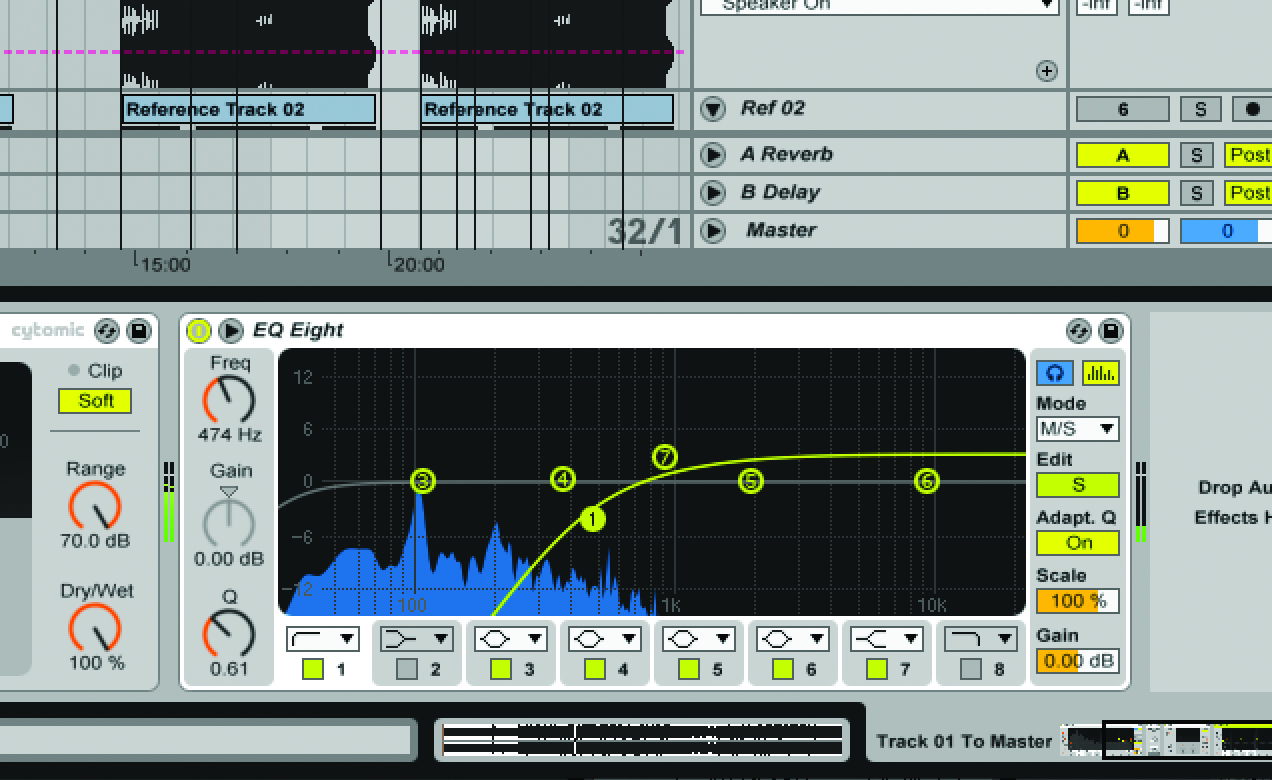
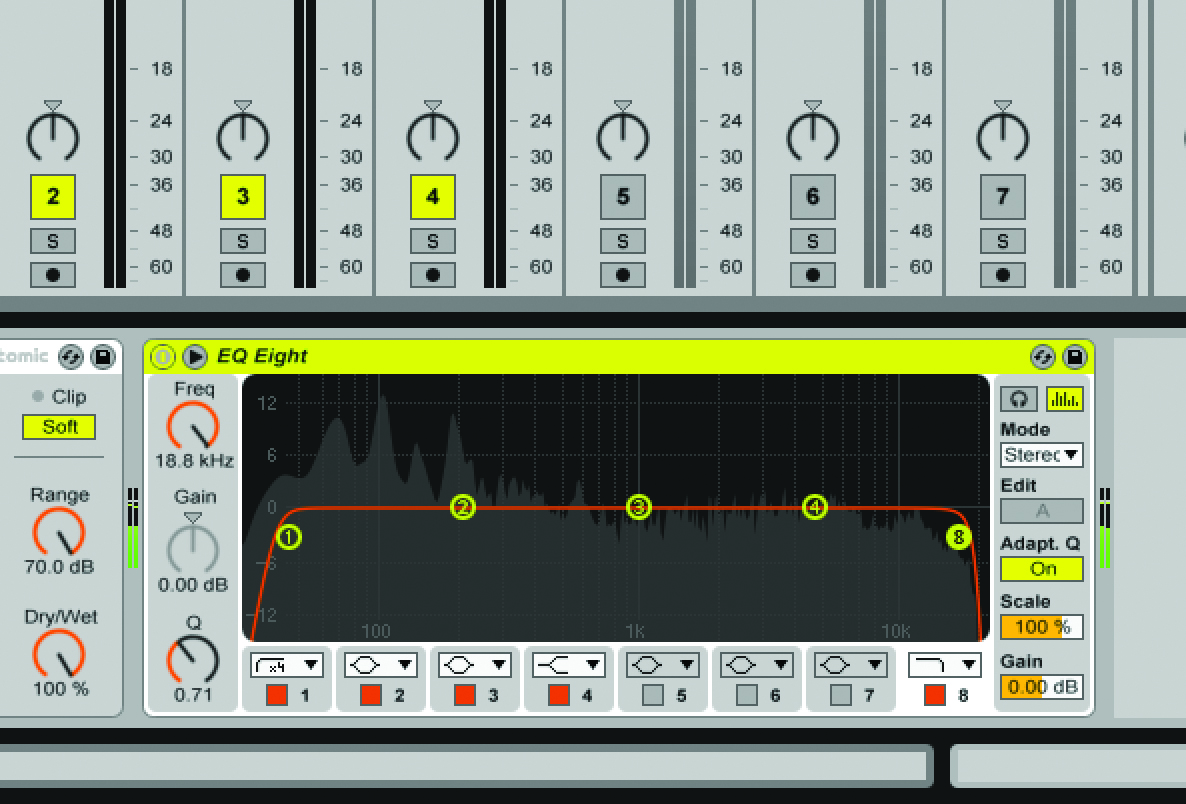
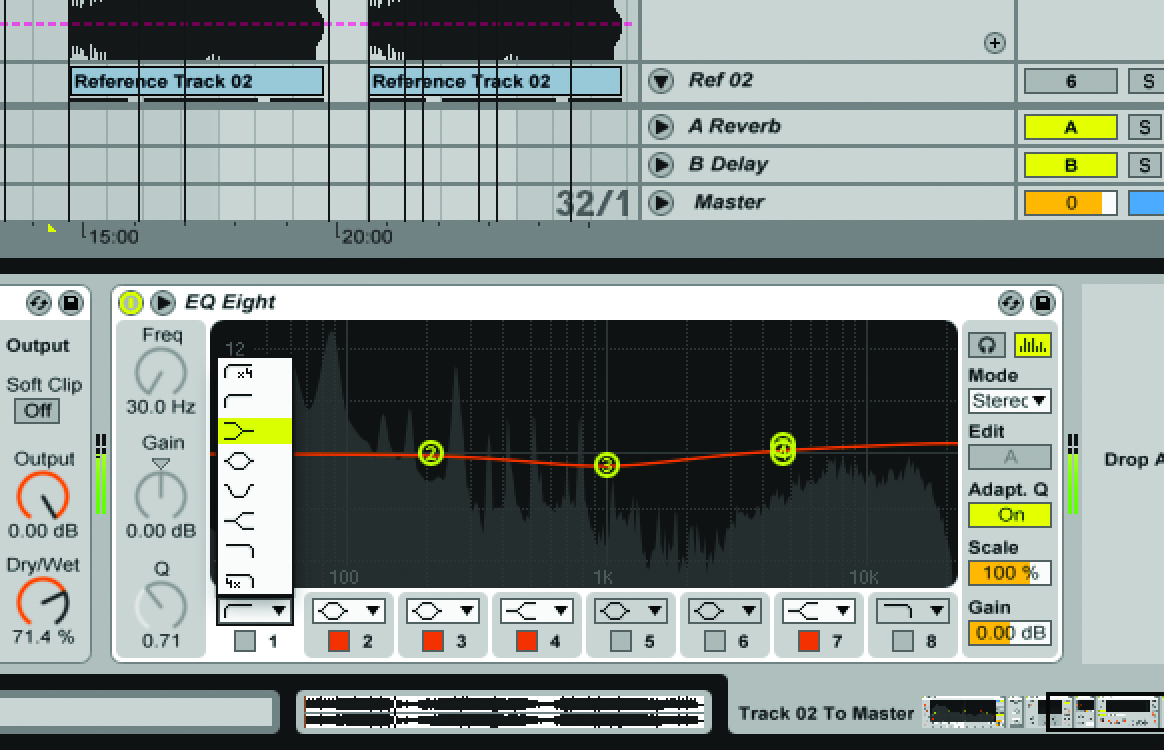
1: Fine-tune the stereo width by switching an EQ Eight into M/S from the Mode menu. This enables you to EQ the Mid and Side parts of the signal individually. Increase stereo width by slightly boosting the tops in the sides with a High Shelve EQ, then use a Low Cut EQ so the low end only passes down the Mid signal. Use Audition Mode to hear where the Low Cut frequency should be set.
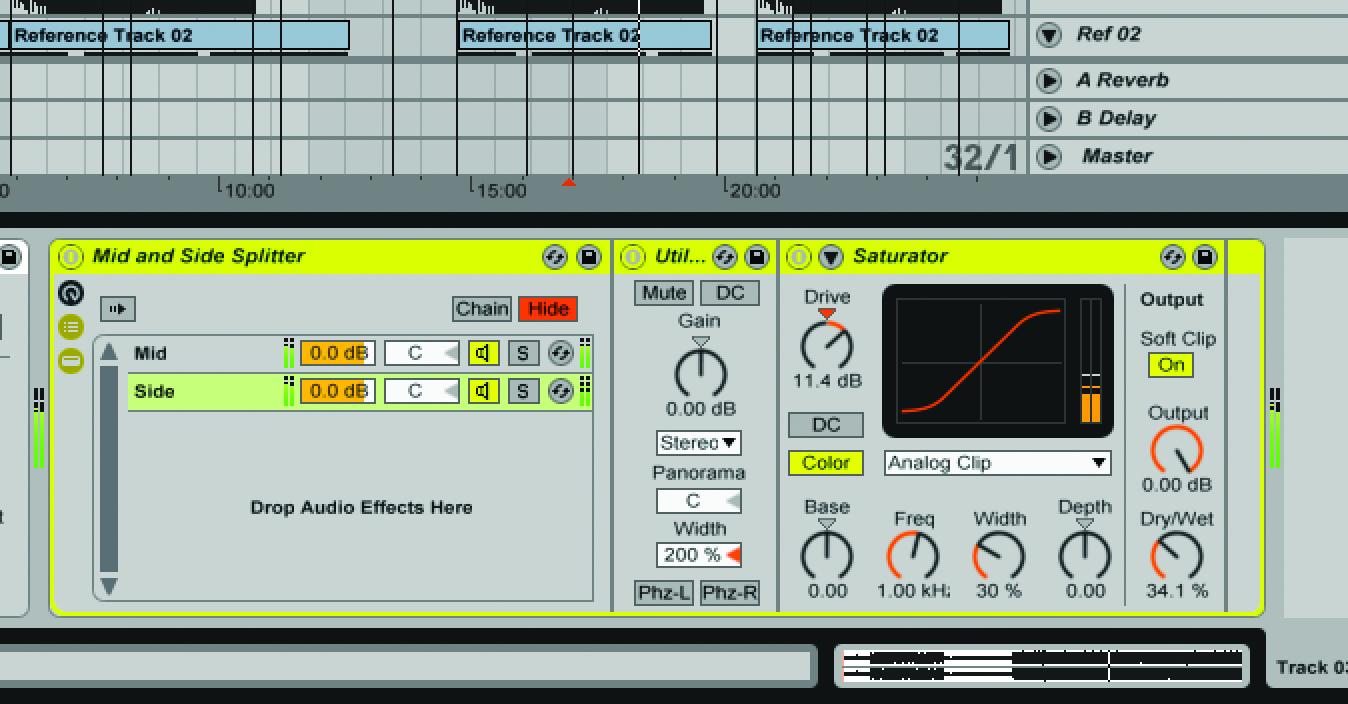
2: Another way to enhance your stereo width is by adding harmonics to the side signal. A Mid and Side Device is included on the DVD which splits the signal into a Mid and Side Chain within an Audio Rack. You can then add processors to either Chain. Drag a Saturator with a high Drive amount to the Side Chain, and set the Dry/Wet balance so the stereo is enhanced without sounding too distorted.
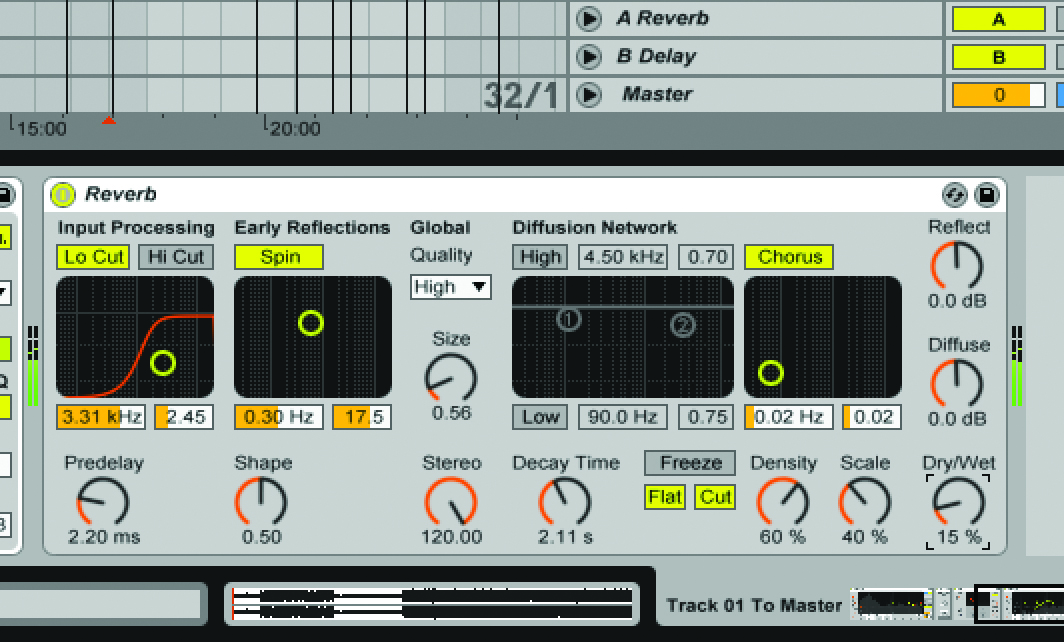
3: A subtle reverb can be used to place a dry-sounding mix into an audible space and add depth. This needs to be done subtly, so be careful with your Dry/Wet balance. We’ve gone for a medium room and used the Reverb device’s Lo Cut on the input to avoid muddying up the low end. Live Suite owners should explore the Convolution Reverb in the Max for Live browser for a more natural sound.

4: The previous technique can be taken a step further by only adding the reverb to the sides, maintaining a dryer sound down the centre of the mix. When applying reverb to the sides be careful to experiment with applying it before or after the Utility device, which removes the mid part of the signal. In most cases it’s best to add the reverb to be pre-Utility, and then balance the Dry/Wet to taste.
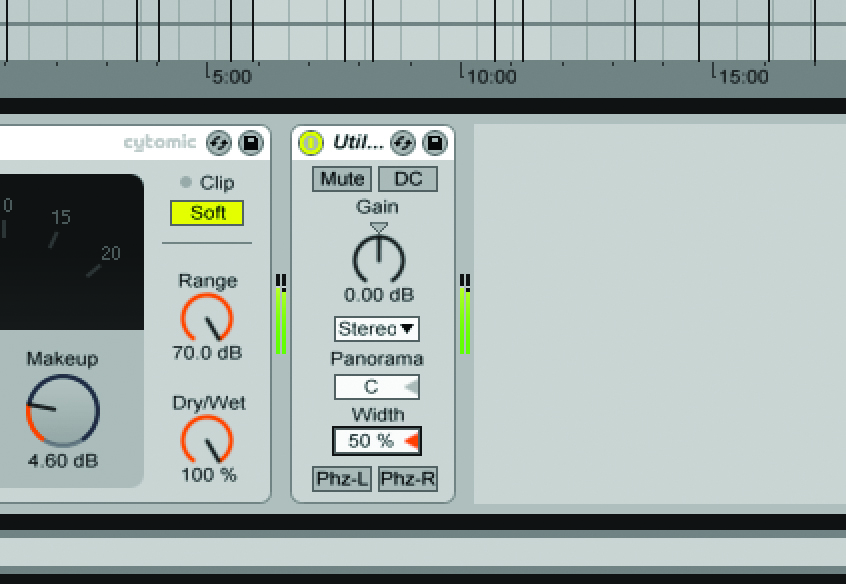
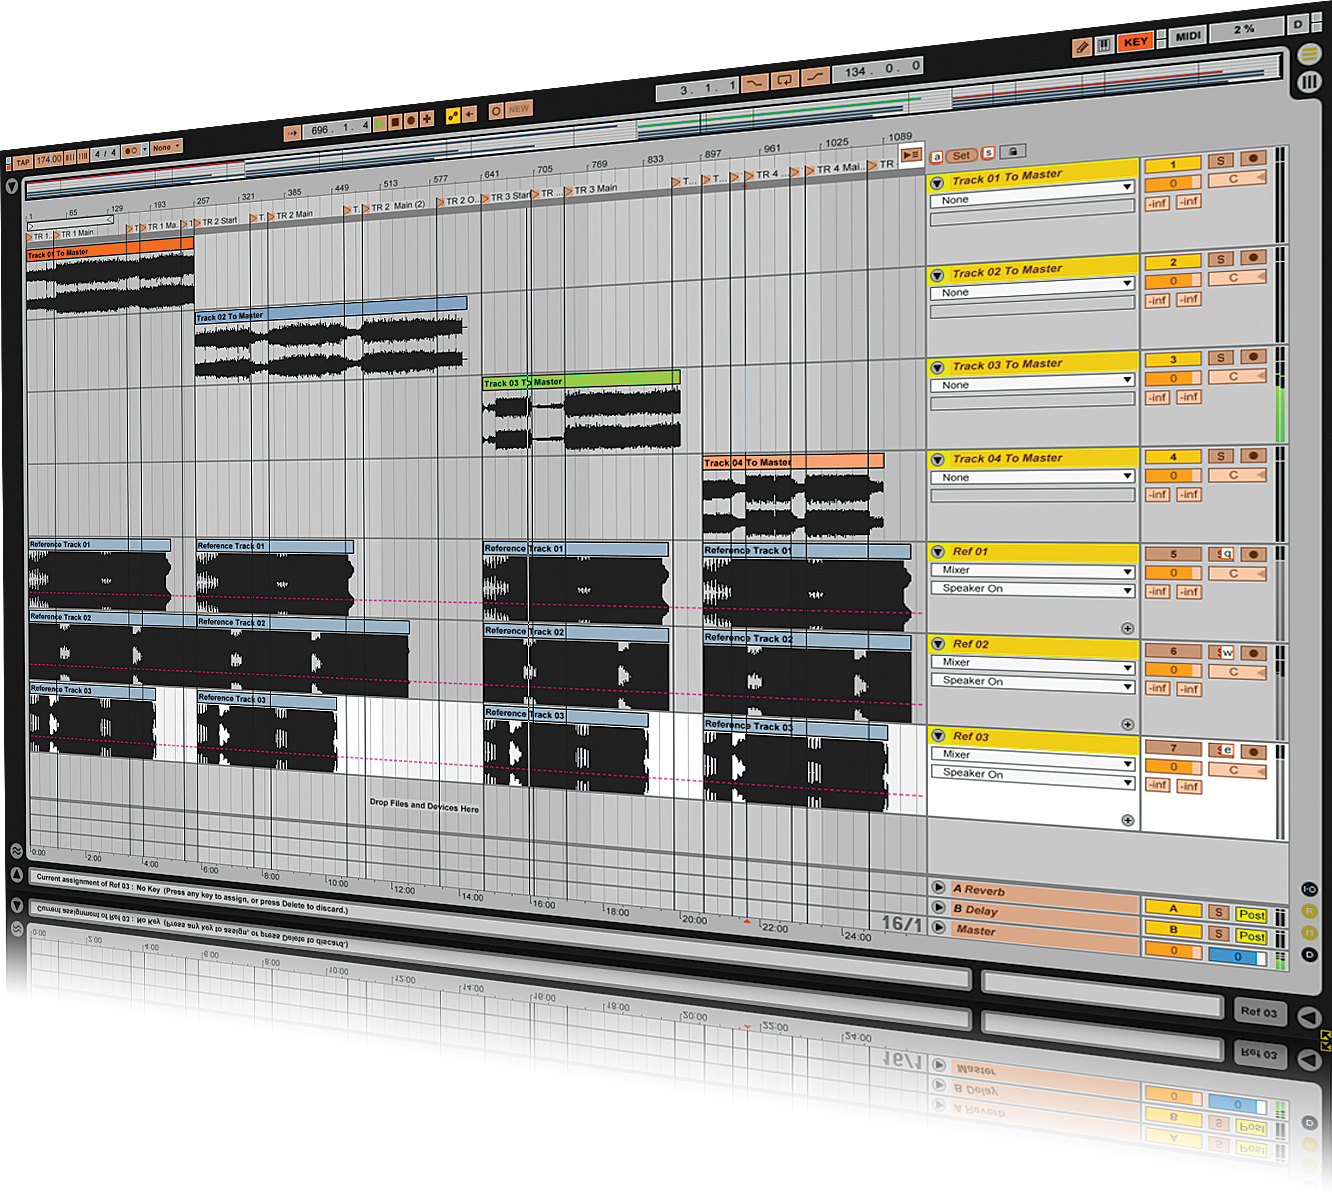
5: You don’t always need to increase the width of a mix, though, especially when matching multiple tracks for an EP or album. To control the balance between mid and sides, a single Utility device can be very helpful. Use values on the Width parameter of lower than 100% to narrow your stereo spread towards mono at 100%.
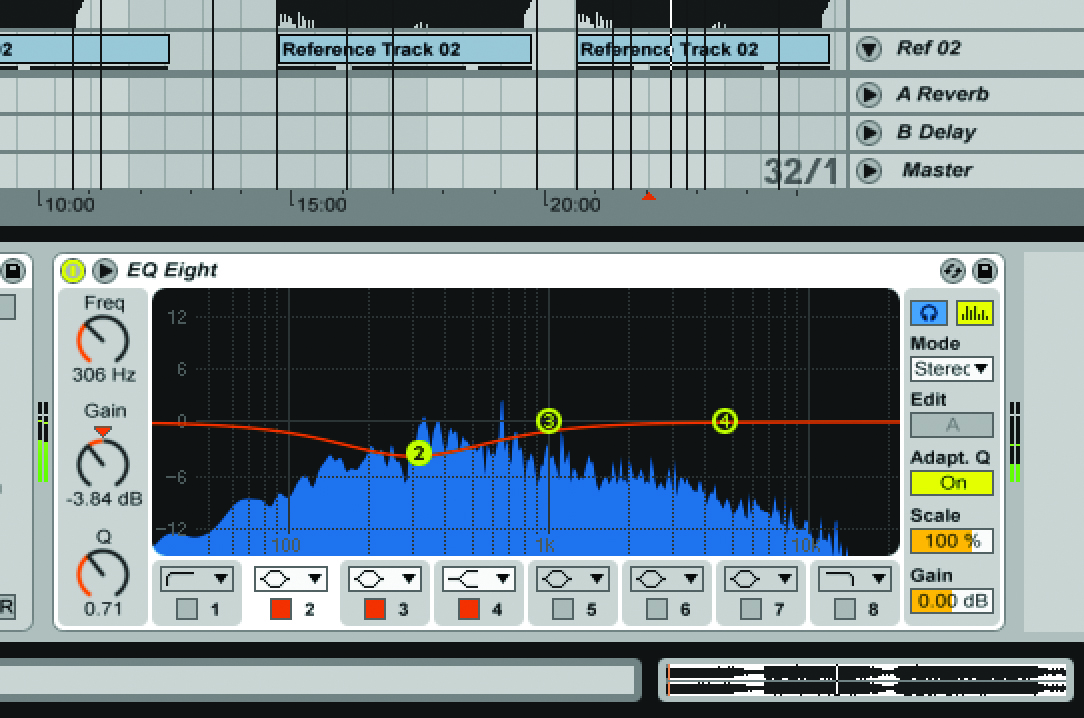
6: A final way to achieve a sense of depth is to push back the pokey, boxy-sounding part of the lower mids. This will generally live below 500Hz and will sound unpleasant when boosted using additive gain. When this area has been identified and the Q amount is wide enough to only boost the offending range you can use subtractive Gain settings to achieve a more scooped and deeper sound.
