Ableton Live Tutorial: Finishing Your Project
You’ve reached the final part of our massive Live guide, and it’s your last chance to tweak before sharing your song with the world! Martin Delaney is your master… Welcome to the last stage in this long-running Live project. We’re finishing with some extra master-track processing, then exporting and taking care of some file management. […]
You’ve reached the final part of our massive Live guide, and it’s your last chance to tweak before sharing your song with the world! Martin Delaney is your master��…
Welcome to the last stage in this long-running Live project. We’re finishing with some extra master-track processing, then exporting and taking care of some file management. Optimising our master track isn’t the same as mastering, which is the preparation of a final stereo mix or group of them, for distribution.
That’s an involved process requiring good ears, objectivity, and specialised gear, which unfortunately we don’t have room for today – we’ll talk about that another time.
In the walkthrough we use the Multiband Dynamics effect to modify the mids and lows in our track, but we also use EQ Eight for further adjustment of frequencies. EQ Eight has a useful real-time frequency display, or you could add the Spectrum device for a more detailed view.
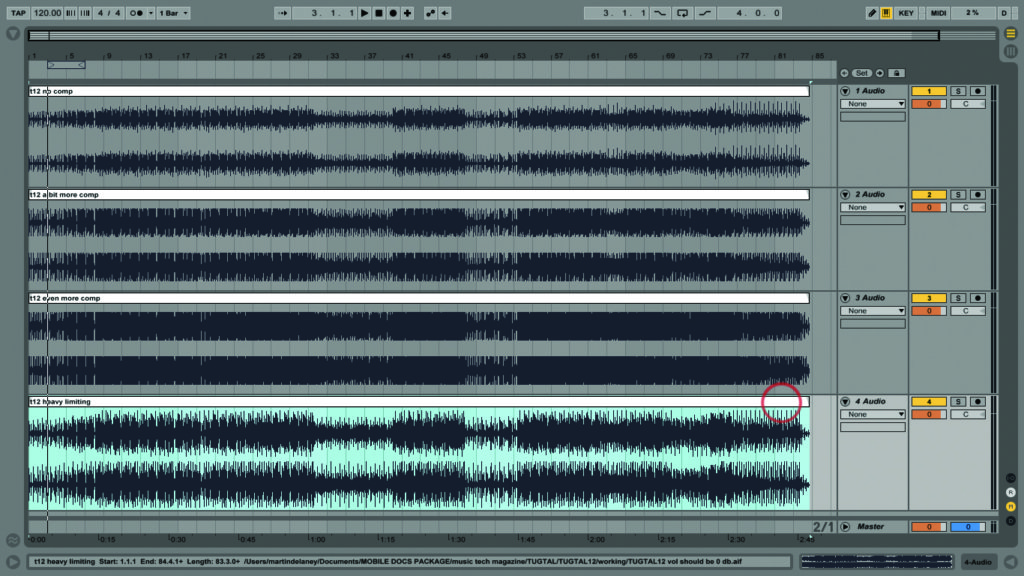
The other issue we address is master volume; you don’t need to thrash your mix volume throughout the production process, you can boost it here. We use the Limiter, inserted after the Multiband Dynamics device, to increase our master volume while preventing any distortion of the final output. You can enjoy watching the Limiter’s orange gain reduction meter react as you adjust the gain level!
This is an important stage for changing the sound of the final mix; the more the compressor is working, and the more limiting is going on, the more heavily compressed your track will sound. If you’re attracted to the character of extreme compression, you could also use dry/wet controls – set up a really extreme compression chain, then dial it back until it sounds more normal!
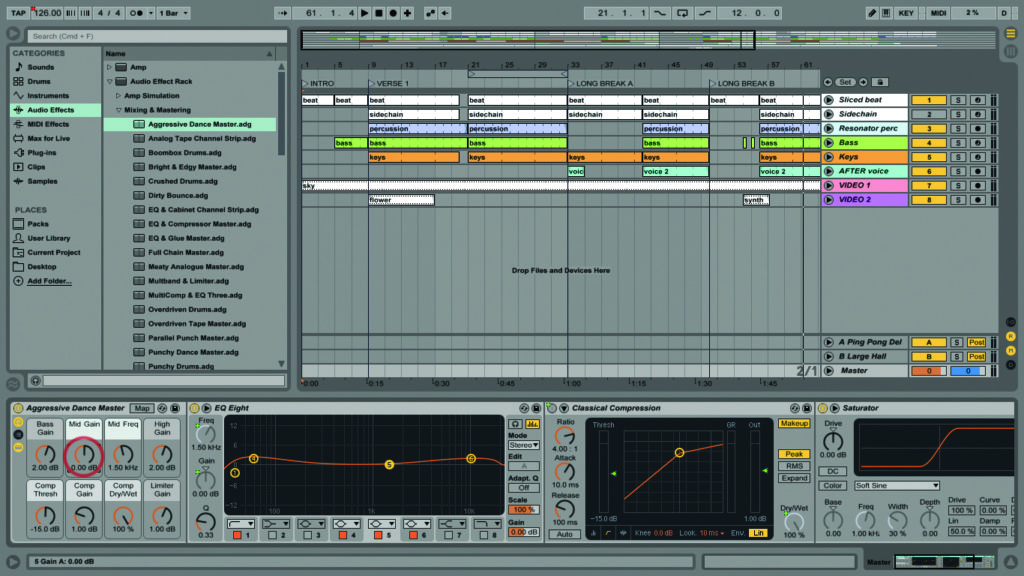
If you’re working with similar styles consistently, and you get a set of favourite devices, save them as an audio effect rack, and set up macros for your most-used controls.
When it’s time to export, use Cmd>A to select the entire project. This step isn’t crucial, but it’s a useful visual reference. Everything highlighted will be included in the export – you’ll see if you’ve left any stray elements beyond the supposed end of the song. You can also click and drag to highlight a section if you only need that part, or type bar numbers in the Render Start and Render Length boxes which appear when you type Shift>Cmd>R to open the Export Audio/Video window. Live’s audio export options are mostly self-explanatory… except for dither, which can be a head-scratcher!
This is useful when you’re rendering to a lower sample rate than that of the original project; because Live works at 32-bit internally, lower bit rates, like 16, require conversion downwards. This process can create audible distortion, caused by the ‘blocky’ character of digital audio waveforms as opposed to the smooth contours of analogue, but dithering adds a tiny bit of digital noise to the signal, effectively smoothing over the effect of the distortion.
In most situations, this added noise should be unnoticeable. Dithering works differently with different material – conduct some tests of your own and see if you can spot the difference. Ableton states that the Triangular mode is the ‘safest’ for general use, while pointing out that dithering shouldn’t be used if you’re sending your mix onwards for more processing – mix to 32-bit without dithering if you’re doing that.
Video export settings are dependent on your hardware and the destination of your finished movie. For a quick fix I’ll use an Apple device preset like iPhone or Apple TV – they provide reasonable quality without being too big.
When everything is done, the last thing you want to deal with is file management, but be patient and take action to protect your work so it’ll still be there when you revisit it for a live show or an alternative mix in six months.
The first thing to do is use Live’s Collect All and Save command in the File menu. You’ll see a pop-up pane with options relating to which project elements you can copy into the Project folder. I always leave all of these turned on, so everything I’ve used in the project – samples, presets, movie clips – is copied. Sure, this takes up more disk space, but it’s worth it for the security.
The next stage after that is to create a Live Pack – a 50%-sized archive of your Live project, that will take up less space when you email it, or Dropbox it, or move it to another drive. To make a Live Pack follow this path: File/Manage Files/Manage Project/Create Pack. Get that project tucked away safely. Move it to an external hard drive, and ideally clone that as well. If you’re really nervous, keep the clone at another location, in case your house is hit by a tornado or whatever.
This project’s been about techniques, rather than creativity. In the real world, how do you know when your tune’s finished? When do you cut if off? The problem is, there’s no ‘right’ answer, you can’t just buy a plug-in or take a pill. It does helps to have a deadline. If you were paying for studio time in the old days, that was a huge motivation right there. Now most of us work at home, we don’t have that pressure, so announce a date for a release or live show – anything that forces you to finish!
That concludes this project for now. Thanks for playing! We’ll be moving on to something new next time…
Why Don’t My Mixes Sound ‘Professional’?
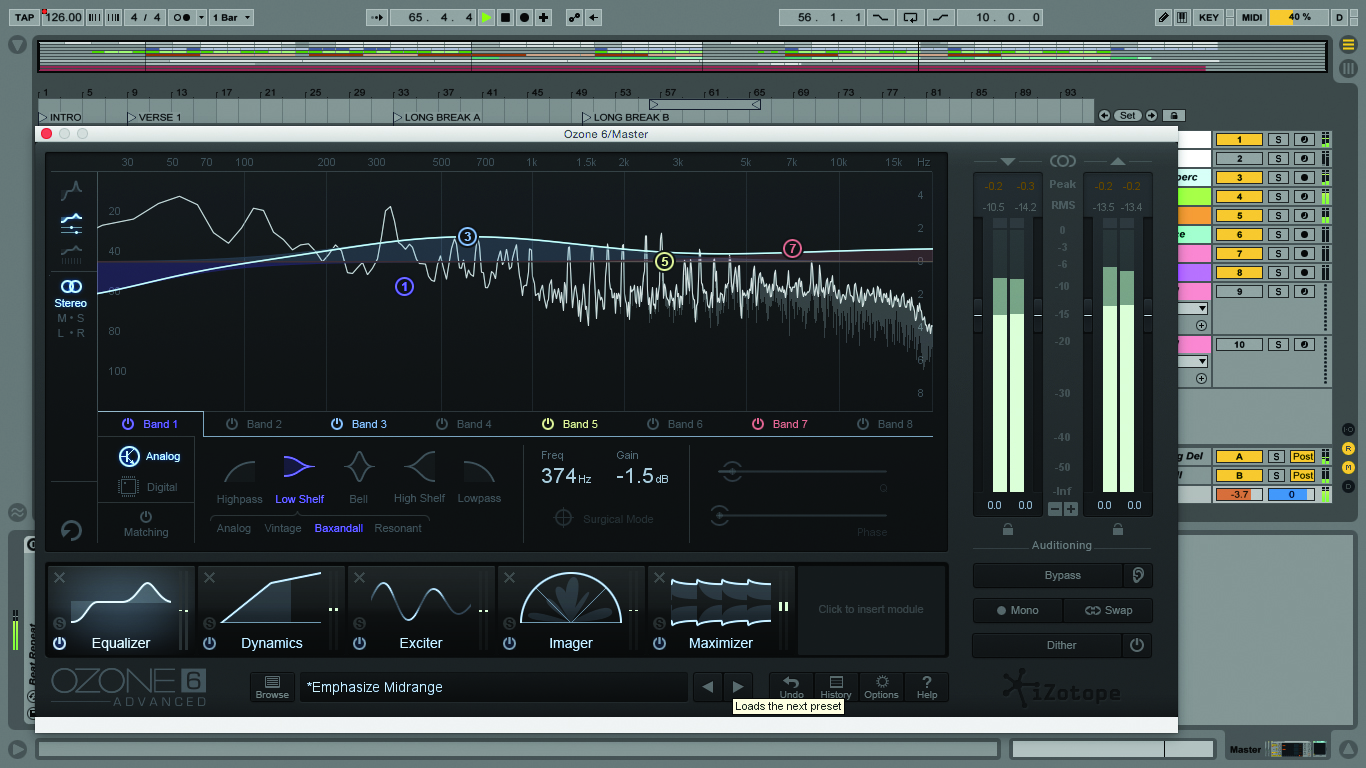
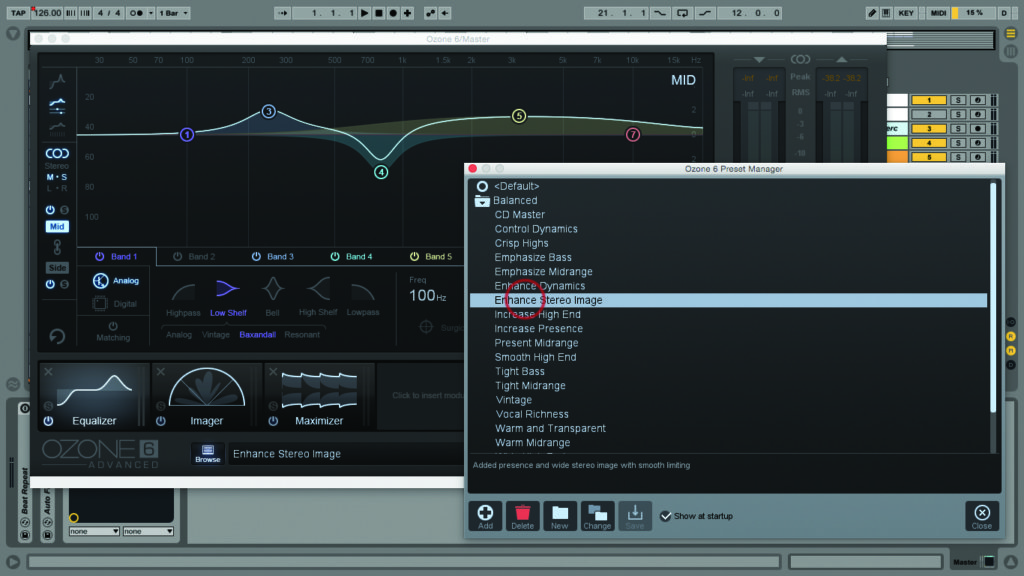
If you want more serious master track/mastering-type tools, sooner or later you’ll use third party solutions alongside Live’s devices. Probably the classic examples of these are Waves’ L2 Ultramaximiser and iZotope’s Ozone.
The L2 is fantastic for quick fixes – when all you care about is making your song louder, it has a very straightforward set of controls. Ozone, though, is much deeper and customisable, being more oriented for mastering than mixing. Conveniently, it also runs as a standalone application which is great if you’re mastering a batch of several tracks that belong together on an album.
Click Here For Step-by-Step
