Ableton Live Tutorial: Making Bass
Martin Delaney thinks it’s time to add some bass to our beats, doubled up with a little sub to make it bounce. Here’s his guide… In this latest Ableton Live tutorial we’re adding a bass part, ideally one that somehow fits in with our beat from the last tutorial. Refer to the example set downloadable […]
Martin Delaney thinks it’s time to add some bass to our beats, doubled up with a little sub to make it bounce. Here’s his guide…

In this latest Ableton Live tutorial we’re adding a bass part, ideally one that somehow fits in with our beat from the last tutorial. Refer to the example set downloadable here – it’s called TUGTAL4. The set includes all the steps from the last tutorial as well as a couple of samples you’ll need to complete this one.
Bass sounds change considerably across genres; you’ve got classic electric bass played with pick or fingers, analogue and digital synths, and LFO-driven wobble sounds. They’re all good and they’re all readily available to us these days,through real or software instruments and Live Packs. We’re going to build our own bass sound and program our own part.
This is because the Simpler instrument we use is included in every version of Live. If I was to do the tutorial using the Operator synth, you might not be able to follow the steps. You should try Operator, though – it’s my go-to synth for bass parts. I’ll move on to others only if I can’t find what I want in there.
We’re spending more time working with instrument racks as this is a great way to build deep synth sounds that would otherwise require complex routing across several tracks. In many ways they’re similar to drum racks, which we’ve already encountered. We’re using two chains in our rack – that’s two instruments playing together – but you can have up to 128 chains in a rack.
Impressive enough, but then bear in mind that you can have 128 racks inside another rack, so you can quickly end up with thousands of chains buried deep within your rack.
When you connect a MIDI keyboard or use your computer keyboard to play those sounds, you’re going to get a massive sound because all of the chains will play at once. This can be a bit overbearing, but we’re only using two today, so we’ll deal with that issue another time, and there are various tactics we can use to specify which sounds play at what times.
We’re using a transposed sine wave to create a sub bass – a low bass fundamental tone which fattens up the bottom end. It can be almost inaudible in the mix at certain times. For reasons of simplicity, we’re pairing it with our square wave sound, but there’s no reason why a sub couldn’t be on a track of its own and subject to a whole other round of editing and effect processing.
After drawing in the notes in our bass clip, we went back to shorten the bass note in our sliced drum rack from last time to make sure it didn’t overlap with the new bass part. When you’re working with MIDI programming, a lot of mixing problems can be fixed at the programming stage. It’s the same reason we set the Simpler instruments to 1 voice each, to avoid overlaps that will affect the bass part.
Simpler Sampler
Simpler is a very powerful sampler, although it has a user-friendly interface. It makes it possible to build long, sustaining notes by loop and crossfading short samples, but on this occasion we don’t need those controls. Lucky us! Maybe we’ll come back and use them later.
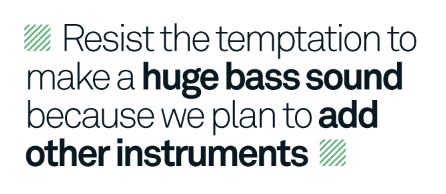
As I mention in the tutorial, it’s important to resist the temptation to make a huge bass sound right now. This is because we plan to add other instruments, and sonically there won’t be any room for them if we have a bass sound that’s riddled with effects and covering a huge frequency range.
We use clip envelopes to create repetitive movement of the Auto Filter controls; it makes our bass sound a bit more evolving and interesting. It depends on what genre you’re working with, but automated filters can be a huge factor in the mix. If you don’t like the restrictions and mouse-work of drawing these envelopes, be aware that you can record them in real time if you’re using a suitable hardware controller.
Also I can’t stress enough the importance of unlinking clip envelopes from the clip length. And remember: each envelope can be a different length. You might notice that the sine wave part of the bass sound doesn’t react much to the filter, but that’s normal – sines are not so responsive compared to other more complex waveforms.
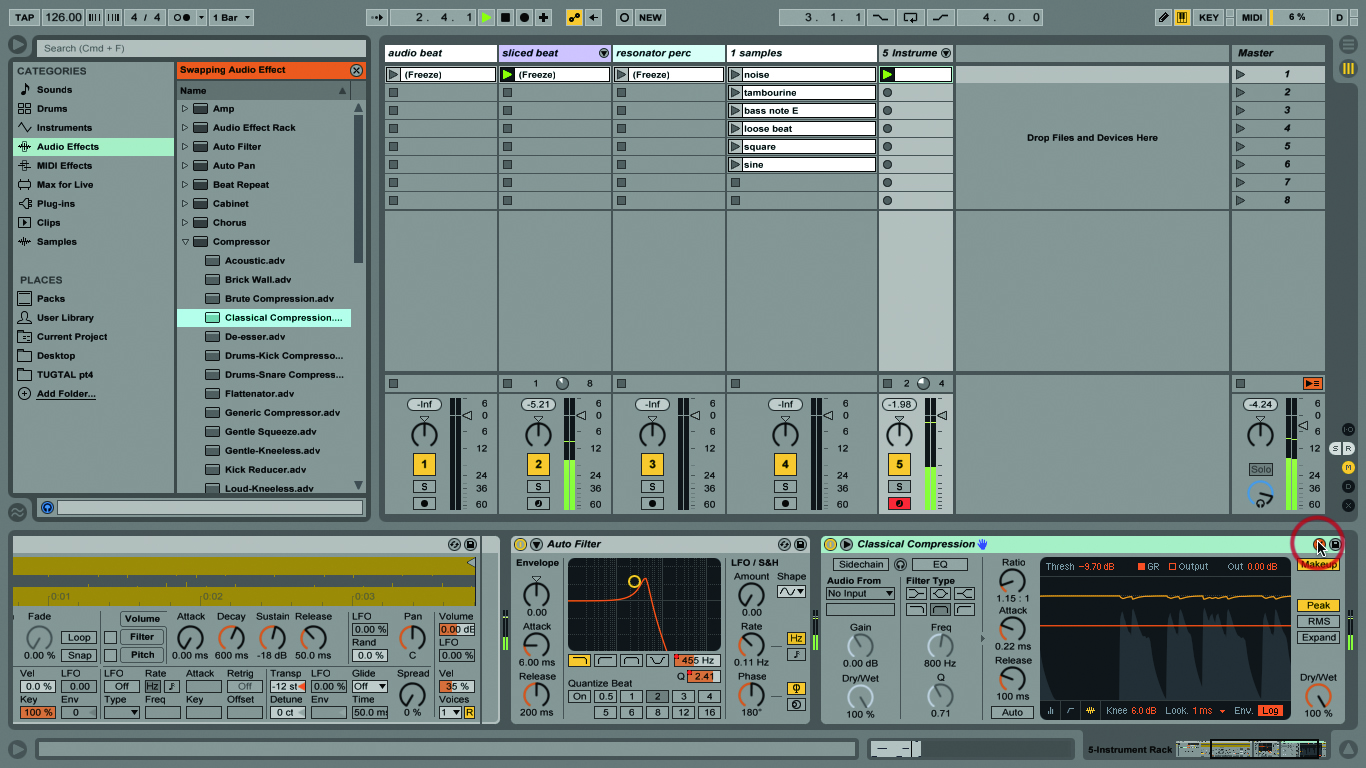
We finished off the bass track with Live’s Compressor. This is perfectly adequate as a clinical compression tool, although that’s one area where I think third-party plug-ins or even hardware can step in and do the job better, for those times when you want a compressor that purposely adds some character to the sound. If you have the Glue Compressor from the Live 9 Suite, that’s a good place
to start…
As we’re adding more elements to our track, we’ve got to make sure everything sounds good alongside everything else. While working with the bass sound, I was starting to feel the Resonator settings were a little bit too abrasive. To fix this you can go to the Resonator in our percussion track and tame it a bit by resetting all of the fine tuning values to 0 using the white boxes under each Pitch control. That should sound better!
That’s all for now. Next time we’ll be working on a keyboard part to layer over our bass and beats. Once again we’ll take a shot at building our own instead of loading a preset.
Focus On Real Bass
The best thing you can do if you want to program good bass parts is to get your hands on a bass guitar – it’s a great way to try ideas against your drum tracks.

You don’t have to learn to play properly, it doesn’t even have to be a good bass and it doesn’t matter what it sounds like, because 99 times out of 100 it doesn’t even get plugged in.
This is my most common way to create bass parts, noodling away while the drums loop. To get a bass vibe…play bass. It’s pretty obvious!
Making Some Bass
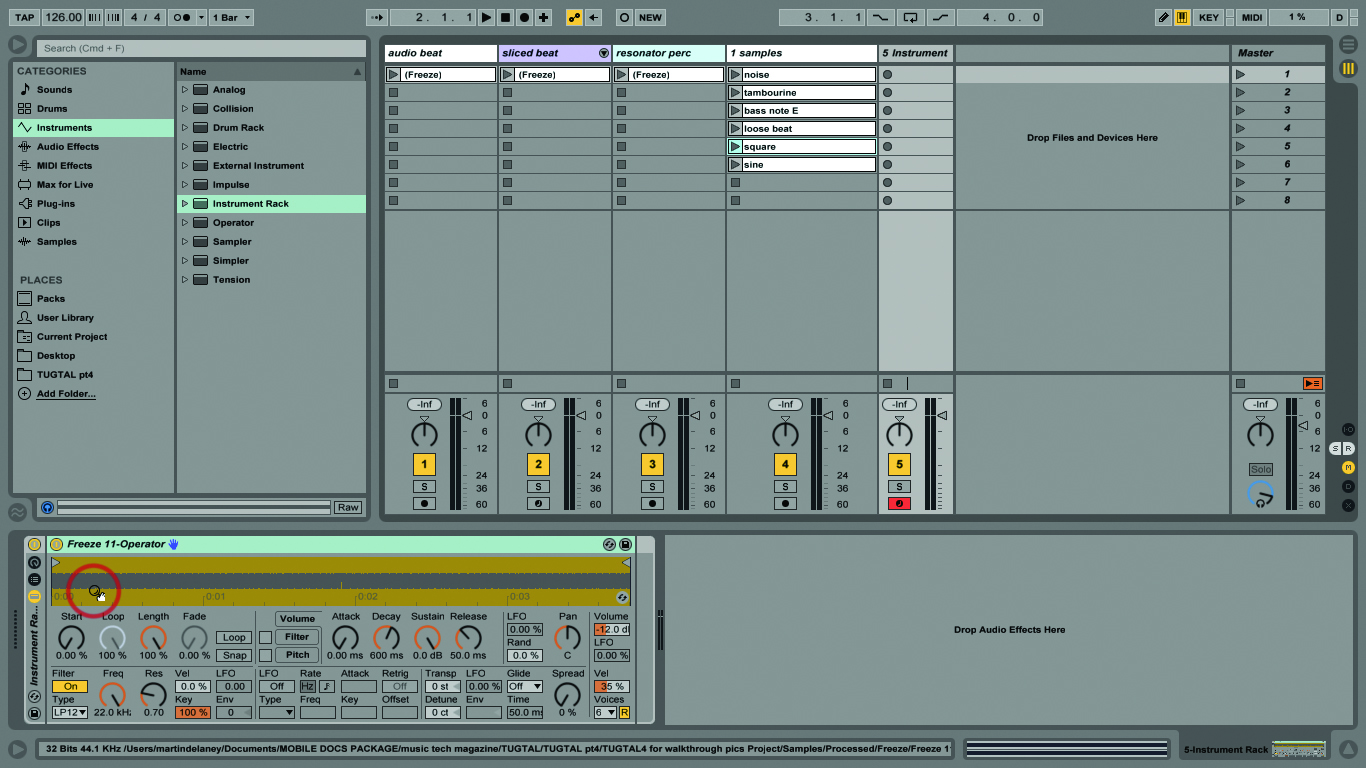
1: Open our example set, which follows on from last time. Load an empty Instrument Rack into a new MIDI track. Drag the clip ‘square’ into the rack and it’ll automatically appear inside a Simpler instrument.
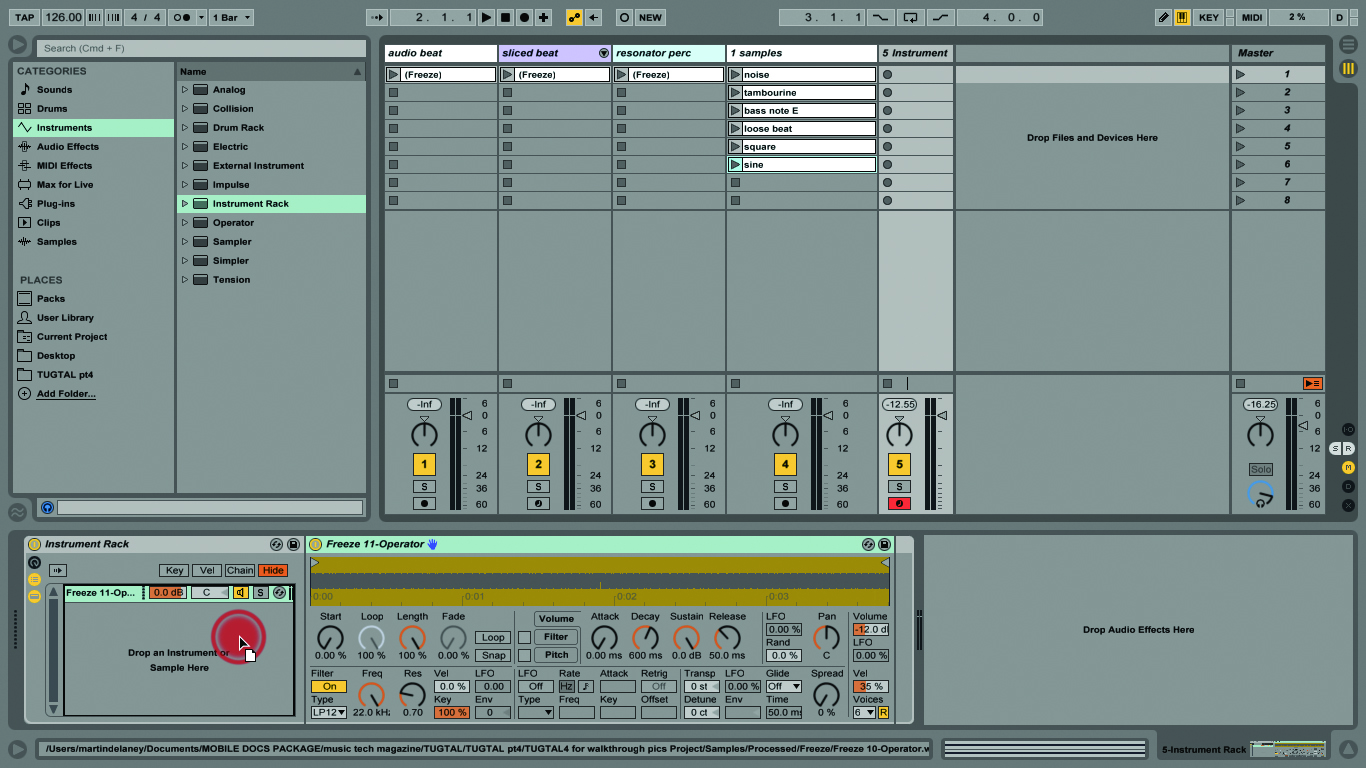
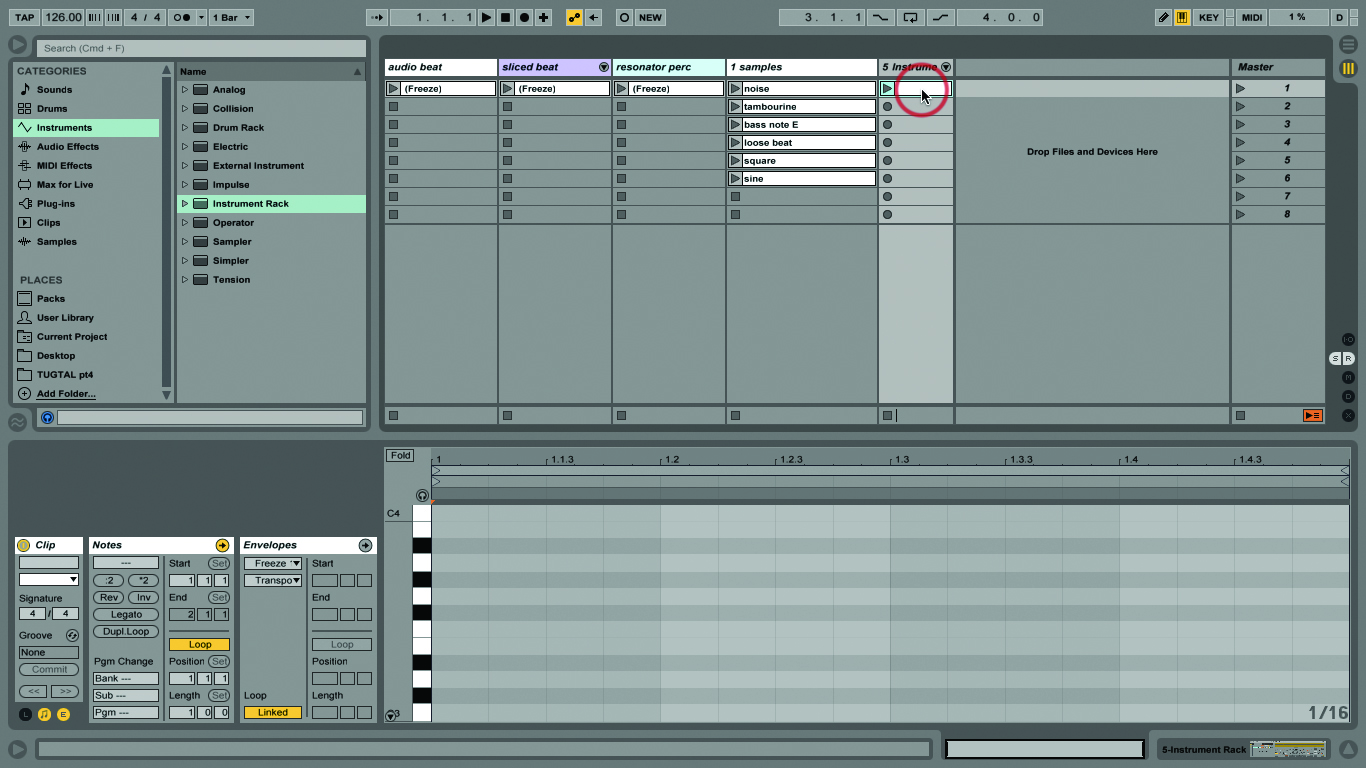
2: Arm the track and play your keyboard to audition the sound, in a low-ish range. Drag the clip ‘sine’ into the rack’s drop area, creating another chain. Now you’ll be playing both sounds together.
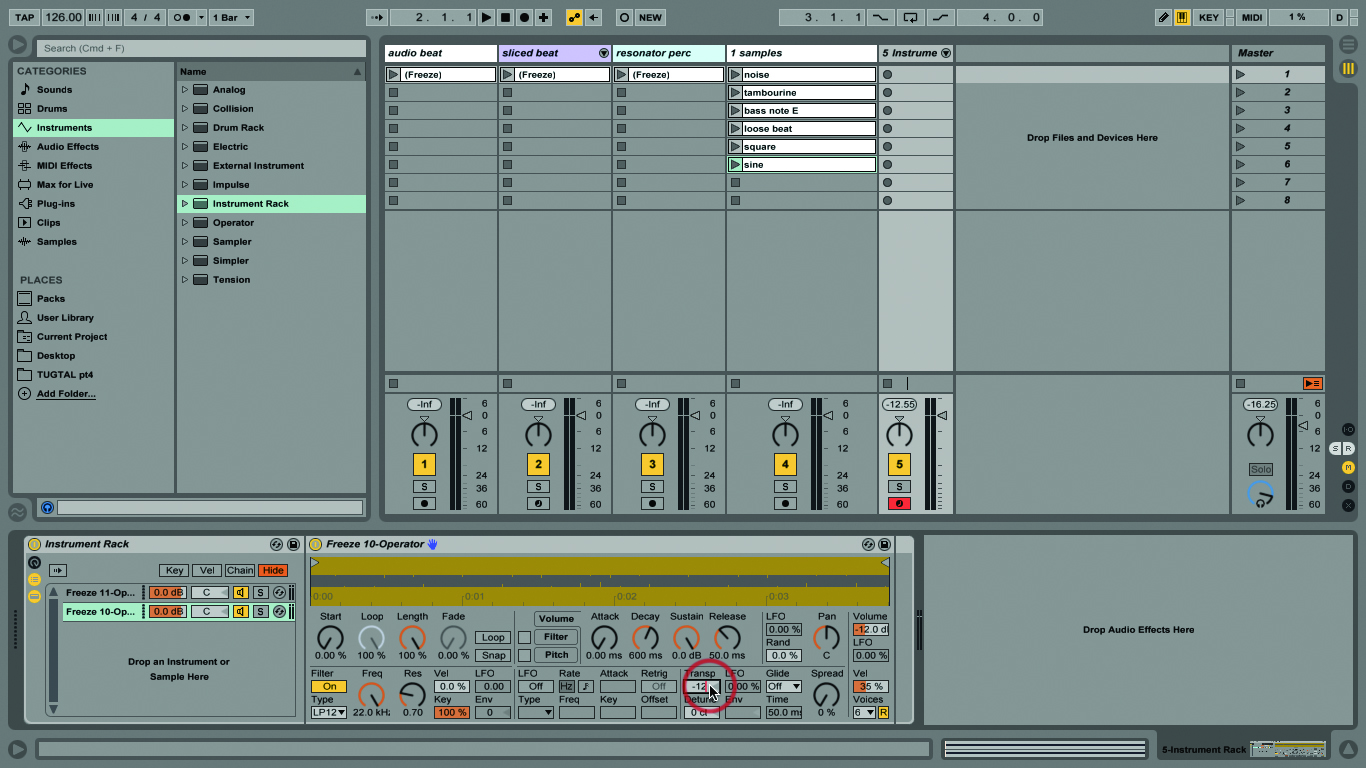
3: In the ‘sine’ Simpler instrument, set the Trans (transpose) value to -12 semi-tones, that’s one octave down. We’ll use this as our sub bass and the saw as our more immediately characteristic tone.
4: You might want to rename the chains now, for visual reference – Cmd-R. Good, now let’s draw in some notes. Double-click in an empty slot to create a new MIDI clip, as we’ve done before.
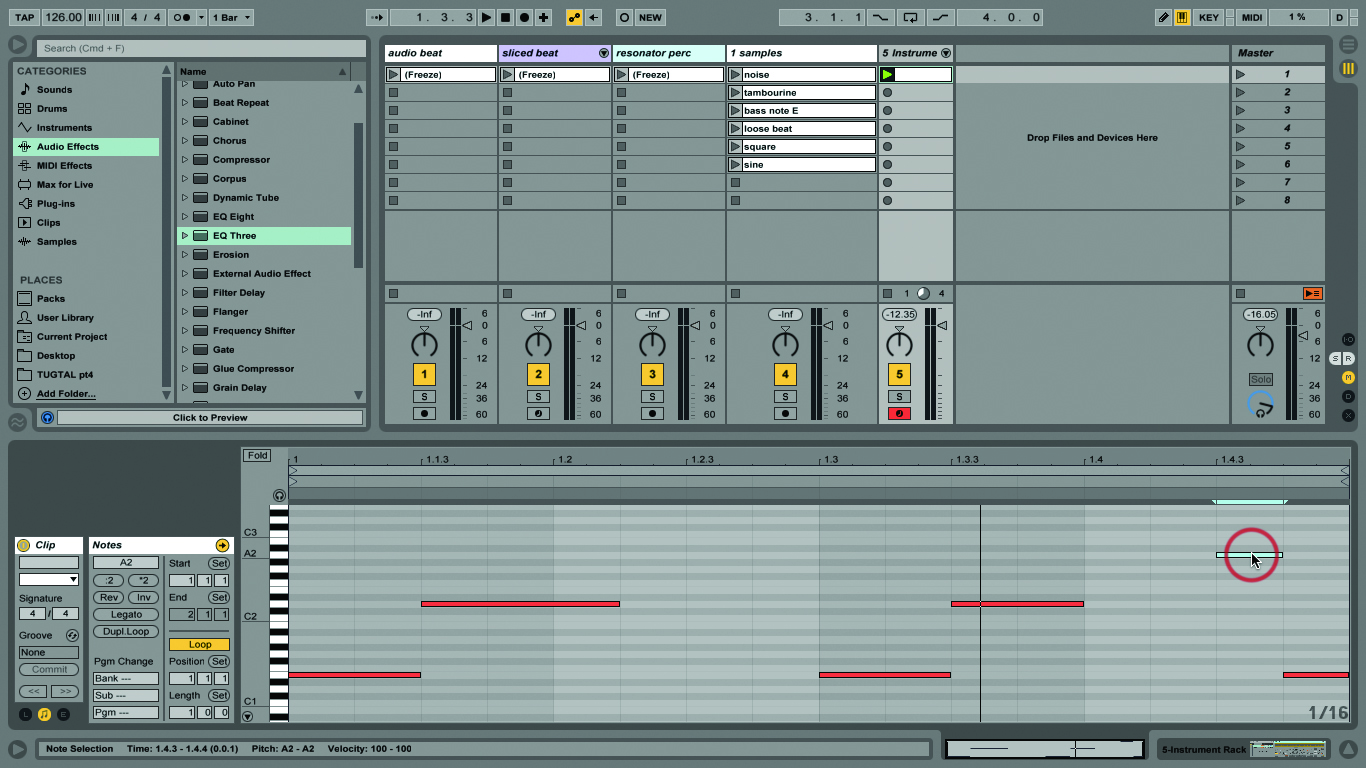
5: Refer to the screen shot. It’s just E1 then D2 at 1.1.3 then E1 again at 1.3, D2 at 1.3.3, and A2 at 1.4.3 and E1 at 1.4.4. Match the note lengths to what you see in the picture.
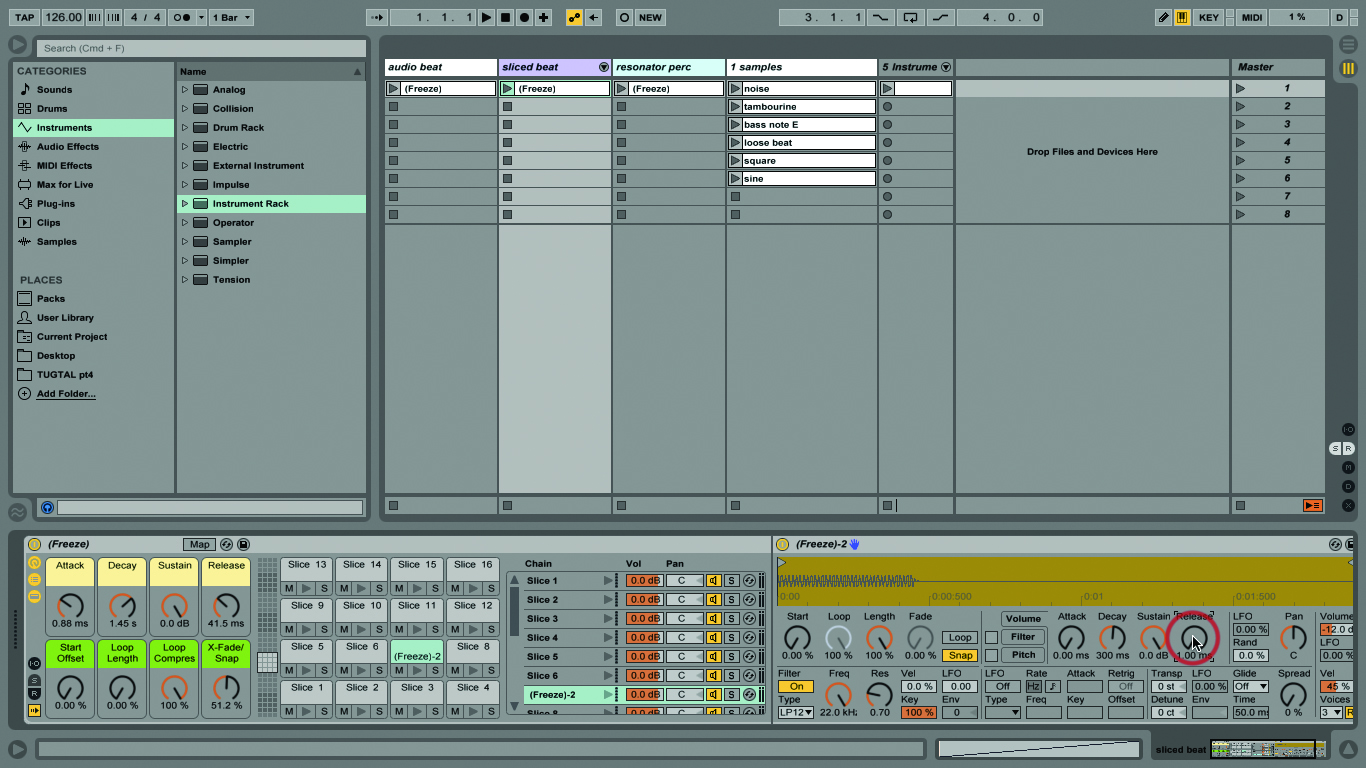
6: There’s a bass sample in the drum kit; our bass clip leaves room for that. But, find the controls for the bass note in the drum rack and reduce the Release to 1.00 ms, shortening the note.
Click Here To Continue
