Ableton Live Tutorial: Pitch and Transposition
In the first of a new series of in depth tutorials for Ableton Live, Martin Delaney shows you where to find some all-important controls relating to pitch and transposition for audio and MIDI, and explains how to use them… Today, we’re talking about pitch and transposition, and how to manipulate them in Ableton Live. But […]
In the first of a new series of in depth tutorials for Ableton Live, Martin Delaney shows you where to find some all-important controls relating to pitch and transposition for audio and MIDI, and explains how to use them…
Today, we’re talking about pitch and transposition, and how to manipulate them in Ableton Live. But we’re not talking about the musical theory involved, as much as looking at the Live tools that let us interact with these important musical principles.
With some people, there’s still an idea that Live is weak at MIDI programming – and it is, if you’re looking for the familiar tools from Cubase or Logic. Ableton Live isn’t so much about MIDI programming in a way you’d recognise from programming with other DAWs – it’s more about using dynamic control, automation and MIDI effects.
And because… well, because Live is Live, we can exercise a huge amount of real-time control with audio samples as well, just as easily as working with MIDI. Because these tools let us be more spontaneous, and can be accessed mostly through hardware controllers, rather than being based on drawing with a mouse, they are equally useful for improvisation, performance and composition.
Live’s transposition and pitch controls are primarily creative tools, meaning you use them to create noticeable sonic effects, with the MIDI plug-ins and within the software instruments. However, they also serve very practical purposes, such as the new Tuner device, and the way that the Pitch MIDI effect device can help you to shift the root of a song to better fit with a certain vocalist’s range, for example.
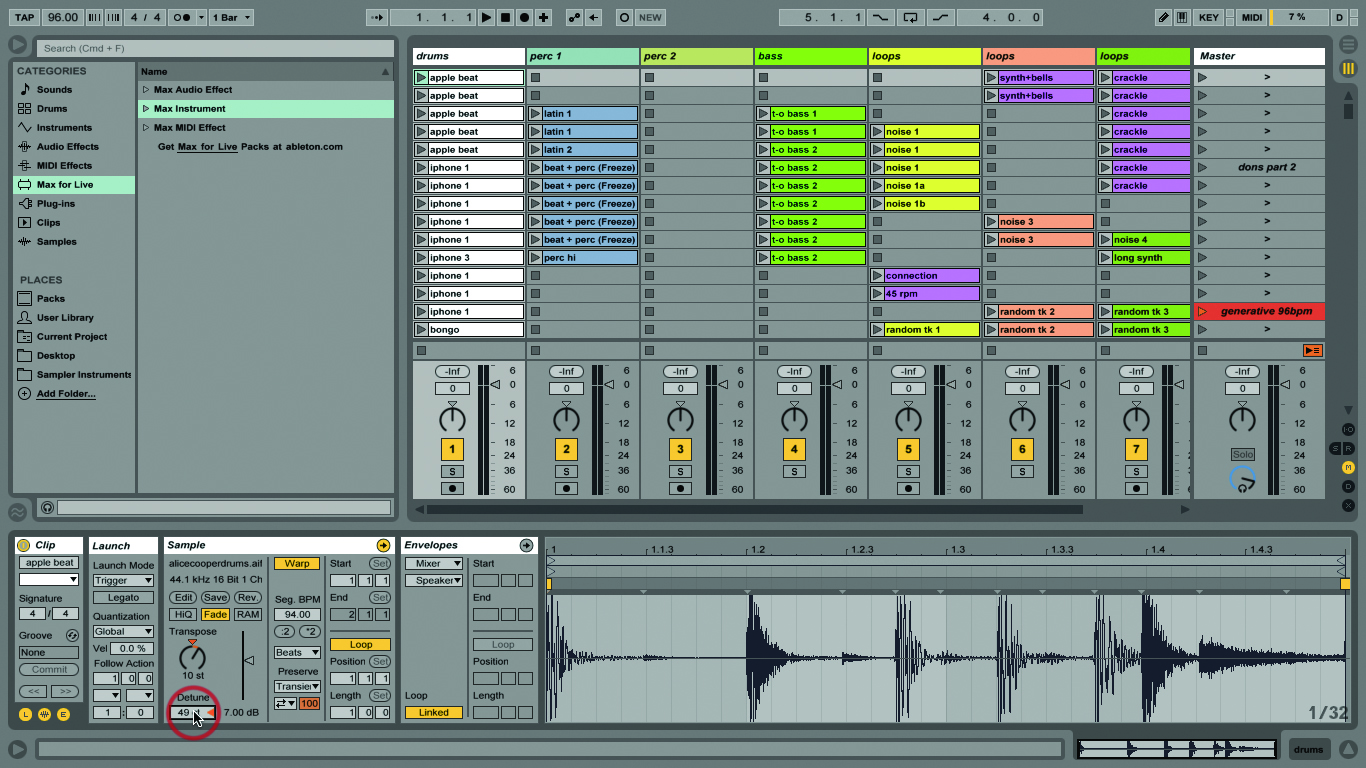
As with project tempo changes, transposing an audio clip is one of the times when you can most hear the difference between how the different warp modes behave. Try it with that audio drum loop in track 1 of our example set – combine it with project tempo changes to get the full benefit! The Transpose control in the Sample box is MIDI-assignable – once assigned, it applies to the currently selected clip or group of clips.
There are various ways we can create harmonies in Live – instrument racks, multiple copies of audio clips across a scene or in a track group, the Chord MIDI effect device or the Apple AU Pitch device (put it on a Return track for the coolest harmony mix options).
If I want more involved harmonies, I’ll use iZotope’s Nectar 2, which is a great plug-in, designed primarily for vocals, but fun with instruments too! On the hardware front, the Eventide PitchFactor is a very cool and not too expensive stompbox-style harmoniser if you want something more physical.
The Re-Pitch Warp mode is great for song transitions – much as I usually mask BPM changes in song transitions, sometimes it’s fun to do the opposite and have a few choice samples that pitch up as you increase tempo between songs.
As far as Live’s instruments go, the Operator synth is a perfect example of how pitch and transposition controls can be used creatively. Each oscillator (or operator) has Coarse and Fine tuning controls – Coarse generally providing more pleasing sounds, while Fine produces more edgy ‘inharmonic’ sounds. These two controls on each oscillator are enough to make a big difference to the sound of Operator.
Beyond that, there’s a pitch envelope that globally affects all of Operator’s output (this defaults to ‘off’), and the Spread control, which thickens Operator’s sound by doubling and slightly detuning the output. Then there’s the Transpose control, which will globally shift notes playing through Operator in semitones to + or – four octaves.
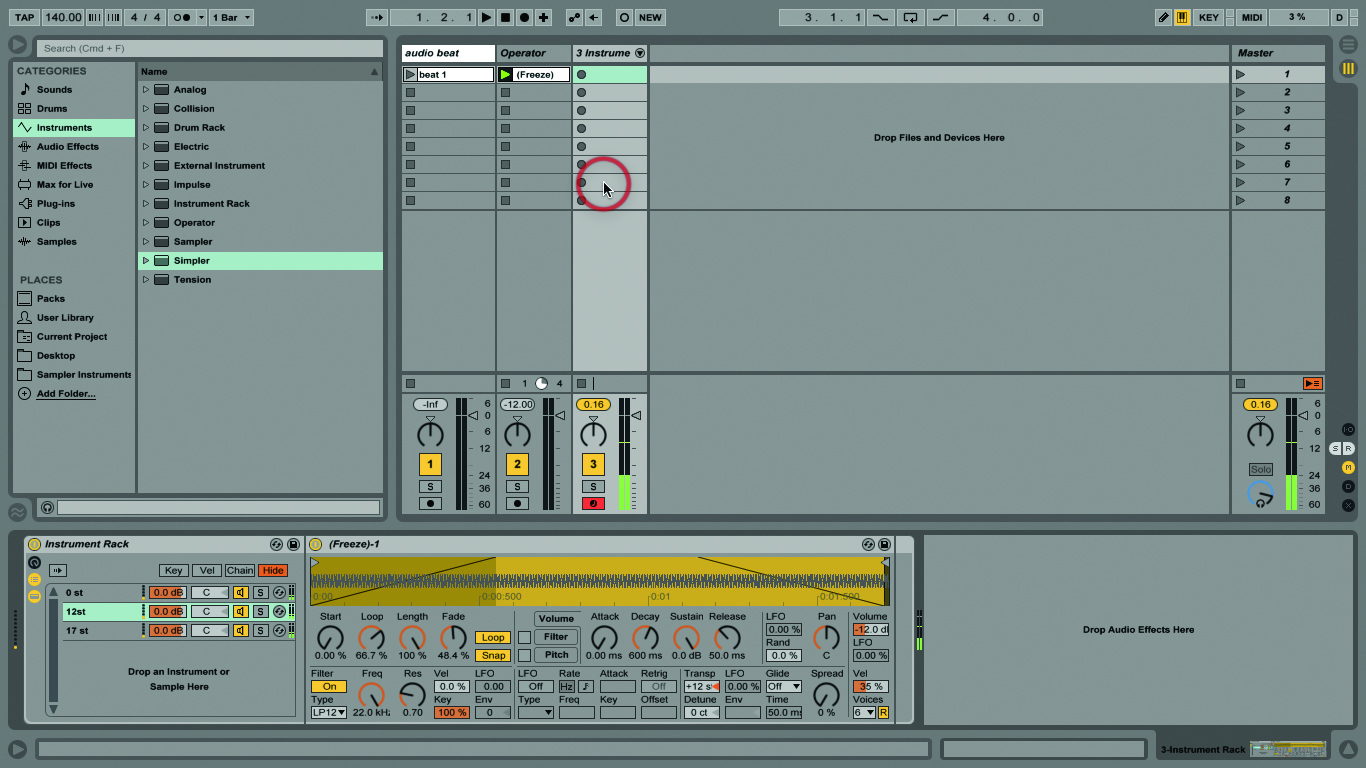
As usual with Live, all of these controls can be automated, with track automation or clip envelopes – I still like to use Impulse, Live’s original drum sample player, and I like to automate pitch changes for each of the eight sample slots. Operator and Simpler are just two of the instruments that feature pitch and transposition-related controls.
Analog, for example, has independent octave, semitone and cent tunings for each oscillator, which could help you create some vintage synth pitch wonk.
Using note pitch to trigger specific instrument sounds within a rack is very useful, especially for ‘real’ keyboard players – I know a few touring musicians who use this type of setup. What makes it extra cool is that, of course, you can build in an element of cross-fading between sounds as well, so it doesn’t have to be strictly one sound or the other (drum racks have a kind of comparable function, where incoming notes can be remapped to other notes).
If you really like to mess around with racks, create an instrument rack with 128 chains, each containing a different instrument sound. Right-click in the Key Zone Editor, and choose Distribute Ranges Equally.
Now you have a separate zone for each chain in the rack – and each sound will be triggered by a different note. Now you can start playing your keyboard, and get to work with the various MIDI effect devices, like Arpeggiator, to keep loading different sounds for each note that plays. I like this and, of course, it’ll work with third-party instruments and effects as well.
That’s all we have time for this month, although there are other places in Live where you’ll see ‘Pitch’ and ‘Transpose’ controls… I hope this helps you appreciate how many different ways we can affect pitch of audio and MIDI components within Live, without ever drawing in a note or
a MIDI cc if we don’t want to. Put all these together to enhance your live performances and productions…
Transposition Explained
There are transposition controls throughout Live, and this applies to audio samples as much as MIDI parts and software instruments. Transposition is what we call it when we change the pitch of a part, or an entire song, usually in semitones.
Furthermore, we have the ability, in some instances, to change pitch in smaller divisions, namely cents – a cent is 1/100th of a semitone. In Live, we’d probably use this kind of adjustment to fine-tune the pitch of samples from different sources, or perhaps to simulate the less consistent pitch of vintage synths.
Step-by-Step: Explore Live’s Pitch Effects
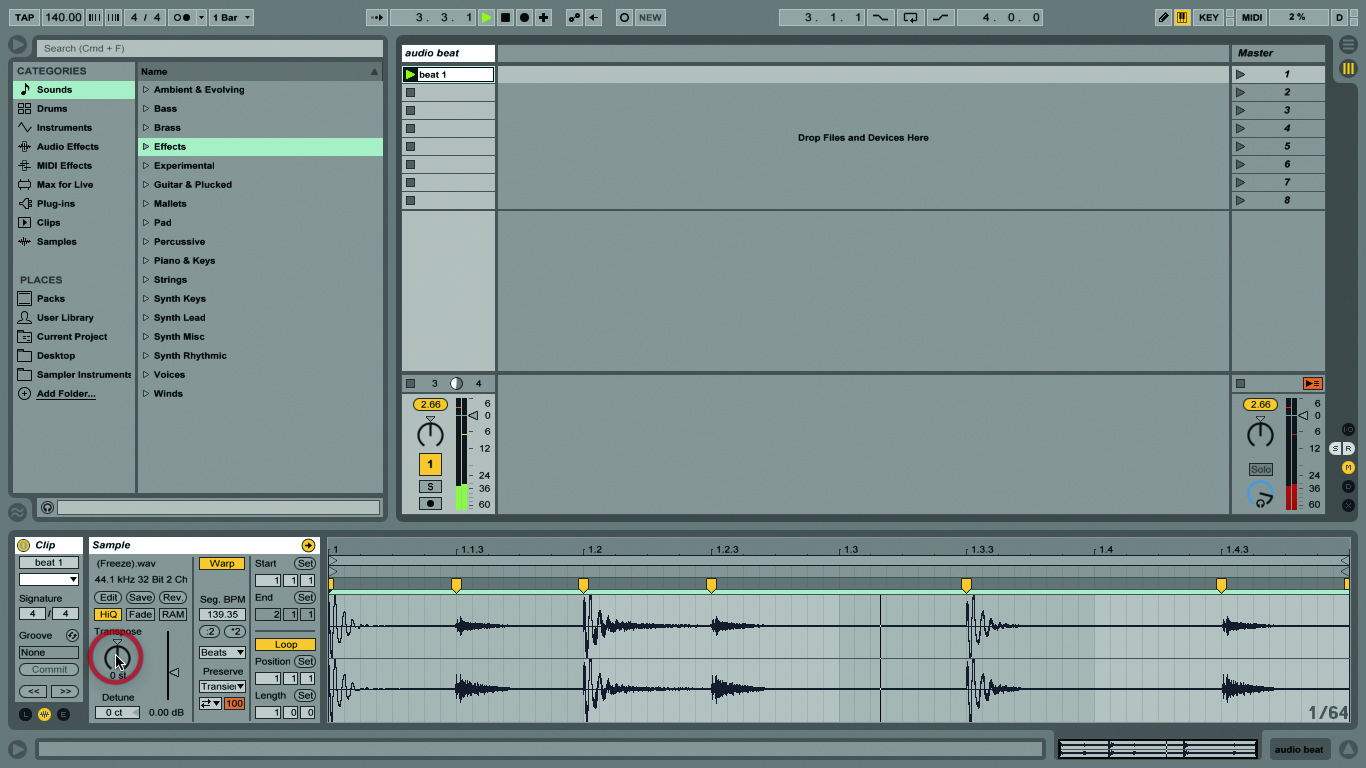
1: Open our example set. Double-click the audio clip ‘beat 1’. Use the Transpose control to shift the beat up and then down. This is also where you’ll better hear the warp modes in action.
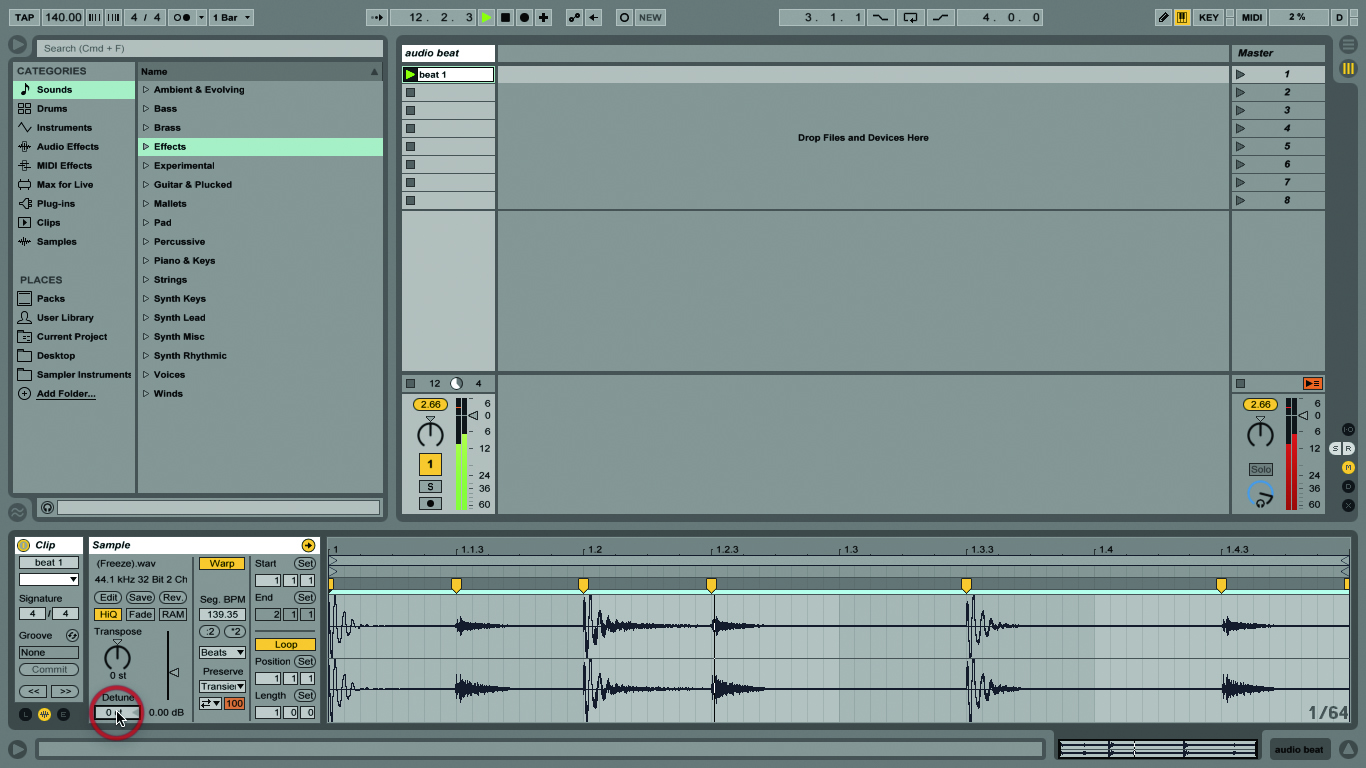
2: Below the Transpose control is a box where you can enter cent values to tweak the tuning of samples to better fit together. Use this in conjunction with Live’s Tuner to finesse your sample pitches.
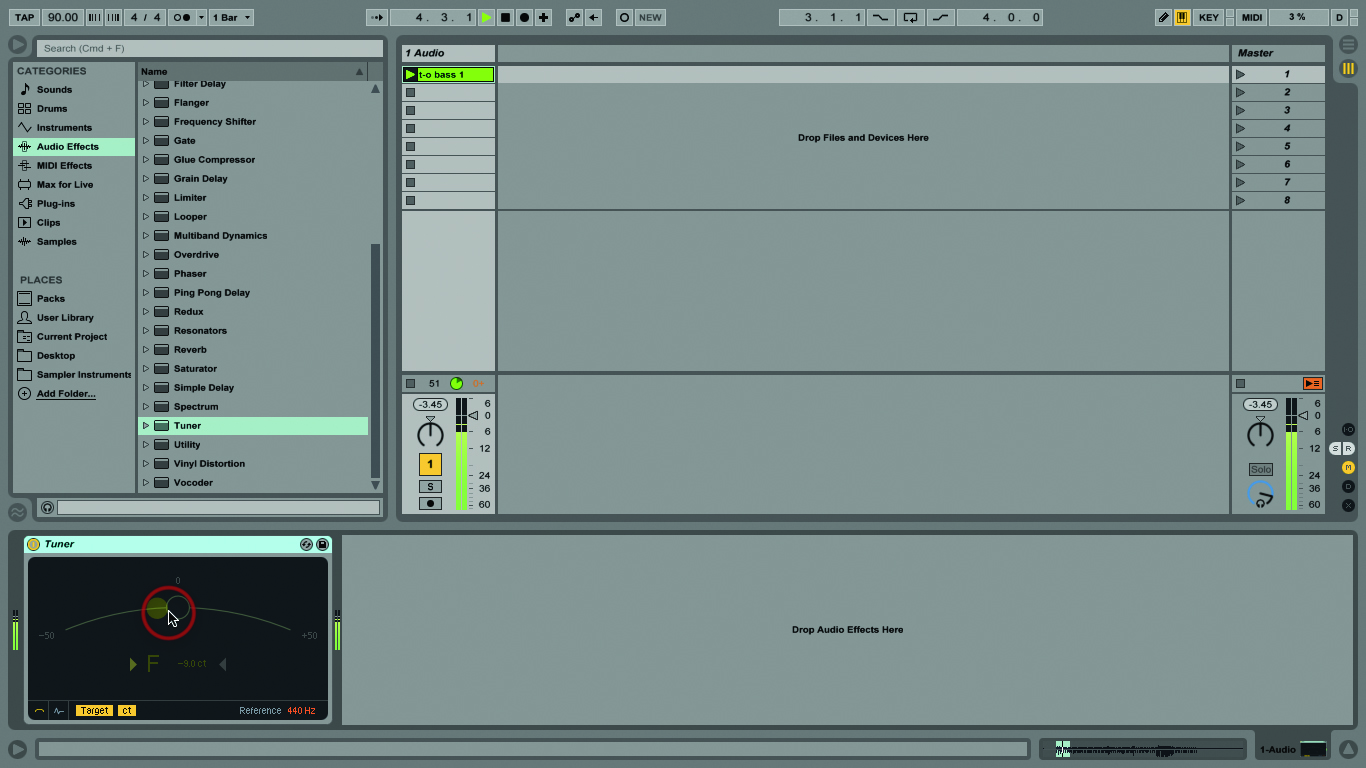
3: The Tuner device is useful… tune your samples with it, tune your guitar, tune your bass, or whatever other stringed instrument you have. Live should’ve had this 10 years ago – better late than never!
4: Create harmonies by copying a clip across different tracks, transposing them all differently and launching the scene. Or create a rack with multiple Simplers containing the same sample, pitch them differently and play from a keyboard.
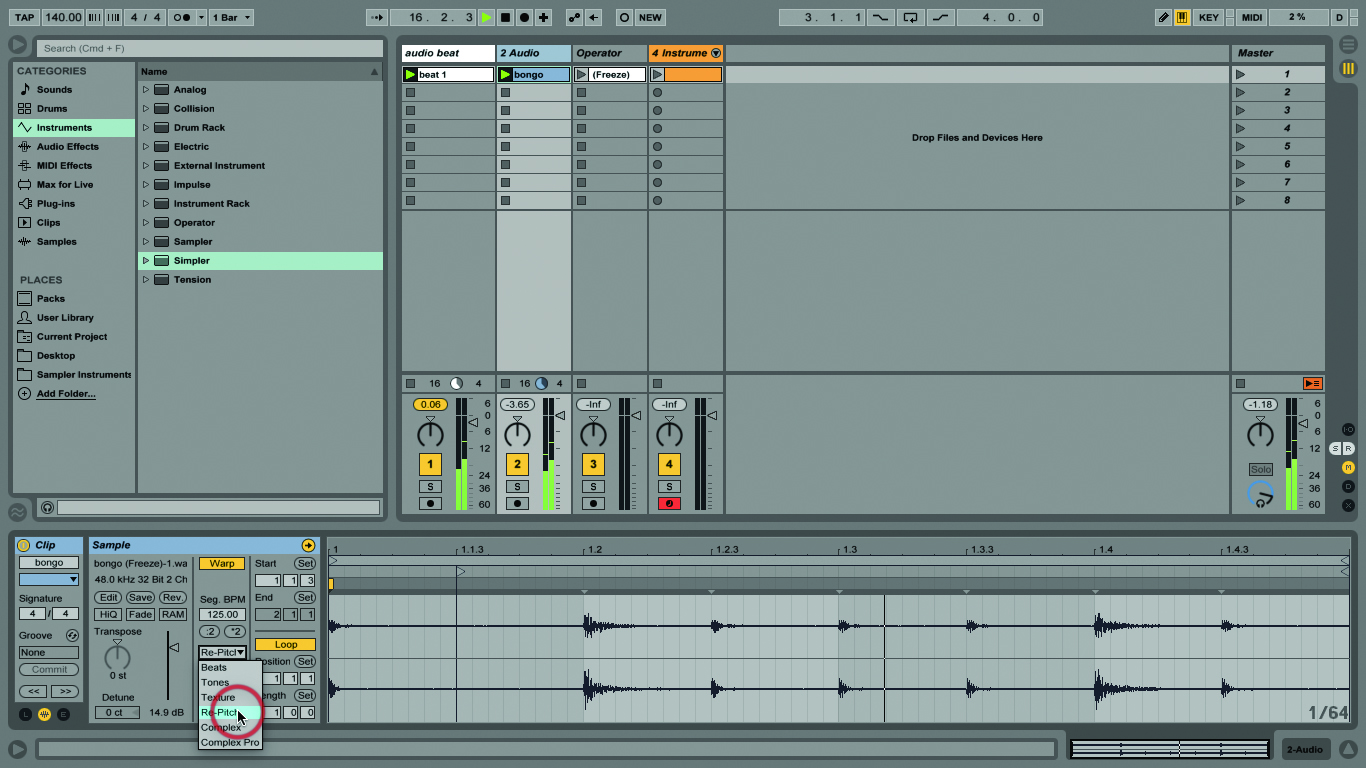
5: Live’s Re-Pitch Warp mode provides vinyl-style effects. Clips set to Re-Pitch change duration with project tempo changes, but also deviate upwards or downwards from their original pitch. It’s a cool effect!
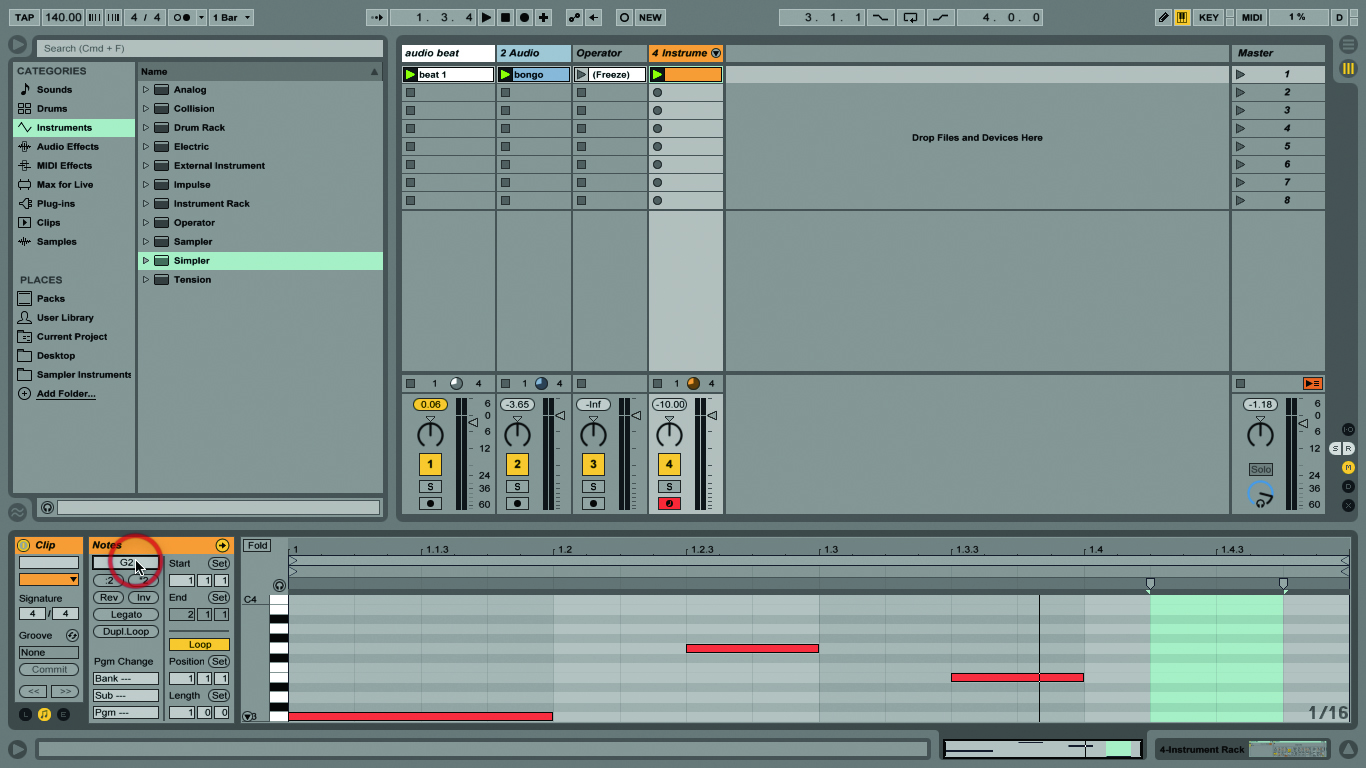
6: Live’s MIDI Notes box has a Transpose control too – type note names, or a transposition value in semitones, or just click and drag up or down to re-pitch the currently selected notes.
Click Here To Continue
