Ableton Live Tutorial: Become A Power User Part 9 – Mixing Tools And Techniques
When it comes to mixing, Live offers both classic and contemporary mixing tools for a variety of sonic options. Liam O’Mullane walks you through his main choices of devices and editing tools to make your mixes shine… Mixing is a process that can happen in one or two stages of the music production process. The […]

When it comes to mixing, Live offers both classic and contemporary mixing tools for a variety of sonic options. Liam O’Mullane walks you through his main choices of devices and editing tools to make your mixes shine…
Mixing is a process that can happen in one or two stages of the music production process. The first stage is creative and composition based, where people may mix as they go. Here they’ll solely concentrate on mixing as the track comes together with possibly a separate tweaking stage at the end.
The second stage is after the composition is complete and sounds are in place, to then mix with a subjective outlook. Some people will ignore major mix decisions until this stage as it gives them the most mix options as possible while they only have their mix engineering hats on. Although mixing has creative sound design aspects, it also has many practical tasks and assessments that need to be carried out. With your creative hat on, you can find this difficult to do, so if you stop to take care of these matters, it can have a negative affect on your creative workflow. So there is a good reason to separate these two mixing processes if you can.

To help commit to this separation, it’s worth rendering out all of your tracks to new audio. This helps you decide when you’re truly ready to mix, while also removing the temptation to tamper with compositional aspects during the mixing stage. Rendering out your audio also frees up computer resources which means more processing power for plug-ins. Finally, if you intend to send your work out to be mixed by an engineer, this process will create files that they can use.
To export your project’s tracks to new individual audio files, highlight the duration of the whole song and then select Export Audio/Video from the File menu. This opens up a large range of options and we recommend you remain at Live’s native bit-depth of 32-bits, and stay at the same sample rate you’re working at. The sample rate you’re currently using is signified by having a small speaker icon next to it. The only other option that needs configuring for this task is the Rendered Track menu (all other options should be disabled). Select Individual Tracks for rendering and then select a new, clean, mix project folder to put them in after clicking the Export button. You will now have a new file for every track which can be imported into a new project. Until next time, happy mixing…
Processing, Side-Chaining And Automation

1: Although Live’s Compressor Device is perfectly functional, Glue Compressor can be used to add some character for dynamic processing. Glue is a great channel, group and mix buss compressor with its SSL-like smoothing effect. Enable the Soft Clip function and explore driving the signal using the Makeup gain for a hot sound. You can always then use the dry/wet dial to make this a parallel effect.

2: If you need to remove unwanted sounds, try editing the unwanted portions out rather than using a gate device. This offers a higher level of individual control to tidy up audio over a more ‘set and forget’ approach used with a gate. After highlighting the portions you don’t want, delete them, then select Show Fades from the Create menu. You can now drag these start and end fades to suit each audio event.
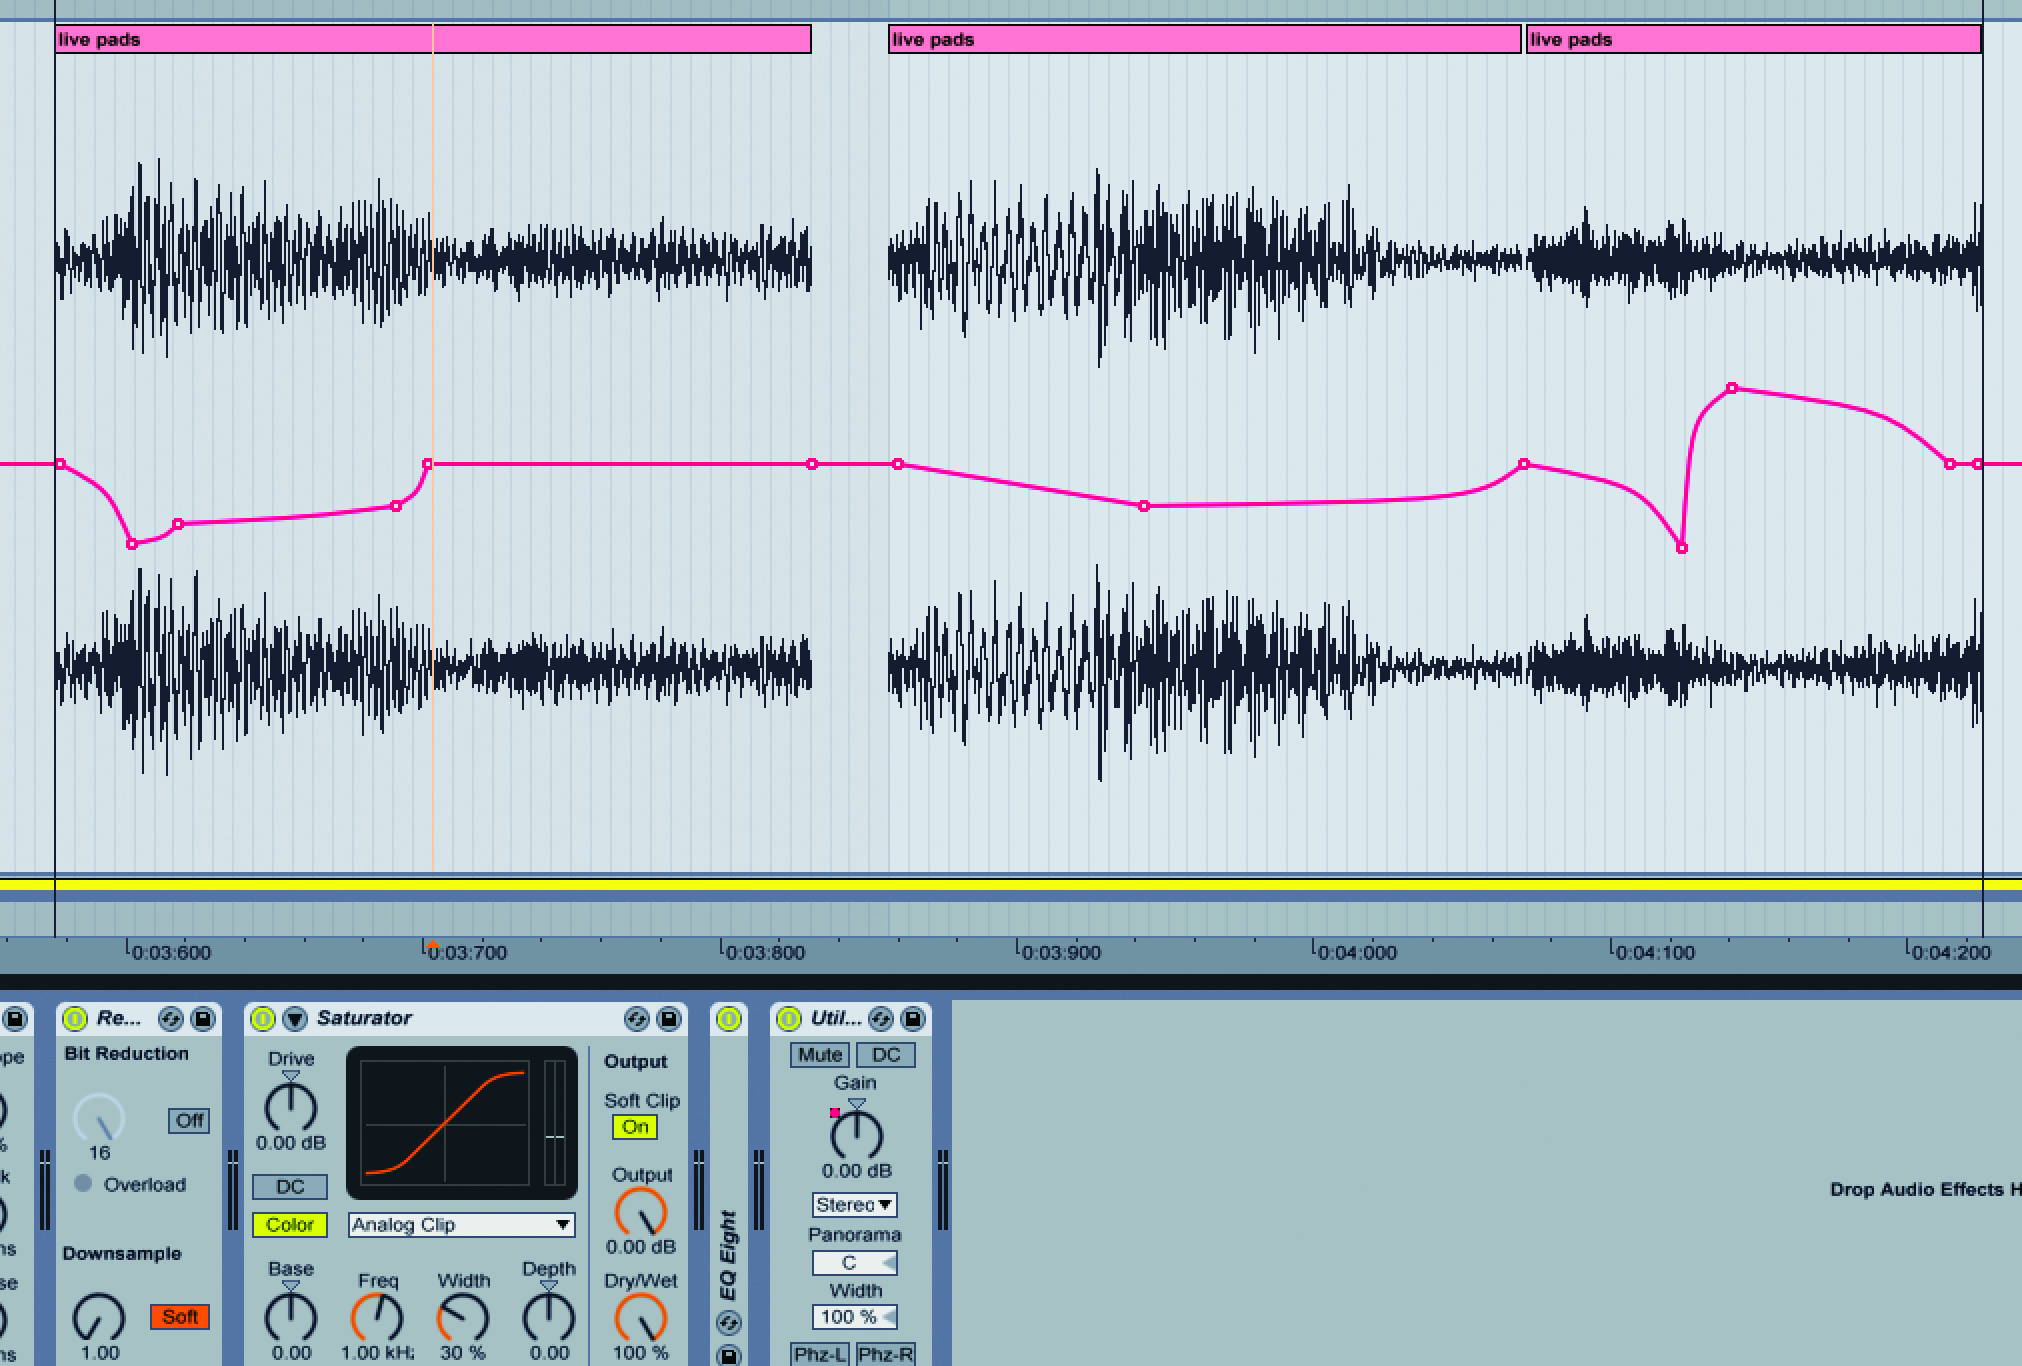
3: As compression is the process of level control, you can also control dynamics using Live’s editing functions. You can automate volume, but this limits you for making level adjustments down the line. Instead, add a Utility Device at the end of the Track’s processing chain, then automate its gain parameter. For more natural automation changes, hit Alt on automation lines to drag and create curves.
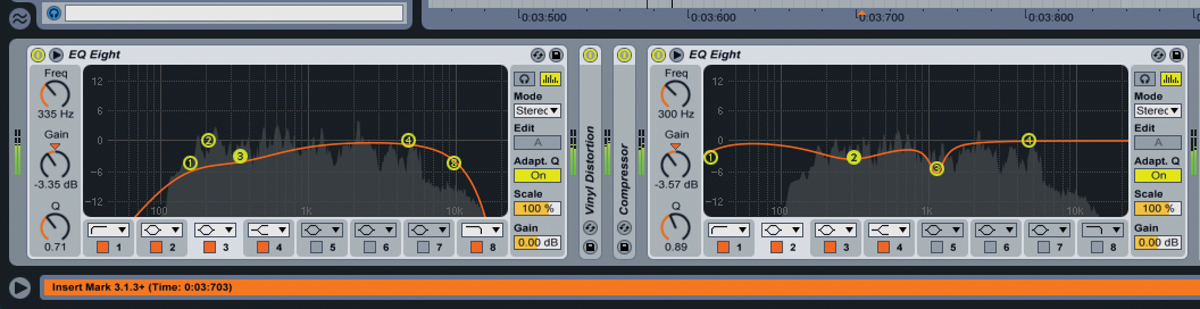
4: Use an EQ Eight before any processing to remove unwanted frequencies. Add another at the end of the chain for re-balancing the frequency curve of a sound. Check unnecessary bottom-end that needs removing using the analyser on the first EQ. The second EQ’s analyser monitors how your processing is affecting the frequency content – useful when trying to fill out holes in your mix.
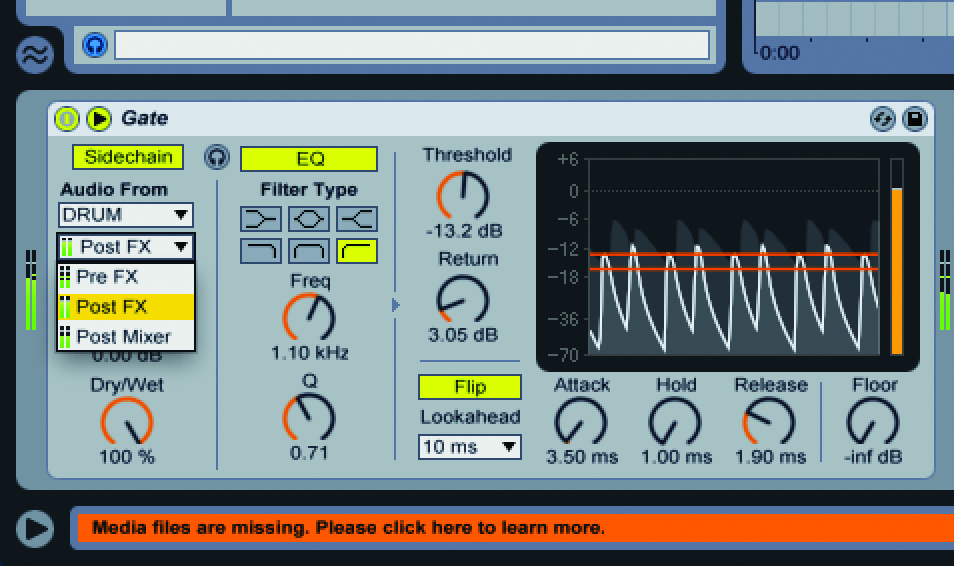
5: Many devices have the ability to be side-chained, so respond to the amplitude levels of an external signal. Most people only use these on single or grouped sounds, overlooking the option to dynamically control ambience effects. Try adding a compressor to each Return Track and set them to take Audio From the drum group. This make your mix move with a pumping, rhythmic sound.
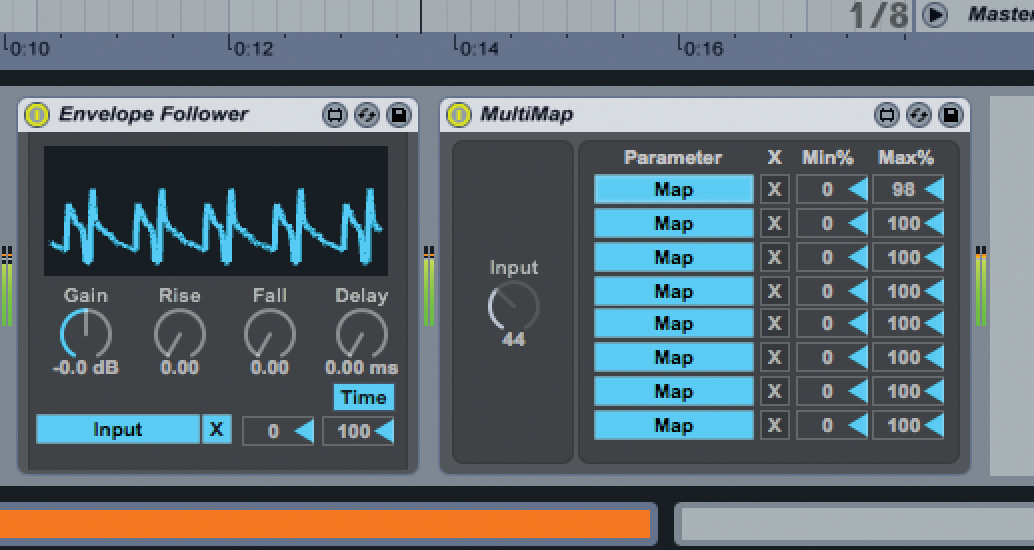
Those with Live Suite can get creative with side-chaining using its Max For Live based Envelope Follower. Place this on the track to be the source sound for side-chaining, then click map before clicking a parameter you wish to control. This moves in time with the audio events on the track with the device on. Use a multimap device to multiply and started mapping this source to various destinations.
Advanced And Unique Processing
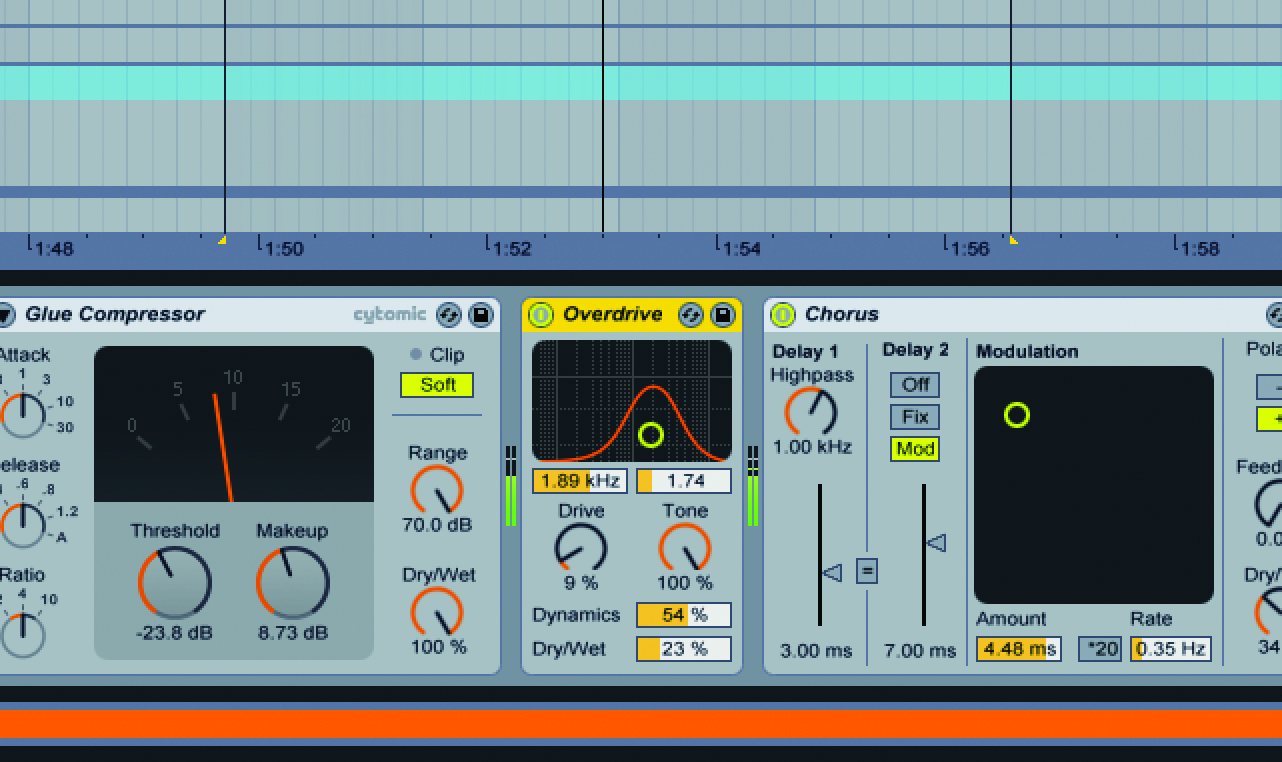
1: An Overdrive device is useful for thickening up the harmonic content of a sound. First, find the right frequency area and width of focus using the device’s bandpass filter. Then control the density of distortion using drive and its brightness using tone. Finally, compress the signal as required using the dynamic amount, then dry/wet can blend the processed signal to taste.
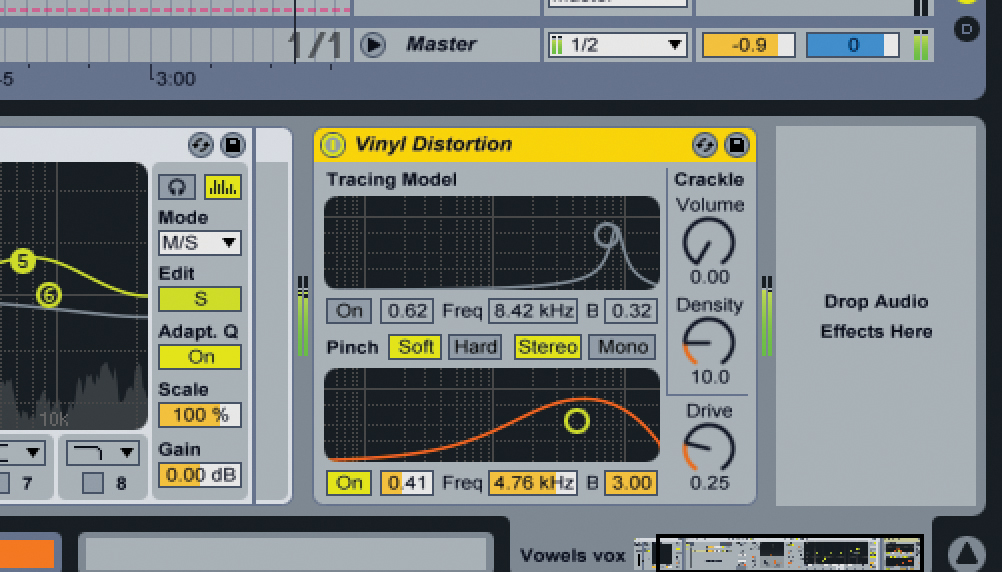
2: Another option for thickening up specific frequencies is the Vinyl Distortion Device. The tracing model graph can be used in much the same way as the bandpass filter on an overdrive device. It’s the pinch graph below where things get interesting as harmonics are distributed across the stereo plane, making it useful for also enhancing its stereo width.
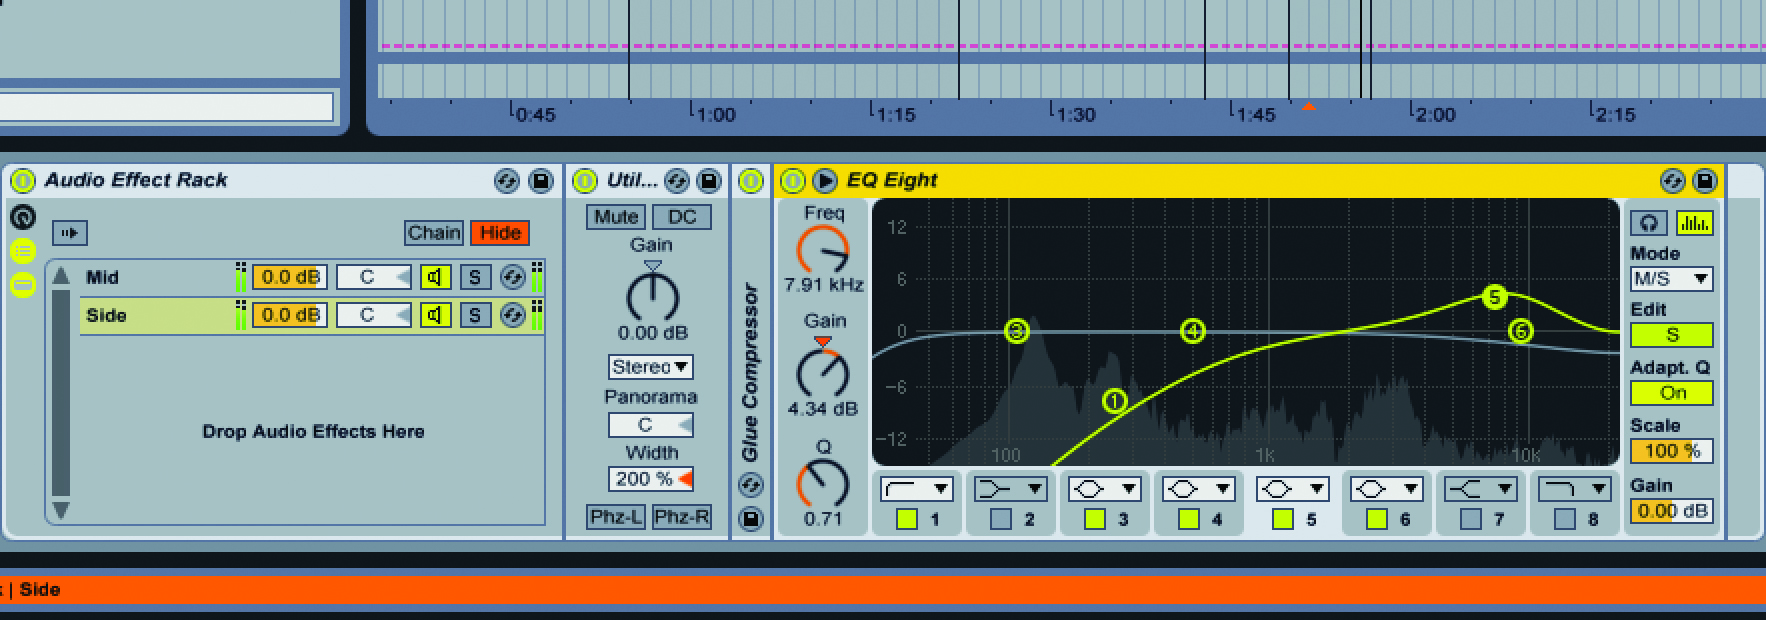
3: We discussed setting up mid and side processing using Audio Racks in Part 5 of this series. This simple process lets you add different processing to the middle (mono) and sides (stereo difference) for a higher level of control. To get used to how these sound, after setting-up, solo each one and play with their respective balance to hear which part of the sound each chain represents.
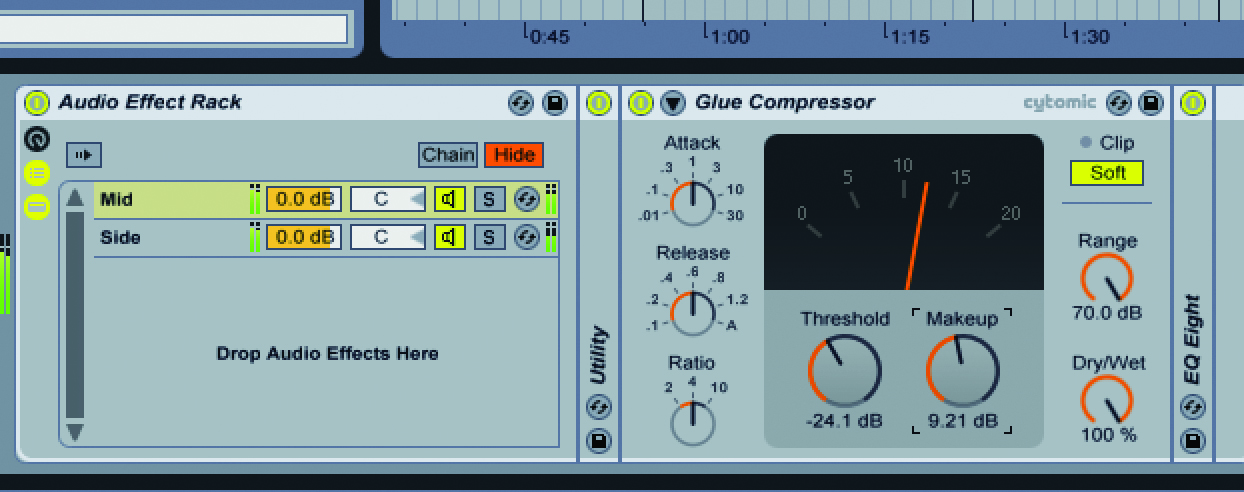
4: If you have a stereo signal, a good way to enhance how stereo it sounds is to compress both the mid and sides of the signal separately. This way you can reduce the dynamic range of the sides so the stereo aspect of the signal is more consistent in volume. Raising the level of the sides will then make the sound more stereo than mono.
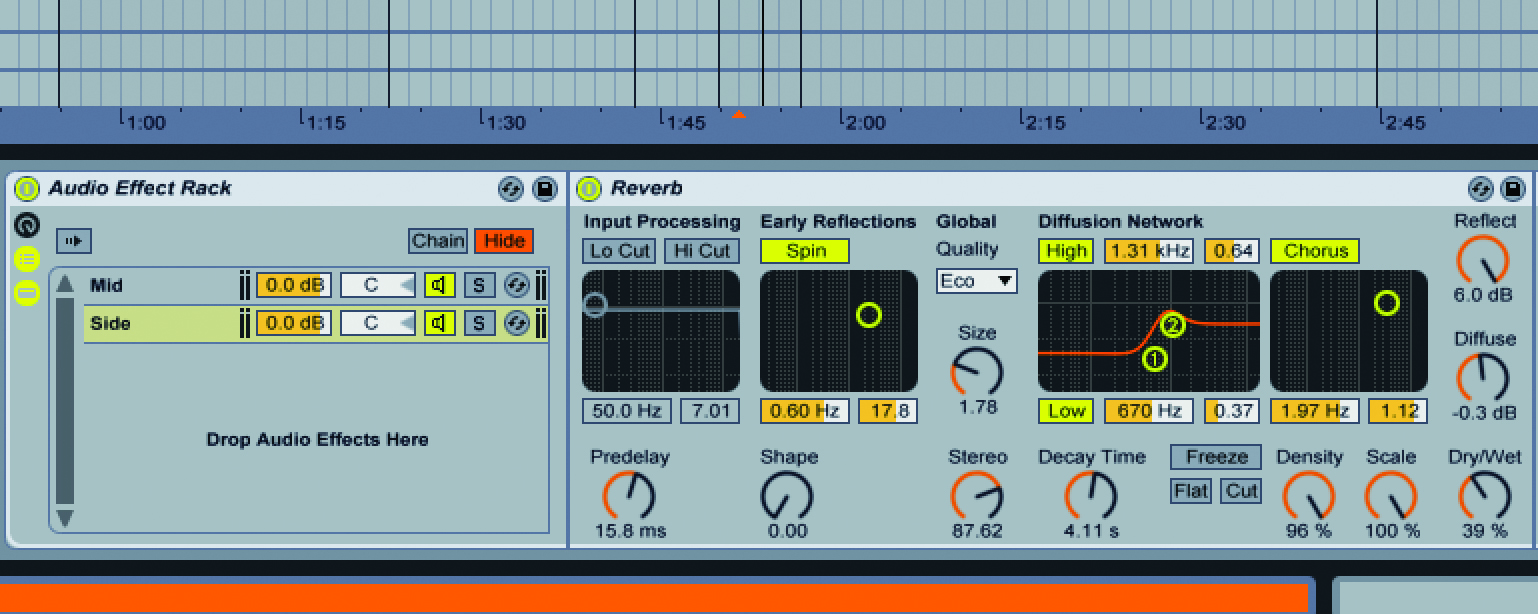
5: Another good place to consider processing mid and side signals on their own is for ambience effects. Try using a different reverb device, or Max For Live Convolution Reverb on each signal with unique settings. This creates a much deeper and engaging ambience soundfield. A shorter decay time on the middle and longer on the side works well for an enhanced sense of stereo spread.
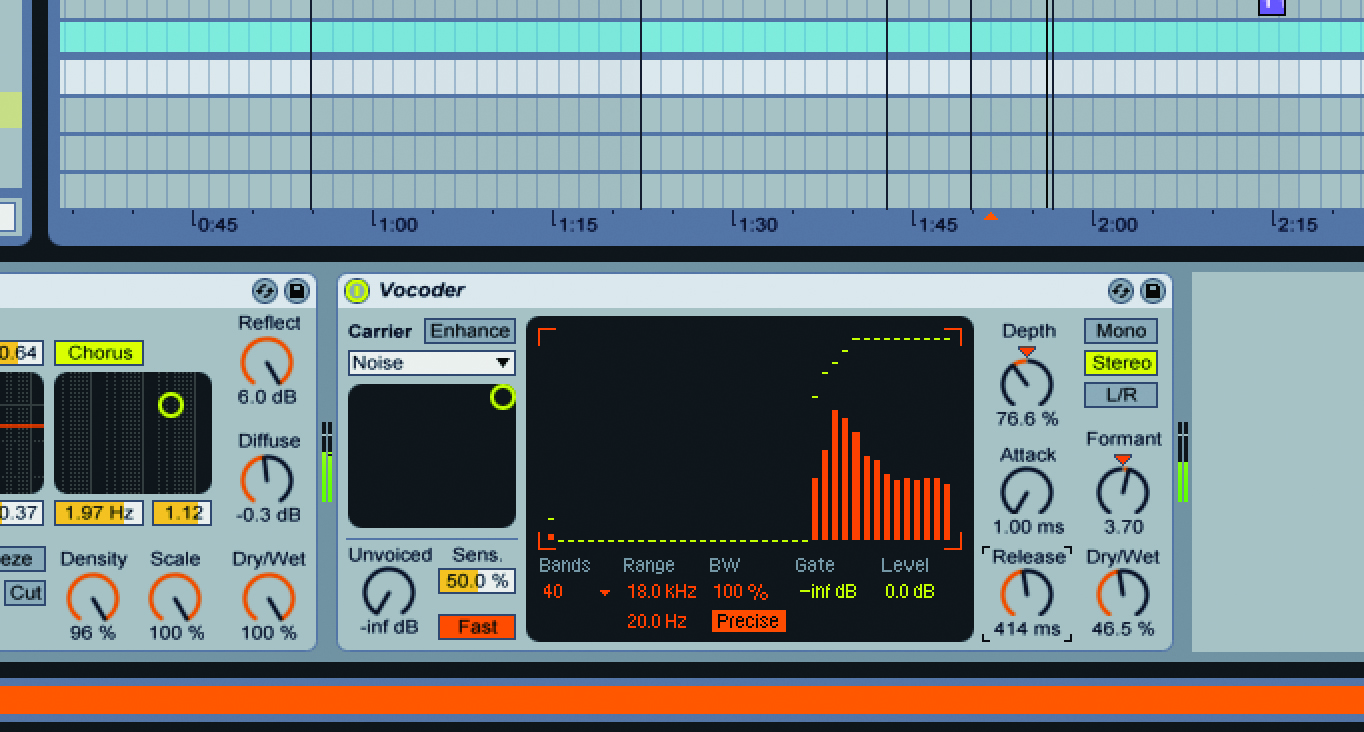
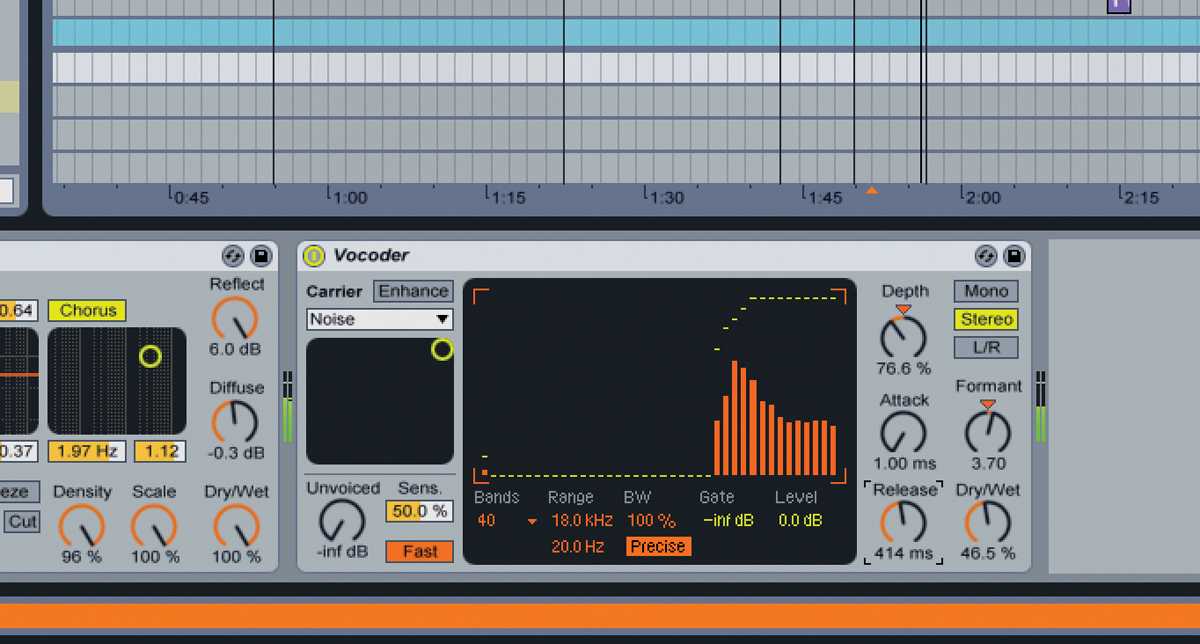
6: Live’s Vocoder device can function as a noise based exciter. With the carrier set to noise, the reverb-like noise effect can have its decay time altered using the release value. After setting the device to 40 Bands for the best fidelity along with a maximum frequency range, explore the depth and formant controls to tune its noise to best suit the source sound and EQ it to taste drawing into the filter bank.