Ableton Live Tutorial: Become a Power User Part 6 – Converting Audio To MIDI
Live has some of the best tools for turning an audio file into MIDI to reflect its musical content. Liam O’Mullane shares his preferred techniques for getting the best results. For this tutorial you will need the project files – Download Here The ability to slice-up audio and retrigger it creatively from MIDI is nothing […]
Live has some of the best tools for turning an audio file into MIDI to reflect its musical content. Liam O’Mullane shares his preferred techniques for getting the best results.
For this tutorial you will need the project files – Download Here
The ability to slice-up audio and retrigger it creatively from MIDI is nothing new – Live has had this functionality for a while now in the form of its Slice To New MIDI Track function and it’s a feature that should never be overlooked. More recently, Live 9 added Convert To MIDI to its toolkit, which translates the musical content of an audio file into MIDI

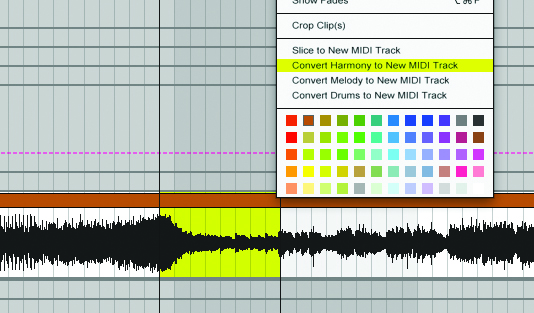
Convert Drums to New MIDI Track lets you detect an audio file’s rhythmic content and then loads in a basic drum kit to play it back. This does a pretty good job of picking the right drum sounds and is handy for starting a song with the right drum style for a given genre. Convert Harmony will detect chords; Melody detects monophonic melody content. The cleaner the pitch and transient information in the source audio, the better the transcription results will be. But, as always, there are ways of helping the computer to do a better job if you’re faced with a less-than-ideal situation. We’ll show you how to achieve the best results while suggesting some experimental uses for the process as well.
It can be easy to dismiss this feature as a simple transcription tool, but it’s eye-opening when you realise how it can enhance your music production. If you want to remix someone else’s music, you can quickly create the MIDI parts for lead lines, drum grooves and so on (depending on the clarity of the source material) to use with your own choice of sounds. Other people’s music can also be used as a starting point to generate your own ideas – very useful when you want to create something spontaneous and different from your usual work.
As a person who’s always made noises with my mouth since I could speak, this feature now allows me to record as I beatbox, hum, whistle or sing ideas and then convert them into usable MIDI data. I can finally use my primary instrument to interact with the computer as well as pick up my trusty guitar from time to time to try out different ideas. We’re in an exciting time for music technology and Convert to MIDI is one of the reasons for this, so let’s look at how to get the most from it.
Fine-tuning the Audio to MIDI Process
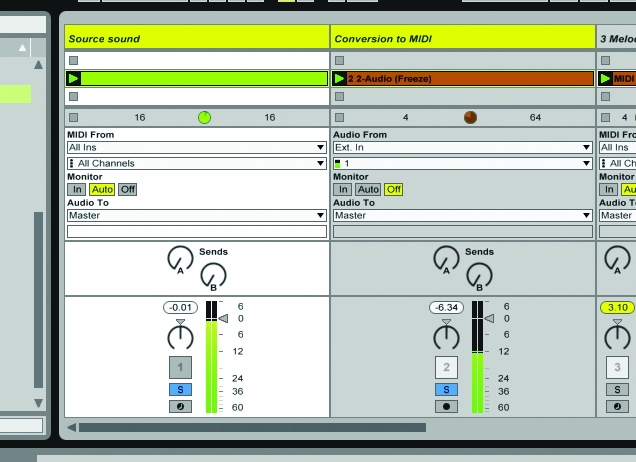
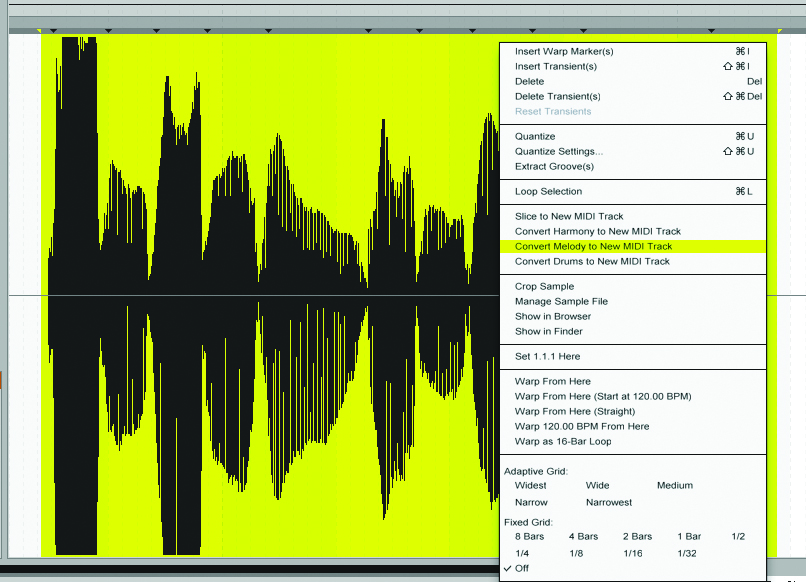
1: Audio-to-MIDI conversion begins by right/[Ctrl]-clicking (PC/Mac) an audio file within Live, its browser, or by dragging and dropping an audio clip over a MIDI track. After selecting the approach you prefer, you can check the accuracy by solo’ing both the original and converted tracks by [Ctrl]/[Cmd]-clicking both track’s solo button.
2: Live uses transient information to determine where each note or beat begins, and this audio example is very distorted and lacks clear transients. If you hover above the waveform in the Sample Editor you’ll see Live’s Transient Markers. These can be clicked and moved while holding [Shift], deleted, or new markers can be added by holding down [Alt] as you double-click anywhere within the display
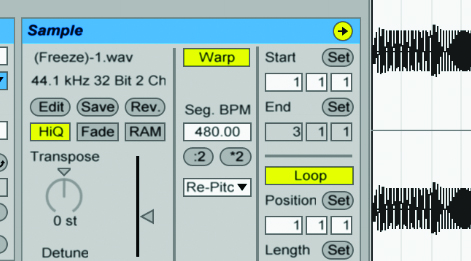
3: If the speed of a musical passage causes issues with the transcription process, slow it down by pressing the Halve Original Tempo button (labelled :2) to make each note and transient more drawn-out. Make sure that the clip is set to the Re-Pitch Warp mode as other modes usually distort the content of your audio (although experimentation is always encouraged).
4: Now that the pitch is easier for Live to detect, you help further by using a Gate device to create clearer transients before conversion. Set the Gate’s threshold low enough so that each note opens the Gate, then Freeze and flatten the file (from the Edit menu) to create a new piece of audio for Live to analyse before trying to convert the file again.
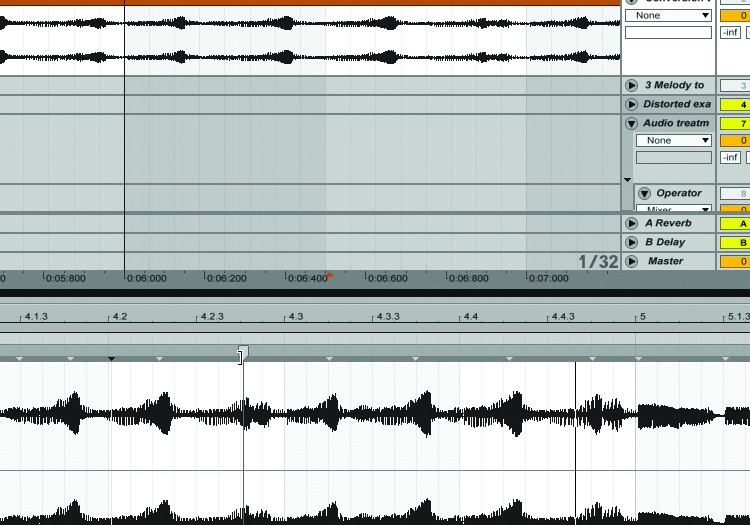
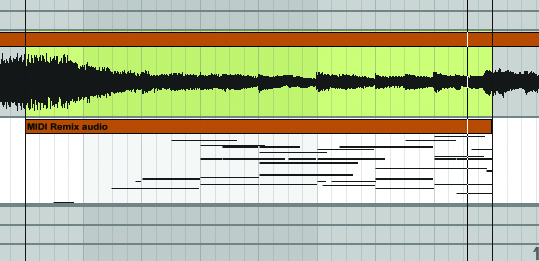
5: When you’re focusing on a specific area from a larger piece of audio, click and drag to highlight the portion of audio in focus before converting to MIDI. This is great for working with sketched audio ideas that don’t follow Live’s tempo, such as a sketched idea sung into your phone’s recorder. You can then sort out the timing as part of the editing process after converting to MIDI.
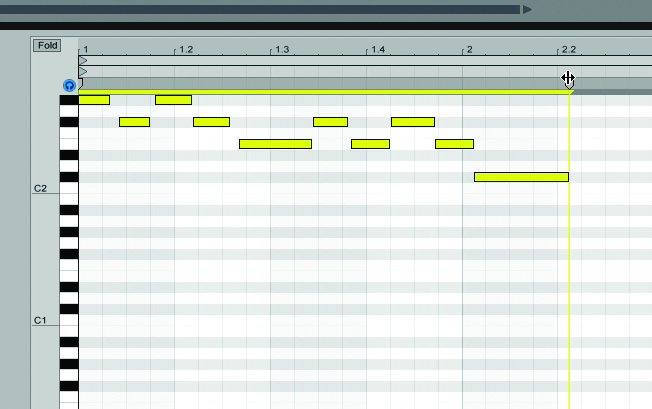
6: The timing of a MIDI clip can be expanded or condensed using MIDI Stretch Markers, which appear when you highlight multiple notes to edit. Select All from the Edit menu to correct the whole piece while moving the markers at the start/end of your pattern. If the timing is out, highlight those notes and condense/expand them as necessary. Select Quantize from the Edit menu to further tidy up the part.
Remixing with Audio to MIDI
1: The results you get from using Audio to MIDI with commercially released material can vary. This is because the sound source will most often be less clearly defined than recordings made with a single instrument. This can be due to many layers of sounds playing at once, or heavy mix processing like resonant filtering. Try to find the cleanest-sounding part in a song to start working from.
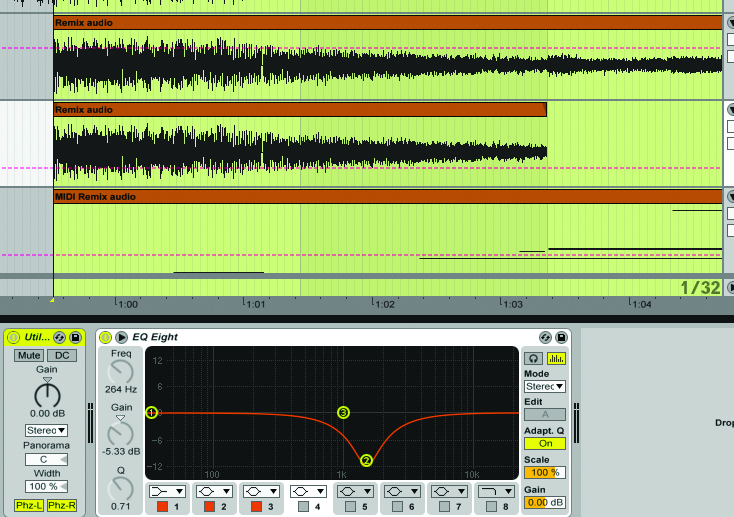
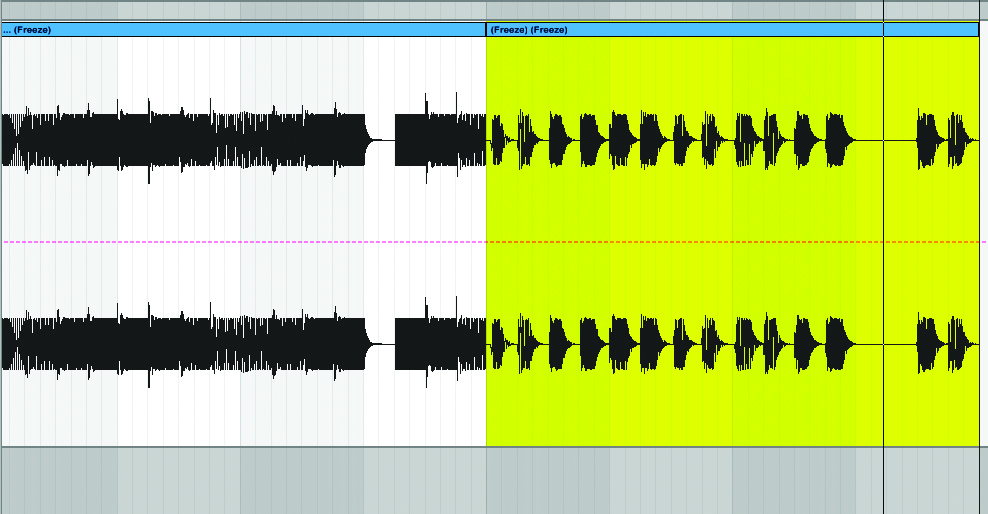
2: The cleanest part of this song we can find for its chord progression is in the breakdown before a vocal sings on top of it. The problem is that it has a loud white-noise impact effect at the start, which as you can see almost completely prevents Live from detecting content for the first two bars. First we’ll try some EQ work to help Live focus on just the melodic content for this section.
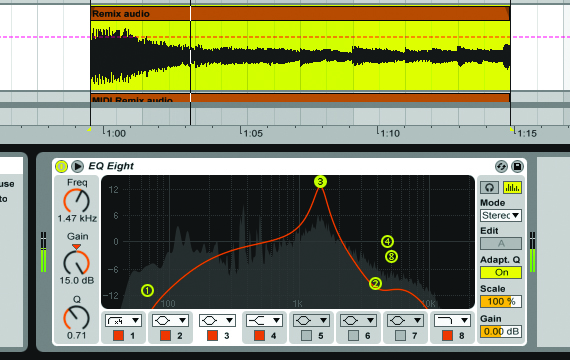
3: We’ve tried a general EQ treatment which we then flattened to the audio before conversion. This helps Live to detect more chord information for the third bar than before. The first two bars, however, are still pretty garbled, so a different approach is required. We’ve instead listened through the whole piece to search for the missing chords elsewhere, with less background information.
4: The missing chords are repeated at the start of the second half of the piece as well, so we’ve copied it from there for the beginning. If you can’t find another usable piece in the song, search for the sound you don’t want on its own (if available). This can then be layered over the problem layer with its phase reversed for cancellation on playback using a Utility device. You’ll need to export these tracks as new audio.
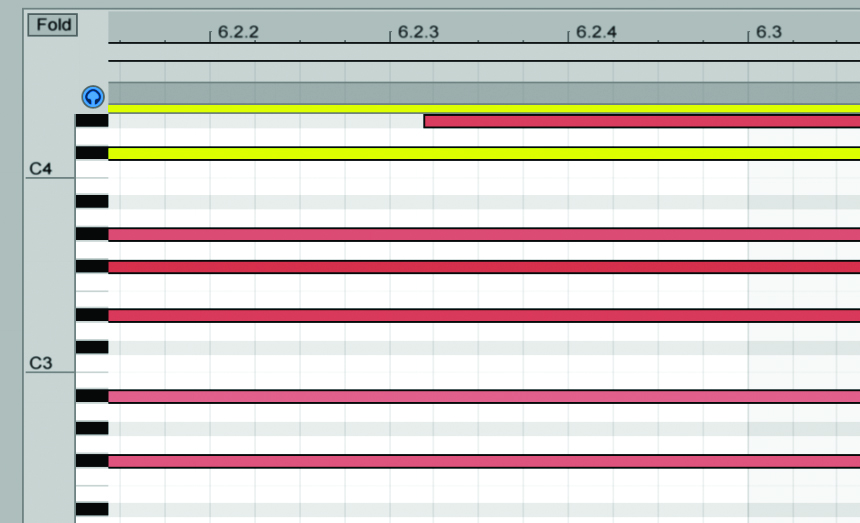
5: Unless you’ve got a very clear and simple piece to transcribe you’ll need to do some tidy-up work to the MIDI that’s created. First there may be some unwanted notes to remove. If they’re within a cluster of notes, enable the MIDI Editor Preview headphone icon in the top-left of the editing window. This allows you to hear notes as you select them. They can then be deleted if they sound out-of-tune
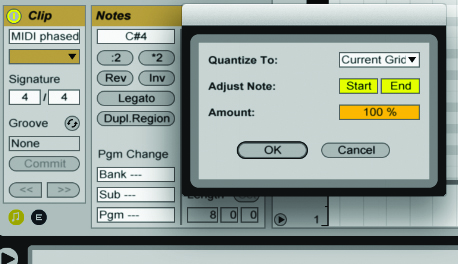
6: For further tidying you may need to edit the start/end points of notes as well. This can be a manual edit (by moving and dragging the end points of individual or grouped notes) or an automated task via Quantize Settings from the Edit menu. If you want a continuous, fluid monophonic melody line for a portamento effect, use the Legato button in the Notes box of Clip View so the notes slightly overlap each other.