Creating Pulsing Effects In Logic Pro X – Step By Step Guide (Continued)
As our step by step to creating pulsing effects in Logic Pro X continues, Mark Cousins continues to explore the ways in which to make a pulse effect, this time utilising Noise Gate and AutoFilter… 7. The effect will probably start working now, with the hi-hat opening and closing the gate. Fine-tune the Threshold so […]
As our step by step to creating pulsing effects in Logic Pro X continues, Mark Cousins continues to explore the ways in which to make a pulse effect, this time utilising Noise Gate and AutoFilter…
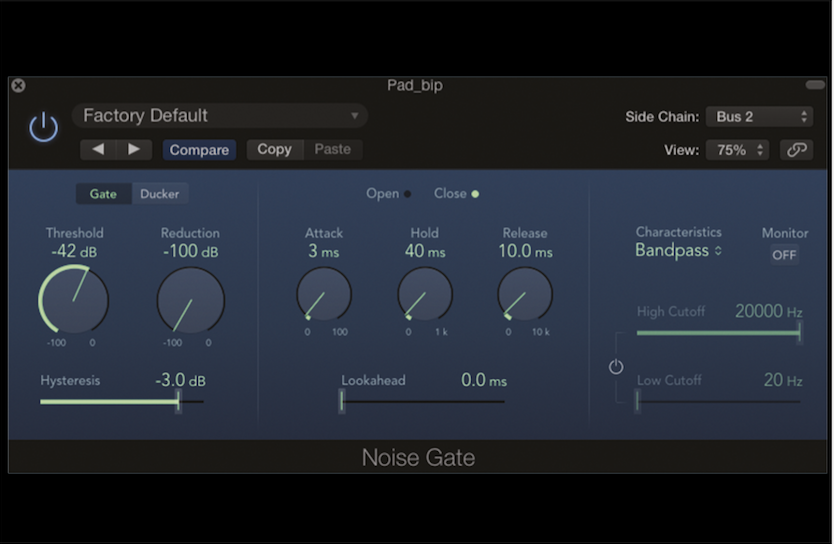
7. The effect will probably start working now, with the hi-hat opening and closing the gate. Fine-tune the Threshold so the gate responds correctly in relation to the steps with the open hi-hat.

8. Next, you can explore various ways of softening the effect. Change Reduction to change the amount of volume attenuation, or adjust Release to create a longer decay between each step.
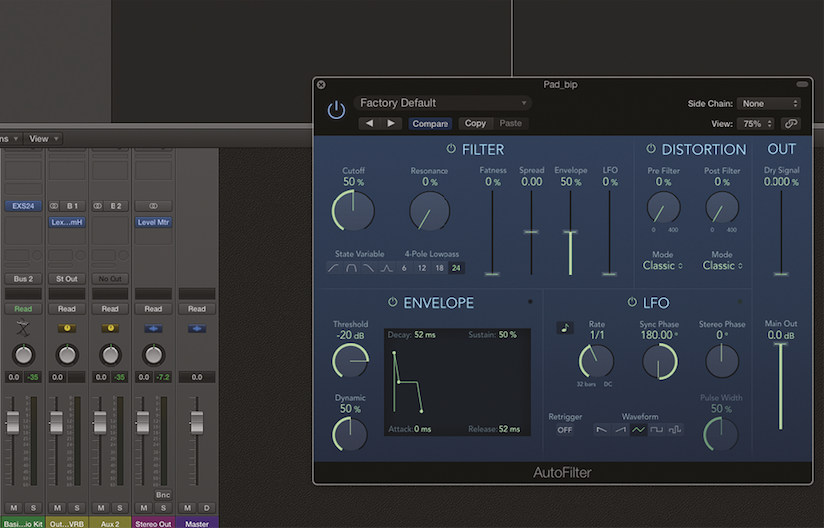
9. As well as using amplitude to create a pulsing effect, we can also use the AutoFilter plug-in to modulate timbre. Use AutoFilter’s LFO section, which modulates Cutoff, for the pulsing movements.
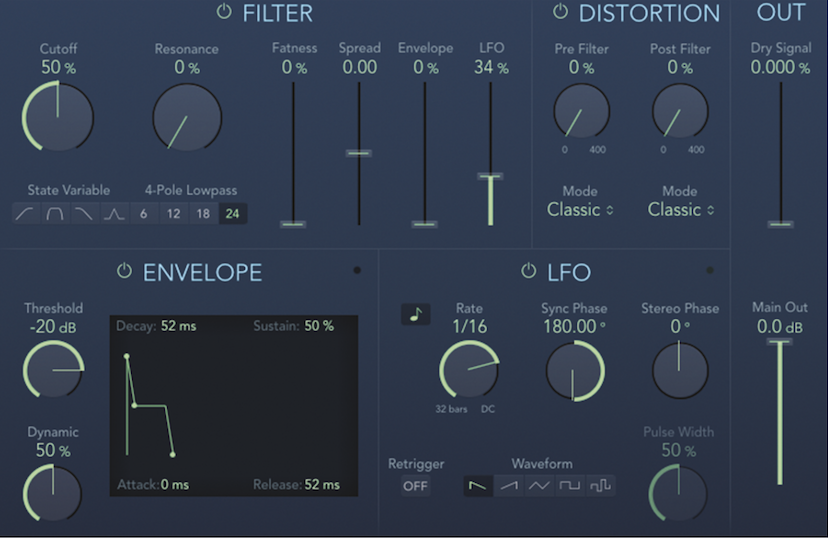
10. For a basic pulse, remove the default Envelope modulation from 50% to 0%. Increase LFO to around 34%. A good movement can be created with a 1/16 Rate and the Ramp Down waveform.

11. It’s also worth adding mix automation, creating a slow undulating movement over several bars, as well as the LFO’s 1/16th movement. This explains why we left headroom on the LFO percentage.
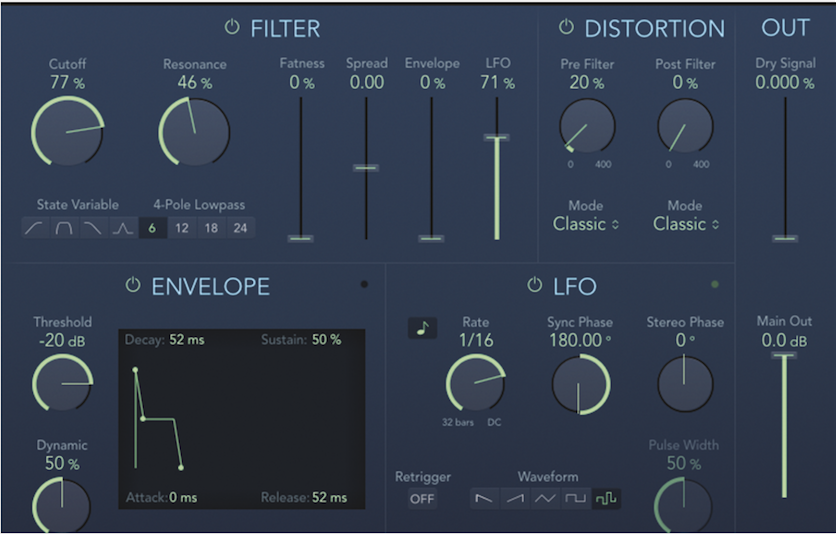
12. It’s worth exploring the other LFO shapes on offer. Another useful option is the Sample & Hold Waveform. We’ve used the softer filter attenuation (6 rather than 12) and some extra resonance.
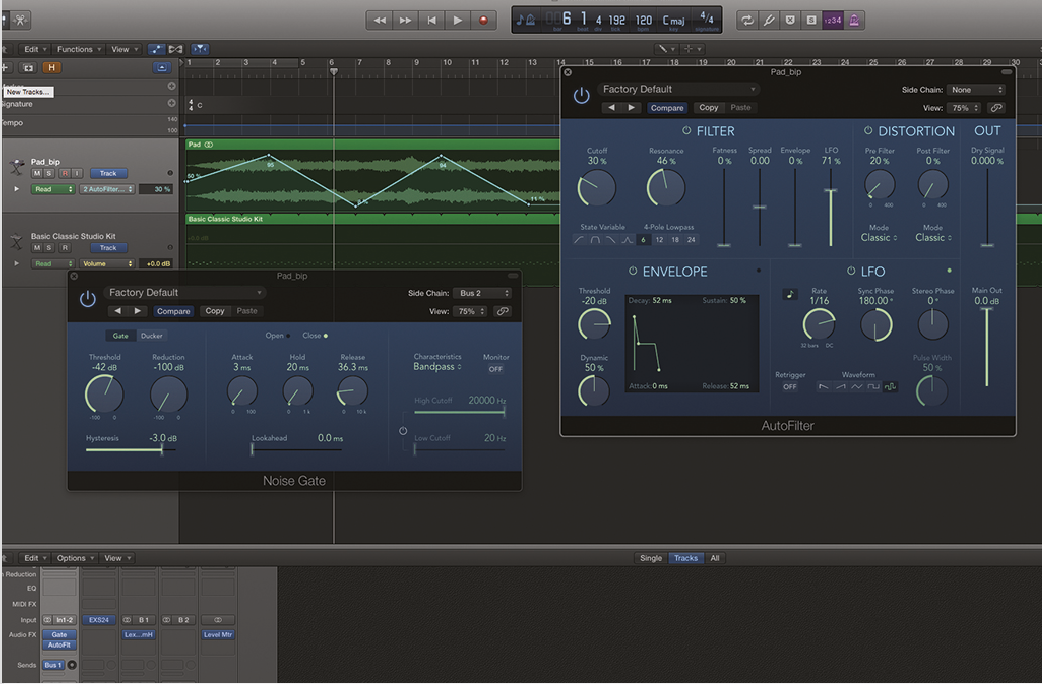
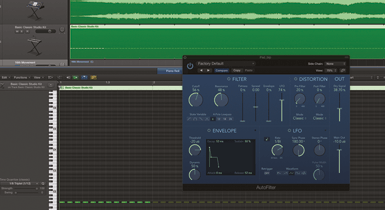
13. You can combine both amplitude and filter movements for a hybrid pulsing effect. Here, the Noise Gate chops the sound up into 16th steps, each of which is filtered by the AutoFilter.
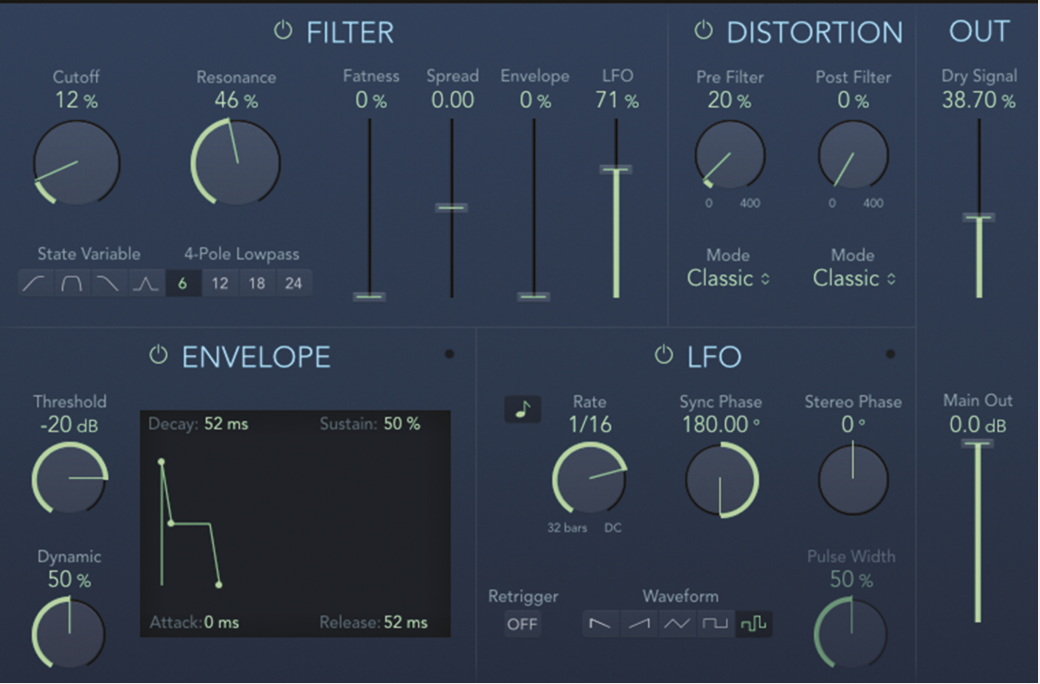
14. You can adjust the filter’s strength with both the amount of LFO modulation and the Dry Signal control. Raising the Dry Signal lets a proportion of the unfiltered sound through.

15. Using the plug-ins can be very rewarding, but it’s well worth exploring options where you print the treatments as audio files. Here, we’ve started by bouncing the 16th movement to disk.

16. Modify your setting to another time division. Our pattern has a triplet 1/8th setting on AutoFilter, with the same triplet movement applied to our Key Gate trigger. Bounce the new sequence.

17. Import the two (or more) audio files into your project. You can now create a sequence that moves between the 16th movement and a triplet note division by muting and un-muting each audio file.
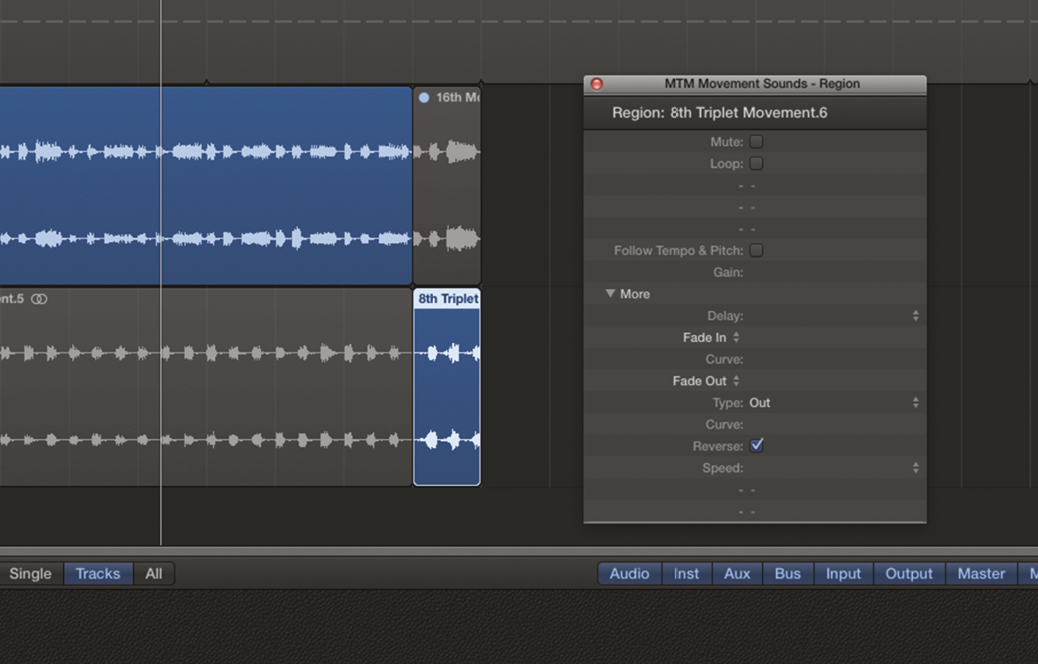
18. We also reversed some of the triplet movement at the end of the phrase. To do this, select the audio region and from the Inspector click on Reverse check box. The region should play back reversed.
