Cubase Tutorial: Become A Power User Part 3 – Creating and Editing MIDI
Last month we looked at getting audio into Cubase and editing it. Now it’s time to explore the other data type that Cubase can deal with. Tim Hallas delves into MIDI in the third instalment of our Cubase Power User series… MIDI is still one of the most important tools within the production arsenal, it […]
Last month we looked at getting audio into Cubase and editing it. Now it’s time to explore the other data type that Cubase can deal with. Tim Hallas delves into MIDI in the third instalment of our Cubase Power User series…
MIDI is still one of the most important tools within the production arsenal, it is just the ways in which we deal with it that have changed. I remember that, as little as ten to 15 years ago, the vast majority of MIDI sounds were created by external devices and the software was used to control keyboards and other synth engines. The introduction of soft synths within those last ten years or so has seen numerous changes in the way we route the signal as well as the addition of instrument tracks to most DAWs, but in all that time the way we actually record it and edit it has changed very little.
The multiple tools for dealing with MIDI in Cubase have always been one of the software’s great strengths and this continues to be the case, with other DAWs often playing catch-up with Cubase when it comes to data-editing within the software. Among the more imaginative features that Steinberg has added to Cubase includes the ability to edit controller data on individual notes rather than entire tracks, and it’s still the only major DAW to offer this.
Cubase features several different methods for controlling MIDI data, including basic editing from within the Arrange window, detailed editing from the Piano Roll, and the List View. When working with the Score View, this too is generating and editing MIDI data (we’ll be taking a detailed look at the Score functions in Cubase next month). So really, Cubase boasts a huge range of ways in which users can manipulate 127 notes and 127 levels of controller data.
What’s more, there are, of course, numerous MIDI plug-ins available that further alter the way in which your notes sound, including arpeggiators and step sequencers, but we shall look at these in detail another time and this month focus on the most efficient ways to get MIDI data in, edited and back out of Cubase.
Setting Up A MIDI Recording
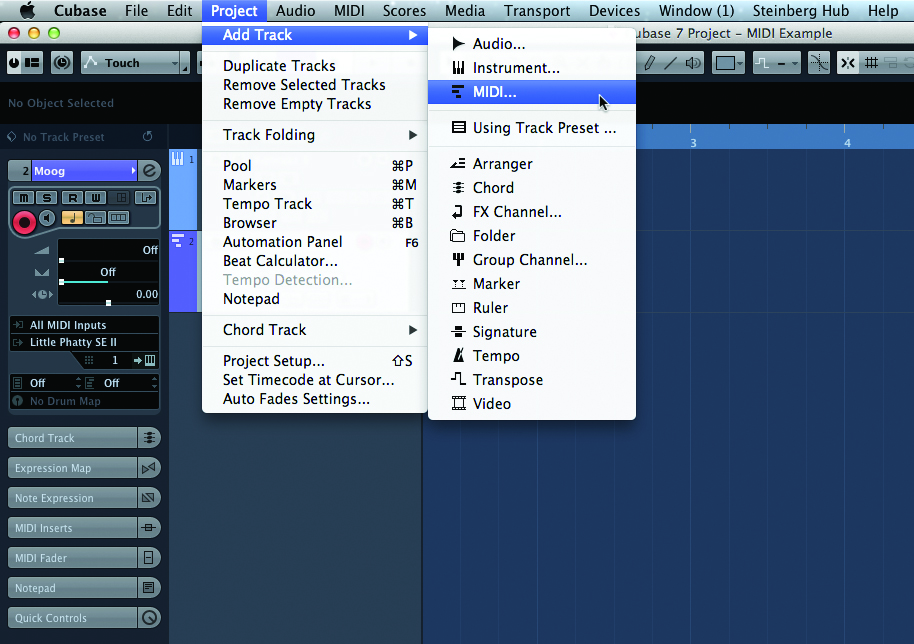
1: Open a project and select a track type to suit what you want to do. If you are using an external MIDI device such as an analogue synth, you’ll need to select Project>Add Track>MIDI. This will create a track that can be routed to any device. If you are using a soft synth, select Add Track>Instrument. This allows connection to any computer-generated plug-in, including those from third-party developers.
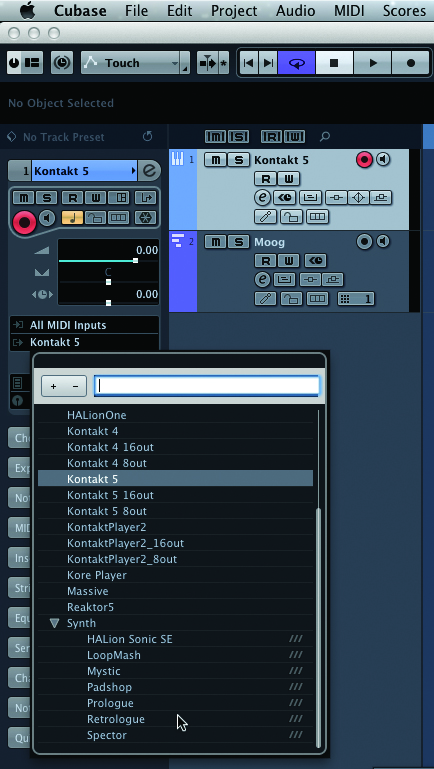
2: Once your track is created you need to route the output. To do this, click on the dropdown window in the Inspector panel on the left-hand side of the Arrange window and select your chosen sound source from the list. This should open your chosen instrument and allow you to select a preset or to program a sound from scratch.
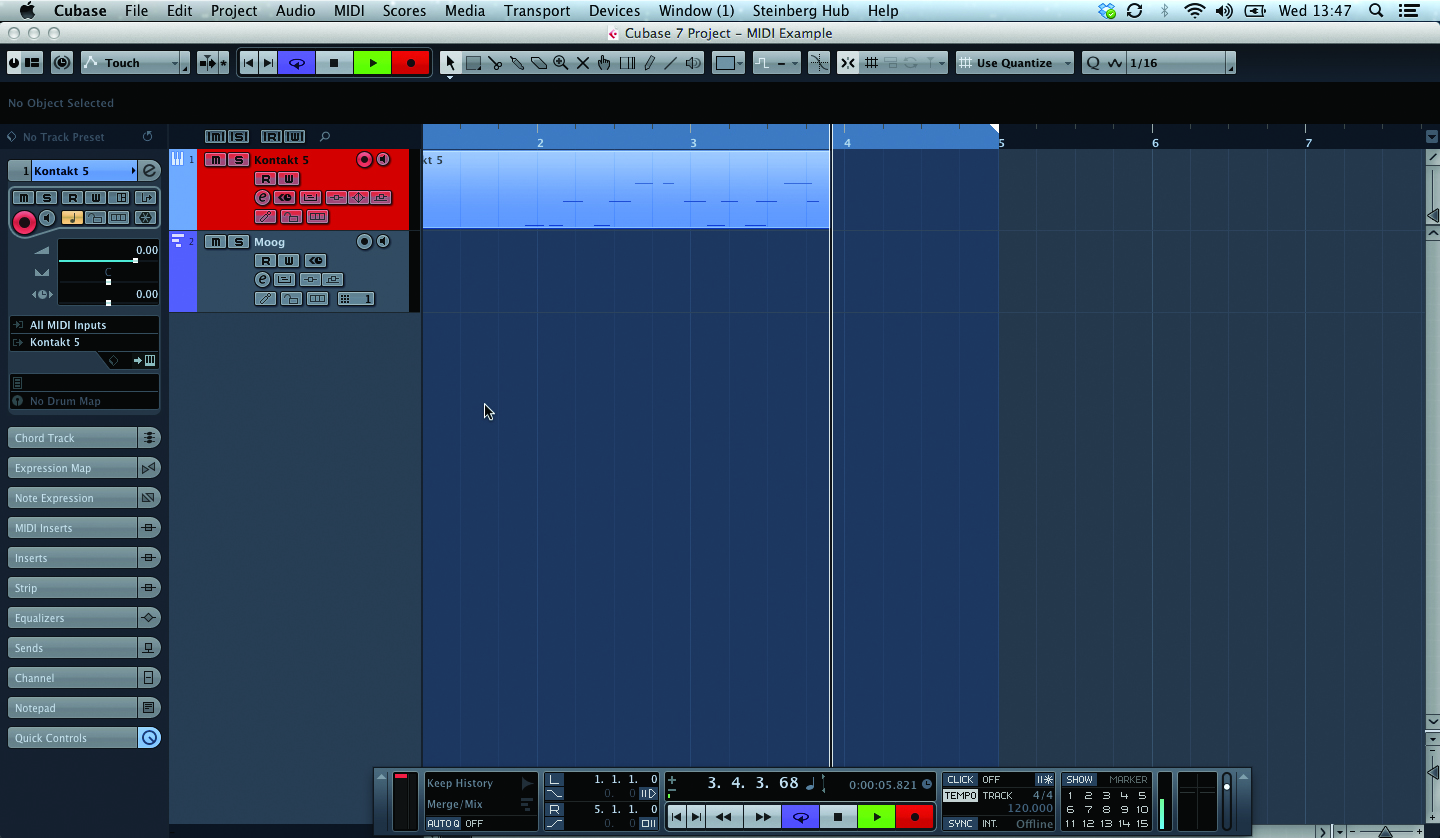
3: Once you have a sound source, it should be playable via your controller keyboard or other MIDI controller. You are now ready to record. Cubase conveniently arms MIDI tracks when you select the track header in the Arrange window. You can, of course, arm multiple tracks if you want to record the same information to several tracks for layers of synth sounds. Click on record and play away.
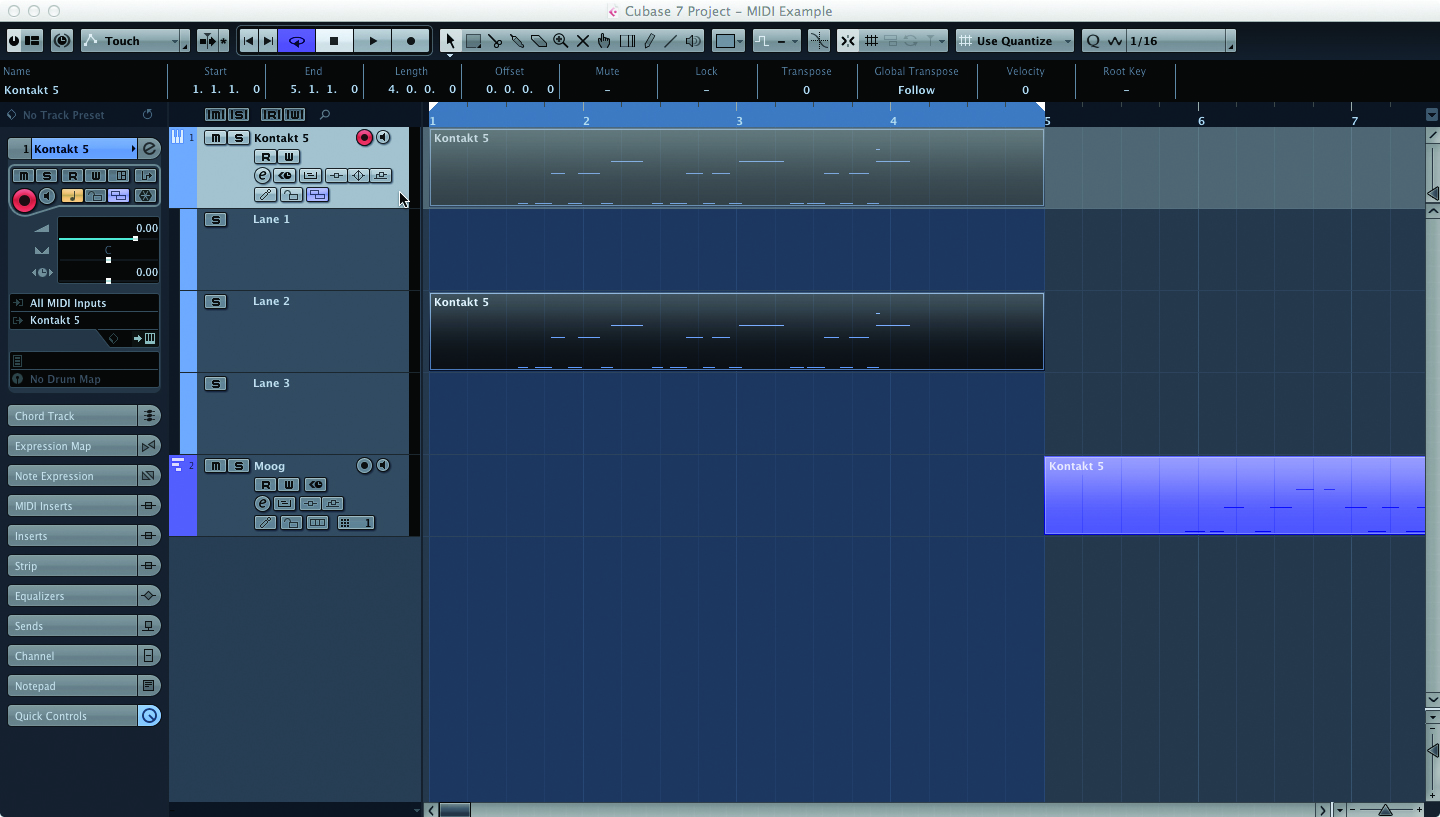
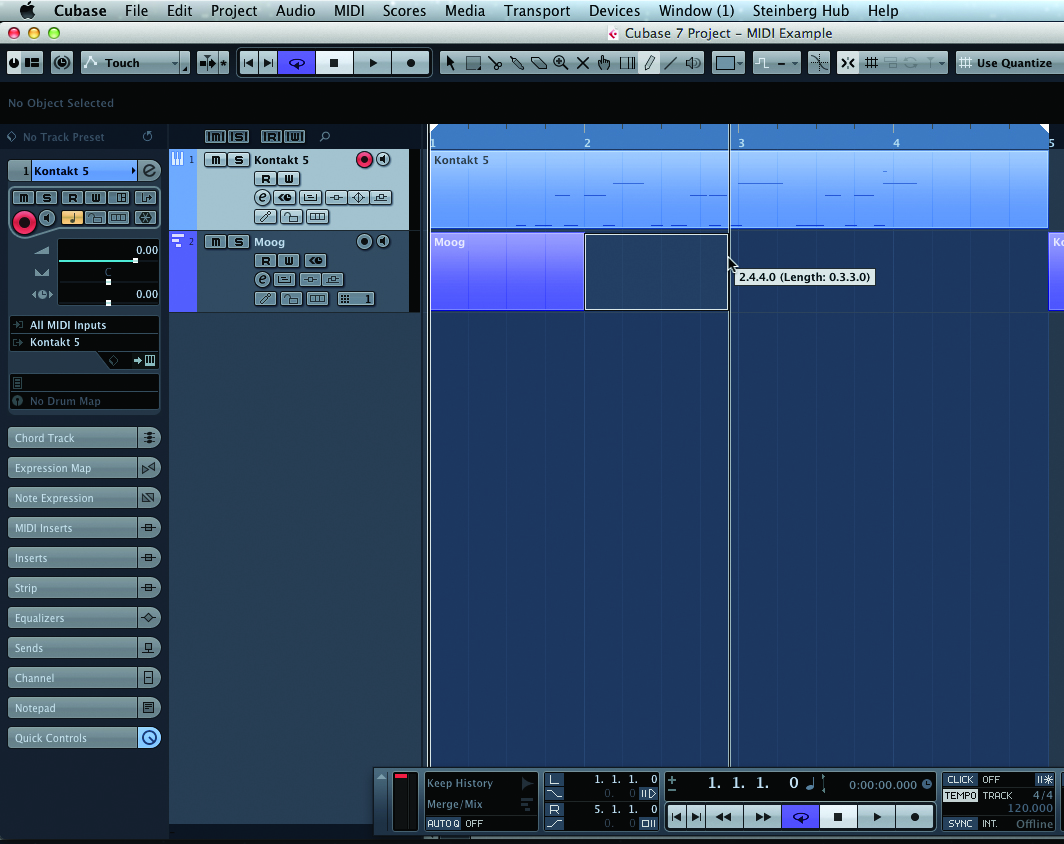
4: If you need to record multiple takes, Cubase doesn’t create lanes like it does for audio. When you record over an existing take, Cubase adds existing MIDI data to that take. To record separate takes, it is better to do them separately and move previous takes elsewhere or you will end up with one messy take. Even by moving previous takes to other lanes, Cubase won’t treat MIDI in the same way as audio.
5: MIDI data can also be added manually by drawing it in. Start by selecting the Pencil tool in the Arrange window and drawing an empty box on the track you want to use. Double-click with the cursor to open the Piano Roll window (don’t click with the Pencil tool as this will just draw another box). This has created an area for you to work within and to generate and write your MIDI information in.
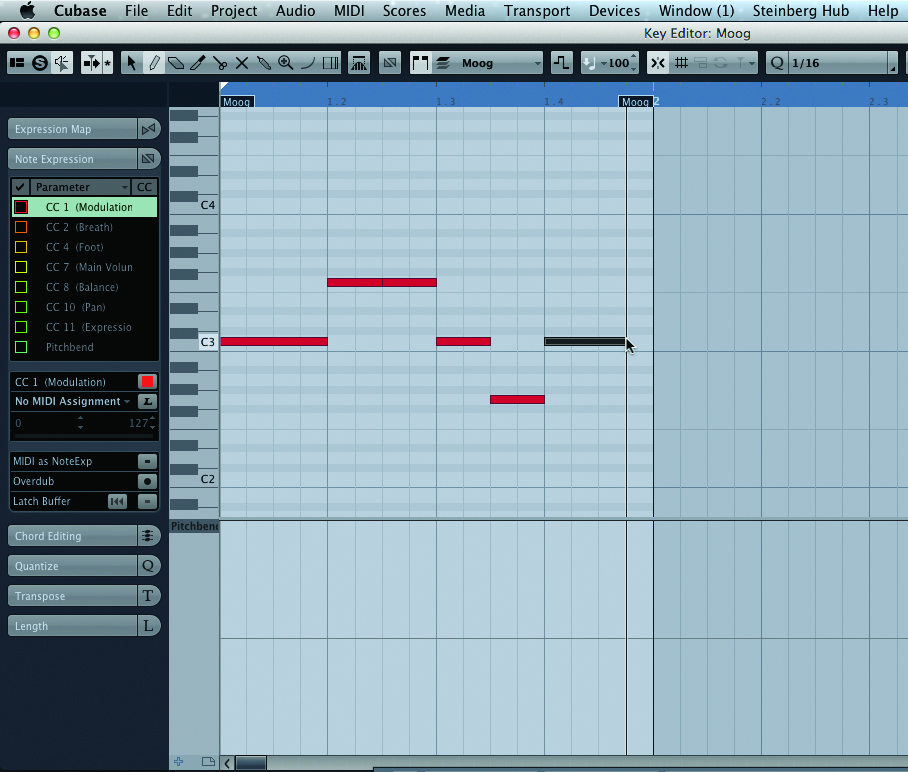
6: With the Piano Roll open and using the Pencil tool again, you can now draw in MIDI notes using the keyboard template on the left as a guide to which note you need. This is quite a laborious process, but I find it useful when generating long pads that might last for whole choruses and so on (it is much quicker than having to hold your hand on the same keys for half a song!).
Continue to Part 2 – Creating MIDI in the Arrange Window and Piano Roll >
