Cubase Tutorial: Become a Power User Part 4 – Score Writing and Editing
If you haven’t explored the scoring tools in Cubase, you’re missing out on a great deal of its overall capabilities. Tim Hallas hits the right notes in our latest Cubase Power User tutorial… Scoring is one of those music-related activities that everyone seemingly forgets that most DAW software is capable of, to a greater or […]

If you haven’t explored the scoring tools in Cubase, you’re missing out on a great deal of its overall capabilities. Tim Hallas hits the right notes in our latest Cubase Power User tutorial…
Scoring is one of those music-related activities that everyone seemingly forgets that most DAW software is capable of, to a greater or lesser extent. In fact, the majority of DAWs now integrate it as part of their MIDI setup, and in recent years major developments have taken place in this area due to links and partnerships formed by parent companies that have cross-pollinated their platforms. Pro Tools developer Avid, for example, also owns Sibelius, and the company ported some of the tools into its flagship DAW and made the export facility more simple.
Equally, it is well known that Steinberg is, in fact, owned by the Yamaha corporation, which has taken a great deal of care in making many of its products compatible with Cubase. Much of Yamaha’s output involves traditional notation of some kind (creating sheet music e-readers as part of some of the higher-end digital pianos being a good example), therefore Steinberg has a natural link to some of this development, which is bound to find its way into Cubase.
But while scoring might not rank too high on your list of priorities, you may suddenly have a need to create a score for a live performer at the last minute, perhaps after a session is already booked, so knowing your way around this area of the software can be very useful, even if you don’t use it very often.
Musicians who do a lot of scoring will usually invest in dedicated software such as Sibelius, Finale or Notion. However, anyone who has imported an existing MIDI file into one of those pieces of software will know just how long it can take to turn that MIDI file into a presentable score. The main problem I find is that when the MIDI data is imported by score-writing software it interprets it exactly ‘as is’ rather than quantising both note positions and note lengths. Fortunately, most DAWs do quantise this data in their Score Editor, and Cubase is no exception
Basic Operation of the Score Window

1: To open the Score Editor you need to have some MIDI data in your Arrange window. This can be either existing MIDI notes or an empty box that you can populate in the score. Either select an existing recording or draw an empty region with the Pencil tool and select MIDI>Open Score Editor – [Ctrl]/[Cmd]+[R] (PC/Mac) – to open the score. This can be done individually or with multiple parts.
2: Setting the basics for the document, such as time signature and key signature, is done on the left via the tabs. Select the key or time signature you want and click on the staff at the desired point (both at the start and at any subsequent changes). The key needs to be added to all staves separately – and it doesn’t transpose for Bb/Eb instruments, so be careful!
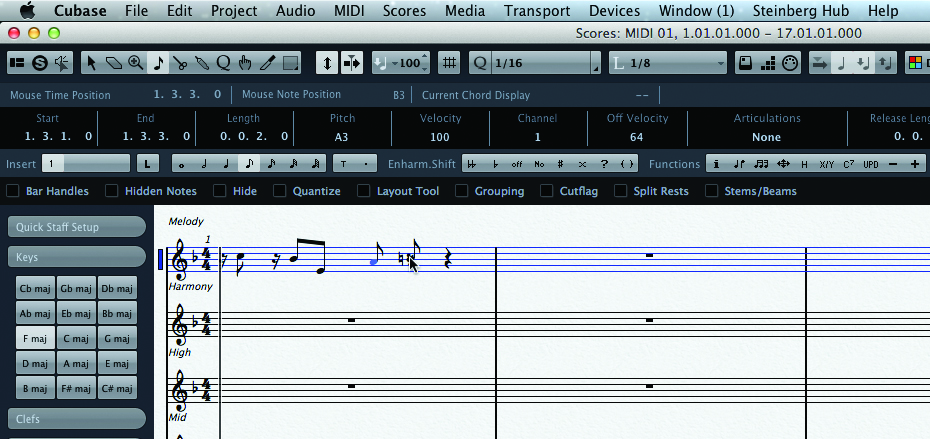
3: The basic inputting of notes requires the Note tool, which can be found alongside the cursor and other tools and looks like a little musical note. To input a note, select the duration of the note you want and simply click onto the score at the relevant place in the bar. Unlike in scoring software, you don’t need to specify rests as Cubase creates these automatically from any gaps that are left.
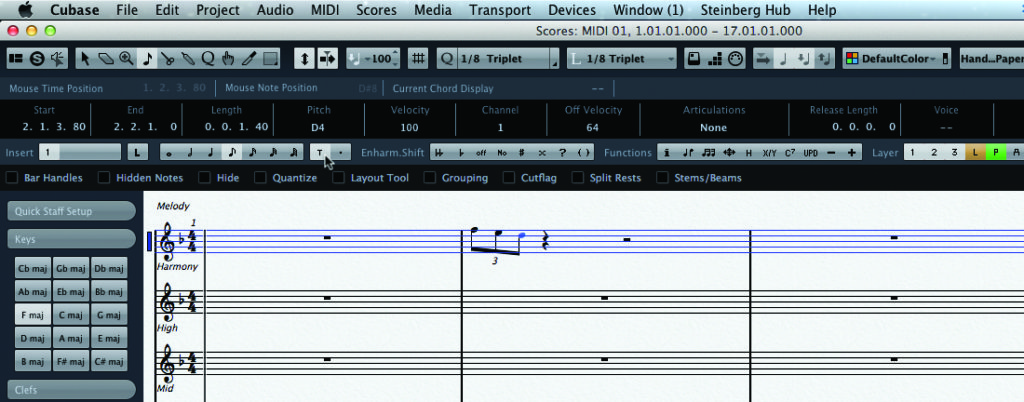
4: Cubase displays all of the common note lengths at the top of the window, but if you need to add a triplet or a dotted note you can find them to the right. To make a triplet, select the note you want to be a triplet and then click on the T button and use as before. To aid accuracy, set the quantise grid to the same length as the note being written.
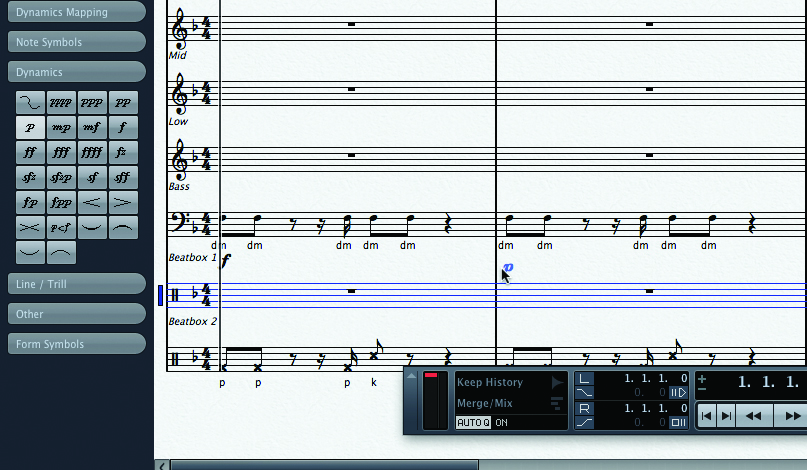
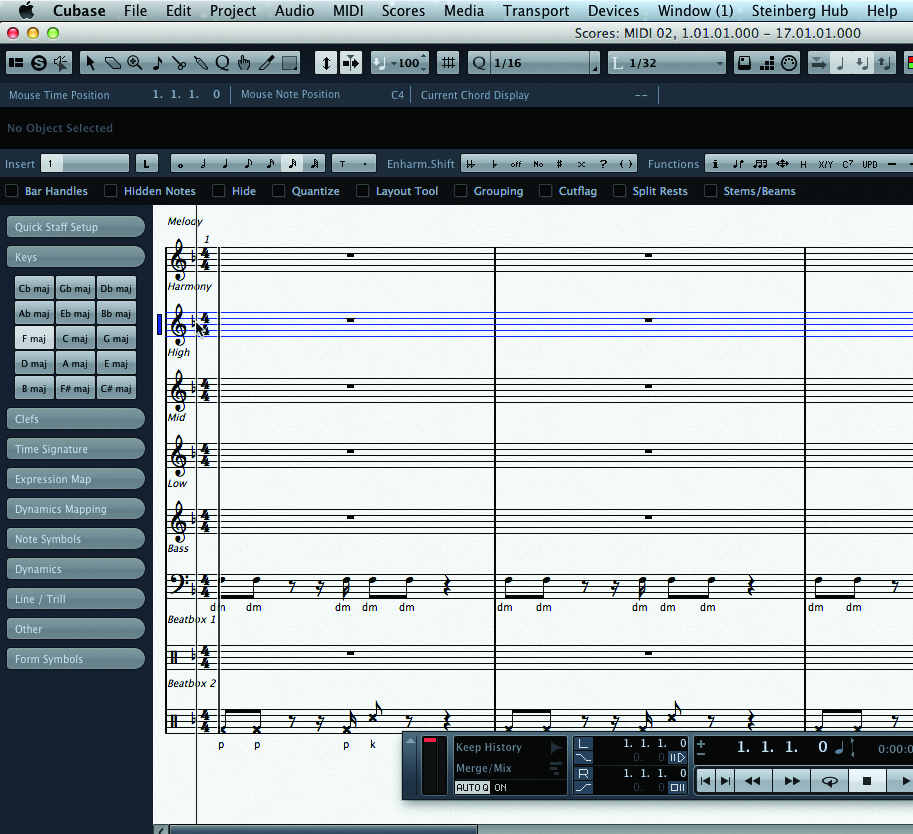
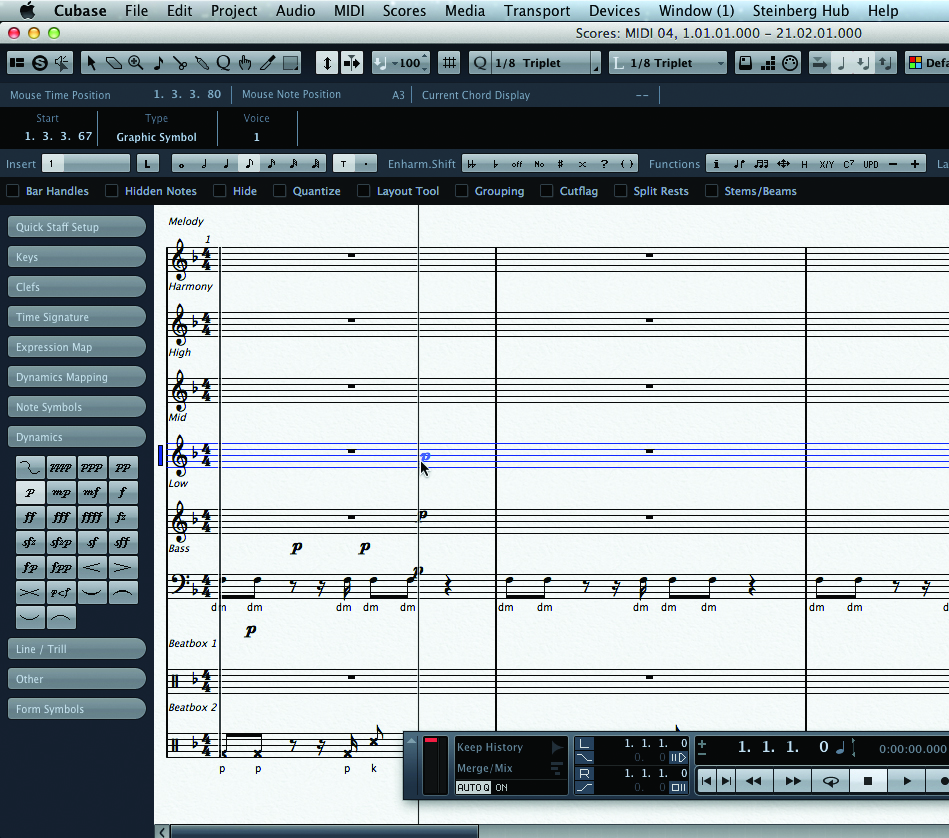
5: To add other important musical directions, such as dynamics and expression, go to the dropdown tabs on the left-hand side of the window. Cubase caters for some quite esoteric dynamics, so from pianissimoissimo right through to quadruple forte, it has got you covered. To add to your score, select the expression you want and click it onto the score with the Pencil tool.
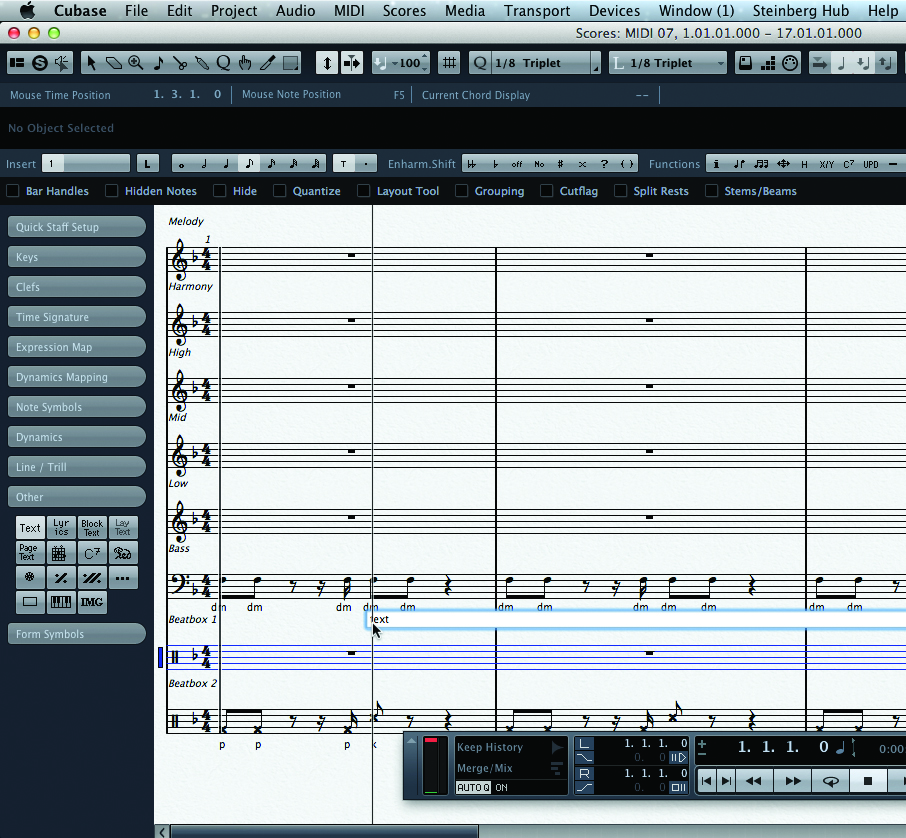
6: To add lyrics to a part, select the Lyric tool from the Other tab on the left and click onto the note you want to add it to. Simply type in the word you want and then press [Enter]; it will be attached to the chosen note. If you want to change the font or size, right-/[Ctrl]-click and select Set Font to change from the default text settings.
Editing and Detailed Scorework
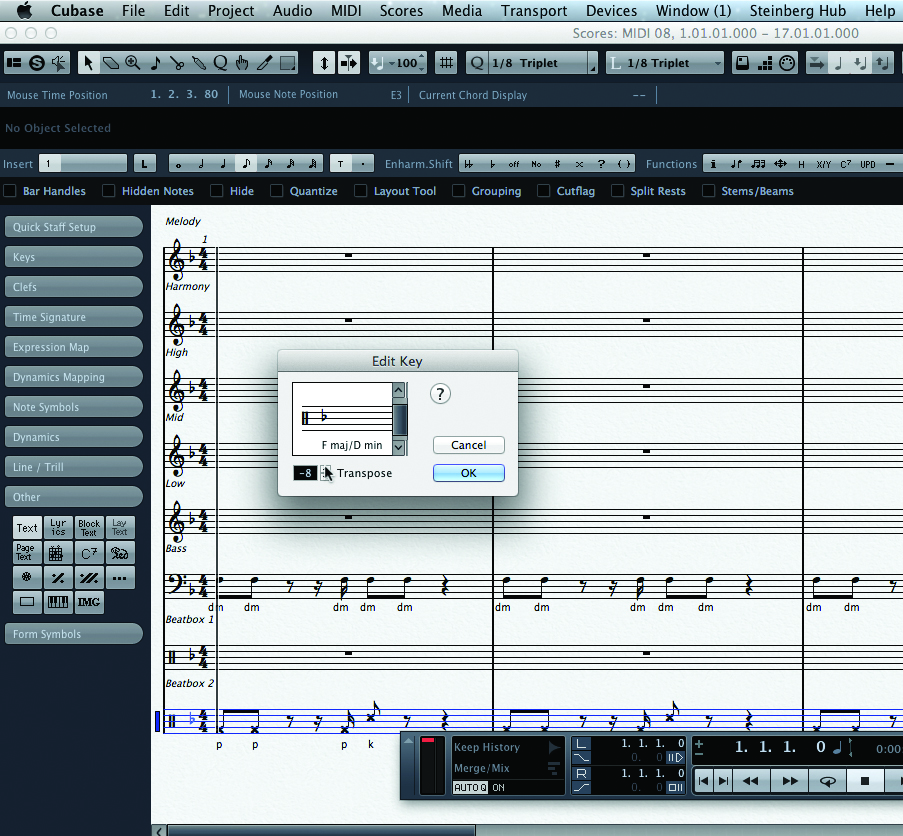
1: It is possible that you are arranging for a transposing instrument, such as clarinet, and want to print a transposed part without altering the MIDI data so that it still plays back at concert pitch. Cubase can do this: right-/[Ctrl]-click on the key signature at the start of the piece, select Properties and you will see an option to transpose. This changes only the key of the score and not the MIDI data behind it.
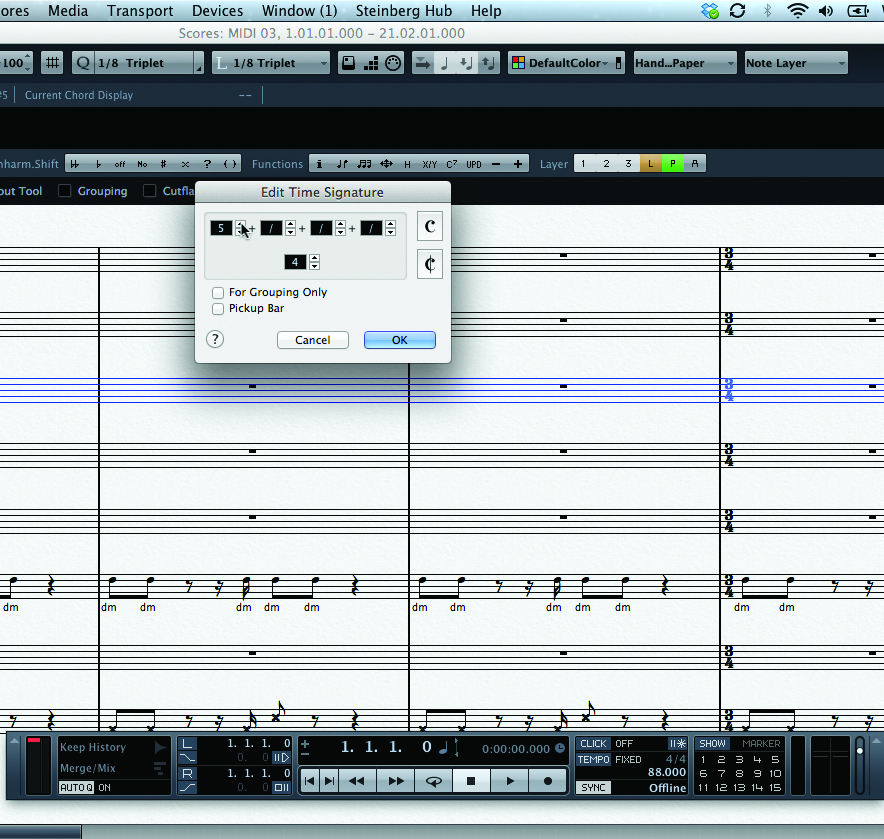
2: Similarly, if you’re looking for more complex time signatures beyond the common ones provided in the dropdown tab, select a time signature and place it at the start of the section you want the change to take effect from. Right-/[Ctrl]-click and alter it from within the Properties window. When you leave the window, Cubase will have placed your odd time signature in the right bar.

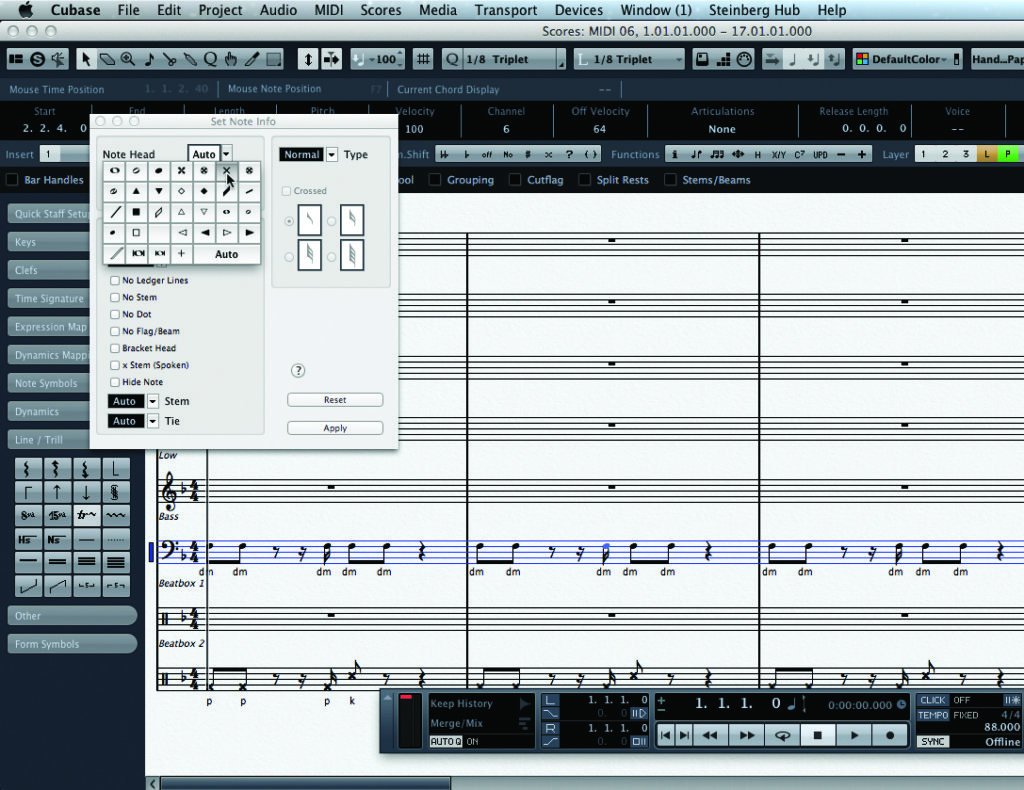
3: To edit an existing note, simply grab it with the cursor – alter the pitch by moving vertically, or in time by moving horizontally. Via the Properties window you can also alter the appearance of the notes to make them into percussion parts or convert them to grace notes and other alternative note types.
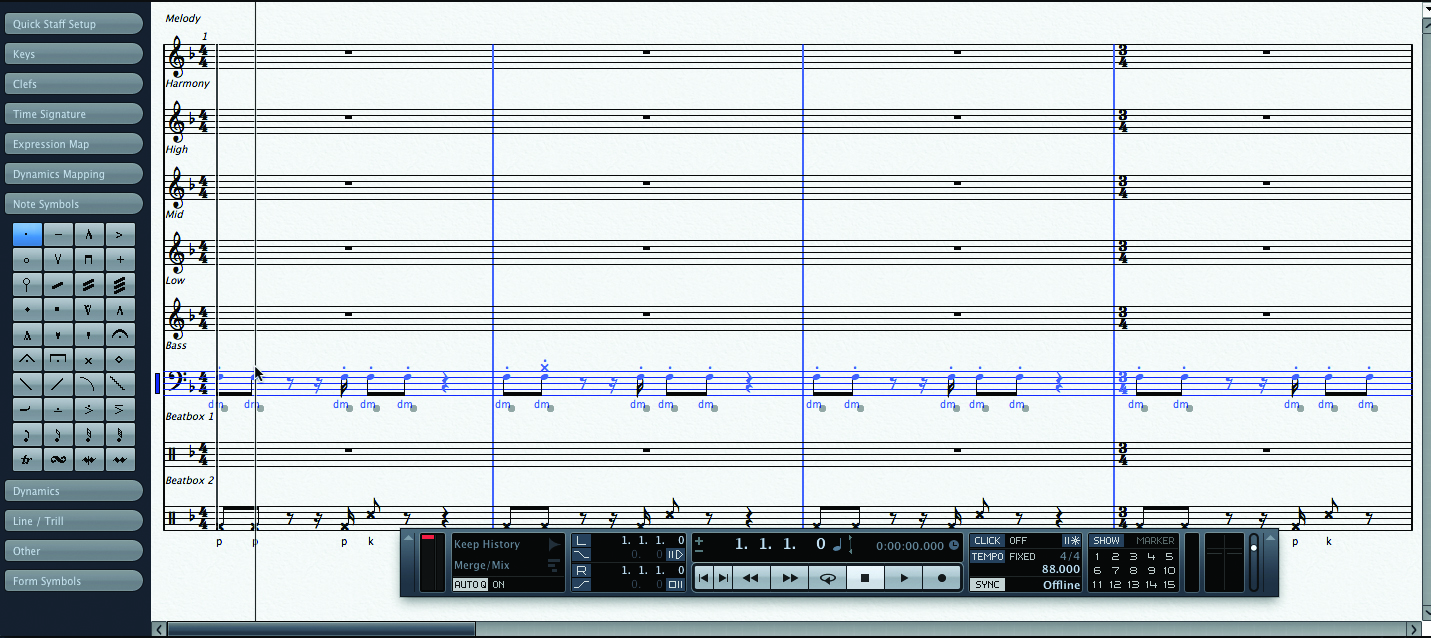
4: Certain notes may require specific performance directions such as staccato – these can be added either individually or en masse. To add an accent to a note, select the accent that you require and click over the appropriate note. To add to multiple notes, first select the notes by drawing a box around them with cursor and then add the accent to any one of the notes; it will appear on all of them.
5: When adding dynamics and other expression commands, Cubase doesn’t fix them in the same way as other scoring software, so you can add dynamics literally anywhere on the score. Firstly, be careful with your clicking! Secondly, Cubase has a tool to help you out. If your dynamics are all slightly off, select them, right-/[Ctrl]-click and select Align. Cubase arranges them all in a neat line.
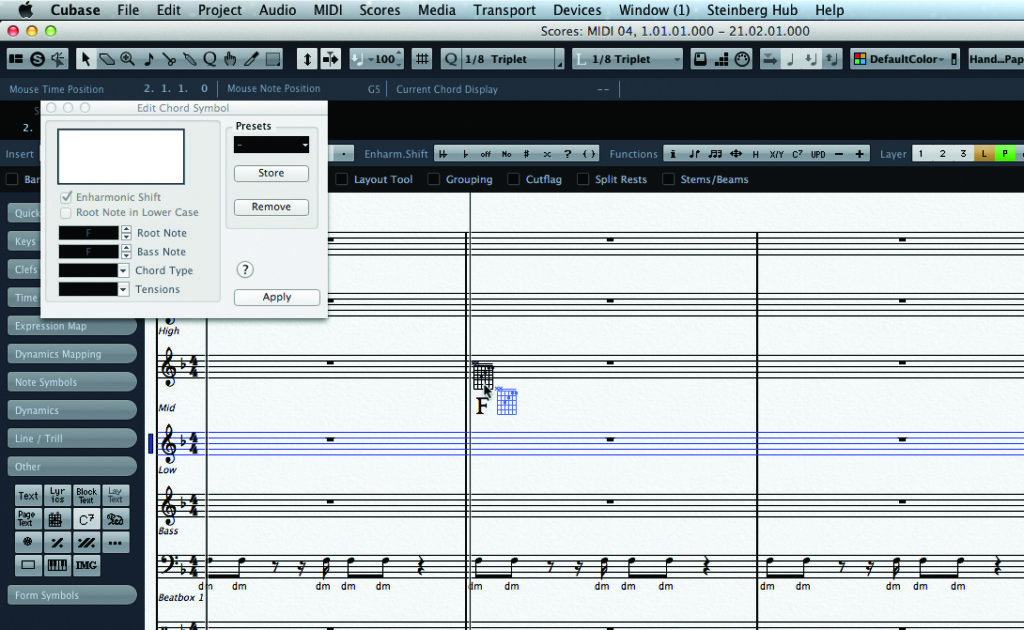
6: If you want to add chords to your project, do it in the same way as adding lyrics, via the Other tab. You can right-/[Ctrl]-click to have Cubase automatically add guitar boxes for fingering by clicking on Make Guitar Symbol. Cubase allows these to be moved separately and located next to each other.
Making Your Score Presentable
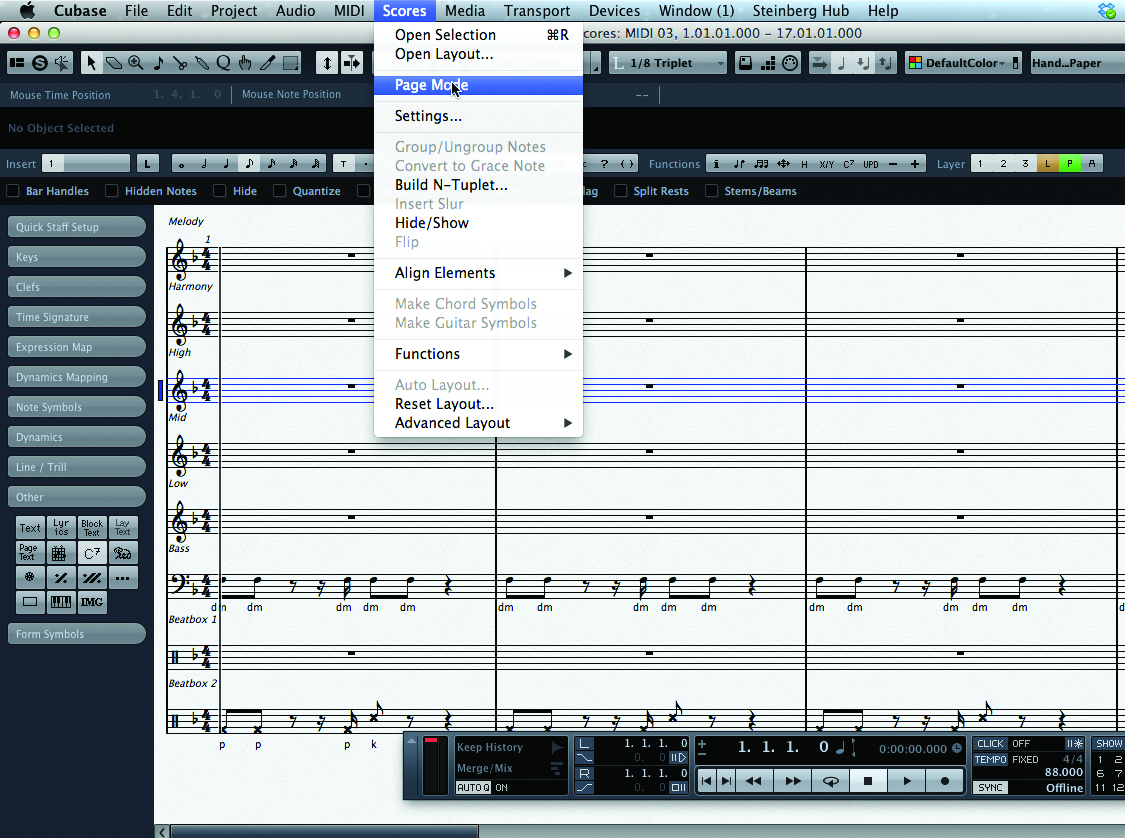
1: Ultimately, you’ll want to print your score, so with this in mind it is worth at this stage switching to Page Layout. This can be found in Scores>Page Layout. It doesn’t change the content and can be switched on and off. I tend to use it only when I’m ready to distribute, and use the Panoramic view when inputting data.
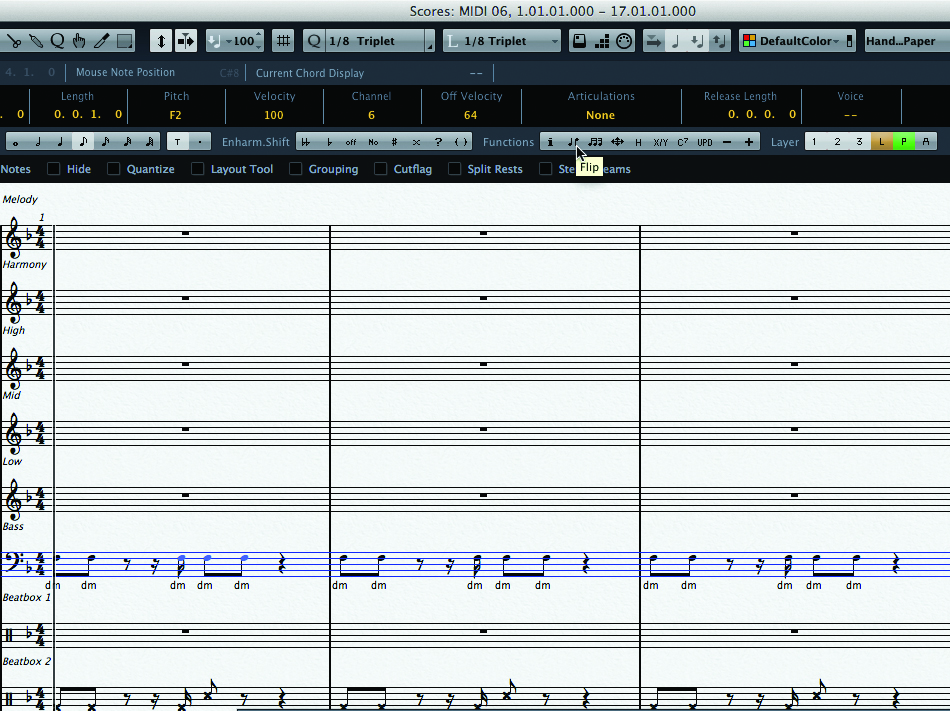
2: The default in music is to have stems pointing up below the middle line and down above it. However, in certain instances it makes sense to alter this (in my lower part I want them all to point up to make it easier to read). To do this, select the relevant notes and click on Flip in the Functions tool at the top of the window.
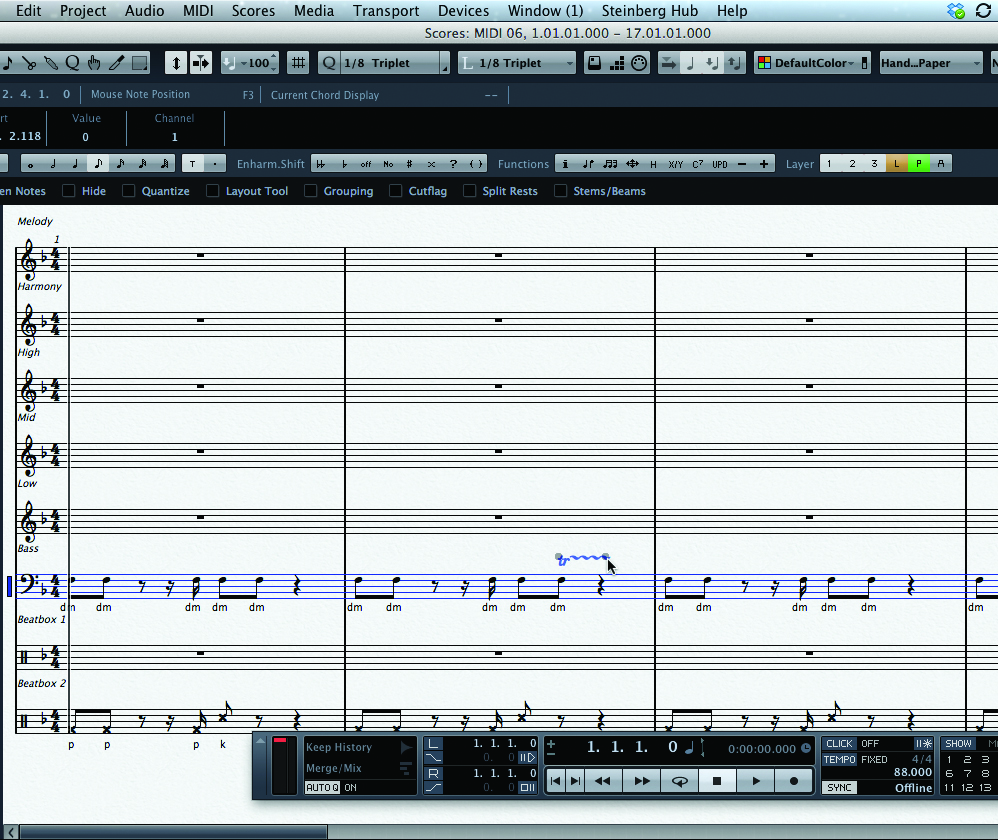
3: When adding final performance directions – trills, slides, arpeggios and so on – make sure that they cover the correct distance. Select them from the left-hand tab (labelled Line/Trill) and apply it to the note you want it on. Two small boxes will appear at either end for editing the length (and angle in the case of slides).
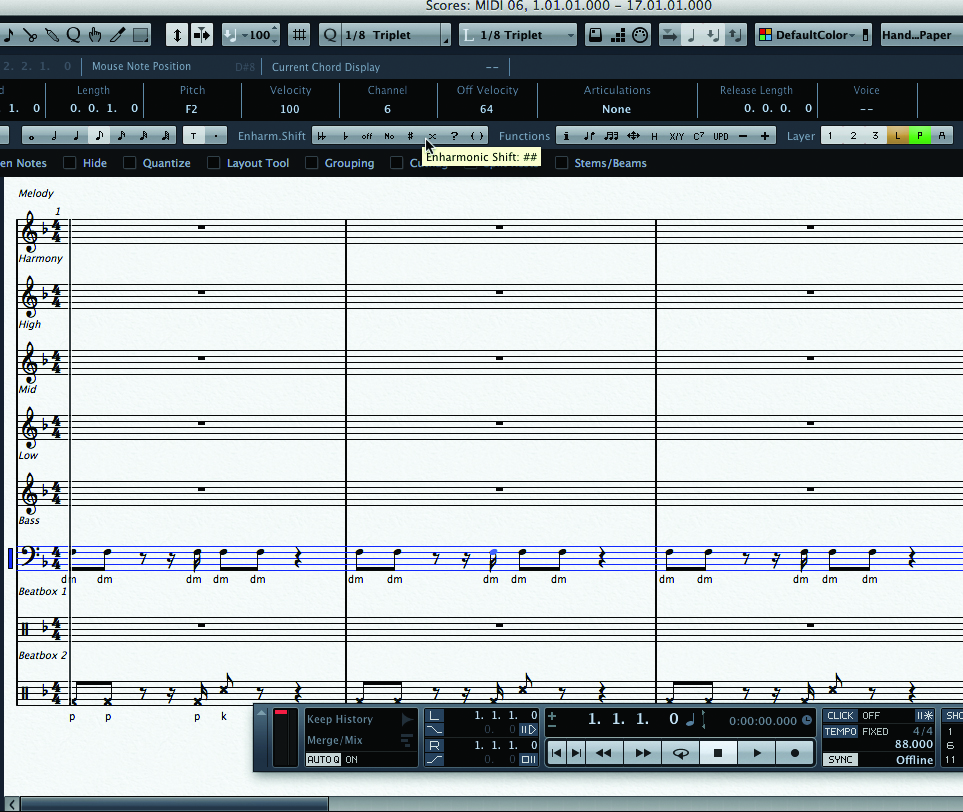
4: Check through and make sure that accidentals have the correct enharmonic – it is much easier to read Eb than F double-flat or A natural than G double-sharp. To correct any that are wrong, click on the relevant note and select the relevant Enharmonic Shift from the list. Cubase will automatically change it to anything that it can.
5: The Layout controls can be found in the Information window by clicking on the letter I in the Functions list and selecting Layout. This gives you options for the size of the staves and to convert the whole project into different musical styles. This is the window for the settings that affect the score as a whole, so it’s worth checking it before printing.
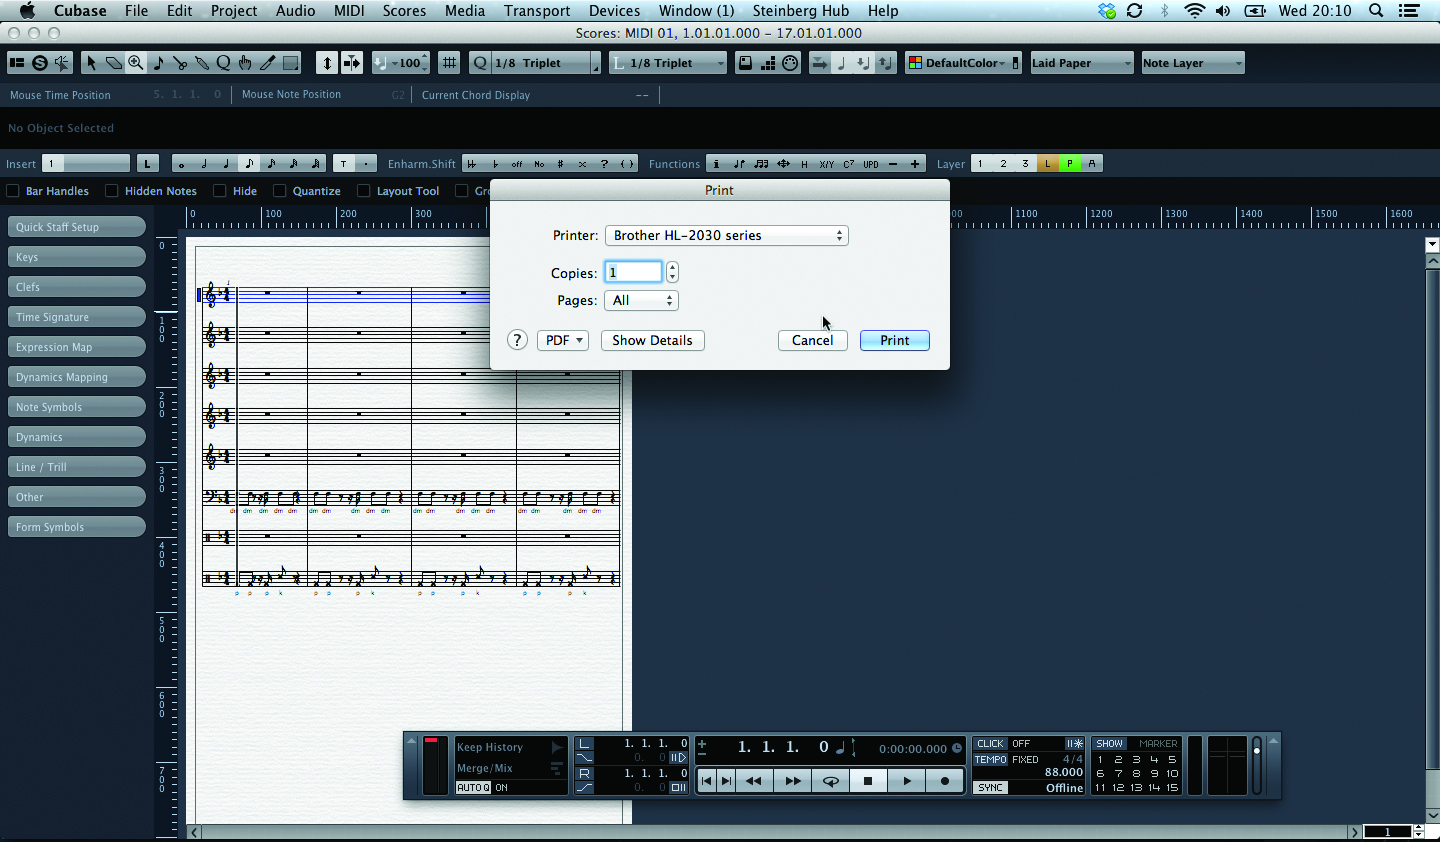
6: You are now ready to print – and this is done in the same way as in any other program by choosing File>Print. Do, of course, make sure that you have set up the page correctly and that it will print to the appropriate paper size. You have now completed your score!