Cubase Tutorial: Become A Power User Part 2 – Creating and Editing Audio Recordings
Now that your Cubase setup is primed and ready to go, it’s time to explore your options for recording and editing audio. Tim Hallas gets behind the mic in the second part of our Become a Power User of Cubase tutorial series… Welcome to part two of our series of articles covering all the aspects […]
Now that your Cubase setup is primed and ready to go, it’s time to explore your options for recording and editing audio. Tim Hallas gets behind the mic in the second part of our Become a Power User of Cubase tutorial series…

Welcome to part two of our series of articles covering all the aspects of Cubase. Last time we looked at the very basics of creating projects in the software; this time we move on and start getting sound in and out of a project. There are essentially two different types of file that we will primarily be working with in Cubase – audio and MIDI. Audio is sound that is captured from a real-world sound source via a microphone, MIDI is simply data that can be used to play instruments remotely or from within the software. In this second tutorial we will take a look at audio – how to capture it in the software and then how to edit it.
Audio recording might seem a bit basic to be covered in a power-user section, but it is, of course, the bread and butter of what we as musicians, engineers and producers work with on a daily basis. The fact is that, regardless of what genre of music you work in, audio is going to play a part to some extent. Whether you are simply recording guitars and vocals for a folk album or using cut-up samples for a Fatboy Slim-style mash-up, audio is something that you can’t escape.
There are many different ways of getting audio into Cubase, the most obvious being to record it into the Arrange window. It also has the ability to import existing audio for you to work on, either for mastering or to chop up and use as a sample. Although I would hope that most users can already do this, it’s worth refreshing the basics as sometimes things get forgotten and some more efficient working practices might come to light.
Cubase is a great program with which to record audio – it features everything that the musician and producer might need. We will look at how to incorporate other types of music data into the project in a future article, but for now, have fun recording and editing audio.
Setting Up Audio Recording and Getting Audio Into Cubase
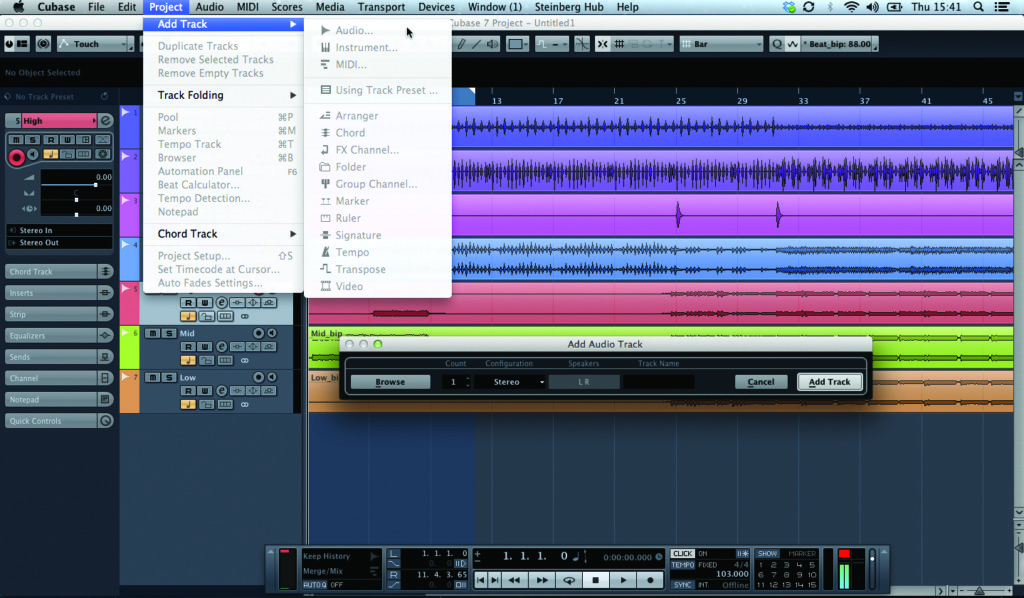
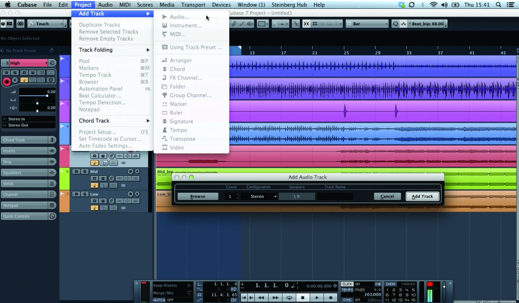
1: Start the project by creating some audio tracks – click on Project>Add Track>Audio. Once the pop-up window appears, select how many tracks you are going to need and whether they are going to be mono or stereo. You can also give each track a name at this stage. Click Add Track to place it in the Arrange window.
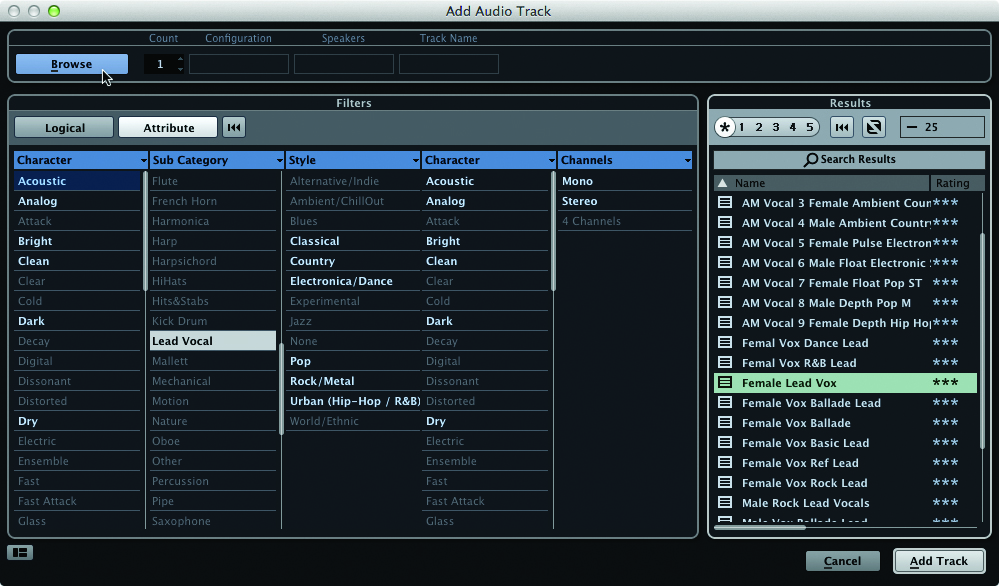
2. You will also see a button labelled Browse, which expands the window to display assorted track presets, including appropriate output effects. However, try to keep it as basic as possible when tracking – it is good to hear the audio as near to neutral as you can because effects can mask issues with the capture.
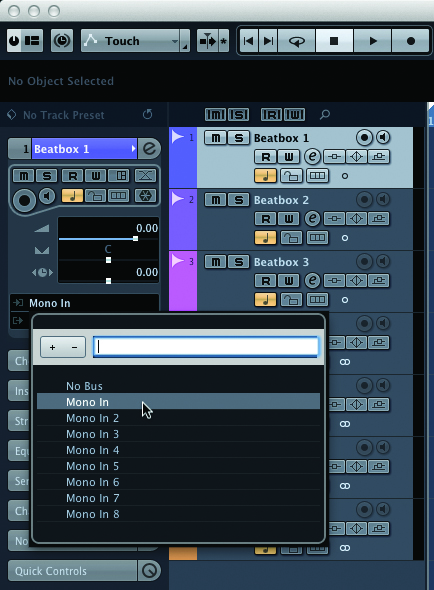
3. When you have your tracks in the Arrange window you need to make sure that the routing is set up appropriately, as unlike some DAW software, Cubase does not automatically increment the inputs sequentially on new tracks and everything will default to the first input buss. To change this, click on the Input Routing dropdown menu on the Channel Inspector panel and select the correct input source.
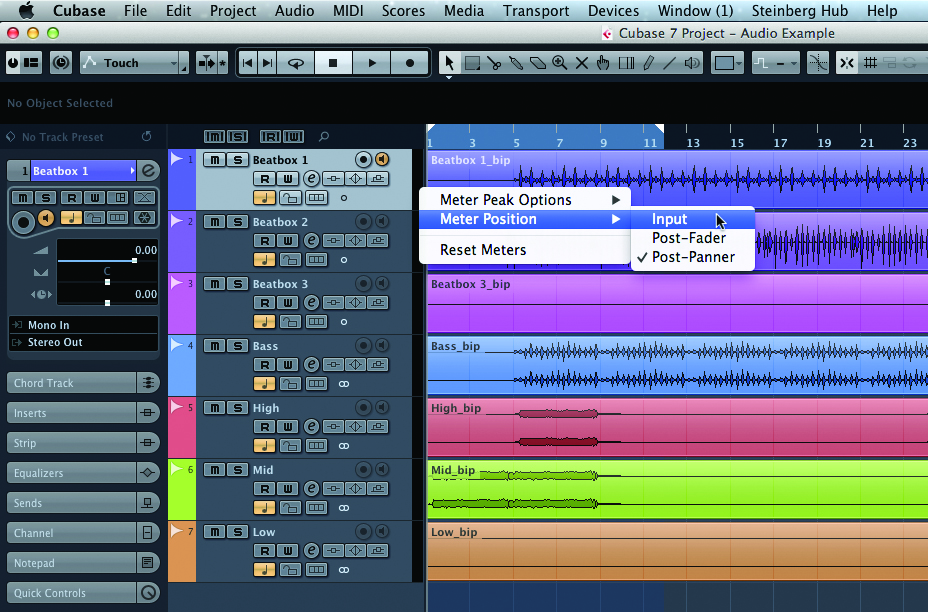
4.You now need to check that the signal is at an appropriate level. On each channel header there is a small speaker icon; this is the input monitor button and when active illuminates in brown. Pressing this enables you to see and hear the incoming signal level from the microphone. Set the gain to an appropriate level for capture by adjusting the controls on your interface.
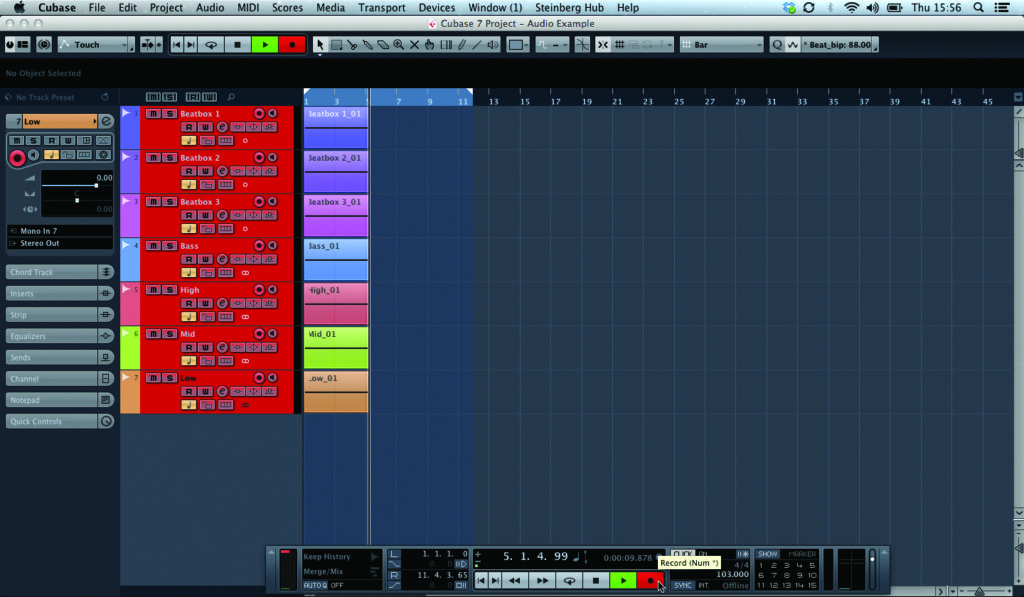
5. You’re now ready to record. Select the channels you want to record to, press the Record Enable button and hit the magic record button in the transport window. Congratulations! Your audio is now recorded and ready to edit.
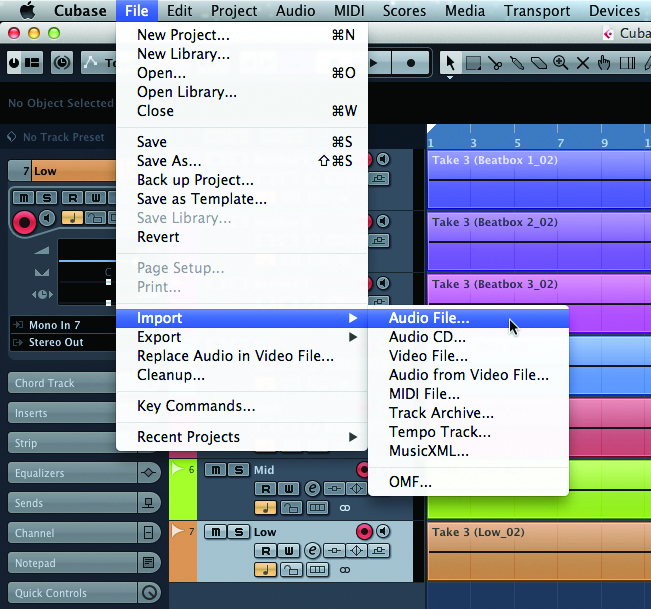
6. If you’re importing audio to a project as well, click on File>Import>Audio File, select the file you want and click Open. Cubase will ask you if you want to copy the audio to the working directory, then place it into the project on the currently selected track at the position of the playback head.
Continue to Part 2 – Editing Audio >
