Cubase Tutorial: Become a Power User Part 13 – Mixing Down and Uploading
In an additional part of the Cubase Power User series, Tim Hallas looks at how to get your tunes out of Cubase and release them into the musical wilds… So, after a year of tutorials we have reached the point of having a finished project. We have set it up, learnt how to record, edit […]
In an additional part of the Cubase Power User series, Tim Hallas looks at how to get your tunes out of Cubase and release them into the musical wilds…
So, after a year of tutorials we have reached the point of having a finished project. We have set it up, learnt how to record, edit and manipulate sounds, and have looked at mixing a track. It is therefore now time to cover the mixdown and export process within Cubase so we can get our music out and release it. Whether as a download or physical pressing we still need to look at getting it from the Arrange window and into a wav, aiff or MP3 file.
This process is often overlooked but it is an important part of any musical project. Exporting is something that everyone needs to do and if it’s done wrong you can end up with files that are unplayable on some systems. Simply having the wrong bitrate can make a big difference to how a piece of music sounds at mixdown.

The path from arrangement to export can include a range of processes, from automation (covered last month) through to mastering. Cubase includes a range of mastering features (check out Music Tech Focus: Mastering for a detailed look at these), but we shan’t be looking at these again in this article as that is a tutorial on its own and is best done on the finished stereo file after mixdown rather than on the output buss of a project file. Mastering in this fashion enables you to compare a group of projects in order to give them a uniform sound. All DAWs export their files differently, and Cubase has a rather unique way of doing it that enables a lot more flexibility than some other software.
As a musician the ultimate goal is to get your music heard and Cubase has some features that are designed to help with this, including direct integration with SoundCloud. We shall look at the process of submitting your projects to a download platform and optimising the output of Cubase to account for it.
Focus On – Batch Export
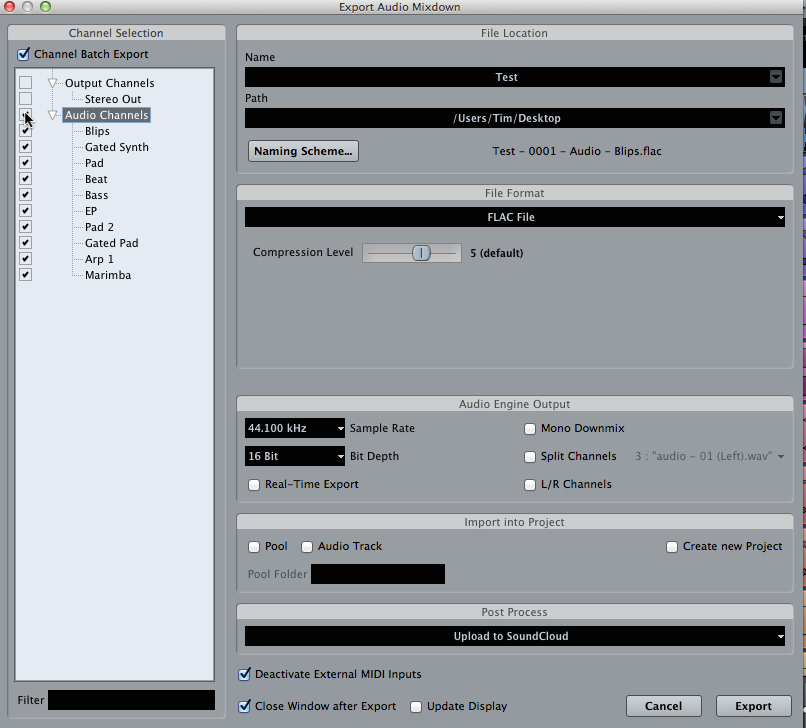
If you are exporting tracks for a purpose other than mixdown, Cubase has a Batch Export function within the Export window. This is more common than you might imagine. I did this recently when I created a project in Cubase but wanted to use the tracks in Ableton Live for use with a band. On the left-hand side there is a tick-box for Batch Output – select this and the box below becomes active, and de-select the Stereo Out box. Then select all of the tracks that you would like to export for further processing. There is also a box in the main window, Naming Scheme, which enables you to select how the output files are labelled.
Mixing Down

1: The first process in mixing down is to make sure that the levels are set correctly. What we don’t want is the track to peak and create distortion. Check the MixConsole (F3) and look at both the channels and the Stereo Out fader and make sure they are not going above 0dB at any point. The channels are a little more flexible than the Stereo Out and can cope with minute peaking.
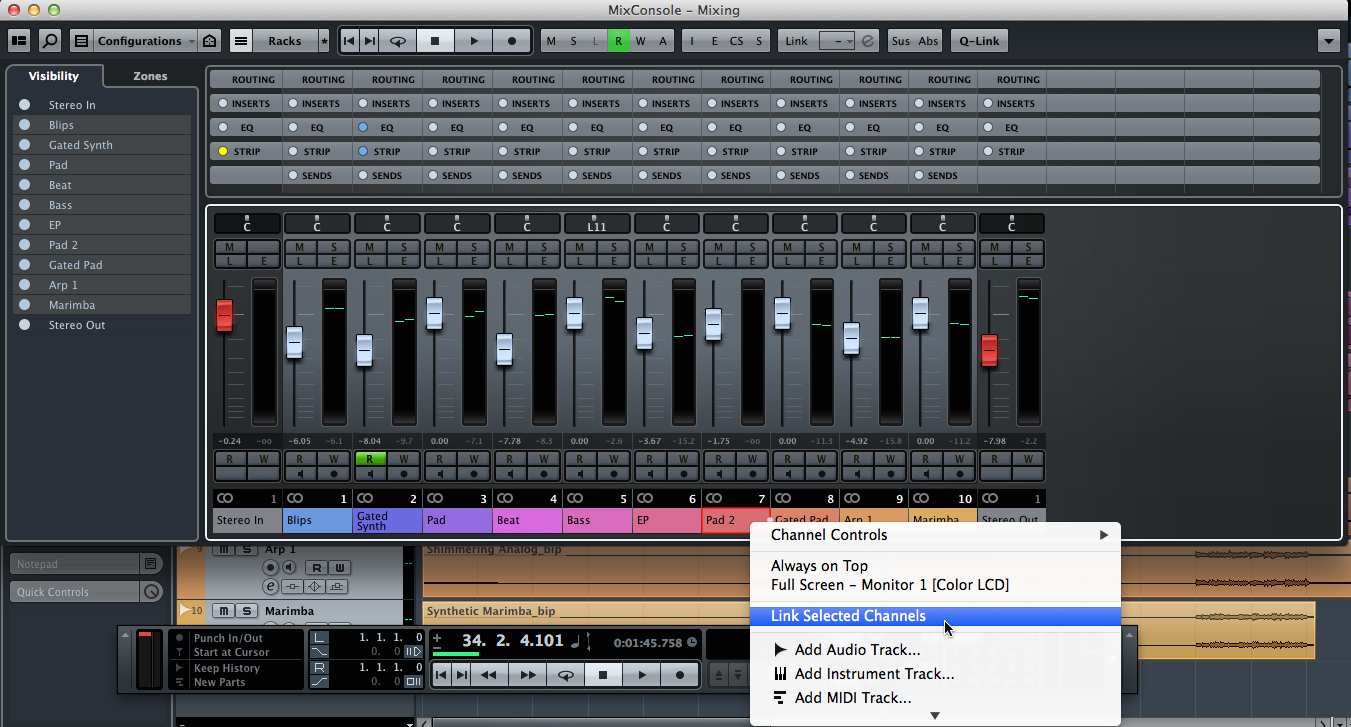
2: To lower the output but without changing the relative volume, select the channels in the entire project by Shift-clicking on each channel header in the MixConsole. Once all the channels are highlighted Right/Ctrl+Click on one and select Link Channels. The volumes can now be raised and lowered simultaneously and relatively to make sure the volume is optimised for output without distortion.
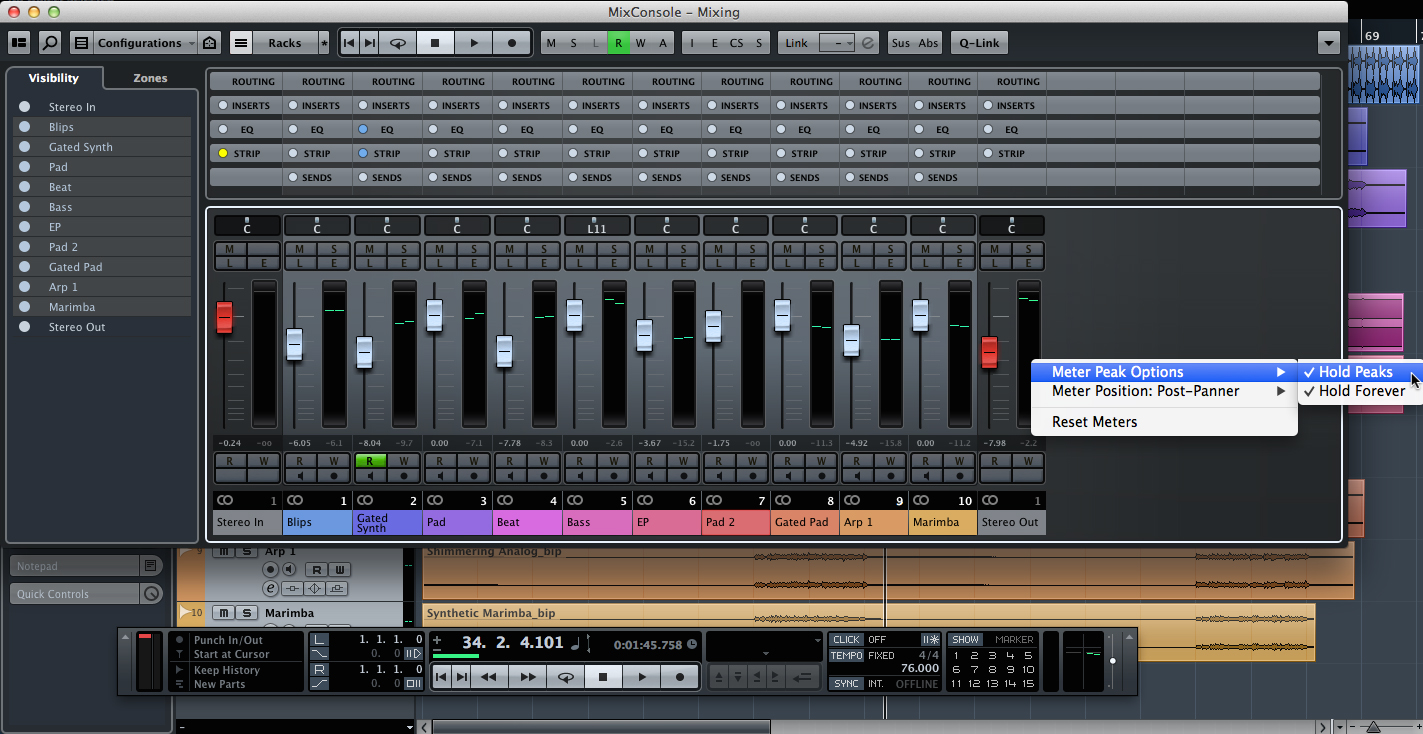
3: At this stage adjust the main Stereo Output so that it is peaking as close to 0dB as possible. To see what the peak of the track is throughout, set the meter to Peak Hold by Right/Ctrl+Clicking on it and then listen to the whole track and make a note of the maximum volume level. Reduce or raise the output by this amount to get the level as close to 0dB as possible.
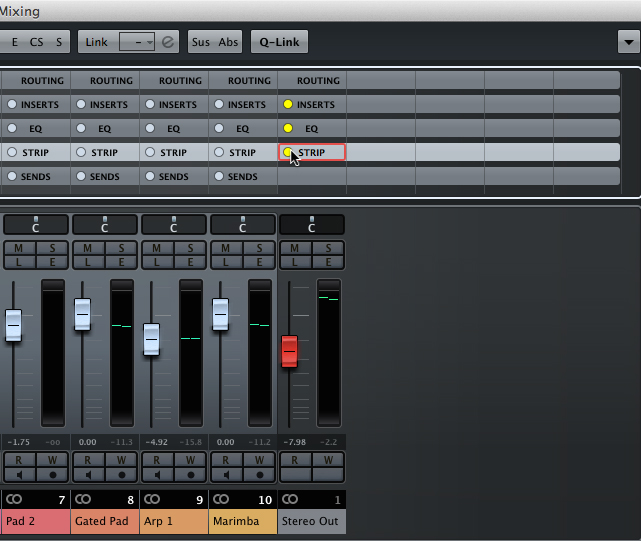
4: If your track is going off to be mastered, or you are doing some mastering yourself, it is best to bypass all the effects you have on the stereo buss, such as multiband compression, limiters or additional EQ. To do this, enter the MixConsole and click on the circles next to each of the inserts, EQ and strip headers. These should turn yellow indicating that they have been bypassed.
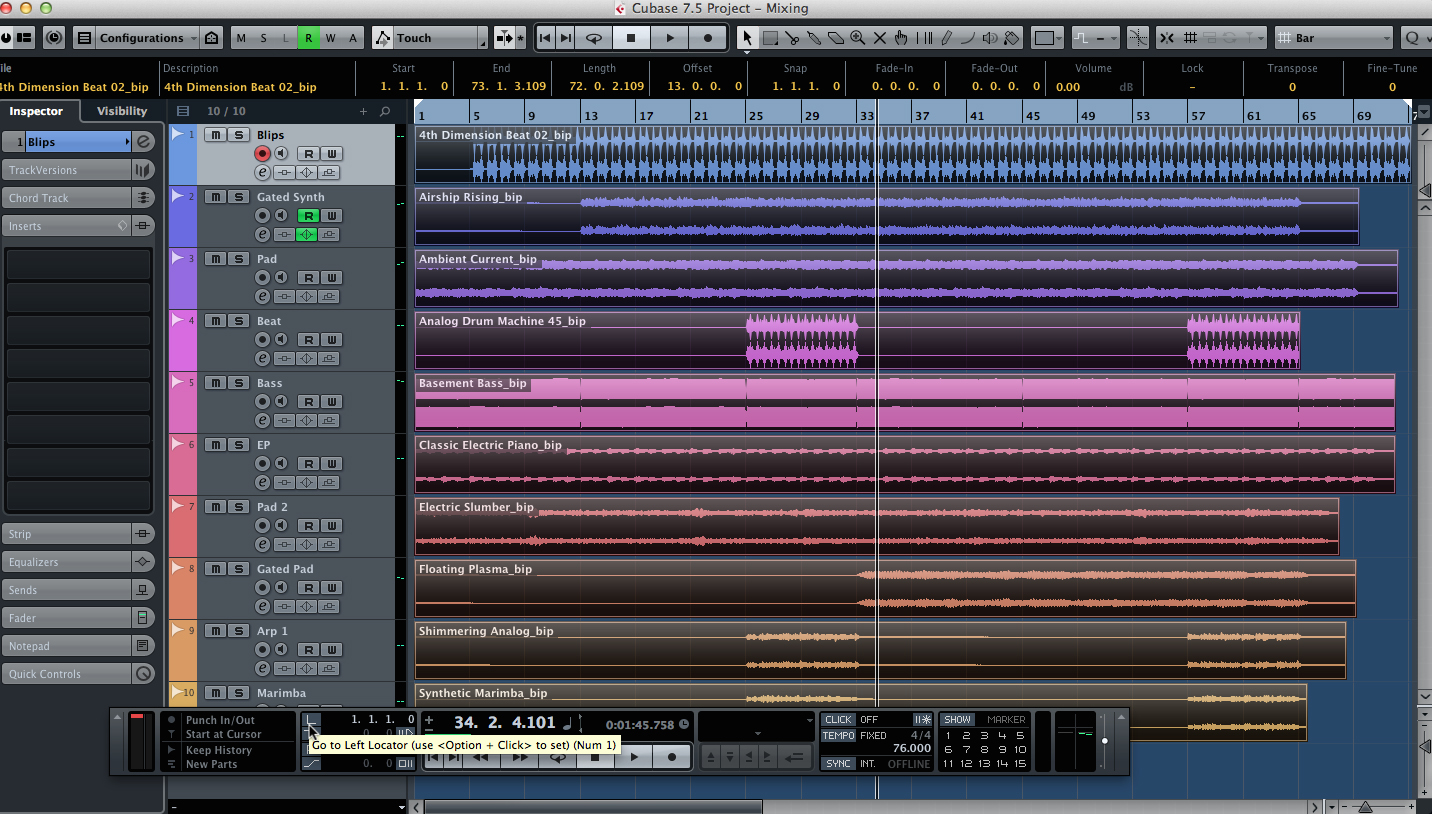
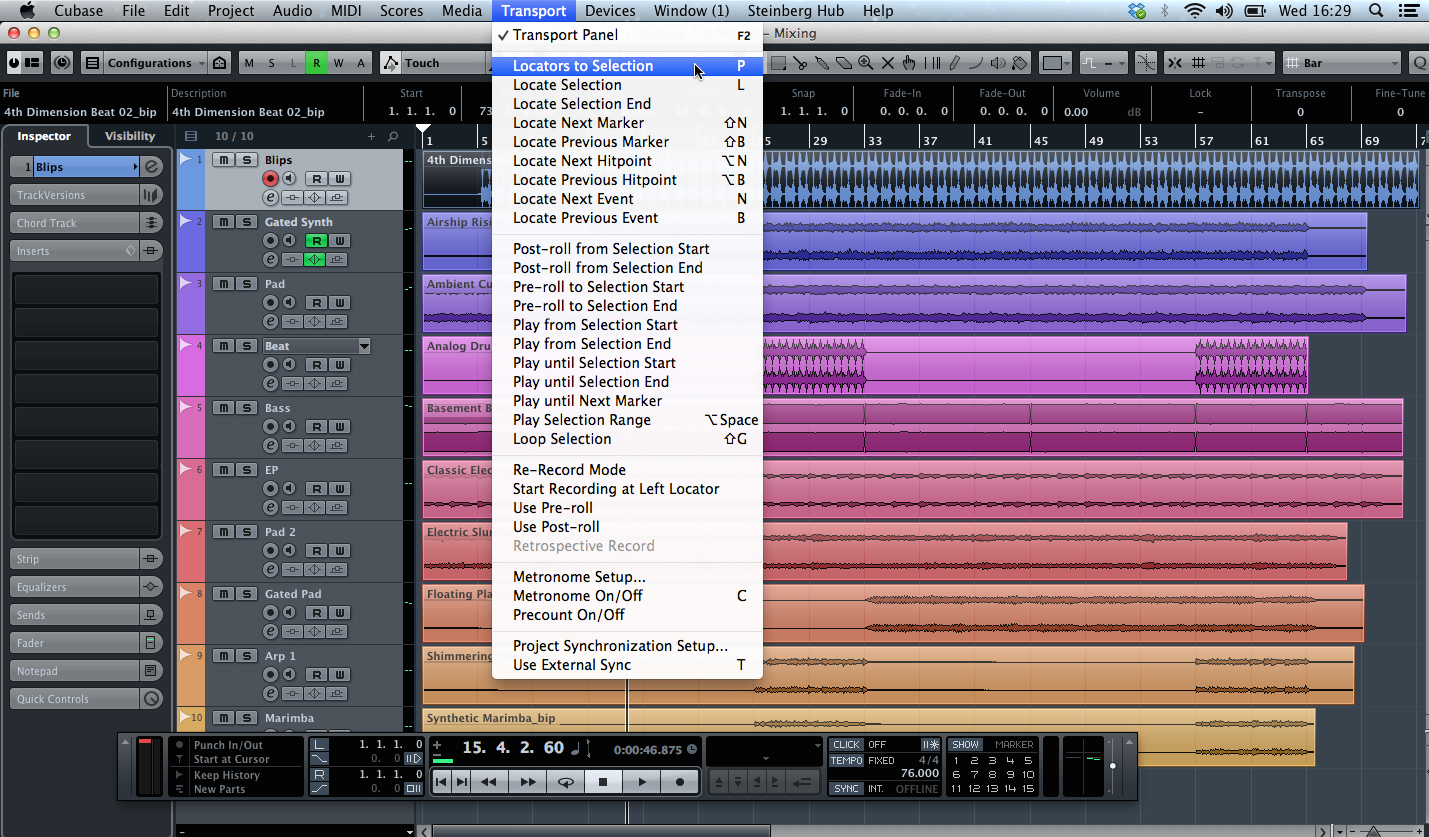
5: Head back to the Arrange window and select the area of the project that you want to mix down by dragging your mouse round it or pressing Ctrl+A to Select All. If you have any tracks you want muted make sure you do that now, and then press P to set the left and right markers.
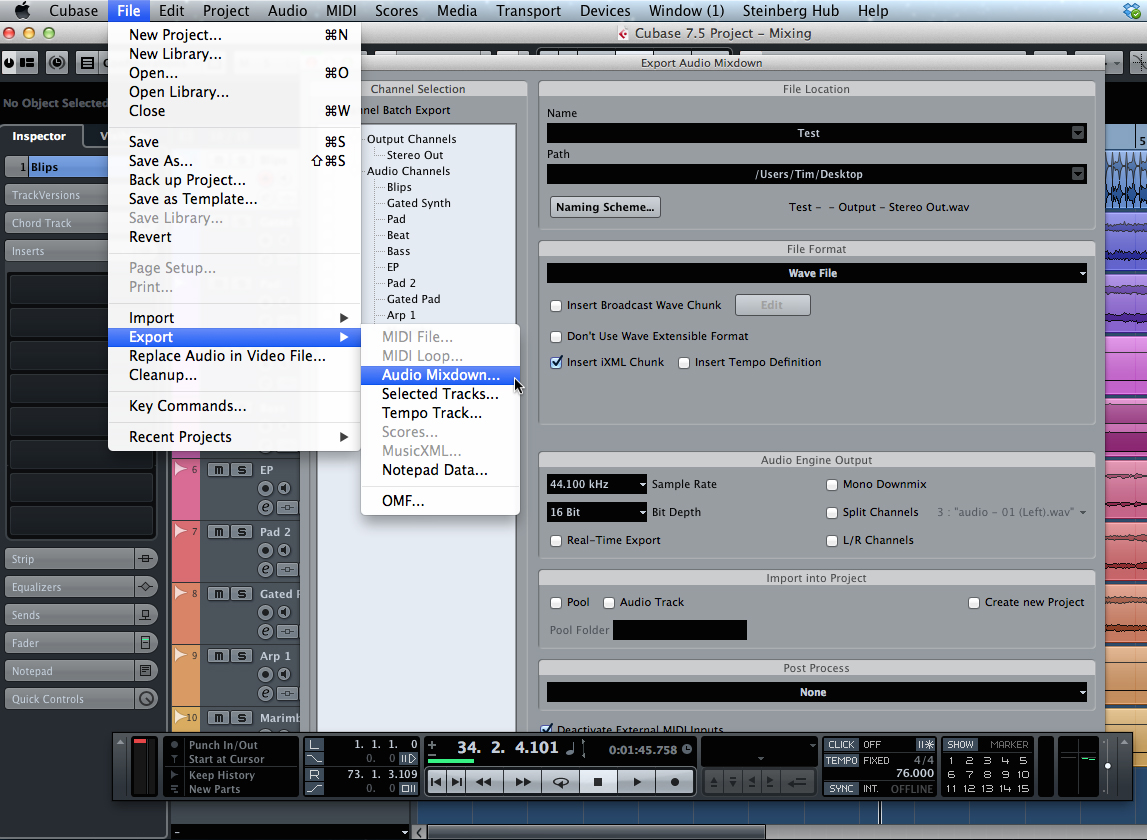
6: We’re now ready to export. Select File> Export> Audio Mixdown and a dialogue box will appear with all the various options. Make sure that Stereo Out is selected on the output options on the left. I recommend Wave File as a sensible file type. CD quality is 16-bit/44.1kHz, but if it’s going on for further mastering it will be worth using 24-bit. Choose your file name and the location and click Export.
Distributing Your Music

1: When it comes to distributing your music you can do this direct from Cubase in certain instances. Begin by repeating the above processes and prepare your tracks for mixdown as normal, then set the left and right markers.
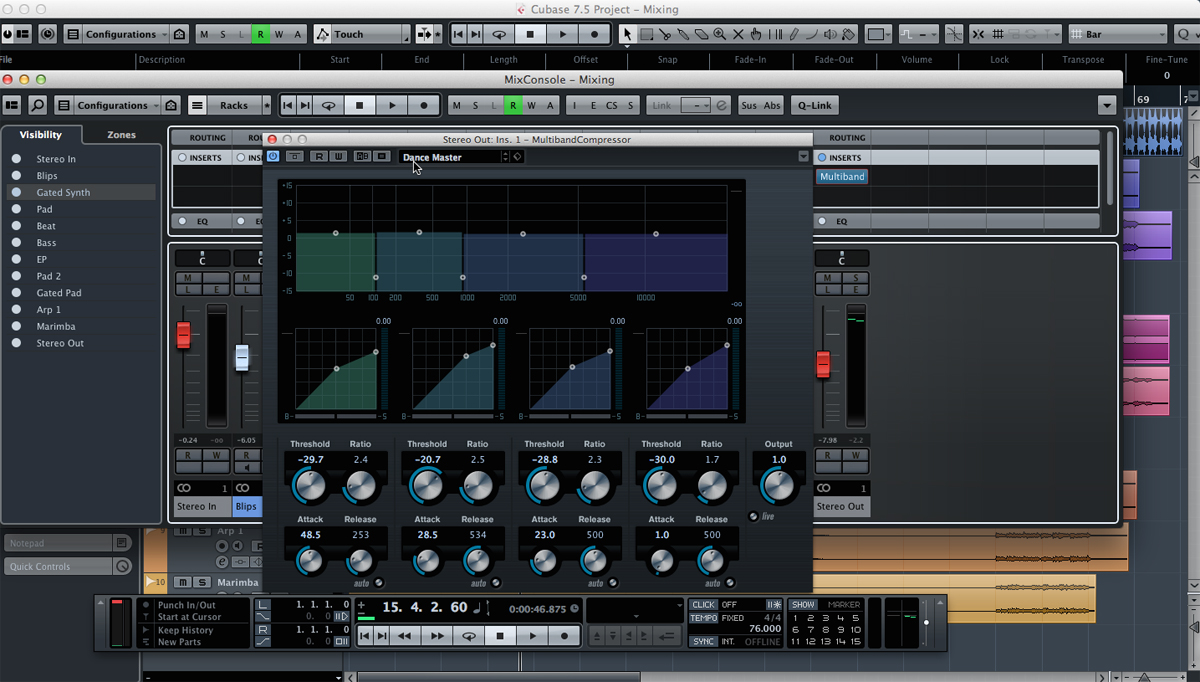
2: In this instance, as the project is being distributed directly to the internet, it might be worth having some mastering plug-ins in the signal chain. If you had a limiter or multiband compressor on the Stereo Out track, reactivate them by clicking on the yellow bypass circles in the MixConsole. Otherwise add them on the Insert panel – each has some presets for mastering that can be used.
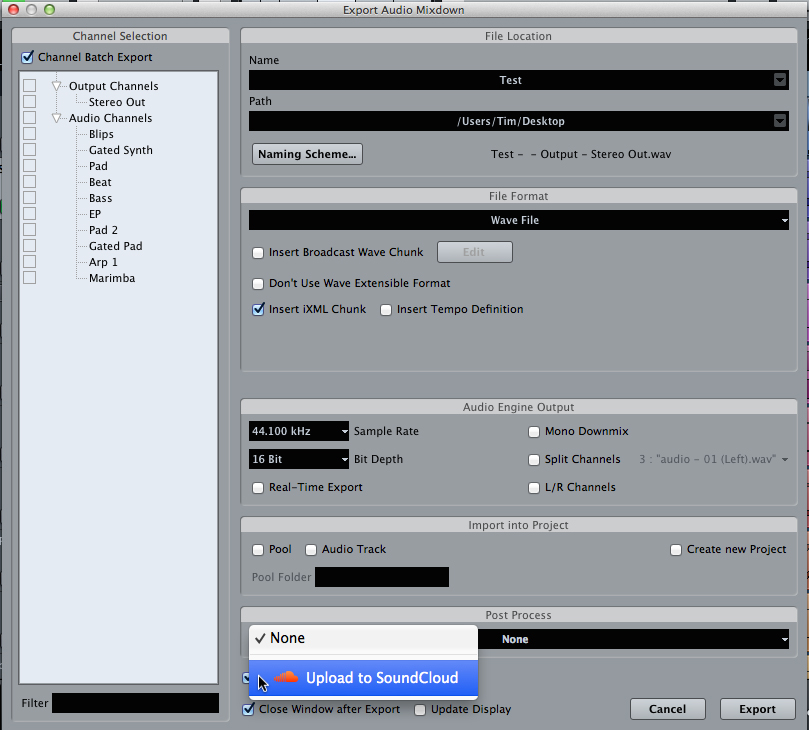
3:The easiest platform to upload to is SoundCloud, as Cubase supports this natively from the Audio Mixdown window. From here, at the bottom, click on the Post Process dropdown menu and select Upload to SoundCloud. For this I would again recommend exporting as a wave file at 16-bit for easier conversion. Then, as before, click on Export and it will bounce the file before upload begins.
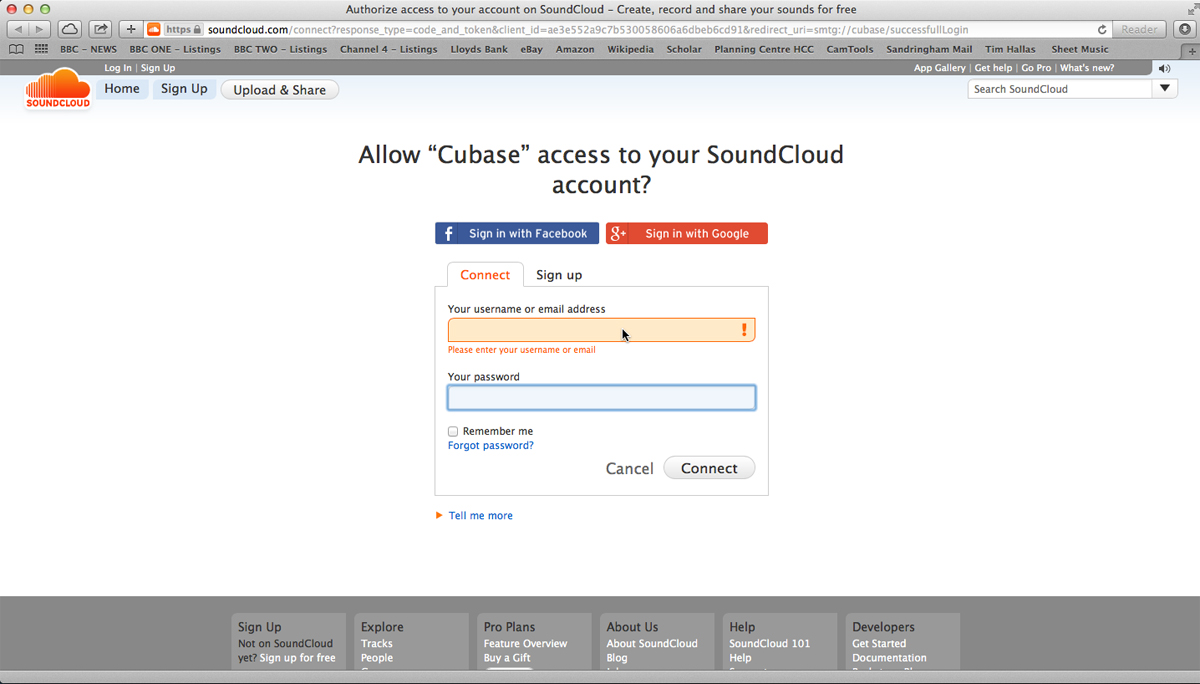
4: Cubase then launches your default browser and goes directly to the SoundCloud website with a dedicated login page. Once there, SoundCloud will ask you to give permission for Cubase to link to your online account. Fill in your login details and press Connect to complete the link. Cubase will directly send the file to the SoundCloud webservers and your track will be ready to go soon after.
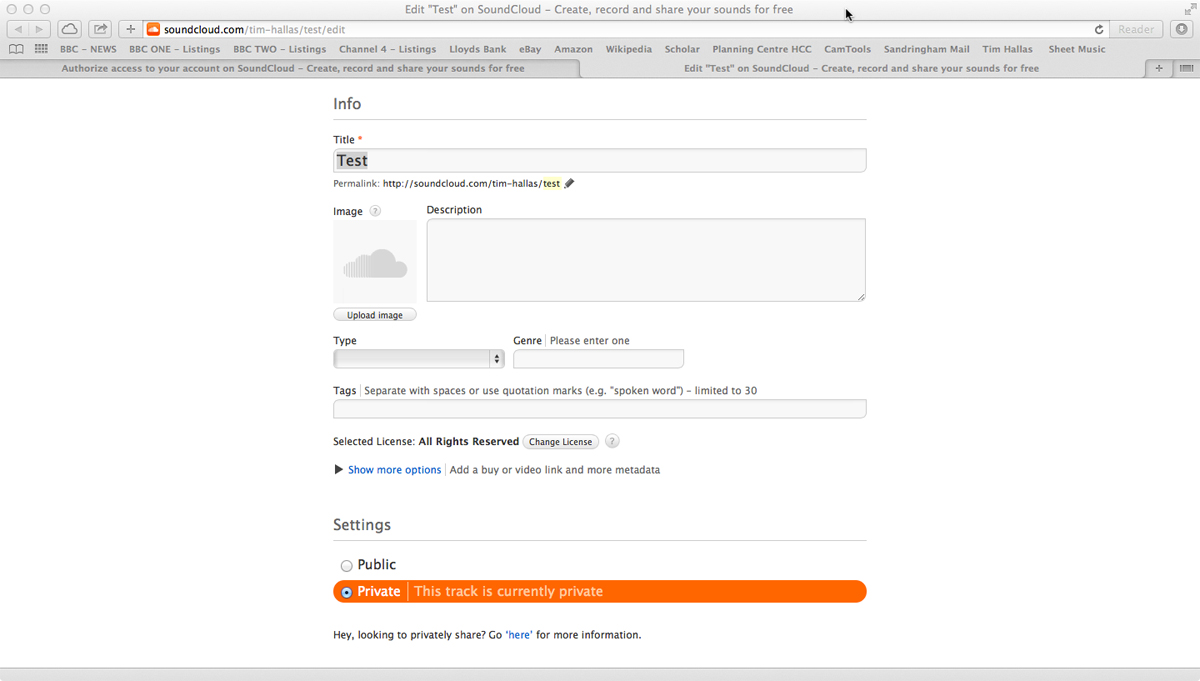
5: Once on the website, SoundCloud asks you to fill in the standard details about the track including title, cover image and a description. It also includes the licence information if it’s a cover version, etc. The track defaults to Private, but select Public if you want to get your music out there. Then press Save and the file is ready to be shared with the world.
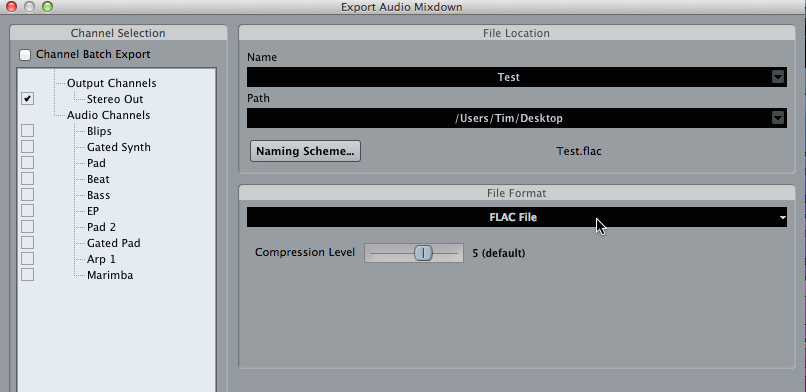
6:Cubase also offers export in other formats that are less common but still useful for distributing music. FLAC is an (allegedly) lossless compressed format for streaming and downloading. Many artist’s own download pages offer the FLAC format and this is a good feature to have within Cubase. Simply choose this as your output format and select the level of compression you want.
