Cubase Tutorial: Audio Restoration
Whether you’re cleaning up old recordings or dealing with a bad take, Cubase has all the tools you need to restore life to your sound. Hollin Jones explains in this Cubase Tutorial As we all know, the vast majority of audio recording these days is done to a digital medium – be it Flash […]
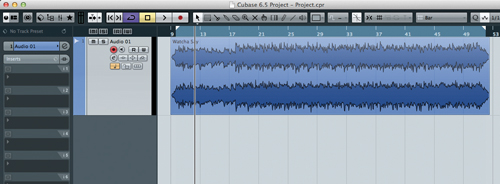
Whether you’re cleaning up old recordings or dealing with a bad take, Cubase has all the tools you need to restore life to your sound. Hollin Jones explains in this Cubase Tutorial

As we all know, the vast majority of audio recording these days is done to a digital medium – be it Flash memory or a hard drive – and recordings often stay in the digital domain for their entire life, from the moment of capture through mixing and mastering to ending up on an iPod.
Like all forms of recording, however, digital is only as good as what you feed it. It’s just as easy to get a bad recording with top-end digital gear as with an old tape four-track – if you make mistakes.
If anything, digital is probably less forgiving than analogue when it comes to issues such as peaks and distortion. The good news, however, is that DAWs such as Cubase make it far easier to restore, clean-up and fix recordings than it used to be. It’s not uncommon to have to work with takes that are muffled or contain peaks, plosives or too much room ambience. Maybe you got your mic positioning wrong, or maybe you’ve inherited a bit of a messy project from someone else and have been tasked with fixing it.
Another thing that people do a lot of these days is digitising older recordings, perhaps tracks that you produced years ago on lower-end equipment, when your production skills were still in their infancy and perhaps your budget didn’t stretch all that far. These too can benefit from some degree of processing to liven them up, to sort out boomy bottom ends, lifeless treble or myriad other deficiencies. There’s not really a magic-bullet solution, since every track will require a different treatment, but there are tools found in Cubase and other DAWs that can really help.
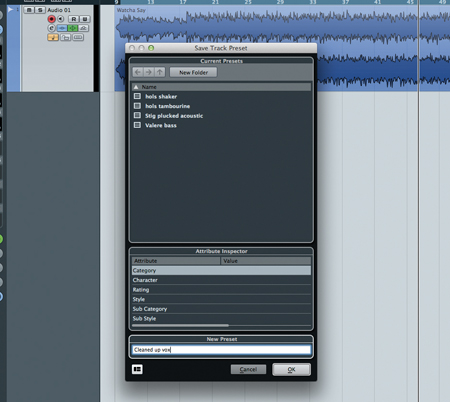
The most effective of these is usually EQ, as this can help to sweeten and re-balance sounds, to draw out the frequencies you want emphasised and tame the ones you want backed off. For plosives and sibilance, de-essers or compressors with very precise frequency settings are ideal tools, while more generic compression and limiting can help to pull out elements of older recordings that you didn’t know were there. Once you hit on a good sound, it’s a good idea to save the plug-in chain as a Track Preset, since these can be instantly applied to other files requiring similar treatment, and minor tweaks can be made quickly and easily.
Getting Started
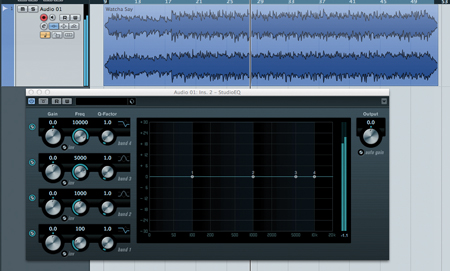
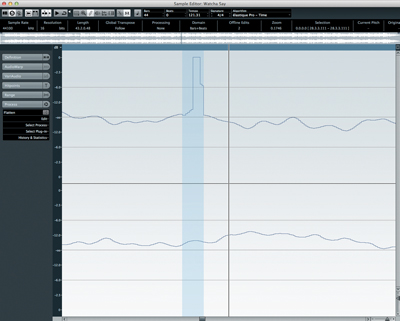
The first thing to note about any audio restoration task is that you will almost certainly want to work with the source material in isolation, at least to begin with. You can worry about fitting the processed audio back into a project later on, but your initial concern should be with identifying exactly why it sounds bad in the first place and how you can go about remedying it. There’s a difference here between something like removing clipping from a guitar take and re-processing an older track to add sparkle. In the former case you will end up doing a lot of zooming in to sample level and drawing out clipped samples; in the latter you will be doing something more akin to mastering, processing a whole file and treating the master output of Cubase.
The order in which you begin to process your audio is important. Some people like to normalize audio files that are too quiet, and this may seem like a good idea if you are cleaning up an old recording. Be aware, however, that normalizing a clip to zero or around 0dB will also amplify any flaws inherent in the original recording, such as background hiss or boomy bass. Unless the clip is so quiet as to make it difficult to work with, it can be better to use dynamic and EQ processing to bring up the level. That way you are enhancing rather than suppressing elements of the sound. If you must normalize, use a more gentle value, somewhere around -3 to -2dB.
As we’ve said, the first step in cleaning up audio in Cubase is identifying what’s wrong with it. This should be pretty obvious if you have a decent ear for mixes, and will typically include problems such as low overall level, elements that stick out or get swamped in a mix, inaudible vocals and so on. When working with a single stereo file – for example, a track that was recorded using old kit – you might want to begin with some gentle compression. This can help to provide some initial ‘glue’ to even out the various frequencies within the track, and you can use the makeup gain control to boost the overall level a little to make things easier to hear. With any dynamics processing you should of course keep an eye on the level meters and watch to avoid clipping or distortion. Don’t push the track hard at this point, just see if some compression helps. You can use single or multiband compression, though multiband is only really necessary when a track needs more special attention.
The Equalizer
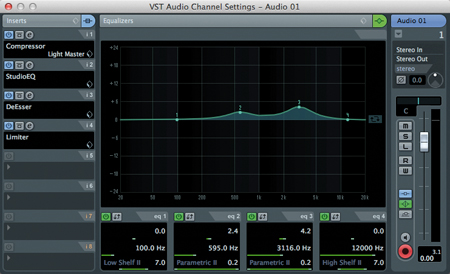
Next up – and likely to make a much greater impact on the sound of the track – will be EQ. Even if a clip or a track is muffled or muddy, that doesn’t mean you can’t pull all sorts of frequencies up with judicious use of EQ. Similarly, you can fix harsh mids and top end using the same tools. A parametric EQ will serve you better than a graphic EQ because they allow more precise control of frequency curves and Q values, which will be vital when tweaking your track.
Take a muffled vocal recording, for example, which generally contains too much lower mid and not enough upper mids. It depends on the voice in question, but in most cases, rolling off some bottom end and lower mid and adding some higher mids will bring the vocal to the fore and help it to cut through the mix (or fix a poor voice-over). A male vocal will probably need more bass roll-off than a female, and a female may require some taming of the upper mids if the recording is too shrill.
The same principles apply to instruments, so if your guitars are too piercing, use EQ to pull down the offending frequencies. A narrow Q setting helps to identify a very specific frequency and a wider Q takes in a greater area around the EQ point.
There’s nothing to prevent you using more than one EQ, and you may find yourself using two or even three, perhaps of differing kinds, to deal with a particularly troublesome recording. It can be trial and error and you may find yourself tweaking the EQ for a while before it sounds better. You may also need to add a de-esser if you are working with vocals or particularly splashy cymbals. Cubase has one, and it can be used to selectively compress and reduce the power of very sibilant sounds.
Best Of The Rest
Stereo imaging is something that you might want to experiment with when restoring audio, though do so with caution, especially if your original recording is in mono. Stereo widening of an existing mixdown can also widen the bass end, which is not usually a good idea since the bass should stay centred. It’s also a process that is best carried out using panning during the original mixdown, though by definition this probably isn’t possible if you’re restoring a track. If you do use widening, use it sparingly and only if you’re sure it is helping.
Finally, there’s limiting, which is the last part of the processing chain and can be used to squeeze more gain out of your track. This is something you would do when cleaning up old recordings but it should be applied sympathetically with reference to the original material. If it’s a jazz recording, for example, don’t hard-limit it as this would sound much too loud. If it’s a live recording that you’re working on, you might be on safer ground pushing the limiter a little harder to create a more powerful effect.
Back To Life
Restoring audio in Cubase is as much an art as a science, and each project you work on will have its own specific requirements. With clever and careful use of EQ, compression and perhaps other tools such as de-essing and stereo imaging, you can take a less than perfect recording and make it sound significantly better. When it comes to fixing distorted or clipped recordings, the going can be even tougher as you have to identify and fix each one by hand, but if re-takes are not possible, it’s good to know you have the option. With a little skill and patience, almost anything can be rescued.
If this seems a little confusing then this useful video takes you through the very basics of Audio editing in Cubase 6.5: