Cubase Tutorial: Recording Instruments Part Two – Perfecting Vocals
In the previous instalment of our instrument recording series we looked at recording a basic demo of guitar and vocals into Cubase. Now we’re going to look in more detail at recording one of these elements, perhaps the most important instrument in any song: the human voice. Andy Price annoys the neighbours… This series on […]
In the previous instalment of our instrument recording series we looked at recording a basic demo of guitar and vocals into Cubase. Now we’re going to look in more detail at recording one of these elements, perhaps the most important instrument in any song: the human voice. Andy Price annoys the neighbours…

This series on recording instruments in your DAW is primarily aimed at the budget singer/songwriter and so it’s fairly important that we cover vocal recording before we look at any other specific instruments.
Last time we looked at recording a quick, rough two-track demo in Cubase but now we’re going to get more specific with that first track. The vocals are without a doubt the element of your song that is most scrutinised by the average listener.
Vocals are infinitely variable in sound, tone, intensity and quality depending on the throat and lungs of the vocalist involved. There is however a vast amount you can do with your recordings to make them more consistent. Numerous singer/songwriters record while playing their instrument, which can be good in some respects – for example, if you wanted to capture a more performance-type take. However, if you’re hoping to get airplay then you need to make sure those vocals are front and centre in the mix and given a great deal of careful thought.
Spaces & Signals
Perhaps the most frequent problem encountered when recording vocals is that they are either too loud or too quiet, and if you are working with a vocalist who can be quite expressive it can be difficult to get the optimal mic position (particularly if they’re the annoying type that like to move their head around!). This obviously can lead to the track hitting the red and clipping, requiring a re-record.
The best solution if you’re in this situation is to use a compressor in the signal chain. This will automatically allow the vocalist to get as vocally dexterous as possible without clipping the track.
It does this by applying a decibel threshold that cannot be exceeded. However, with the right kind
of pre-amp, mic and vocalist you can get around this without the need to fork out. We can then apply a certain level of compression later at the digital stage
You’ll obviously need to bear in mind the acoustic space of the room that you are recording in. The majority of non-treated rooms will have a natural reverberation that will be audible once you have recorded.
You may also want to capture the specific ‘sound’ of the room in your track but the general rule with recording is to capture your lead vocal in an isolated, reflection-free environment.
This can be achieved artificially by recording in a smaller space, an enclosed booth like the sE Space, or treating your room with foam tiles to dampen the reflections.
A decent pop shield is essential to limit the number of plosive sounds that a vocalist may inadvertently make – particularly on the ‘p’ sounds – which cause clipping and can peak the decibel level of your natural singing voice. The pop shield will also protect the mic from corrosive spit.
In your signal chain it can help to have a decent pre-amp so you can further amplify your microphone without dirtying the sound, providing stable gain while preventing overloading of the microphone and input source.
Again the preamp is only as effective as your microphone – if you have a cheap, dud mic then the pre-amp can only do a little to improve the sound quality. Many modern audio input devices have their own in-built preamp too.
So carefully assess what you need – a good room, a decent microphone, a good preamp and, yes, a significant amount of time to capture the very best vocal performance.
DAW a Deer…
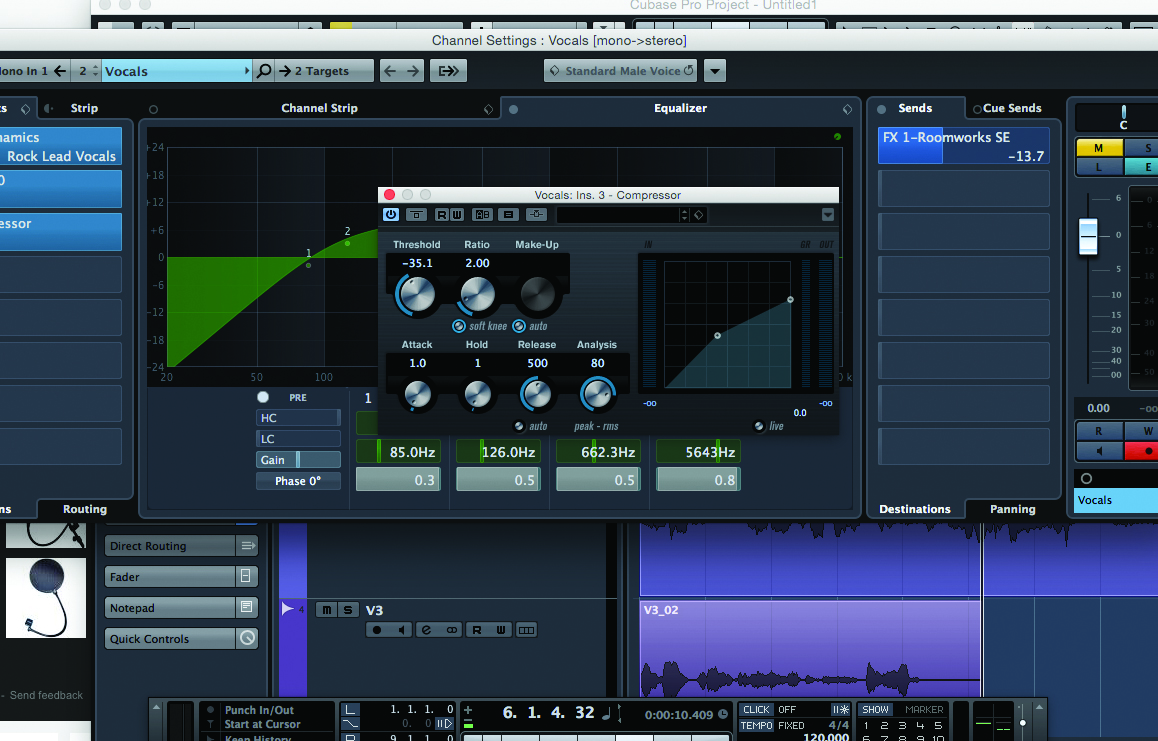
It’s often better to leave a lot of the processing to the DAW itself, and Cubase is more than up to the challenge of quite fundamentally modifying your vocal recordings. One of the biggest things we can do to the track is to add compression, even if you’ve already used a standalone compressor as a technical tool in the signal chain.
If you’re ill-informed on compression and what exactly you’re doing then use a preset in your DAW and further tweak and modify from there until you get the required sound. Cubase has a vast array, which are usefully titled to reflect their sonic effects.
All DAWs have in-built compression presets (in Cubase 8 it can be found under Inserts > Dynamics > Compressor). One of the key things to remember is that by adding compression you’ll often suffer in terms of track volume – although you can make up for this by adding Gain.
Another way of cleaning up your vocal take is to use equalisation (EQ) to clean up the various frequencies that make up the track. If you haven’t already then it’s better to mute all existing tracks aside from your vocal – with the aim of making it sound clean in isolation and getting rid
of any additional noise you don’t want on your track.
This is quite a delicate juggling act – you must make sure that the vocal stands out by boosting the frequencies your vocal naturally occupies and reducing the frequencies that aren’t necessarily needed. It’s best to start cutting frequencies that are extremely high and low and working ‘in’ from there. Again there are in-built tools in most DAWs to help but it’s often better to use a dedicated EQ plugin.
It’s quite possible that after all this treatment your vocal take will sound pretty isolated and dry. It’s a good idea to add reverb to your vocal track to make it sound more spacious and natural. The benefit of adding digital reverb is that you can control every parameter after the recording, from extremely wet to hardly any at all.
Add a small amount (in Cubase you can find Reverb controls under it’s own section Inserts > Reverb – in here you can find a few extremely useful in-built reverb plugins including the excellent REVerence), and keep experimenting by manually tweaking the presets and you should hit on something suitable for your track.
Final Tidy
Finally, we must ensure any additional, extraneous noise is cleaned up – we can zoom into our track at any spot where there is rogue noise and reduce the audio substantially so it becomes inaudible, or we can crossfade the end of the last word into the start of the next.
Although many swear by it and it can suit certain genres of music I would advise against using any kind of artificial auto-tuning software like Melodyne, sudden pitch shifts can really stand out and sound very unnatural if your track isn’t a layered-up EDM composition. It’s always better to just keep trying to attain natural harmony
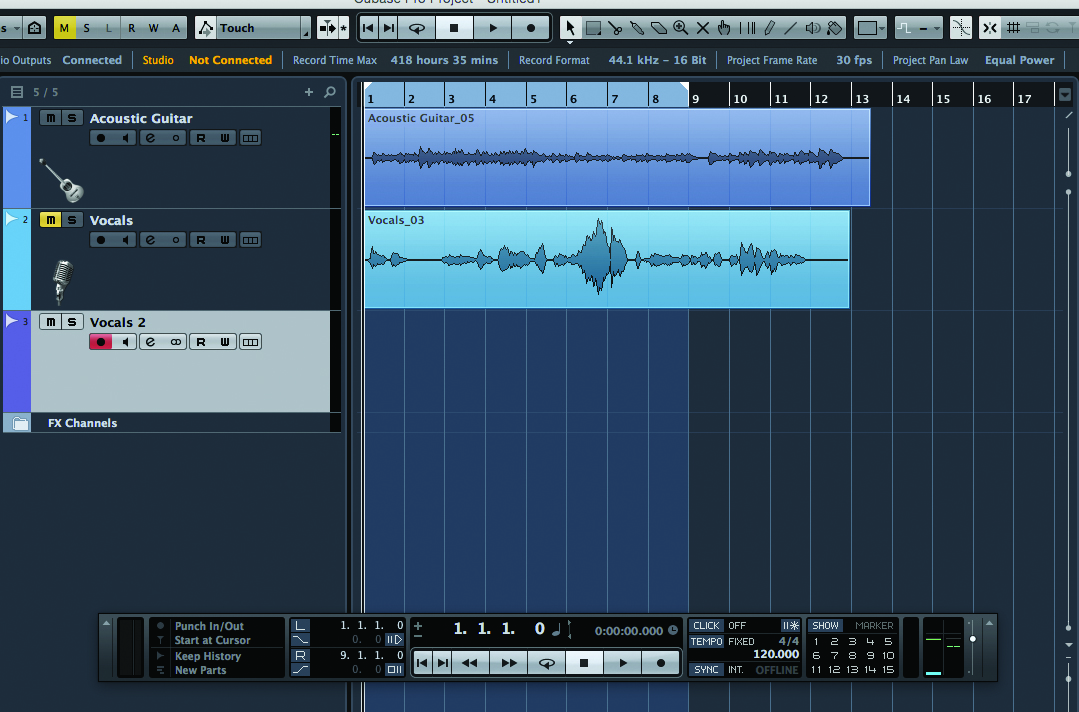
This process is simplified by building your final vocal from multiple takes as discussed last time – so you can choose the best elements from each recording to create a patchwork.
Once you’ve got your final vocal take, assess how ‘powerful��’ it sounds – you may want to add backing vocals to bolster parts of the track or the entire song. Apply the same principles to your backing vocals but reduce the volume so it doesn’t conflict with your master vocal – the master vocal should be centrally placed in the mix, while backing vocals should be situated somewhere else

Focus On Breathing Exercises
One of the key things for any vocalist to get in the habit of before they start recording is to warm up effectively, this will help you control your breathing effectively during the recording process so you don’t over strain your vocal chords.
You should spend at least ten minutes warming up your voice with humming notes in a scale and five minutes of controlled breathing. There are a variety of useful websites that list more specific vocal exercises you should try, find the ones that work for you and make sure you remember to get that throat limbered up before you start the often demanding process of recording vocal takes.