Exploring the new features of Cubase 10.5
Being just-about the longest-serving DAW out there, it’s surprising that Steinberg can still think up ways to improve the venerable Cubase. But it can and it does, so let’s see what’s new in 10.5.
It seems like only a few months ago that Cubase 10 landed, with its smartened-up interface, audio engine improvements, and so much more. But it was over a year ago, a fact that only dawned on us when Cubase 10.5 landed like an early and unexpected Christmas gift.
And where the previous release focused a lot of its attention on deep-down improvements and optimisations, the new features in 10.5 feel more user-focused, and therefore more visible and exciting. With an upgrade price starting at just £51 for Cubase 10 users, this is an update you do not want to miss – to prove it, let’s take a look at some of those new features in detail.
Recording when you aren’t recording
Once upon a time, the task of capturing and reproducing sequences of MIDI data could be quite taxing for a computer, especially if the MIDI data was particularly dense and/or complex. Modern systems have orders-of-magnitude more power, and so even the densest of MIDI data streams is little more than a dribble of data as far as your computer is concerned. The comparatively large amounts of RAM fitted into modern computers also means that the quantity of MIDI data that can be stored in memory is far far greater than in the past: for example a fully expanded Atari STE offered 4MB of RAM, where today even a modest modern machine will have 8GB, some 2000x that of the Atari!
The point is that to a modern computer, the resources needed to handle MIDI data are rather insignificant, and this leads us to one of Cubase’s coolest new features: Retrospective MIDI Recording. Put simply, when this feature is enabled, Cubase constantly monitors incoming MIDI data, storing it in a memory buffer from where it can be later retrieved if needed. Just think about all of those times when you’ve been playing around with a synth, or playing along with a track, and have played something awesome that you then struggle to recreate when you try to actually record it… we’ve all been there! Now imagine what you would have given to be able to just click a button and have that lost performance extracted from the ethereal past and pasted onto your Cubase timeline! We’ll look at how this works in the walkthrough.
Comparing curves
EQ is a staple of music production, and you’ll struggle to get good final mixes without it. But learning to use EQ effectively can be challenging, especially as there are no hard-and-fast rules about how to EQ a given type of sound – it always depends on multiple factors. Real time spectrum analysis readouts overlaid on EQ graphs can be a big help here, even for those with oodles of EQ-ing know-how, because they help you to understand the often complex frequency make-up of the sound you are working on, highlighting problem areas and showing where, in the overall frequency spectrum, a part is doing its most important work.
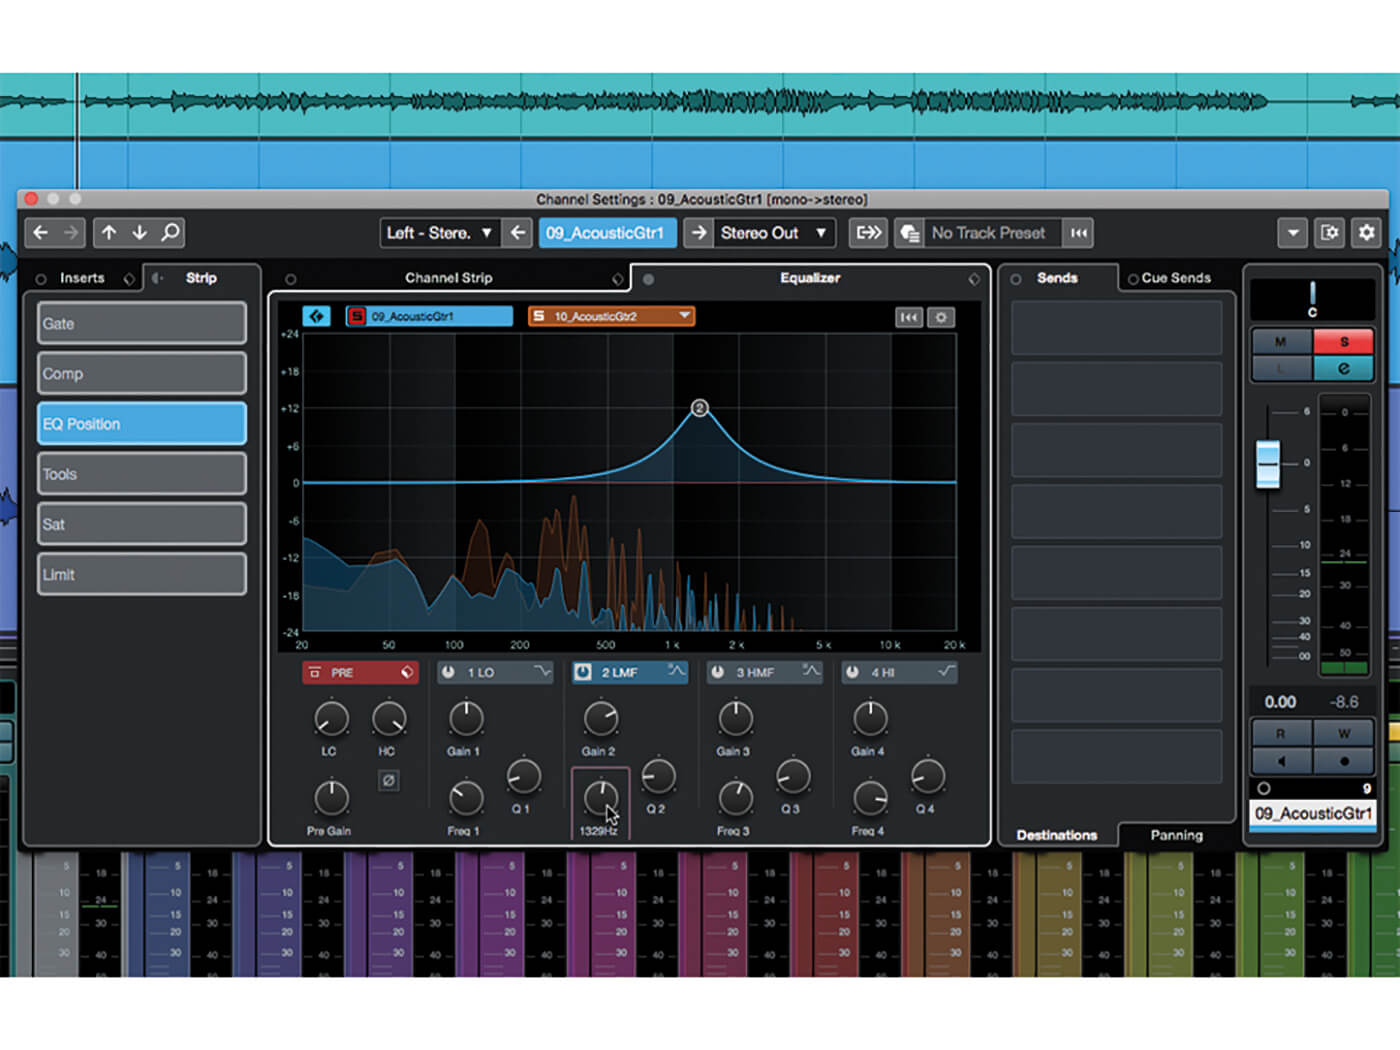
When viewed in the Channel Settings panel, which gives an entire overview of a channel, the Channel Strip EQ module has for a long time sported just such a spectrum analysis overlay (the Channel Strip is the common set of processors included on all tracks that handle audio). This has always been useful, but has become even more so in this latest Cubase release. You see, the EQ module can now display the spectrum analysis of a different track alongside that of the track you’re working on, something Steinberg refer to as Spectral Comparison EQ.
There are two scenarios in which the ability to compare spectra is of particular use. The first is when trying to match the general frequency balance of a part (or, indeed, a full mix) so that it matches that of another. The other scenario is when you wish to separate in a mix two parts that have a similar frequency make-up. A common technique in such a scenario is to boost frequencies in one part that you cut in the other; having the guidance of both spectrum analysis graphs makes this a far quicker and easier trick to pull off.
Colourful Cubase
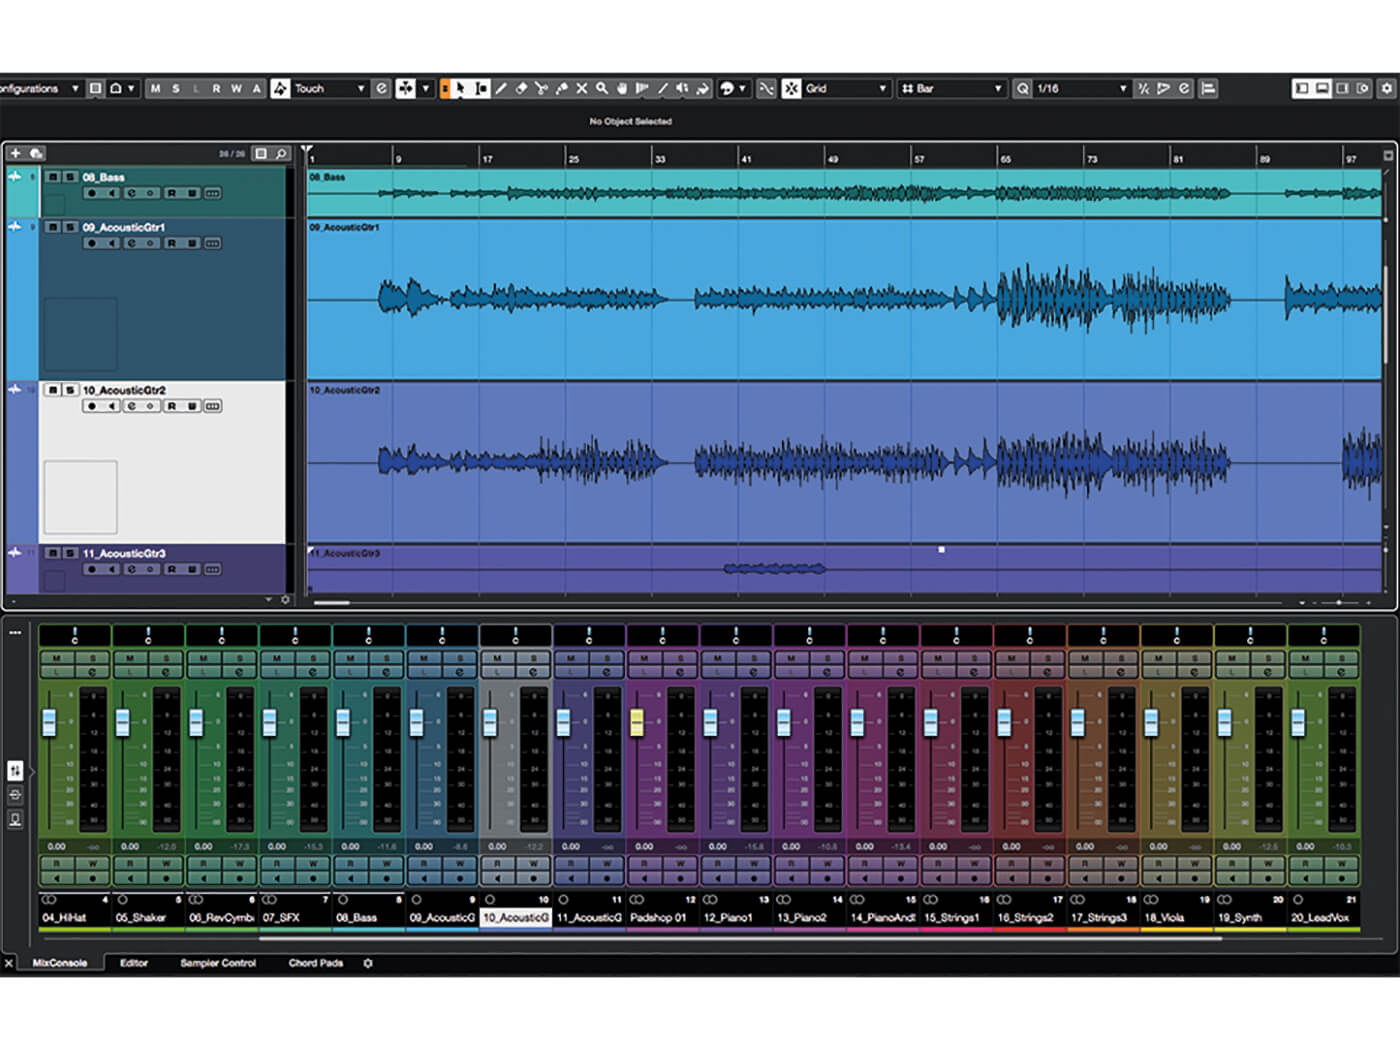
Alongside these two very cool new features (not to mention many others that we’ll be coming back to in future workshops), there are some little tweaks that make a huge difference. The best of these is that track heads and channel strips can now fully take on the colour assigned them, which is much more readable than the small flashes of colour used previously. You have to dig into the program preferences to enable this new feature, and may not even realise it’s there if you hadn’t heard about it already, so we’ll start this month’s walkthrough by making Cubase much more colourful…
Exploring the new features of Cubase 10.5: Step-by-step

1. Launch Cubase 10.5 and, when it’s ready, open the program preferences panel. To do this on a Mac, open the ‘Cubase’ menu and select ‘Preferences’; on Windows, the option is located in the ‘Edit’ menu.
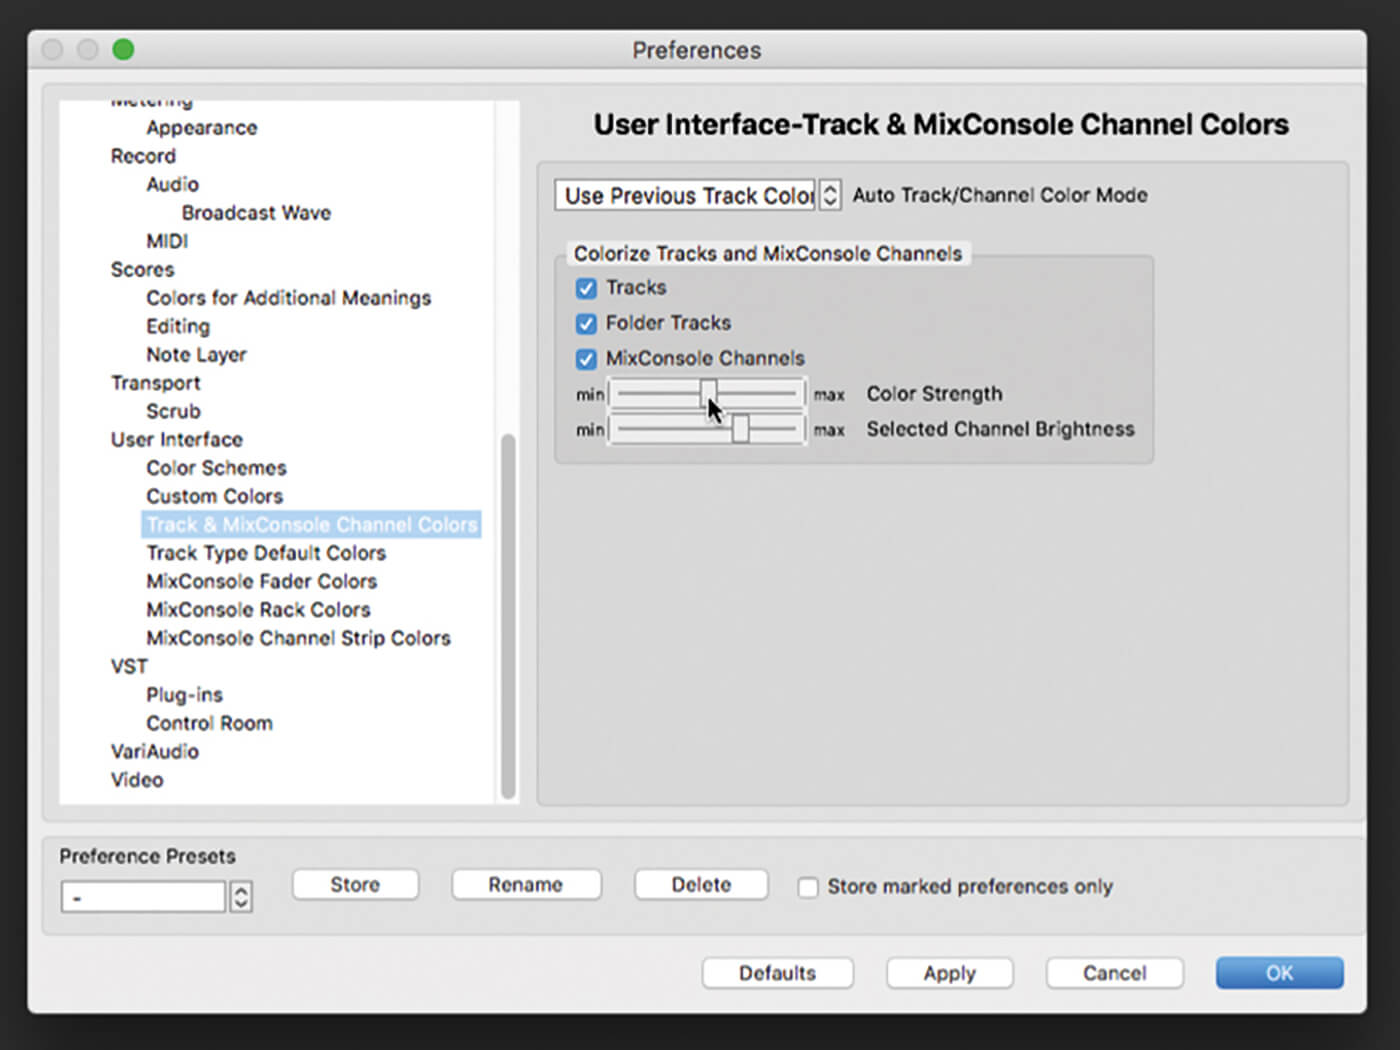
2. Locate and select the ‘Track & MixConsole Channel Colors’ preference item, which is listed in the ‘User Interface’ section. In the main area of the panel, activate all three tick boxes, and use the two sliders to control how the colours will be applied.
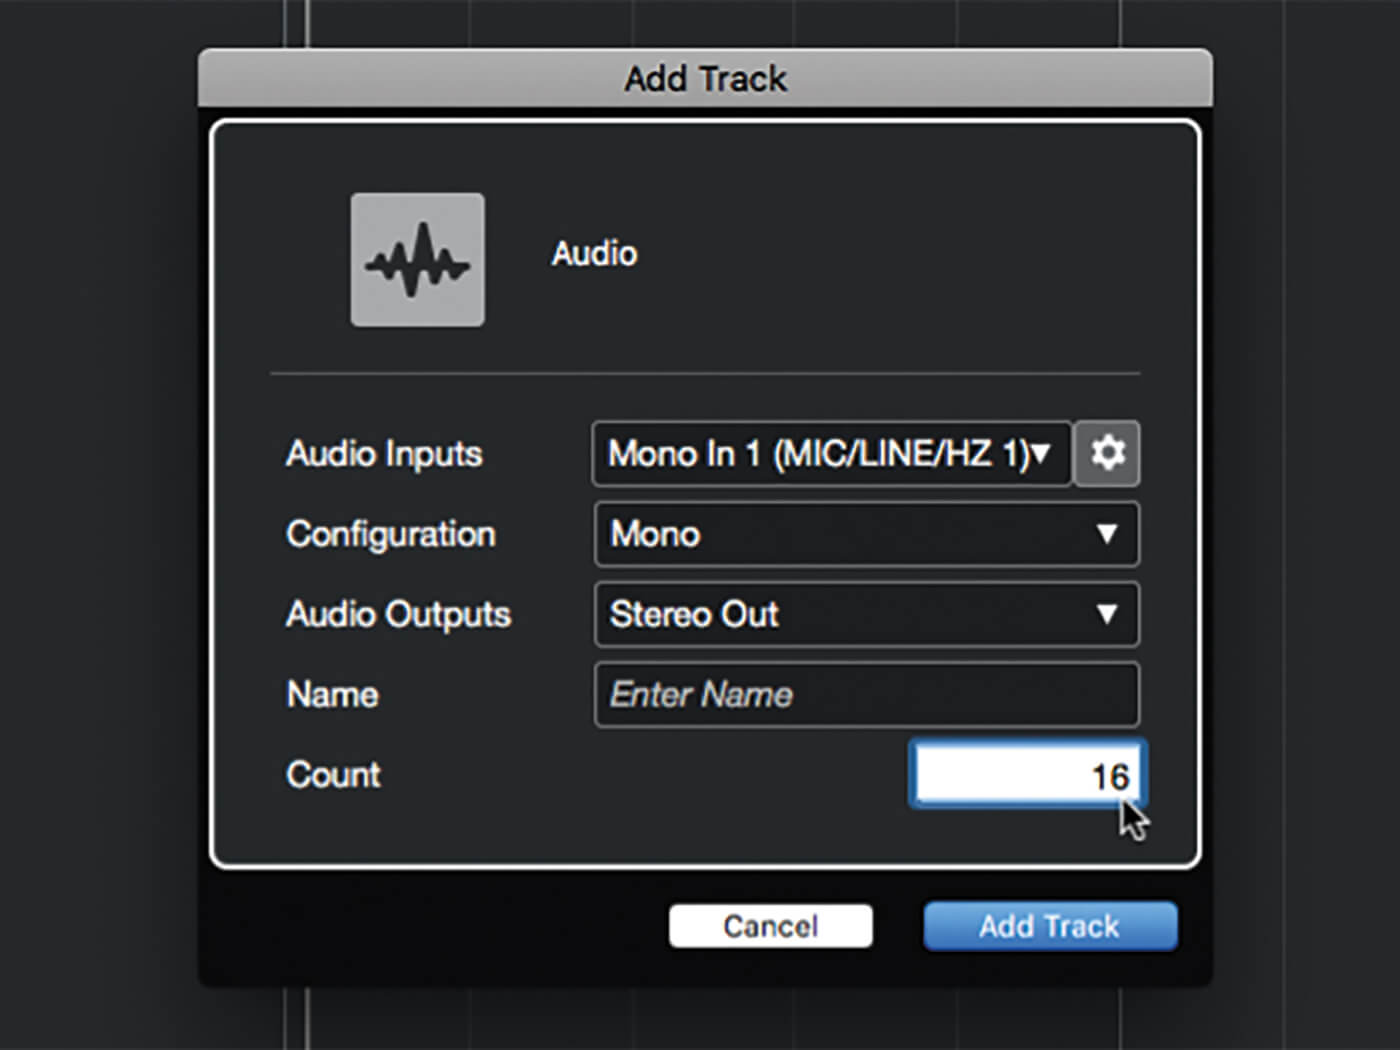
3. Close the preferences panel by clicking its ‘OK’ button and then create a new project. Right-click in the tracklist area and select ‘Add Audio Track’, enter ’16’ into the ‘Count’ field, and click OK.
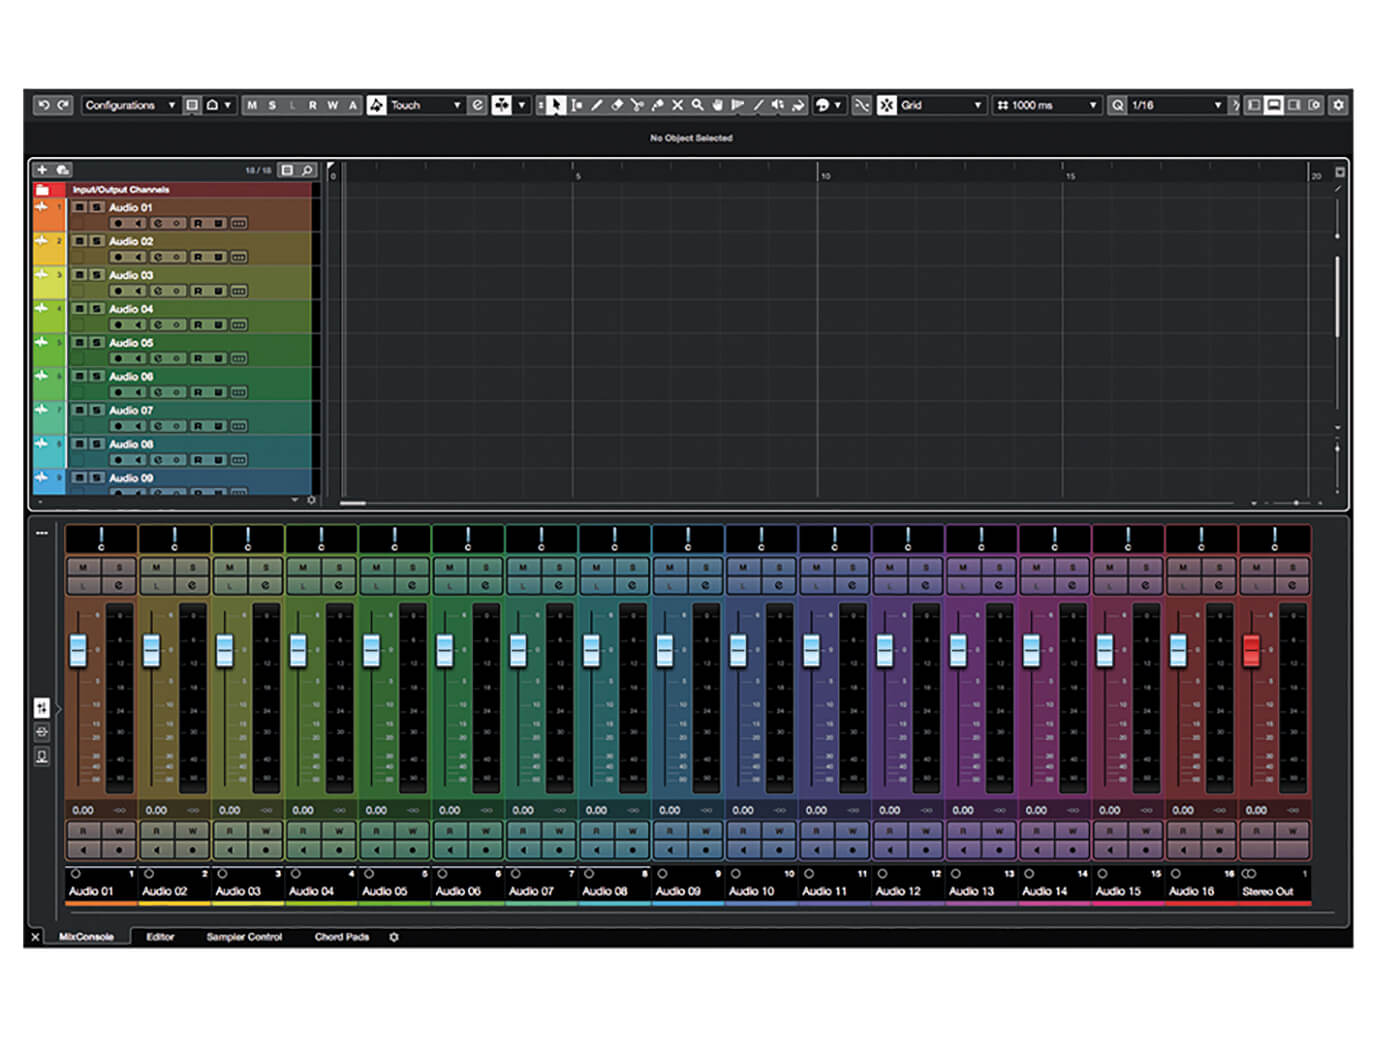
4. You should now see that track heads in the Project window, and channels in the Mix Console, are shaded with the colour that’s assigned to the track. Reopen the preference panel and tweak the settings for stronger or weaker colouration.
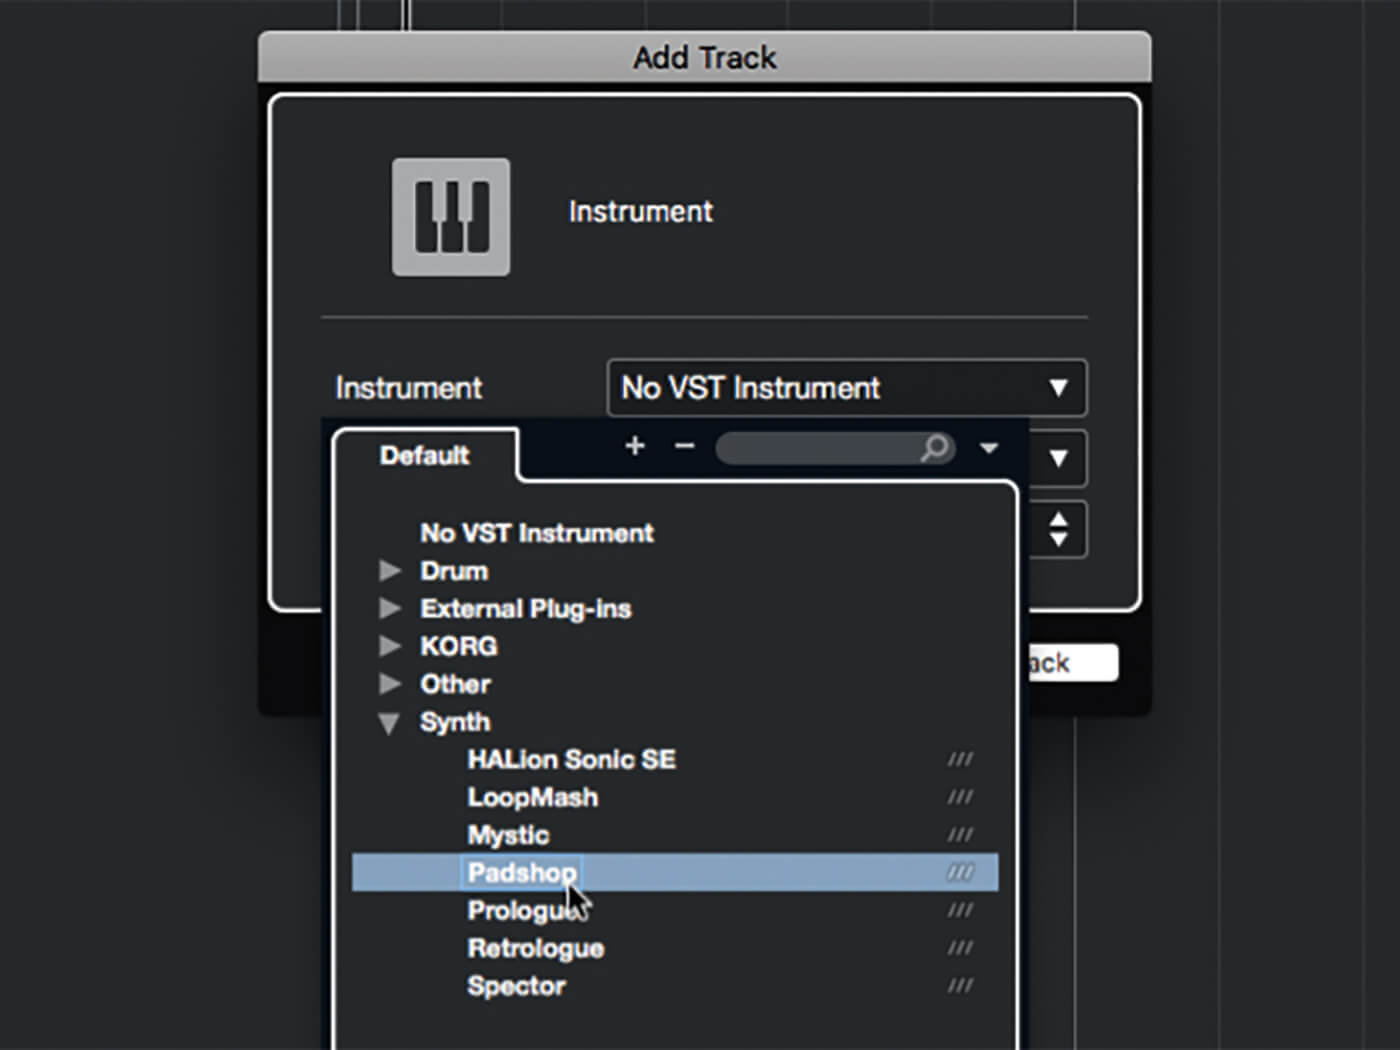
5. Remove all the audio tracks you created in step 3, then create an instrument track using the new Padshop 2 synth. Go through a few presets, playing them from your keyboard and allowing the sounds to inspire your playing.
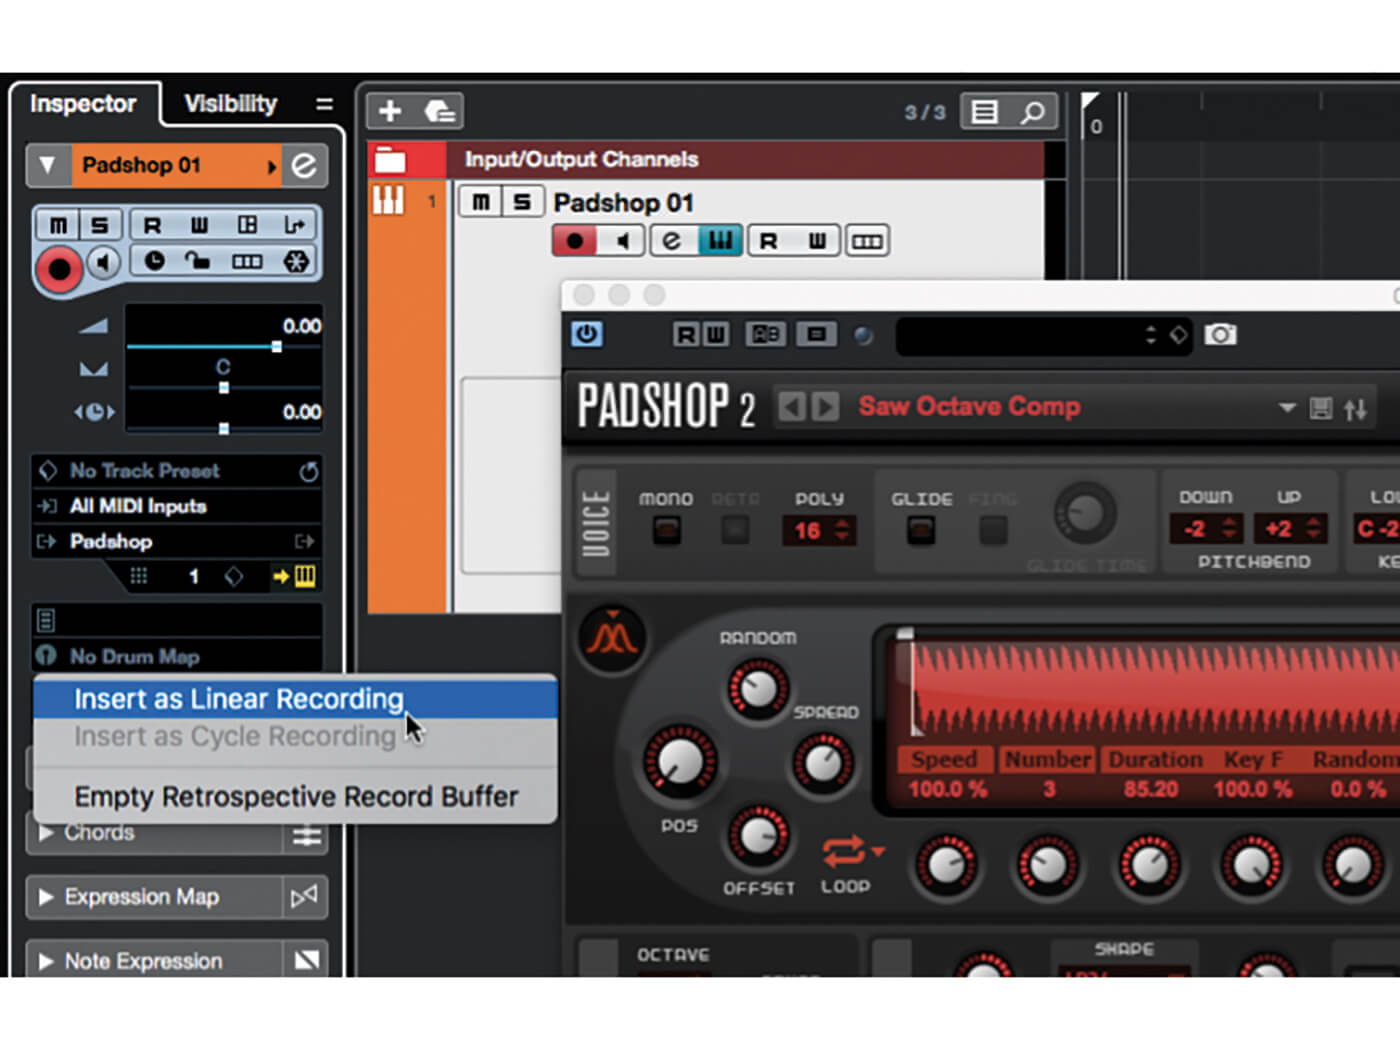
6. At some point you’re going to play something you like… but oh no, you weren’t recording! Open the instrument track’s inspector and in its top section locate the ‘Retrospective Recording’ drop-down. Click this and select ‘Insert as Linear Recording’.
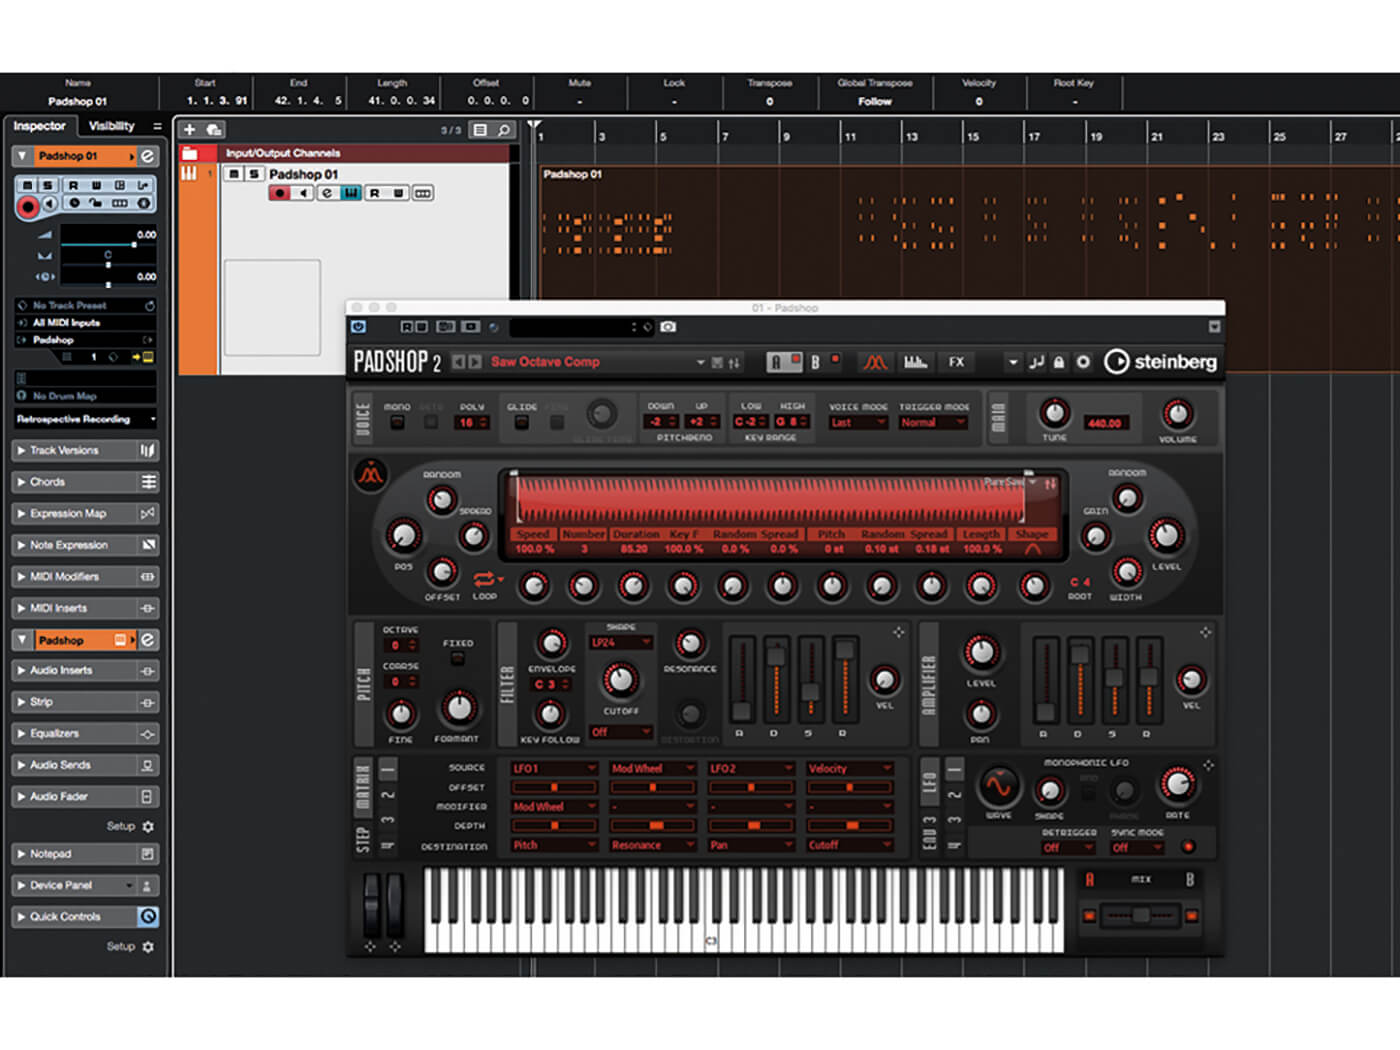
7. Ta-da! Everything you were playing was buffered, and has now appeared on the track. Where there were pauses in your playing there will be commensurate pauses in the MIDI data. You can now identify and trim-out the section(s) you want to keep.
![]()
NO ACCIDENTAL LOOPS By default, clicking in the upper half of the time ruler between the left and right locators enables cycle mode, but it’s all-too-easy to do this accidentally when zooming or navigating using the ruler. Disable this in Cubase 10.5 from the Transport section of the preferences panel.
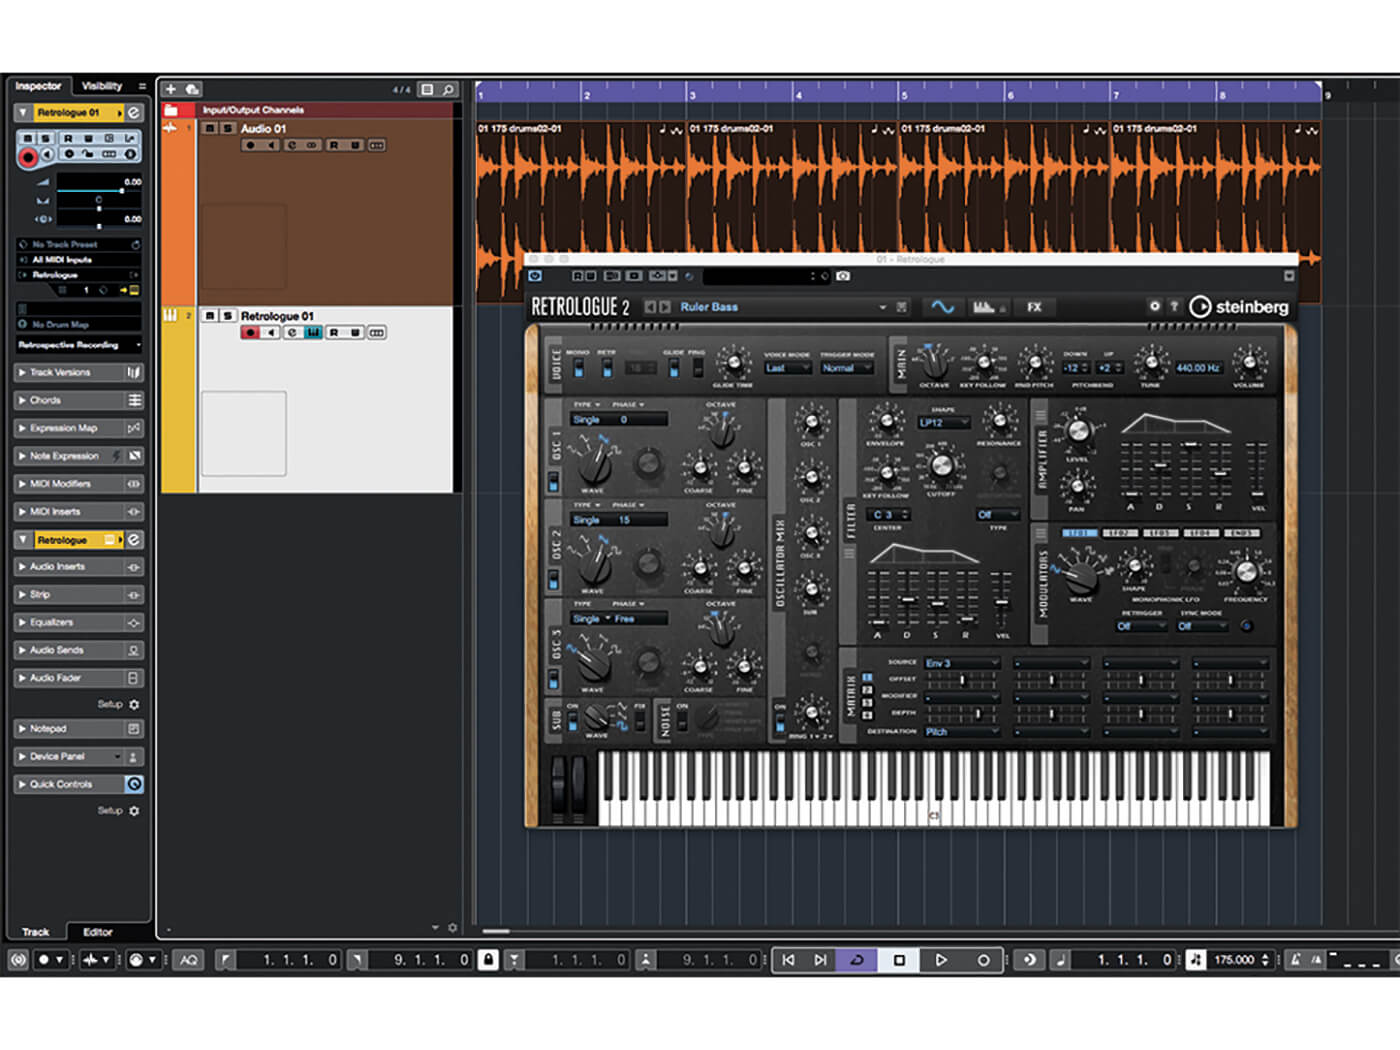
8. Create a new project and import a drum loop onto a new audio track, duplicating it a few times. Add an instrument track. Select all loop parts in the timeline, press P to set the locators to the loop’s bounds, and enable cycle mode.
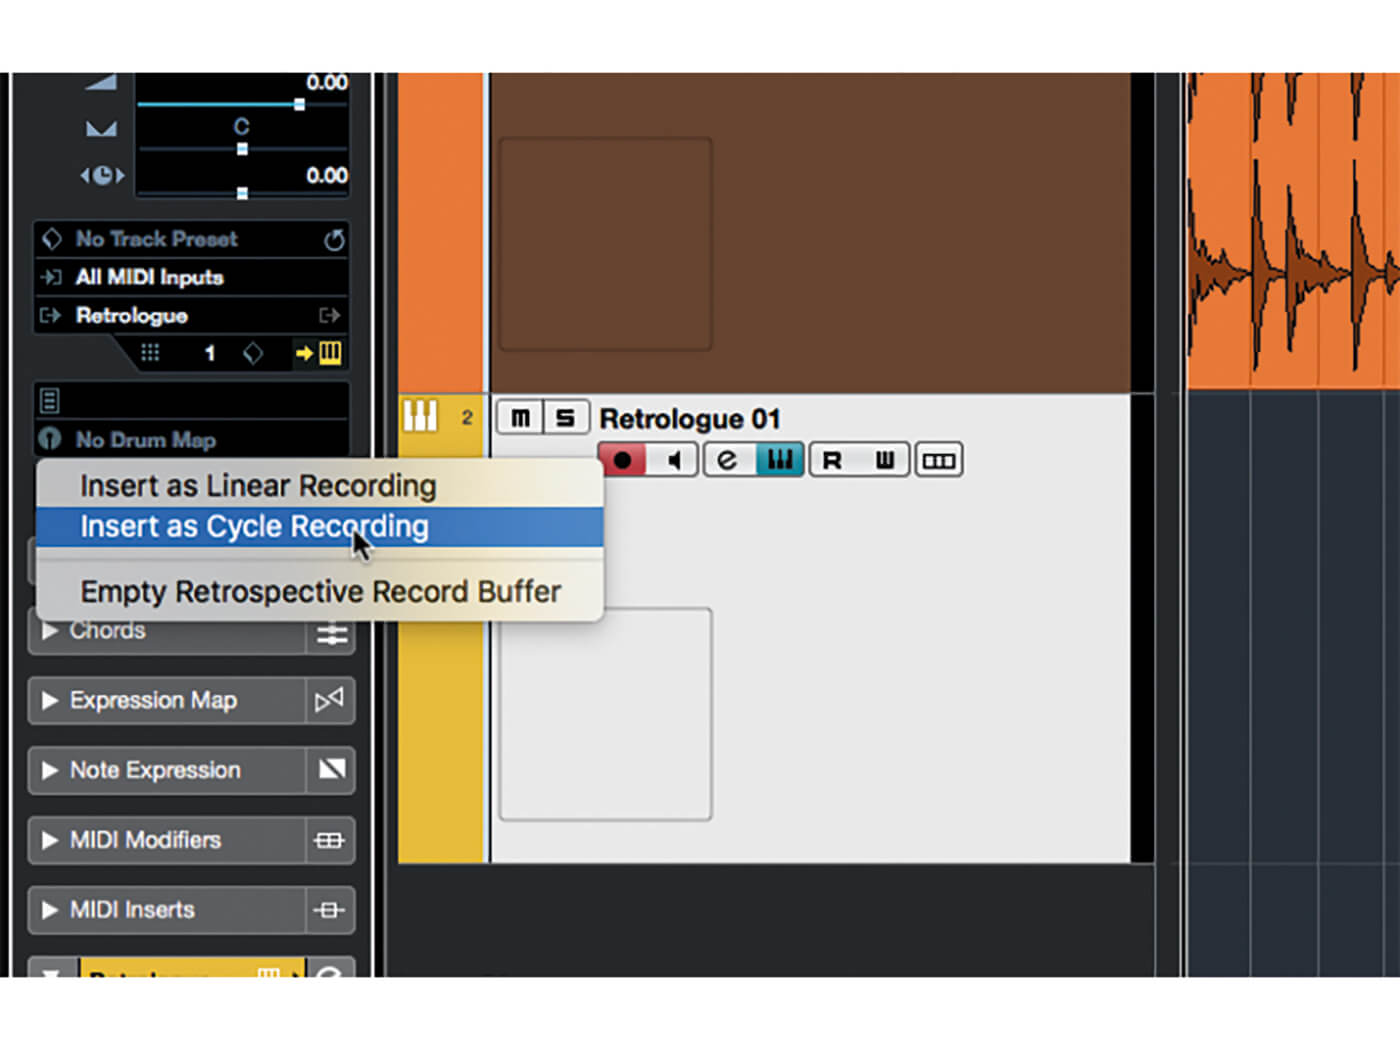
9. Start playback and jam along for at least two full cycles of the loop track. When you’ve had enough jamming, or played something good, stop playback. Click the instrument track’s Retrospective Recording drop-down and select ‘Insert As Cycle Recording’.

10. Click the instrument track’s ‘Show Lanes’ button to see each pass’s MIDI part. Use the Mute tool to mute and unmute the parts in each lane. Choose and edit the part(s) that you like and delete the rest. Close the Lanes view when done.
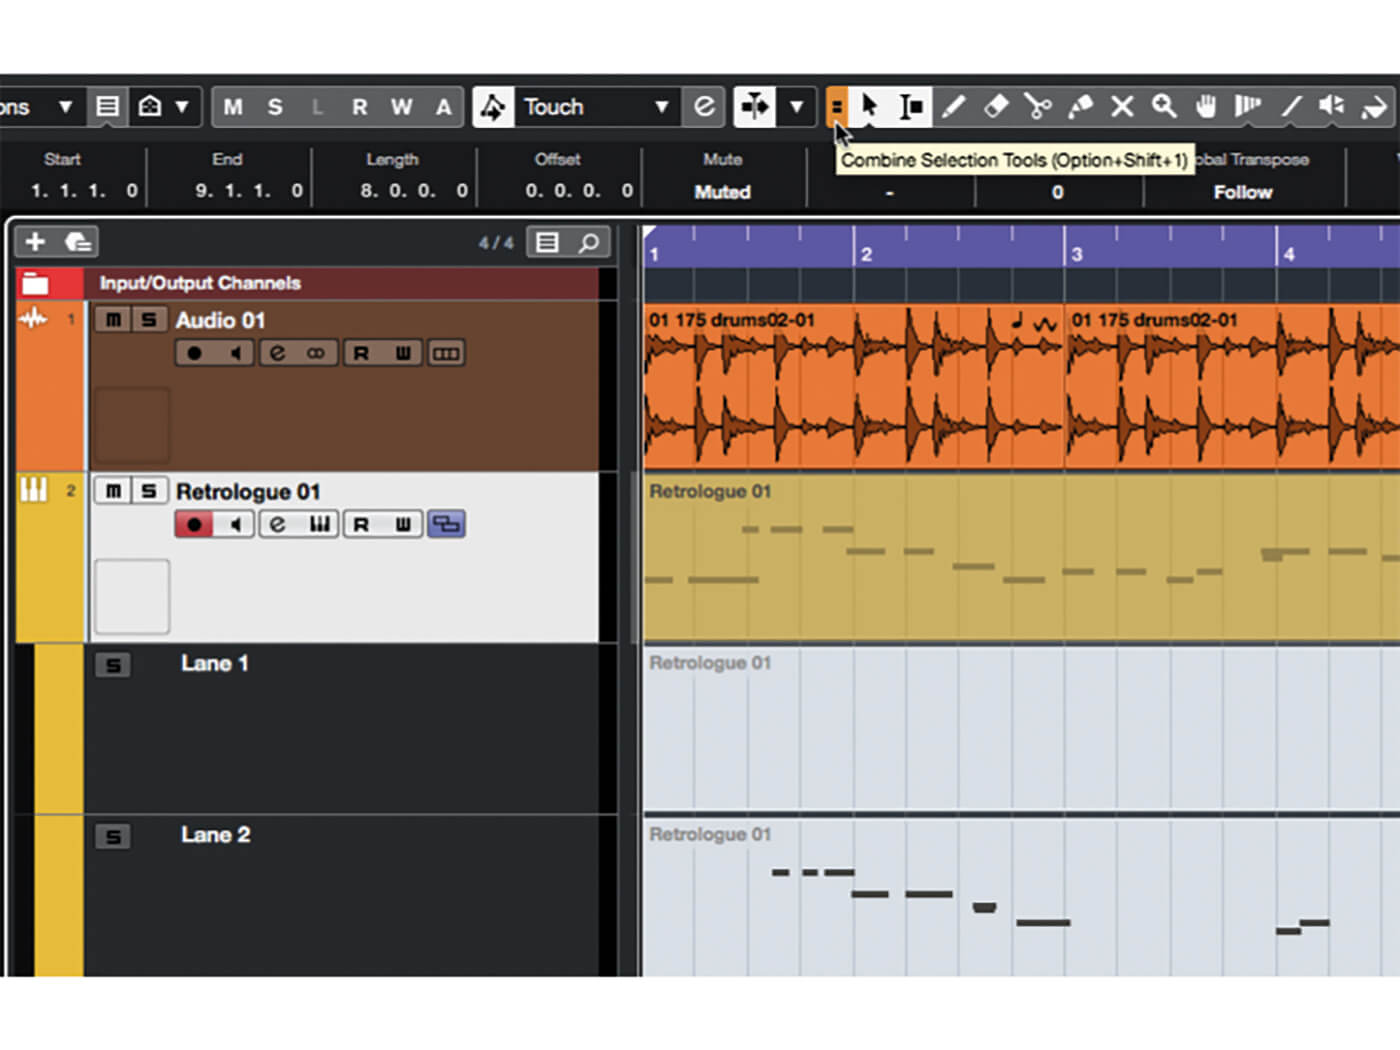
11. Incidentally, you may find the new Combined Selection Tool useful when editing the MIDI parts. Enable it by clicking the symbol to the left of the Object Select cursor button in the project window’s toolbar. Experiment to see how the cursor now behaves…
12. Let’s look at the new Spectral Comparison EQ. Load an existing multitrack project into Cubase. Have a listen and identify two tracks that contain sounds that occupy a similar range in the overall spectrum, such as a couple of similar-sounding guitar or synth parts.
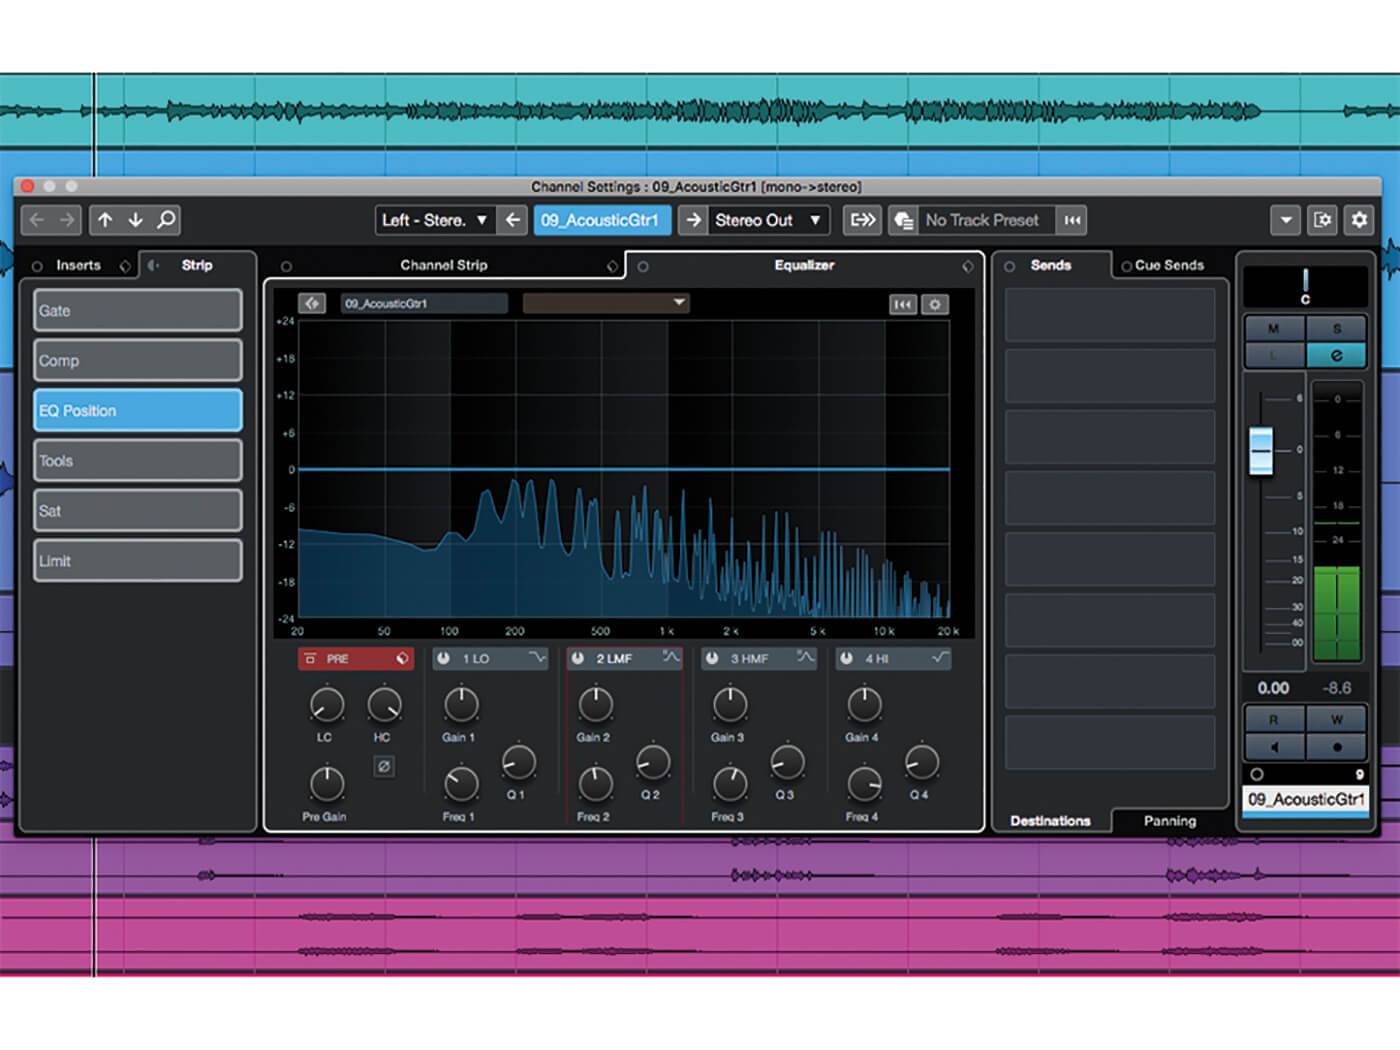
13. Open the Channel Settings panel for the first identified track by clicking the ‘e’ symbol in its track inspector. Select the panel’s ‘Equalizer’ tab and start playback, noting the spectrum analysis shown in the EQ graph window.
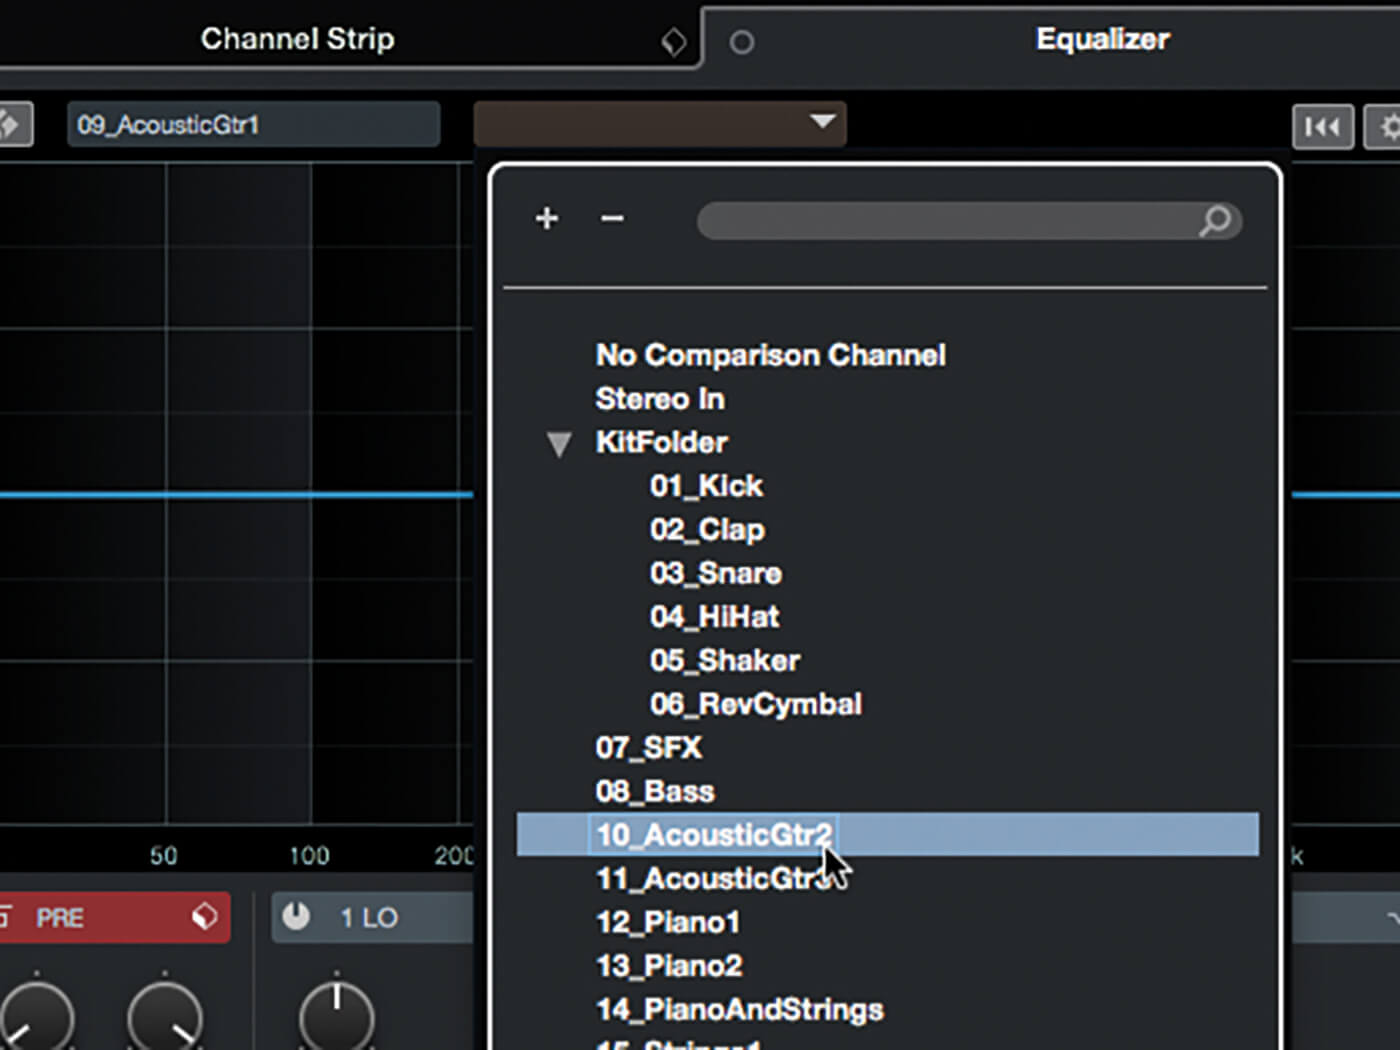
14. Select a comparison track by clicking on the drop-down that sits just above the EQ graph window and select from the list the second track that you identified in step 12. Start playback, noticing how you can now see two spectrum analysis overlays.
![]()
NEW NORMAL(ISATION) Another nice little addition in Cubase 10.5 is that the Normalisation processor, which can be used offline or as a Direct Offline processor, can now normalise to a target LUFS (Loudness Unit Full Scale) value. This is especially useful if producing for film or broadcast.
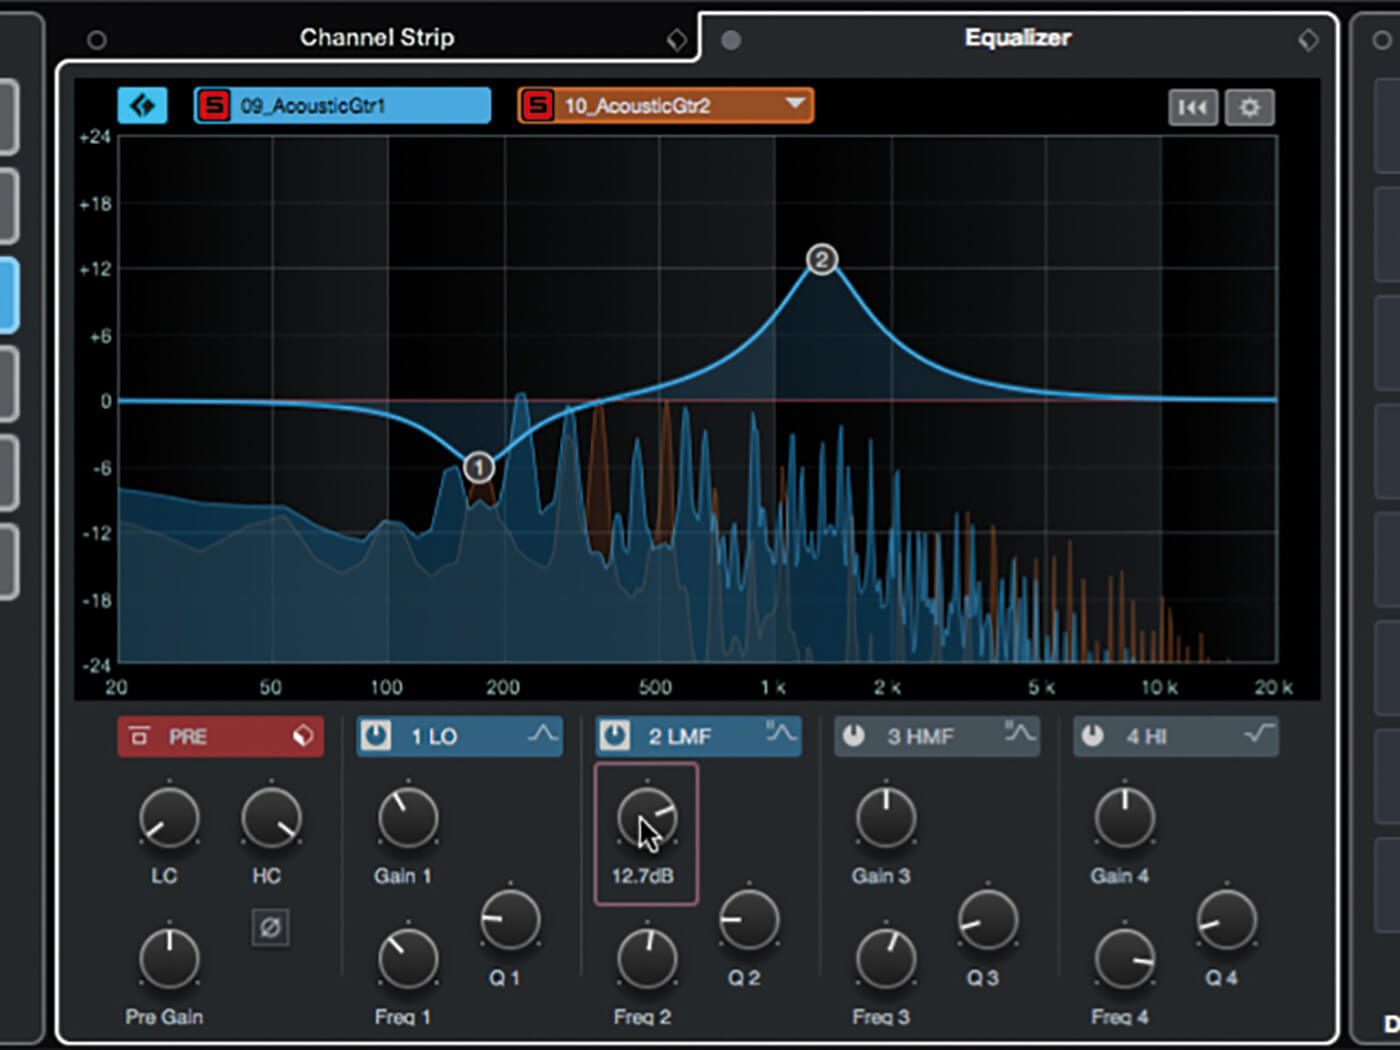
15. Solo the first track and listen to it. Identify any ‘sweet’ spots in its frequency curve by dialling in a big boost on a mid band and then sweeping the band’s frequency. Reduce the boost to a comfortable level once you’ve identified a nice frequency.
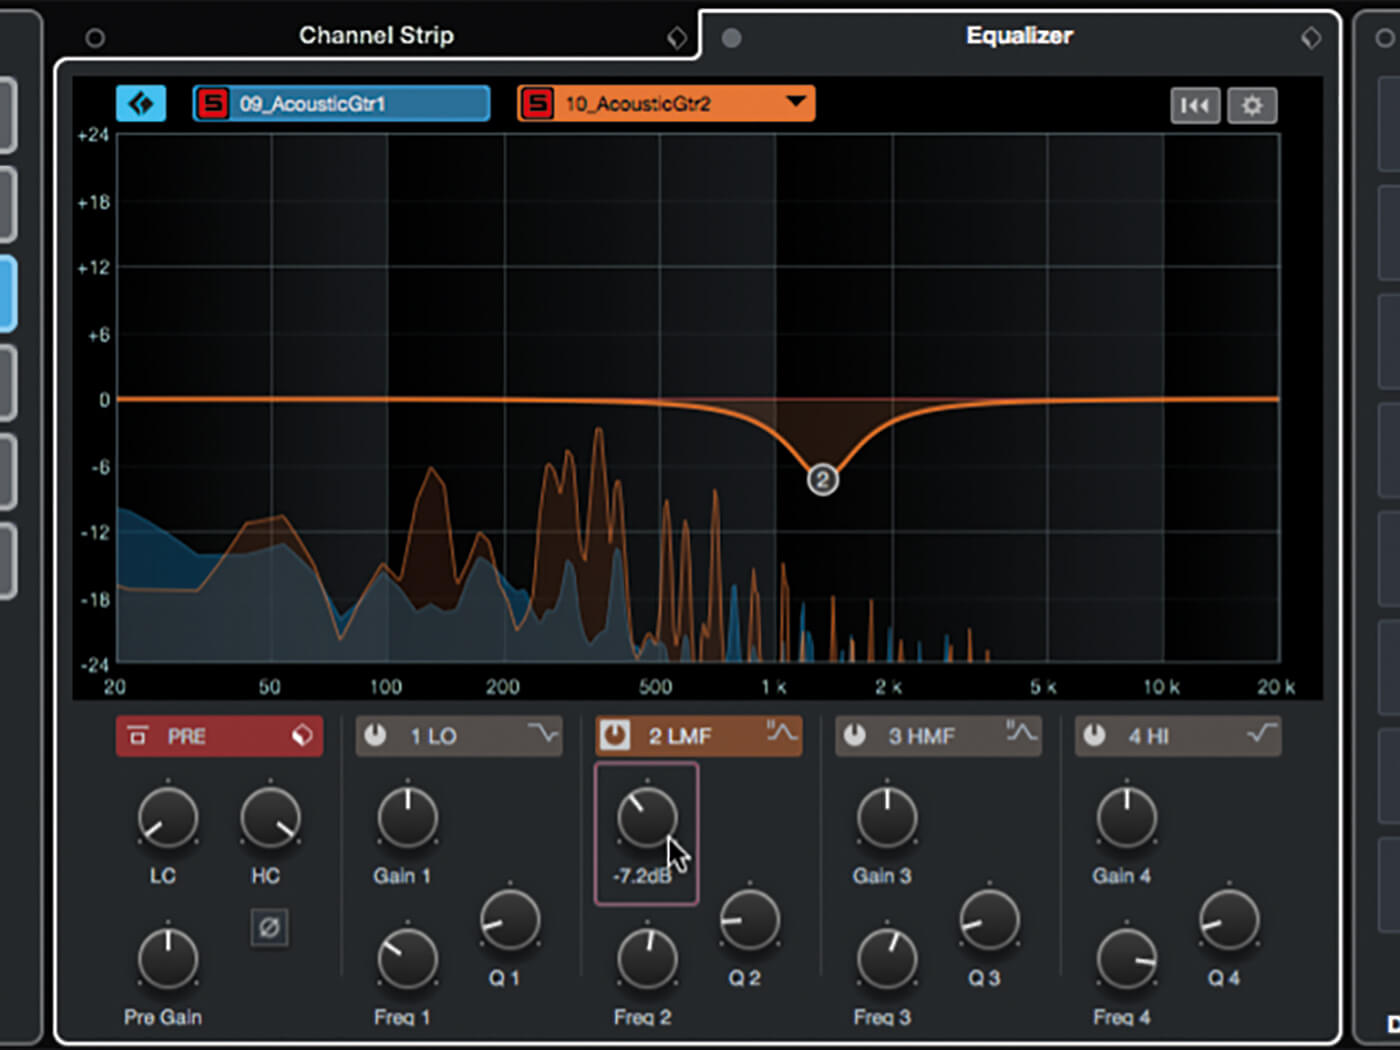
16. Click the drop-down that shows the name of the comparison track – that track is now loaded into the Channel Settings Panel, with the first track now acting as the comparison track. Create an EQ cut at the same frequency as you boosted in step 15.
17. Use the same technique as before to find and boost a sweet-spot in the second track, then switch back to the first and create a cut to mirror it. Keep flipping back-and-forth, tweaking the EQ until the two parts are nicely separated.
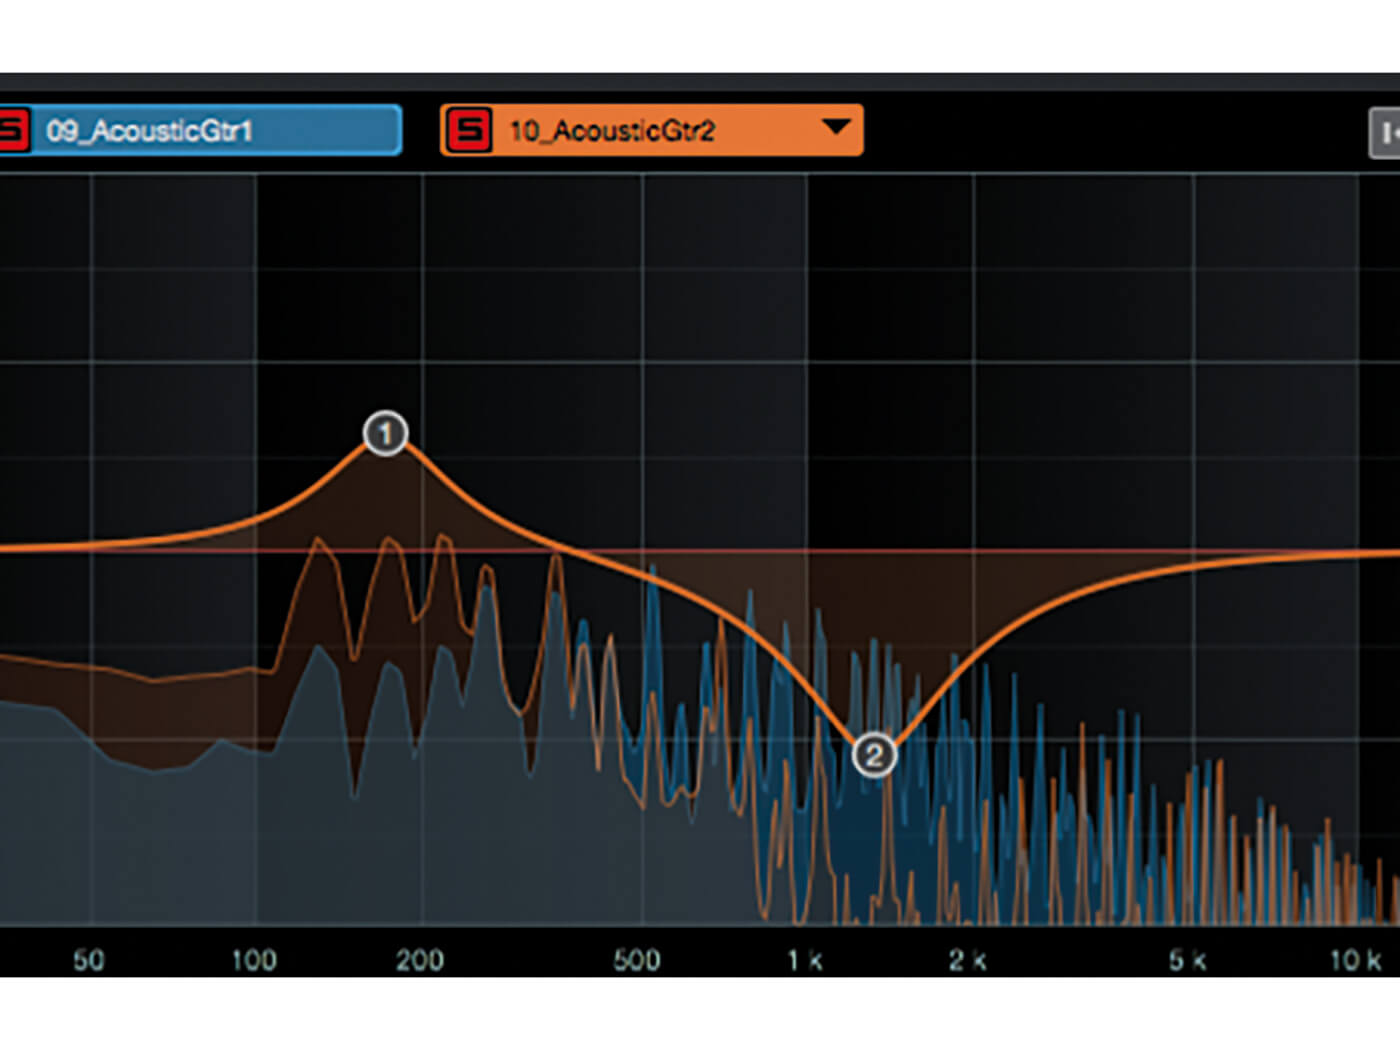
18. Notice how the new Spectral Comparison EQ helps you to both identify the sweet (and nasty) spots in each track, but also how you can see the spectral peep-holes you’ve created for the two competing parts.
For more Cubase tutorials and workshops, click here.