Synthesising drums in Cubase
Sick of using the same tired old drum sounds in your recordings? Worry not. Cubase has all the tools required to craft your own original kits – all you need to provide is your imagination.
We all love the big, fat thump of an 808 kick as much as we love the tight crispness of the 909’s snare. If you could audit every computer and device in the world, you would likely find petabytes of storage given over to these tiniest of samples. But as iconic as these sounds are, if you want your beats to sound original, you should forswear the often clichéd tones of classic drum machines and begin building your own drum and percussion sounds – and, if you’re a Cubase user, you’re already equipped to do so.
The idea here is not to create realistic emulations of acoustic drum kits, nor faithful recreations of classic drum machines – there are enough of such samples around; don’t waste your time reinventing those wheels. Instead, what you should want to do is craft original, distinctive sounds. To do this, you need to think about the essences of the drums and cymbals contained within a typical drum kit, as well as the role that each drum plays within the kit and in any music made with it. You can then aim to recreate that essence in different ways.
You may still think of the sound you’re creating as, say, a snare. But that doesn’t necessarily mean it has to sound like any snare that’s ever been heard before.
Retromania
One of the best tools for making drum sounds is the good ol’ subtractive synth. Some synthesisers are better suited to the task than others. Retrologue, which comes bundled with Cubase, can certainly make a go of it. Synths such as Retrologue don’t let you assign different sounds to each key in order to create an entire kit from a single instance of the instrument. Running an instance for each drum sound is possible but this will devour system resources and be terribly awkward to work with. A better solution, then, is to record each drum sound as standalone audio clips, which can then be loaded into a sampler for further synthesis and playback. Again, Cubase has just the right tool for such a task, this time in the form of Groove Agent. Transferring drum sounds to a sampler in this way also presents you with an opportunity to add extra character via a few plug-in effects and processors.
Groove Agent itself provides you with other ways of creating original drum sounds too. It allows you to stack and layer multiple sounds on a single pad, and while its various synthesis stages can be relatively basic, you can seed those stages with any source samples that you like. Those source samples needn’t be drum samples either, because it’s easy to sculpt a drum-like envelope onto any sound – in other words: if you can record it, Groove Agent can make a drum sound from it.
Many of the other synths that come bundled with Cubase can create percussive sounds of some sort – although you may be wasting your time trying to get drum sounds out of Padshop. Many of the sounds found in HALion Sonic, for example, are sample-based and therefore not as appealing to use as the basis for new sounds. But routing these through processors and blending them with other sounds can lend them character.
Bring the noise
There are many tricks and techniques that can aid in synthesising drum sounds with a subtractive synth such as Retrologue. First and foremost, unless you’re creating a crash or similar sound, the amp envelope will need an instant attack and rapid decay back to silence. However, you can enjoy a little more latitude when using pitch and filter envelopes – the falling pitch of a classic synth tom sound is a perfect example of this.
Next, think about how the sound of many drums is inharmonic in nature – there may be a pitched element but most have a strong noise component too. Retrologue’s noise generator can help here, especially with snares and cymbals, and the different noise types on offer allow for greater timbral flexibility. Noise isn’t the only way to create inharmonicity either. Widely detuned oscillators, rapid pitch LFOs, and ring modulation can also do the trick.
Once you’ve mastered the basics, start introducing more expression into the drum sounds you synthesise. For example, softly played drums should likely have a different sound to those struck with greater force. This can be simulated by mapping key velocity to both amplitude and filter cutoff. Mapping velocity to the strength of filter and/or pitch envelopes so that higher velocities result in more prominent envelopes is also effective. Ready? Let’s build a drum kit.
Synthesising drums in Cubase: step-by-step
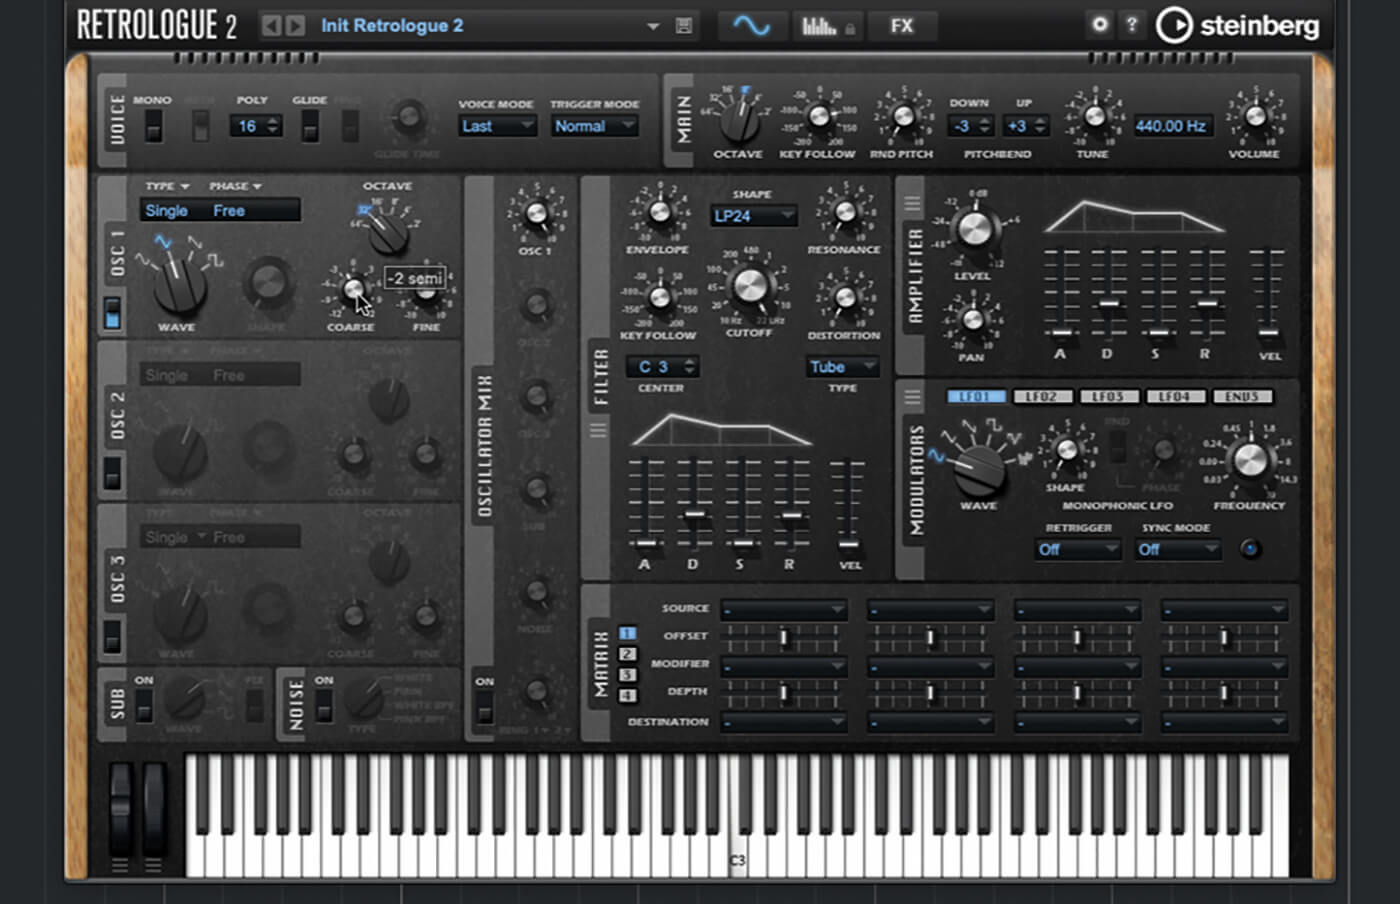
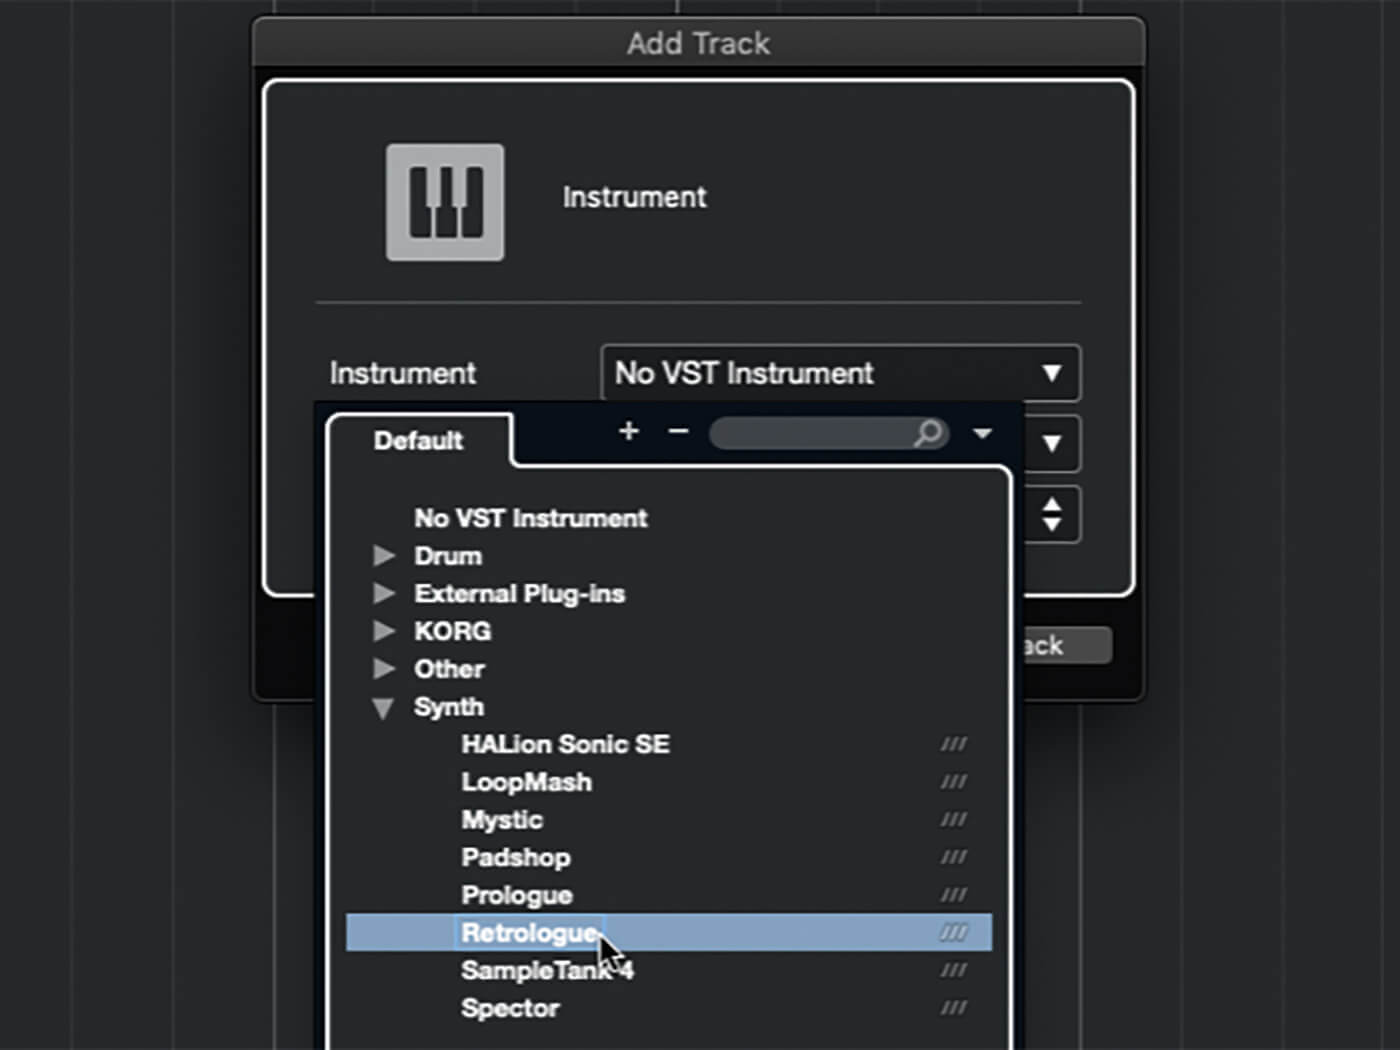 1. You’ll end up with a fairly messy timeline and track list when creating drum sounds, so create a new project. Let’s begin by using Retrologue to create a kick drum sound. Add an instance of Retrologue to your project.
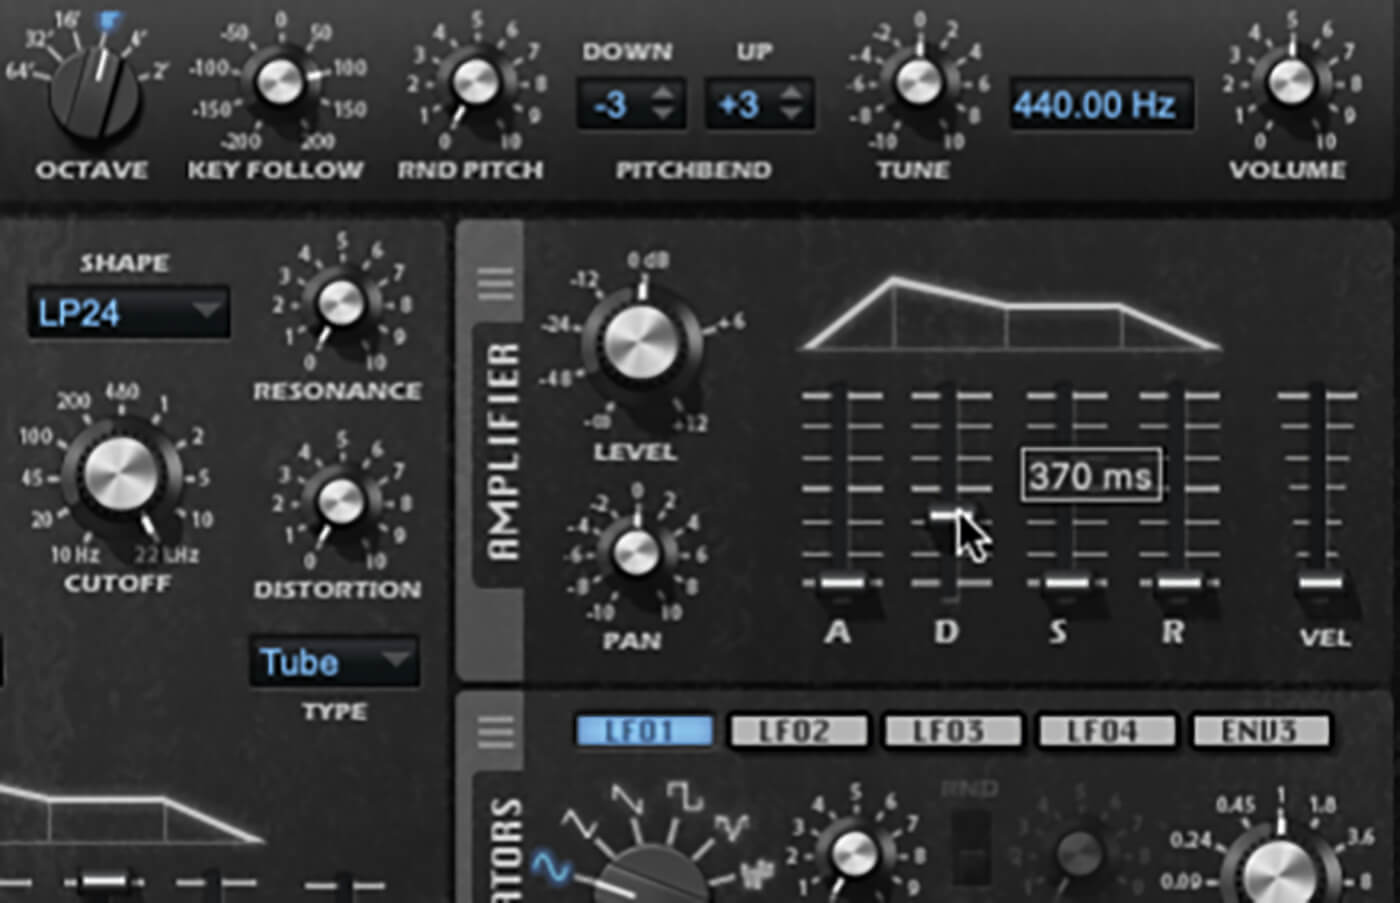
2. The amplitude envelope for a kick drum is simple: instant attack, fast decay back to silence. Set up such an envelope in Retrologue’s amplifier section. A decay of 300-400ms should be about right.
3. Set the release time to about the same value as the decay time to ensure the entire sound will play when triggered, no matter how long or short the trigger note. When you’re happy, dial in a matching filter envelope.
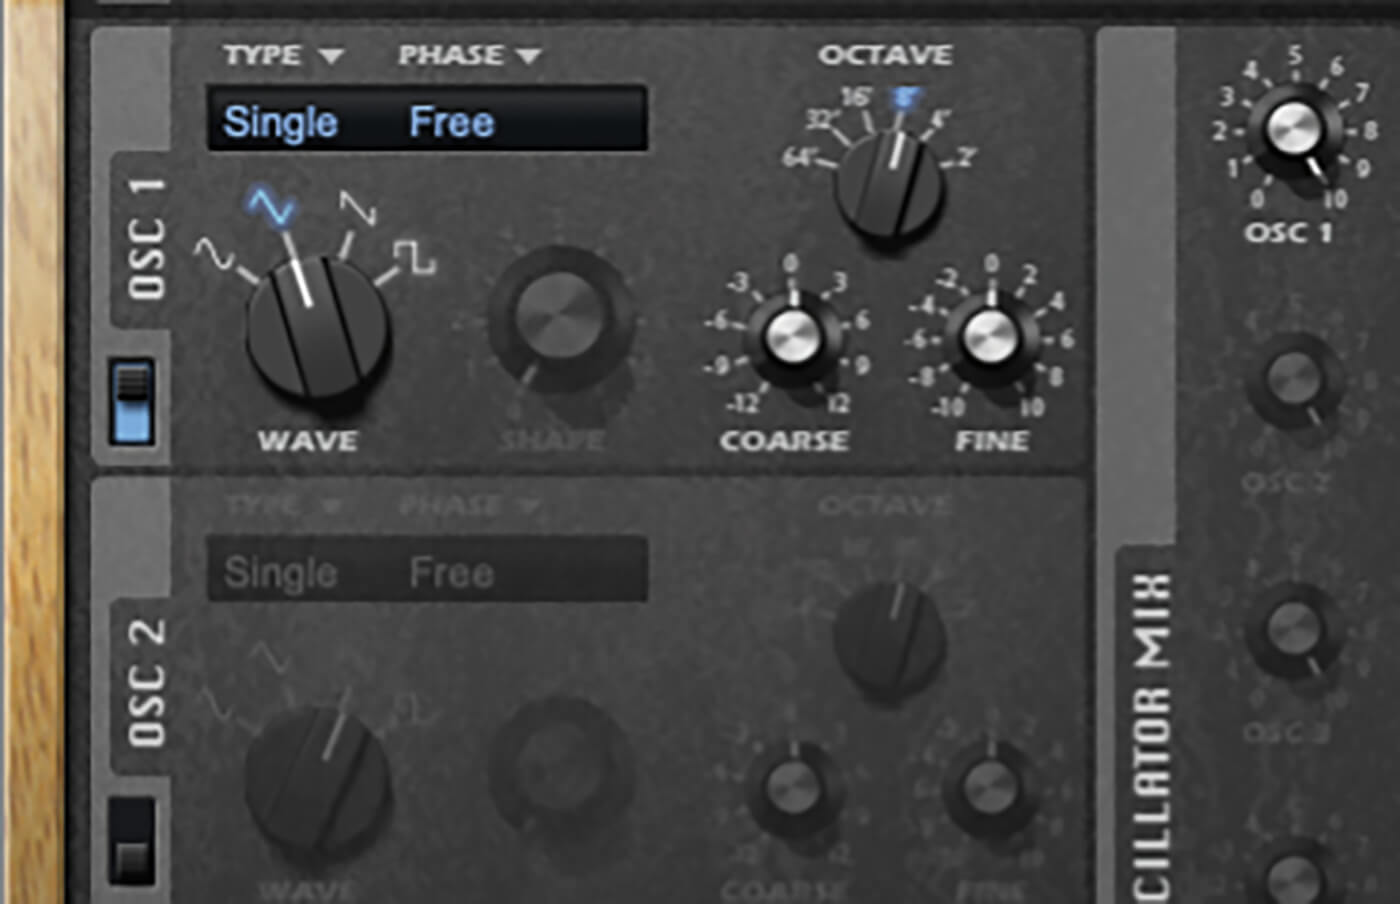
4. Kick drums typically feature strong low-frequency components but not many harmonics. A sine or triangle wave is therefore a good solution. Select either as the waveform for oscillator 1 (we’re using triangle here).
5. Set up your drums so that you get the desired pitch and timbre when playing key C3. Repeatedly play C3 while adjusting the oscillator’s octave, coarse and fine-tuning until you get the pitch and depth you want.
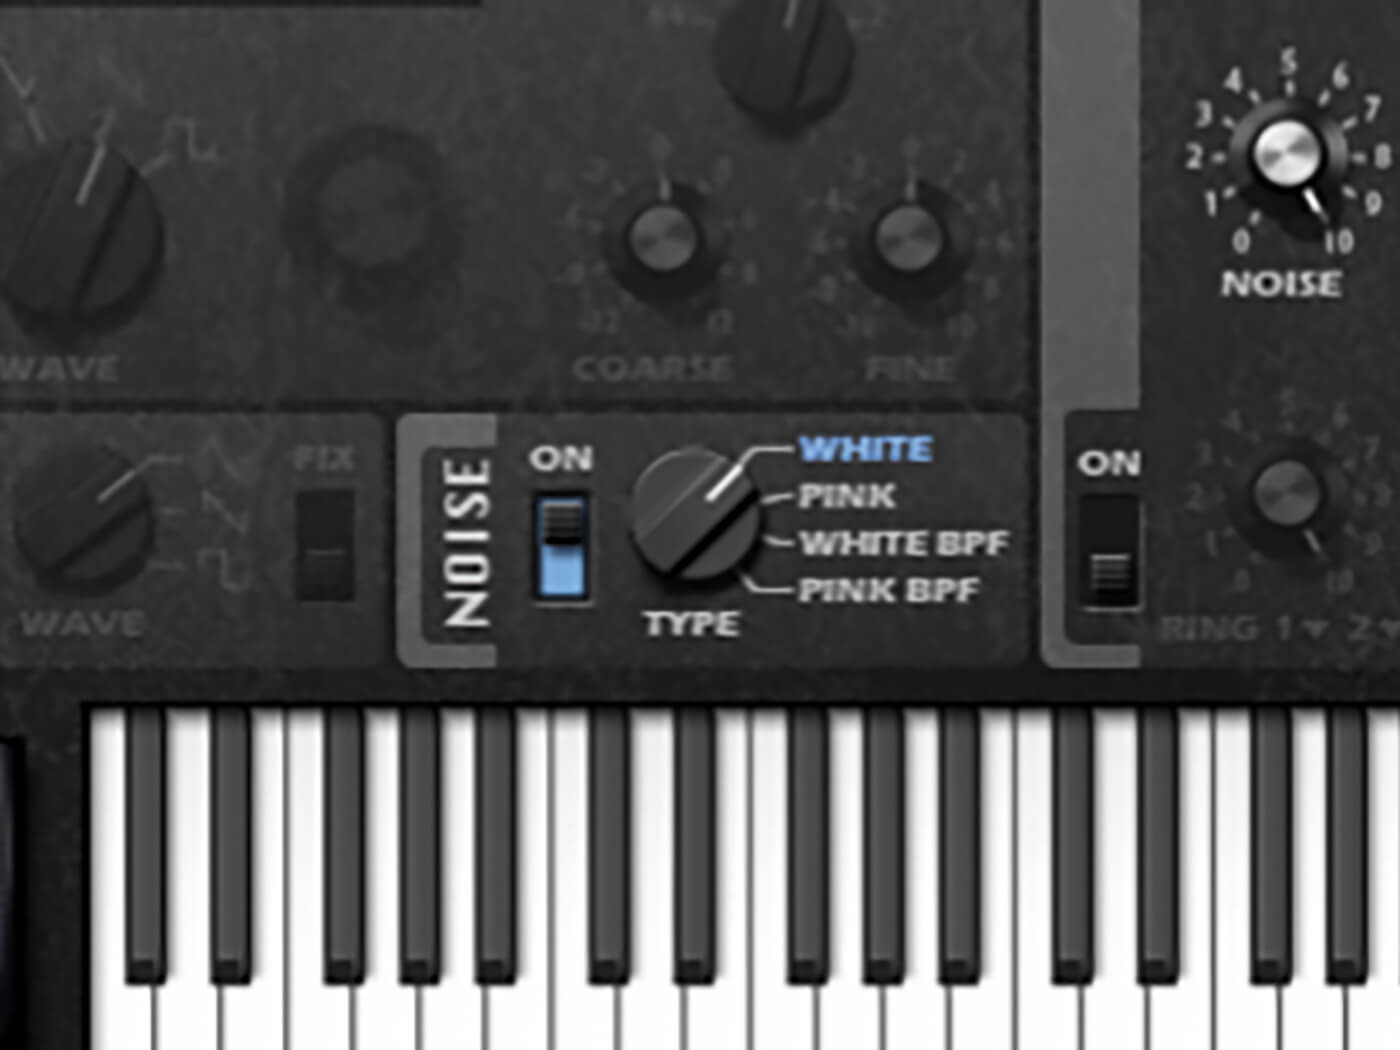
6. To add some noise to this kick, turn on Retrologue’s noise generator. Though the darker sound of pink noise may seem a good match for a kick, it can get lost once you set up the filter. Stick with white noise instead.
![]()
STORE YOUR PATCHES Although you will probably bounce all your synthesised drum sounds into audio samples, it’s important to store the synth patches and/or effects chains that you create along the way. That way, you can easily make tweaks and changes to your sounds in future.
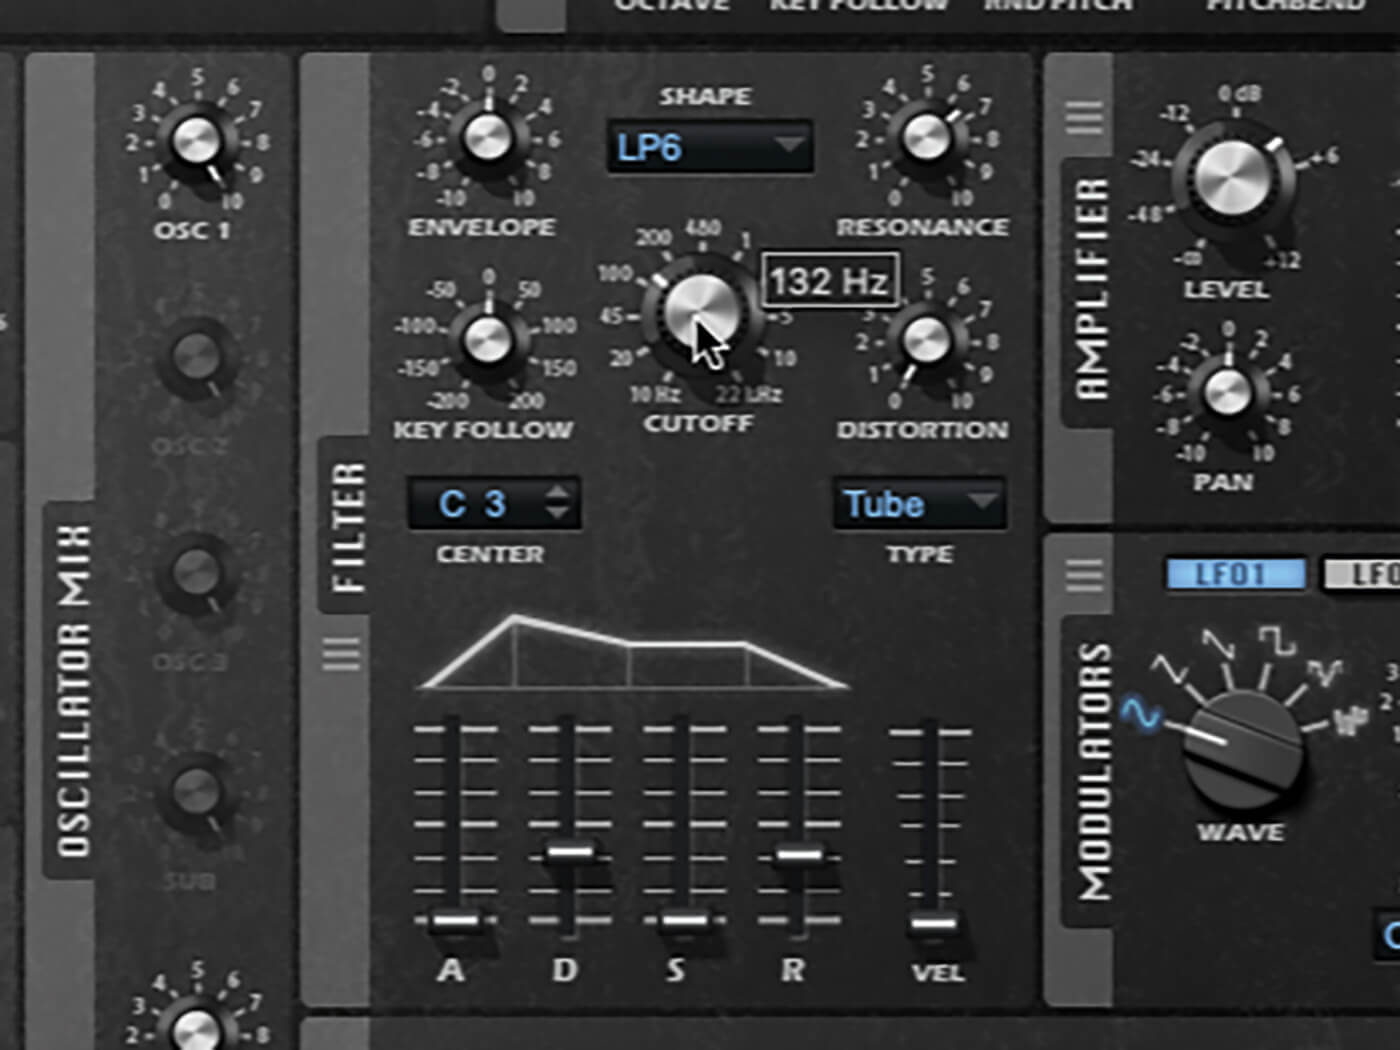
7. Filter resonance accentuates frequencies around the cutoff, so dial in additional low-end thump with a high resonance and a cutoff at about 120Hz. Use a gentle LP6 filter slope so that the white noise can still cut through.
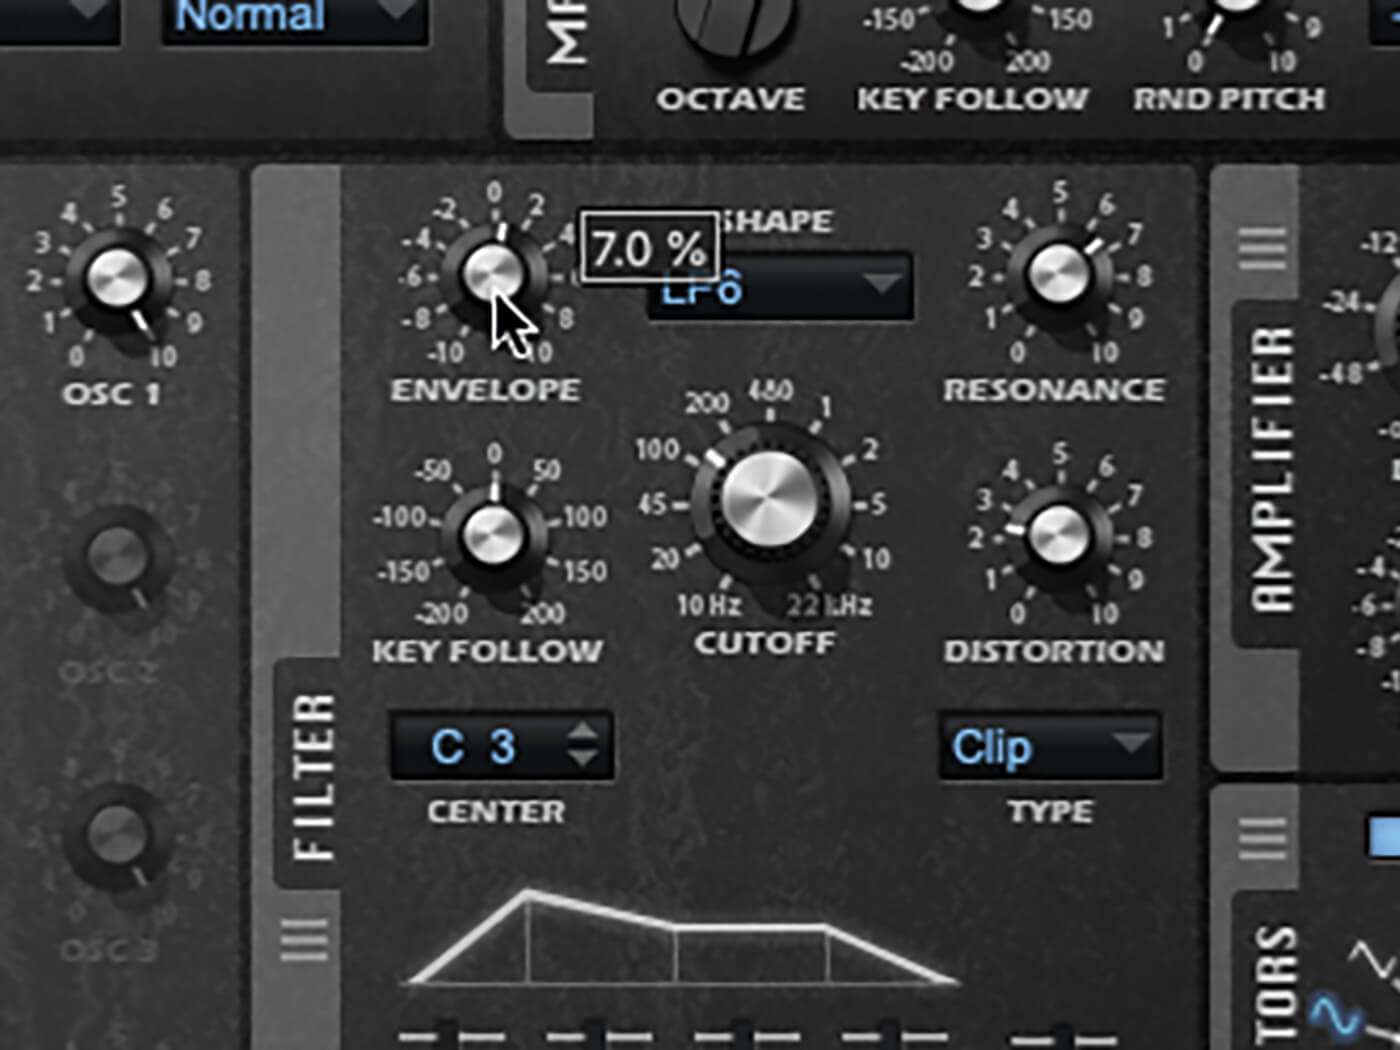
8. Dial in a small amount of positive filter envelope to add more movement and character to the sound. Experiment with adding a bit of drive to the filter. Use the mix section to balance the level of oscillator and noise.
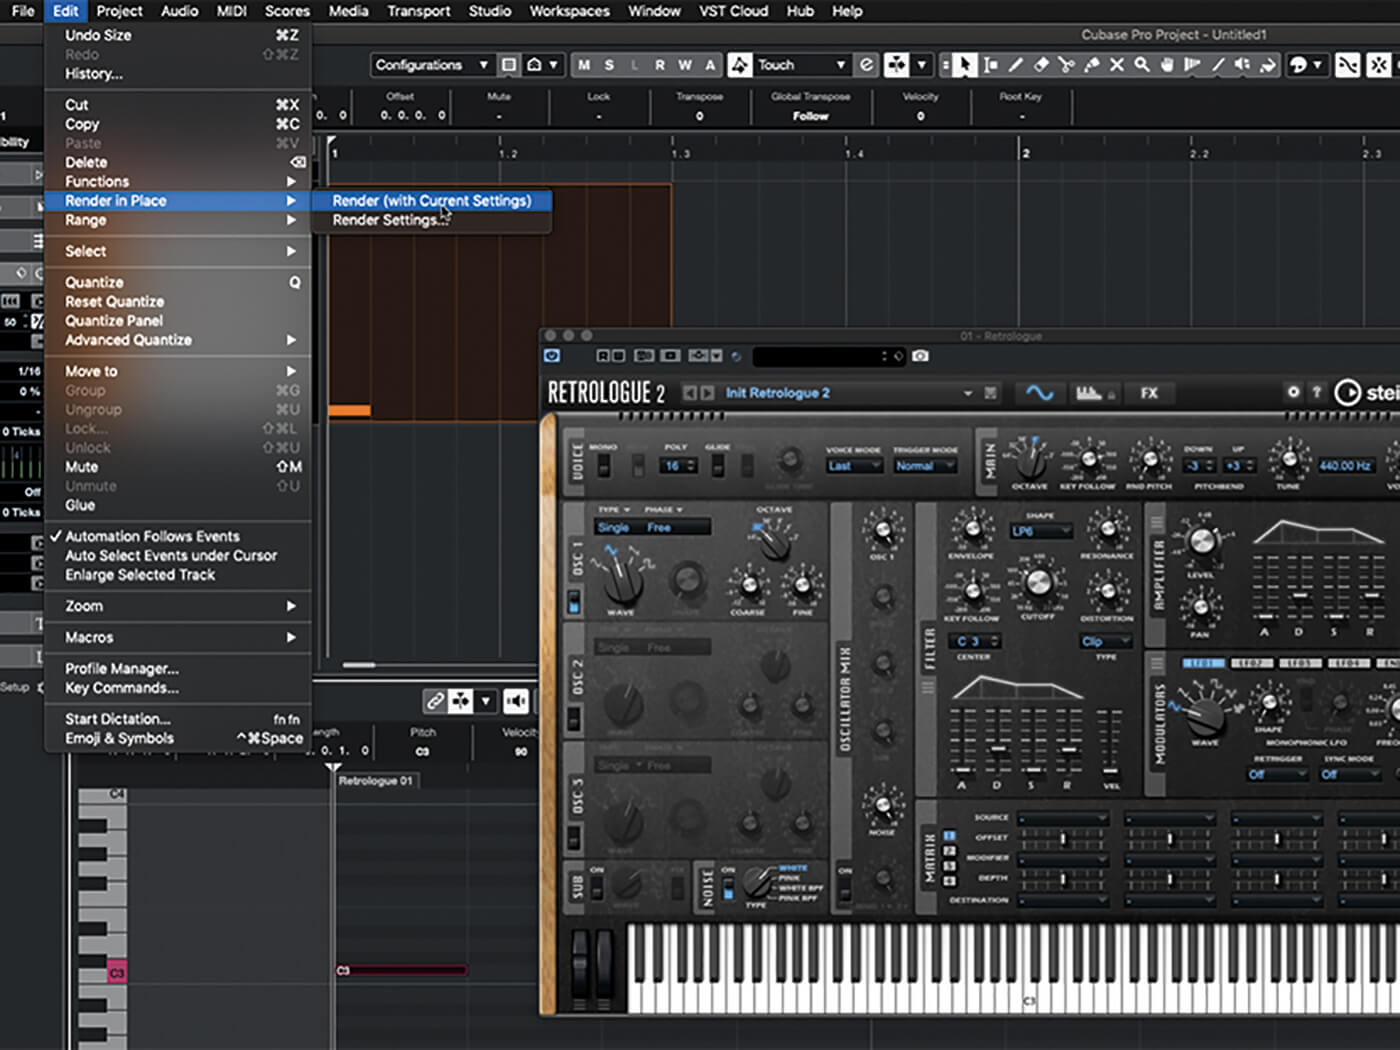
9. Now it’s time to sample your sound. Create a part on Retrologue’s track and draw a C3 trigger note into it. With the part selected, open the Edit menu and hit Render In Place > Render (with Current Settings).
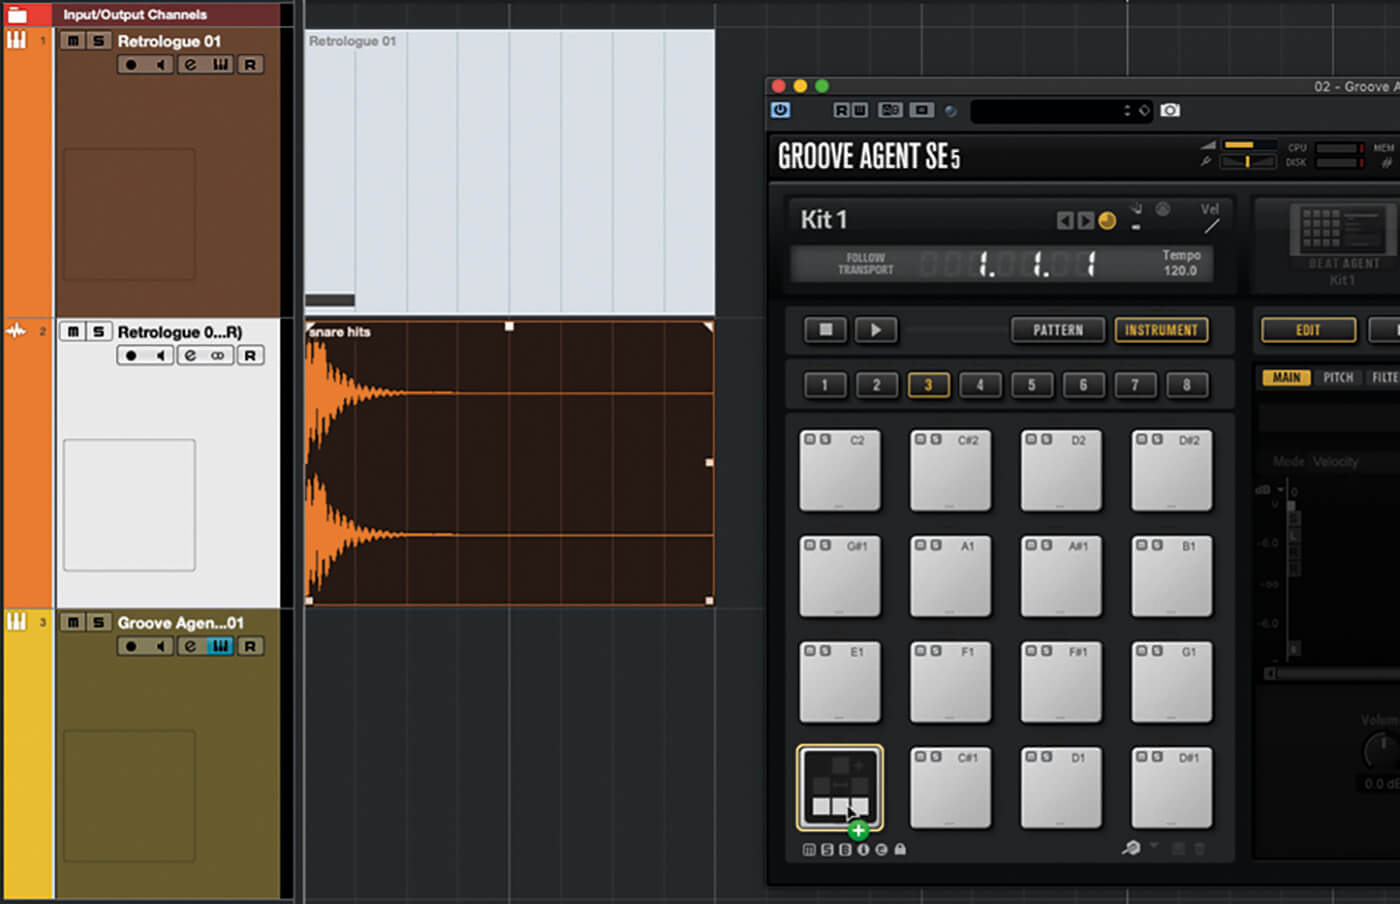
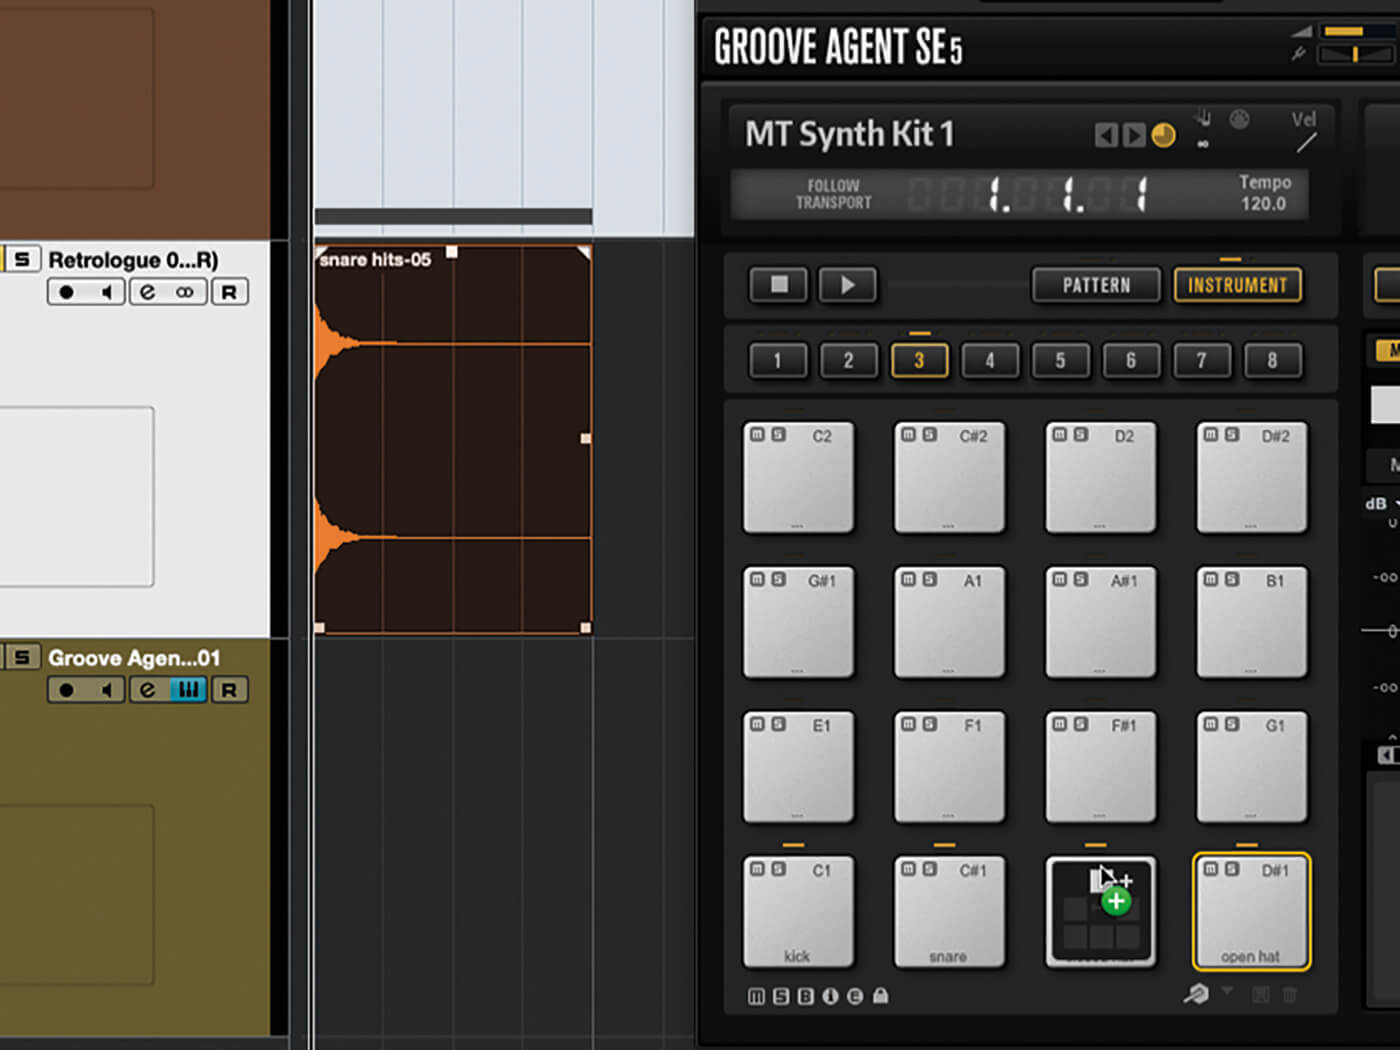
10. You now have a sample of the kick on a track below the MIDI part. Add an instance of Groove Agent to your project, then drag the new sample onto GA’s first pad. Rename the pad. Save both the GA kit and the Retrologue patch.
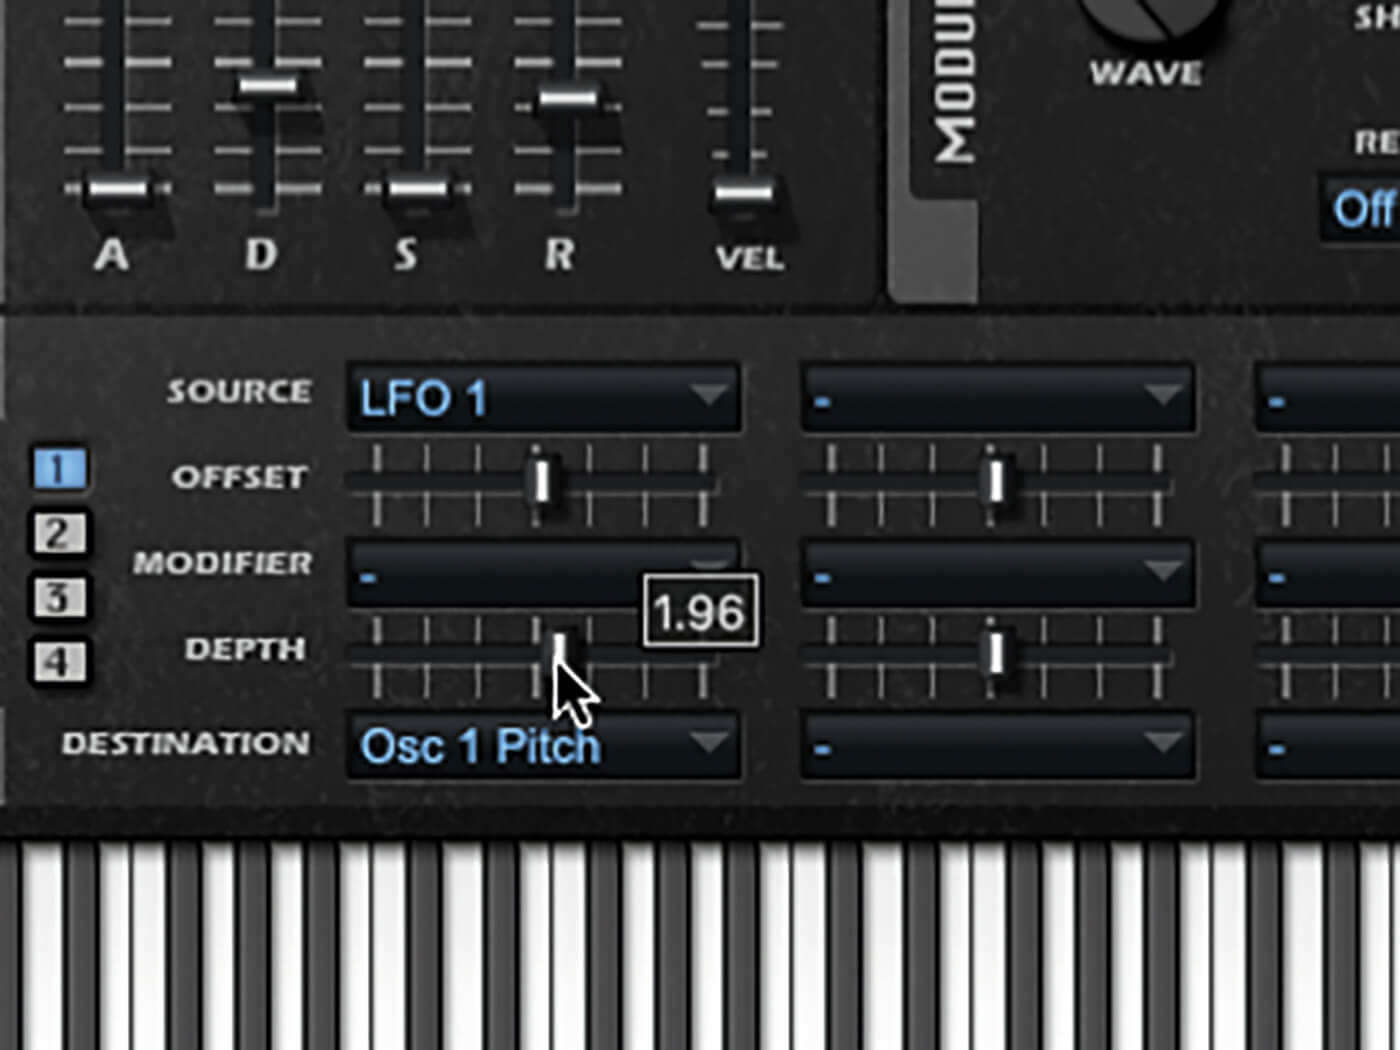
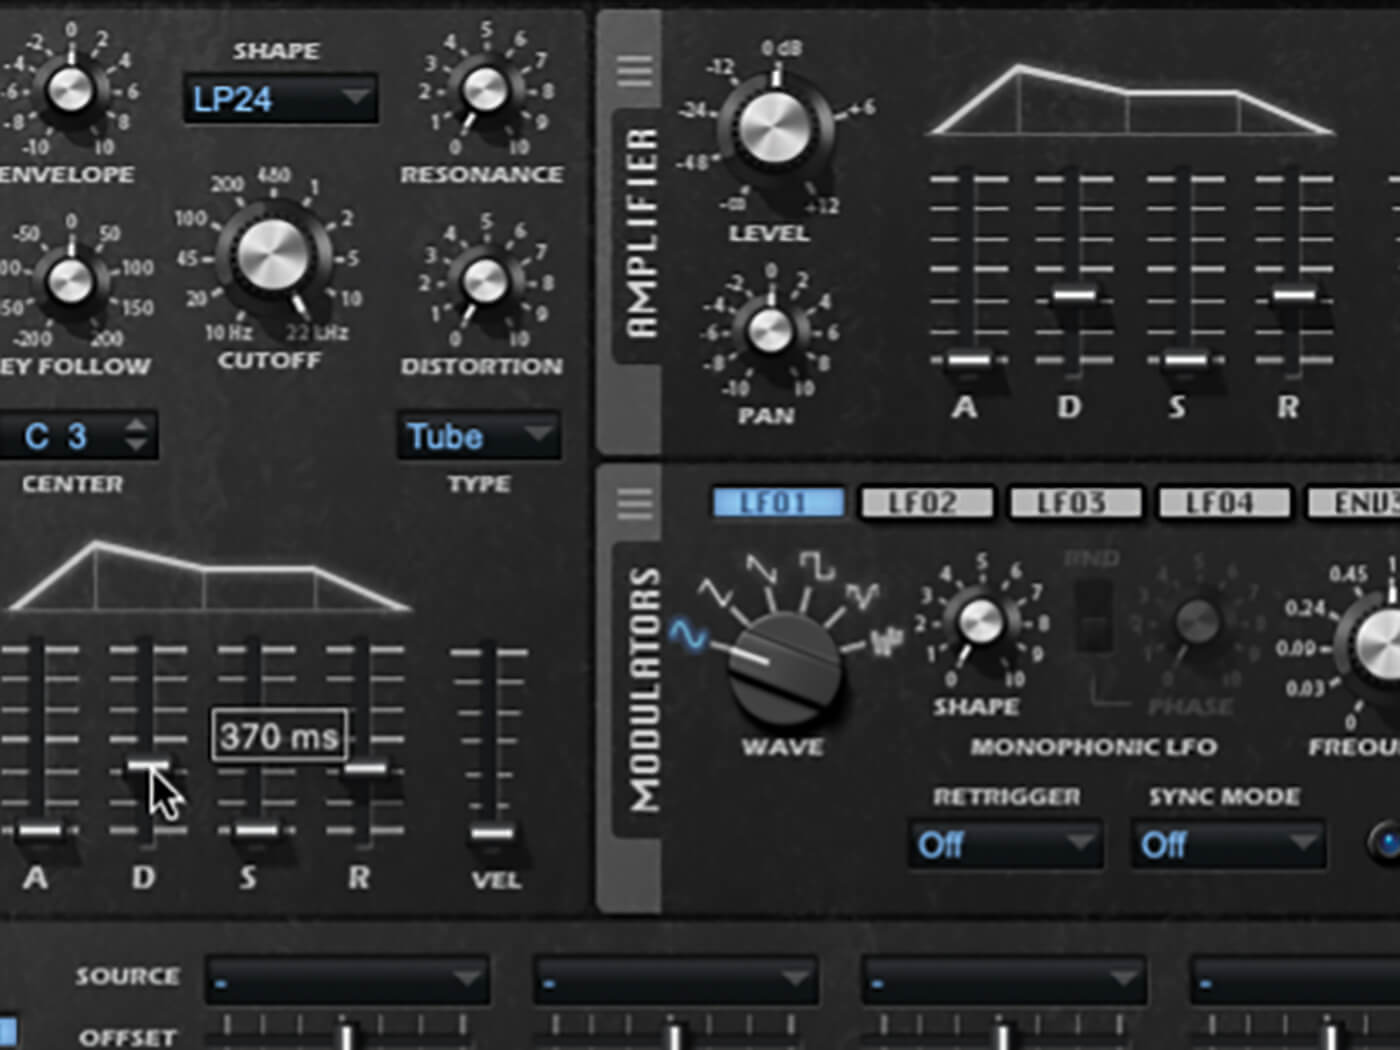
11. Repeat the procedure to create a snare, which should be pitched higher, feature more noise, and sport a longer decay tail. Snares have greater inharmonicity too – simulate this by routing fast LFO to the oscillator’s pitch.

12. Hi-hats should have different envelopes depending on whether they’re open or closed. Create one and then simply adjust the envelope for the other. Use a high- or band-pass filter, and a blend of cutoff and resonance.
![]()
RENDER IN PLACE Cubase’s Render In Place command is useful when creating new drum samples, as it’s a fuss-free way of converting instrument sounds into standalone audio clips, and for embedding effects and processors into clips – both handy abilities when creating samples.
13. Once you’ve added closed and open hi-hats to your GA kit, make a small adjustment to the filter and create a second pair of samples. Drag each to the same pad as the first ones and drop them on the upper-third of the pad.
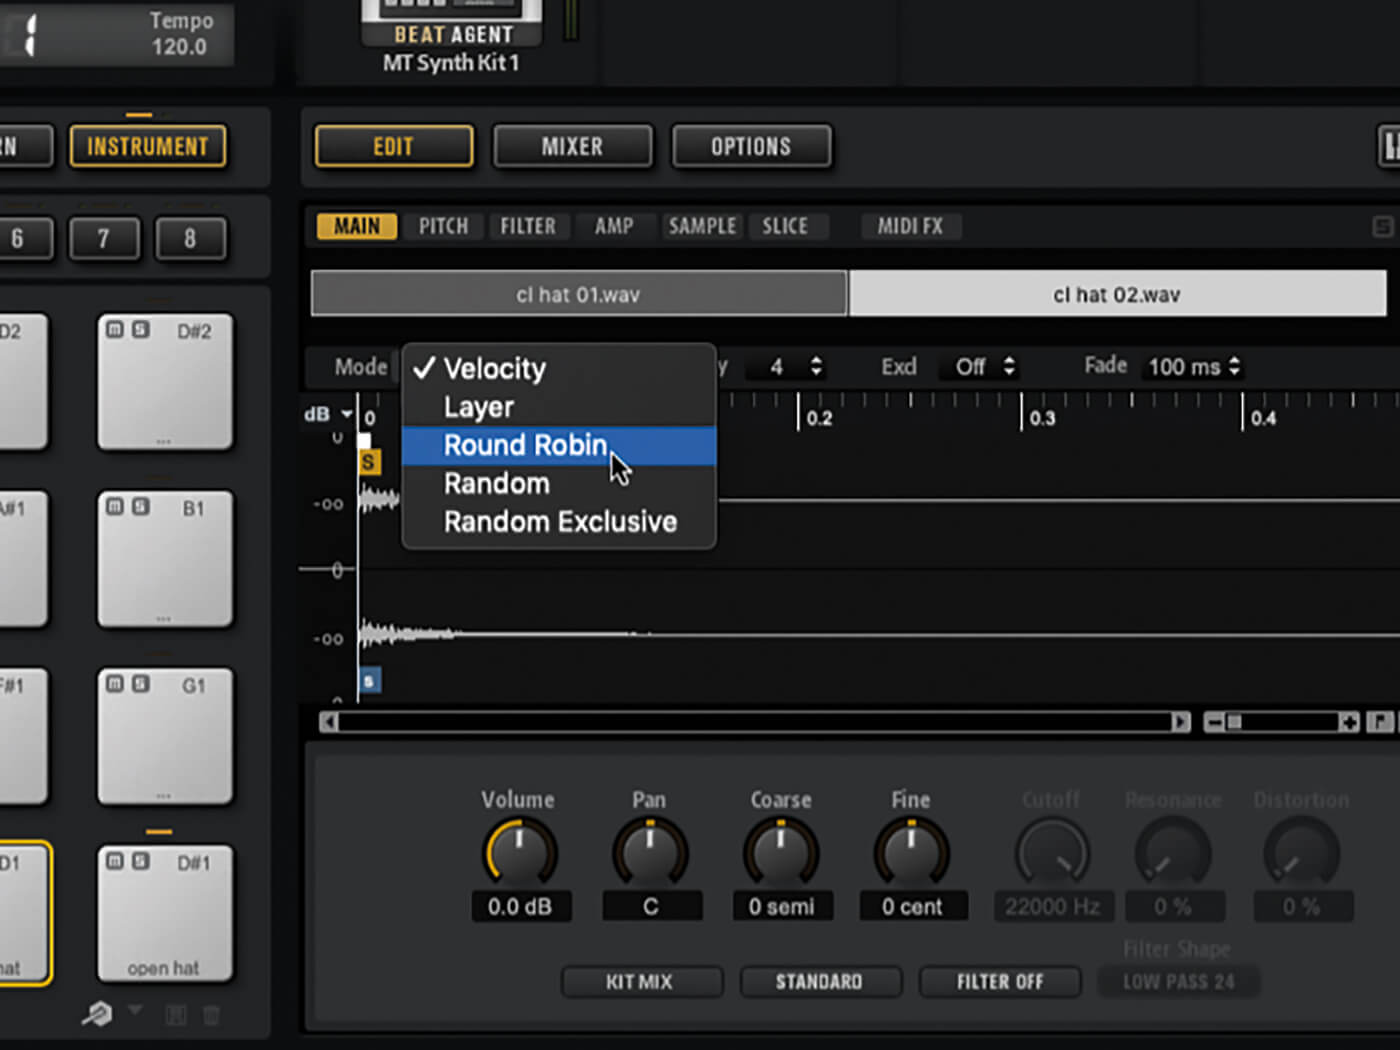
14. The second samples added to the hi-hat pads will be velocity-switched. Change this to alternating articulations by clicking both the closed and open hi-hat pads and, under GA’s Main edit tab, switching them to round-robin.
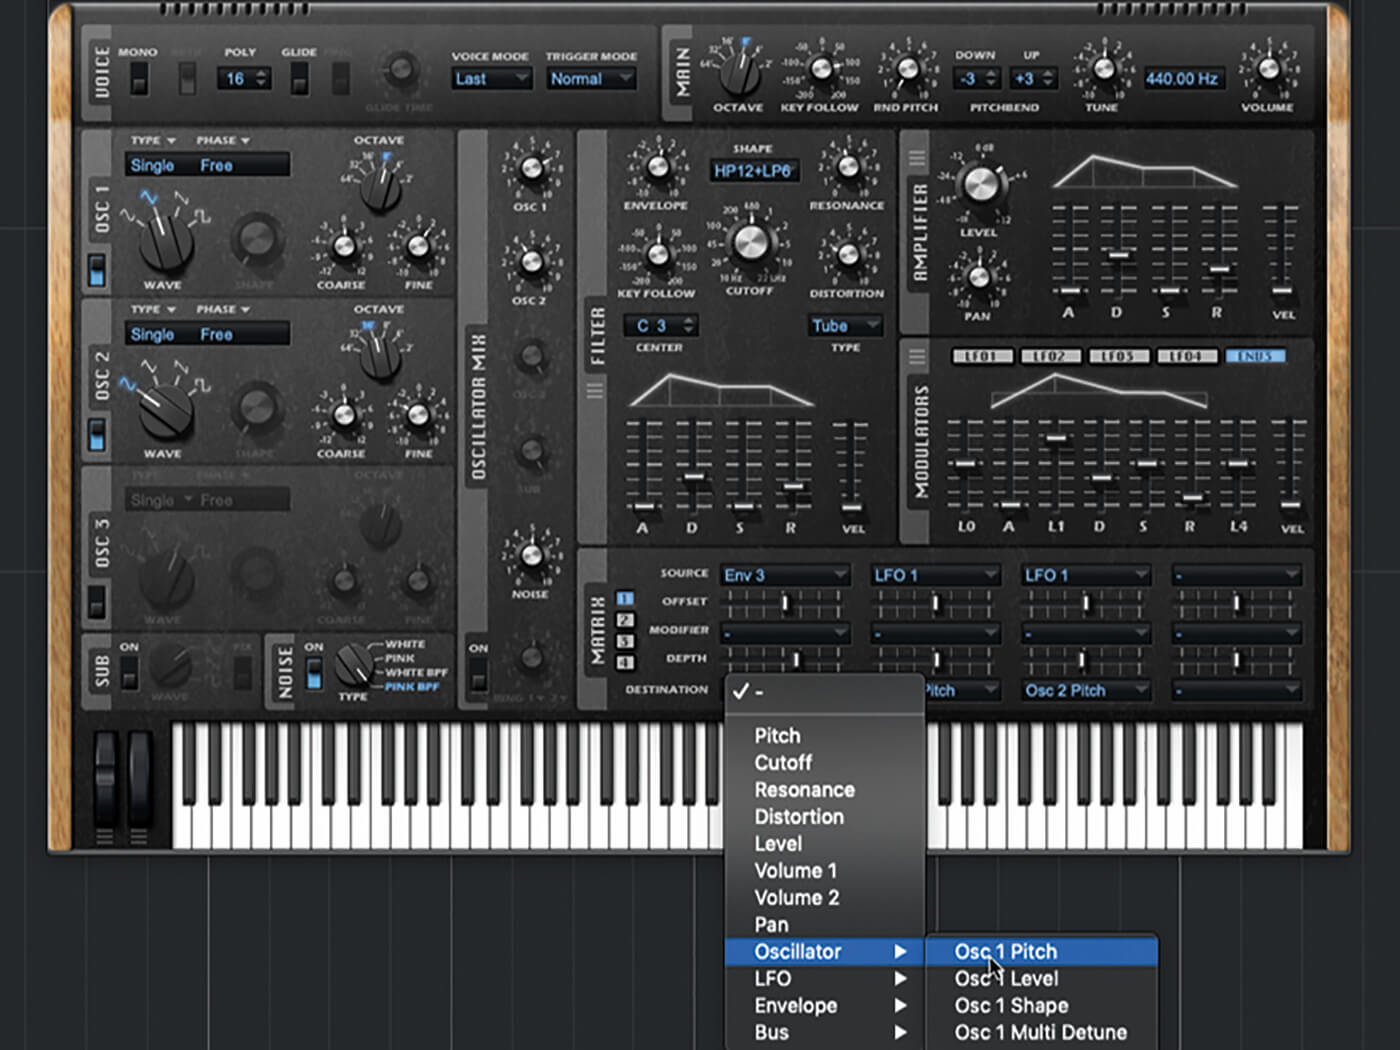
15. A classic synth-tom sound should have a strong pitched element, with that pitch dropping slightly over the course of the sound. Set this up in Retrologue. Remember to output at a few different pitches for different toms.
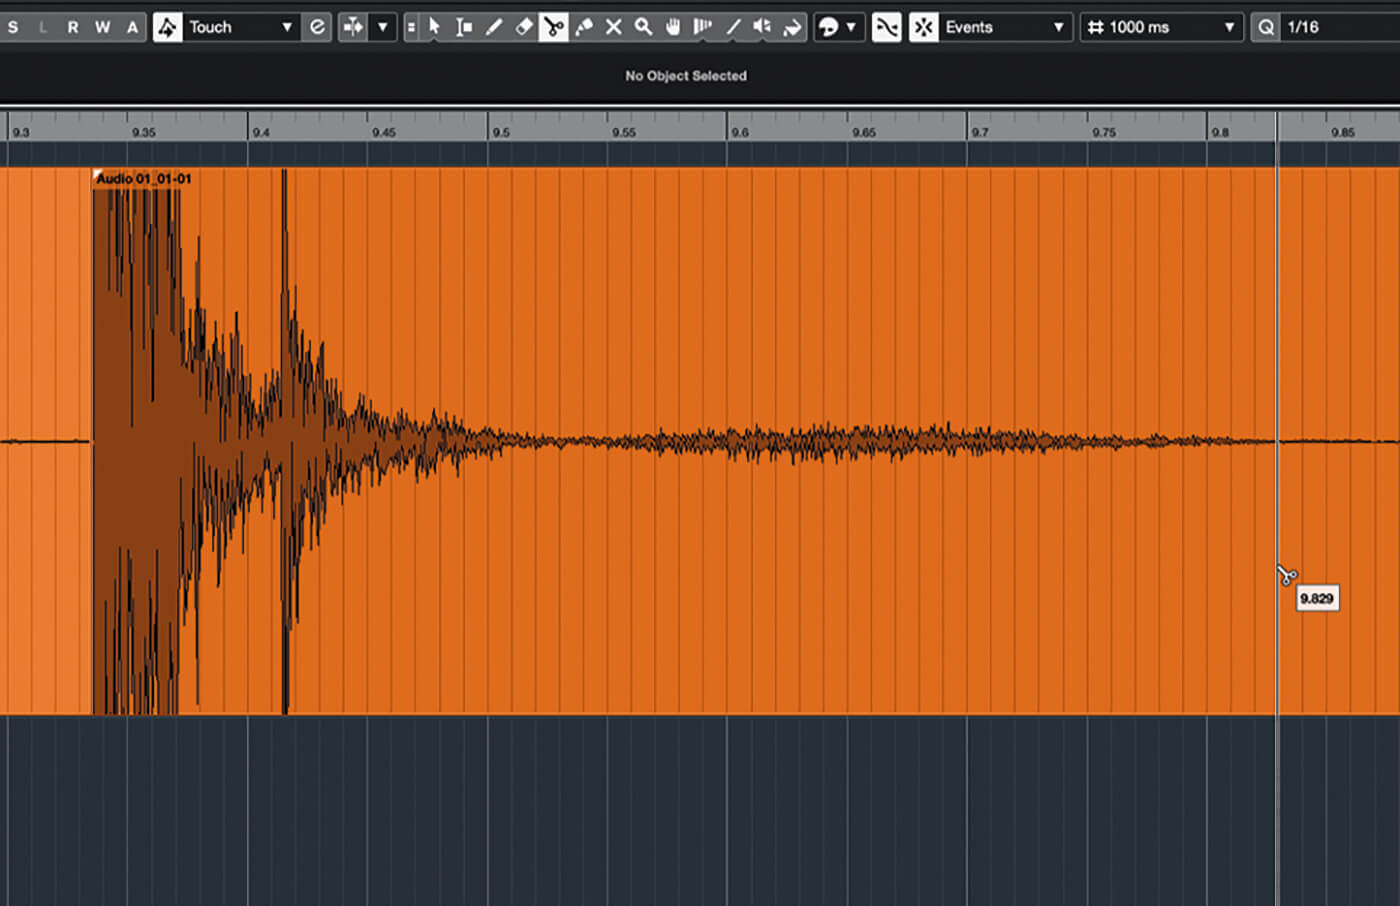
16. Let’s try something new. Set up a mic and record yourself doing something that generates noise. Listen for transients in the recording. Edit out a small snippet of sound starting at one of these transients.
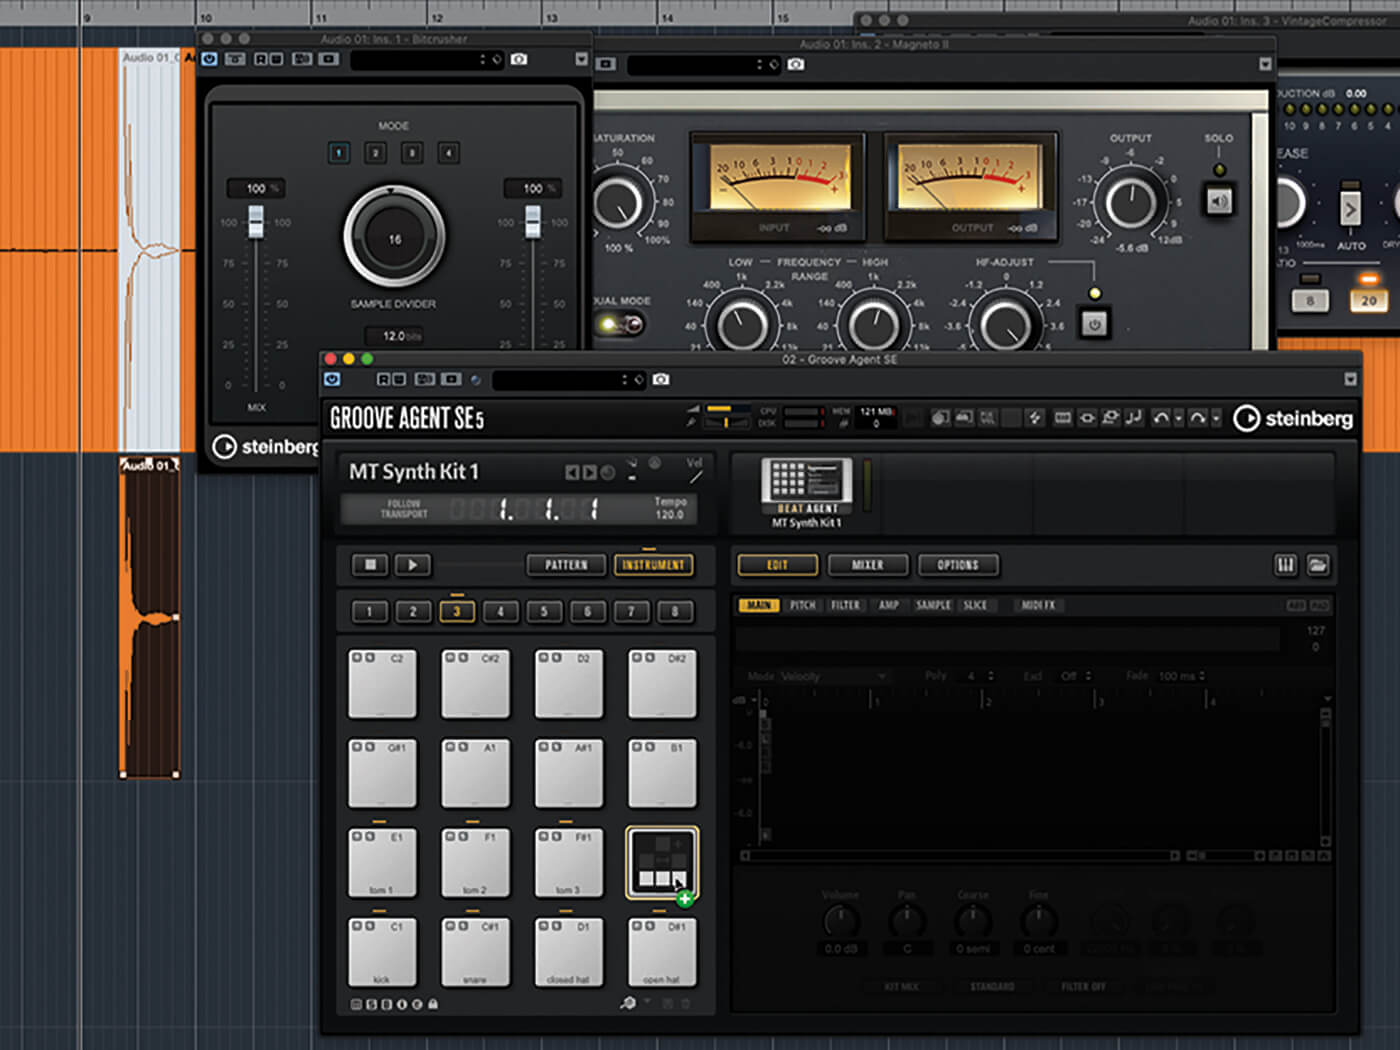
17. Experiment with adding processors to the recording. Bitcrusher, DaTube and/or Magneto will add dirt, while EQ and compression can bring out detail. Render your results to a new audio clip, then drag the clip to a GA pad.
18. Think about the lessons learnt here on synthesising drum sounds and apply these ideas to your new found-sound drum hit using GA’s synthesis tools. Combine the above techniques and keep experimenting.
For more Cubase tutorials and workshops, click here.