Working with Retrologue 2 in Cubase Pro 10
Cubase Pro and Artist come bundled with the fabulous Retrologue 2 virtual instrument, which can also be purchased for use with any other DAW. So, in keeping with our synth theme this month, let’s take a look…

The intuitive hands-on nature of subtractive synthesis and the rapidity with which interesting and original sounds can be crafted goes a long way to explaining its enduring popularity in music-making. This popularity means that there’s a huge choice when it comes to selecting a subtractive synth, but Cubase users have a head start with the bundled Retrologue 2 synth.
While not modelled on any specific classic instrument, Retrologue takes the best bits of the best analogue synths and packages them with the look, feel and hands-on intuitiveness of classic hardware (right down to the wood-effect trim). But don’t let its retro aesthetic fool you: this is a fantastic-sounding synth with modern touches that make it astonishingly versatile. It really does deserve to be your go-to subtractive synth, so let’s dig into some of its deeper capabilities.
Flexible oscillators and filters
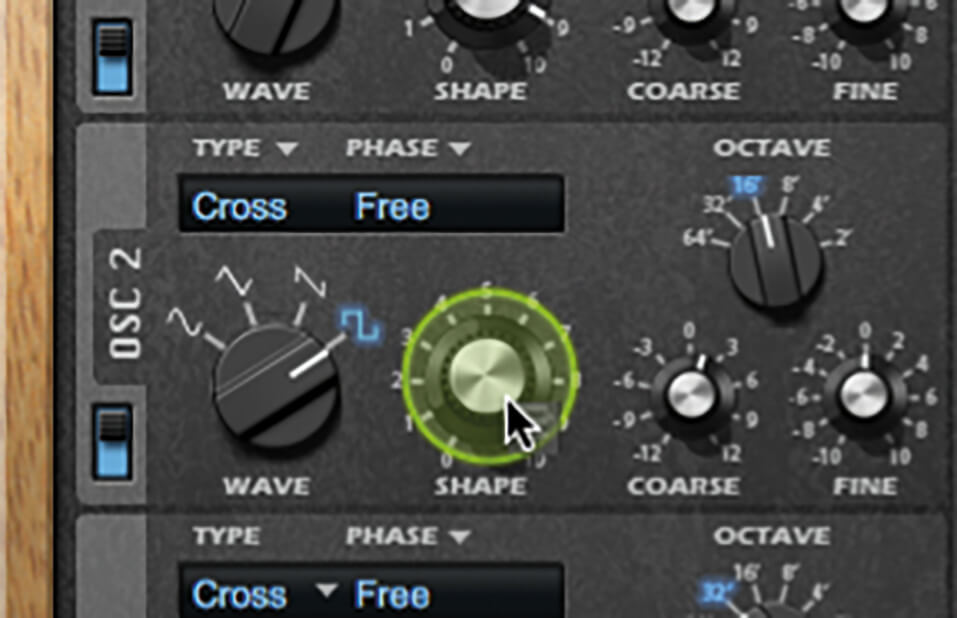
Like all good subtractive synths, Retrologue’s control panel is laid out in clearly labelled sections that are simple to understand and to work with; but this on-the-surface simplicity hides a lot of depth. The oscillators are a case in point. Each offers a choice of four waveforms (sine, triangle, saw and square/pulse), with octave, coarse and fine pitch controls. So far, so ordinary, but where things get more interesting is that as well as a conventional ‘single’ oscillator type, where each oscillator generates just a single waveform, the oscillators also have four additional types that pack additional wave oscillators within each Retrologue oscillator stage.
For example, the Sync option creates a master and slave oscillator. The slave’s frequency can be offset from that of the master, but its waveform is reset with each full cycle of the master waveform. This gives the classic hard-edged ‘oscillator sync’ sound. Similarly, the Cross mode has master and slave oscillators, but here the master modulates the frequency of the slave. This gives the metallic complex sound of a ring modulator or two-operator FM synth.
The XOR – or Exclusive OR – mode is somewhat harder to understand. Here, a pair of square waveforms, whose frequency can be offset from each other, are used to determine whether-or-not to reset the waveform of the main, audible oscillator. This results in a comb-filtered type sound, where different harmonics take precedence as the offset is changed.
Finally, the Multi mode creates up to eight oscillators that can be detuned from each other to create a thick and rich sound. This is like the Unison mode found on some subtractive synths, but where it is traditionally applied as a global option that affects the entire synth, Retrologue’s ability to do this on a per-oscillator basis offers some interesting options.
Retrologue’s filter offers a large number of different filter types and slopes – low-pass, band-pass, high-pass etc, – and even includes a relatively uncommon All Pass filter. Having a filter that allows all frequencies to pass through may sound like something of a waste of time, but there’s a little more to an AP filter than this. What they actually are is a combination of a low-pass and a high-pass filter with a common cutoff frequency and slope. The phase of the frequencies around the cutoff are affected by the low- and high-pass filters, which results in interesting timbral characteristics around that cutoff frequency. Modulating the cutoff with an LFO or envelope really makes the effect stand out.
Modulation and arpeggiator
Talking of LFOs and envelopes, Retrologue offers three of each. Two of the envelopes are of the standard ADSR variety and are hard-wired to the filter and amp respectively, but can also be used as modulation sources. The third envelope, which is a modulation source only, includes start, attack and release levels, giving some interesting sculpting abilities.
Retrologue’s modulation matrix can provide up to 16 mappings, but what’s really interesting is that each mapping includes an additional modifier slot so that, for example, the intensity of an LFO can be modified by an envelope. The matrix includes all of the normal performance modifiers – mod wheel, velocity, aftertouch etc, – as well as a set of 16 internal modulation busses. These can be used to simplify the process of applying the same modulation to multiple destinations, as well as allowing complex modulation patterns to be constructed.
Finally, Retrologue has a fully programmable arpeggiator built-in and thanks to its three controller lanes, which are presented to the synth as modulation sources, it can do step-based modulation effects as well as simple note triggering. The final sonic icing comes in the form of a set of effects that add a bit of extra polish to things. Let’s play around with some of these cool features to see just how flexible Retrologue is…
Using retrologue in Cubase: step-by-step
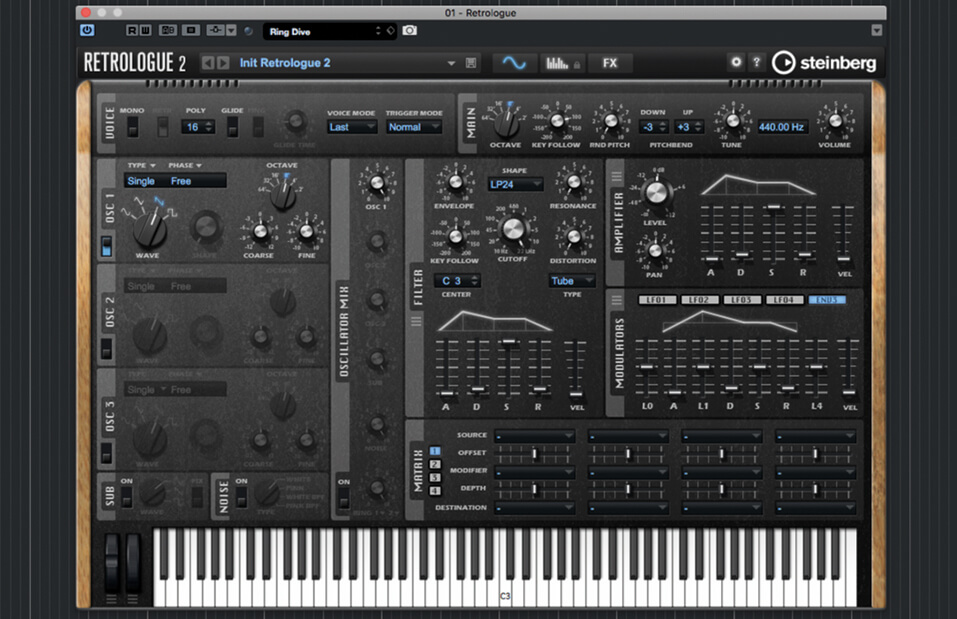
1. Launch Cubase, create a new project and add a Retrologue 2 instrument track. The instrument should open with the Init Retrologue 2 patch loaded, which has just one oscillator enabled, an open filter, and on-off gate envelope settings.
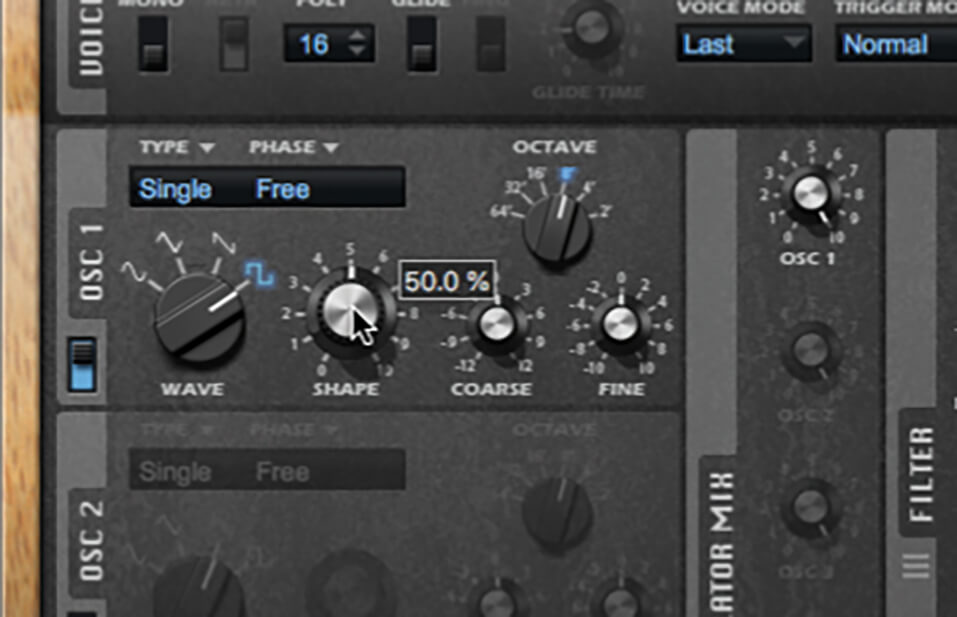
2. Play your keyboard and use Oscillator 1’s waveform selector to audition different waveforms. Note that the Shape control is enabled when you get to the square/pulse waveform, which controls the pulse width; 50% gives a pure square wave.
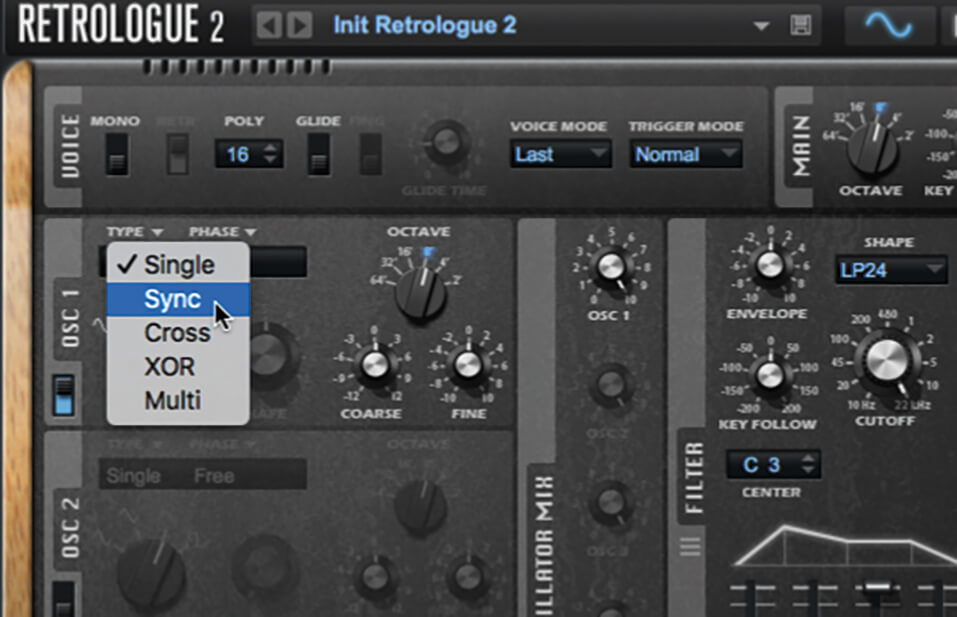
3. Switch the oscillator back to a triangle and then click the Type field. Select Sync from the pop-up menu. Now, the Shape control changes the frequency ratio between master and slave waveforms – give it a waggle to hear how it sounds.
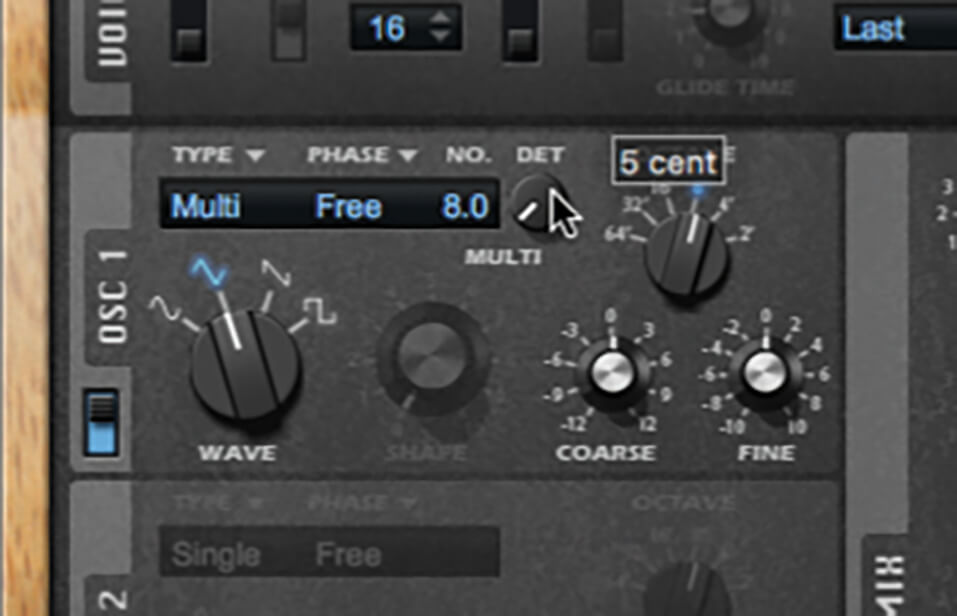
4. Repeat the process for the Cross and XOR options, then move to Multi mode. An extra field appears where you can set the number of waveforms to generate. Double-click this, enter ‘8’, then add some detuning with the knob that appears.
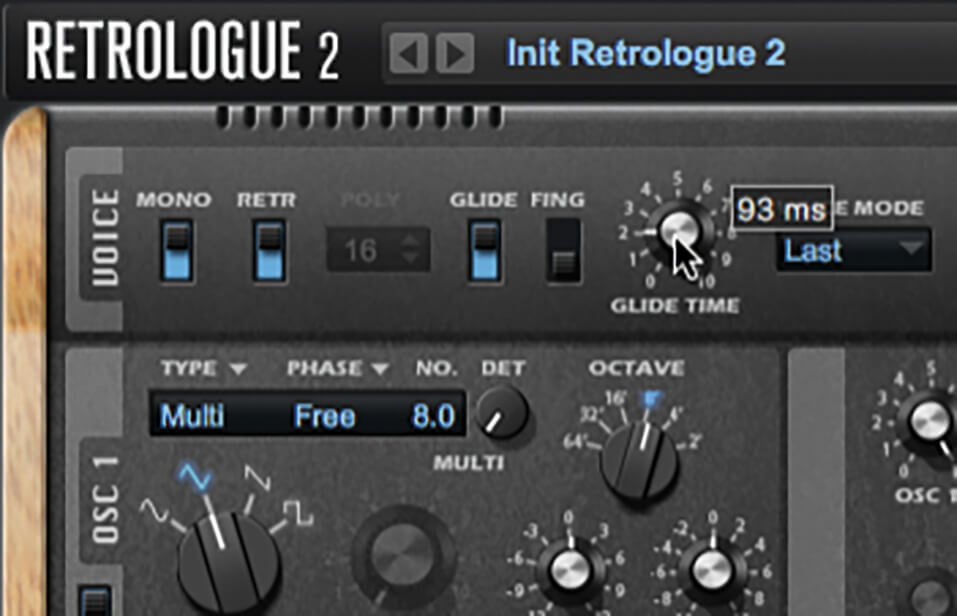
5. We’ve got the basis of a nice smooth lead tone, so let’s build on it. Switch Retrologue into Monophonic mode using the Mono button in the Voice section. In the same section, enable Glide and dial-in a glide time of 80-100ms.
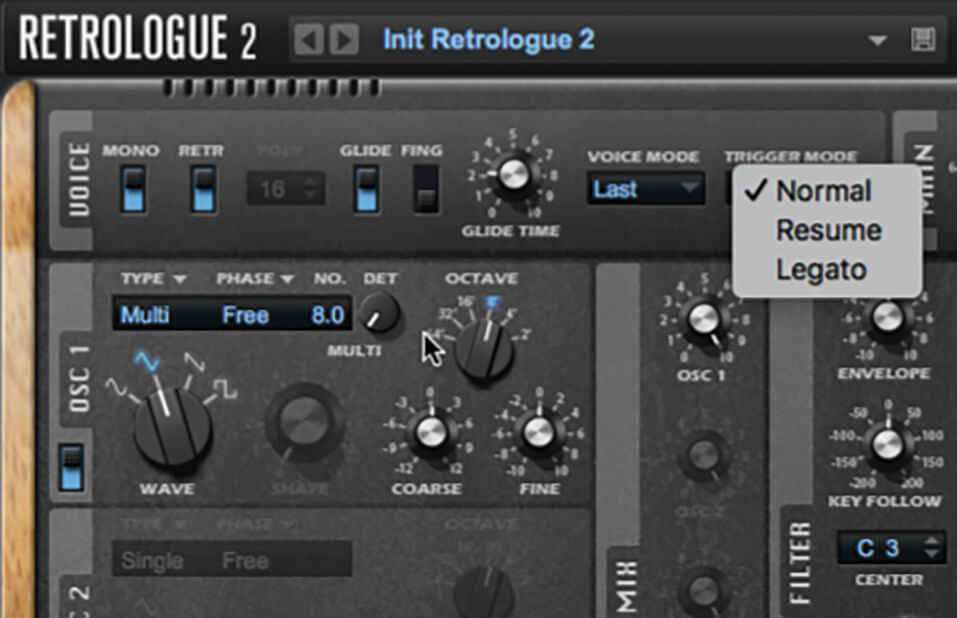
6. In the Voice section, set Trigger Mode to Resume. This ensures that envelopes are retriggered smoothly when playing legatos (the Normal setting retriggers envelopes with no smoothing, whilst Legato setting doesn’t retrigger them at all).

RETROLOGUE PRESETS Retrologue comes with a huge library of over 700 patches, all tagged to work with Cubase’s Media Browser. Selecting a patch in the Browser also loads it temporarily for auditioning. This makes finding sounds easy, but remember, tweak the presets to suit your own music.
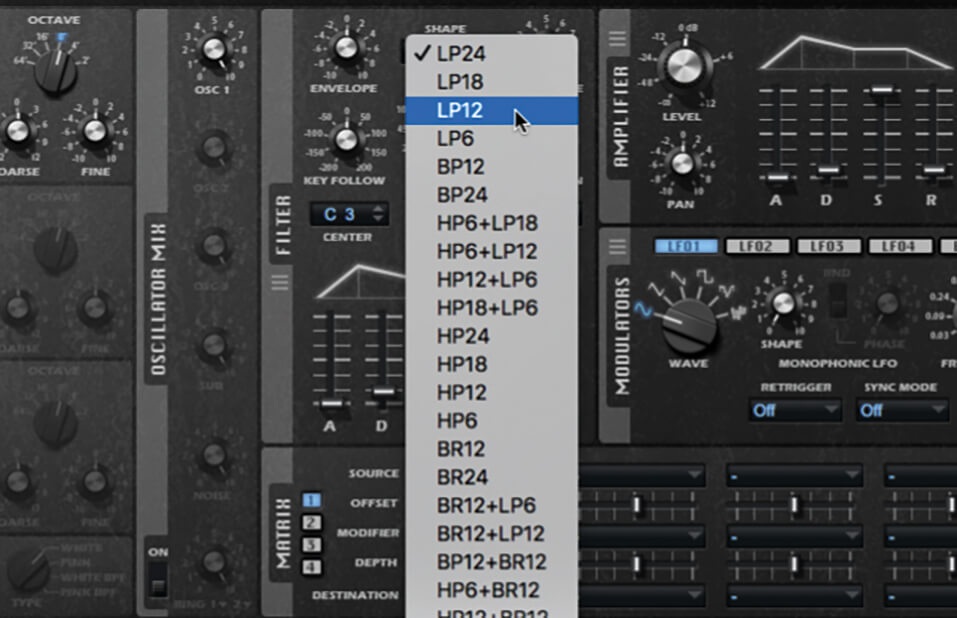
7. In the Filter section, click the Shape field and select LP12 from the pop-up (a low-pass filter with a 12dB/octave slope). Bring down the cutoff frequency to smooth the harsher edges off the sound, and add some resonance to give definition.
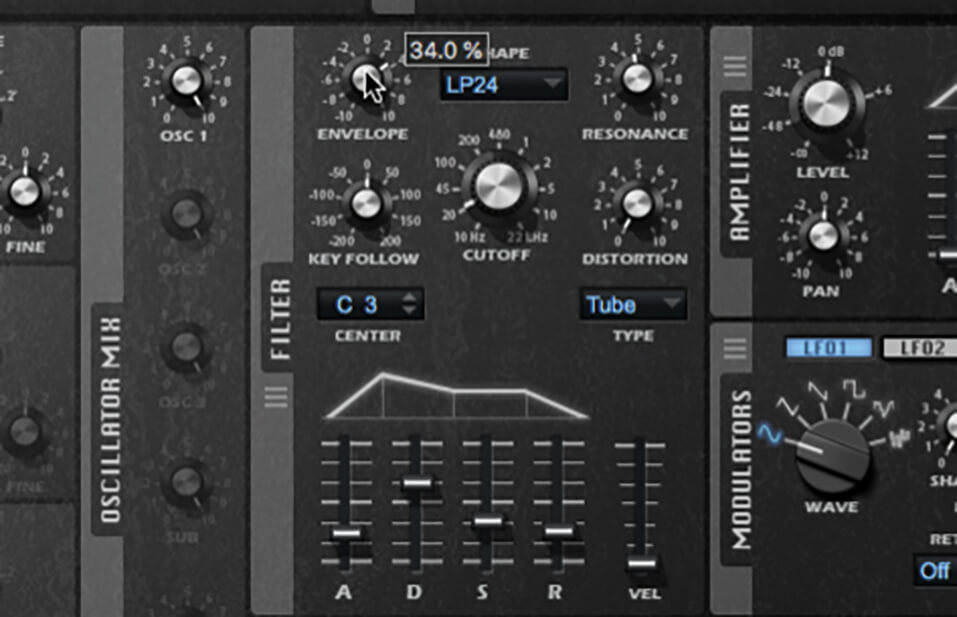
8. Set up the filter envelope to have a short-ish attack and decay, a middling sustain and short release. Adjust the filter’s Envelope level to apply the envelope to the filter – positive settings add to the filter cutoff, negative take away from it.
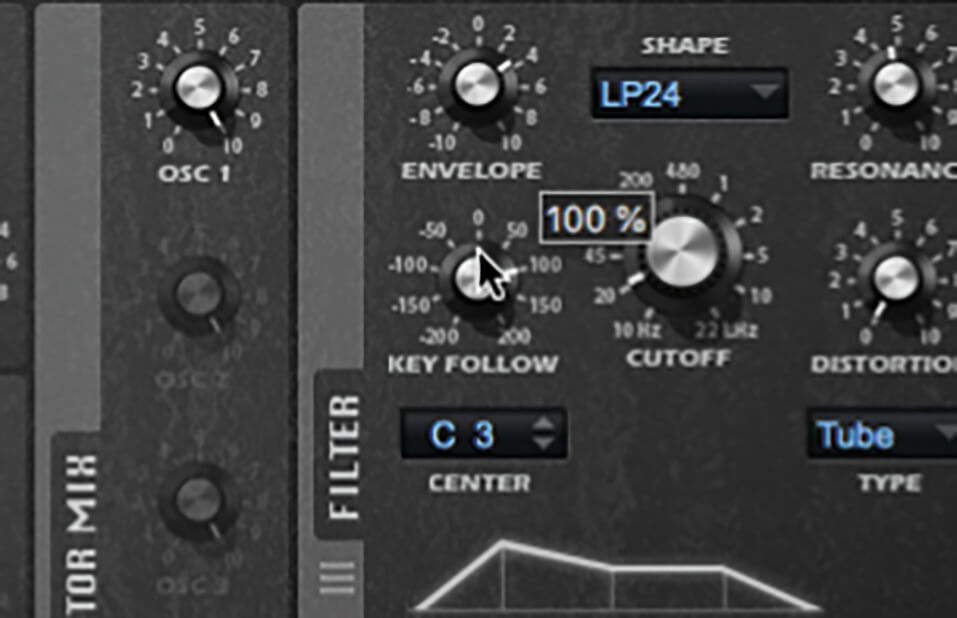
9. Let’s also make the filter open more when playing higher up the keyboard. We do this with the filter’s Key Follow parameter – set it to 100% and then play notes up the keyboard to hear the difference.
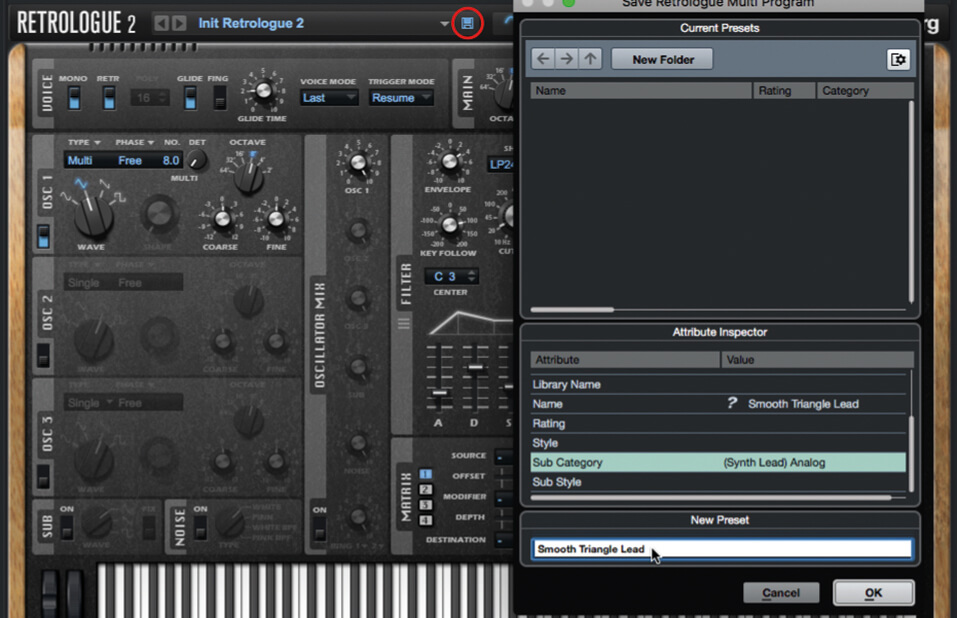
10. Set up the amp envelope to have a fast attack, medium decay, a middling sustain, and a release time that matches the filter envelope’s release time. When happy, click the Save icon, enter a new name and details, and click OK.
NOISE GENERATOR As well as its trio of regular oscillators and single sub oscillator, Retrologue also has a noise generator. This can turn out white and pink noise, with or without a band-pass filter applied. These work well for adding a bit of fuzziness, and for creating analogue percussion sounds.
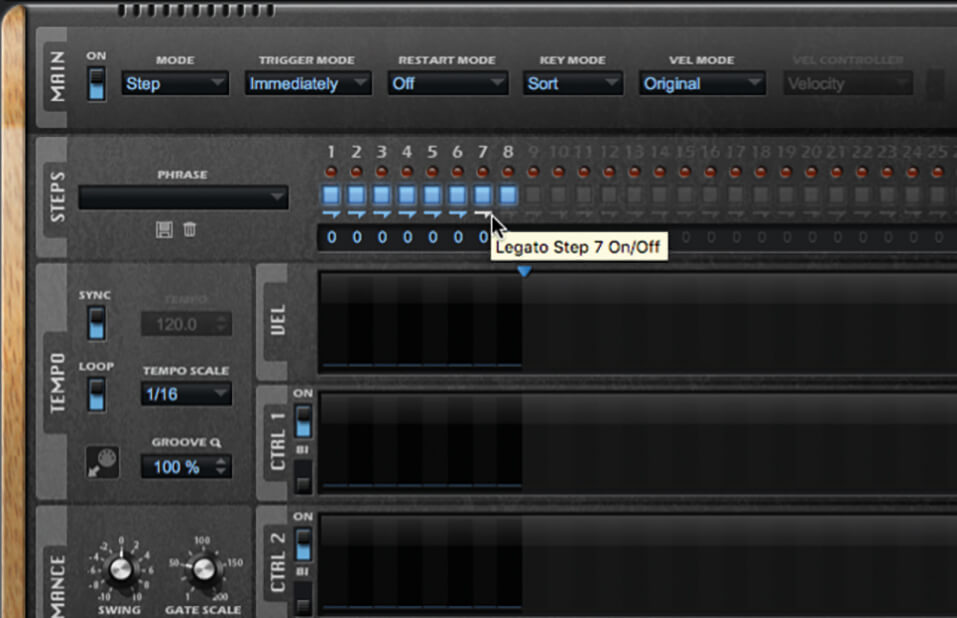
11. Switch to the arpeggiator page and switch on the arpeggiator. Drag the Number of Steps indicator in the Velocity lane to create eight steps. Set the velocity for each step to zero and enable each step’s Legato option.
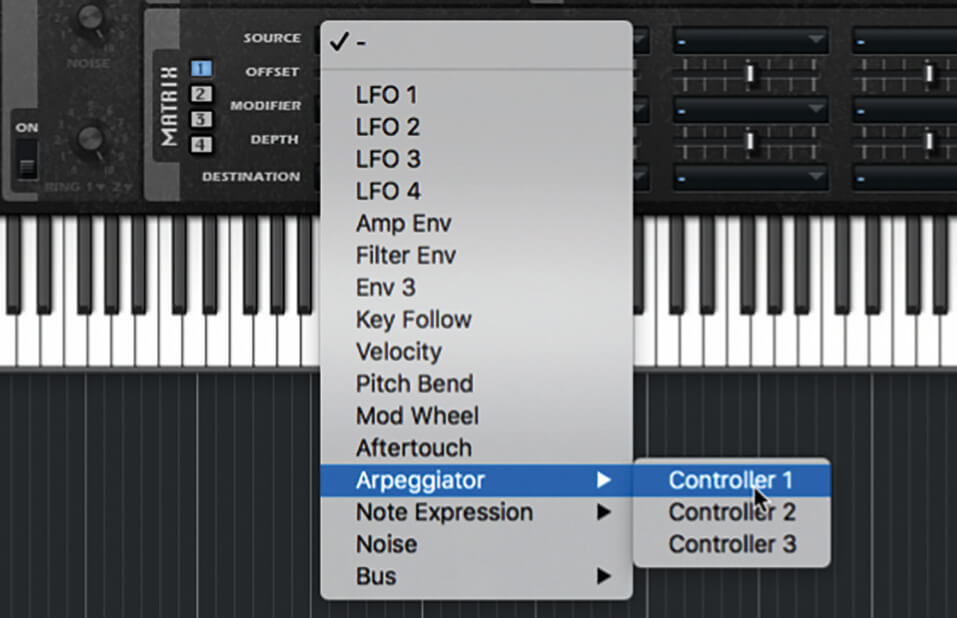
12. Draw values in the CTRL 1 lane – you can be fairly random for this example. Switch back to Retrologue’s Synth view and, in the Matrix section, click the Source dropdown for the first mapping and select Arpeggiator > Controller 1.
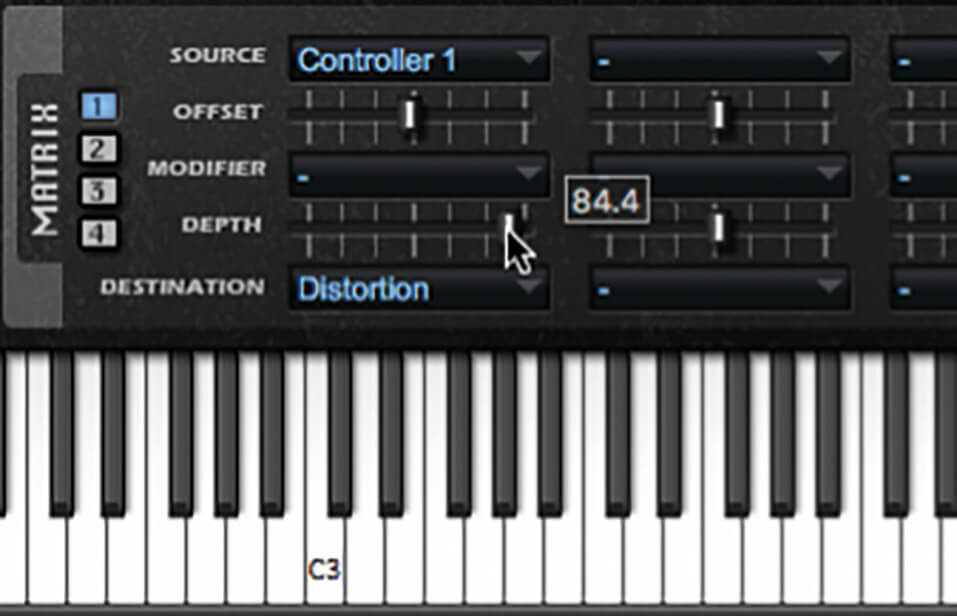
13. Set the mapping’s destination to Distortion, play a note while bringing up the mapping’s Depth control. You should be able to hear the filter distortion stepped by the arpeggiator’s controller lane. Tweak settings and save your patch.
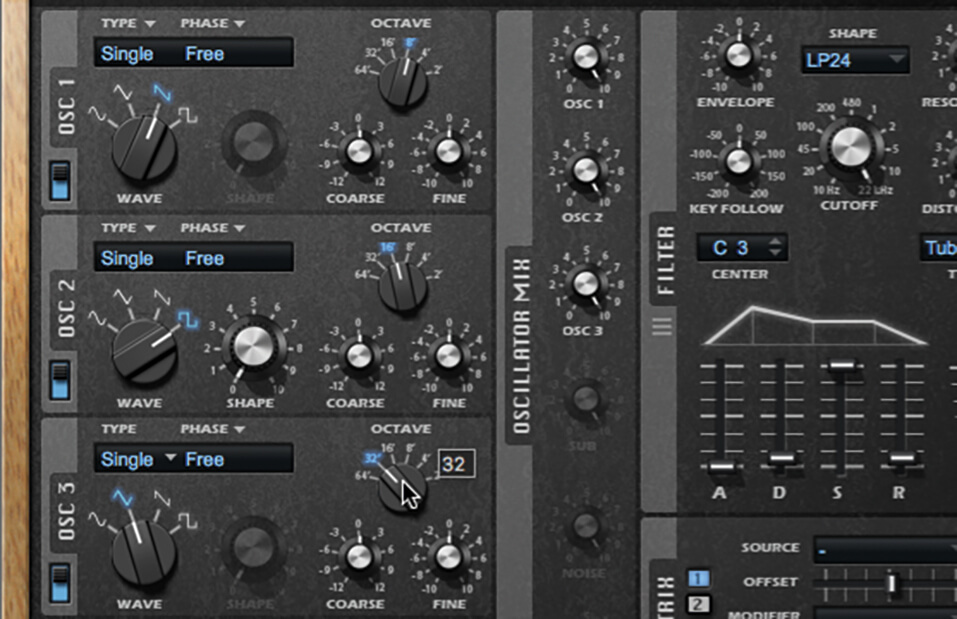
14. Reload the Init Retrologue 2 patch (the browser’s search field will help here). Turn on all oscillators. Set the first to a saw wave with an octave of 8’, the second to a pulse with octave 16’, and the third to triangle with octave 32’.
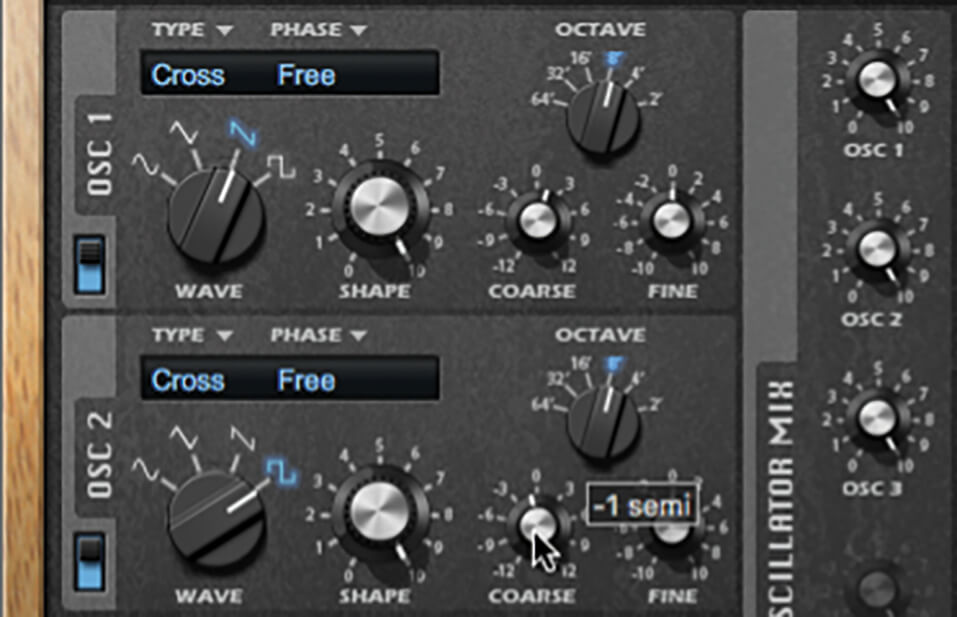
15. Set each oscillator�’s type to Cross and turn the Shape up to Full on each. Use the coarse tuning to offset the first oscillator’s pitch by +1 semitone, and the second by -1 semitone. Play the sound to see how chaotic and odd it is!
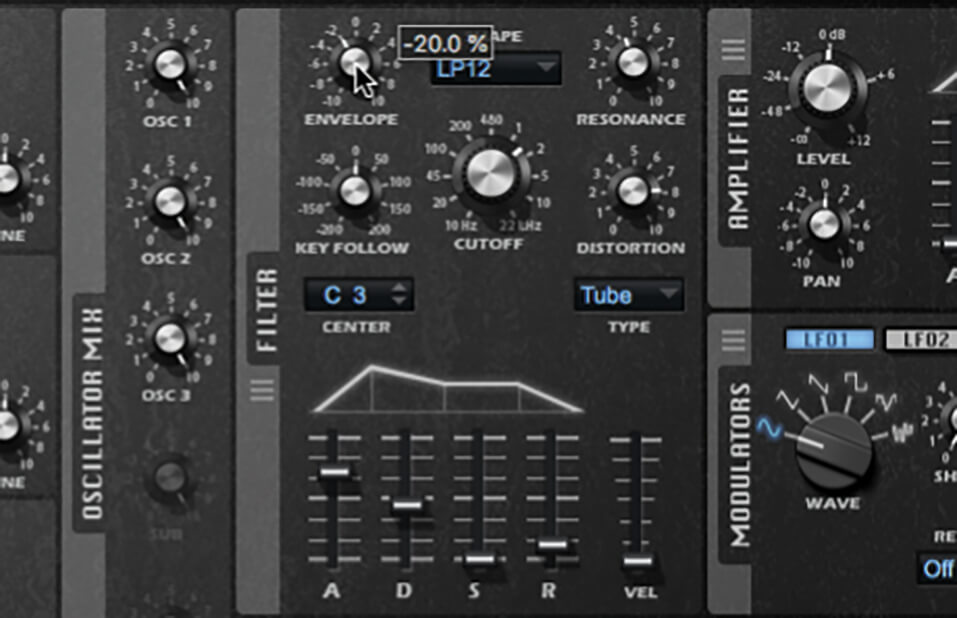
16. Select an LP12 filter shape with a cutoff of around 1.5kHz, resonance of around 45 and distortion at around 80%. Create an envelope with a long-ish attack, faster decay, 0% sustain and short release and apply -20% of this to the filter.
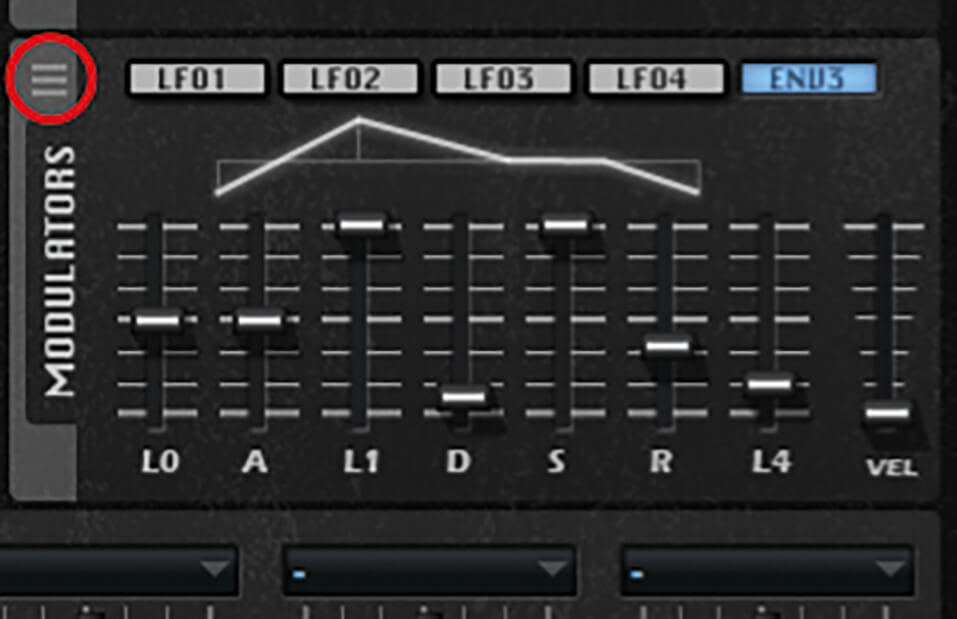
17. Click the ENV3 button in the Modulators section and set up the envelope as in the image above. Then, grab the handle just above the Modulators title (marked in image) and drag-and-drop it onto oscillator 1’s Shape control.
18. Notice a new mapping has been created in the Matrix section. Drag ENV3 to the Shape control of oscillators 2 and 3 and then in the Matrix set the depth for all mappings to -100%. Tweak settings and save your patch.
For more Cubase tutorials and workshops, check here.