Getting Expressive With Patcher in FL Studio
In the first of a new series, looking in-depth at Image Line’s FL Studio 12 from a creative standpoint, Leo König takes us through using FL’s Patcher to get expressive… Many people wrongly assume that electronic music can never quite achieve the same depth or expressiveness as its non-electronic counterpart. We know this simply isn’t […]
In the first of a new series, looking in-depth at Image Line’s FL Studio 12 from a creative standpoint, Leo König takes us through using FL’s Patcher to get expressive…
Many people wrongly assume that electronic music can never quite achieve the same depth or expressiveness as its non-electronic counterpart. We know this simply isn’t the case, but nevertheless – the perceptions persists.
Here’s the thing though: electronics and electronic music in turn have come a long way over the last few decades and there’s a vast amount of new and exciting software around that enables the electronic-music maker to have possibly more expresive control over their instruments than any other, traditional, instrument. What I’ll be using to demonstrate this with is Patcher by Image Line, a very powerful modular plugin host environment.
Patcher is a strange beast in the plugin world, because it has an instrument version and an effect version. It can contain an unlimited amount of plugins in series or parallel-generators or FX- in both versions and it even has dedicated VFX modules that help streamline the process of creating something rich in timbre and expressiveness.
For easier access to important modulation, you can put knobs and sliders on patchers, front panel, the control surface. In the following sections I will walk you through how you can make a beautiful, velocity mapped, key tracking pad sound with integrated sidechain ducked reverb in FL Studio 12.
Patcher Pad
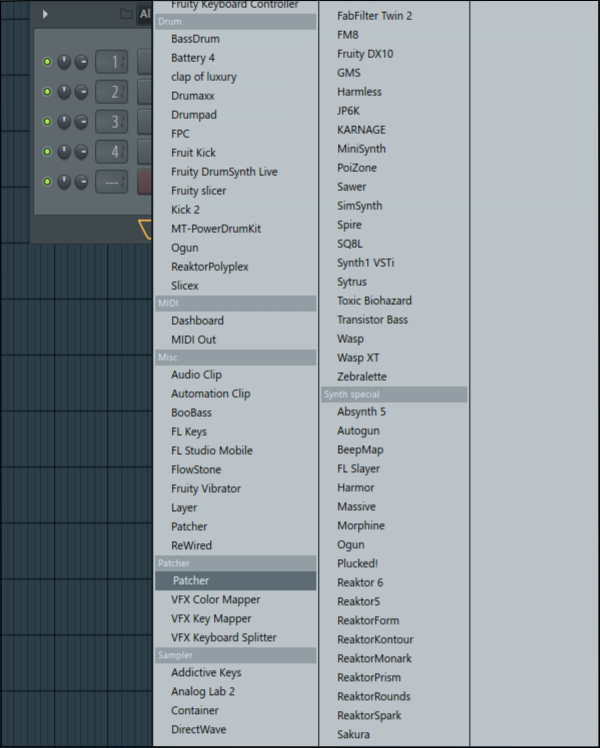
First, access the Channel Rack by pressing F6 on your keyboard if you’re not seeing it already. Click the „+“ button on the bottom to open your generator database and select Patcher. This menu contains all the plugins you’ve favourited in FL studio’s plugin manager app. Now, click the Patcher channel that has just appeared.
You will see a patcher panel with 2 modules, one titled ‘From FL Studio’ and one titled ‘To FL Studio’. Right click the panel and choose ‘add plugin’. Now you will see the full list of your favourited plugins, generators on the left and effects on the right.
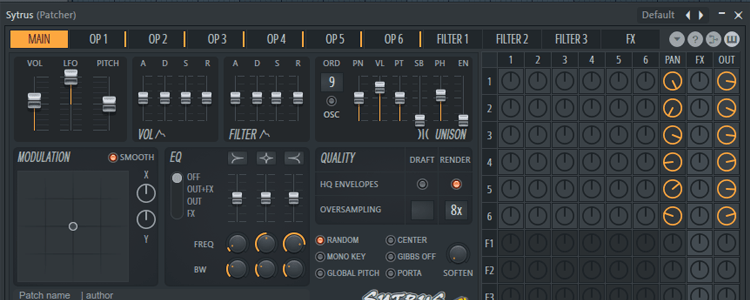
Choose a generator. In my case it will be Image Line’s Sytrus, but it works with third party plugins just as well. If you are using Sytrus, I just made a basic supersaw with all operators as saw waves going out directly, detuned a little bit and spread in the stereo field (9 Unison).
As soon as you drop the generator in, you’ll have noticed that it will auto-connect two wires. ‘From FL Studio’ has a turquoise wire going into the generator, and the generator has a yellow wire going ‘To FL Studio’.
There are 3 types of connections in Patcher. Turqoise is note (MIDI) data, yellow is audio and red is parameter (automation) data. The effect version of Patcher has an ever-expanding preset library, too, if you’re looking for certain kinds of effects and you don’t have a lot of time to tweak them, check those out.
Since everything in Patcher is connected by wires, and the more complex your patch gets the more of them you’re going to see, there are display options for all three node types in the top right of the window. That makes it easier to follow an audio path through the entire patch. Also, if you right click the panel again, there is an option to ‘Auto-arrange modules’ which will try to evenly space your plugins using existing panel space based on signal flow.
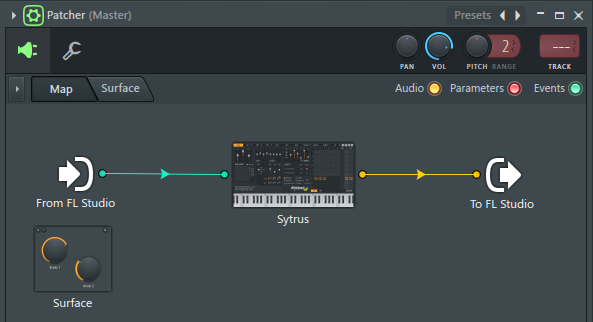
Right now, your patcher should look pretty basic. You can now play this single-instrument patch with your master keyboard and it will act as if you had just dragged the plugin on the channel rack.
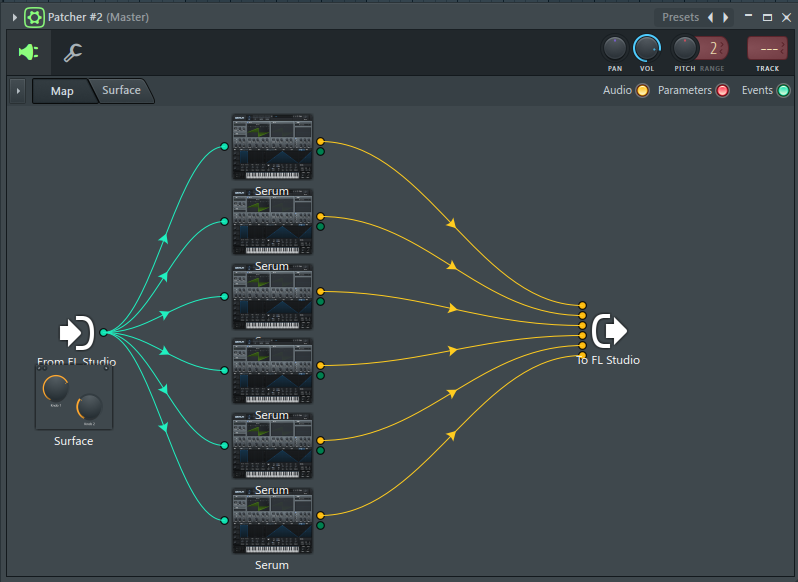
You can now add more instruments to make a parallel chain. In my case I’m cloning my existing Supersaw by right clicking Sytrus on the panel and dragging the ‘save preset as’ option. This works for all plugins in FL and Patcher. I am also pitching one of the Sytruses up an octave in the synth. Now it’s an octave stack.
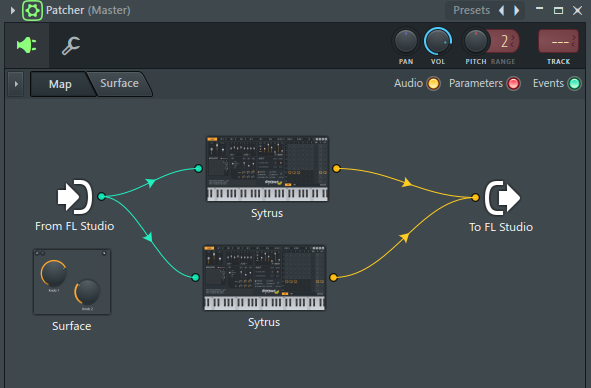
Patcher auto-connected MIDI and audio nodes for me. To connect a node to a corresponding input, simply left click it and drag. Or right click a sending node and select the destination from all available ones. You can mute an audio wire by right clicking it or change its send level when the mouse is over it.
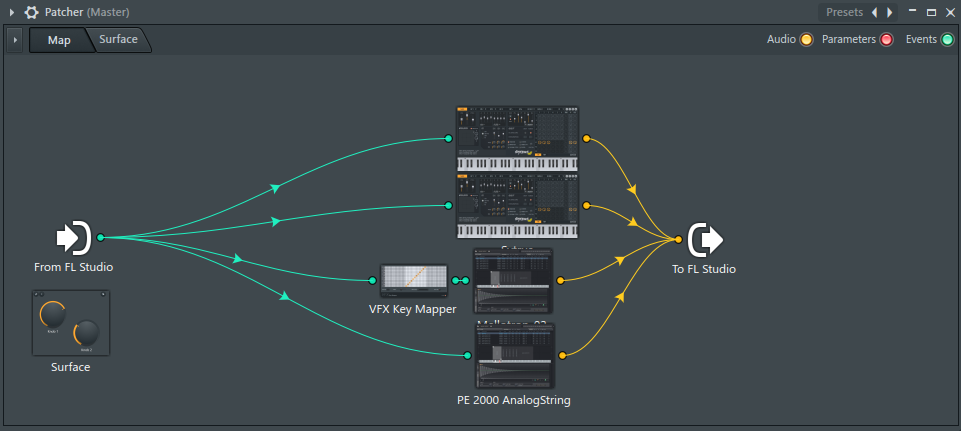
I dropped two sample libraries from DirectWave, FL’s native multitimbral sampler, into the chain. One of them was a whole tone flat, so I added a VFX key mapper module in front of its MIDI input and transposed the MIDI up a whole tone going in.
Key Splits, Envelopes and Velocity Mapping
While I’ve already got a big sound, it’s still very static, it sounds the same no matter how hard I press the key or how high up on the keyboard I go. To prevent this, I often split my layers up into key ranges, modulate the timbres using Envelopes/LFOs and map important parameters to velocity.
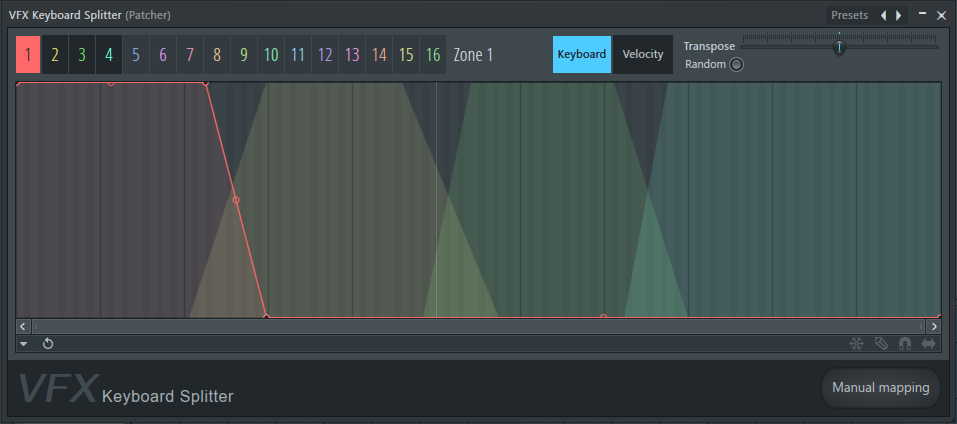
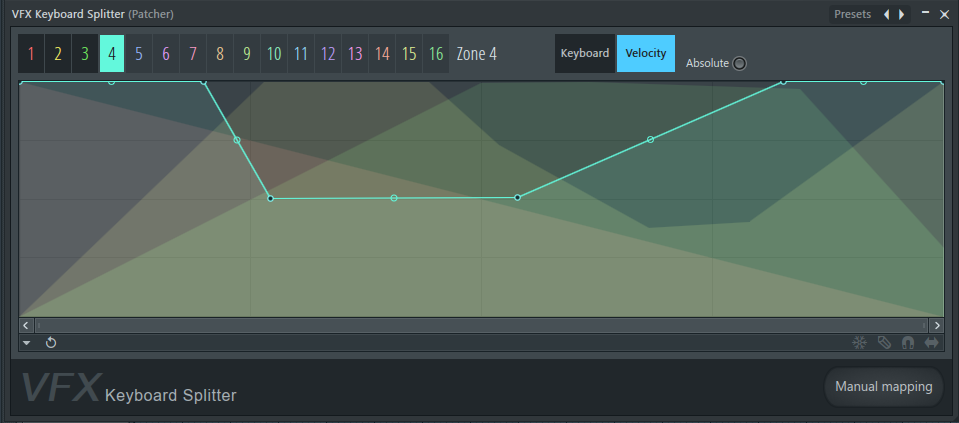
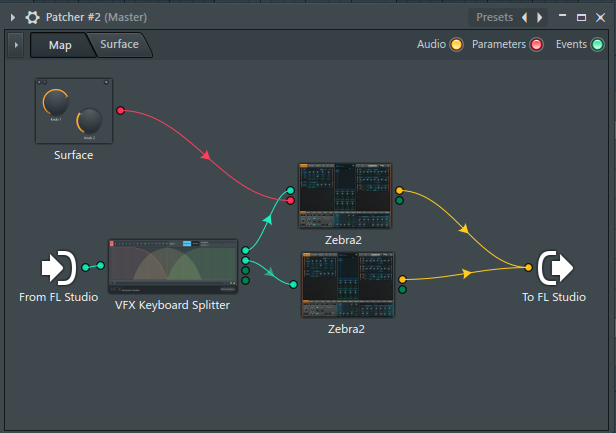
To make a Key split, simply right click the MIDI node on ‘From FL Studio’ – select ‘Insert Plugin’ and choose the ‘VFX Keyboard Splitter’.
Right click it on the panel, select ‘Outputs->events’ and activate zone 1-4. Right click in the menu to avoid it closing once you’ve activated an additional output. Each zone has a MIDI output, and it has 16 zones. Should that not be enough, you can have unlimited instances of it.
Now it will have 4 turqoise output nodes. Connect those to your individual generators. Now double click the VFX Key Splitter in the patcher panel and set your zones using the line editor.
In the line editor, turn off snap, slide and step and then right click to create additional points in the graph. Each zone has a line editor and is superimposed on the previously edited zones to make it easy to cover the full MIDI range if need be.
In the same plugin, you can also transform incoming velocity for each layer, which is all you need if your synth patches already respond to velocity.
In this case however, my patches themselves don’t care about velocity much beyond volume, so I am going to use a method that can make anything respond to velocity no matter what it is. I am going to drop a simple set of 4 Fruity Free Filters and Fruity Balances after all of my synths.
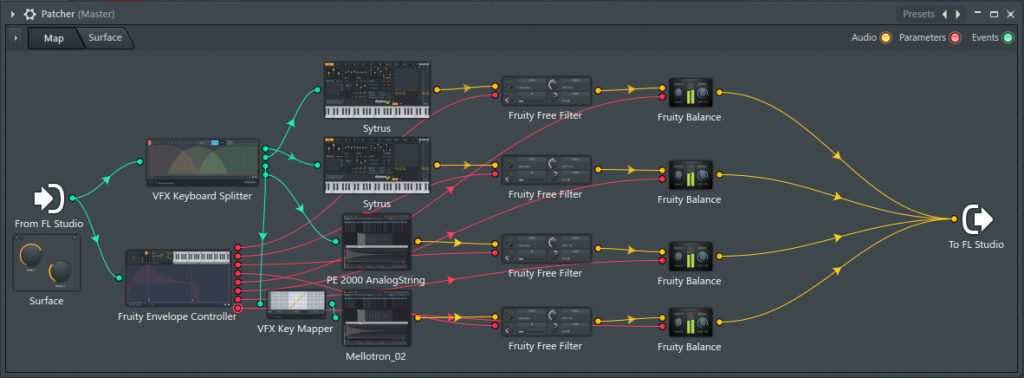
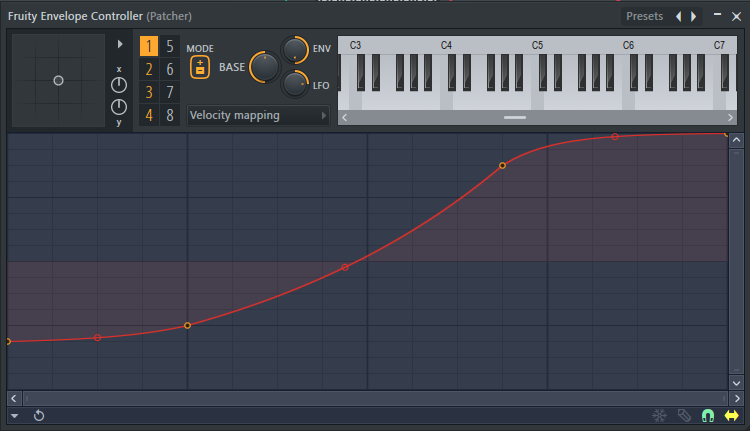
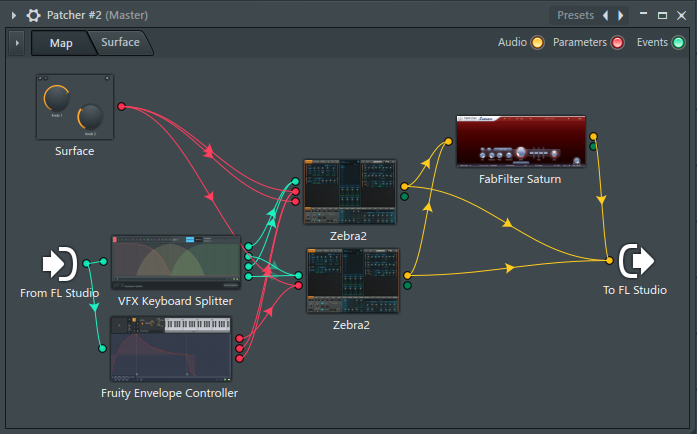
Then I’m going to add another plugin. An Envelope Controller. It’s an Envelope/LFO generator with Velocity mapping and Key tracking and it lives on the generator side of the menu. Once it’s in your Patcher, it will connect to the original MIDI stream before the key split.
Right click it on the panel. Go to ‘Outputs-> Parameters“ and select ‘Activate All’. You should now have 8 red (parameter) outputs. Now, go to each Fruity Free Filter and activate the Cutoff knobs by right clicking it and selecting „Activate“. Do the same for the Balances’ Volume knobs. Now, connect the first four red nodes from the envelope controller to the red nodes on the filters, and the second four to the red nodes on the Balances.
Your Patcher should now be looking something like this. You can of course connect a parameter output to multiple inputs, should you choose to do so. In this case that would mean one filter velocity map would affect two filters or volume knobs at the same time.
Inside the Envelope Controller you now have access to one of the most powerful modulation tools around. You now have Envelopes, LFOs and dedicated scaling articulators for Velocity, Keytracking, Macros X and Y and the built in Randomizer for each of the 8 parameter ouputs. On the first 4 articulators, turn on the envelopes, but delete the pre drawn shape using the step mode and make a single point, right click it and set it as the sustain. Use the Velocity view to map the Lowpass cutoff frequencies to velocity. Also give the Keyboard Mapping and LFO tabs a glance to introduce some change in timbre over time.
For the second set of four articulators, which will affect output volume, we’re going to use the envelopes as well as the velocity mapping. Tweak the multi stage envelopes of each one into a shape of your liking, then use the velocity tab to make the output scale with velocity. I’m going for a longer attack, as this is supposed to be a pad sound.
Effects
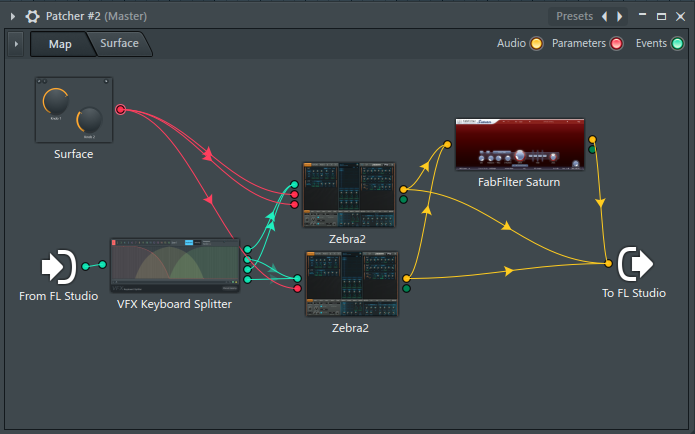
Now that the basic sound has been made velocity responsive and has got a tailored ADSR, it’s time to add some effects.I’m going to add reverbs to all of them, then I’ll combine one of the Sytruses audio streams with a Directwave, add a delay plus reverb panned hard left to that stream and keep a dry stream as well.
I will do the same thing with the other pair, only the delay and reverb will be panned right and different in nature. I will then combine the wet chains and sidechain them with the dry chains, so they only pop up when I let go of the note. Then I’m going to EQ and compress the whole thing before it goes out to the mixer.
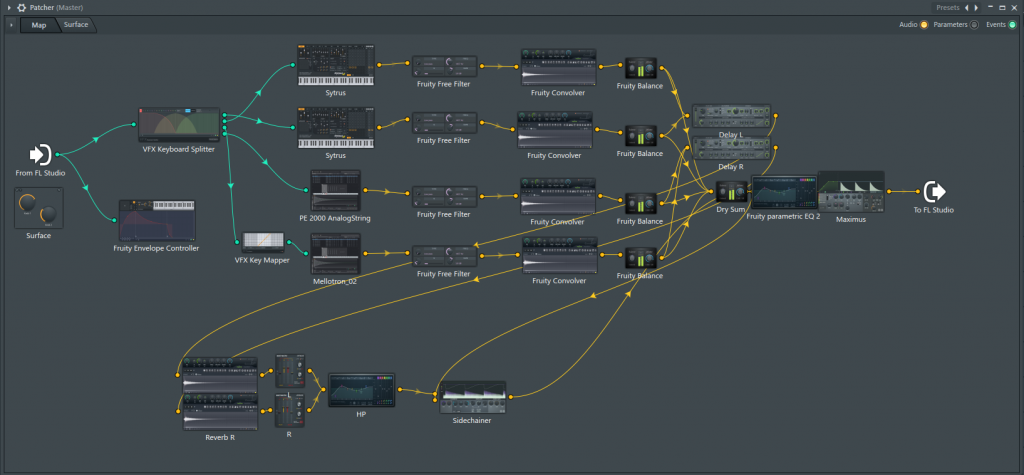
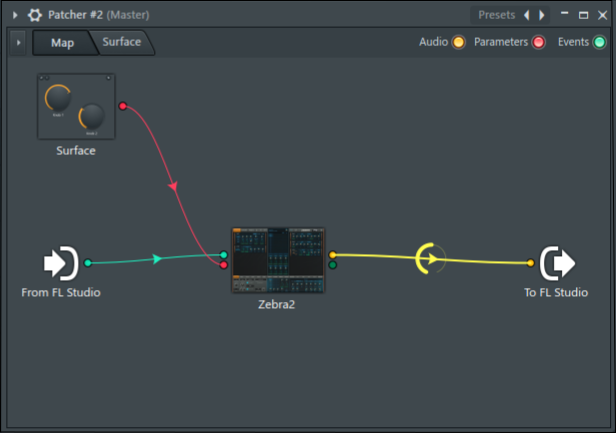
The image above is approximately is what your patcher should look like after doing that. To sidechain in patcher, simply right click the compressor you want to sidechain with, select ‘Inputs->Add one’ and connect your sidechain audio stream to that. Now set the compressor up like you usually do.
This patch uses about 15% of FL’s CPU meter when playing 5 notes at the same time, so you do lose a bit of headroom. If you want a more live performance-oriented patch, you can skip the sidechain from the dry to the wet, and maybe not everything needs its own reverb or 9 unison voices, which would give you better multithreading performance inside patcher.
Macros
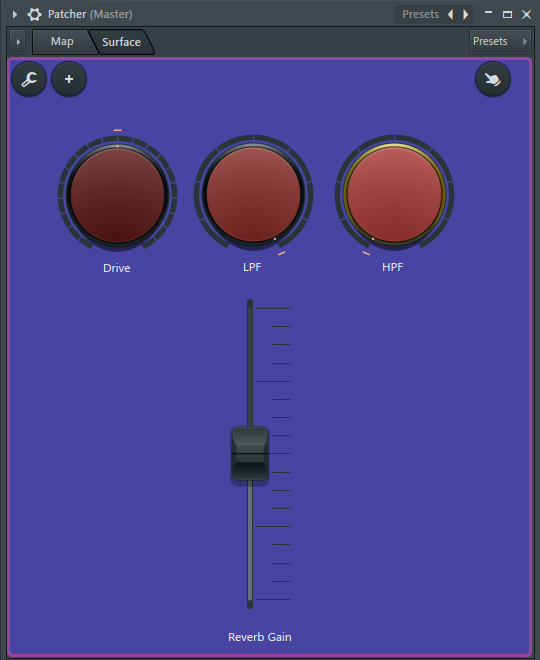
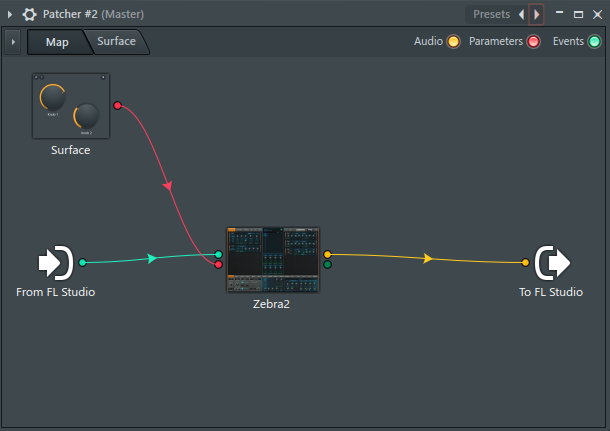
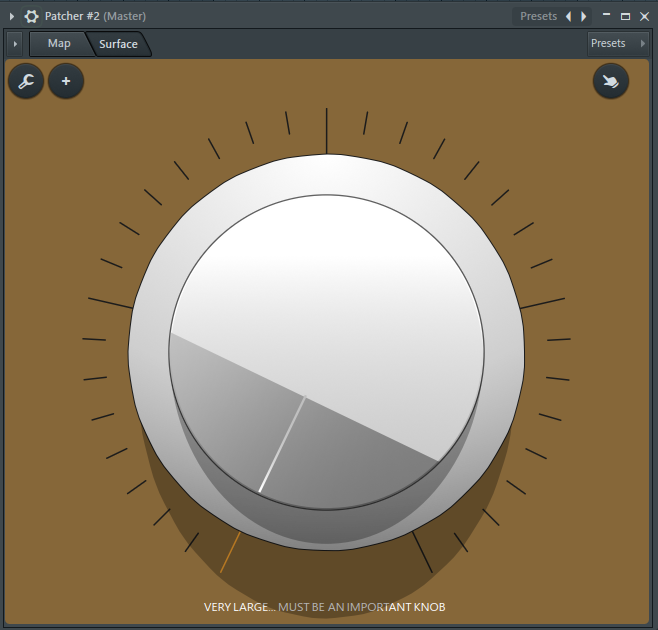
Let’s turn our attention to the module that has just been sitting there idly, the Surface. This is where you can put knobs, sliders and buttons to control the whole thing by hand, with your mouse or via MIDI messages.
In Edit mode (the wrench in the top left) it lets you design a basic face plate and knobs for your Patcher patch. Once you’ve created a control element, it too will have a red node in Map view coming out of the Surface module. You can set default values for each of them by right clicking in edit mode. For my patch, I’ve chosen pre-compressor drive, reverb gain and a set of filters.
I made this very expressive custom patch in about 30 minutes, give or take a few minutes spent just listening, playing around with it and tweaking. Taking that time to craft these personalised tools in electronic music might seem daunting at first. But when you have a whole range of them, ready to drop into a session, your workflow will actually speed up a fair bit when writing.
You don’t have to spend a lot of time fiddling about with 3rd party presets that you don’t know or don’t care for, you won’t stump your creative process because you need to go into sound design mode mid session that often and you’ll end up with something that feels – and most importantly sounds – like a human made it.
Step by step Quick Recap:
1. Add a Patcher and drop in some instruments.
2. You can play multiple instruments at the same time using Patcher and still have them come out as discrete mixer channels (useful for drum patches).
3. MIDI= turquoise, audio= yellow, parameters= red.
4. Each audio wire has a volume control.
5. VFX Modules allow Key and Velocity splitting into different MIDI outputs.
6. You can route multiple outputs to a single input and one output to multiple inputs- whichever way you like.
7. Envelope Controller lets you get into the nitty gritty.
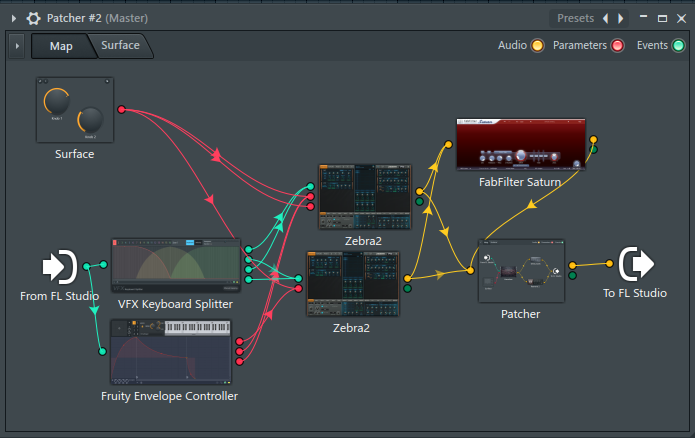
8. You can put a patcher inside a patcher, to avoid cable mess.
9. You can customise the look and feel of your patch via macros and a face plate.