FL Studio Tutorial: Become a Power User 3 – MIDI Editing (Continued)
Hollin Jones continues his look at MIDI editing in FL Studio… 10: In the Articulator window you can precisely control the way the selected notes will be changed. You can choose a length alteration style from the Options menu and then specify a multiplication factor, gap and variation amount. Hit Accept and the notes will […]
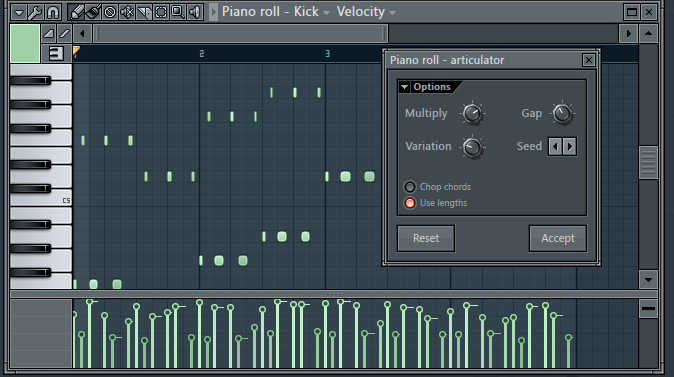
Hollin Jones continues his look at MIDI editing in FL Studio…
10: In the Articulator window you can precisely control the way the selected notes will be changed. You can choose a length alteration style from the Options menu and then specify a multiplication factor, gap and variation amount. Hit Accept and the notes will be changed accordingly. It’s a quick way to tweak performances.
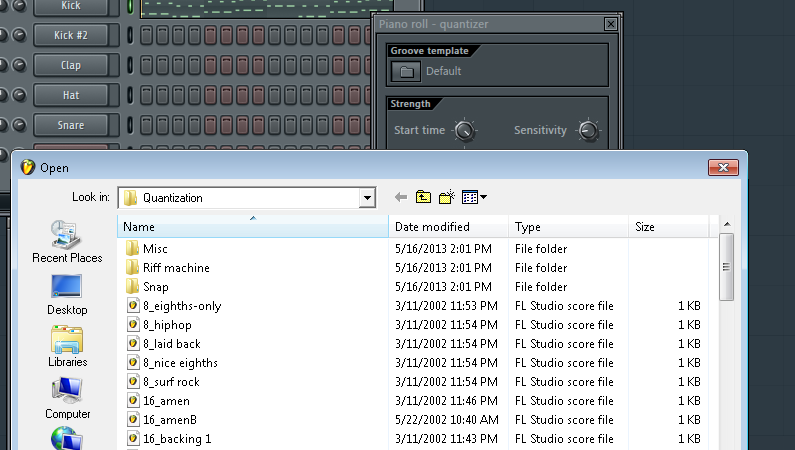
11: Further down the Tools list you will find the Quantize tool and this is vital for any kind of MIDI-based music-making. Select it to reveal the Quantizer window. You can if you wish load a groove template, by clicking on the menu of that name. Using groove templates is a great way to bring a specific type of swing – like he Amen break – to your beats and other MIDI parts.
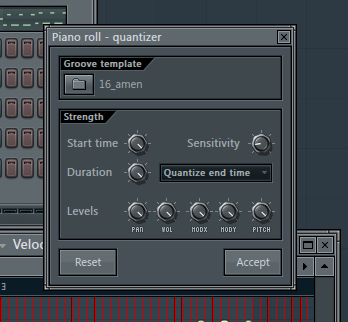
12: Make further settings for quantization by tweaking the other controls in the window. You can change the start time, sensitivity, duration and even quantize the different parameter levels including pan, volume and pitch controllers. Hit Accept to hear the changes : you can always undo this and try again with a different value if you like.
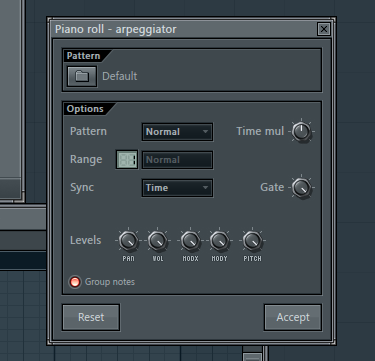
13: Moving down the list of MIDI tools you will find a range of specialised processors. The first is an arpeggiator, which like other effects has many presets available to choose from. Load one up or start from scratch and whichever you choose, use the controls on the window to tweak the results. You can take simple MIDI parts and make them sound complex and interesting by adding arpeggiaton.
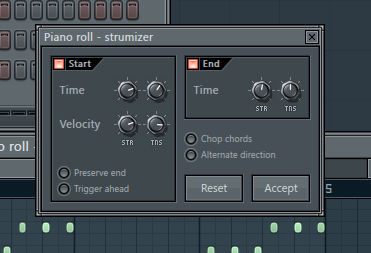
14: The other MIDI tools can be more useful for certain types of instrument than others. For example the “Strum” command, which processes MIDI signal to make it appear to have been strummed, is obviously better suited to a guitar sound. Similarly the flam effect is better on drums. But you are free to try any effect on any part, and you may get some unexpectedly great results.

15: The Limit option is an interesting one. This allows you to restrict the MIDI notes within any given pattern to a specific scale or range of notes. It’s useful if for example you have recorded or generated a complex part but want to quickly get rid of any notes or accidentals that may not fit with the scale of the piece as a whole.
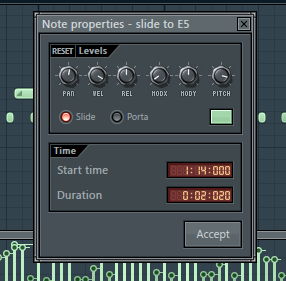
16: Double click on any MIDI note and you can reveal the note properties : there is one available for every note in a pattern. Here you can change the pan, velocity, release, mod x y and pitch of a note as well as activating slide and portamento. You can also manually enter a precise note duration using the number friends in the Time area. These controls are all good for very accurately setting up any note much more precisely than playing from a keyboard would allow.
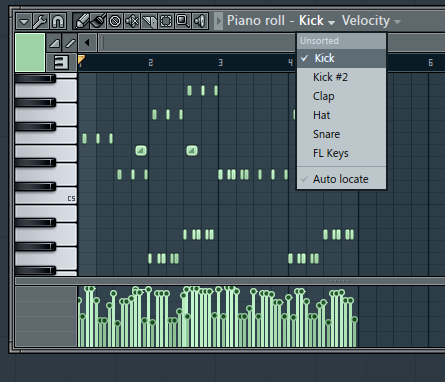
17: In the Piano Roll Editor, go to the title bar and click on the Target Track selector. This shows a list of all the channels in a project that can accept Piano Roll input. From here you can quickly select another Piano Roll to view and work on without having to open a new window. Of course if you want to open multiple windows for more flexibility, this is possible as well.
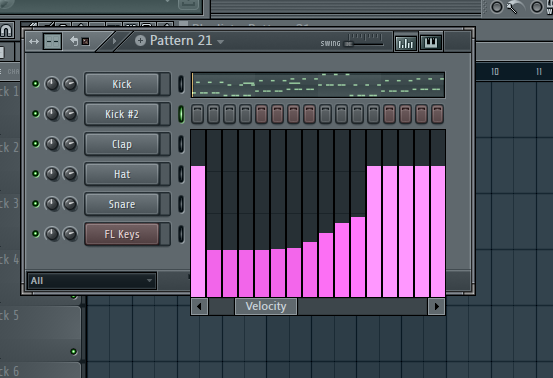
18: As we have noted before, MIDI can be edited directly from the Step Sequencer view as well, by using the Graph and Keyboard editor windows that can be revealed from the top right corner of the window. These can be used to quickly change notes or draw in controller data such as pan, velocity or mod x and y.
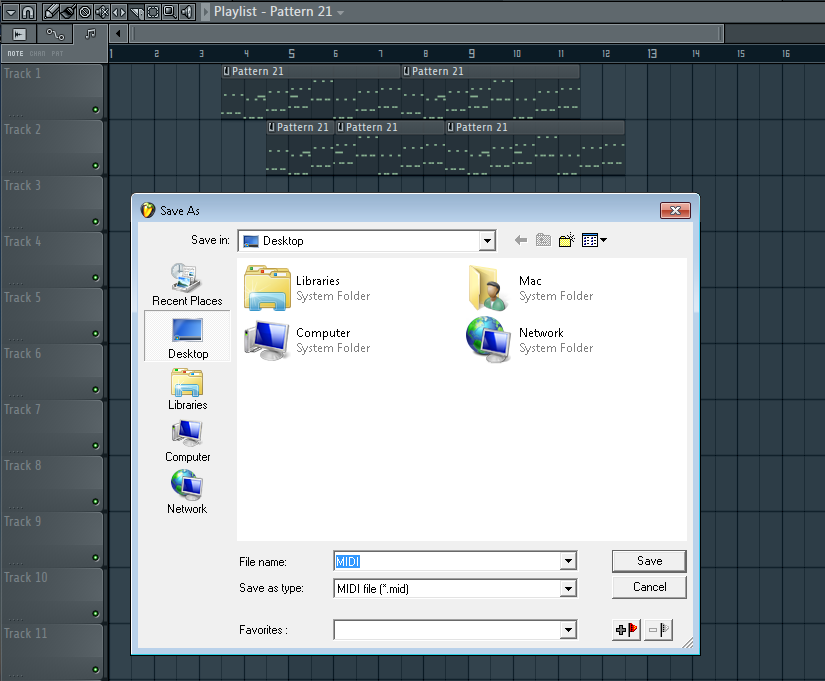
19: Many of the tools that you use to work with MIDI in the Piano Roll editor can also be found in the toolbar that appears at the top of the Playlist window. Here, they have similar functions such as the ability to draw or paint entire patterns into the playlist, delete, mute or move patterns and indeed slice patterns up for easier arrangement across the timeline. MIDI files can be output from FL Studio using the File > Export menu and then choosing MIDI File. These can be imported into any other DAW, so you might for example use FL Studio’s great generators and MIDI processing tools to create backing parts, then export them to send to someone else to use to trigger the plug-ins they are using in their own setup. If they too are using FL Studio you can of course send them raw project data.
