Getting a lo-fi sound using Phat FX in Logic Pro X: Step-by-step (Continued)
Following on from part 1, Mark Cousins shows us how to add some lo-fi treatments to drums and synth using Phat FX… 7. Now add some Distortion to the drums. Because the drums now exist over a narrow frequency range, we’ve picked a heavy Scream setting at 100%. Try auditioning the effect with the band-pass […]
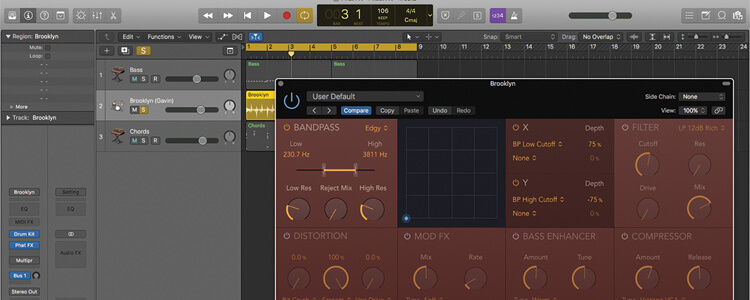
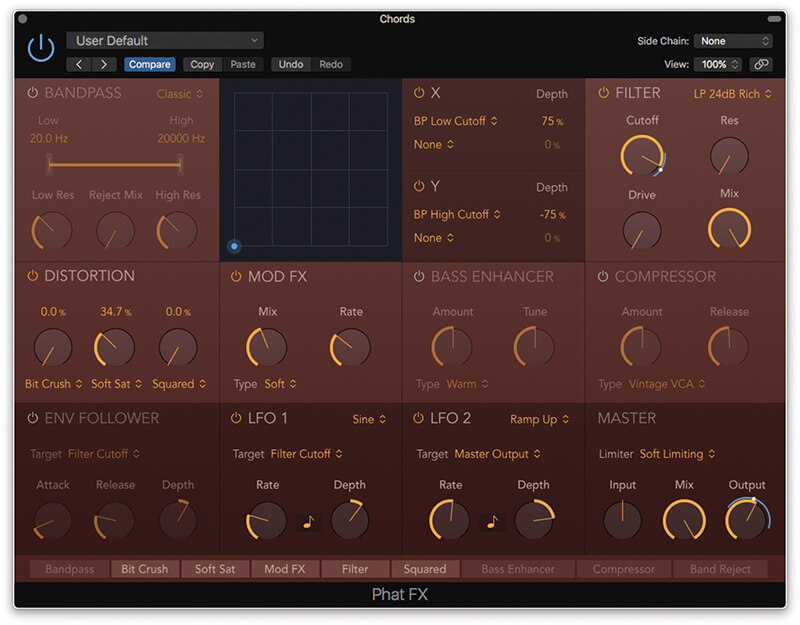
Following on from part 1, Mark Cousins shows us how to add some lo-fi treatments to drums and synth using Phat FX…
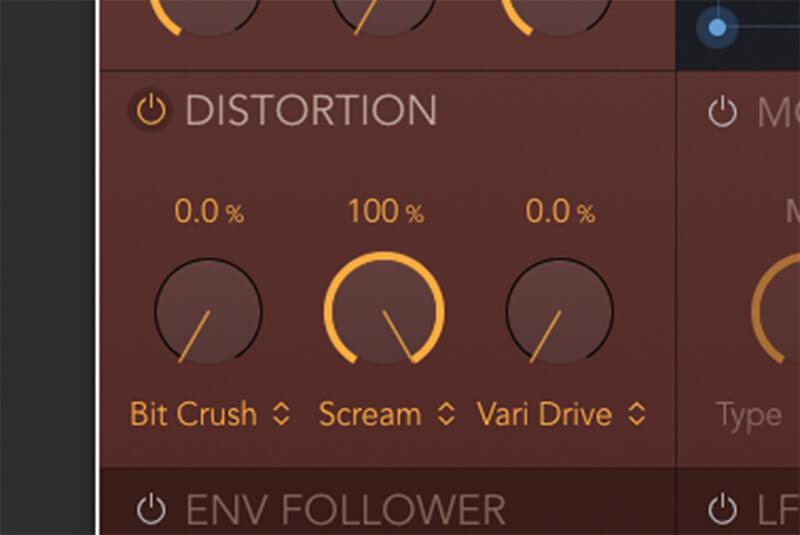
7. Now add some Distortion to the drums. Because the drums now exist over a narrow frequency range, we’ve picked a heavy Scream setting at 100%. Try auditioning the effect with the band-pass before and after the Distortion block.
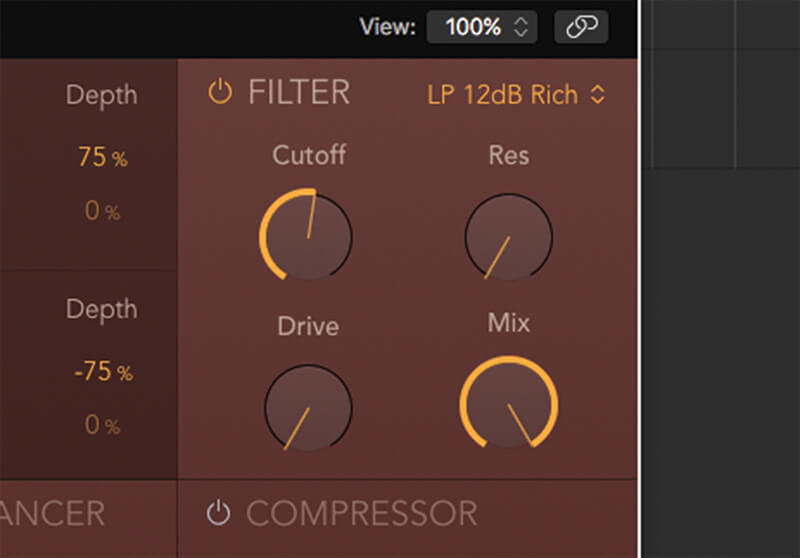
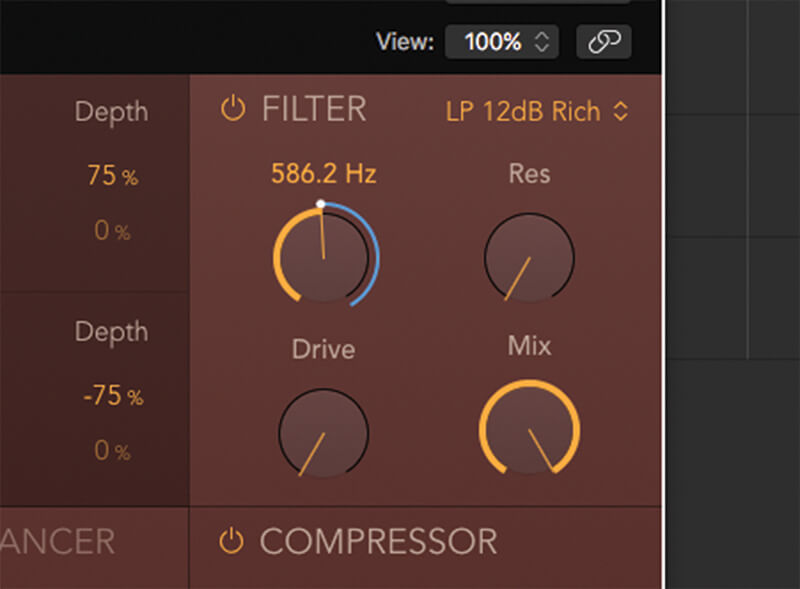
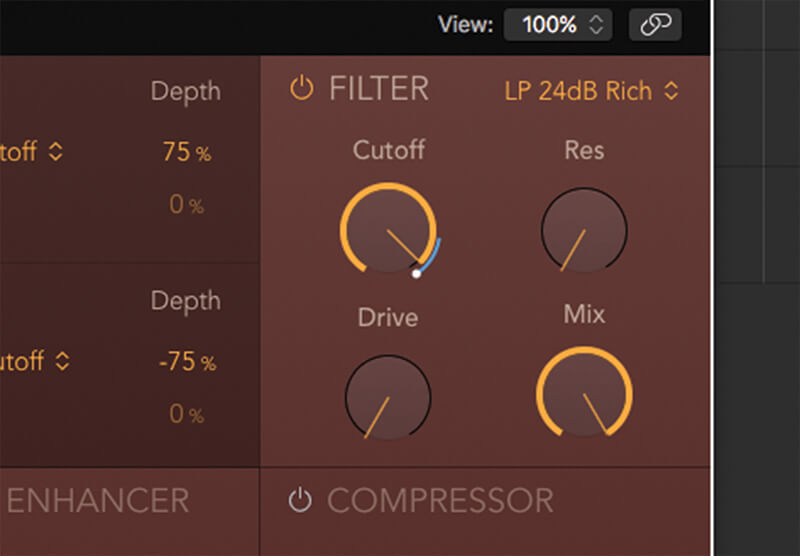
8. Distortion adds harmonic material, so it’s often beneficial to tame some of that energy with a low-pass filter. 1000Hz (on a LP 12dB Rich setting) sounds suitably ‘dark’, but with all the added body of the Scream setting.
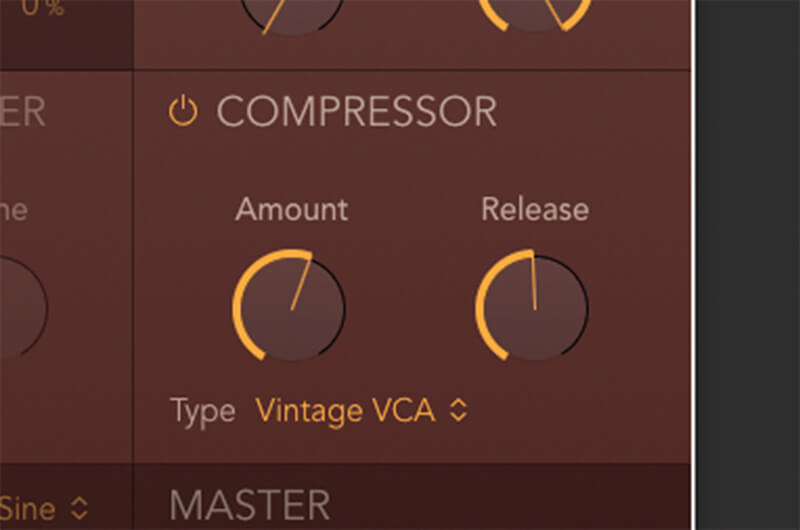
9. Lo-fi drums wouldn’t be complete without a heavy dose of compression. As you can see, the Amount is pushed harder than the bass so that the drums start to pump and have an increased sense of body.
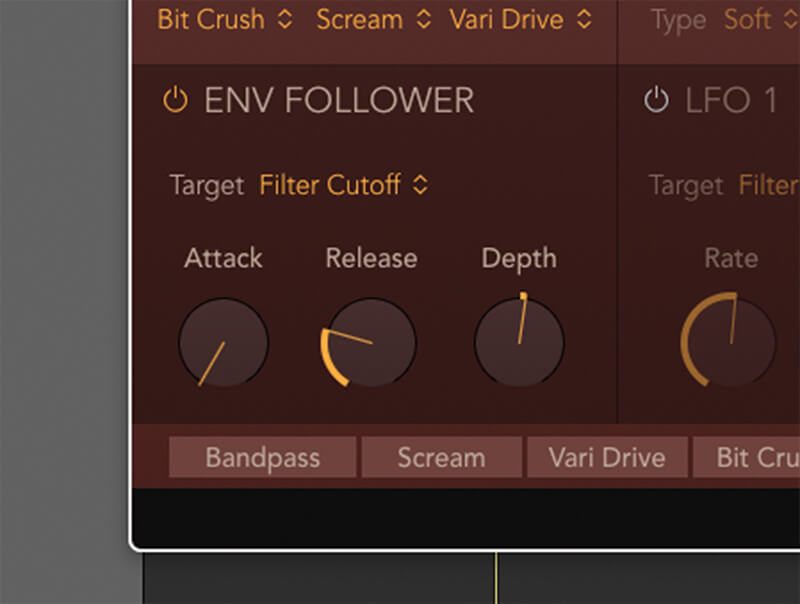
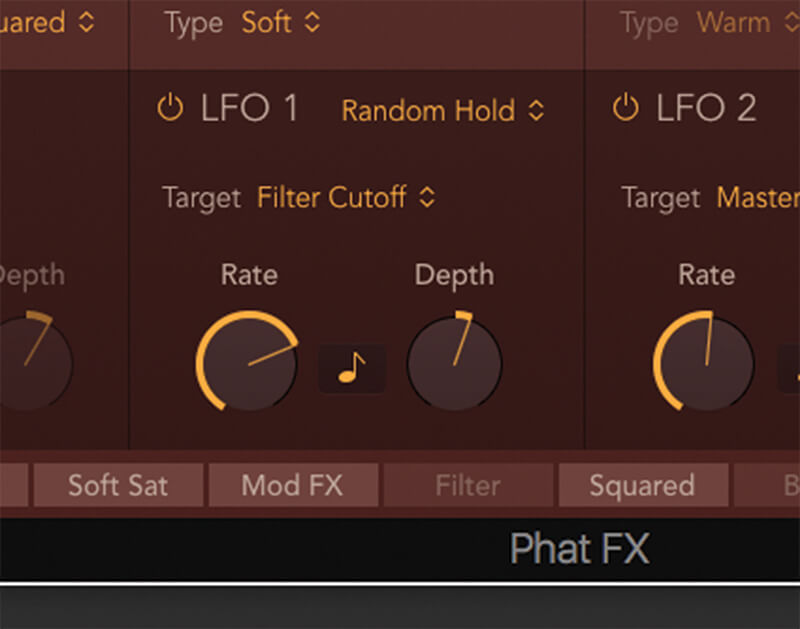
10. The Envelope Follower is a natural fit with drums. We’ve set Filter Cutoff as the target, with the fastest attack setting and a release that is graduated enough to match the drum track (around 0.51s).
11. The finesse of the effect is balancing the Depth of the effect (in the Envelope follower section) with the Filter Cutoff position. Note how the blue line indicates the modulation being applied additively to your initial setting
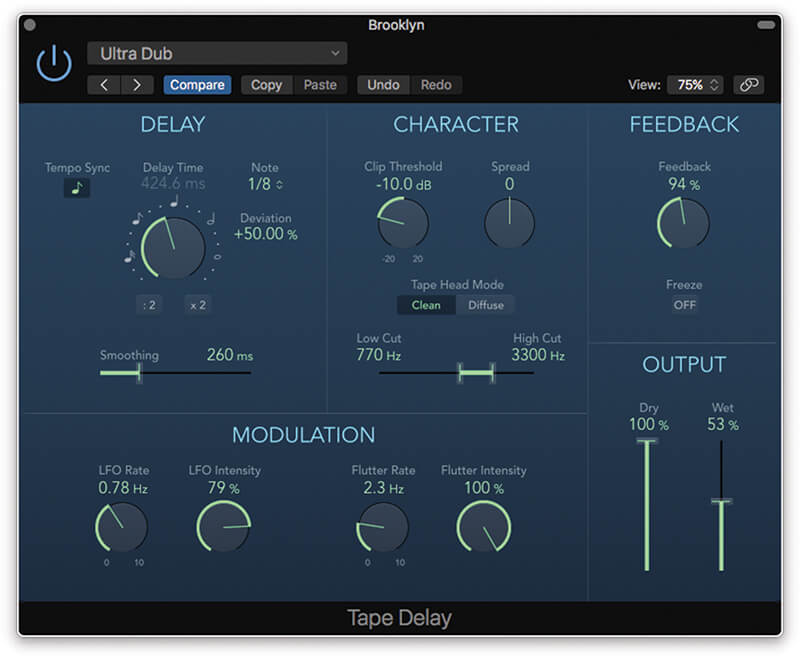
12. One arguable omission from Phat FX is a delay module. To complete the lo-fi drum treatment, therefore, we’ll add some Tape Delay using the Ultra Dub setting. This is placed as insert effect after Phat FX.

The two principle forms of digital distortion
Downsampling and Bit Crush come to life when relative amounts are modulated using LFOs. Tempo-lock the LFO. Use either of the sample-and-hold waveforms for glitches or un-sync the LFOs and push their speed into audio-rate modulation.
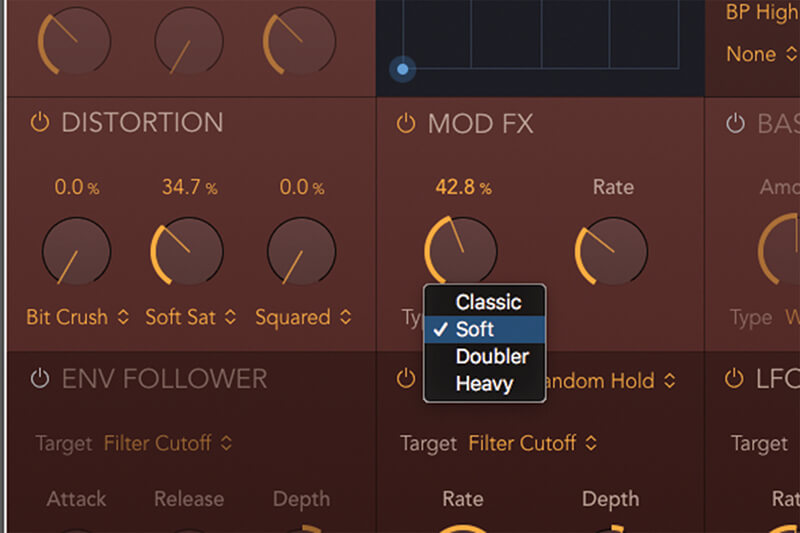
13. Now let’s look at the synth pad in Phat FX. To start, we’ve added a small amount of Soft Saturation and the Mod FX block. The Mod FX in its Soft setting produces Juno-like chorus that works with pad sounds.
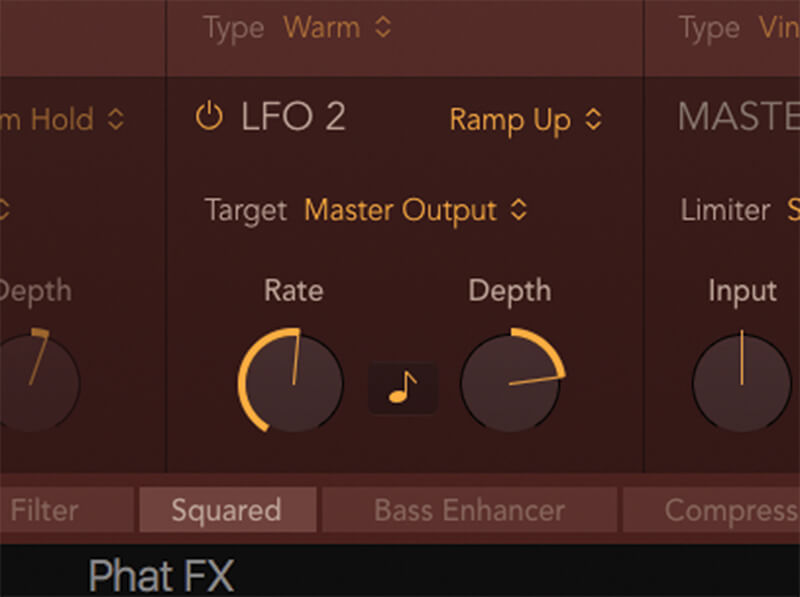
14. Now let’s add some side chain-styled amplitude modulation. On LFO 2, select the Ramp Up option from the drop-down menu, set the Rate to 1/4 notes (in sync mode) and the depth to around 50%.
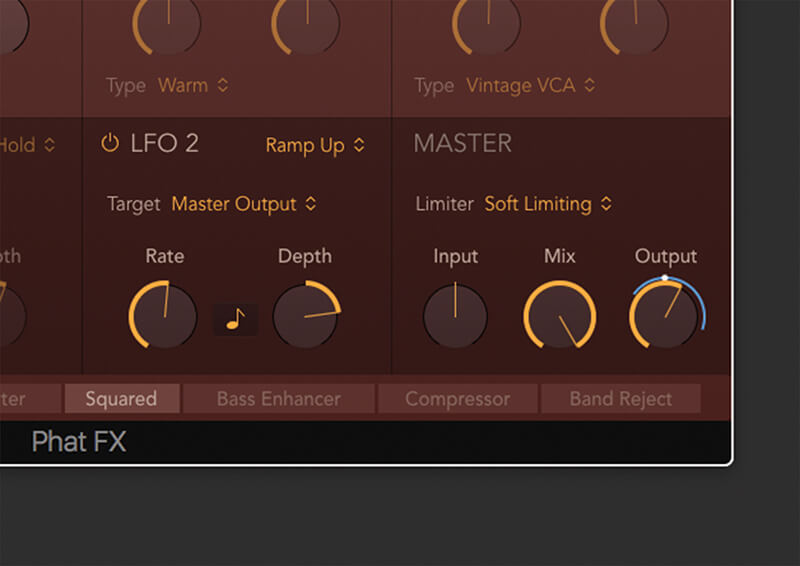
15. The pad should now pump up and down in the same way as if it were being side chained from a kick. The Depth of the LFO sets the amount of amplitude modulation, making it increasingly ‘pumpy’.
16. With two LFOs to hand, there’s plenty of modulation possibilities with Phat FX. This next option uses a Sample-and-Hold waveshape, set to 1/16th and routed through to Filter Cutoff.
17. In this application we’ve used a small amount of Depth on the LFO and positioned the Cutoff near the top-end of its range. The result is a subtle shimmer, rather than a pronounced stepping effect.
18. This final option swaps out the Sample-and-Hold waveshape and instead uses a slow-moving sine wave on the LFO to slowly undulate the filter cutoff. As before, the finesse is in relative position of Depth and Cutoff.
For all the latest Logic tutorials head HERE
