How To Create Dub Stab Delay FX in Logic Pro X
Crafting effects is one of the most fun things to do, as you can let your imagination run riot. Most FX sounds in a track are fleeting, so you can push the sound design more, without having to worry quite so much about how it will fit in the mix. We’re going to create a […]
Crafting effects is one of the most fun things to do, as you can let your imagination run riot. Most FX sounds in a track are fleeting, so you can push the sound design more, without having to worry quite so much about how it will fit in the mix. We’re going to create a dubby, brass stab delay effect using Logic’s stock plug-ins…
Creating a dub stab delay effect: step-by-step
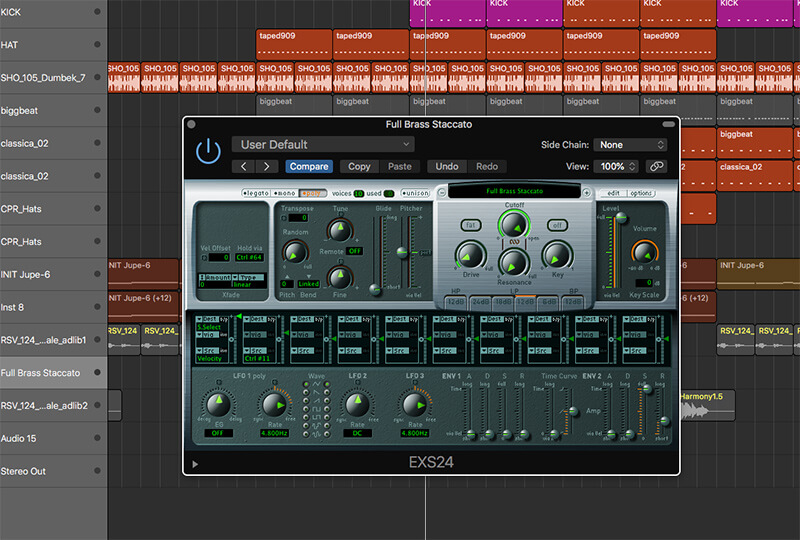
1. Let’s begin by loading up an orchestral sound such as the Full Brass Staccato patch in EXS24. Don’t get too hung up on trying to find a super realistic sounding instrument, but ideally you want something fairly short as we’re going to be adding our own tail using effects.
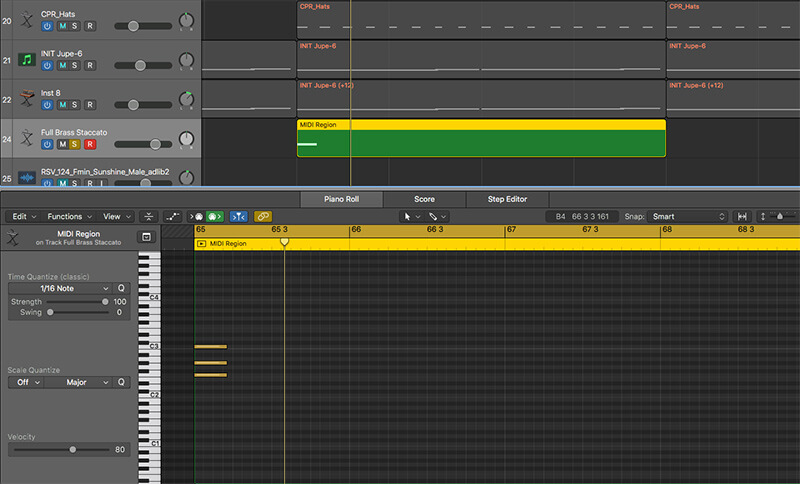
2. Work out the key of the track and record or draw in a short staccato chord stab at the beginning of the bar. Sometimes it’s worth just solo-ing the musical elements of a track and looping it to find out which chords sound best when played on top.
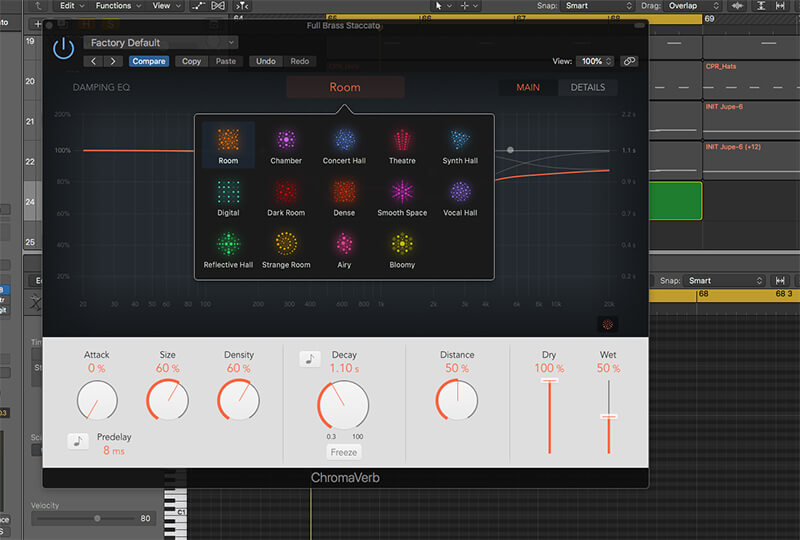
3. Now let’s add Logic’s lovely new ChromaVerb to the stab. Try listening to the different algorithms to see how they affect the sound, and notice how they have slightly different timbres and decay characteristics. We’ve gone with the Reflective Hall setting as we want a long, open reverb tail.
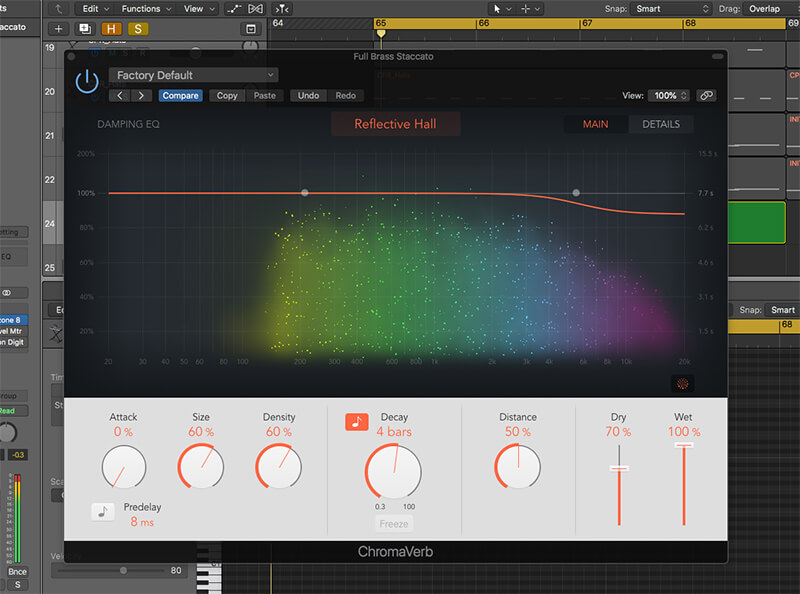
4. We can now fine tune the Decay time. If you click on the note icon, you can set the Decay length to last 4-bars. We’ll also turn up the Wet to 100%, and turn down the Dry to 70% to create a big washed out tail sound.
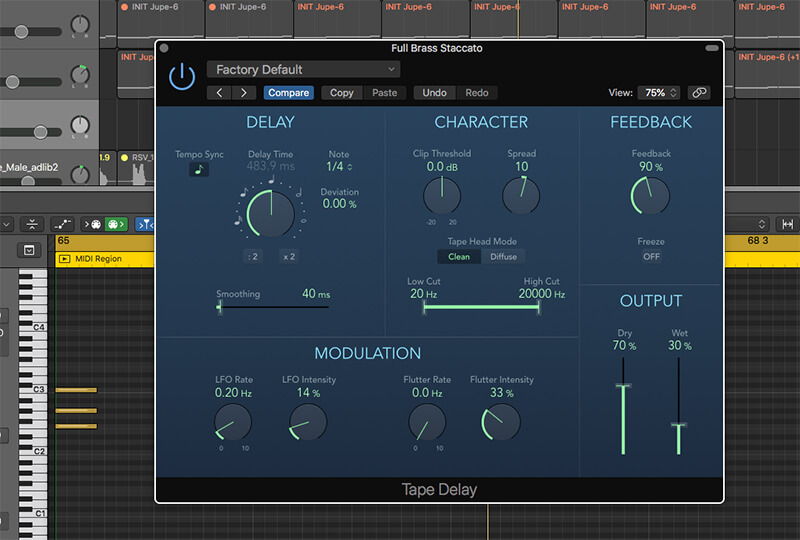
5. To extend the sound to over 8-bars long, we can add a Tape Delay and set the feedback to 90%. Adding a touch of LFO Intensity and Flutter Intensity can bring some life to the sound, and also a small amount of Width creates space in the centre.
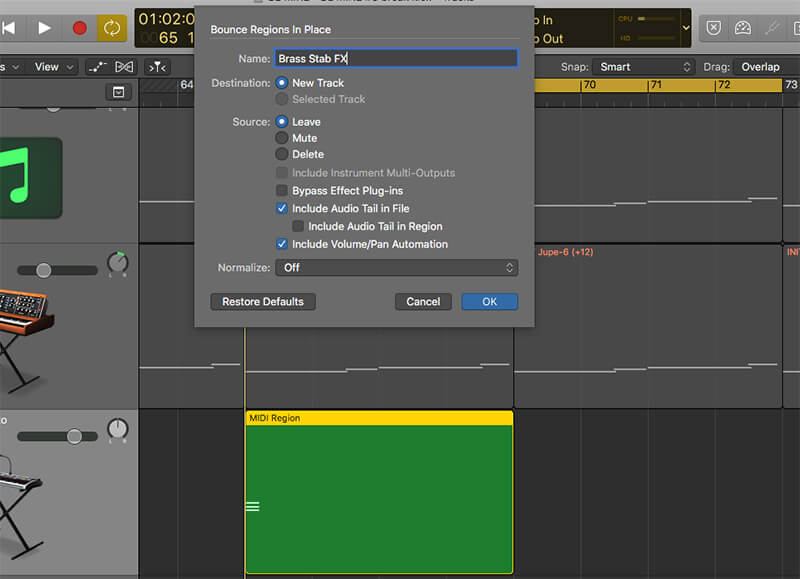
6. We’ll now bounce the sound in place to bring it into the audio realm. Make sure you have ‘Include Audio Tail in File’ ticked so that it processes all of the decay. Once we have an audio region, we can trim it back to a tidy 8 bars.

7. You now have a few options. You could try reversing the region using the tick box in the Region Inspector, then placing it alongside the original so that it decays out, then sucks back in again. Some panning automation may also be a nice touch here.
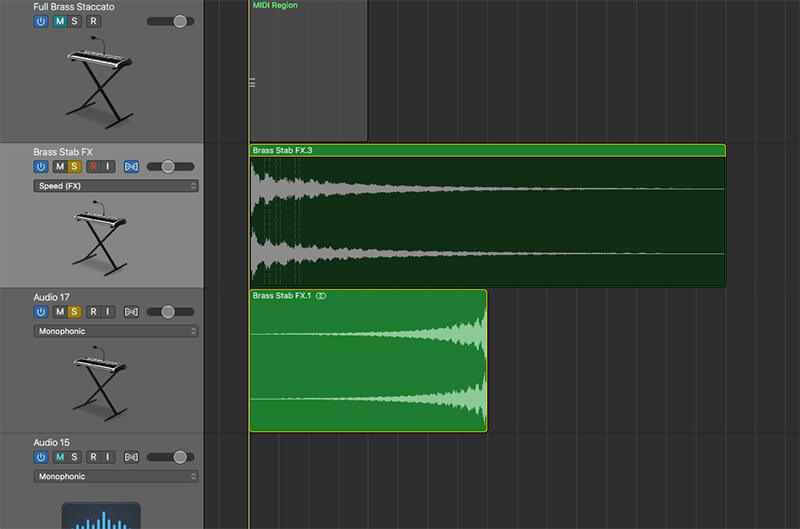
8. To develop this idea further, you could take the original and turn on Flex set to the Speed algorithm, then stretch it out to double the length at 16-bars. This gives a nice atmospheric feel as it plays an octave down, and morphs into the reversing sound at the original pitch.
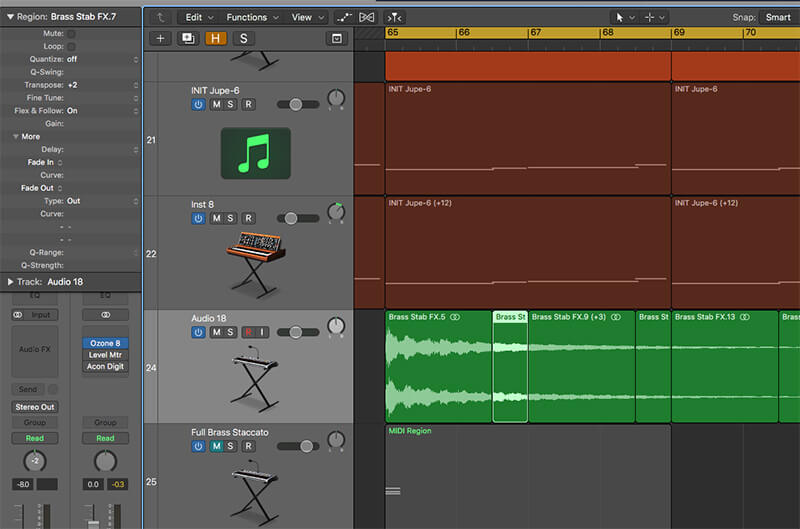
9. A sideline technique to explore, is to chop out sections and transpose them using the Region Inspector so that they go with other parts of your track. Here we’re transposed the sections up a few semi-tones to follow a sustained bass part.
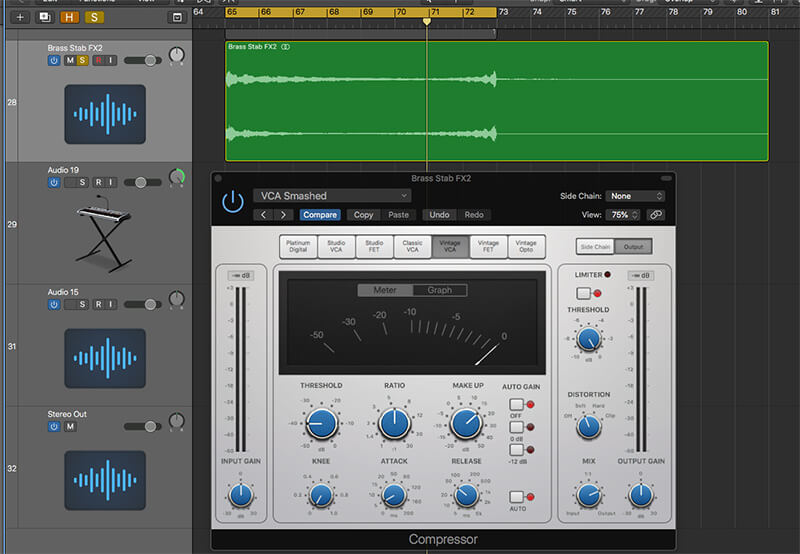
10. Going back to our original idea, we want to add further processing. We could send these two to a buss, but to keep it clean we’ll just bounce them in place again. Now we’ll add some fairly extreme compression to bring out some grit and detail.
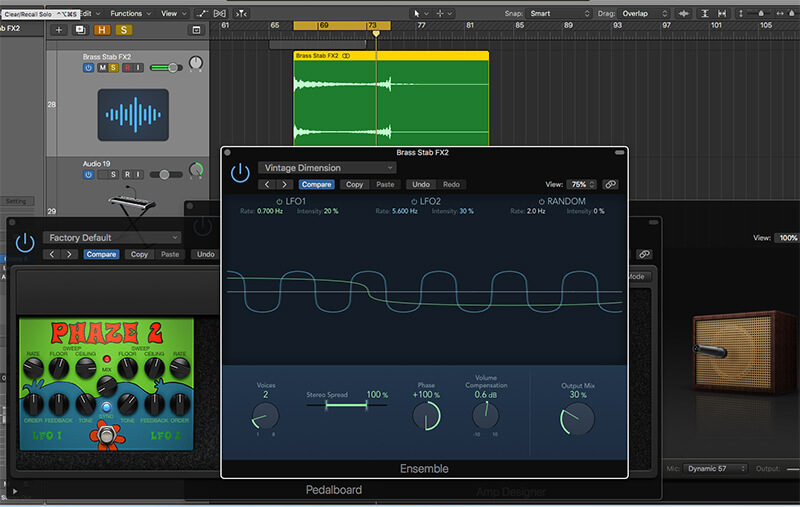
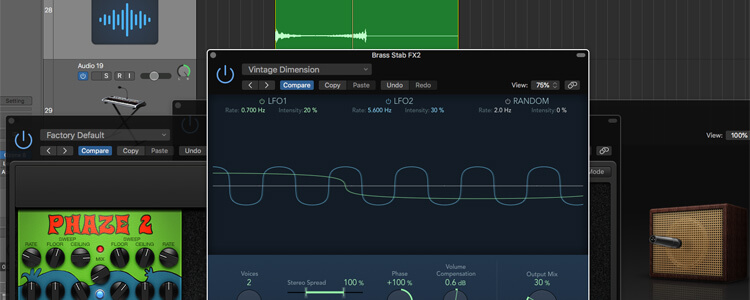
11. You can add FX to give the sound further character, but be aware of it’s roll in the overall track, as you may not want to push it too far back. We’ve opted for some subtle phasing and vintage Ensemble effects, plus some guitar cab crunch.
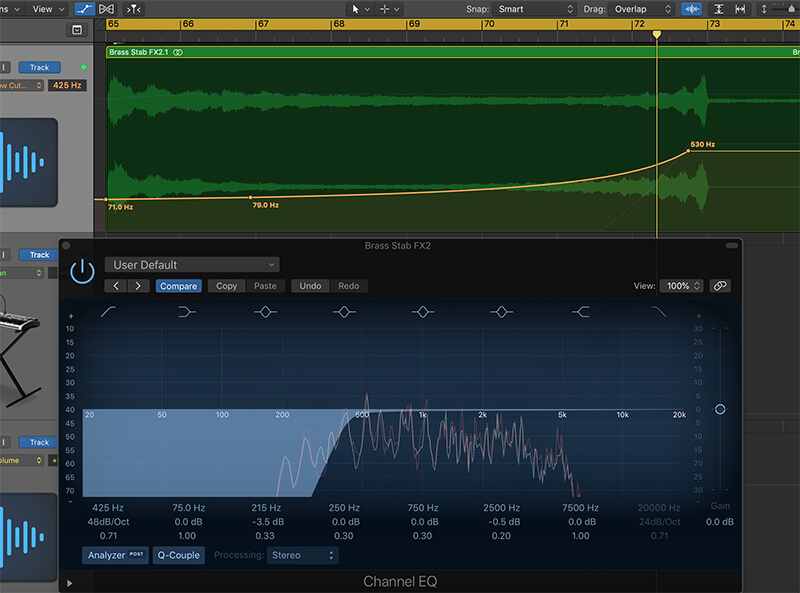
12. As a final step, we’ve added a Channel EQ and automated a HP filter to take out the low frequencies as the reverse sound builds to a sharp finish. Depending on how and where you use the effect, you may want it to delay out or come to an abrupt stop.