Ableton Live Tutorial: Become a Power User Part 3 – Compose and Experiment 2
Liam O’Mullane continues to explore the variety of methods that using Ableton Live can help fuel your creative process in this Ableton Live Tutorial Creative Audio Processing 1: Certain aspects of audio processing are considered mixing aids, like compression, EQ and so on. But other effects can become part of your creative process. For instance […]
Liam O’Mullane continues to explore the variety of methods that using Ableton Live can help fuel your creative process in this Ableton Live Tutorial
Creative Audio Processing
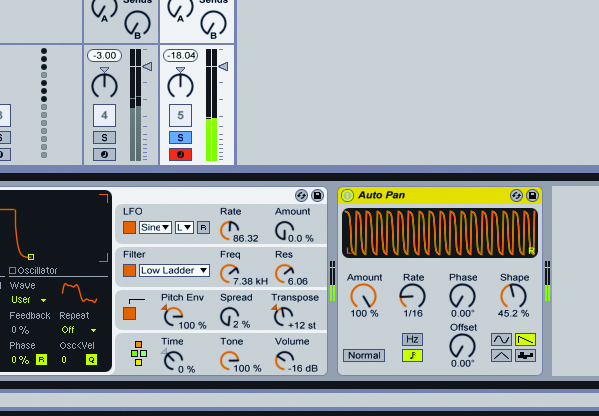
1: Certain aspects of audio processing are considered mixing aids, like compression, EQ and so on. But other effects can become part of your creative process. For instance an immediate and drastic way to change your ideas into something rhythmic is to add an Auto Pan device.

2: You can take this a step further by automating its sync value so rhythmic changes become an integral part of your idea. For quick automation either hit the Arrangement Record Button in arrangement view or the Session Record Button for session view. Then tweak away to record your movement.
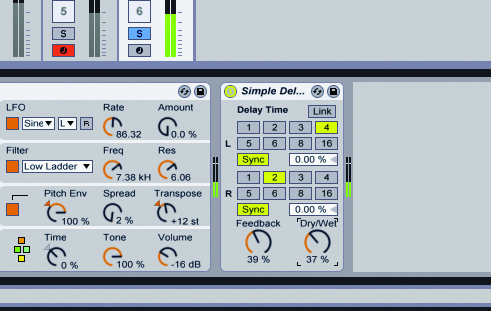
3: Auto Pan works best on sounds with a constant output whereas delays can be useful for the opposite situation when you have more sporadic notes. Try adding a Simple Delay device and exploring the Delay Time values, press Link if you don’t want a stereo effect and, of course, explore automation too.
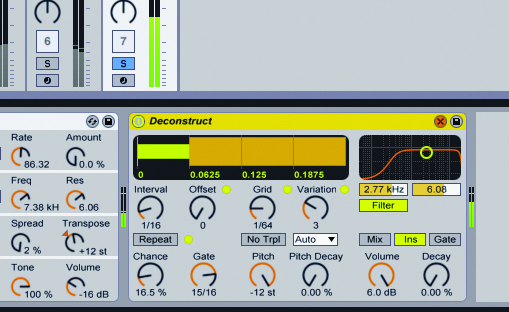
4: The time aspect of your ideas can also be manipulated through the use of Live’s Beat Repeat device. This can add a mash-up/edit like aspect to your work so it saves the need for you to get heavily into editing for a quick re-work. Explore the library presets, especially Decontruct which will heavily change your current sound.
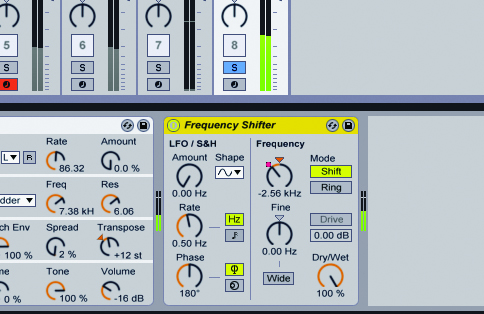
5: For musical pitch changes to an audio file over time you need to automate the clip’s Tranpose control. But for sound-design styles of pitch change, try Frequency Shifter as this doesn’t keep the harmonic relationships intact which adds a nastier tone to your sounds.
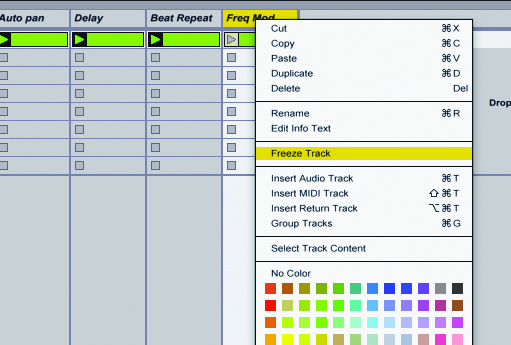
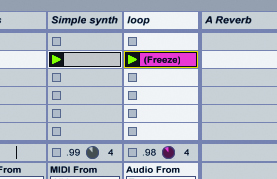
6: Thankfully turning any audio processed into a new, rendered clip is much simpler than working with MIDI effects. Just Right [PC] / Ctrl [Mac] + Click the top of a track in session view or its header to the right in arrangement view. Select Freeze Track from the menu, then right click again and select Flatten.
Max For Live Devices
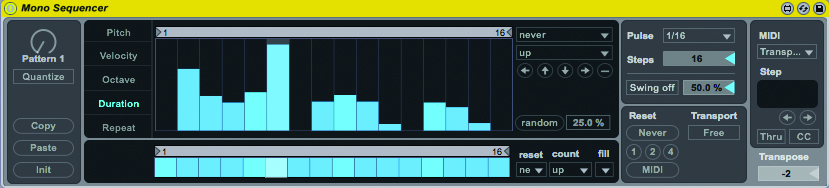
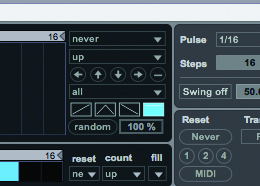
1: For those who own Live Suite, you can use many of the Max for Live devices for experimental work as well. A good starting point is Mono Sequencer if you don’t have anything created already. It’s a monophonic step sequencer but its Random button is the real winner for unexpected results.
2: The Random button randomizes whichever of the five tabs are selected at anytime – Pitch, Velocity, Octave, Duration and Repeat. If you’re close to getting something you like, keep Random set to a lower percentage, but if you want complete change with each click, set this to 100%.
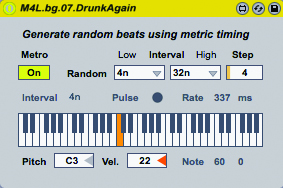
3: Drunk Again is an interesting device as it adds Random’s rapid repeats of notes within the playback of your MIDI clip. It’s best recorded for a while to capture the magic moments. We like this on percussion parts to help them get the glitch treatment.
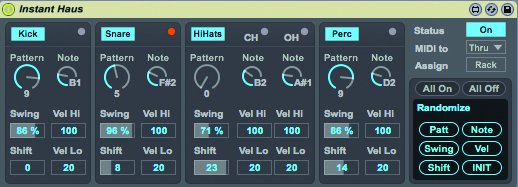
4: Instant Haus is another interesting device as it’s designed to drive kick, snare/clap, hi-hat and percussion parts for immediate house music. Run this into an instrument and you might get results similar to Mono Sequencer, but the random section includes groove if you want to explore timing.
5:When it comes to adjusting parameters over time there are a few tools with Max that allow you to do this, with an added twist of being able to use another sound as the trigger for the sound you’re focussing on. Alongside your melody idea, set up a drum source. Here we’re using a simple drum loop.
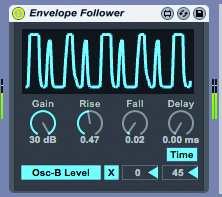
6: Under Audio Effects in the Max for Live folder, grab an Envelope Follower and drag this to the drum track. This will follow the rhythmic amplitude changes of the drum sound. You can then click Map followed by clicking the parameter you wish to control to connect them together.
