Logic Tutorial: Granular Synthesis With Alchemy – Part Two
Mark Cousins continues to explore granular synthesis in Alchemy in this Logic Tutorial… 7: The Density and Size of the grains can have a big effect on the sonic output of Alchemy. Try reducing Density to zero to hear just a single grain, which can be varied, using the Size parameter, from 2 to 230ms. […]
Mark Cousins continues to explore granular synthesis in Alchemy in this Logic Tutorial…
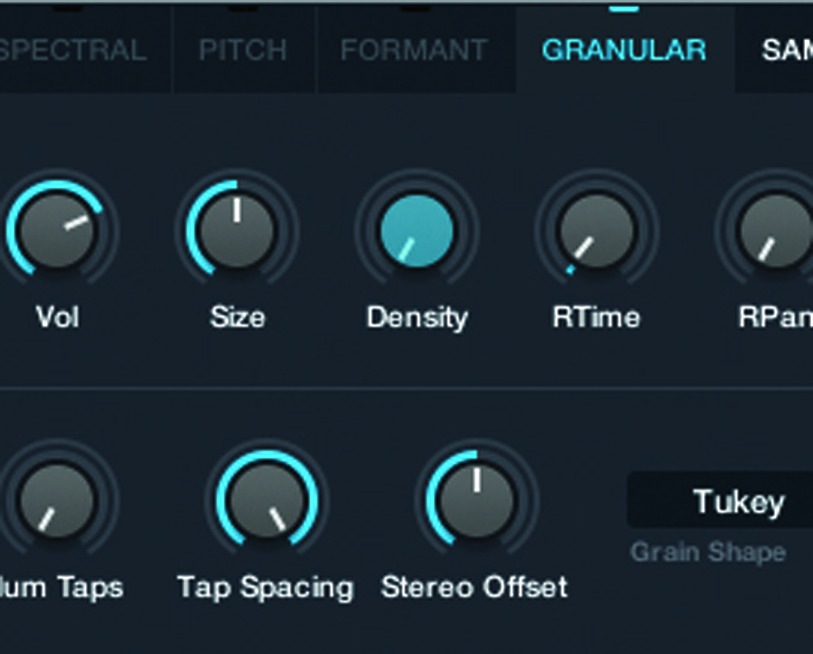
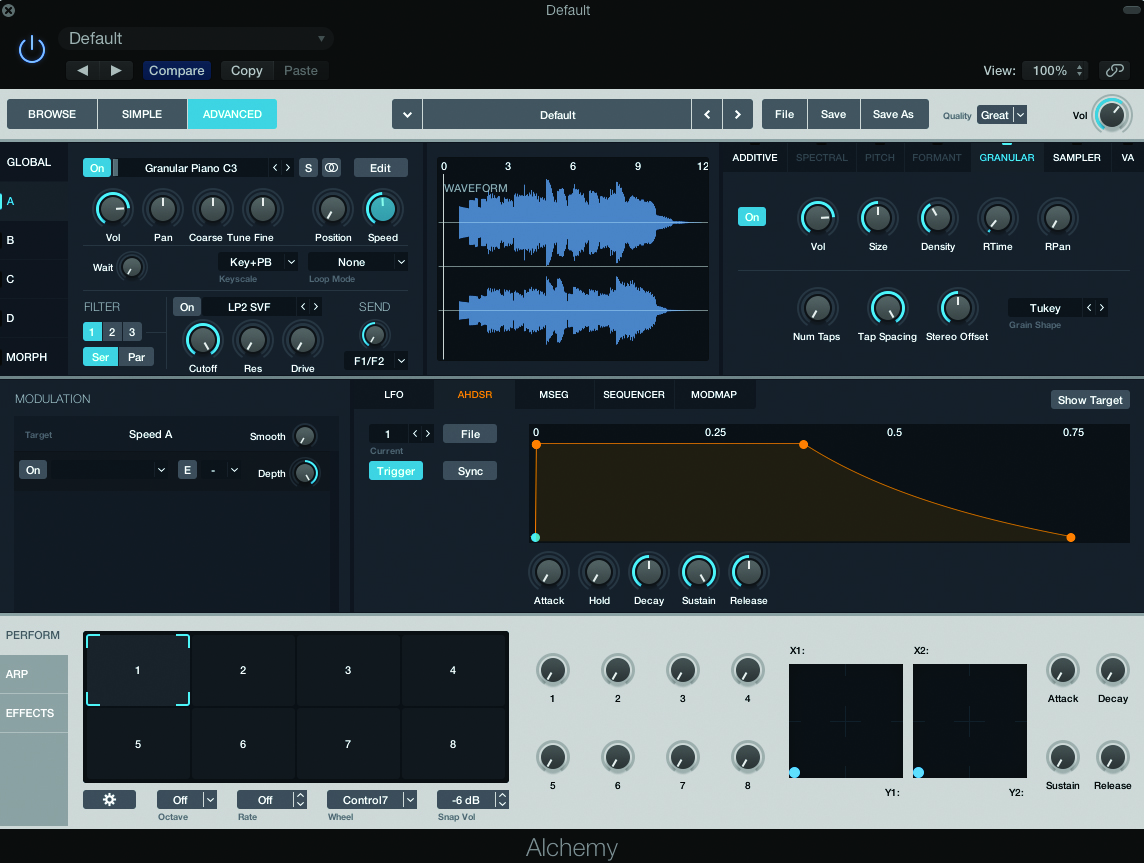
7: The Density and Size of the grains can have a big effect on the sonic output of Alchemy. Try reducing Density to zero to hear just a single grain, which can be varied, using the Size parameter, from 2 to 230ms.
8: Coarse Size and Density settings can be effective (especially on textural sample data), but if you’re seeking a smoother overall sound you’ll want to use a larger amount of grains, via the Density setting, and grain sizes greater than 140ms.
9: The RTime control adds small time variables between each grain. Try reducing RTime to its lowest setting to see how sterile the granular engine can sound without these variations. On the whole, 3% seems a good default

10: As the name suggests, RPan introduces random panning artefacts into the grain distribution, and are a great way of adding stereo information to a mono source. Hear the effect in action using a low density/large size setting.
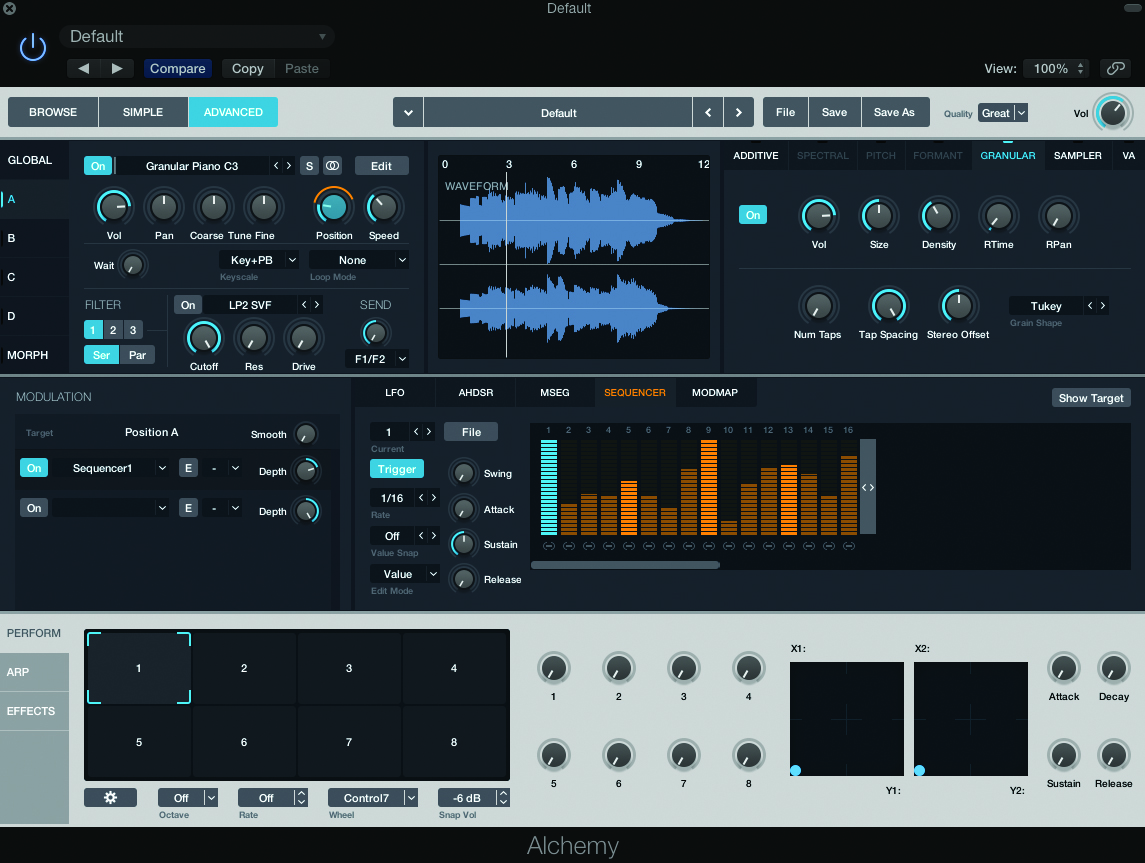
11: Having understood the basics, let’s take a look at two granular treatments – a granular pad sound and then a granular sequence effect. Initialize the sound and import the Granular Piano C3 sample that’s residing in our Logic project.
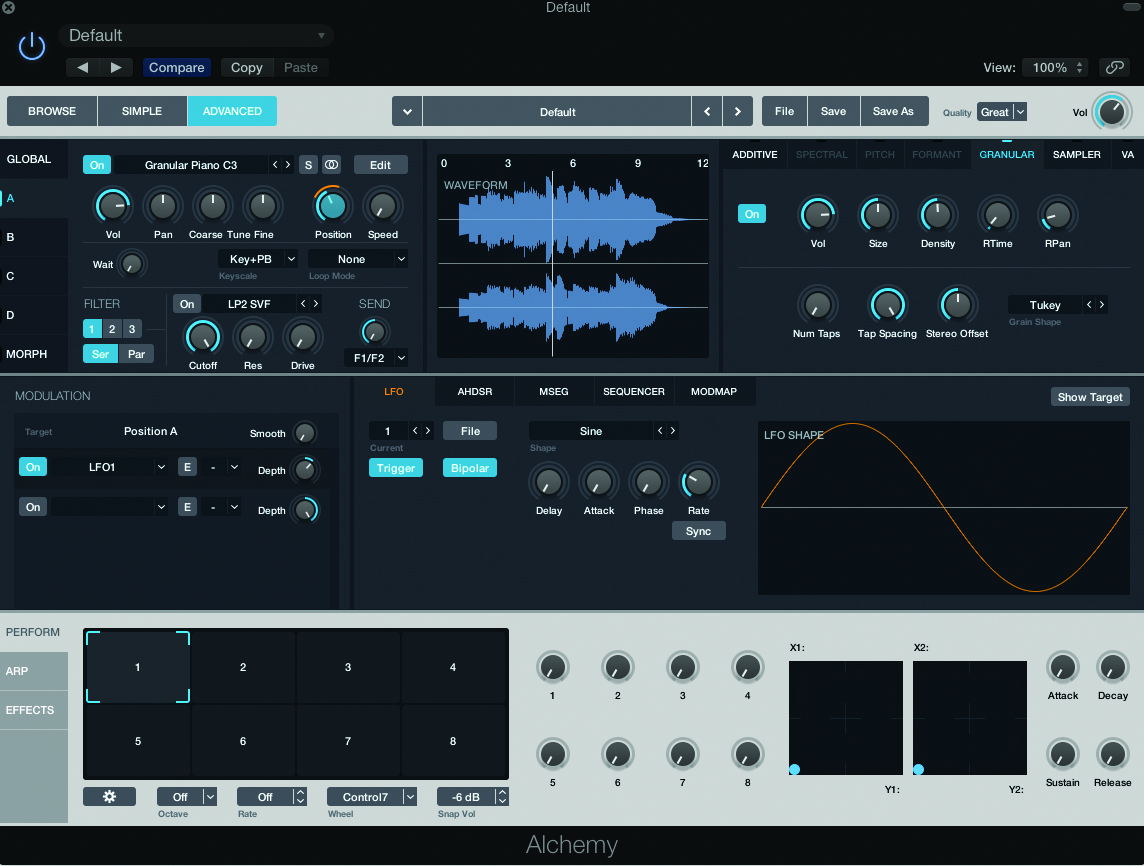
12: Rather than stepping through the sound in a conventional fashion, route the LFO through to the Position parameters and set speed to 0. Reduce to the depth so that the sound ‘shimmers’ around a portion of the piano sample.
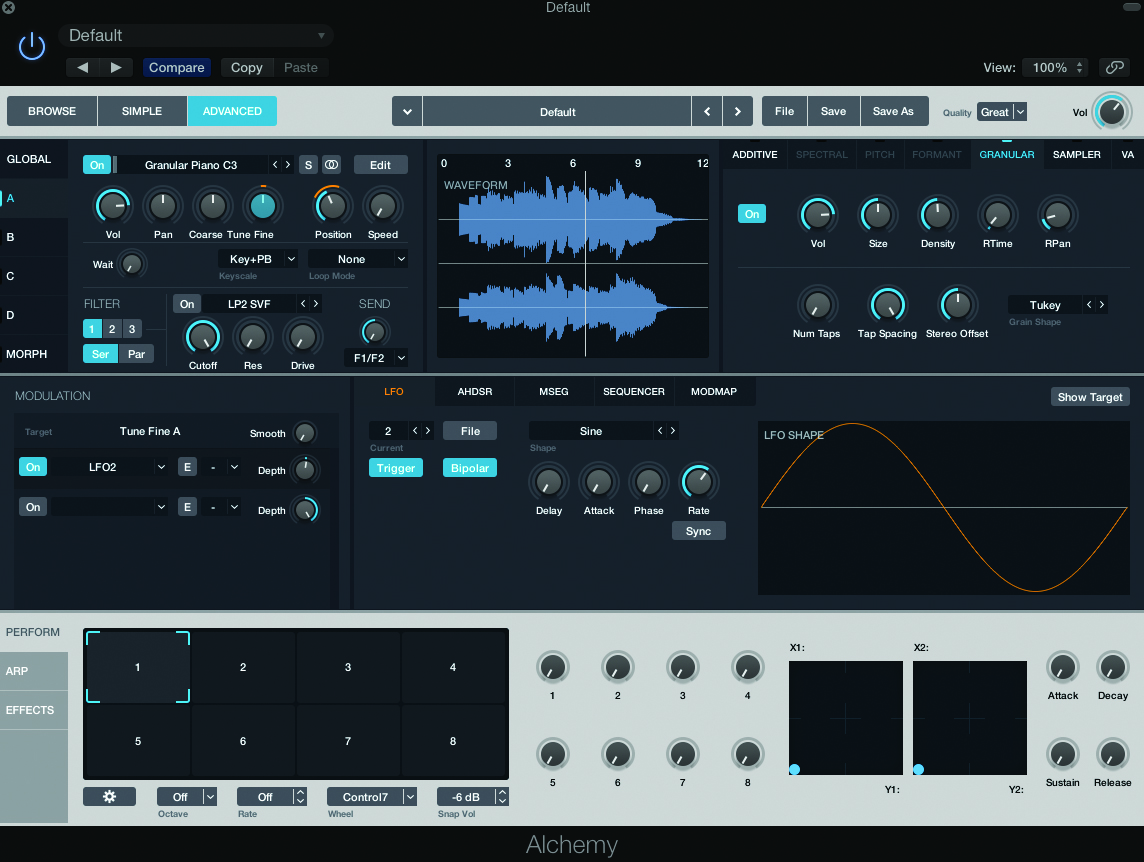
13: To add some warmth and further interest to the pad sound, we’ve used a second LFO to subtly modulate the tuning (Fine). You could also edit the amplifier’s AHDSR to have a more graduated attack and decay so that it’s more pad-like.
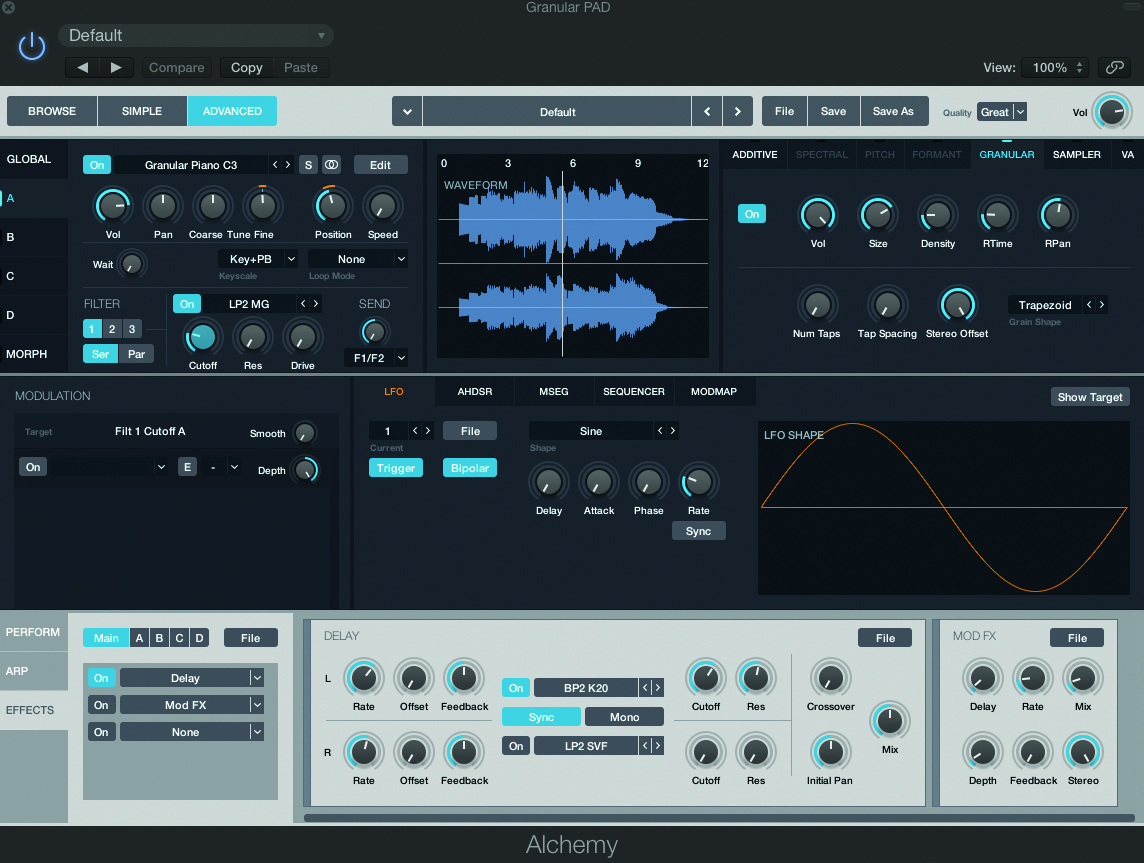
14: To complete the patch (which sounds best an octave above its original pitch), try adding a 2-pole low-pass filter and a touch of delay. Also experiment with high-pass filtering, which is useful where you want the results to have more texture.
15: Open up another instance of Alchemy (importing the same sample) to explore another sound. We’re using the step sequencer to modulate position, rather than the LFO. The result is a sound that appears to jump between different portions of the audio.
16: To exaggerate the movement, we’ve also routed the sequencer through to the LP2 MG filter, with a medium amount of release and small amount of drive for extra body. As the filter mirrors the granular shifts, it helps define the timbral movement.
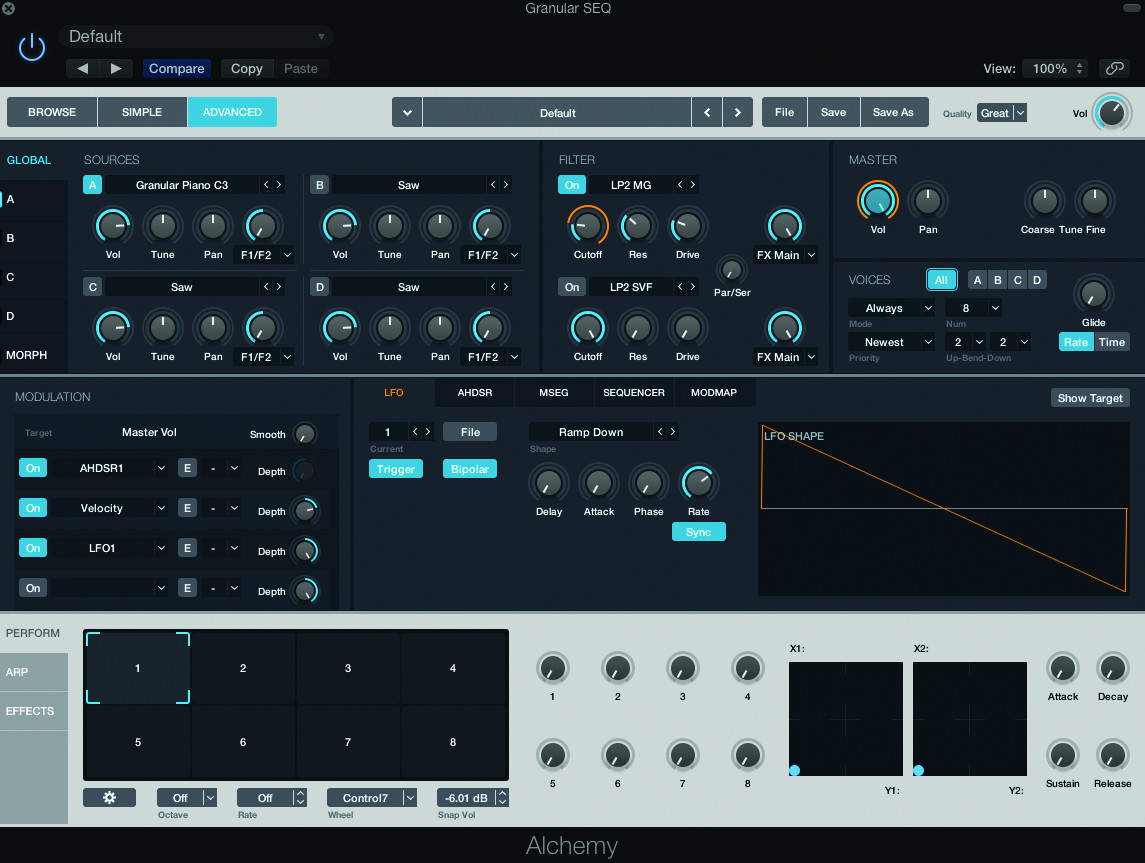
17: Routing LFO1 through to the main Volume control lets us shape the amplitude for each step of the sequence. Use the Ramp Down shape options and set its Rate to 1/16ths (assuming you have the Sync option enabled).
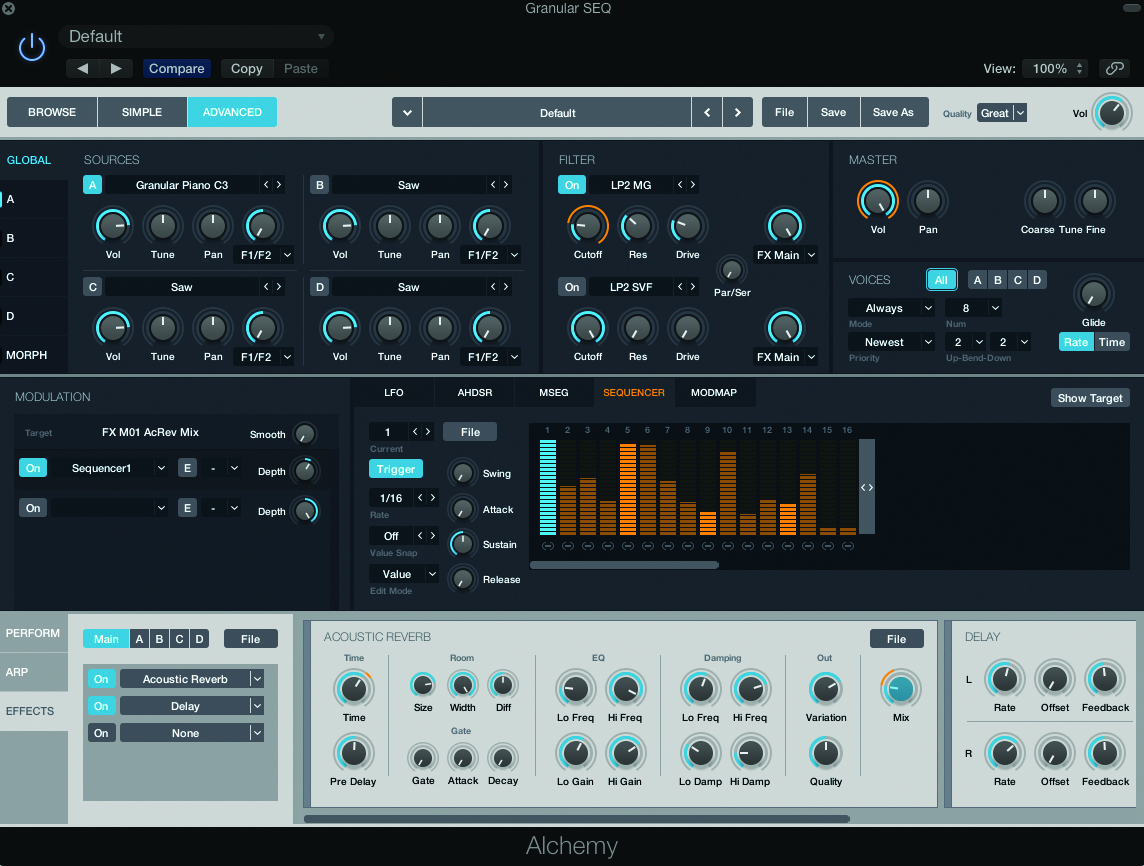
18: It’s worth remembering that the FX section can also be modulated. Rather than reverb and delay being static effects, therefore, we’ve used the same step sequencer to modulate the FX mix, so that the higher valued steps have more effect.
This tutorial is endorsed by Point Blank. With courses in London, online and now in LA, Point Blank is the Global Music School. You can study sound to picture on their Music Production Diploma courses, with pro industry tutors.
