Logic Pro X Tutorial: Arranging In Logic Pro X
In Logic Pro X it’s now easier than ever to turn your mix ideas into fully blown songs and arrangements. In this tutorial, we use some of Logic’s specific features to arrange song ideas and reveal a couple of shortcuts to easily add variation to any arrangement So you are ready to arrange your Logic […]
In Logic Pro X it’s now easier than ever to turn your mix ideas into fully blown songs and arrangements. In this tutorial, we use some of Logic’s specific features to arrange song ideas and reveal a couple of shortcuts to easily add variation to any arrangement


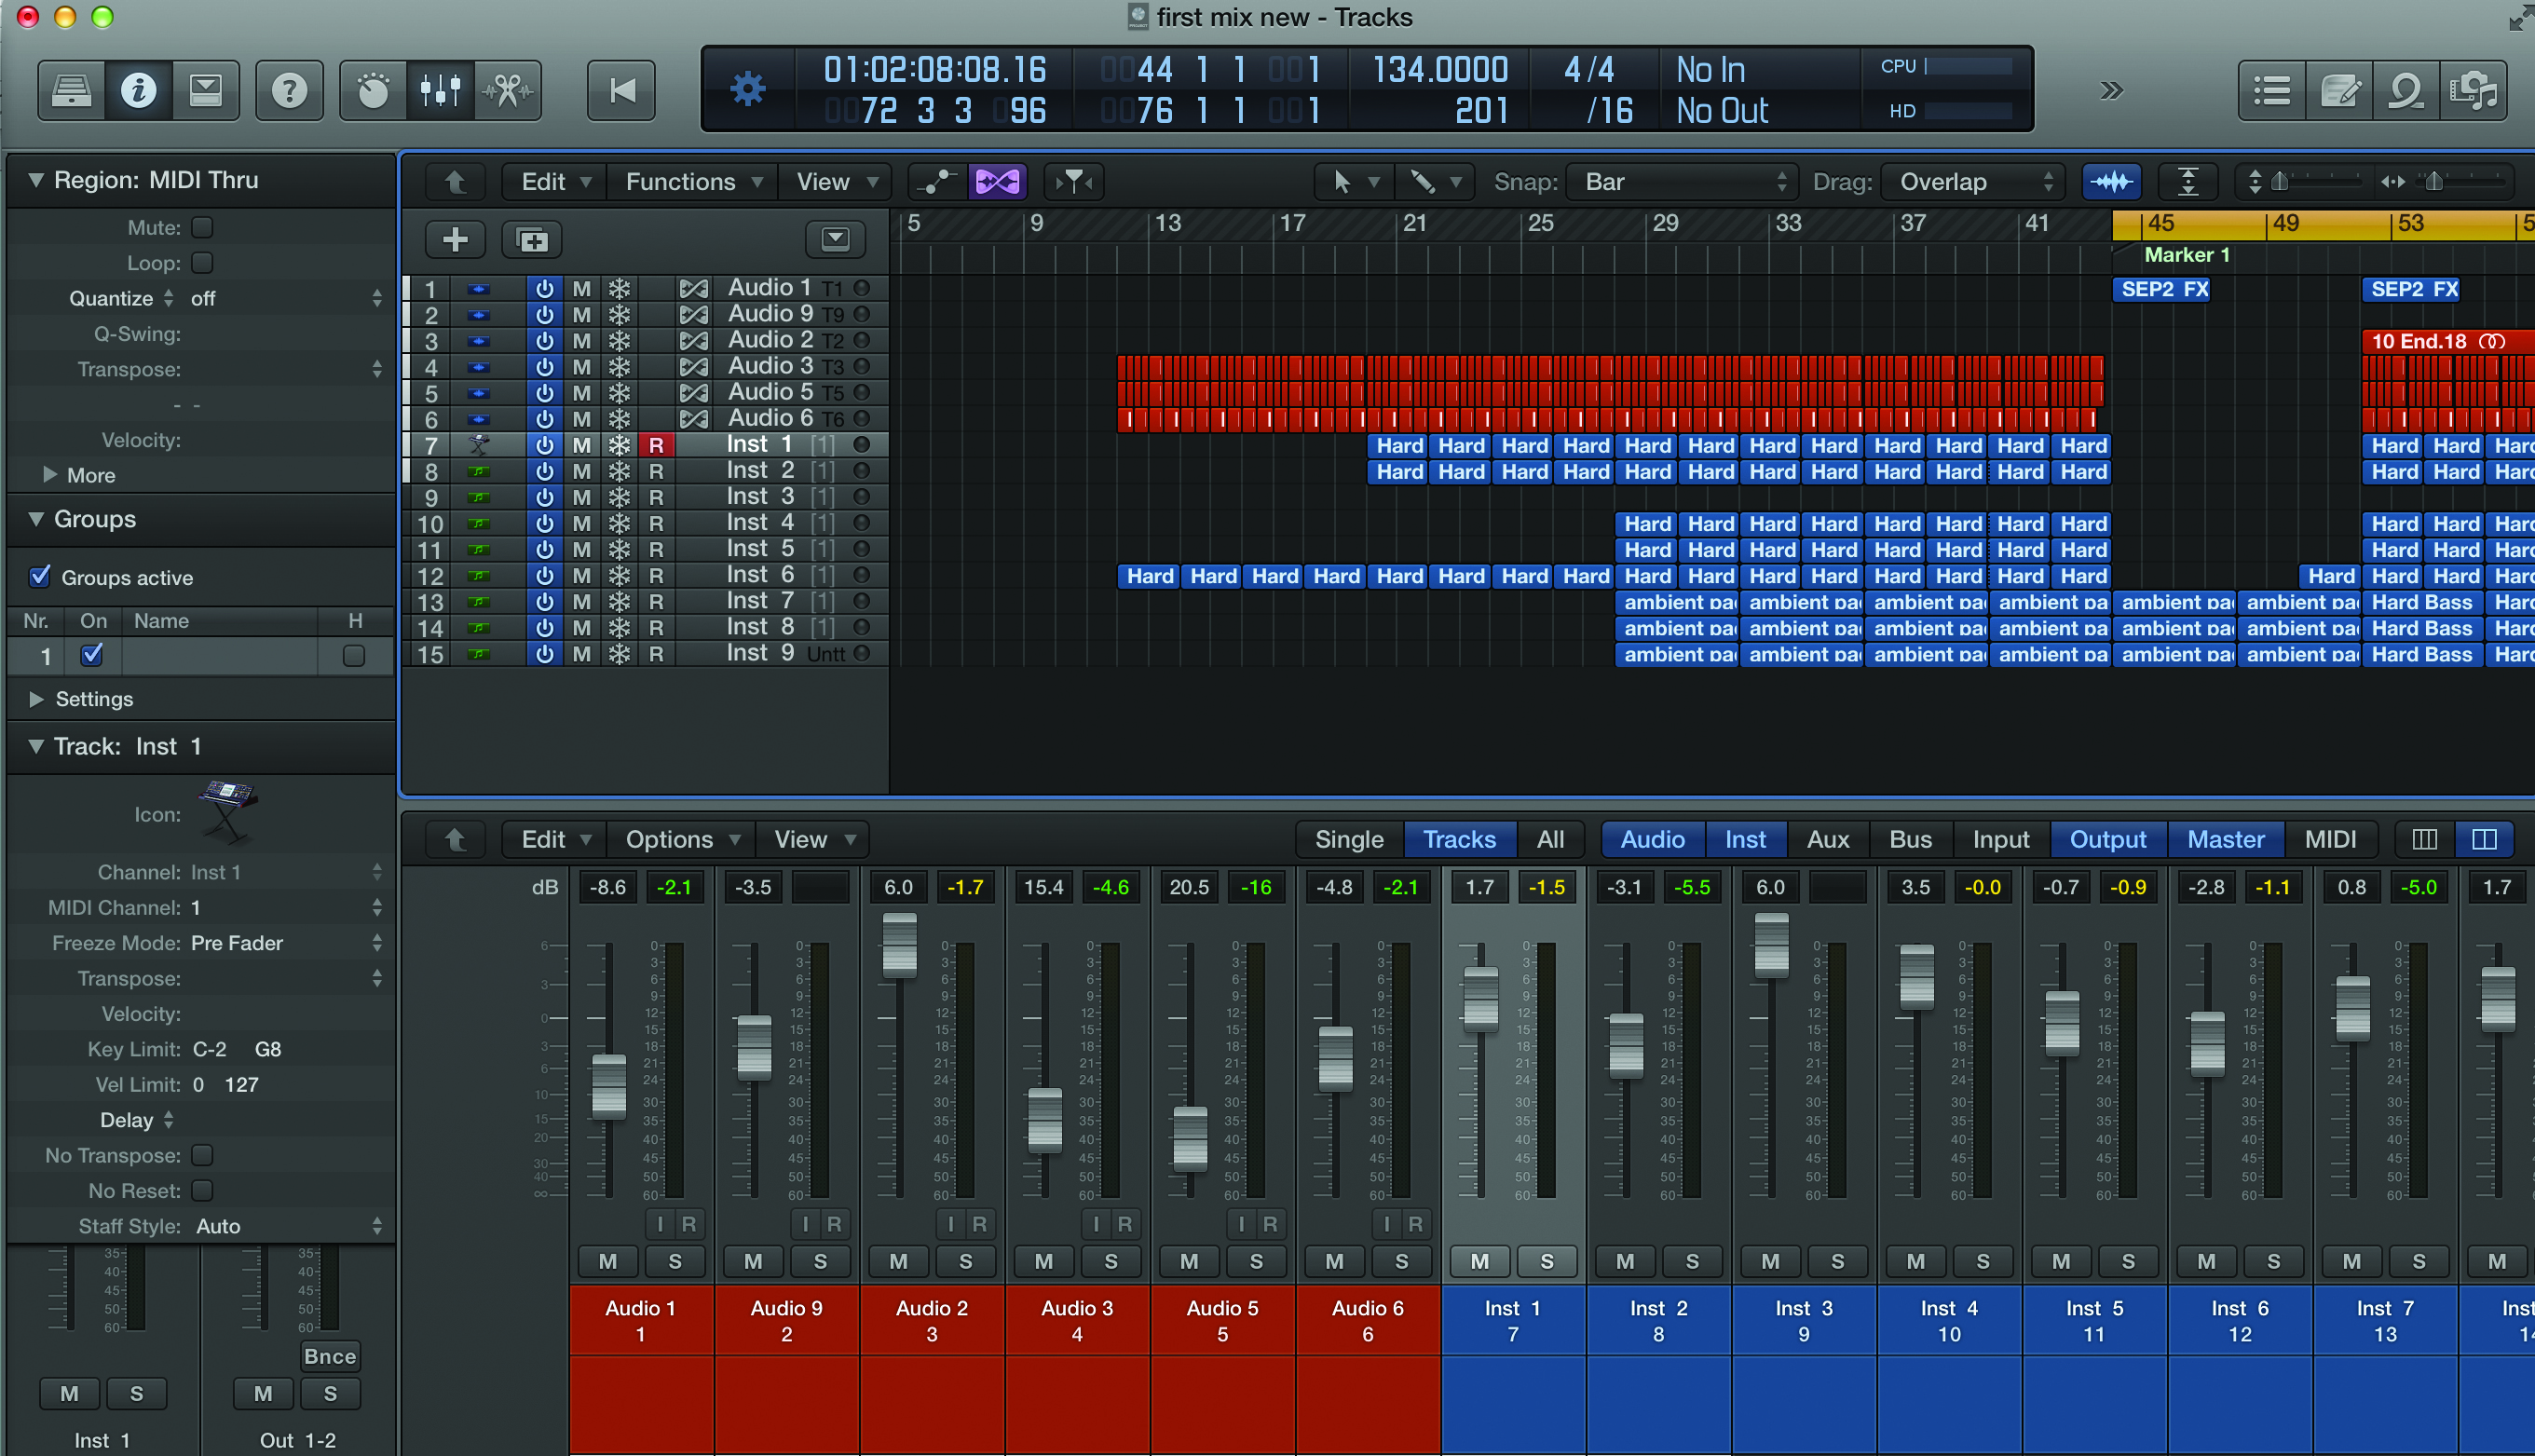
So you are ready to arrange your Logic Pro X project. You have possibly got a mix ready, with track levels sorted, panned, EQ’d and added effects and you are now happy with your ideas and it’s all there within a loop. We’ll assume it is a very typical band-type track, maybe with two guitars, bass, vocals and piano, plus some spare tracks for beats.
The idea of this tutorial is that it will help you progress these ideas – and maybe those that have been kicking around on your drive for a while and that perhaps you’ve not done much with.
We will help you take these ideas and mix and arrange them. In truth, those are both processes that you might typically do at the same time in music production – arranging and mixing as you go along – so do bear that in mind that as you read this one. You might need to adjust levels here or tweak effects there to make the parts work in your new arrangement and finished song.
For many, the arranging part of music production can often be the trickiest, possibly a stumbling block. This is strange as sequencers and modern production technology make the process easy. Maybe the problem is that DAWs/sequencers make the initial looping process so very easy, that it is hard to get in a mindset to move beyond it.
1. Basic Arranging in Logic Pro X
If you are having trouble moving beyond your two, four or eight-bar loop, there’s one surefire way to quickly get yourself out of the rut – select all (Cmnd>A) and repeat (Cmnd>R)! Specify how many copies you want and hit ‘OK’.
Some may see this as too easy a solution, but it’s a great way to get yourself an instant arrangement, or at least an arrangement that covers the right duration of the song that you are producing. For dance music, it’s also a very quick way of building up tunes which – by the genre’s very definition and nature – are quite repetitive. For rock music this is less the case, so we’ll look at how to enhance an arrangement, making it less repetitive.
Adding to this, what you might call ‘classic’, way of fleshing out an arrangement, is Logic Pro X ’s Arrangement feature, which allows you to segment your song into typical and very recognisable sections.
When looking at a typical song structure, think of it in terms of these sections: intro, verse, chorus, bridge and outro. Typically, you will start with an intro, go into a verse, maybe two, then a chorus, bridge, verse, chorus, outro.
For our song, we want the intro to feature just the bass guitar and beats, the chorus everything, and the outro just the piano and beats. You can define each section however you want. We simply create Marker points for each section and just strip out the parts we don’t want from all of the repeated sections we made earlier.
We can then audition these by pressing the Option button while clicking each Marker section in the Edit Window – it’s a great way to try out new arrangements without changing anything.
We then use these Marker Points and sections to create a new arrangement by clicking and dragging the top of each Arrangement Part, which should take everything below to a new point. Copy and paste the verse section, move it later, swap the intro and outro… it’s easy to create a new arrangement by copying these big chunks at a time.
2. Variation and Automation in Logic Pro X
In this last tutorial, we use some tricks to bolster up our arrangement and make it less repetitive, including returning to the beats that we looked at in the Mixing tutorial and using a similar technique to isolate certain elements to add a bit of variation. We’ll look at some specific processes common to all DAWs but especially accessible in Logic where you can beef up an arrangement with automation.
Here, you can add variation by changing certain parameters over time. The brilliant thing about automation is that you can return to it and edit it at any time to tweak and correct mistakes. Below, we show how to fade the drum track in as the intro of the song, but you can automate and add effects, pan positions and a lot of other parameters to easily add changes in a mix.
These are just some of the very quick ways to create arrangements within Logic and add a little variation while you are at it. We’ll look at others in a future workshop.
Focus On Genres
We focus very much on a typical rock/pop piece of music here, with the elements of a band song – drums, bass, two guitars, and so on – and how you would typically arrange them over an intro, verse and chorus.
This, of course, varies depending on the genre of music (and can even vary within a genre). With dance music, for example, the focus might be, arguably should be, to just start the beats straight away so a DJ can mix your track into a set without having to worry about mixing the melody you have chosen.
Then you can bring in the musical elements, followed typically by a big breakdown where the beats are dropped in favour of synths and pads and then the whole lot comes crashing back in for a huge dance climax. Arrangements can therefore be the vital ingredient within the genre you are working in.
Step by Step – Basic Arranging in Logic Pro X
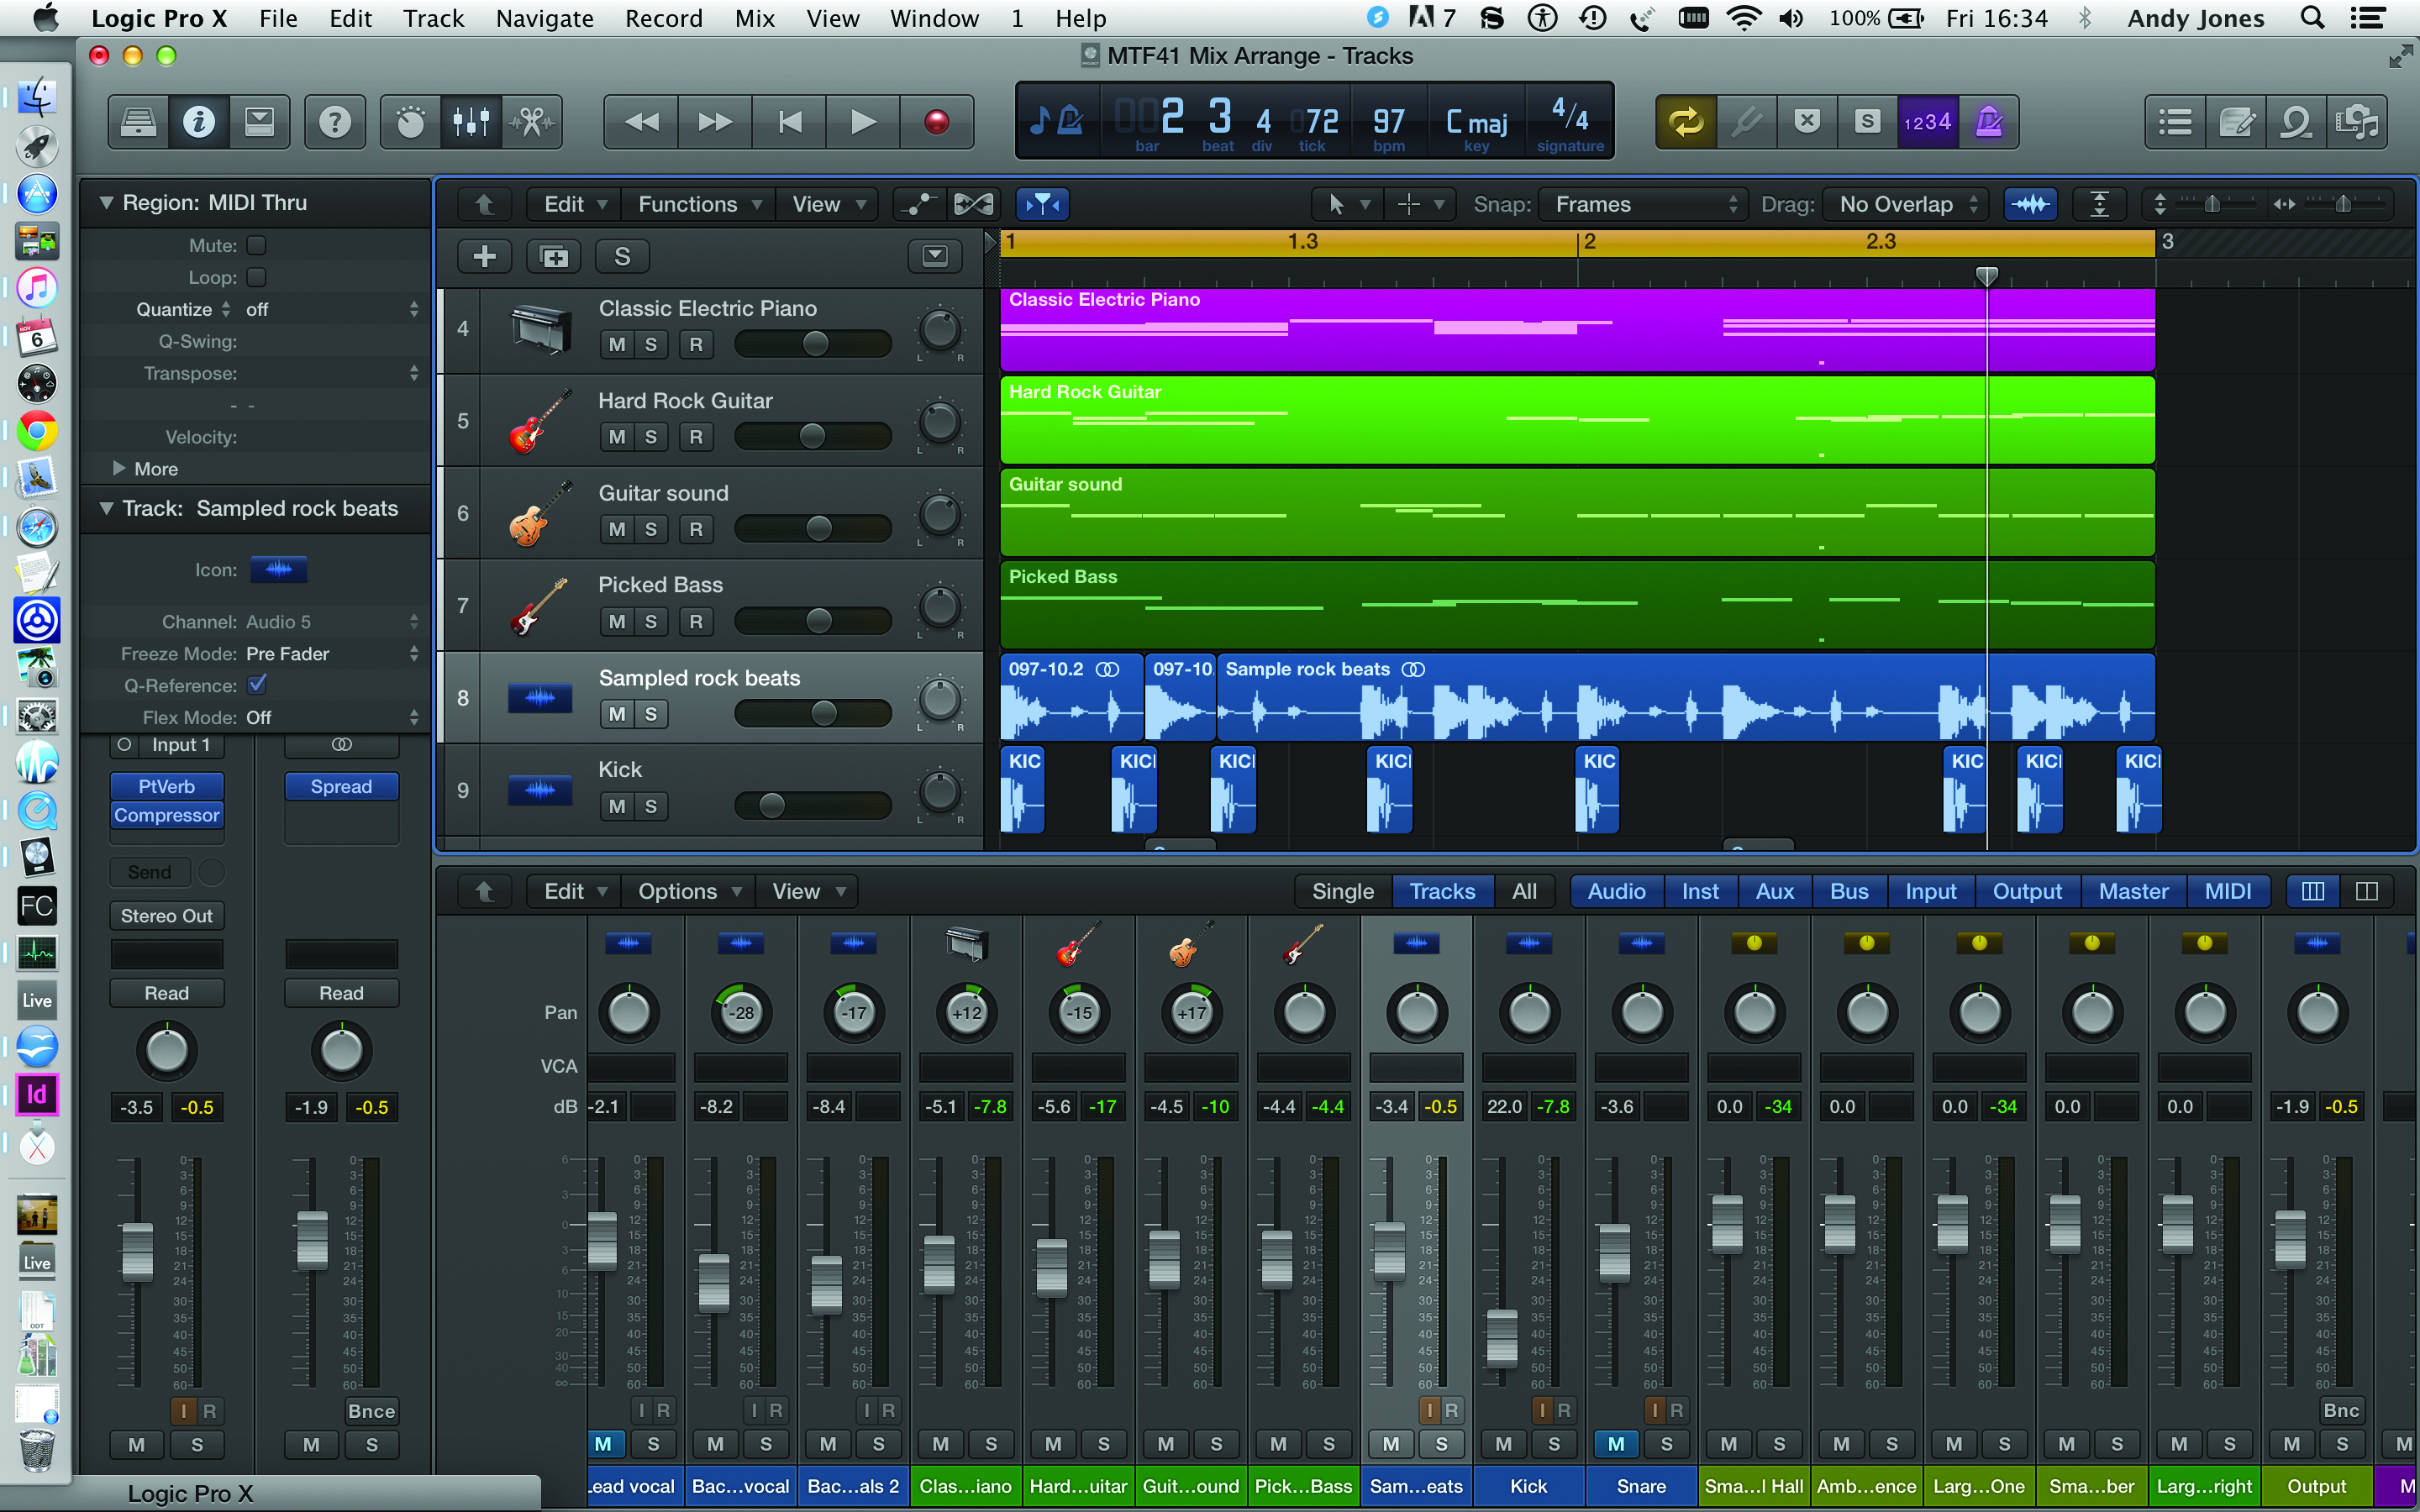
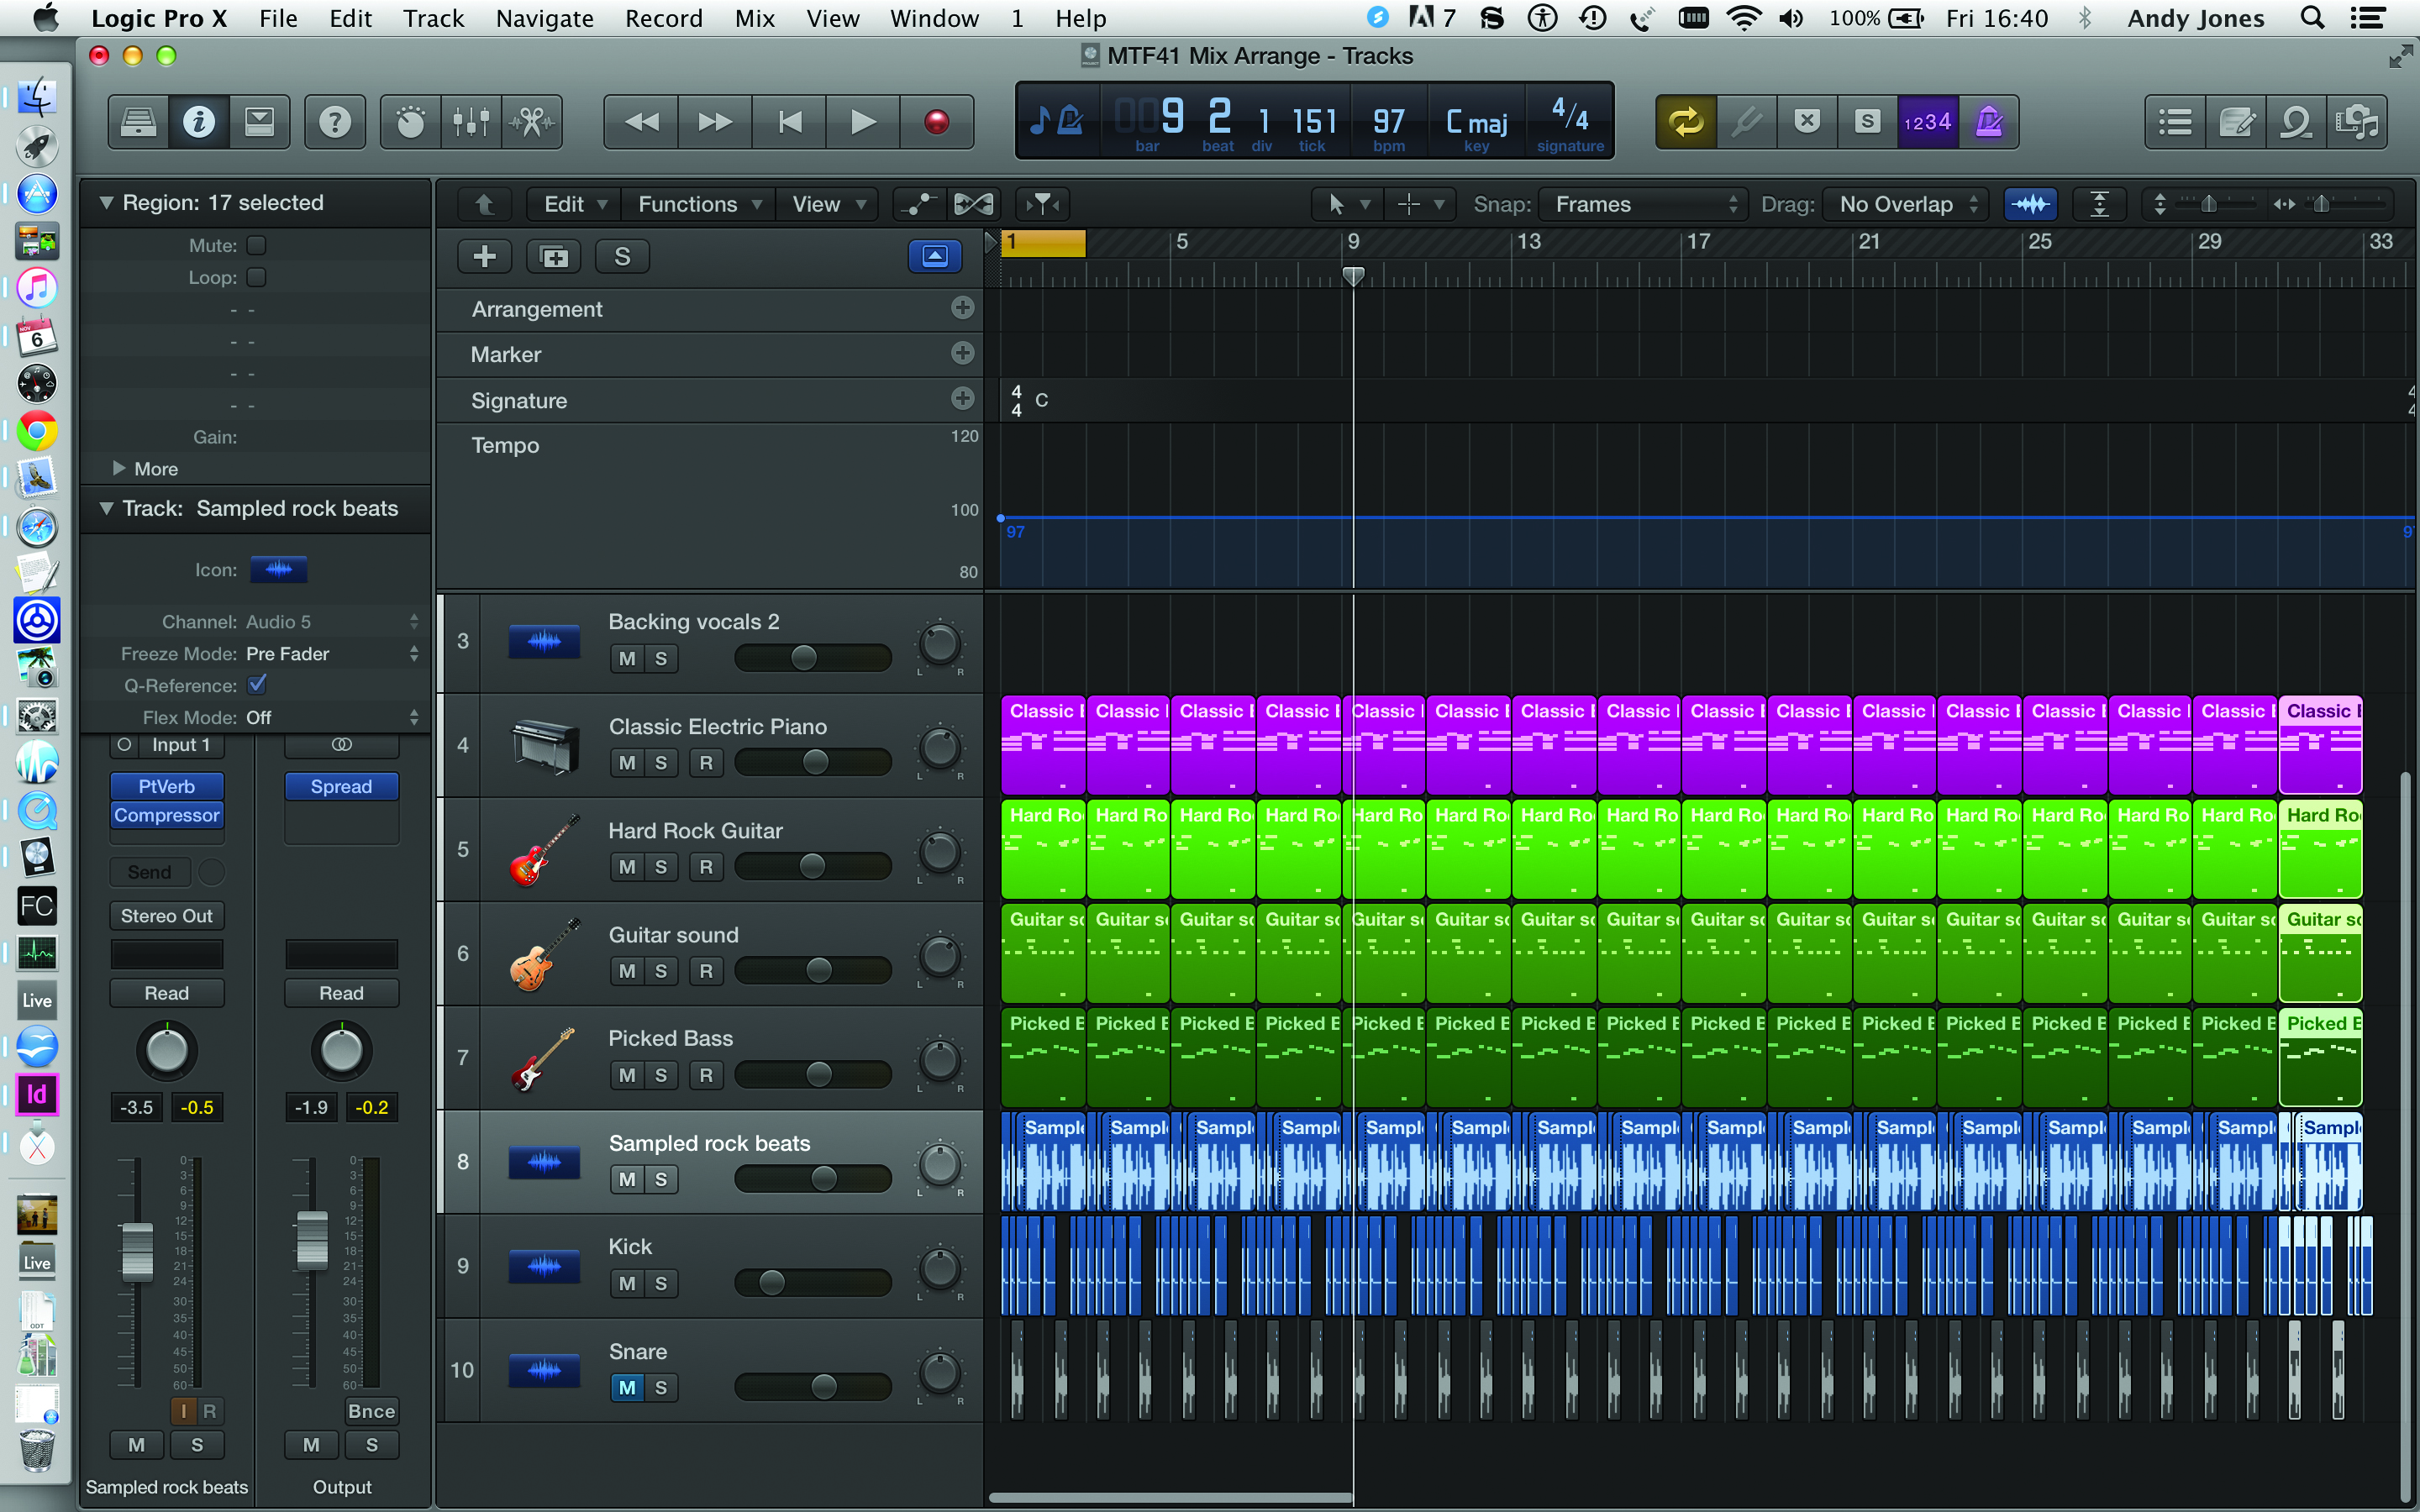
1: We’ll use the same looping idea – now nicely mixed – from the previous tutorial on mixing. It has a couple of guitars, bass, piano and beats. Select all using Cmnd>A.
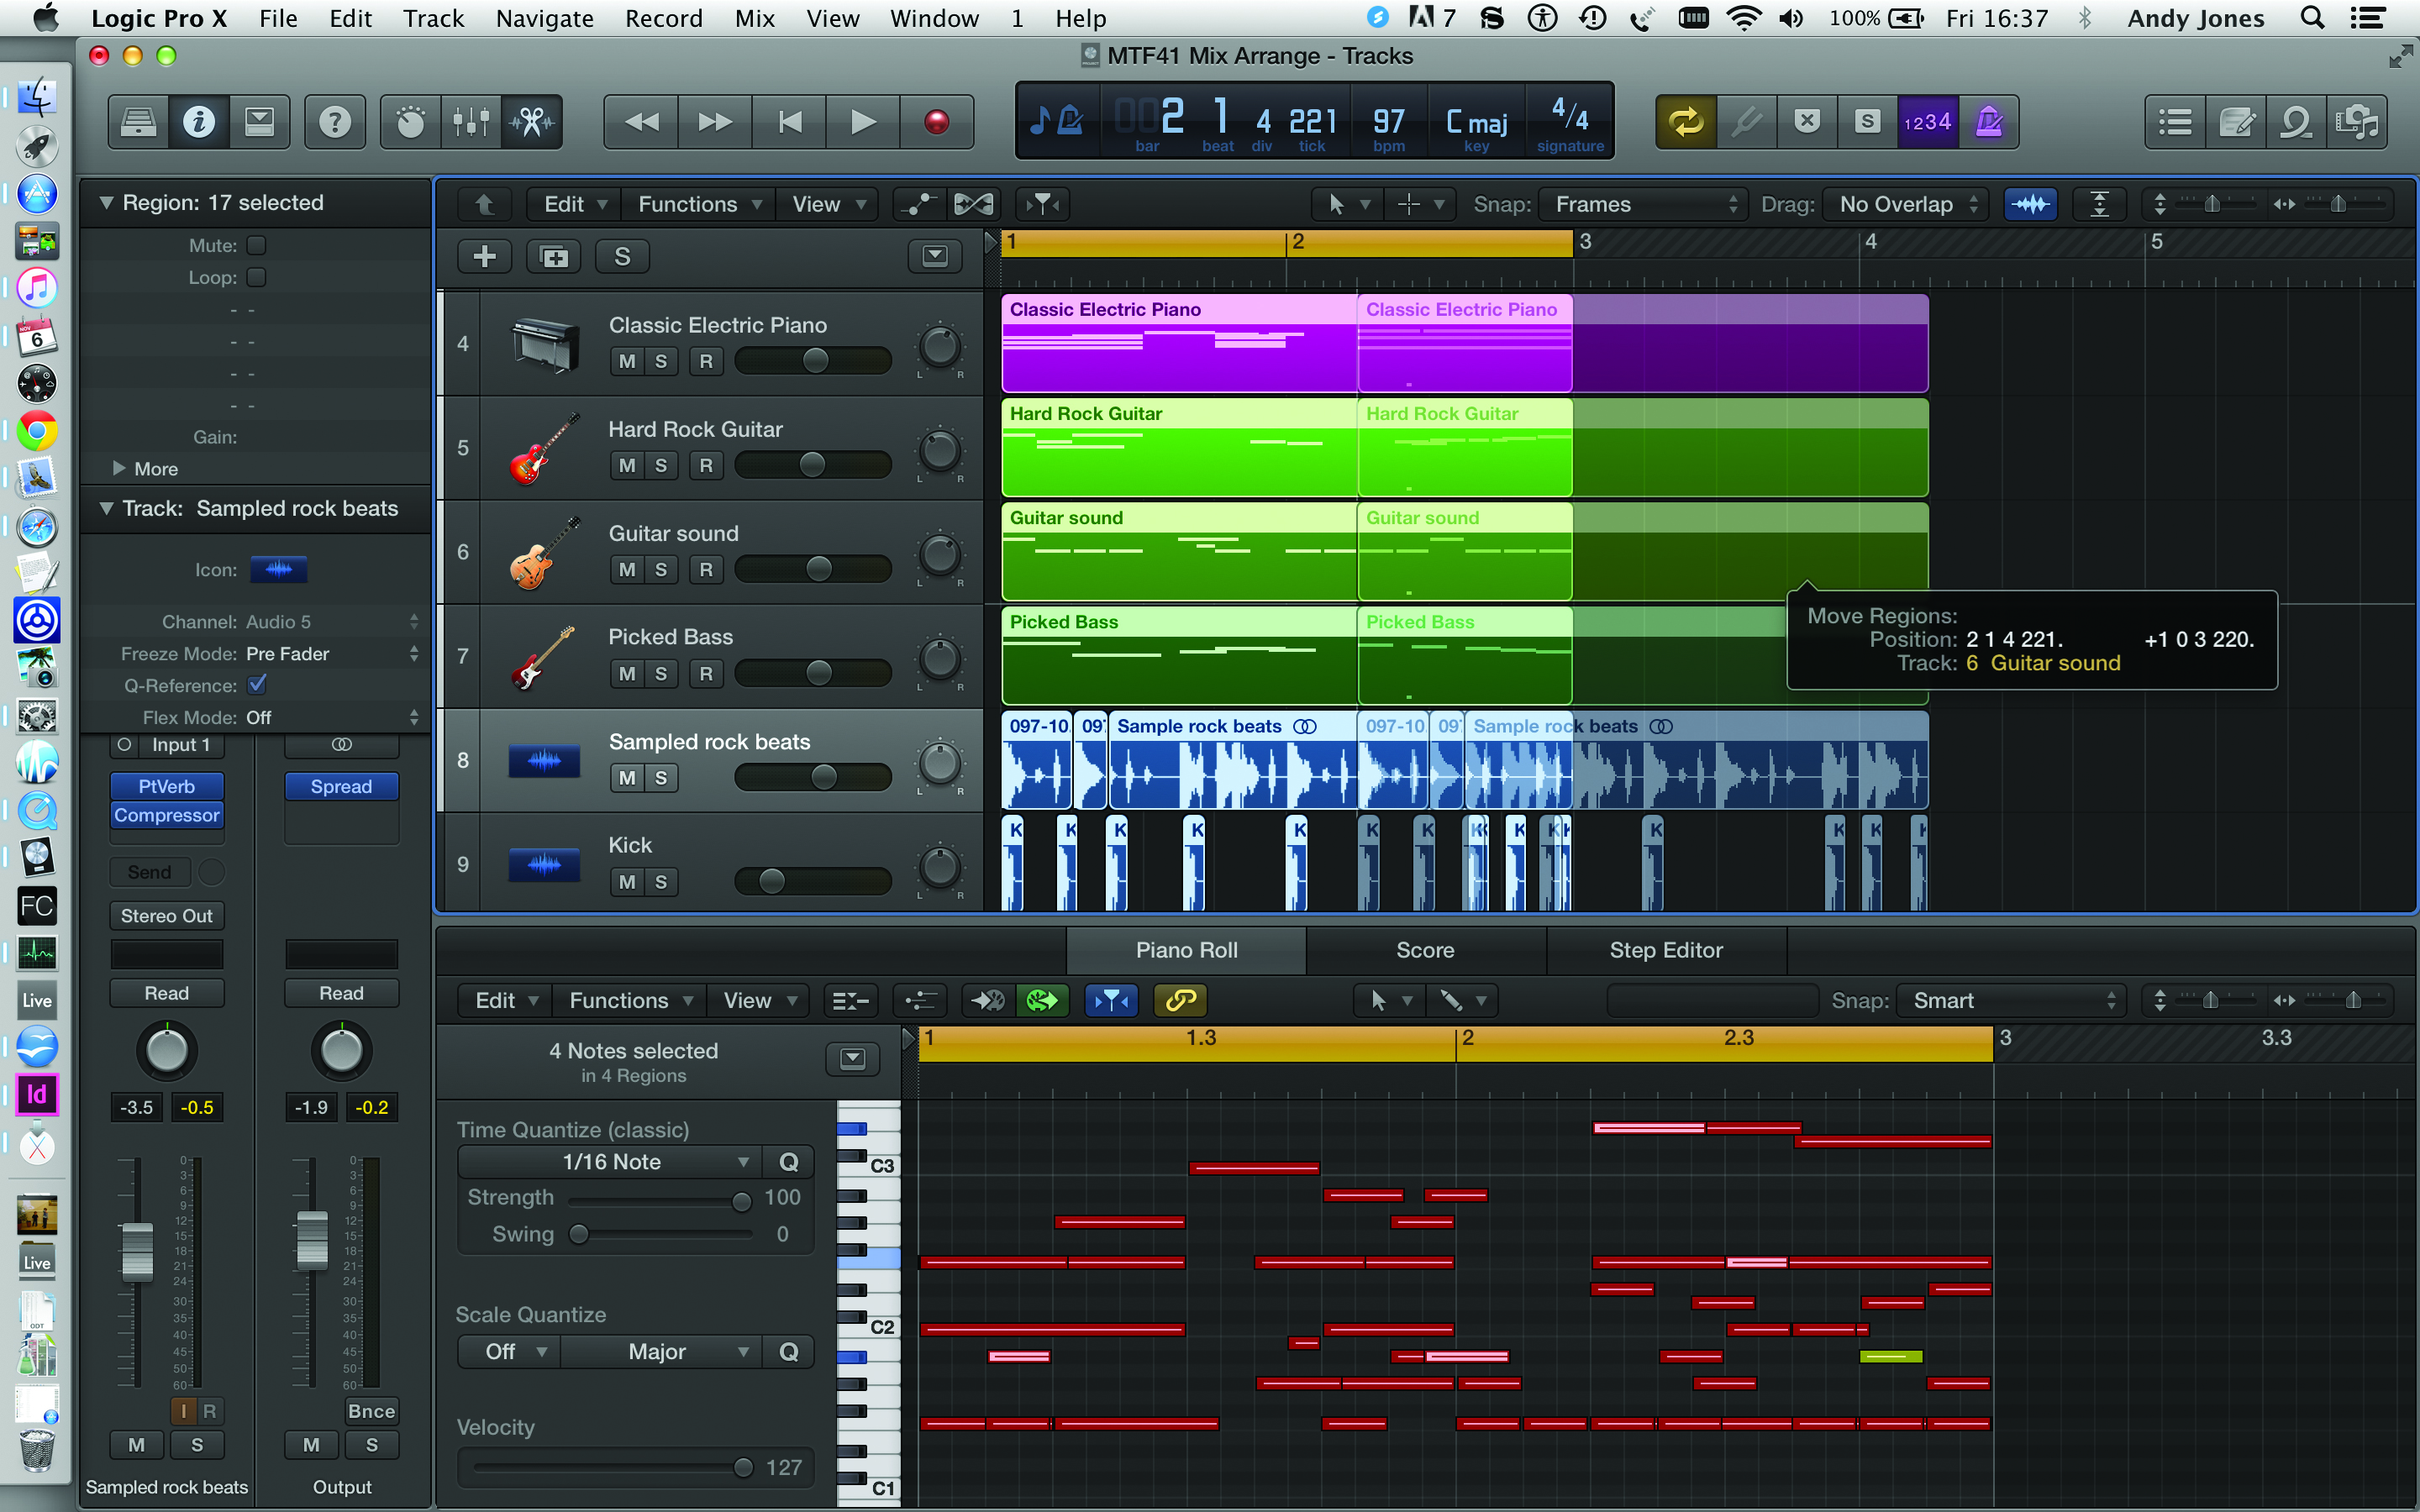
2: You can click Alt and then drag just a single copy, as shown, which doubles the length and is useful if you just want to add a couple of bars at this stage.
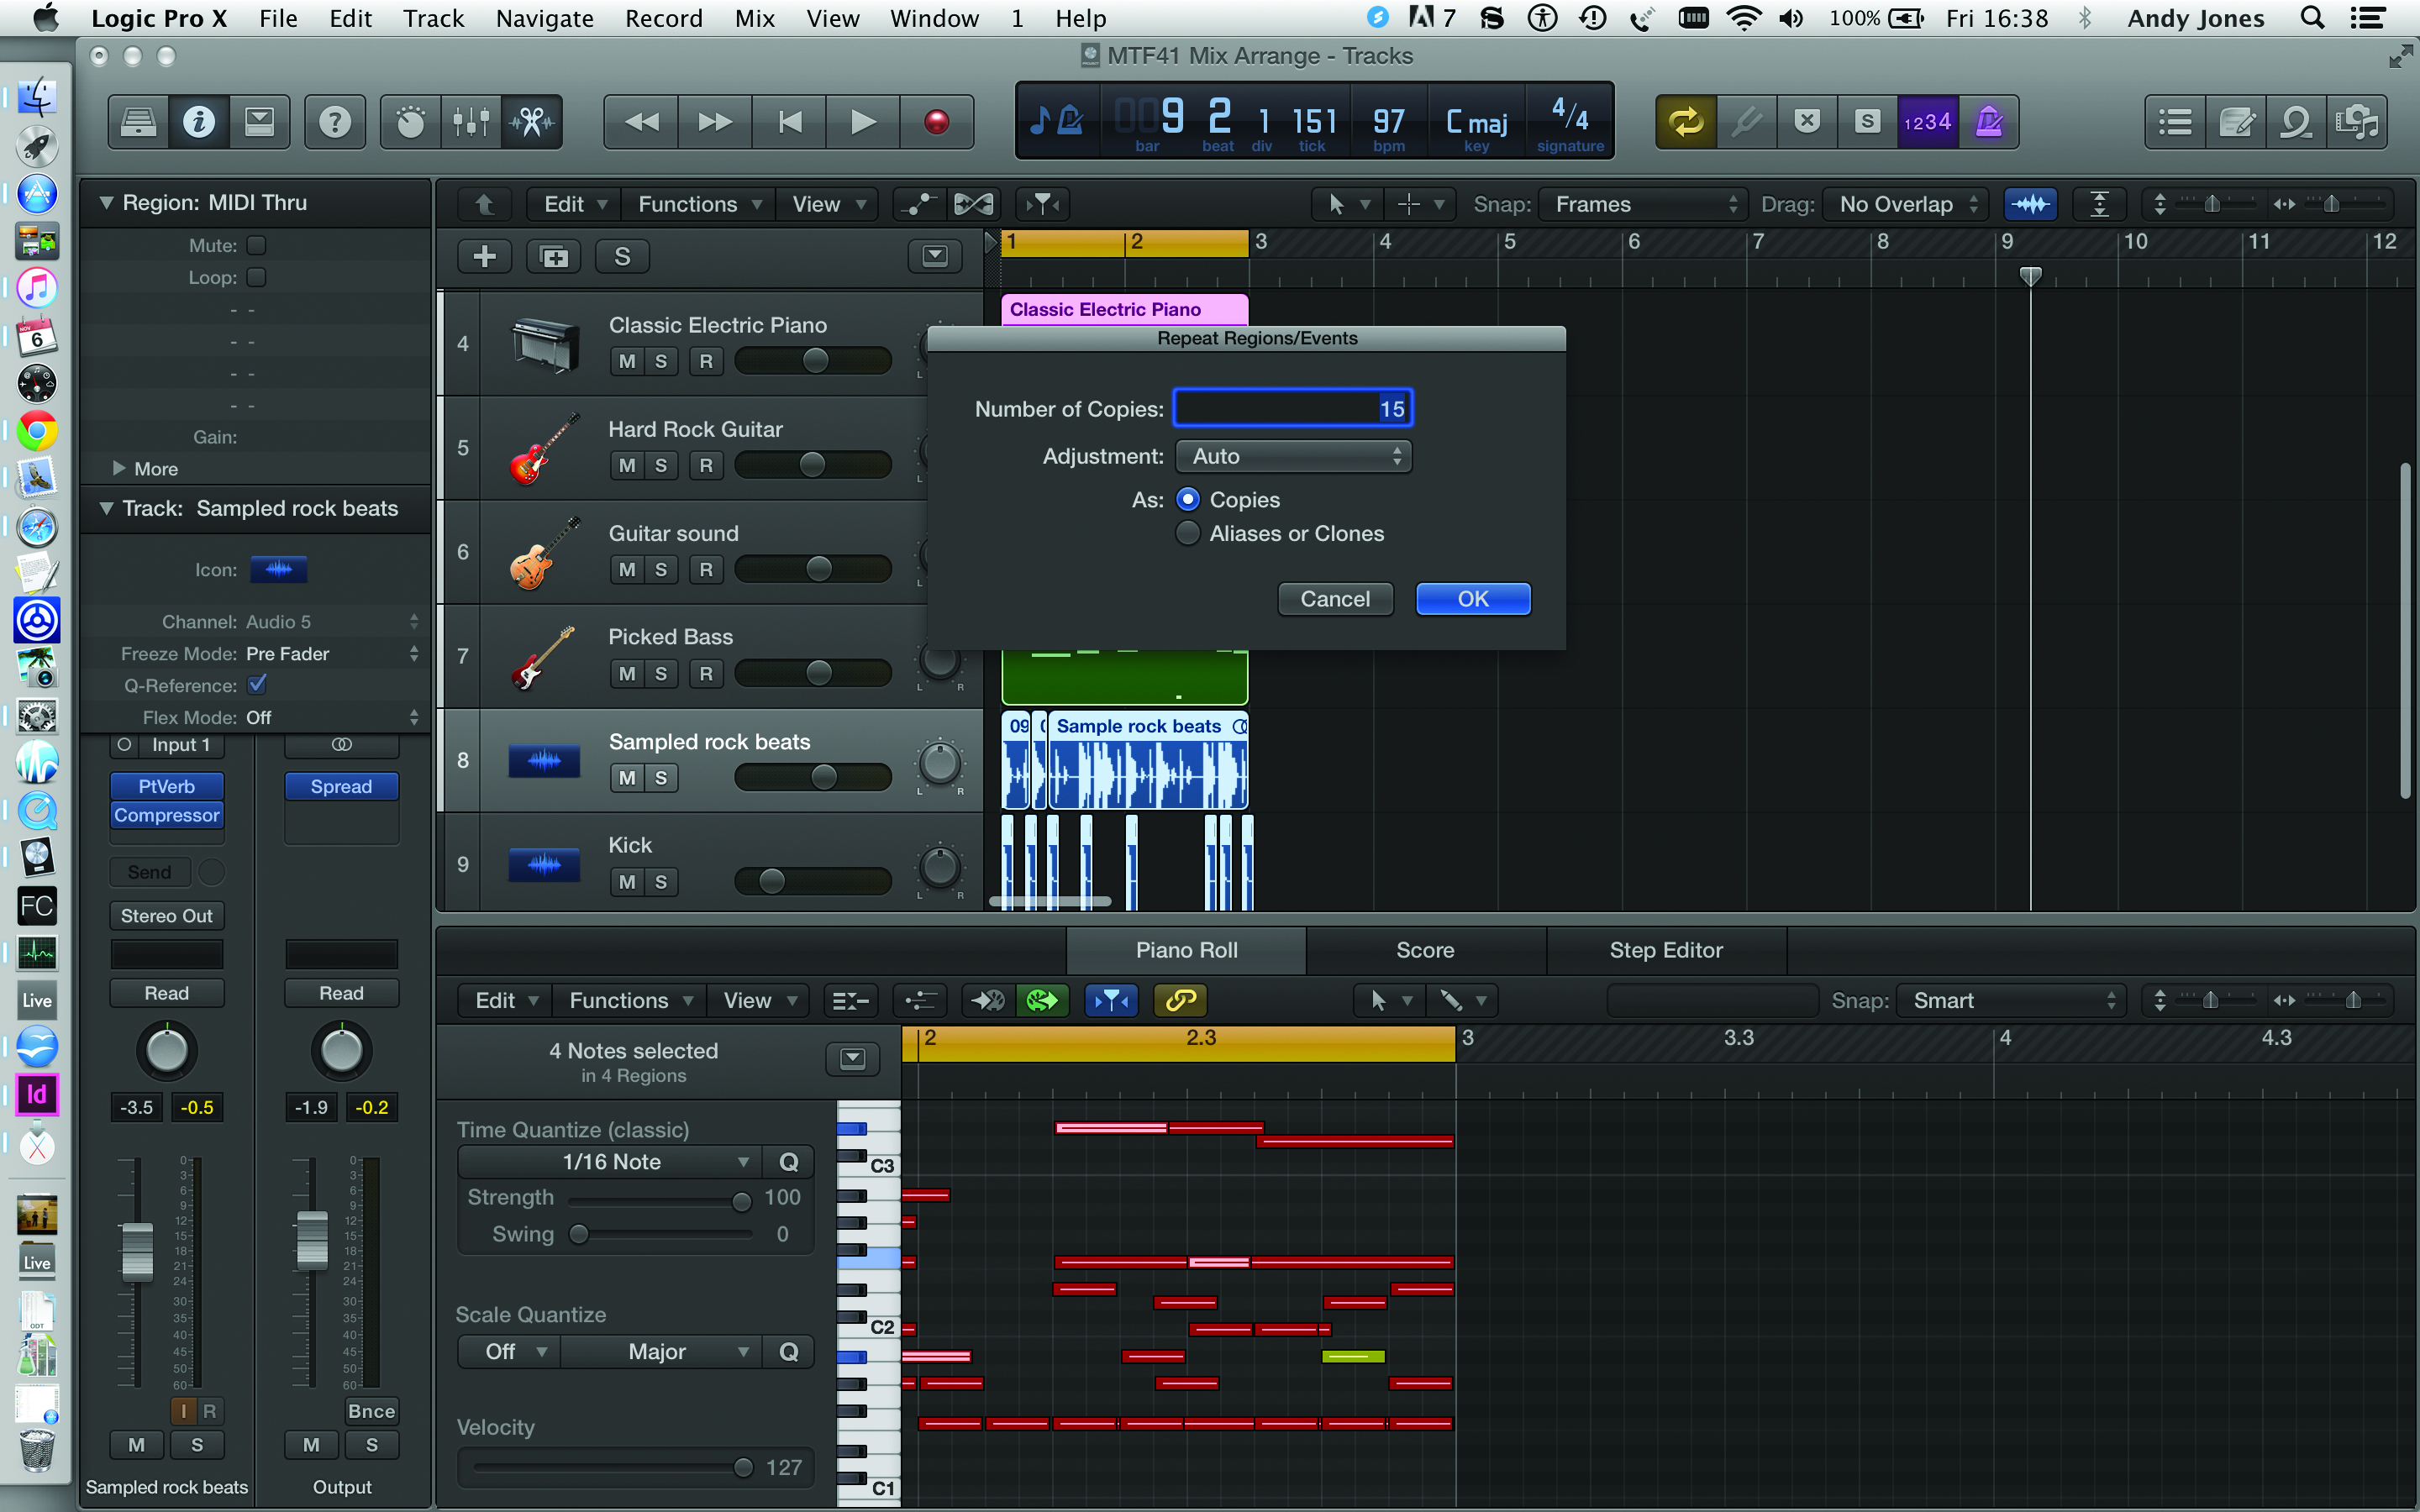
3: Far easier after you select all (Cmnd>A) is to Repeat (Cmnd>R) and type in the specific number of repeats of your two-bar loop. We start with 15 but then double this to make 32 in total; that’s 64 bars.
4: Now select Logic Pro X’s Arrangement tab by clicking the blue icon at the top of the track list to the right, which reveals Arrangement, Marker, Signature and Tempo tracks.
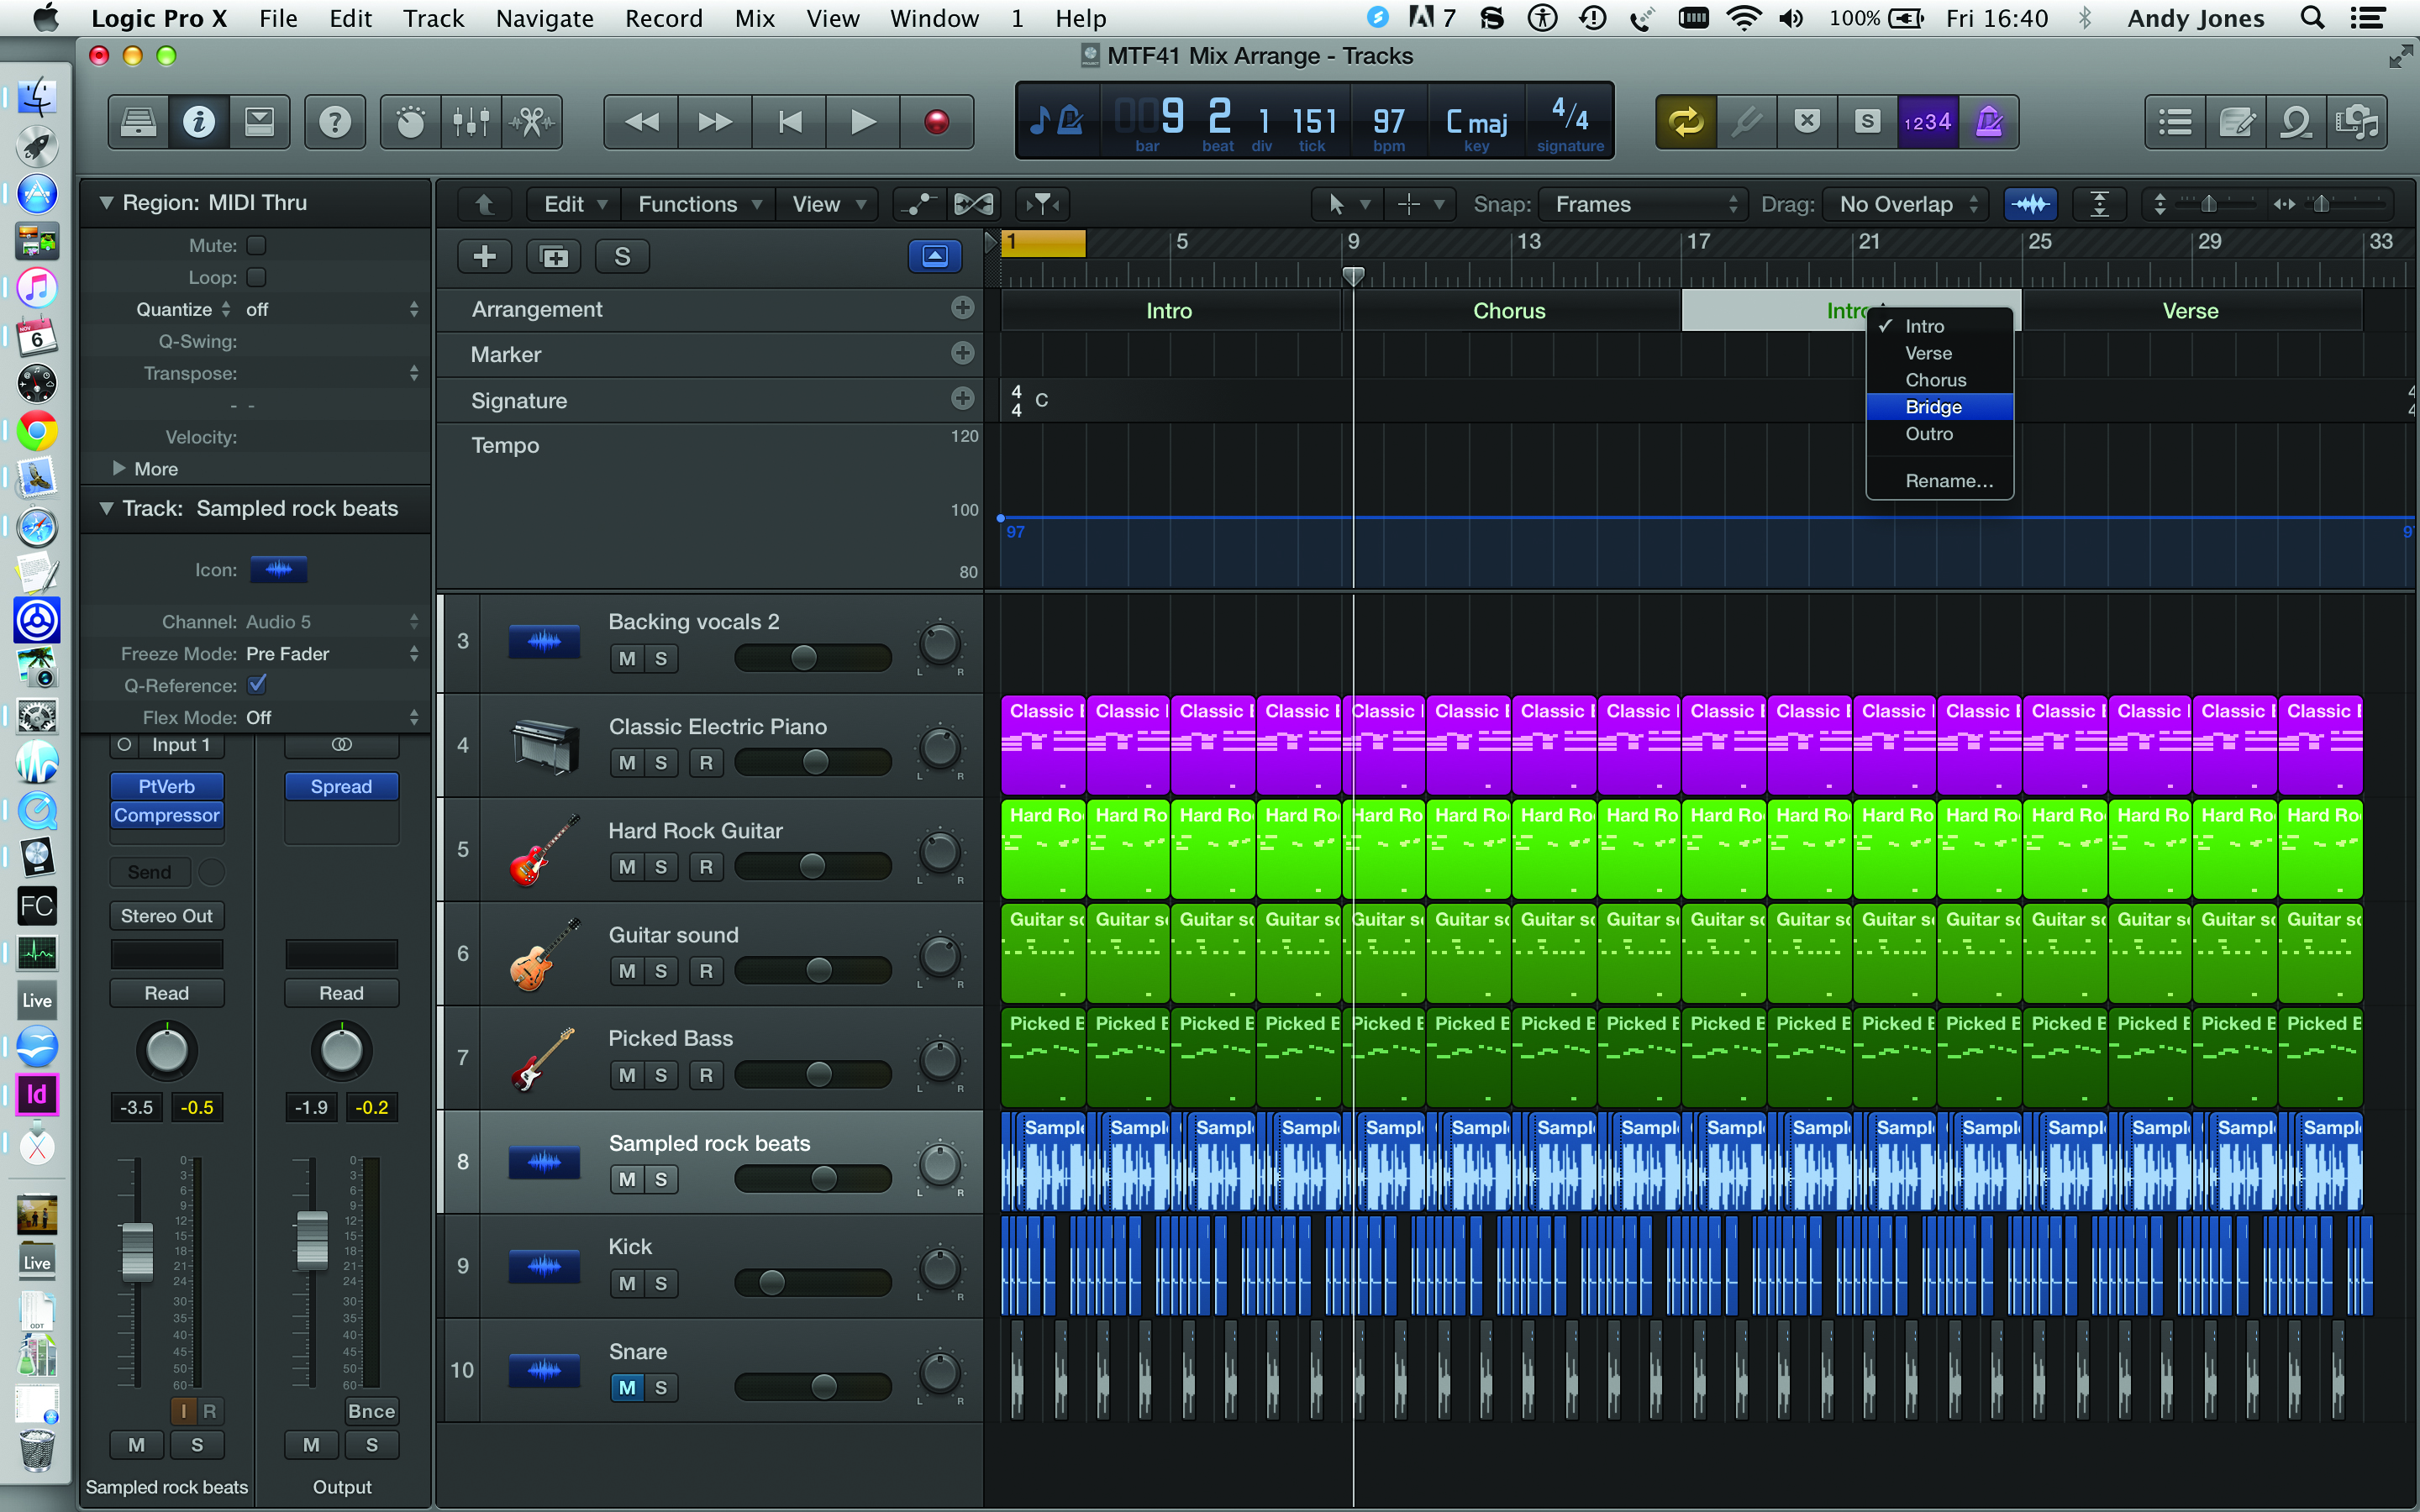
5: Press the + button on the Arrangement track and sections automatically appear, in this case every eight bars. Name each section (Intro, Verse, Chorus etc) using the drop-down menu on each, or simply click the title to name it whatever you want.
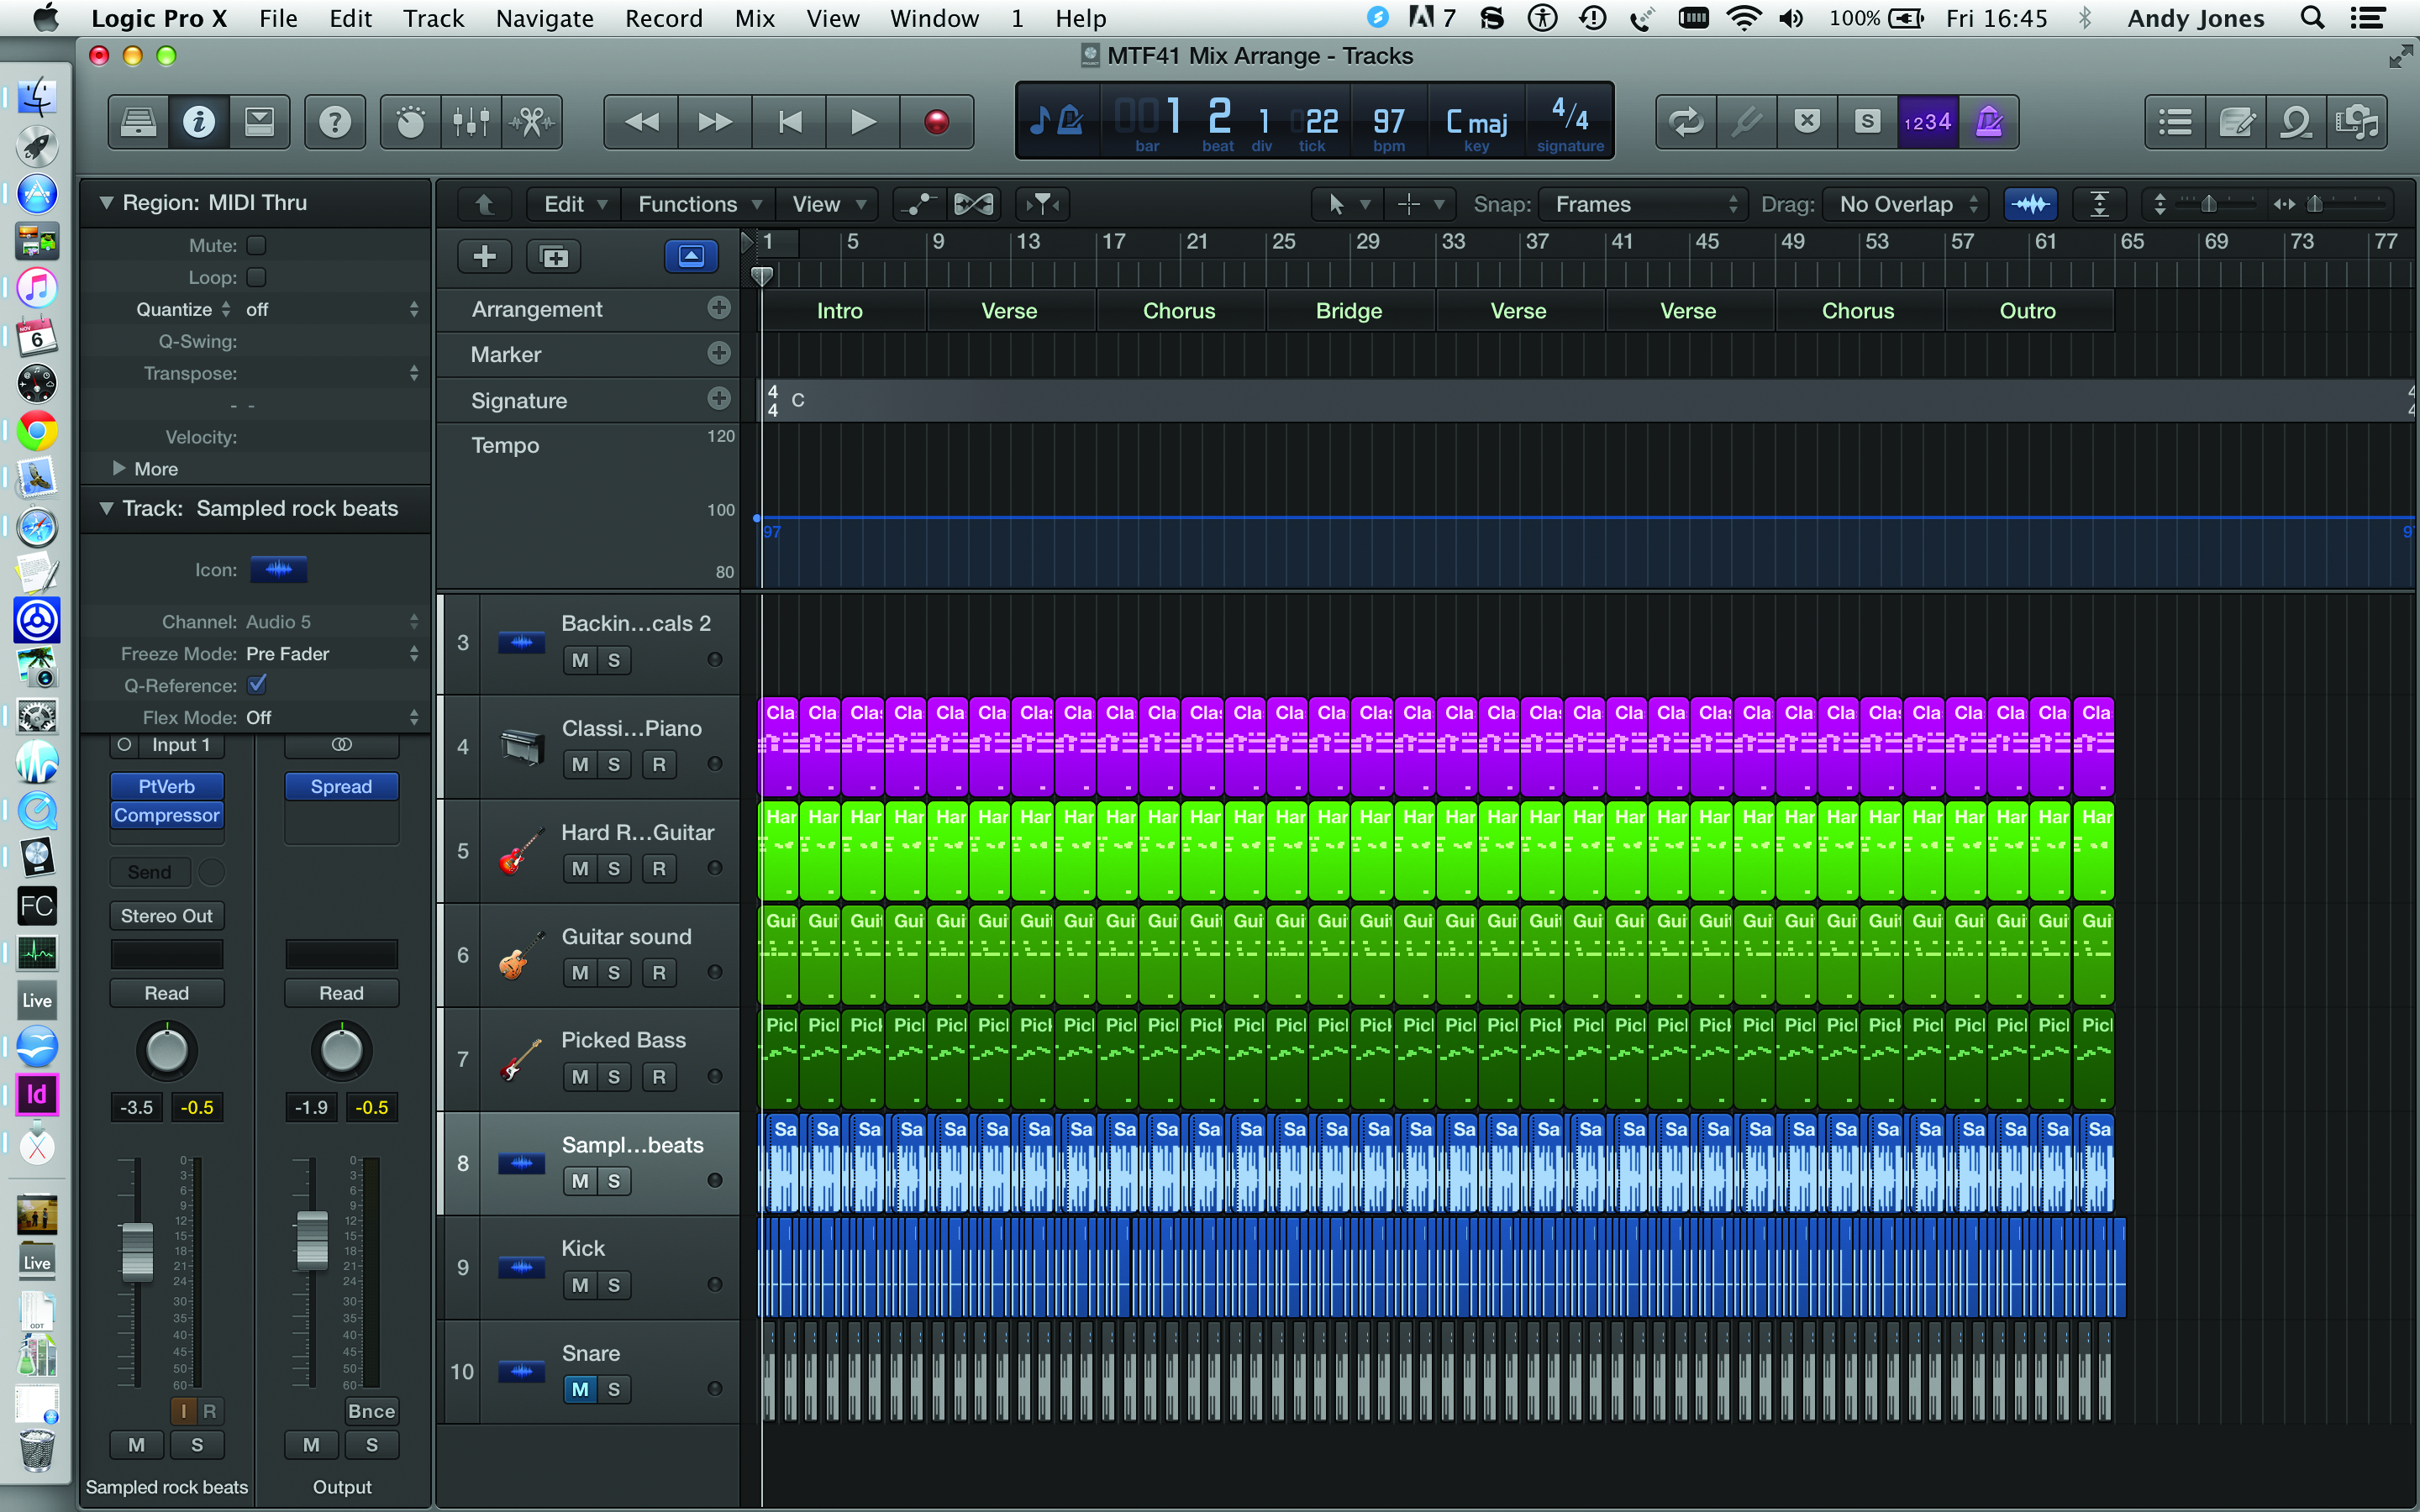
6: We’ve now copied enough of our original loop to cover 64 bars and have eight sections in our arrangement, including Intro, Chorus, Bridge and Outro as shown.
Click Here To Continue
This tutorial is endorsed by Point Blank. With courses in London, online and now in LA, Point Blank is the Global Music School. You can study sound to picture on their Music Production Diploma courses, with pro industry tutors.
