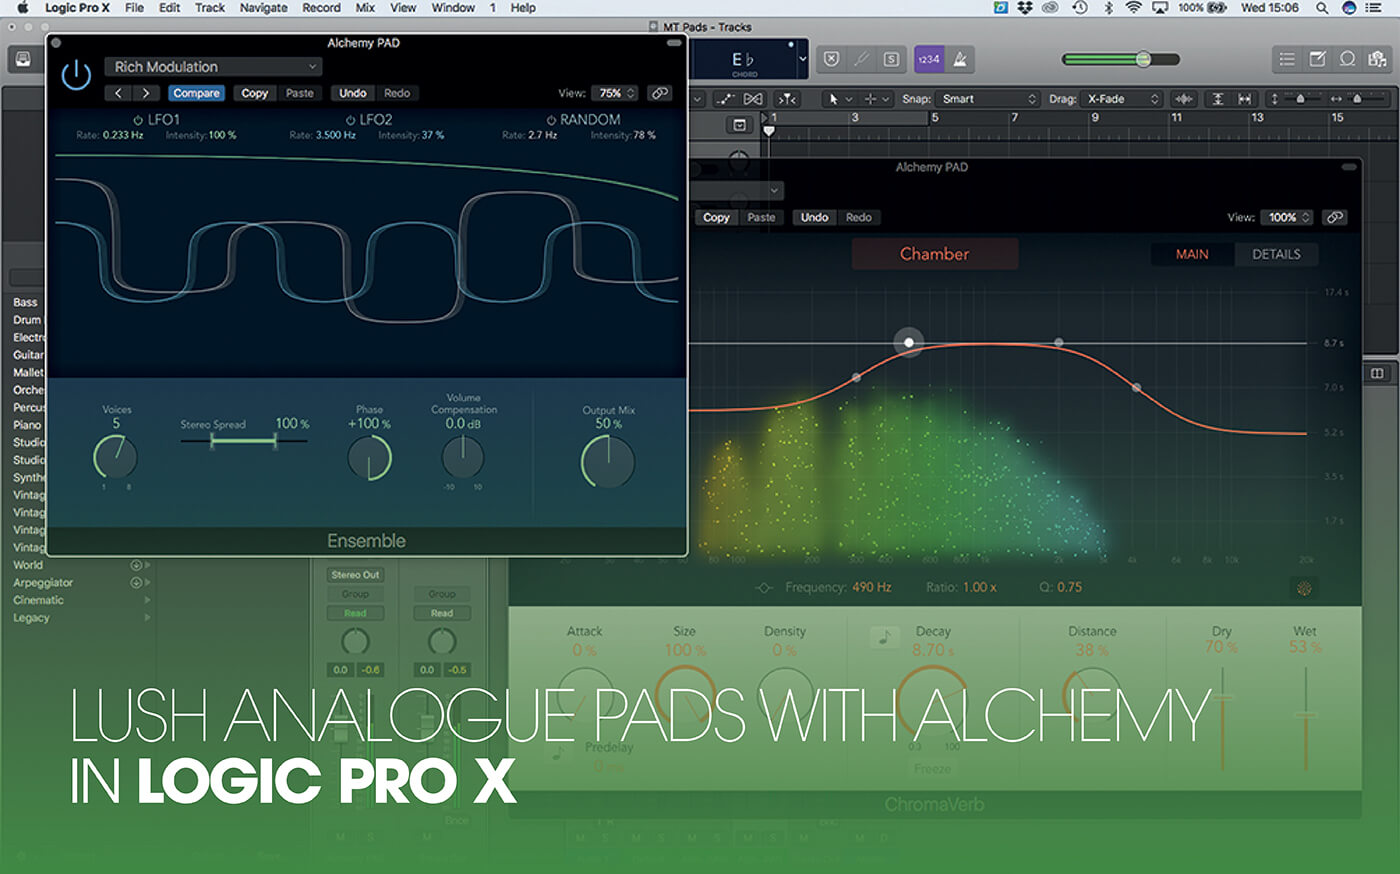
How to create analogue-synth-style pads using Alchemy in Logic Pro X
Alchemy’s virtual-analogue synthesis engine can produce pad sounds with all of the sumptuous warmth of classic polysynths such as the Roland Jupiter-8. We show you how…
One of our favourite applications of Logic Pro’s Alchemy synth is the creation of pad sounds. There are many aspects of Alchemy that make this powerful synth perfect in the application of pads – including a range of synthesis methods, super-weighty virtual-analogue oscillators and, of course, a highly flexible modulation matrix.
Naturally, the temptation with pads (as with many other synth sounds) is to dive into the presets folder, but with a little know-how, you’ll find yourself able to produce pad sounds that are perfect for your track (and 100 per cent unique) in less time than it takes to audition a few pre-heated options.
For the purposes of this workshop, we’re going to concentrate on the basics of pad creation, and particular, the process of creating the kind of lush analogue pads that we’re used to hearing from classic synths like the Roland Jupiter-8 or Yamaha CS-80. Although we’re concentrating on Alchemy, there’s no reason why some of these techniques can’t be used on Logic’s other analogue-like synthesisers (namely, Retro Synth and the ES2), or indeed, other third-party instruments.
Designer pad
The classic, archetypal pad sound is formed from a combination of sawtooth waves, arguably mimicking the sound of multiple players performing together but with each voice slightly out of tune. With respect to the detuning effect, there’s two solutions you’ll want to explore, possibly even using a combination of the two approaches.
The simplest option, of course, is to detune the oscillators using the fine-tune control – maybe using three oscillators and pitching two of them up or down, respectively. Another option is to use two LFOs, each at different rates and depths, so that the oscillators weave in and out of pitch with each other.
Another interesting solution is the classic PWM (or pulse-width modulation) pad, which was often used on one-oscillator synthesisers as a means of fudging a sound similar to detuned sawtooths. As the name suggests, pulse-width modulation uses an LFO to modulate the width of a square/pulse wave so that the waveshape is constantly changing. Get the rate and depth of the modulation right, and the effect almost sounds like two oscillators ‘beating’ against one another. Adding another oscillator, playing a sawtooth slightly out-of-tune with the PWM effect, produces a sound much bigger than just two oscillators would suggest.
The next objective is to ‘soften’ the pad sound, which is currently bright and harsh, using a combination of filtering and envelopes. With the filter, it’s often a good idea to add a degree of KeyFollow, so that the filter tracks the keyboard position, resulting in a sound that maps across the whole range of the keyboard rather than sounding muted in the upper octaves. In effect, the KeyFollow makes the lower notes darker, and the higher notes slightly brighter, so the cutoff point has some musical relationship with key position. Also experiment with different filter strength, so a 24dB setting, for example, will appear darker than a 12dB option.
Enveloping on both the filter and amplifier further softens the sound – with a graduated attack, medium decay, moderate sustain and a slow release. Distinguishing between the filter and amp envelopes (see tip) will help your sound recede towards the back of the mix, leaving space for lead sounds and the vocal.
One aspect worth considering is tereo. On the basis that we’re trying to replicate a group of players performing as an ensemble, you’ll want to inject a level of stereo dimensionality into the pad sound. Alchemy’s ability to individually pan each oscillator is useful, which is great on the three-oscillator sawtooth pad example where you can precisely define the width. In addition, or in the example where you’re creating PWM pad sounds from one or two oscillators, it’s also worth exploring the Ensemble plug-in, which is similar to the chorus effect Roland would add to many of its single-oscillator polysynths.
There’s a world of further pad sounds to be explored using Alchemy. Whether it’s a shimmering, glassy additive pad, or something more textural and abstract based on samples, Alchemy is a powerhouse synthesiser that’s one of the best features of Logic Pro X.
Lush analogue pads with Alchemy: step-by-step
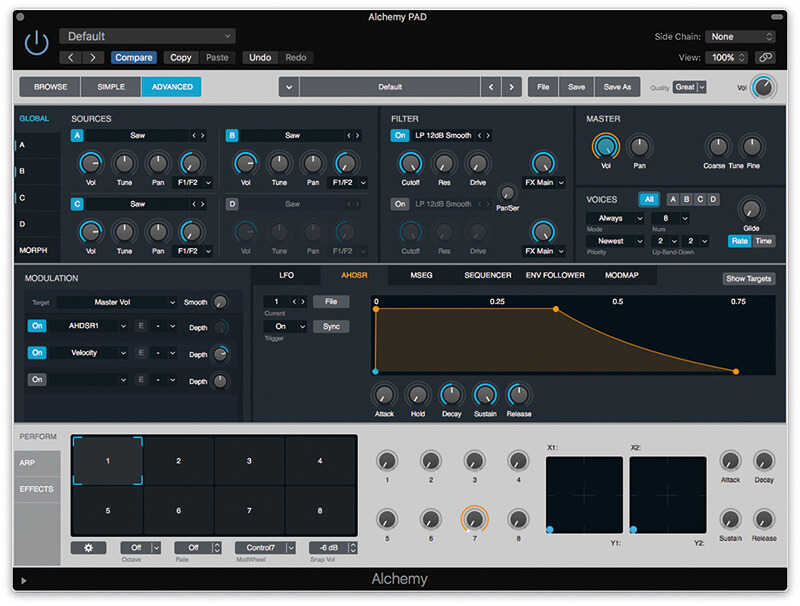
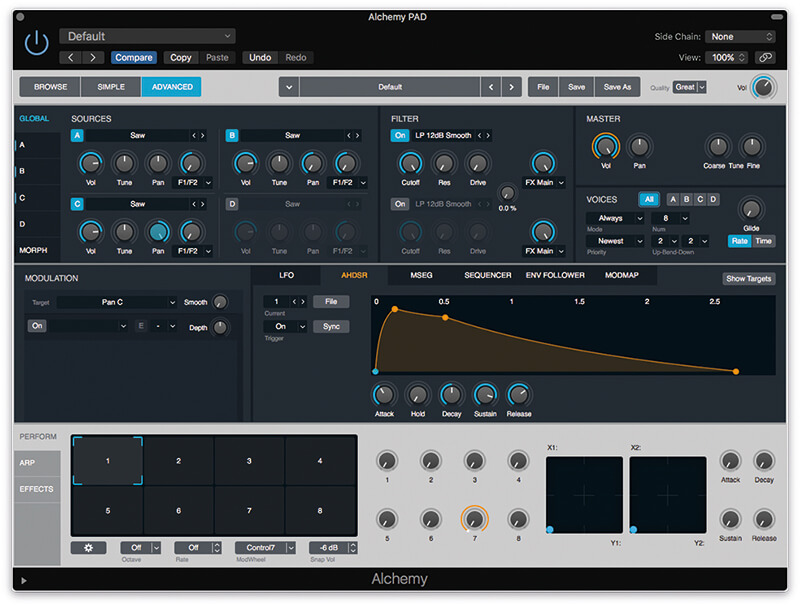
1. Start with an initialised patch (File>Initialize Preset) and click on the Advanced view to see the full editing functions. Activate three oscillators (A, B and C) and then set each one to be a sawtooth wave.
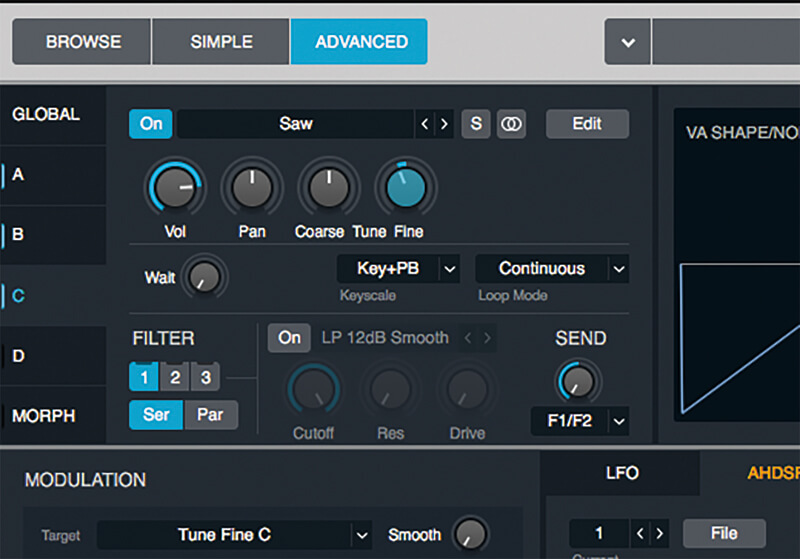
2. Click on the tabs in the top left-hand corner to move through a more detailed view of each oscillator. For oscillators B and C, raise and lower the Fine tune control to thicken the sound.
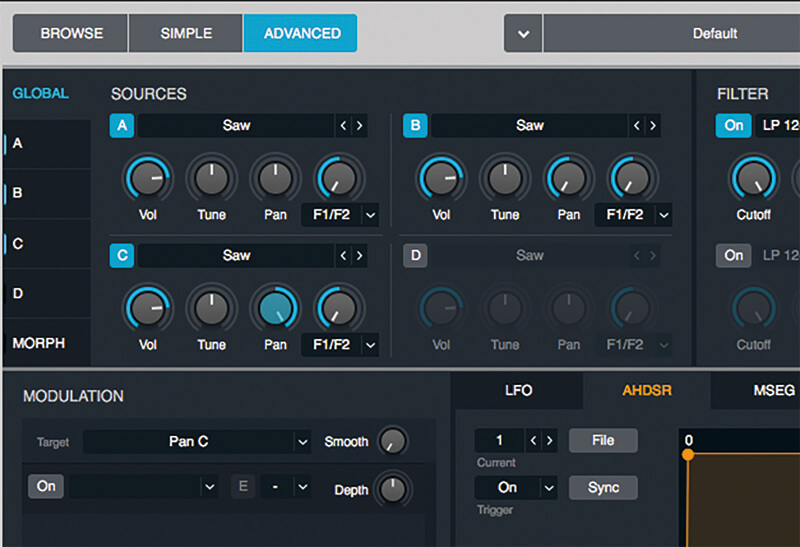
3. Move back to the Global view and set the panning of the oscillators (A, B and C) so that they cover the full soundstage. You can bring B and C closer to the centre to limit the width.
4. Create a smoother volume envelope using ADHSR 1. Set the attack to around 0.1 seconds, sustain slightly lower at 88 per cent, and a long, graduated release time of around 1.5 seconds.
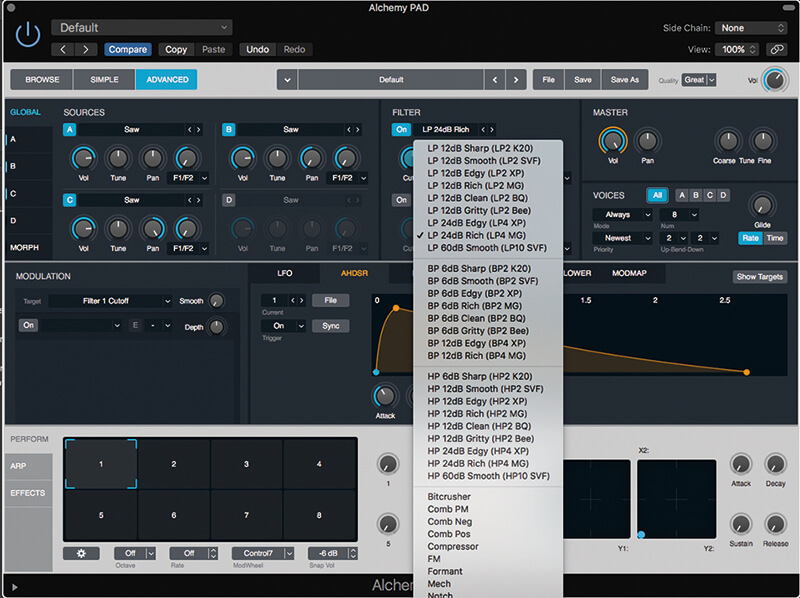
5. Lowering the filter cutoff makes the pad sound softer. It’s also worth playing with the different filter strengths (12dB and 24dB) that vary the amount attenuation applied around the cutoff, with 24dB sounding noticeably darker.
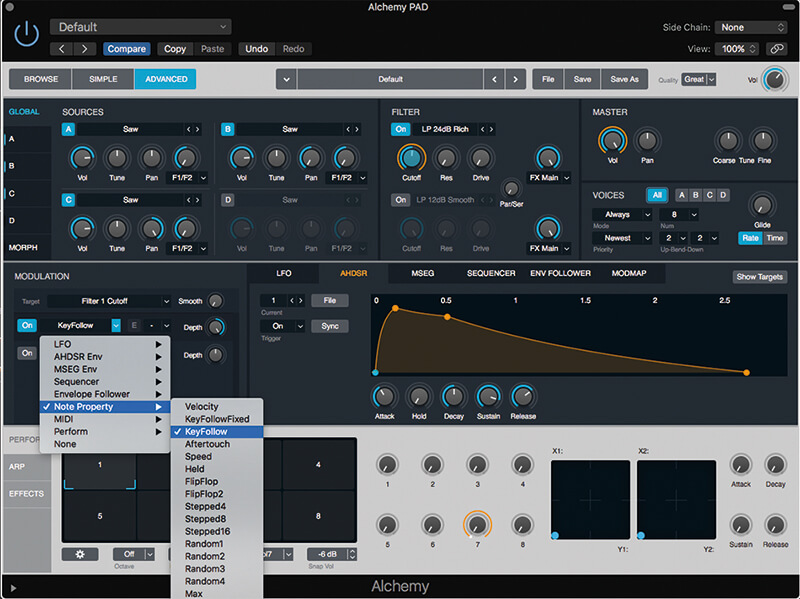
6. If you want your pad to sound good across the full range of the keyboard, use Note Property>KeyFollow as a modulation source applied to Filter 1 Cutoff. The filter will now follow the key position.
![]()
OTHER VOICES A restricted voice count – say four or five voices – has creative potential. With longer release times, notes can merge if you have a high voice count. Yet if you restrict your voice count to the number of notes you play in a chord, the oscillators ‘reset’ for each new chord played.
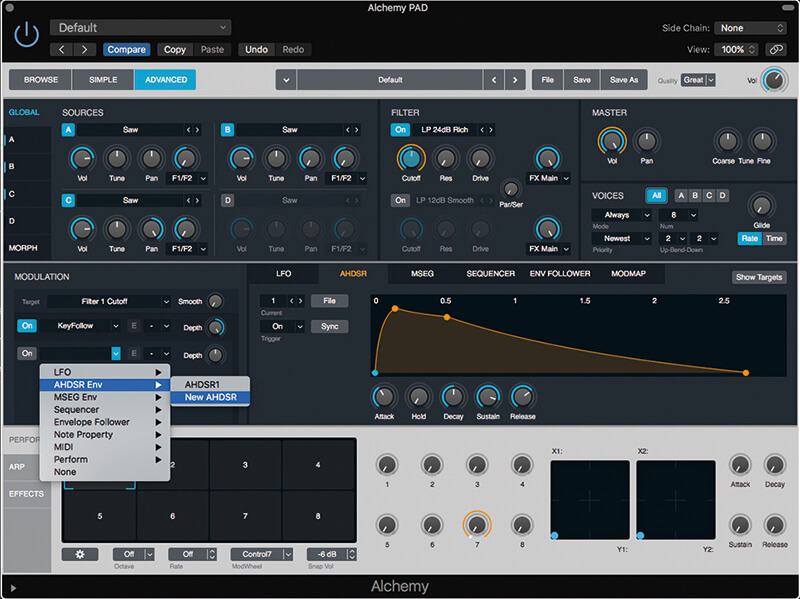
7. You can add multiple modulation sources to the same target. Click on the next empty slot for Filter 1 Cutoff and pick AHDSR Env>New AHDSR. This will create a completely new envelope for the filter.
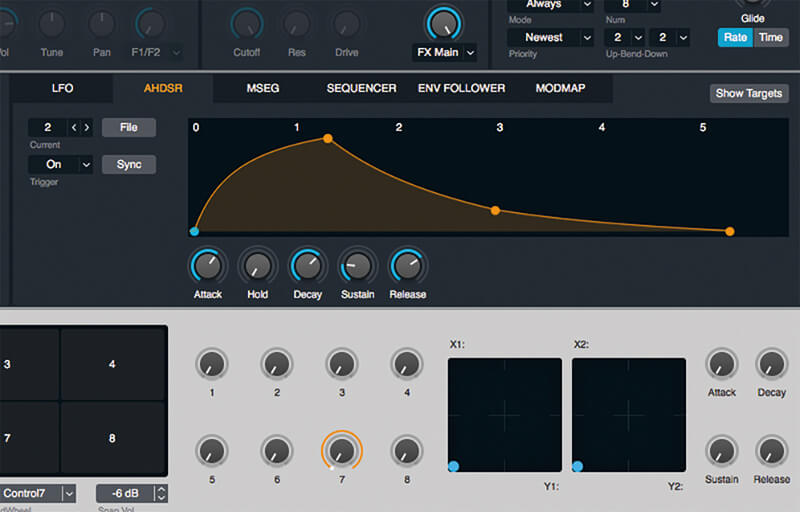
8. Ensure the envelope display is set AHDSR 2 on the left-hand side. Set AHDSR 2 to have a slower attack, decay and sustain alongside a similar release time. Increase the depth to hear the results.

9. The finesse of the filter envelope sits between the relative filter cutoff and the amount of depth. Set filter cutoff as the ‘baseline’ level and then increase the depth to create the desired amount of movement.
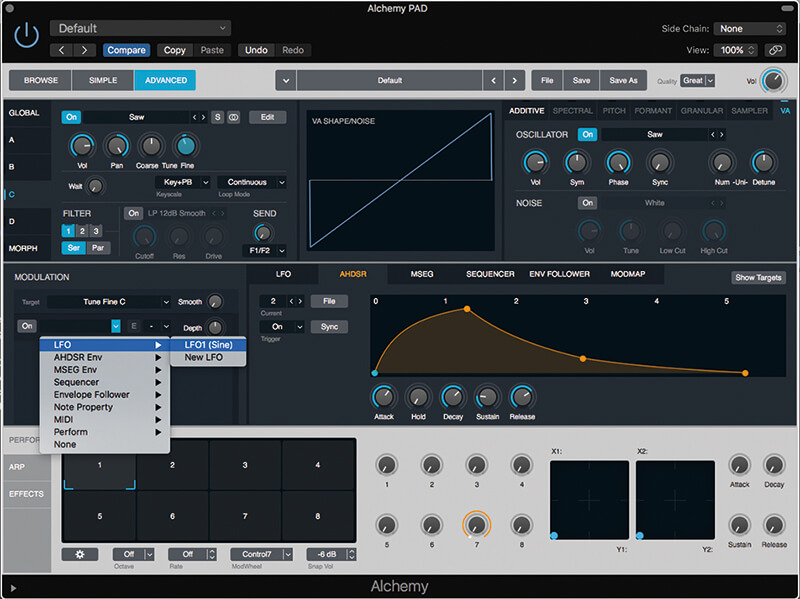
10. As well as detuning the oscillators, consider using different LFOs to add pitch interest to the pad sound. Solo oscillator C by muting A and B and then set LFO1 to modulate the Fine tune control.
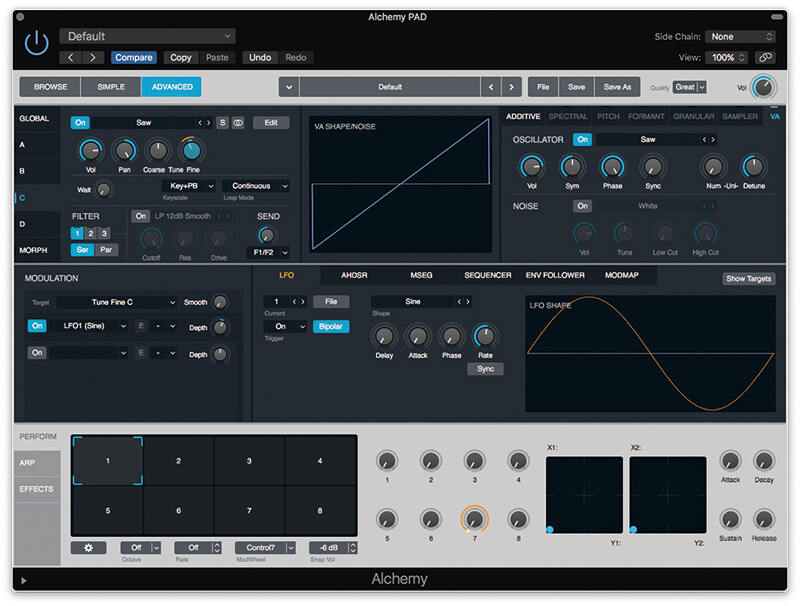
11. Set the rate and depth of the pitch modulation on LFO1. In this case, we un-synced the LFO, set the rate around 6Hz, and added a small amount of depth (14 per cent) to create a fast vibrato.

12. Repeat the same on Oscillator B, this time using a slower vibrato using LFO2. Recombine the three oscillators and notice how the detune effect has become far more dynamic than just a static detune.
![]()
VARY THE ENVELOPES One useful trick is to distinguish between the envelopes applied to the filter and amplifier respectively. For the filter’s envelope, you could pick a slower attack and a lower sustain, so there’s a ‘swell’ at the sound’s start, but a darker timbre as the note progresses.
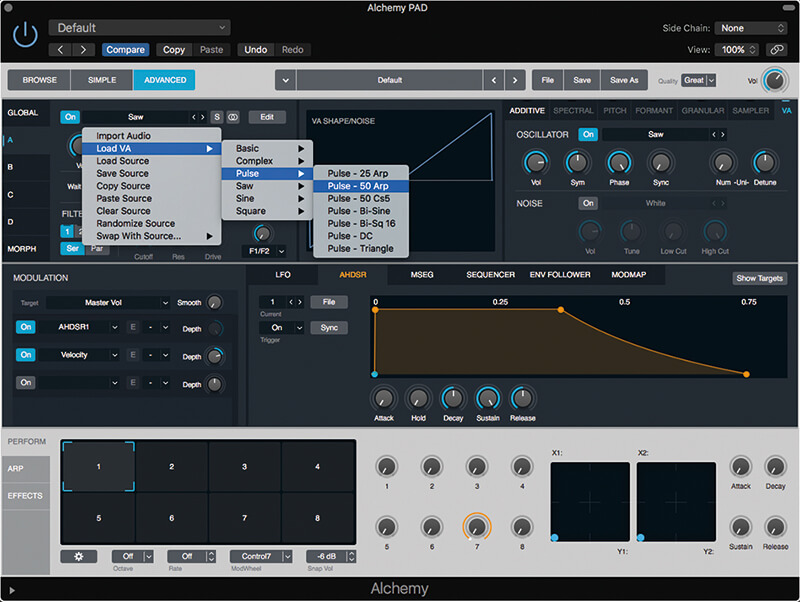
13. Create a new instance of Alchemy with an initialised patch. We’re now going to explore a classic PWM pad sound. Start by loading in the Pulse – 50 Arp VA waveform. At this stage, you’ll hear a square wave.
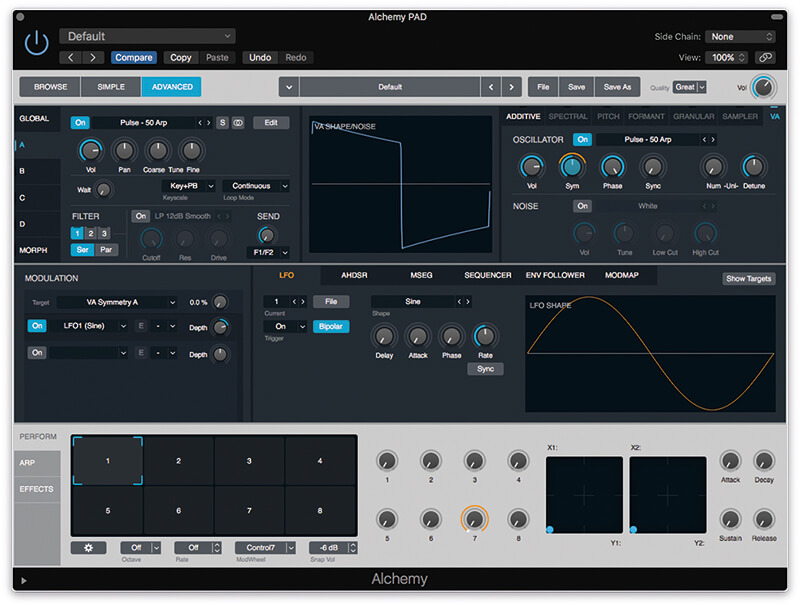
14. Click on the Symmetry control and add LFO1 as a modulation source. Try to fine-tune both the speed and depth of the effect. There’s no perfect setting, so see what sounds best to your ears.
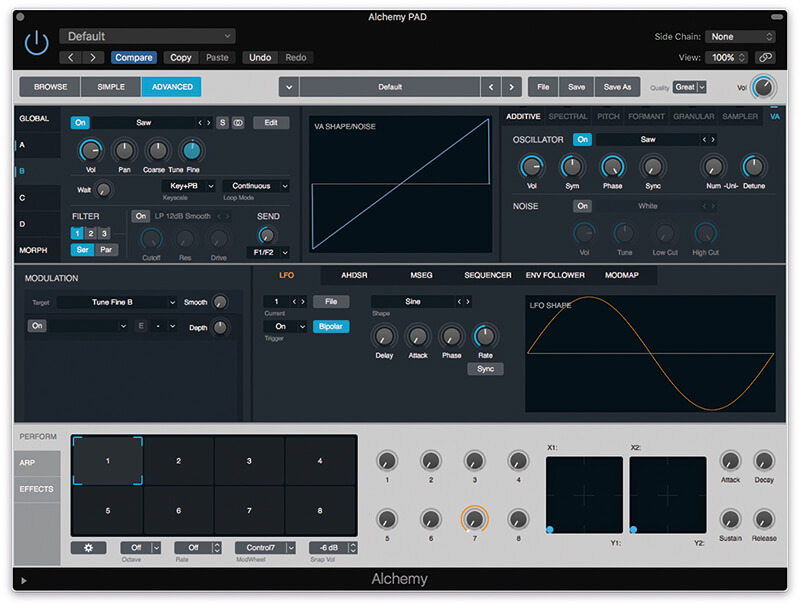
15. Add a second oscillator set to a sawtooth waveshape and use the Fine tune control so that it ‘beats’ against the PWM oscillator. The greater the difference in pitch, the higher the beat frequency will be.

16. What works well is establishing some difference between the ‘beat frequency’ of the two oscillators and the rate of PWM. Try matching them and either marginally increasing or decreasing the PWM rate.
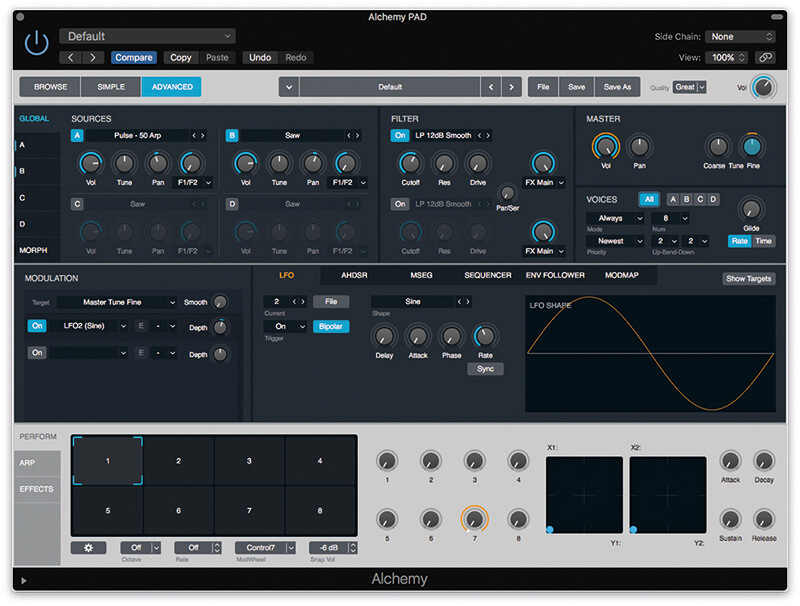
17. For generic vibrato, you can always modulate the Fine tune control in the Master section – in this case, using a new LFO. You could also choose to pan the oscillators if you wanted to add some stereo width.
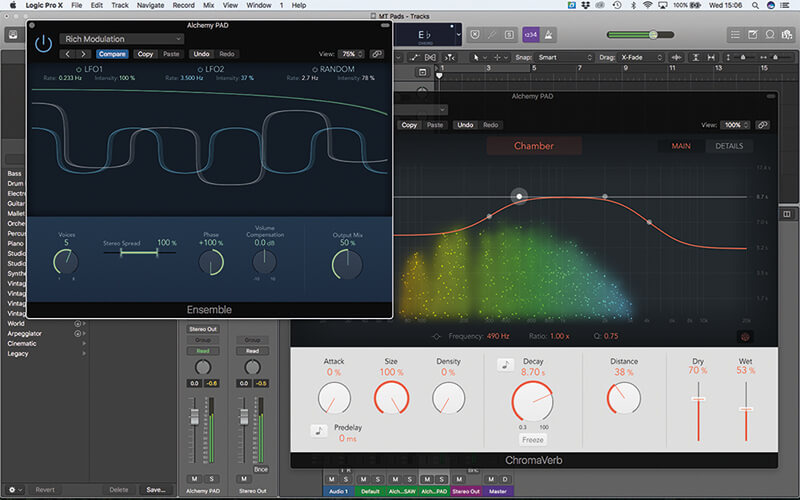
18. Ensemble and ChromaVerb are both useful as a means of adding more stereo information to a range of pads. The Ensemble plug-in artificially increases the voice count, while ChromaVerb adds stereo spatiality.