Logic Pro X Tutorial: Become a Power User Part 2 – Quick Swipe Comping
Harnessing the full power of Quick Swipe Comping allows your sessions to run smoother and more efficiently. Mark Cousins polishes his performance. Unless you’re lucky enough to work with a musician who consistently delivers ‘one-take wonders’, it’s highly likely that your finished recording will be compiled from a jigsaw-puzzle of different takes. Using Logic Pro […]
Harnessing the full power of Quick Swipe Comping allows your sessions to run smoother and more efficiently. Mark Cousins polishes his performance.
Unless you’re lucky enough to work with a musician who consistently delivers ‘one-take wonders’, it’s highly likely that your finished recording will be compiled from a jigsaw-puzzle of different takes. Using Logic Pro X’s Quick Swipe Comping, though, can make the task of recording and assembling a finished ‘comp’ considerably easier, enabling you to record multiple takes and switch between them with relative ease. However, although a basic comp is easy enough to achieve, it’s well worth looking at some of the deeper functional complexities of Quick Swipe Comping to make the most from this essential feature.
In essence, the Quick Swipe Comping feature is a handy way of recording multiple passes of the same musical part, whether it’s a vocal or an instrument line. At the top level, the region might seem like any other audio recording, but expand the Take folder and you’ll see the complete series of takes, alongside the precise edit points used to create the final comp. This functionality not only makes multiple takes easier to work with, but also enables you to experiment with the various edit points with ease, even down to the ability to create several differently named ‘comps’ from the same material.
As we’ll see, though, recording and creating your comp is just the start of the comping process. Once you’ve made your edits, you need to consider the options in respect to how the audio resides in your session. One option might be to ‘flatten’ the comp – a process that renders it as a series of regions, which can then be polished and refined using Logic Pro X’s conventional audio-editing tools. If you want to retain the option to return to the original comp later, options such as Export Active Comp to New Track are worth exploring.
With a little practice, you’ll soon be recording, editing and flattening your own comps, keeping your tracks area clean and creating near-perfect performances.
Working With Comps
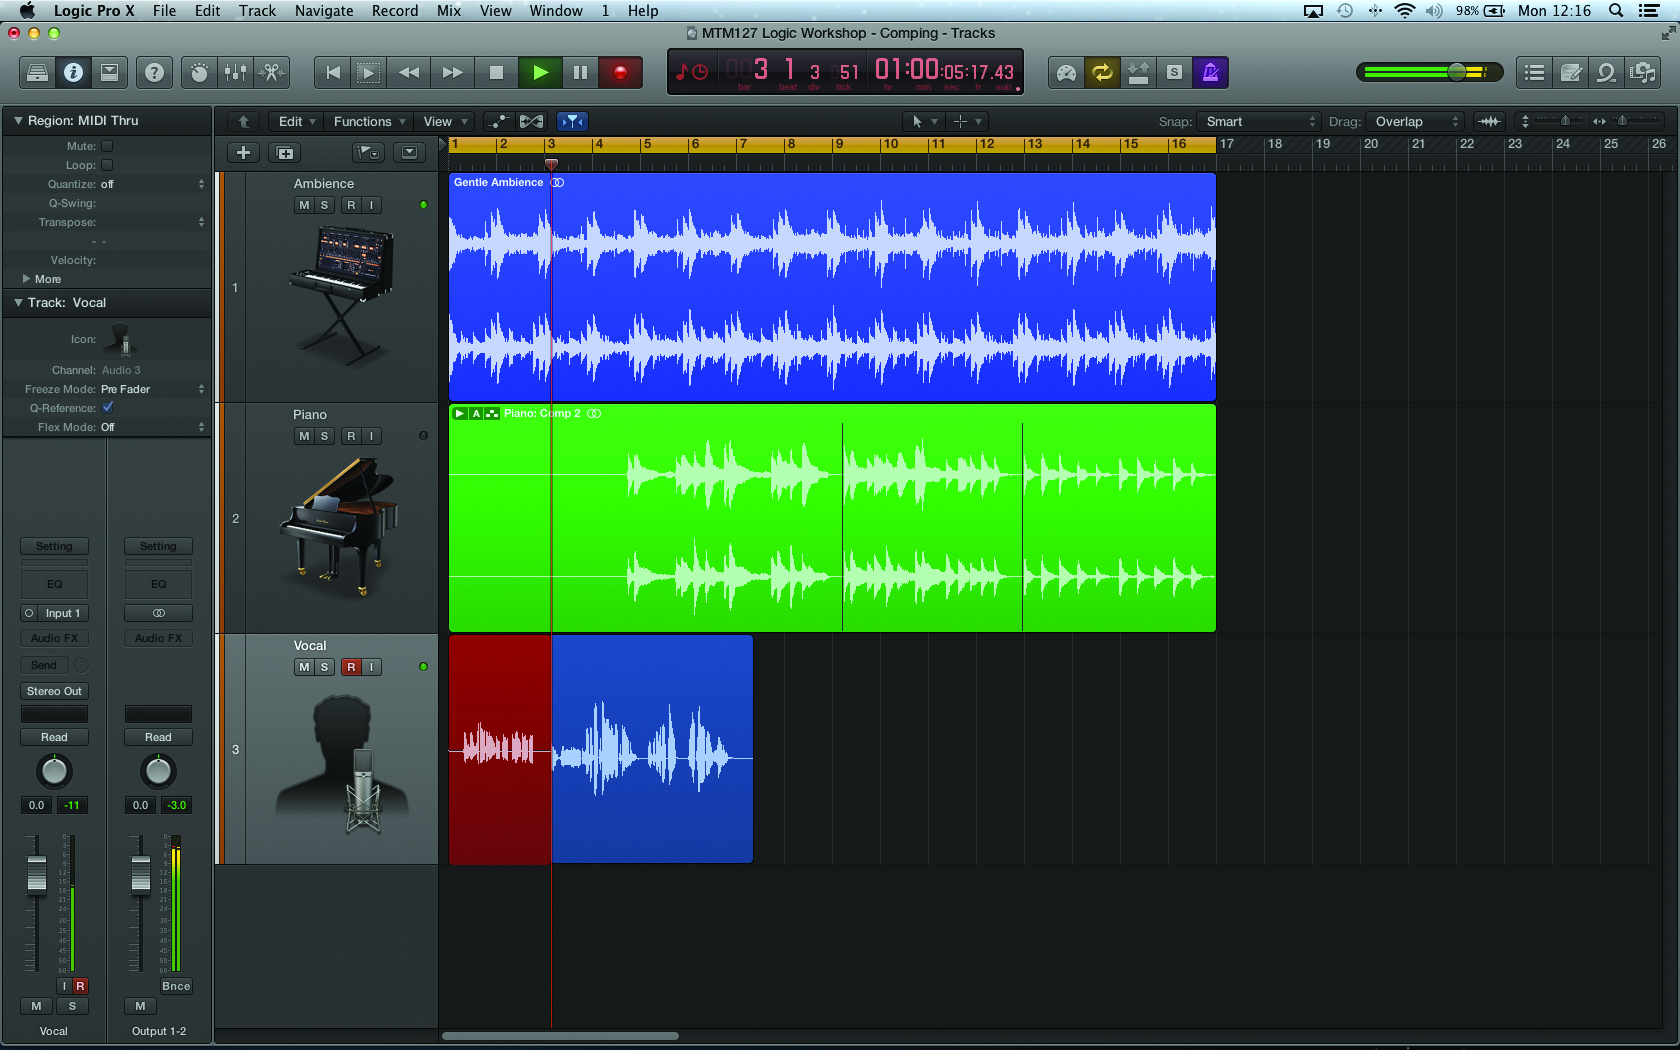
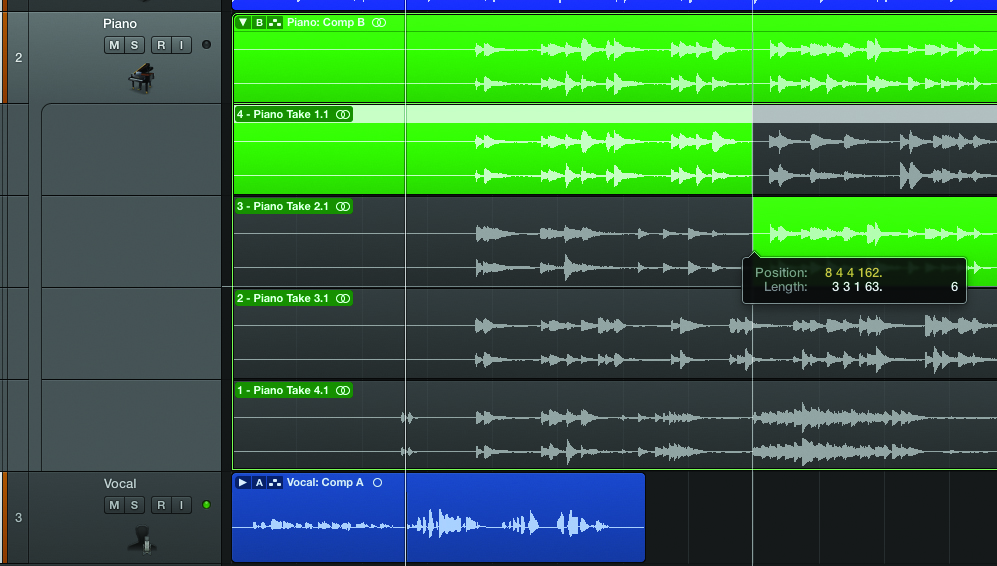
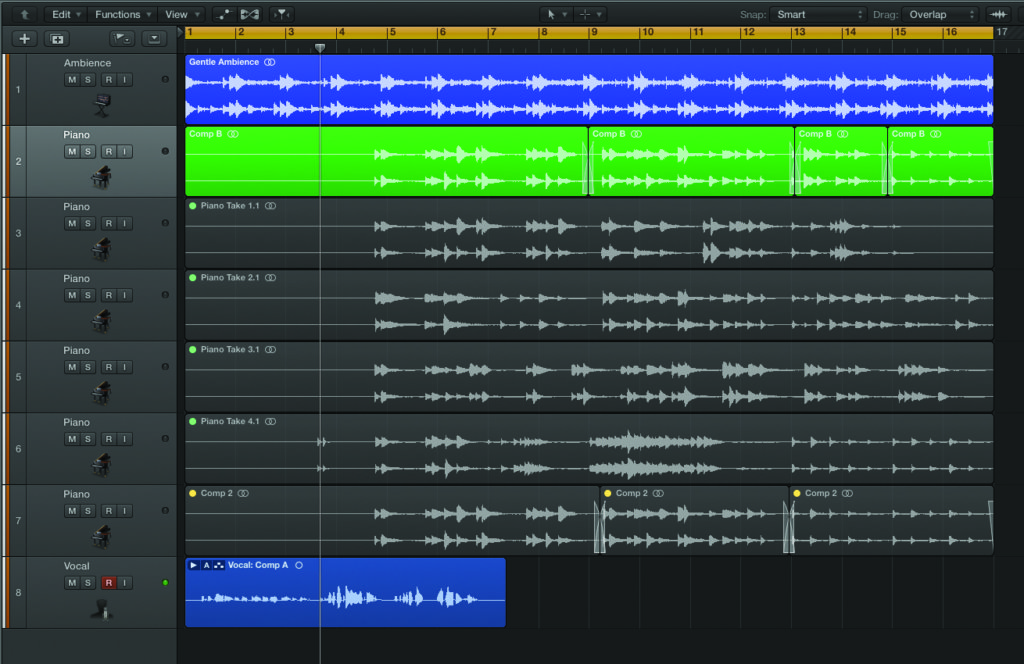
1: Whenever you record over an existing performance, Logic will create what is known as a Take folder. The Take folder system is useful both as a means of handling multiple different takes of the same musical part and creating comps, whereby edits are placed to switch between different phrases or words in a performance.
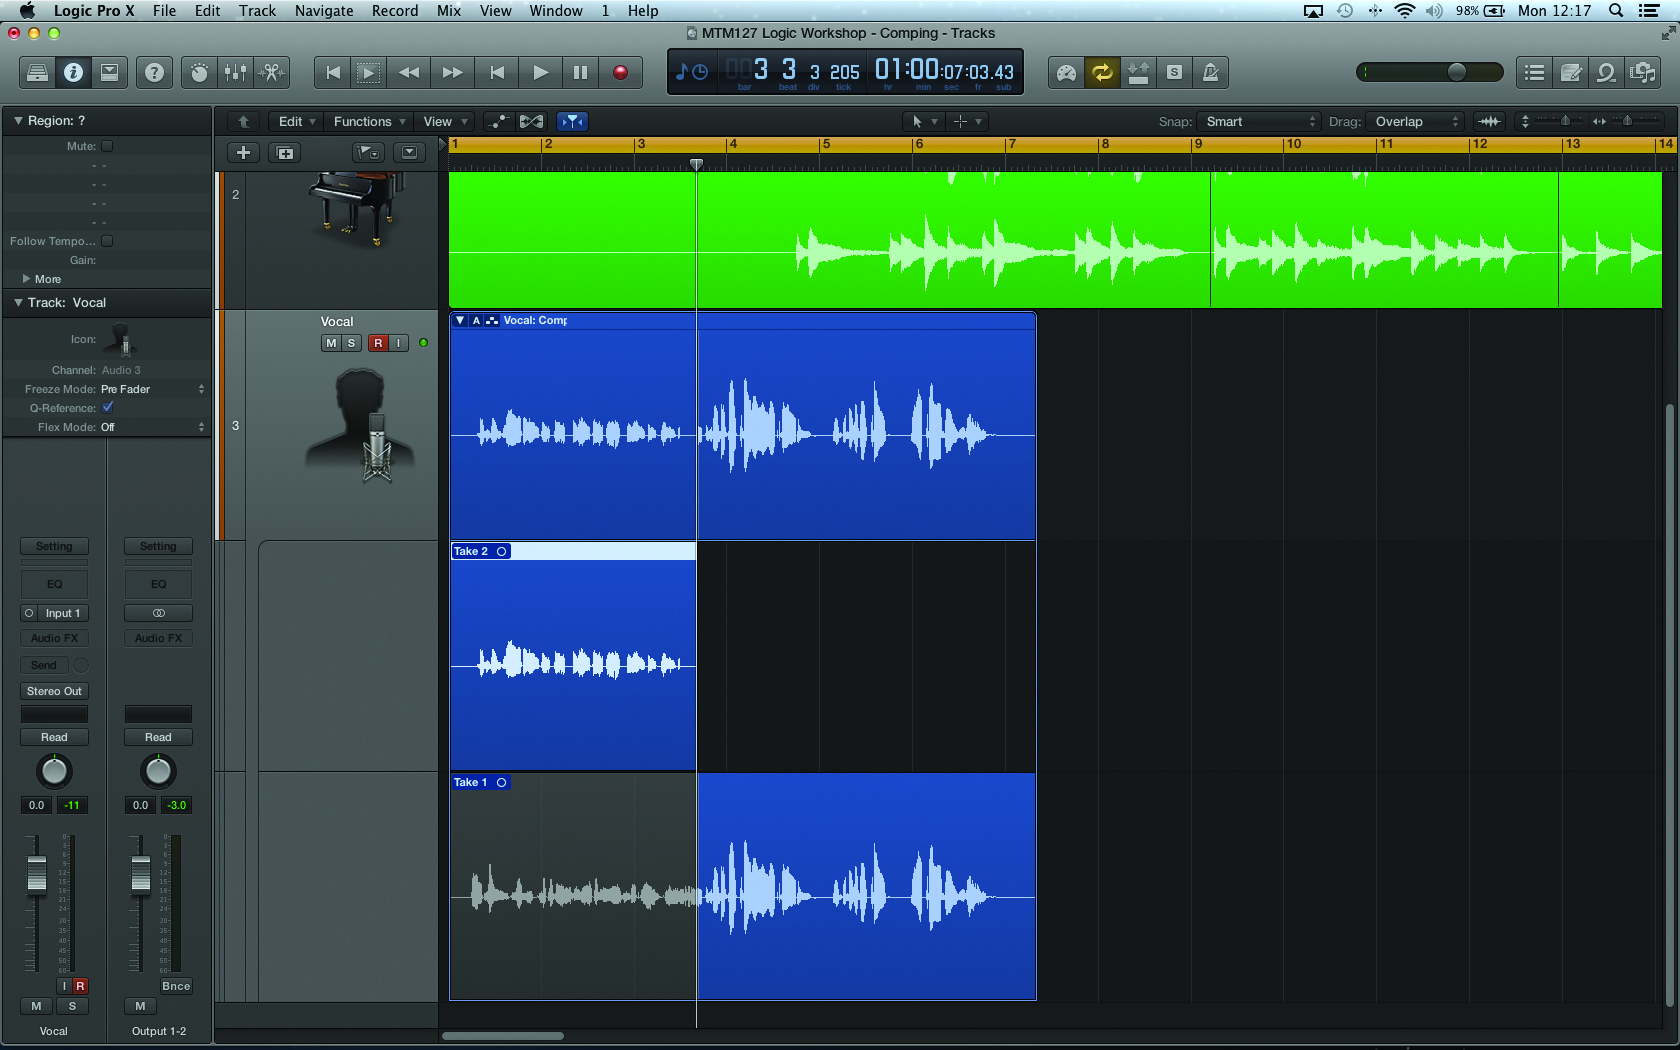
2: A Take folder looks different from a conventional audio region – notice the addition of some important icons added to its top left-hand corner. The arrow, for example, allows you to collapse or expand the folder, displaying the various original takes as well as the edits point (indicated by the coloured shading) used to switch between the different performances.
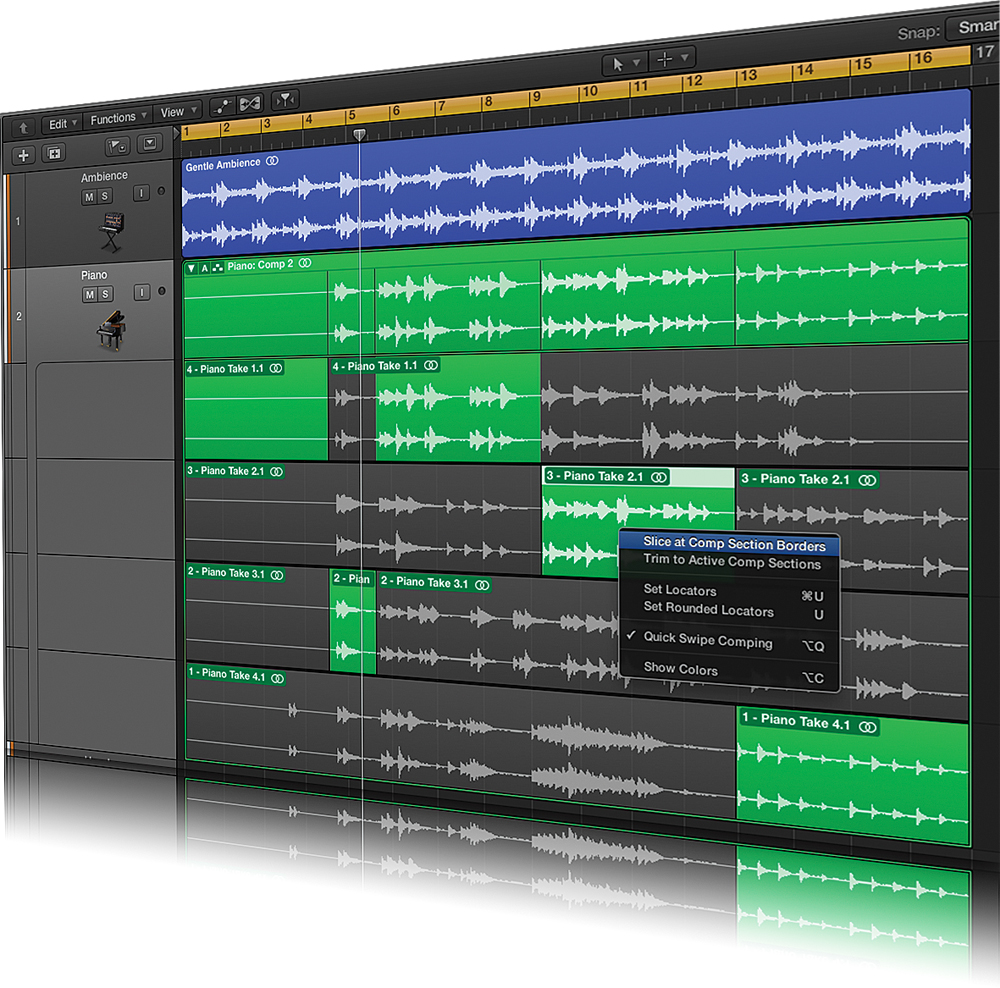
3: Clicking on the second icon opens the Quick Swipe Comping menu, which has a series of features and functions that let you audition and edit the takes. On the uppermost level, for example, you can see each take. This is a great way of auditioning each performance, irrespective of how far into the editing process you’ve gone.
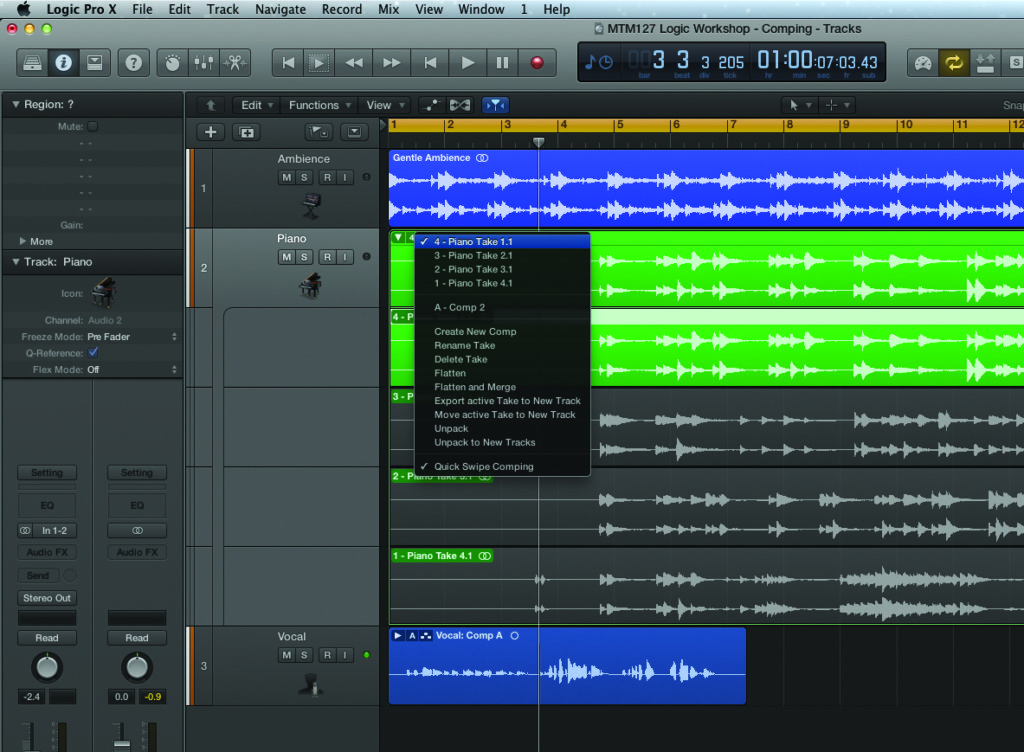
4: To create your comp, pick the Create New Comp option from the dropdown menu. The first comp, with the A prefix, is created as a result of your recording. Your new comp, prefixed with the letter B, can be made by dragging the edit points or clicking and dragging on the respective take. The final take can be seen at the top level.
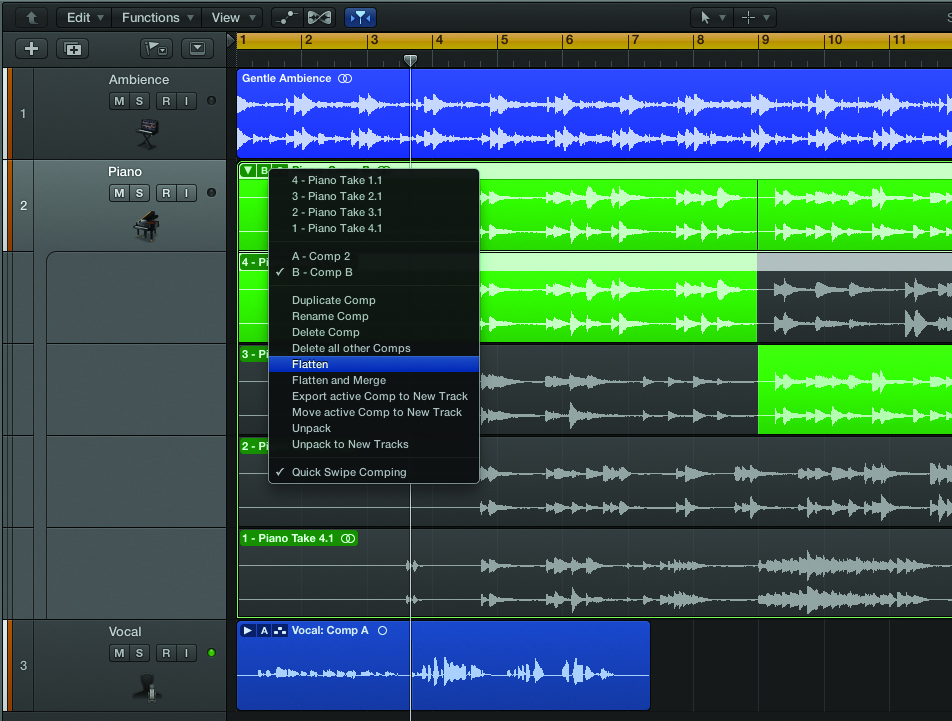
5: In theory, once you’ve created your comp you can leave the Take folder as is. There are, however, a number of situations in which you might want to flatten, export or unpack the comp. Flattening the comp (via the Quick Swipe Comping menu) is particularly useful when you want to refine the crossfades between takes.
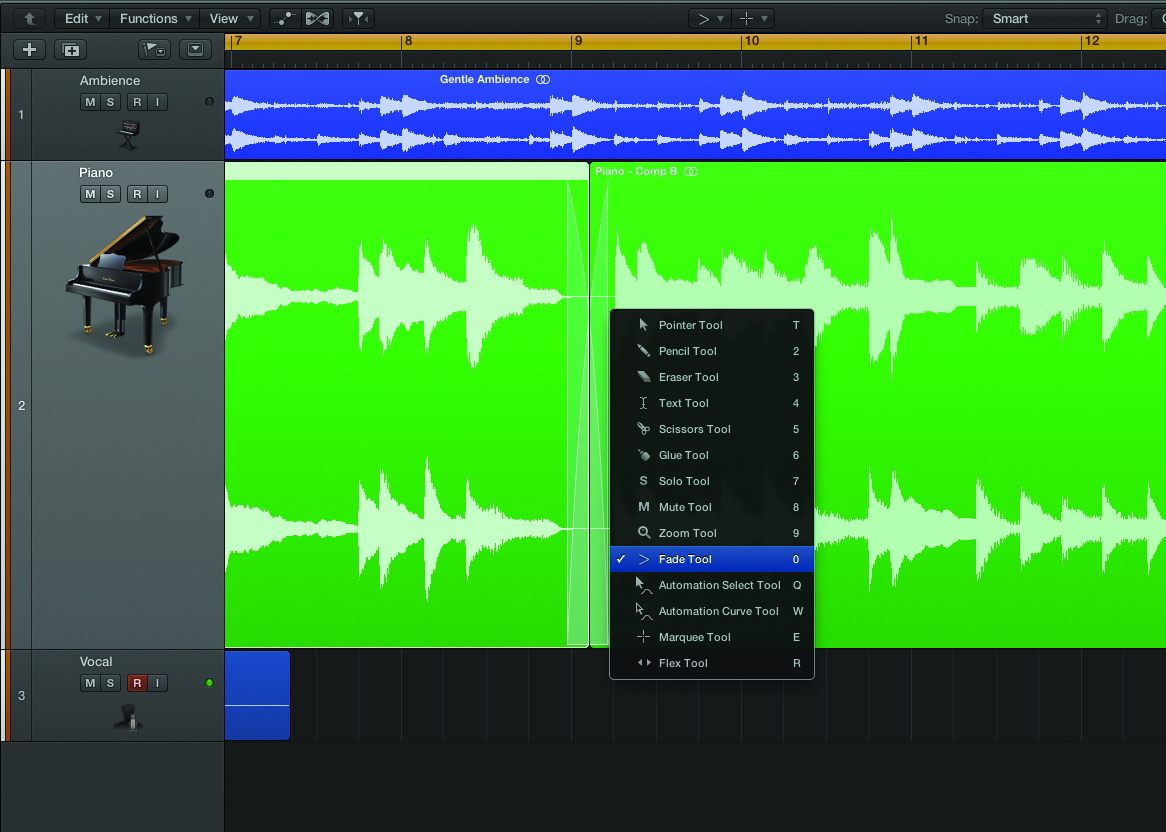
6: Flattening the comp will render the edits as a series of regions on the same track, with a predefined crossfade between each take. In most cases, the default crossfade should be fine, but if you’ve flattened the comp you can use the Crossfade tool (or region resizing in the X-Fade Edit mode) to manually adjust each edit point.
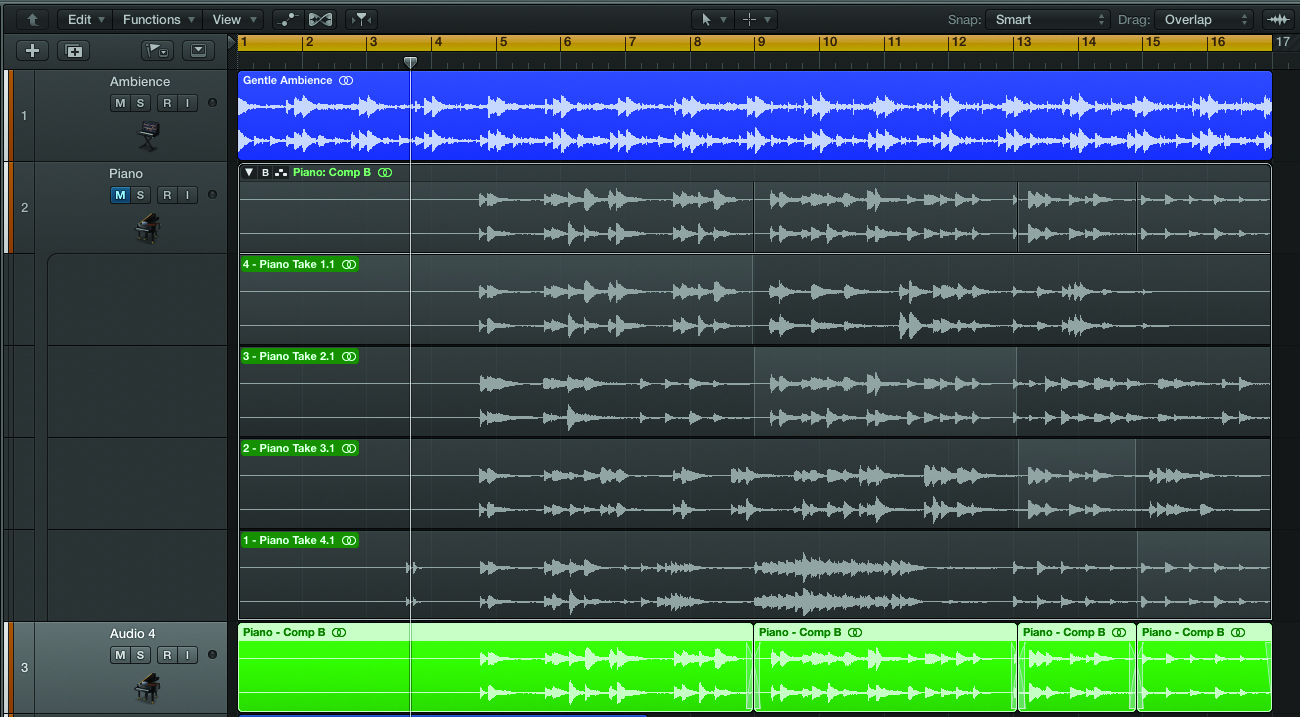
7: The only downside to the flattening process is that you lose the ability to return to the Quick Swipe Comp later on in the production process. An alternative is to use the menu option Export Active Comp to New Track, which creates a flattened comp on an adjacent new track. Simply mute the original track so that you don’t hear the two playing simultaneously.
8: If you want full access to the contents of the Take folder, you’ll need to use the Unpack option. Using Unpack will render all the current comps, as well as place each and every take on a separate track. This is useful if you want to explore a completely different creative direction with the source material you’ve recorded.
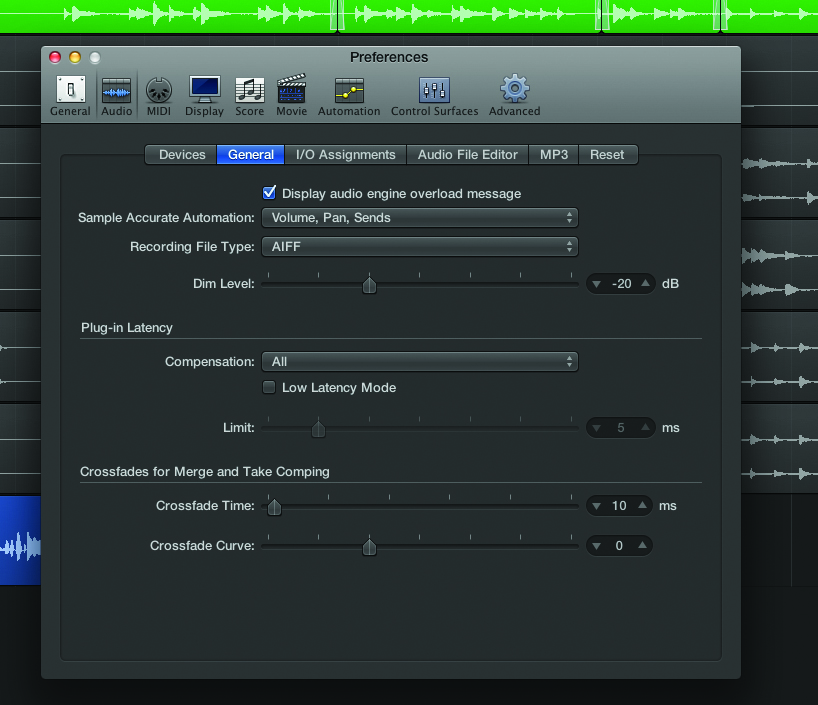
9: As we’ve seen in all the unpacking and flattening options, the final comp is rendered with a series of default crossfades. The setting for the default crossfade time is part of Logic’s Preferences, found under the General tab of Audio Preferences. The default setting is 10ms, which is usually fine for most editing activities.

10: Comping between takes is easy enough, but what if you need to slip a take, or part of a take, in time? The trick here is being able to disable Quick Swipe Comping editing as part of the Take folder. You can do this by clicking on the third icon in the top left-hand corner, switching it to Scissors mode.
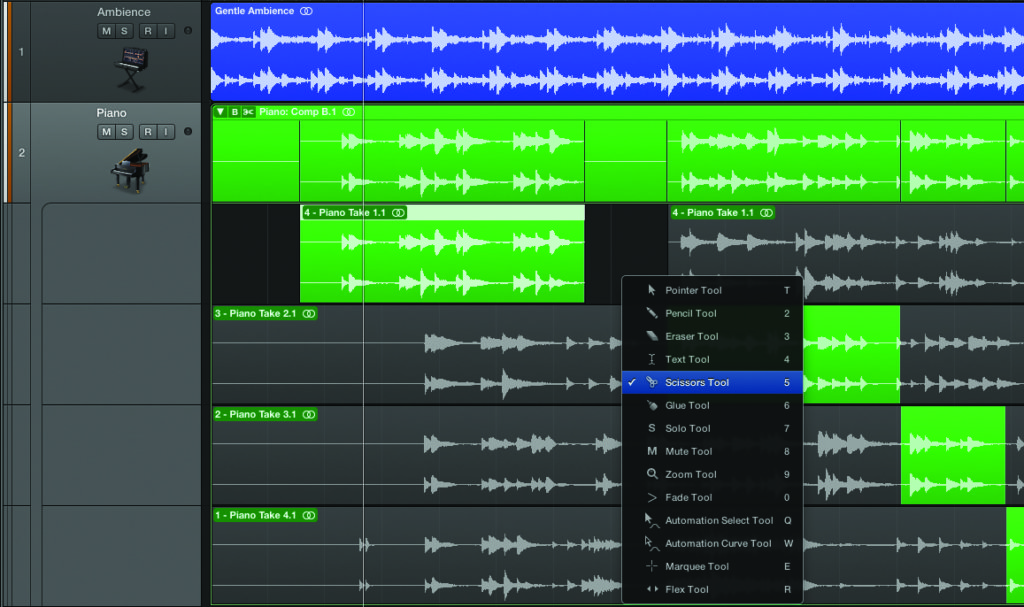
11: With Quick Swipe Comping disabled, you should be able to use Logic’s conventional editing tools – particularly the Scissors and Pointer tools – as a means of cutting and repositioning any of the takes. Notice how the comp remains in place – you’re simply editing the Take folder through a different portal, as such.
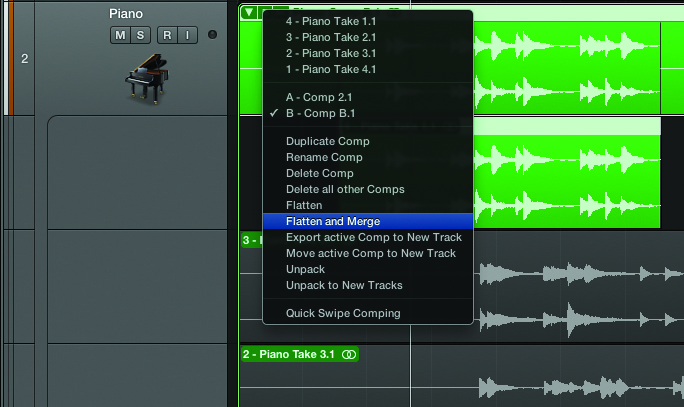
12: If you want to move the comp to another DAW, it’s worth knowing how to render it as a single, contiguous file. One option is to use the Flatten and Merge feature, which will flatten and bounce the finished comp as a new audio file. If you’ve flattened already, consider using the Join function to achieve the same objective.
