Logic Tutorial: Cinematic Synth Bass – Step-by-Step
Mark Cousins continues to explore how to add powerful synth bass to your score in this step by step… 1: Working from a drum session – download here – create a simple bass sequence using 16th notes. The sequence can either follow your chord progression (if you’re working with one) or stay fixed on the […]
Mark Cousins continues to explore how to add powerful synth bass to your score in this step by step…
1: Working from a drum session – download here – create a simple bass sequence using 16th notes. The sequence can either follow your chord progression (if you’re working with one) or stay fixed on the root note.
2: All the drum parts feature an accent pattern (four groups of three and two groups of two) that needs to be replicated in the synth part. To create the accents, we’ve used a combination of higher velocities and an octave shift.
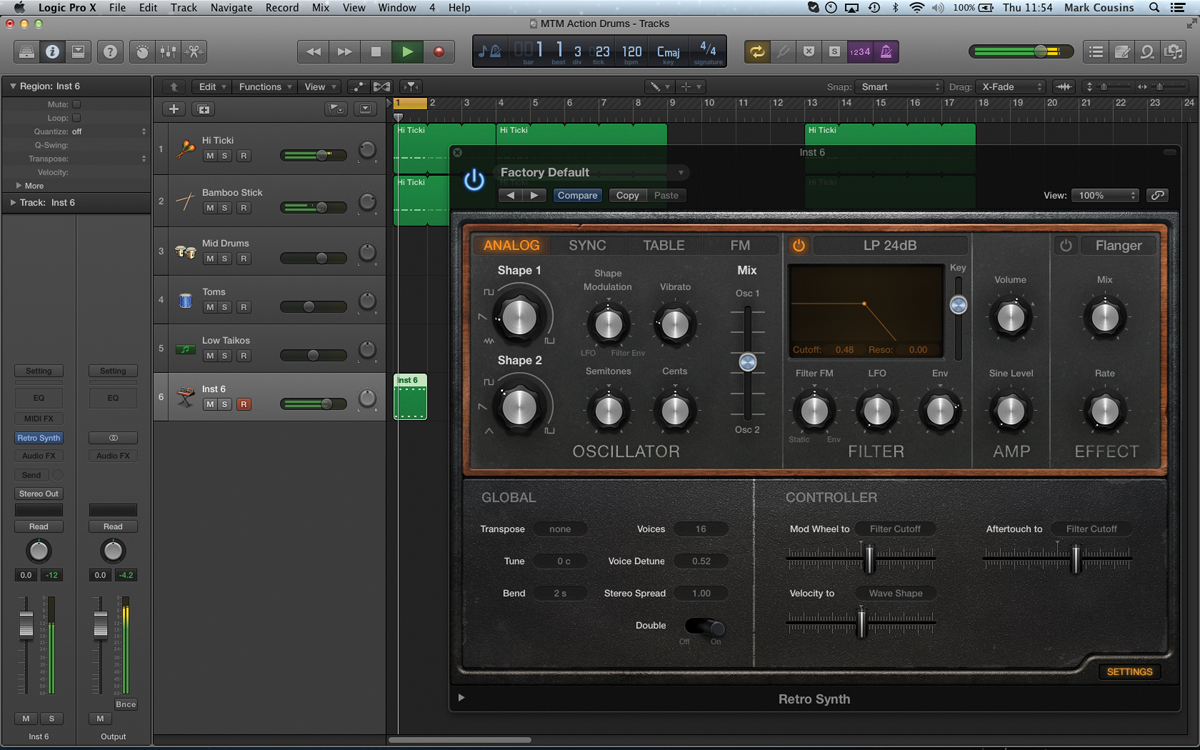
3: Create an instance of Retro Synth for the bass part. We’re using a combination of sawtooth and square waves between the two oscillators, and plenty of Voice Detune under the Global controls to give the sound some fatness.
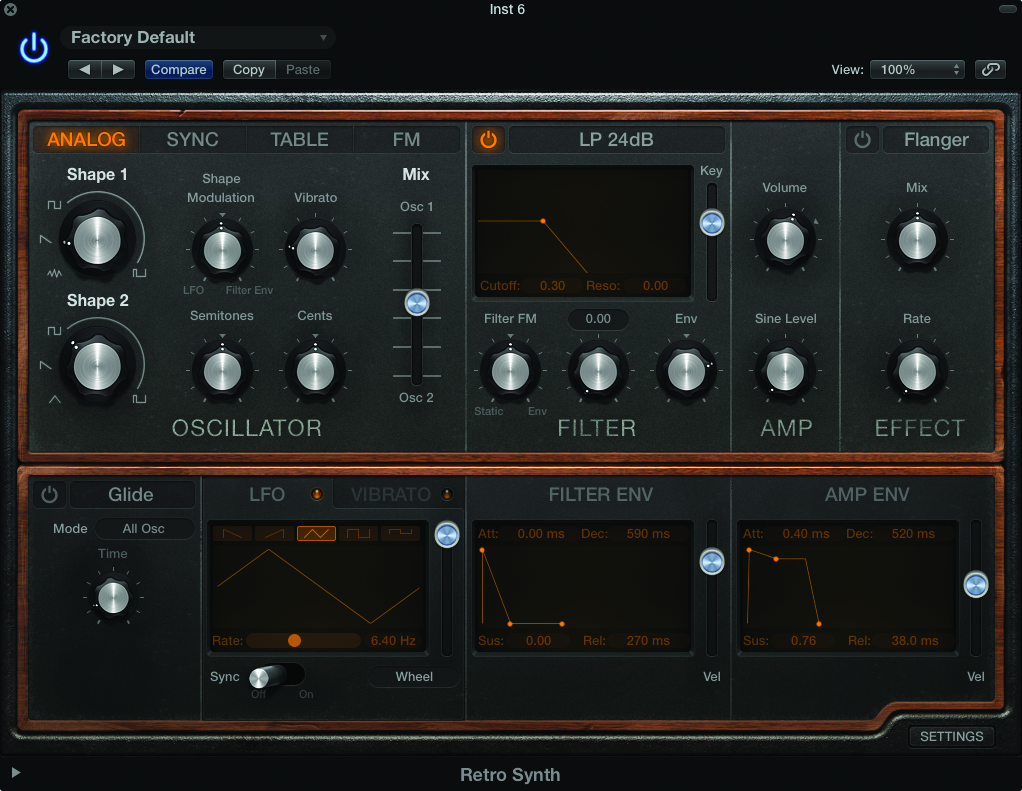
4: To give the sound some percussive bite, create a sharp filter envelope – setting: Attack 0ms, Decay 590ms, Sus 0 and Release 270ms. You’ll need to lower the cutoff and adjust the Env Depth control to get the desired amount of movement.
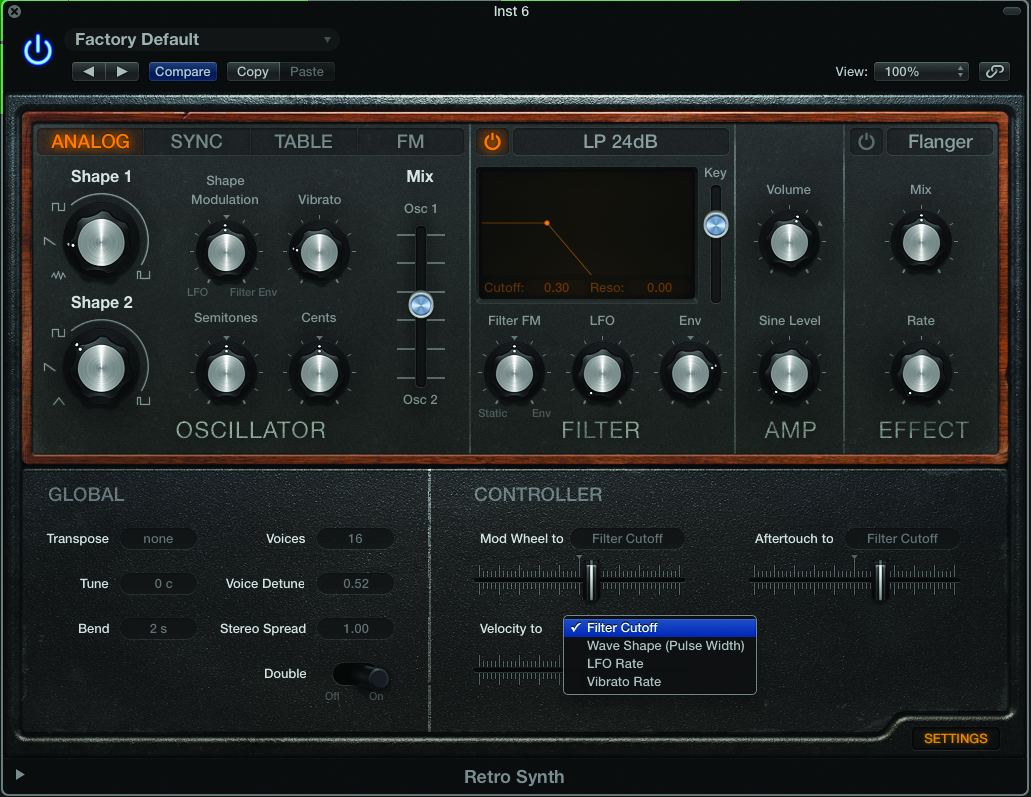
5: To create the accent, we can use two routes. Firstly, the Vel slider (found in the Filter Env section) can adjust the amount of Envelope Depth added by harder velocities. Also, look at the Velocity to Filter Cutoff option under the Settings tab.
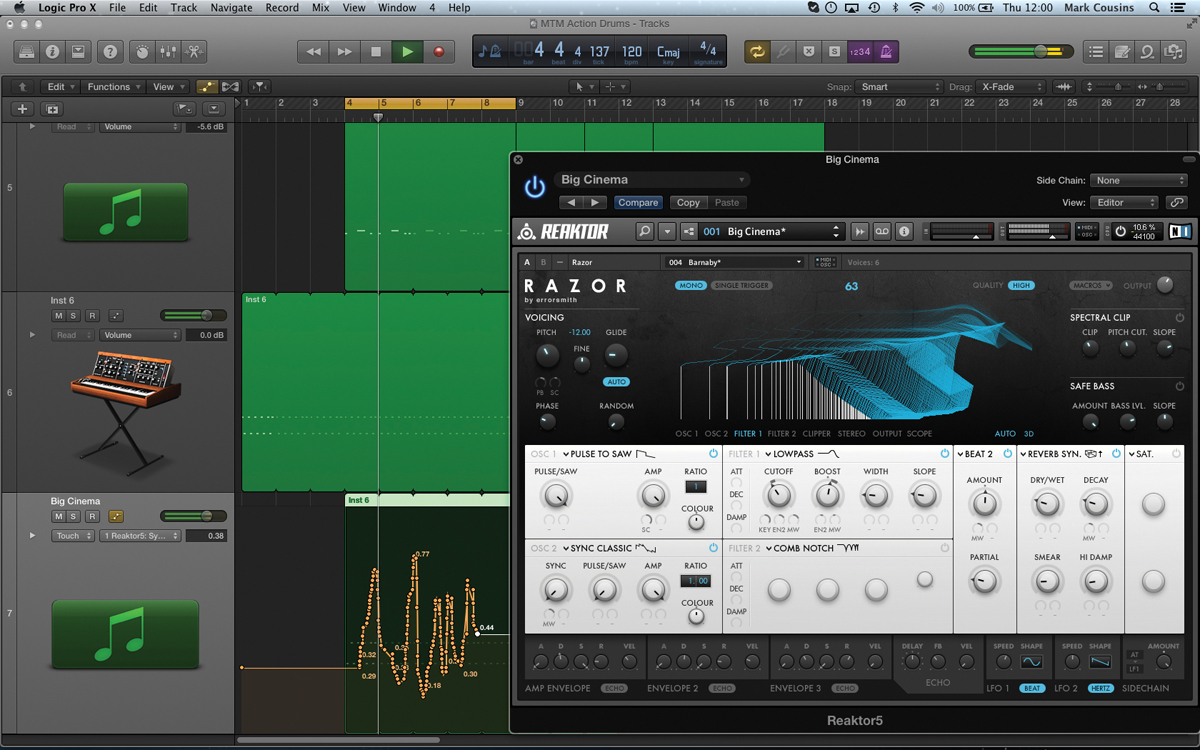
6: Add a composite layer using another synth working with the same pattern. In this case, we’ve used Razor but added some cutoff modulation (via an automation track lane) to create more movement and interest in the additional layer.
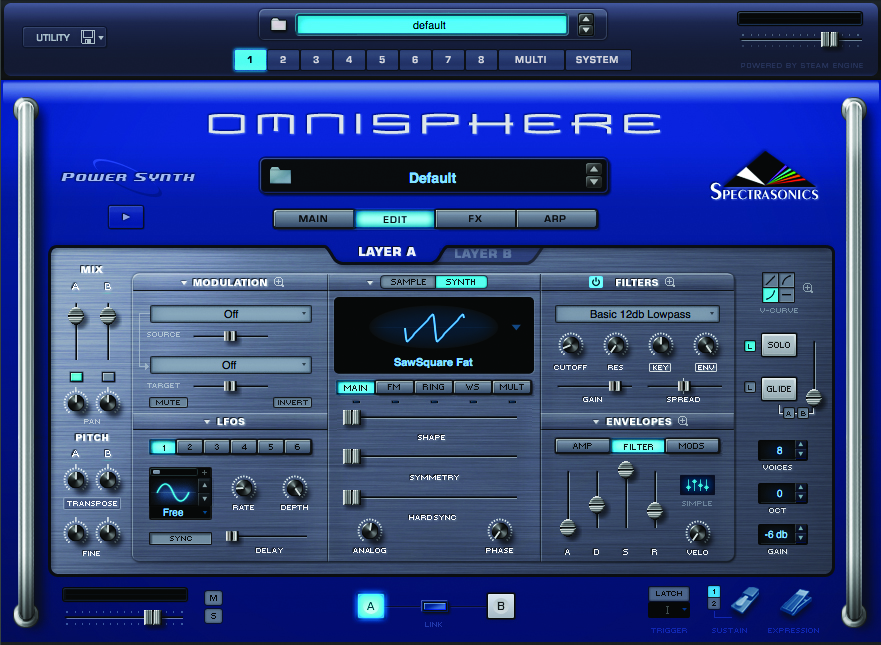
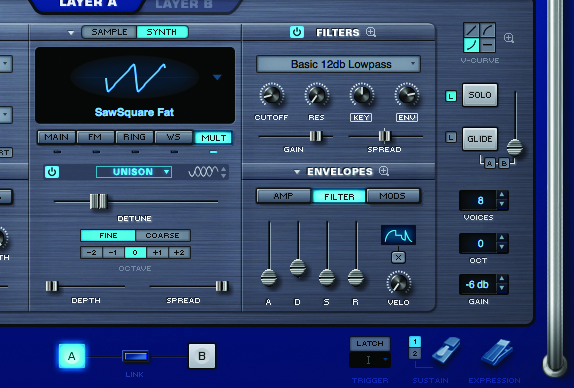
7: Here’s another means of creating a ‘pulsing’ synth layer using Omnisphere. We’re starting from an initialised patch, using the SawSquare Fat waveform. Add a basic 12dB low-pass filter, increase the filter’s sustain and reduce its Velo setting to 0.
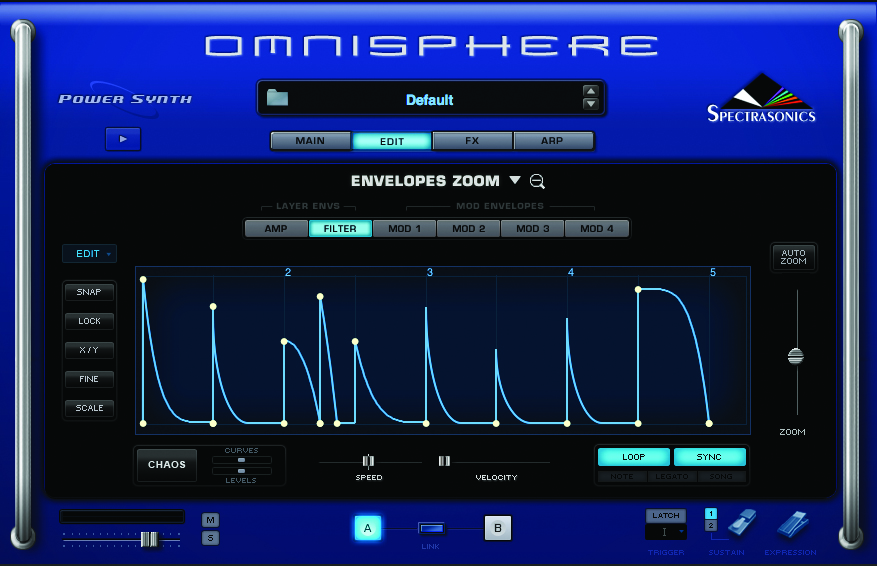
8: Press the Envelope Zoom magnifying glass. Click on the drop-down menu and select one of the Rhythmic Envelopes. Ensure both Loop and Sync are active, so that the pattern repeats and stays in time with your DAW’s tempo.
9: Return to the main Edit page to tweak the results. Set the amount of Env Depth to establish how much effect the envelope has. Also, tweak the Cutoff setting to establish the ‘base level’ for the envelope movement.
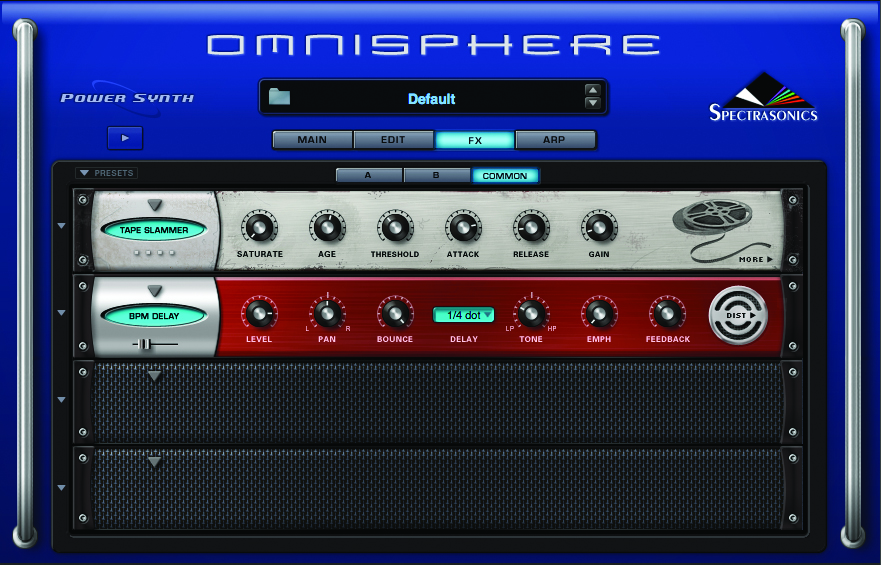
10: Adding some effects can really improve the overall sound. Move over to the FX page and insert the Tape Slammer and BMP Delay. As the delay is synced with the envelope movements, it adds a pleasing extra rhythmic dimension.
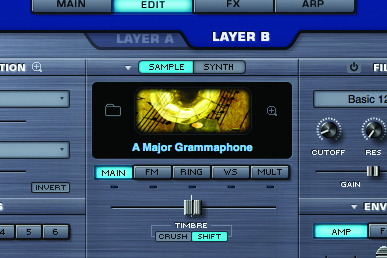
11: An Omnisphere patch has two layers (A and B, accessed via the tabs at the top of the Edit page), so try adding a sample-based layer on Layer B. You can use the Mix and Pan controls to balance the amounts of each layer.
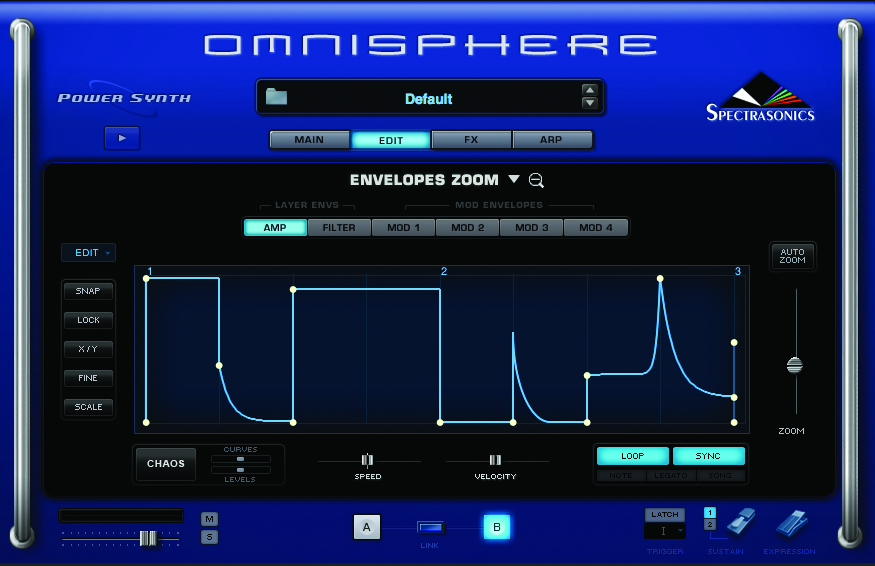
12: Rather than modulating the filter, this time try using the Rhythmic Envelope feature to modulate the amplifier, which creates a form of key gating effect. You can either use the same envelope setting, or pick a different pattern for a syncopated effect.
