Logic Tutorial: Creative Filtering – Tools And Techniques
Logic Pro’s powerful filtering plug-ins can yield some radical timbral transformations – if you know how to exploit them. Mark Cousins shows you round in this Logic Tutorial When it comes to shaping the timbre of a sound, there’s little doubt that a filter offers some of the most extreme and creative treatments available. From […]
Logic Pro’s powerful filtering plug-ins can yield some radical timbral transformations – if you know how to exploit them. Mark Cousins shows you round in this Logic Tutorial
When it comes to shaping the timbre of a sound, there’s little doubt that a filter offers some of the most extreme and creative treatments available. From simple colouring effects to dynamic timbral sweeps, filters have the power to transform your music in some surprising ways.
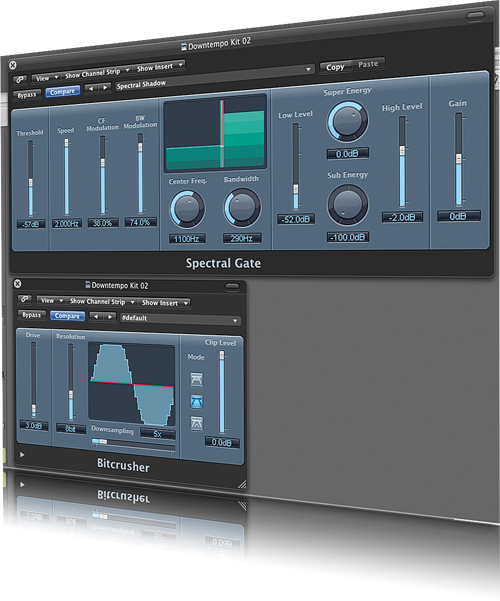
As you’d expect, Logic Pro is well-stocked with filter plug-ins, boasting the extremely flexible AutoFilter, the EVOC 20 Filterbank, and the distinctly unusual Spectral Gate. Between these three powerful plug-ins there’s a whole raft of effects you can achieve, some of which we’ll explore in detail in this month’s Workshop.
Logic’s Filter plug-ins folder contains a number of different filter-based models, although it’s arguably AutoFilter that’s the most flexible and powerful, especially when you’re after traditional synth-like filter effects. As well as being a very powerful multi-mode filter – having low-pass, band-pass and high-pass settings – AutoFilter comes with a number of interesting modulation features, enabling you to shape the cutoff using the envelope of the input signal or a built-in LFO.
Air Filter
To start our exploration of filtering, though, we’re going to look at a simple use of the AutoFilter as a static ‘colouring’ effect. Insert an instance of AutoFilter across the PWM Lead sound on track 4. This sound is rich in harmonics, so it’s good fodder for the filter to play with. For now, try experimenting with different positions of the Cutoff and Resonance controls, noticing how lower Cutoff settings produce a darker timbre, while Resonance adds a boost around the cutoff point, usually yielding a nasal-like thinning of the timbre. Of course, the precise effect of cutoff varies given the filter mode you select, so try experimenting with the different pole strengths (6, 12, 18 and 24) as well as the three principal modes (HP, BP and LP).

An important point to note with any filter is the introduction of distortion as part of the input path. Put simply, the distortion forms a big part of the ‘meatiness’ of the filtering process, adding body to the sound ahead of the filtering taking place. Set the Input Distortion to around 100% (the full amount is 400%, so this isn’t excessive) and listen to how it changes the result of the filtering. The Input Distortion is particularly effective on lower cutoff settings, helping the output of the filter to cut through the mix even with a relatively dark timbre.

Wobble Time
Although AutoFilter works well as a static sound-sculpting tool, things get more exciting when we add in some modulation. Now that we’re finished with the PWM Lead, switch to the Hand tool and drag your instance of AutoFilter to the bass line on track 1. The key concept to grasp here is the modulation routing, setting both the initial cutoff point as a ‘base level’ for modulation as well as the depth of modulation established using the Cutoff Mod parameter as part of the LFO section.
To start, you’ll need to set the Cutoff around 50% as a suitable starting point for the LFO to add or subtract to. Raising the Cutoff Mod (between 50–100%) activates the LFO modulation, adding to and subtracting from the base level established with the Cutoff control.

Once we’ve established our basic modulation routing we can start to fine-tune the LFO settings. Importantly, note that the AutoFilter’s LFO can be tempo-sync’ed, allowing the filter movements to occur in time with the track. You can achieve interesting results using dotted and triplet settings (1/8d or 1/4t), either increasing the amount of Cutoff Mod to make the effect more dramatic, or reducing it to create a more subtle form of pulsing. Immediately, you can see the potential here for dubstep ‘wobble’ sounds, especially if you increase the Input Distortion and look at ways of automating the Rate parameter, which we’ll explore later.

Push The Envelope
As well as using an LFO, we can also use the dynamic envelope of a sound to shape the filter cutoff accordingly. Let’s return to the PWM Lead, therefore, and instantiate a basic AutoFilter setting with a touch of resonant low-pass filtering and a small amount of Input Drive. Technically speaking, envelope modulation usually works best on rhythmic sounds with clear transients to trigger the envelope. In this case, given that the synth sound has a consistent amplitude, we’re going to use the AutoFilter’s ability to be controlled by a sidechain input. Click on the Side Chain parameter, therefore, and switch it to Bus 3 so that the AutoFilter is listening to the kick drum buss (which, incidentally, is also being used to pump the compressors on each channel).

To tweak this basic setup, take a look the envelope controls – particularly Attack, Decay, Sustain and Release – as well as the amount of Cutoff Mod. Given the use of a kick drum as a sidechain source, it’s worth using fast Attack, no Sustain and a graduated Decay (around 440ms). With a little experimenting you can achieve a pleasing 1/4 pulsing effect, with the kick creating a filter click on each beat. Even when used relatively discretely (by reducing Cutoff Mod and raising Cutoff) the effect adds an interesting dynamic quality to the track, especially if you add a good dose of Resonance (around 50%) to enhance the movement.

Break Down
Probably the most exciting application for a filter, though, is when it’s being used ‘DJ-style’ to modify the entirety of a track. Although there’s the option of instantiating the AutoFilter across the main stereo buss, it makes sense to route the material to a buss, which is then used as a point to apply the filtering before being passed to the main outputs. The other advantage here is that you can also decide on which tracks are routed to the filter, potentially leaving a few key instruments – particularly vocals – free from the extreme filtering effect. To start with, therefore, route all of the current instruments and effects returns to Bus 4. Move over to the newly created aux channel and insert an instance of AutoFilter.

One of the key points to get right with this massed filtering effect is a degree of level matching. Assuming that you add a touch of Resonance and Input Distortion (which is a good idea if you want a meatier result) it’s easy for the filtered version to be slightly higher in amplitude and/or loudness. Pay close attention to the Main Out level, therefore, and try to match the levels between AutoFilter in Bypass mode and the output level when AutoFilter is active. On the whole, 2–5dB should be enough attenuation, assuming you don’t drive the Input Distortion too hard.

To automate the aux channel, you’ll first need to create a new Arrangement track using the Mixer’s local menu item Options>Create Arrange Track for Selected Channel Strips. Engage the Automation view from the Arrangement area’s local menu (View>Track Automation) and you can then create the move in one of two ways. The hands-on solution, of course, is to place the track in Touch mode and tweak the Cutoff manually, which will write the moves directly into the track lane. Alternatively, select the Cutoff control from the dropdown Automation parameter list and draw in an automation move using the Pencil tool.

As well as automating the Cutoff parameter, though, you’ll also need to remember to automate the Bypass so that the filter is active in other parts of the song.
Bank Robber
Alongside the AutoFilter, Logic has a number of other interesting filter-based plug-ins. One of the more intriguing possibilities is the EVOC 20 Filterbank. In theory, the EVOC 20 Filterbank provides access to the same series of band-pass filters used in Logic’s Vocoder. To understand the creative possibilities of the EVOC 20 Filterbank, try instantiating it across the Movement pad sound on track 2.
At first, the Filterbank’s sound is slightly difficult to grasp, possibly because its output isn’t as dramatic as that of the AutoFilter. In effect, what you’re looking at are two parallel graphic equalizers, designated by the green and blue sliders.
The output of the EVOC 20 Filterbank becomes much more distinctive when you reduce the number of bands used, using the control on the far left-hand side of the interface. For example, try reducing the Filterbank to eight bands and then increase the Resonance slightly. What should be apparent now is the distinct ‘comb-like’ effect of the filter, with some bands prominent and others as ‘holes’ in the audio spectrum. You can also try increasing the Slope parameter from 1 to 2 to make the effect even more prominent.

The final piece of the Filterbank puzzle is the application of an LFO to modulate the filter peaks. Increase the LFO Intensity, therefore, and notice the distinctive sweeping effect as the filter peaks comb through the audio spectrum. To some extent, the results aren’t entirely dissimilar to a flanger or a phaser (which arguably achieve the same ‘frequency notching’ through phase cancellations), although given the precise controls on the EVOC 20 Filterbank, you can achieve a more refined and controllable output.

Filter Logic
Having such a well-stocked and flexible collection of filter plug-ins is a real asset to Logic, offering up a plethora of creative possibilities. AutoFilter’s ability to add modulation – both through an envelope tracker and the LFO – make it an incredibly dynamic tool, while the more unusual treatments offered by plug-ins such as the EVOC 20 Filterbank enable you to explore filtering effects in some radically different ways.
Next time you need to apply some extreme timbral shaping to your tracks, therefore, it’s well worth exploring what the filters have to offer, and what they can bring to your music.
This video walkthrough explores Filter Automation: