Logic Tutorial: Producing Music To Picture Part Two – Working With Hit Points
Getting your soundtrack to follow the action on screen is an essential part of composing music to picture. Mark Cousins shows you how to hit your marks. One of the most important skills of any film and TV soundtrack composer is the ability to ‘lock’ their music to the action that’s happening on screen. Although […]
Getting your soundtrack to follow the action on screen is an essential part of composing music to picture. Mark Cousins shows you how to hit your marks.

One of the most important skills of any film and TV soundtrack composer is the ability to ‘lock’ their music to the action that’s happening on screen. Although it would be foolish to spot every action with some form of musical gesture (unless you’re scoring a Tom and Jerry animation, that is), it is important that your music follows the broad pace of the cut as well as marking key points in the narrative.
To do this, a composer will often resort to a variety of techniques such as varying the time signature, tempo and pulse of a cue, so that the music discretely aligns itself with the action on screen.
As we saw in last month’s workshop the key initial stage of the compositional process is the establishment of a series of SMPTE-locked markers, which can be used as a visual guide to ensure your timeline and musical structure matches the action on screen. What should become apparent in this workshop is that the amount and relative density of the markers is often critical to the success of the final score. Put simply, placing too many markers will make your music unnecessarily complicated, whereas a few well-chosen markers will mean that the task of aligning the music becomes simpler.
Just in Time
Before diving in at the deep end it’s worth considering the broad overarching tempo of your cue, balancing the need to precisely hit all the markers as well as matching the overall pace and energy of the scene. So, although a tempo of 158bpm might mean that you can hit each and every marker, it could be too fast for the action happening on screen. The beauty of working with a DAW, of course, is that you can quickly audition a variety of options and immediately hear and see the relative merits of each solution.
In situations where your current tempo doesn’t result in the music aligning itself with the hit points you can adopt a variety of different solutions. Arguably the simplest solution is a time signature change, so that the marker hits the downbeat of a new bar. A bar might be cut short, for example, so that a 4/4 bar becomes 3/4; to facilitate the hit point arriving earlier, or a beat added (making a 5/4 measure); or if the music needs to be extended to the next hit point. Musically speaking, the addition or subtraction of a beat can be a relatively transparent modification that most casual listeners will miss.
Where marker points fall off the beat, you’ll need to consider the use of tempo changes as means of stretching or compressing the music ahead of a hit point.
The issue with tempo changes is that they can start to become noticeable to the listener, unless you can keep them within one or two beats-per-minute of change. One interesting work-around is to align your tempo change with a bar of silence, or at the very least, a bar that’s devoid of any noticeable rhythmic movement or pulse. When applied to an empty bar, the tempo change becomes like a form of elastic padding, enabling you to slip in the subsequent musical material in a precise and relatively subtle way.
Used in a considered way (rather than just as a necessity), tempo can serve as both a musical tool and help you meet the next hit point. Raising the tempo of an action cue is a great way of adding tension, whereas gradual rises and falls of tempo can be a useful way of changing the shape of a cue, so that the music comes down from a ‘high’, for example, or that there’s a subtle lift at the end.
Don’t forget that even the slightest change of tempo can have a big effect on the feel of the music, even though the listener might not be completely aware of what you’ve done.
Whatever solution you adopt it’s important to remember the role and function of the music and the need to make your transformations and tweaks in a transparent way. Ultimately, as soon as the listener hears the music being deliberately ‘modified’ in some way, you’ve shattered the illusion – the music is now subservient to the picture, rather than the two forms working in conjunction.
Establishing the correct ‘grid’ has a transformative effect on the rest of the process, enabling you to concentrate on the notes, harmony and arrangement, rather than being constantly distracted by the mechanics of aligning your music to picture.

Aligning Your Markers

1: Following on from the last workshop, you should have imported a video file and placed a series of SMPTE-locked markers. We’ve also allotted for a two-pop at the start, as well as marking the beginning of the picture.
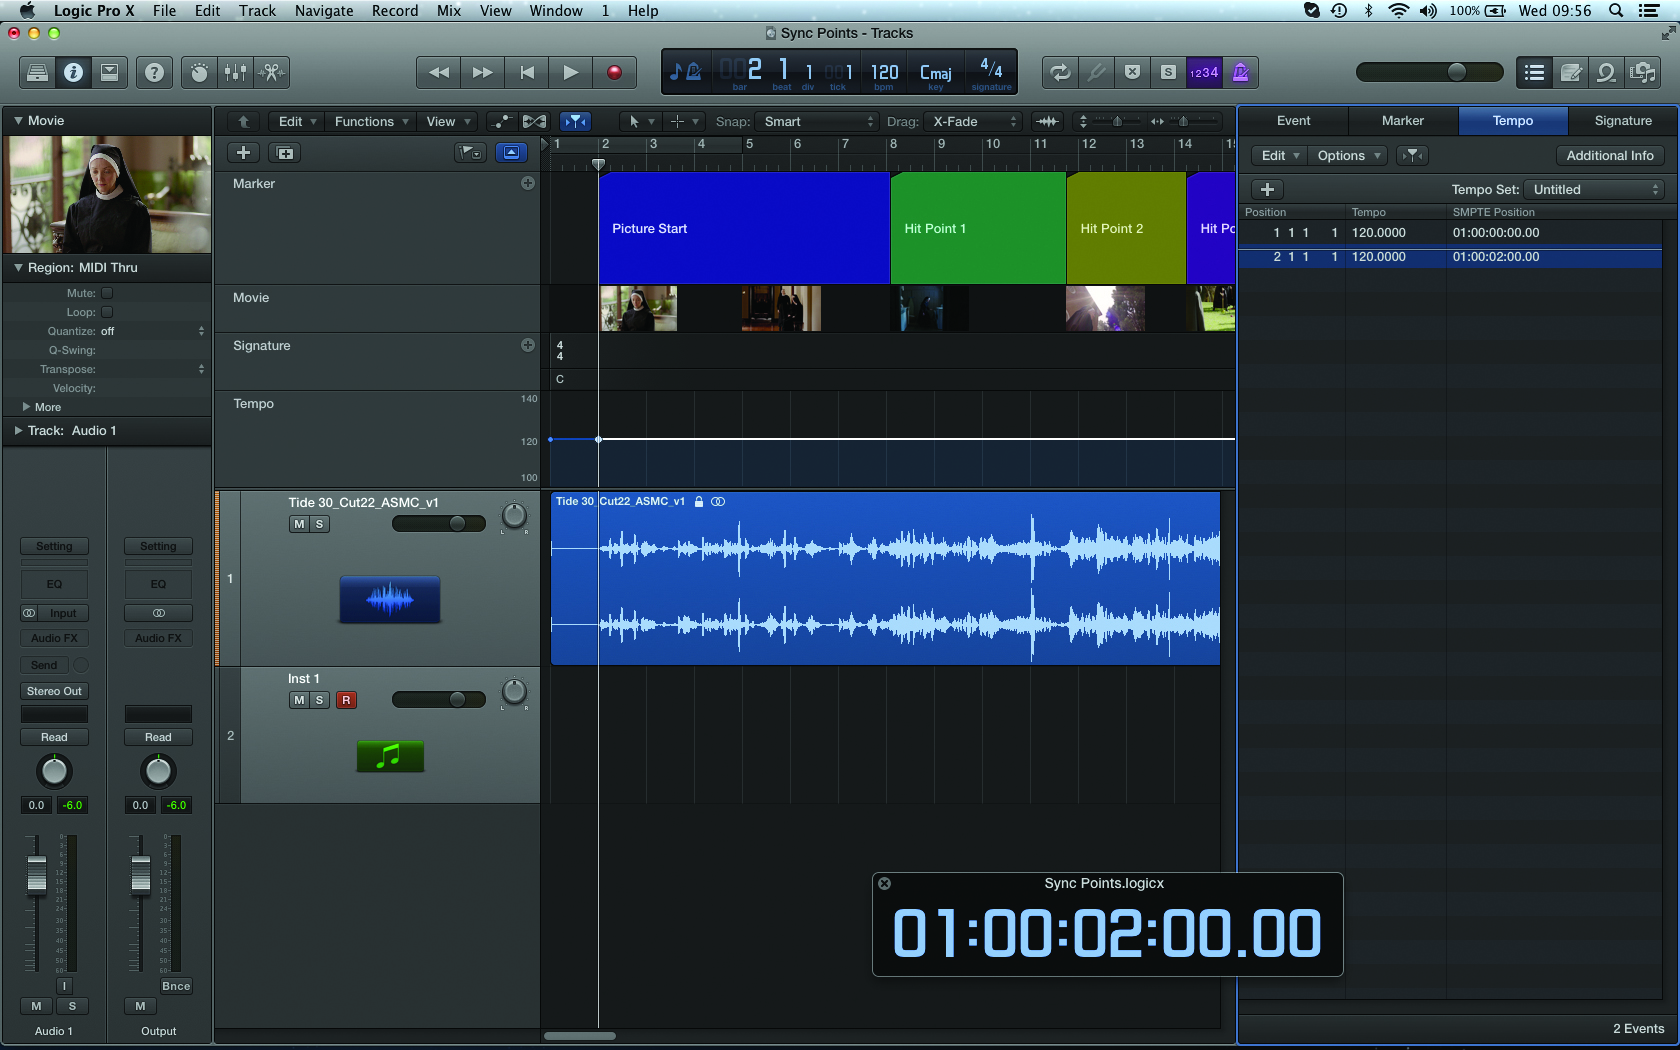
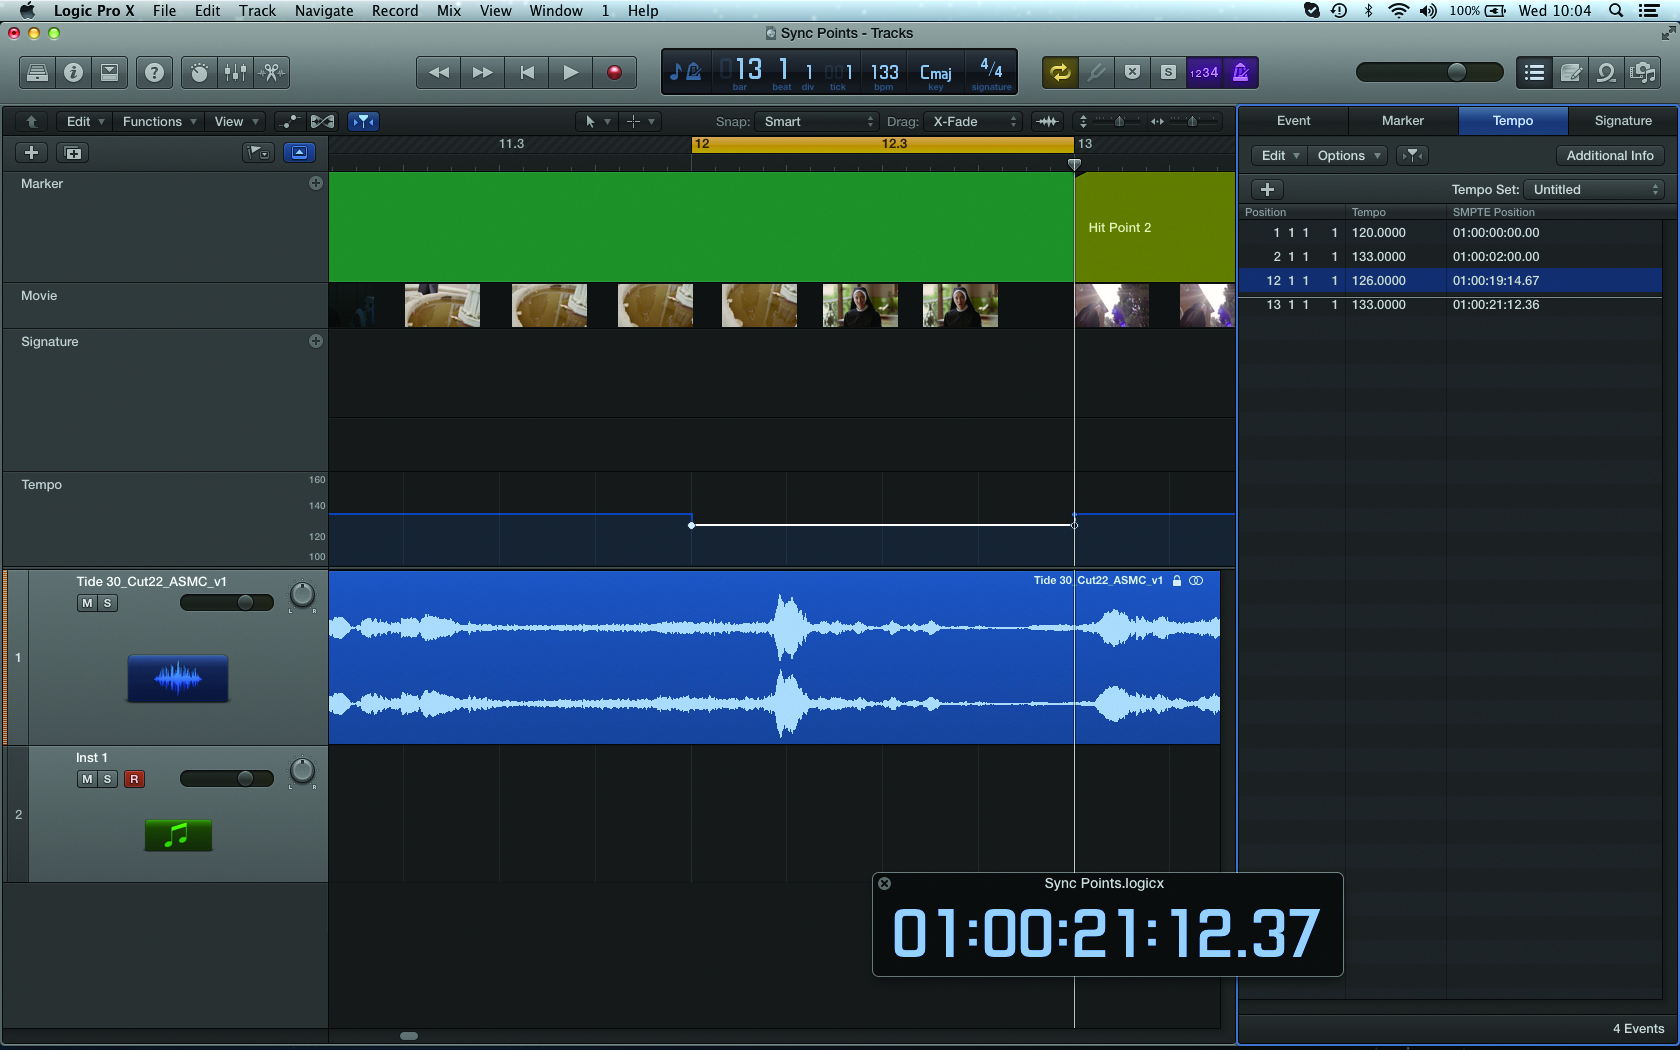
2: We’re using the first bar to cover the two-pop, so we’ll leave this at 120bpm unless you want more silence before the music starts. On bar two, therefore, insert a new tempo event that will form the basic tempo of our cue.
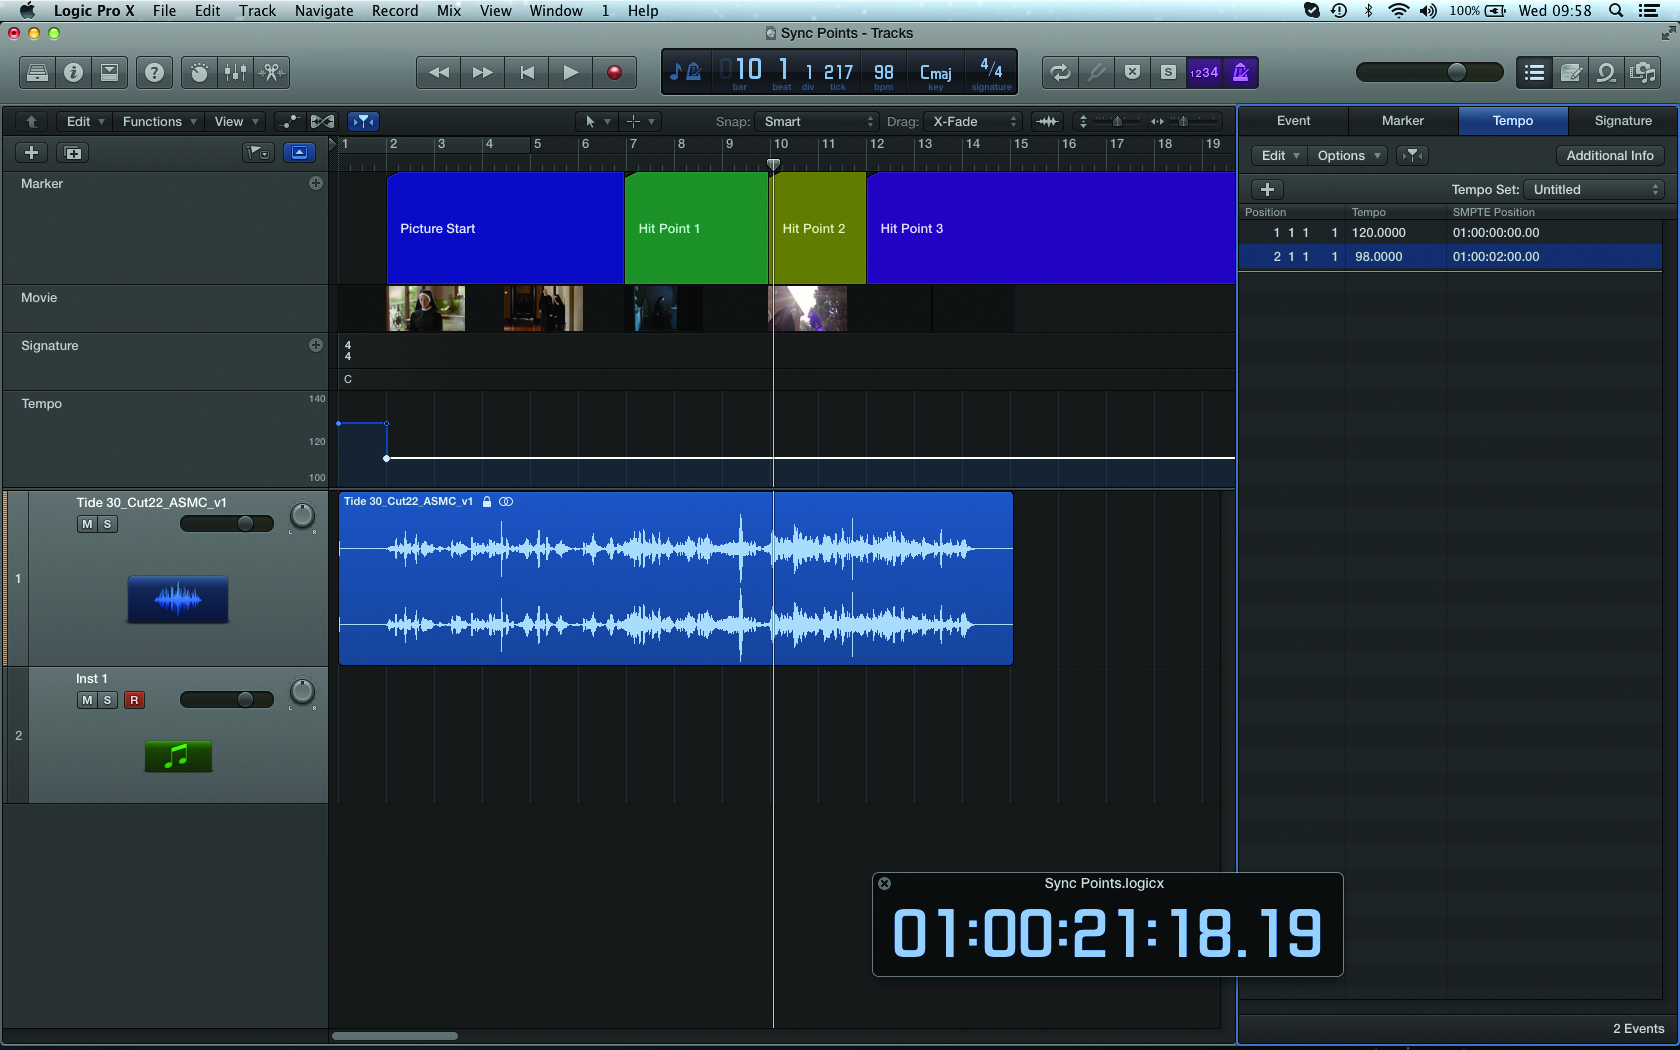
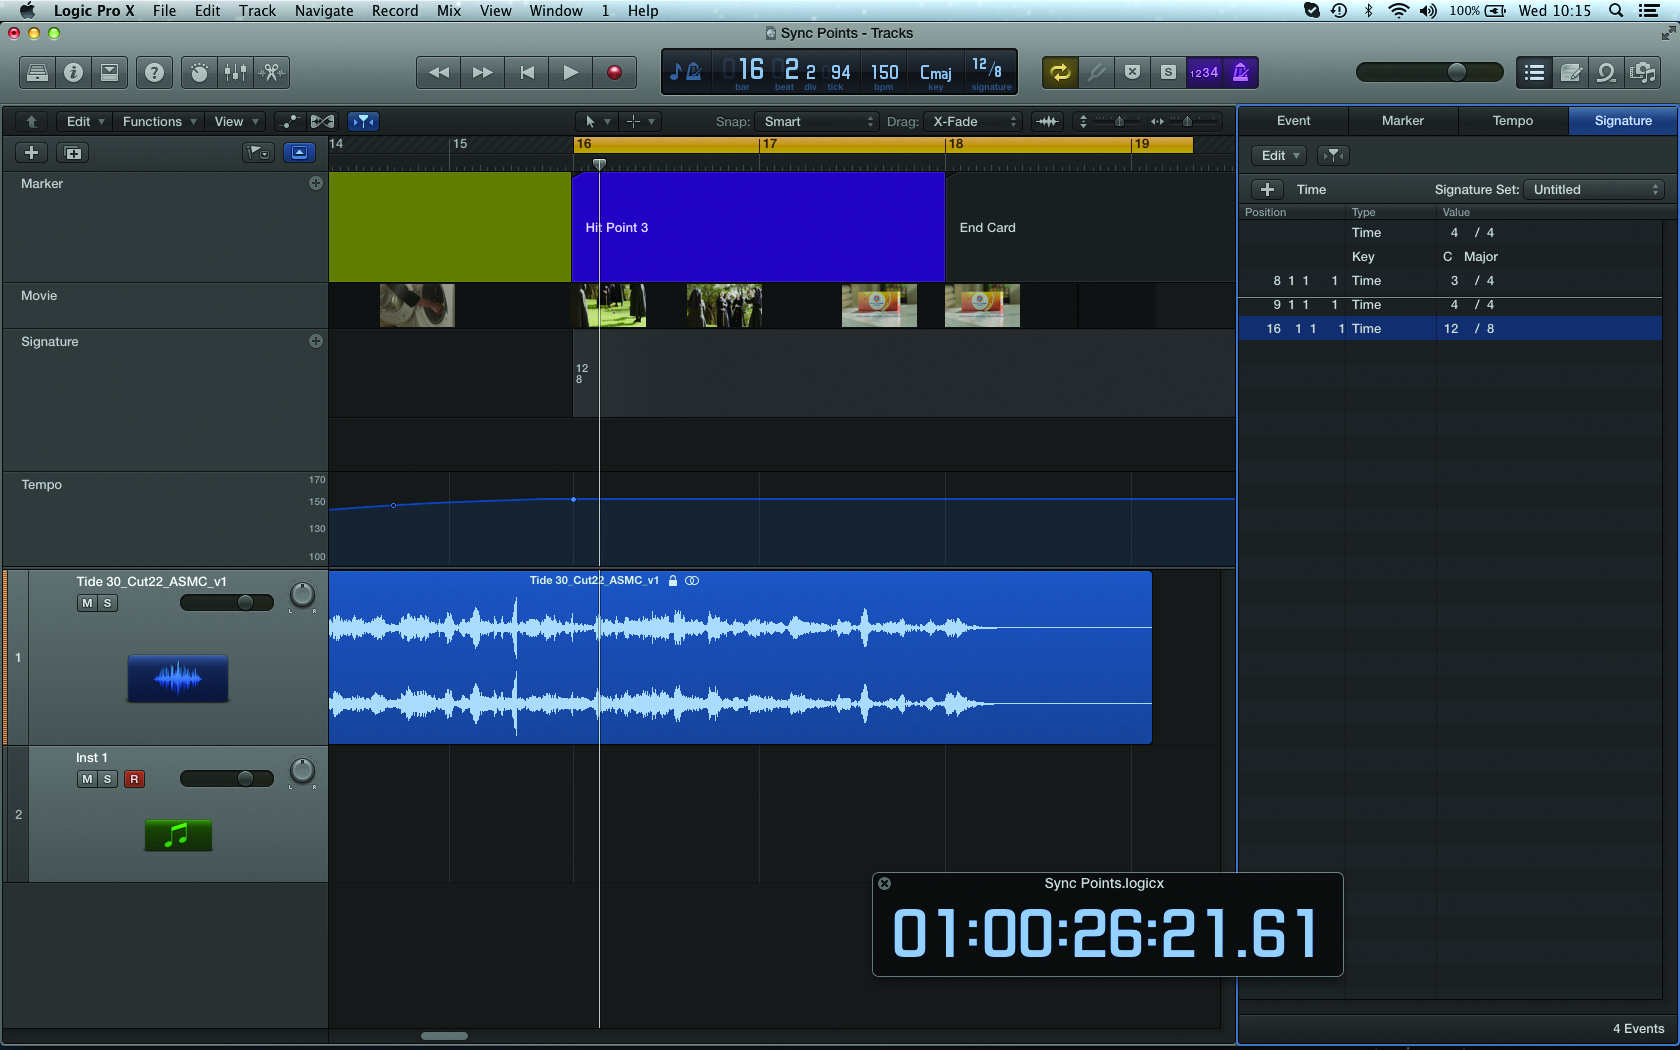
3: Adjust the tempo event on bar two to find a ‘best fit’ for the given hit points. Ideally the markers should align themselves with a downbeat or a subdivision of the bar. 98bpm works well, but we’re going to choose 128bpm for a faster cue.
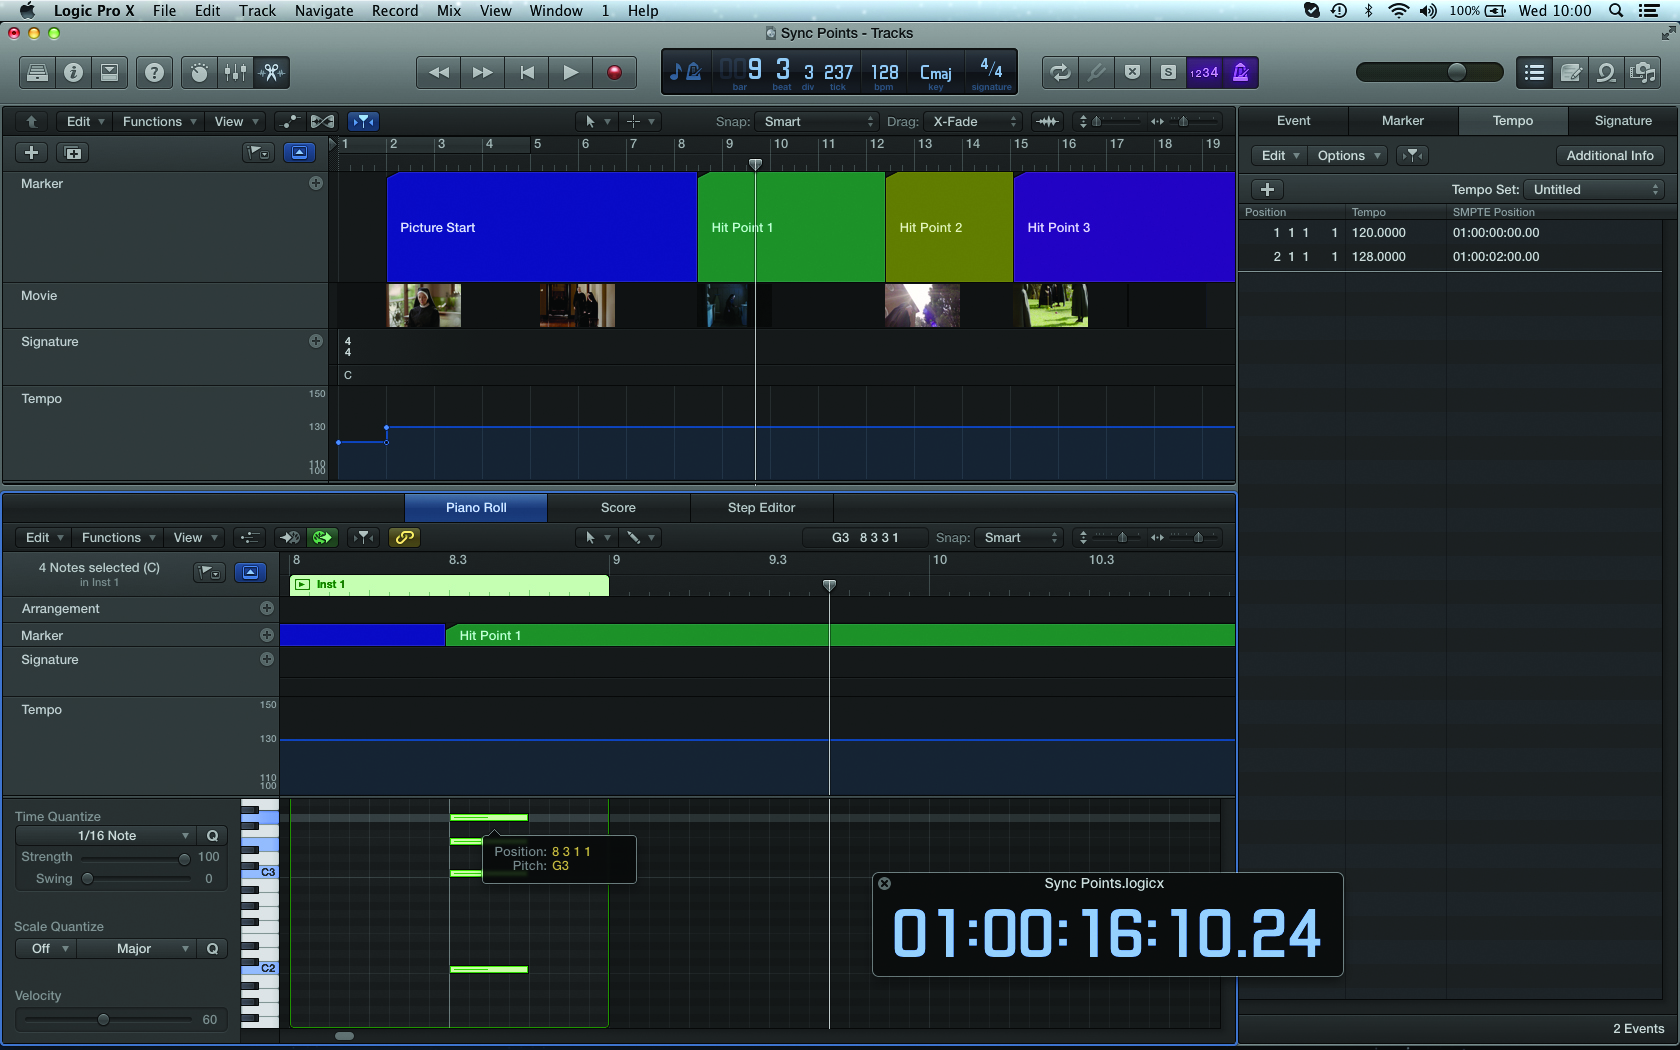
4: In situations where the marker falls mid bar, you always have the option to spot the action with a music feature– say, a chord stab or percussive effect – on the accompanying beat. If the hit point needs more impact, though, this isn’t a good strategy.
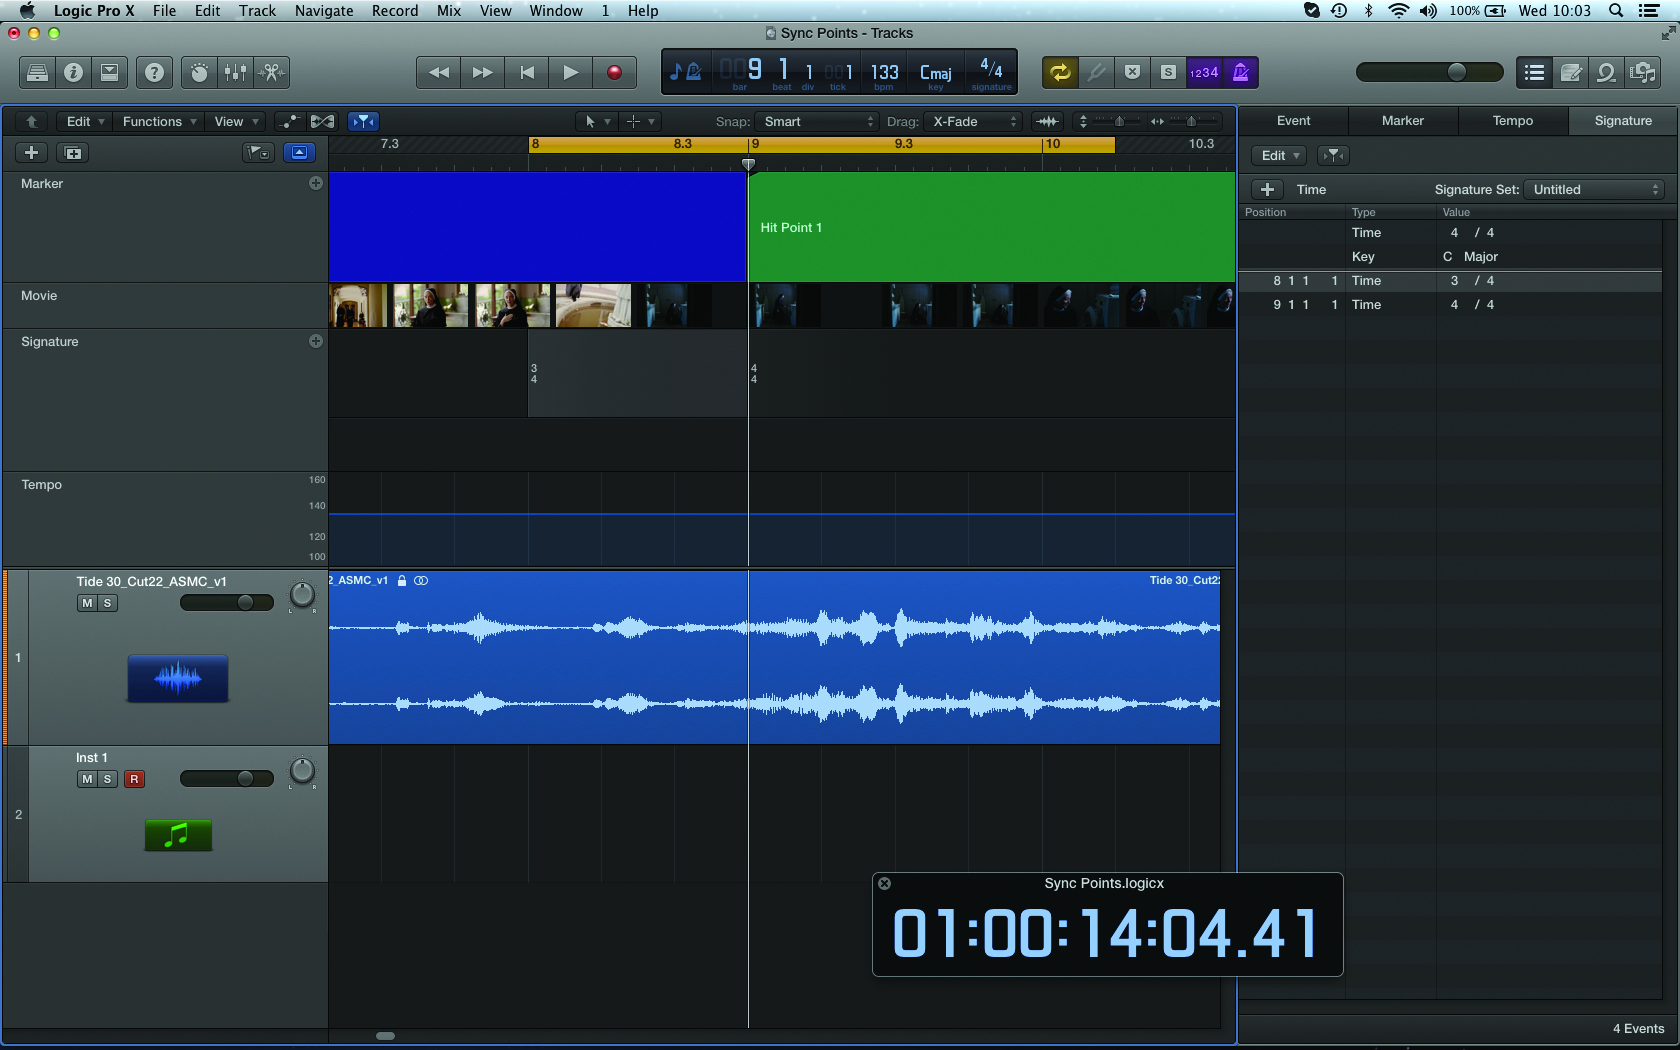
5: Where you want to align the marker to a downbeat, consider inserting a time signature change, such as taking a 4/4 bar to 3/4, or stretching it to 5/4. Executed correctly, the addition or removal of a beat shouldn’t be too conspicuous.
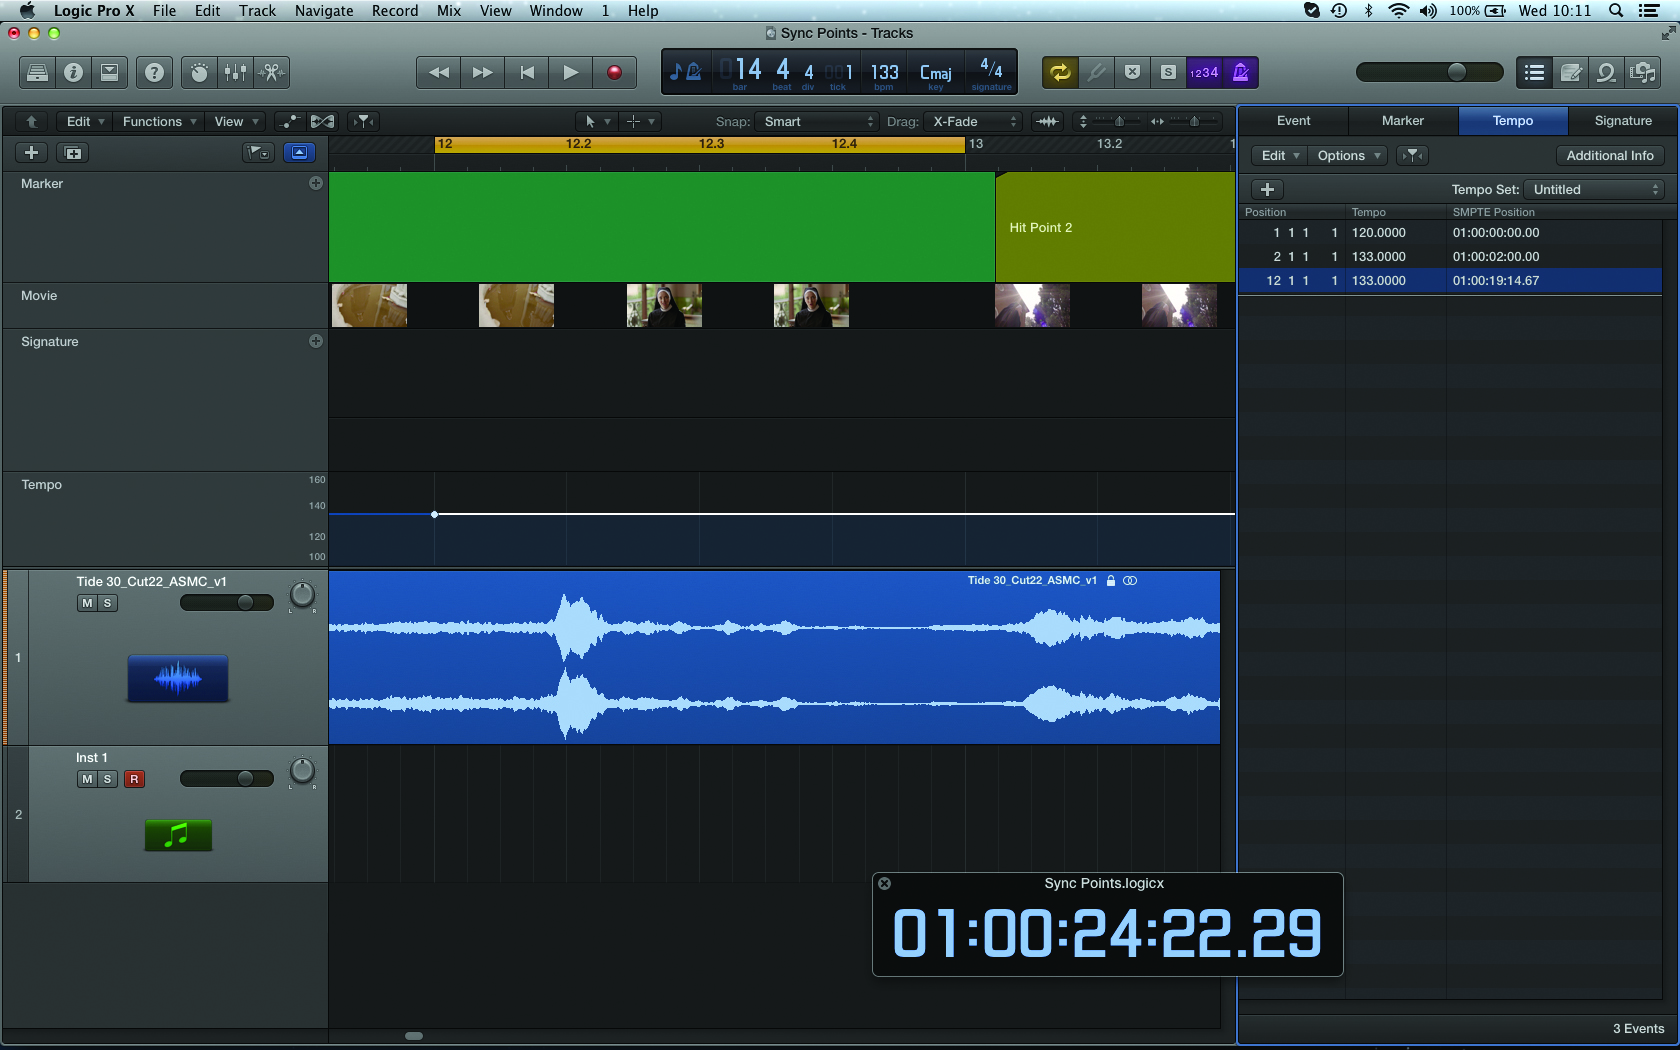
6: For trickier alignments you can always use a small bar of silence before a given marker point, something that can also work to your musical advantage. To start with, place two tempo events at the beginning and end of your chosen bar.
7: Adjusting the tempo of your silent bar will enable you to precisely align the next marker. Raise the tempo to pull the marker closer, lower it to move it away. Consider using a reverse sound to fill the gap, or just leave it empty for dramatic effect!
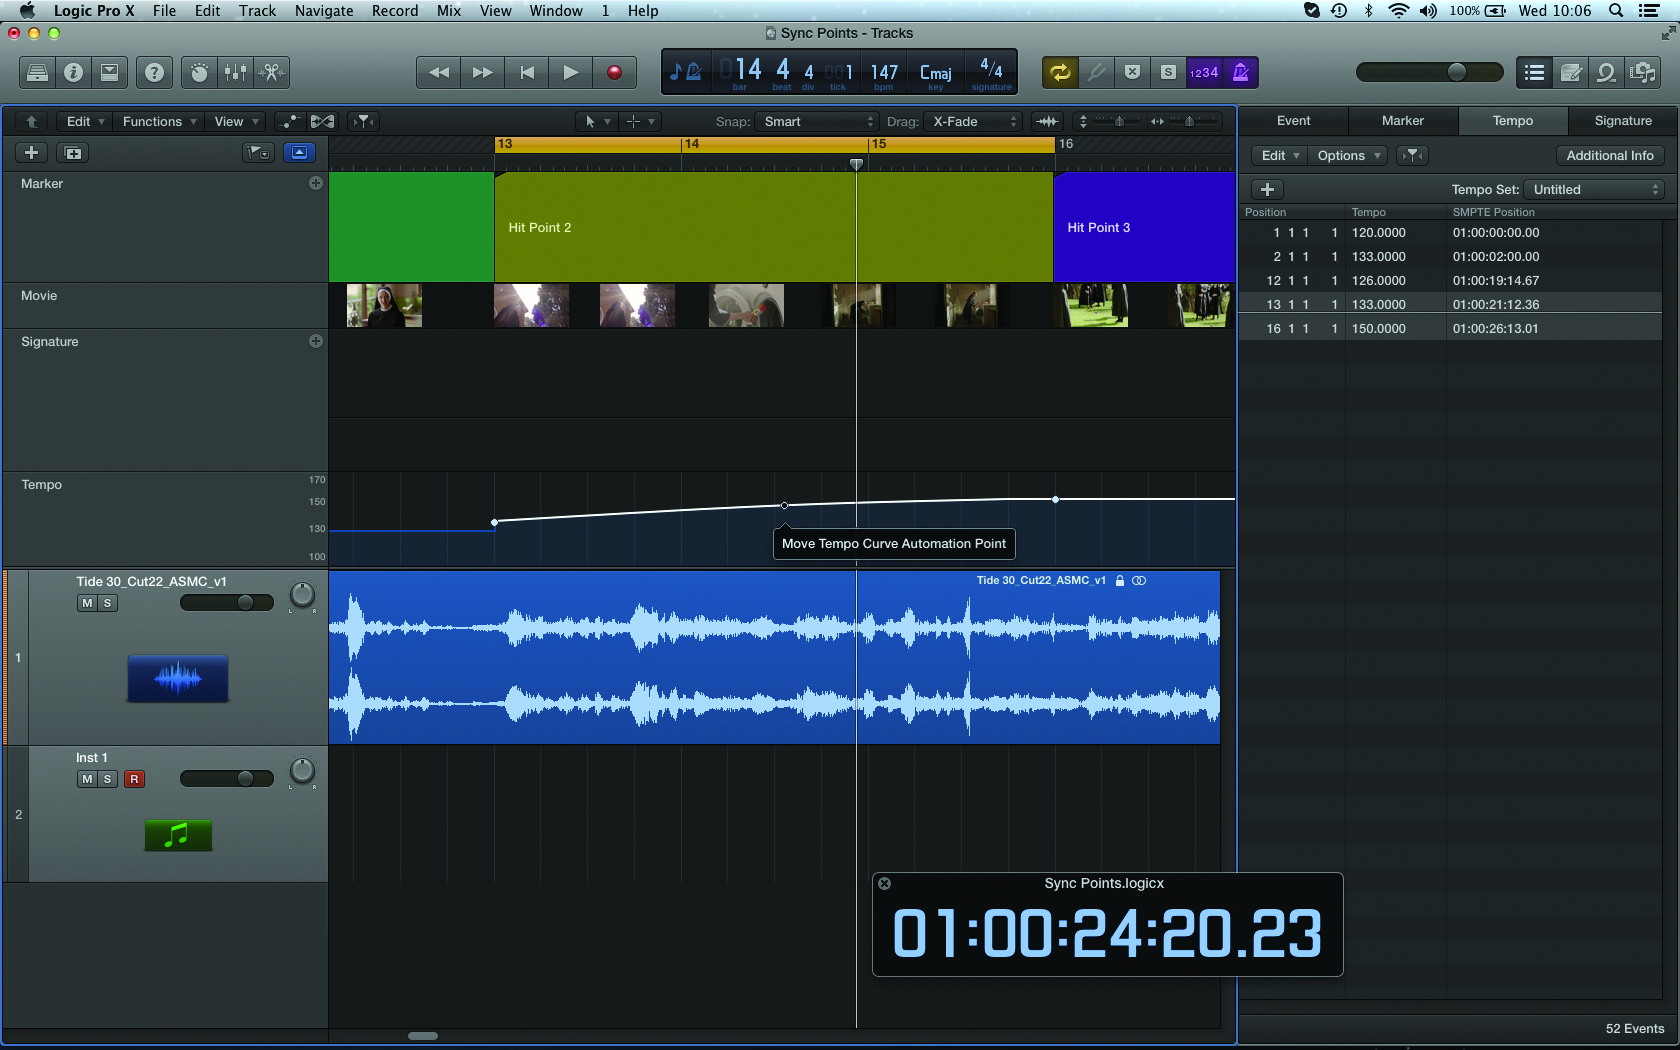
8: Used carefully, tempo changes can be a useful tool to help pull your music into shape. A gradual rallentando or accelerando can discreetly pull your music into line, as well as changing the feel of the cue, arguably increasing or decreasing its pace.
9: While it won’t necessarily help align your music to a hit point, it’s also interesting to contrast simple time signatures (like 4/4) and compound time signatures with a triplet feel (12/8). To maintain the 4/4 pulse, though, you’ll need to raise the tempo.
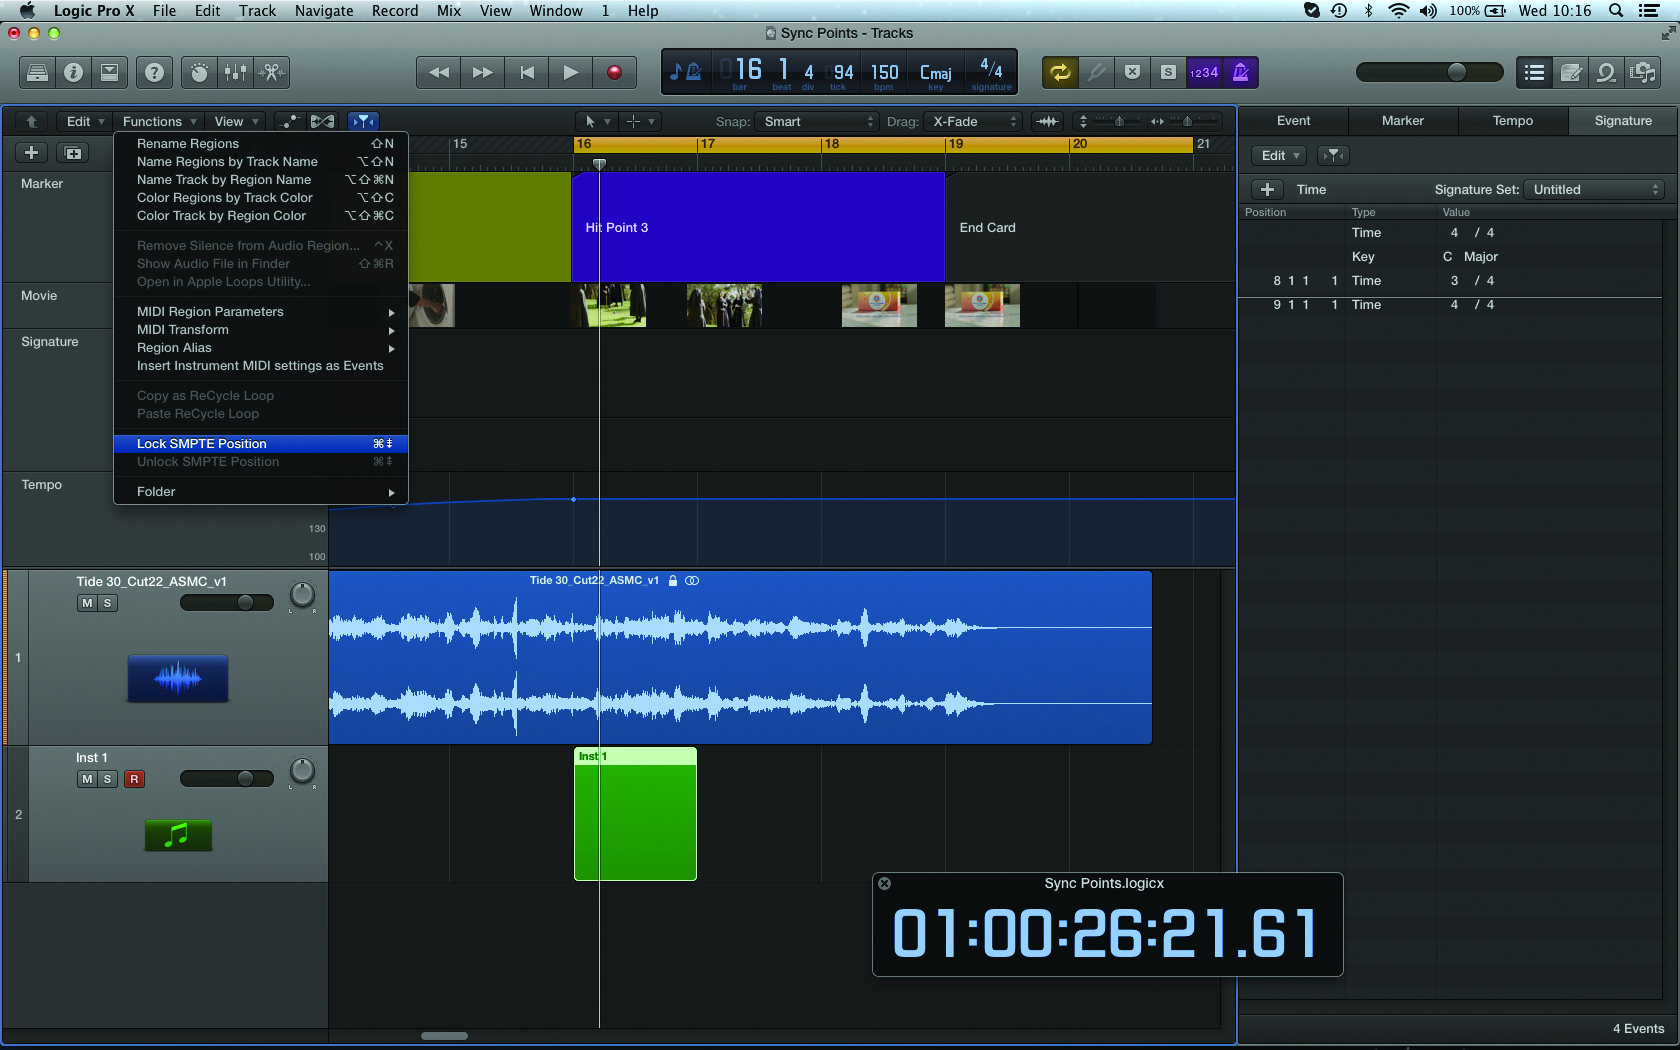
10: Starting off in your original 4/4 tempo, insert a new region and then ensure that it is time-locked to SMPTE. Now, when you change to 12/8 notice how the region effectively becomes shorter than a bar, as the DAW is counting triplets as quavers.
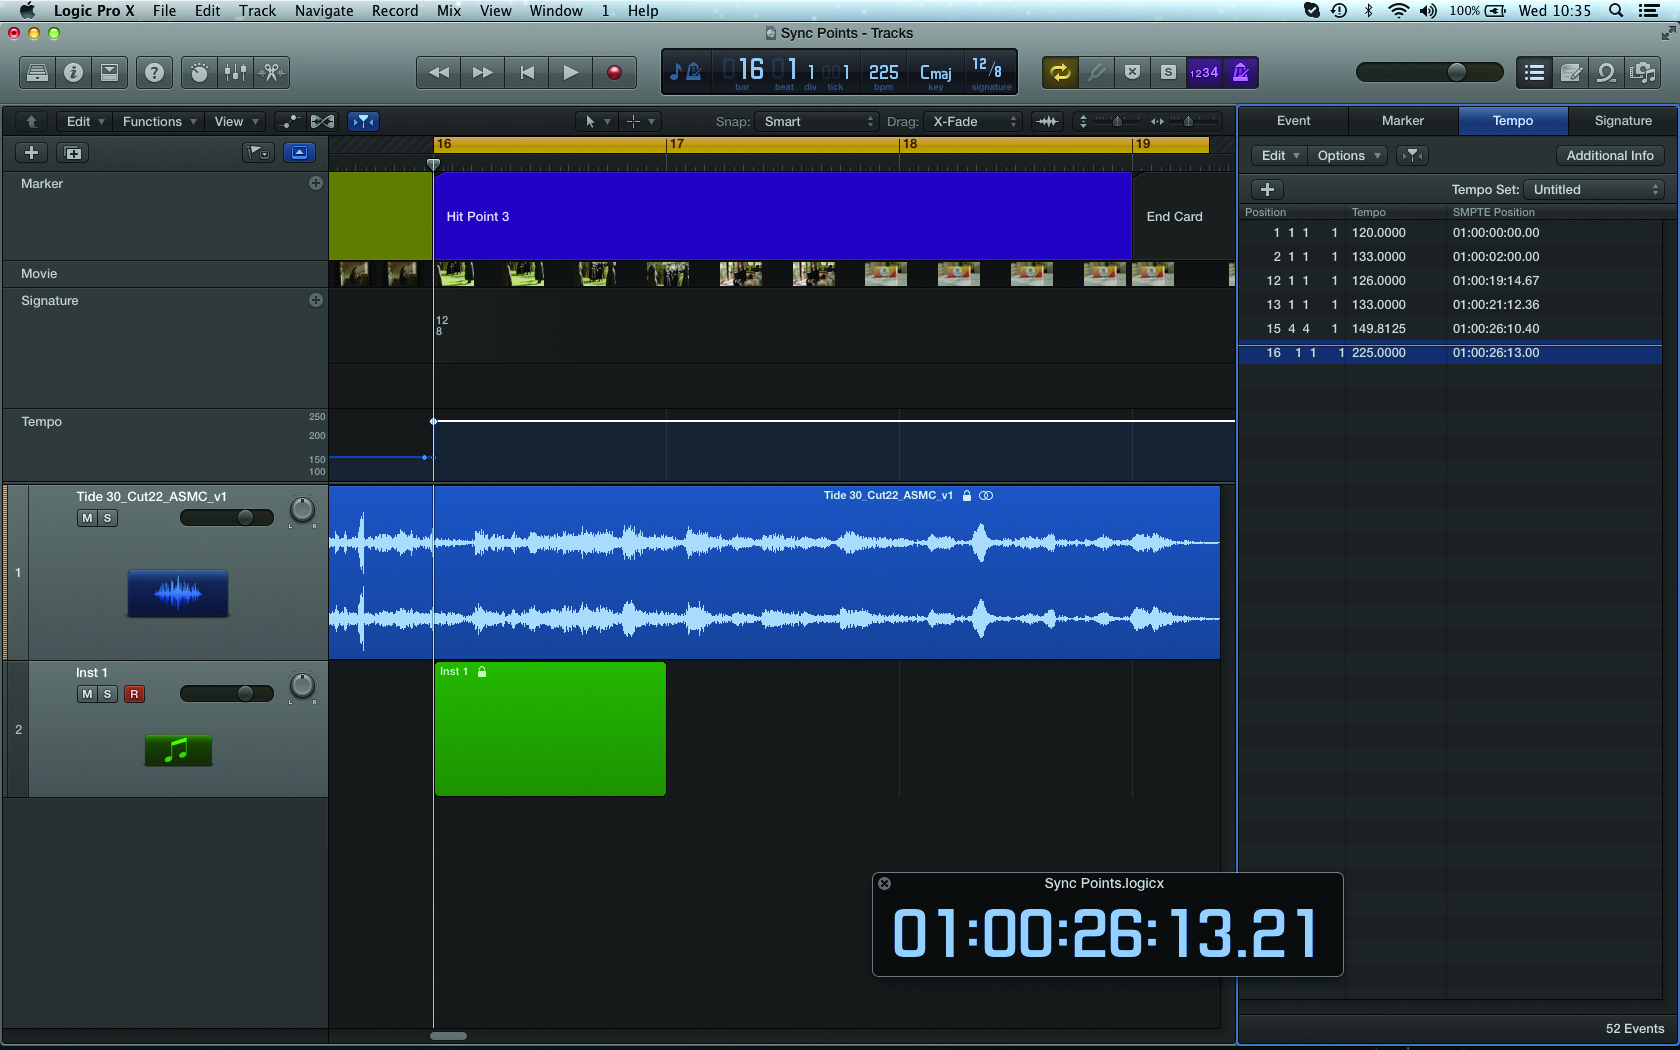
11: Increase the tempo at the same point as you inserted a time signature event, raising it so that the length of the region is equal to the bar length. In this case, 150bpm in 4/4 becomes 225bpm in 12/8, maintaining the same 4/4 pulse but in 12/812: Another interesting work-around is to use you DAW’s score writing abilities. Inserting a metronome marking (on a dotted crochet setting) will enable you to see the equivalent 4/4 pulse. If your new tempo is correct it should match the old 4/4 tempo.
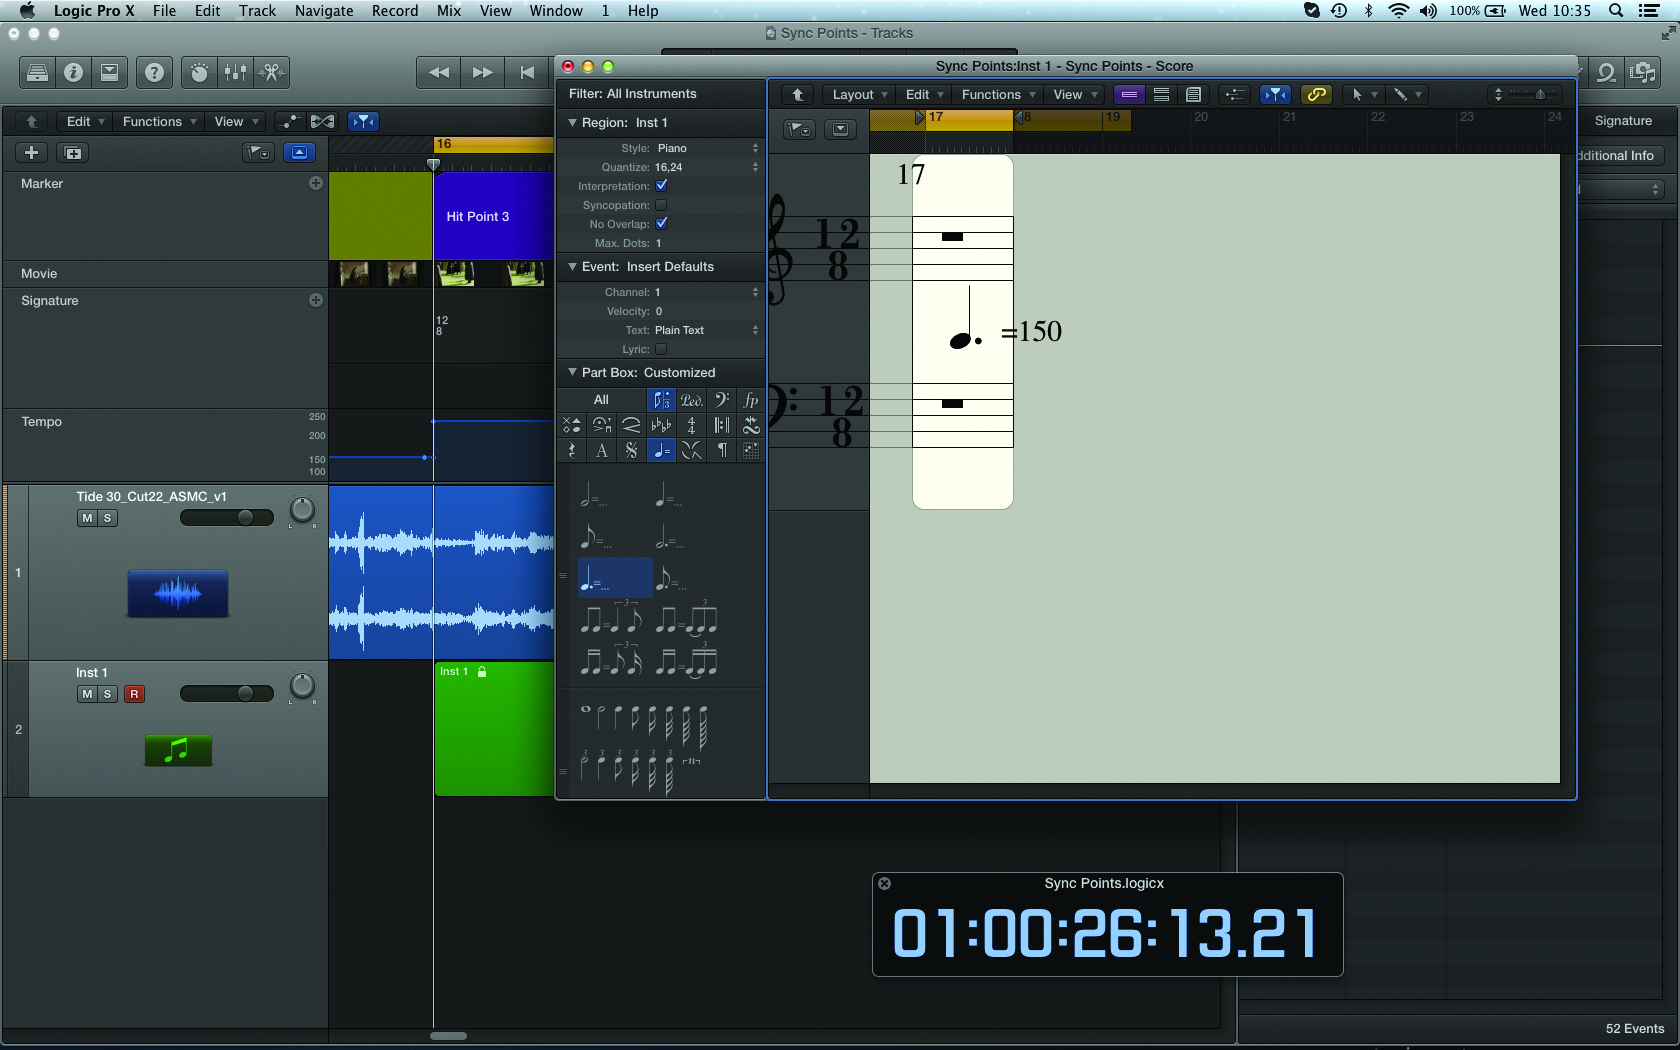
12: Another interesting work-around is to use you DAW’s score writing abilities. Inserting a metronome marking (on a dotted crochet setting) will enable you to see the equivalent 4/4 pulse. If your new tempo is correct it should match the old 4/4 tempo.
This tutorial is endorsed by Point Blank. With courses in London, online and now LA, Point Blank is The Global Music School. You can study sound to picture on their Music Production Diploma courses, with pro industry tutors. More info here: www.pointblanklondon.com