Part Two of our Better Recording Workflow in Logic Pro X Step-by-Step
In the second part of our tutorial looking at improving your recording workflow we continue looking at how to track a session… 7: To save time when record-enabling tracks, consider using the Track Grouping options. Assign the tracks to the same Group and then select the Record option from the Group settings window. Record-enabling one […]
In the second part of our tutorial looking at improving your recording workflow we continue looking at how to track a session…
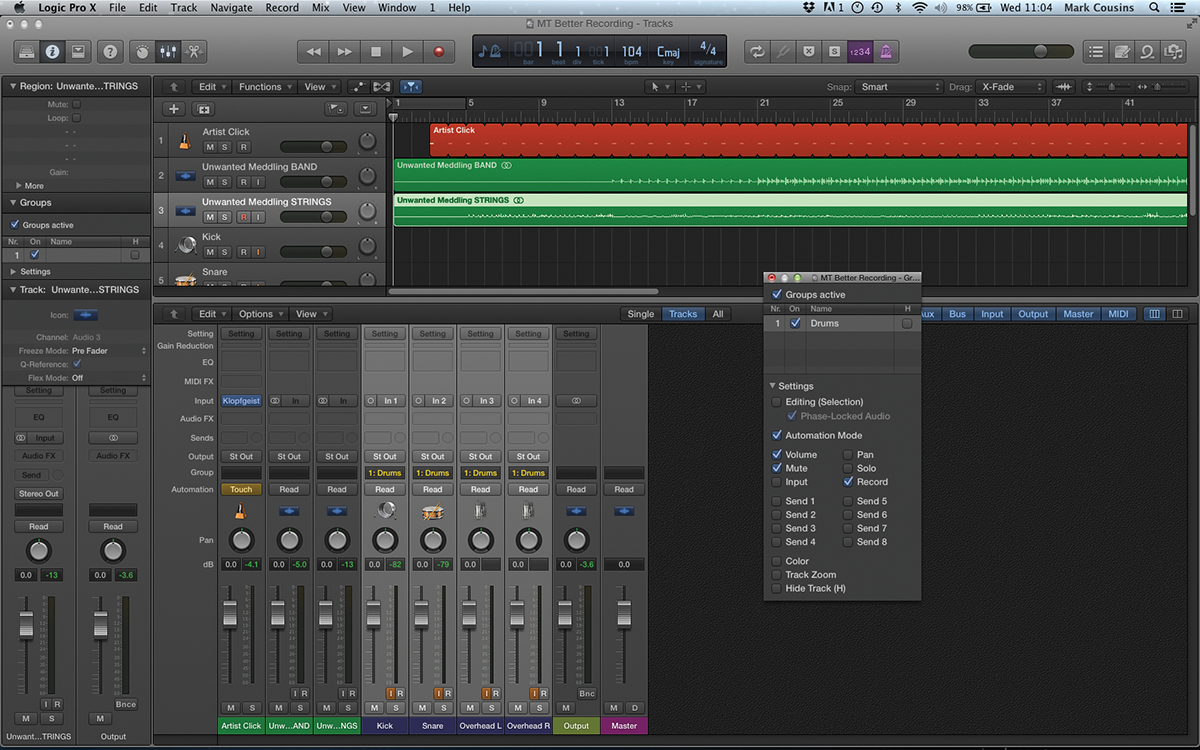
7: To save time when record-enabling tracks, consider using the Track Grouping options. Assign the tracks to the same Group and then select the Record option from the Group settings window. Record-enabling one track should now enable them all.
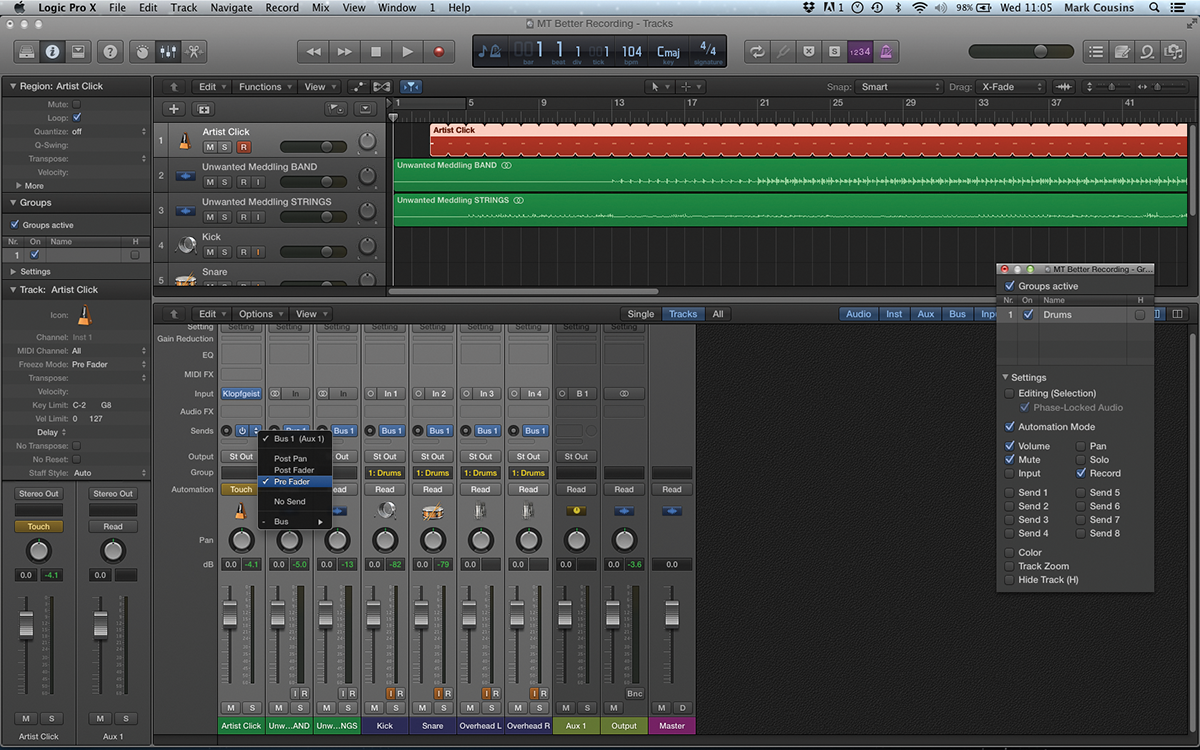
8: Now let’s create a completely customisable headphone mix for the musicians that’s independent of the control-room mix. Create bus sends for the all the channels in the mix, and then switch them to pre-fade (rather than post-fade).
9: Solo the Aux fader for the headphone mix and start balancing the instruments using the bus sends on the channel faders. Change the output of the Aux fader to match the headphone output, and also remove the output assignment for the click.
10: If your musicians are happy with the headphone mix, you can now record your first pass. Ensure you leave lots of headroom, though, with your average signal levels metering around -11dBFS to -15dBFS, so as to avoid any unwanted distortion.
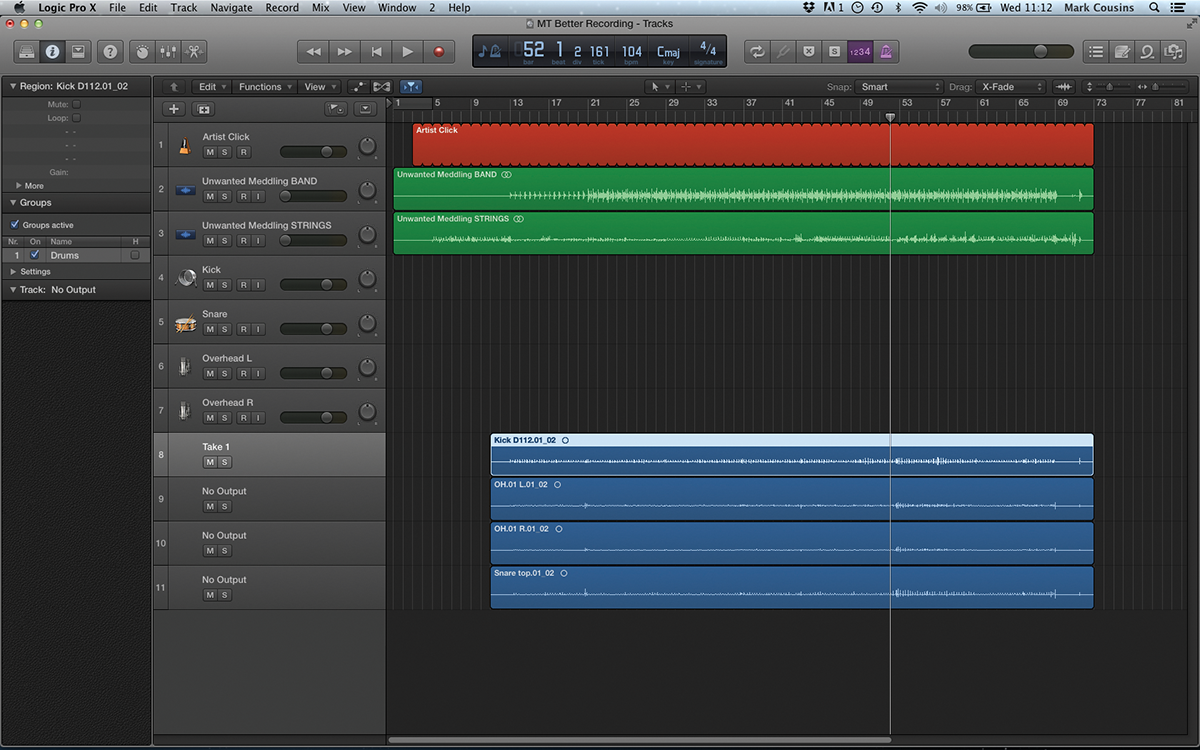
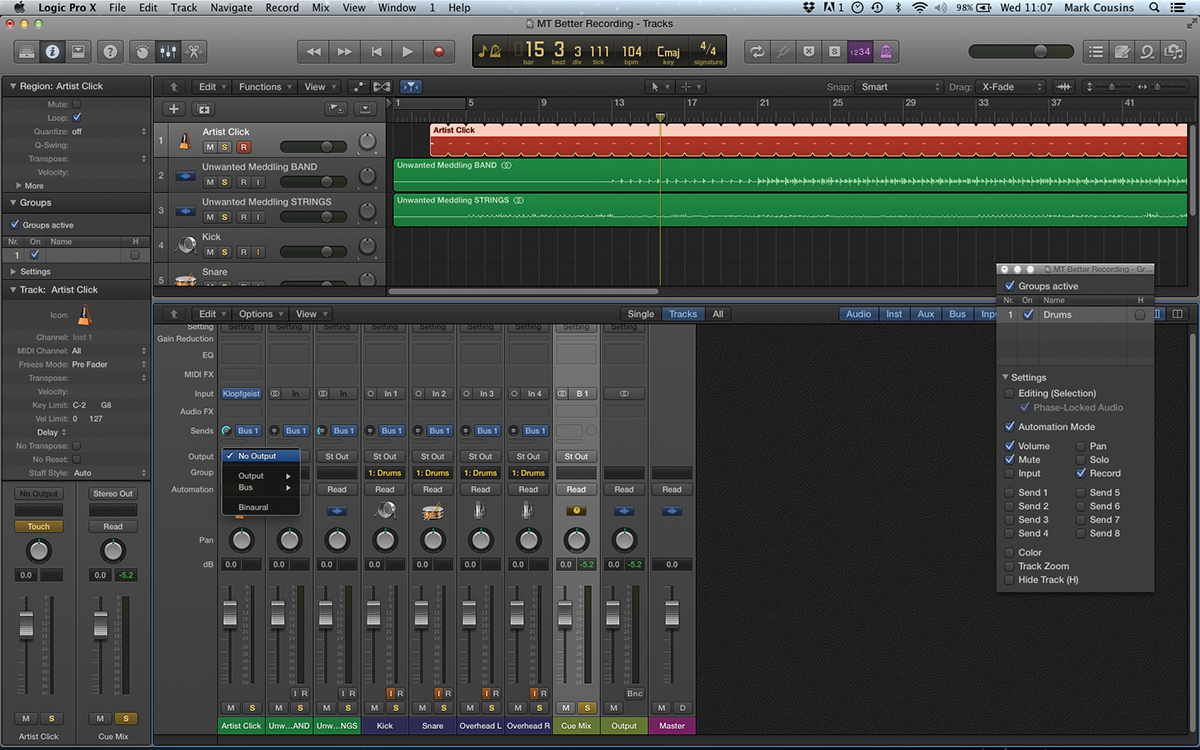
11: If you want to record another take, consider using a series of ‘No Output’ tracks as a temporary holding zone. First, create a new Audio track, and then change its assignment by Ctrl-clicking in the track lane and selecting the Reassign Track option.
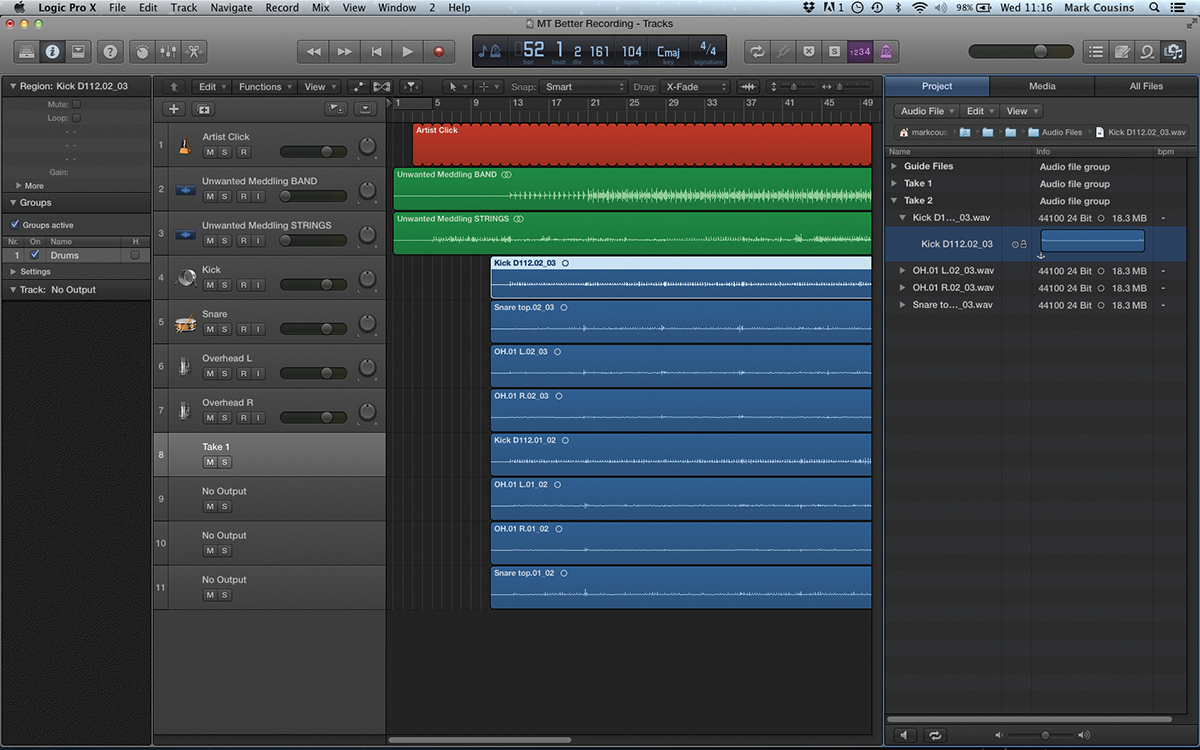
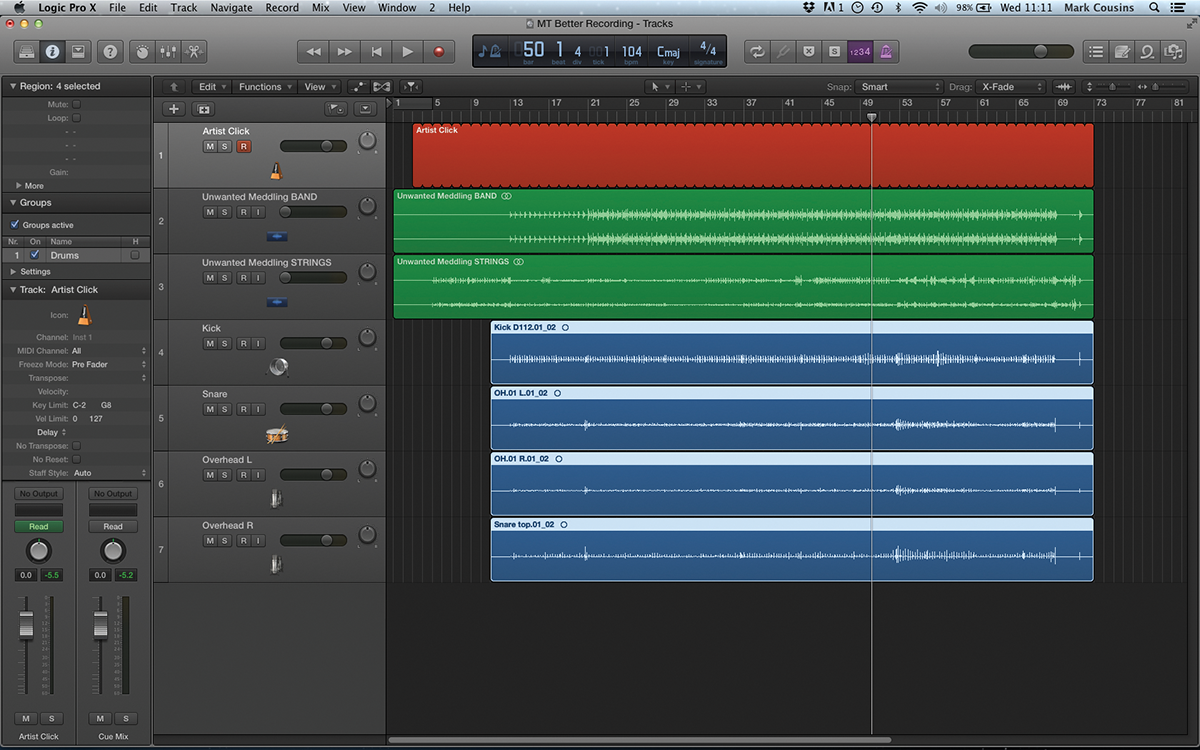
12: As well as keeping your Tracks area organised, it’s also worth organising takes in the Project Audio Browser. First, select the regions belonging to one of the takes and then select View > Group Files by > Selection in Tracks from the Project Audio Browser.
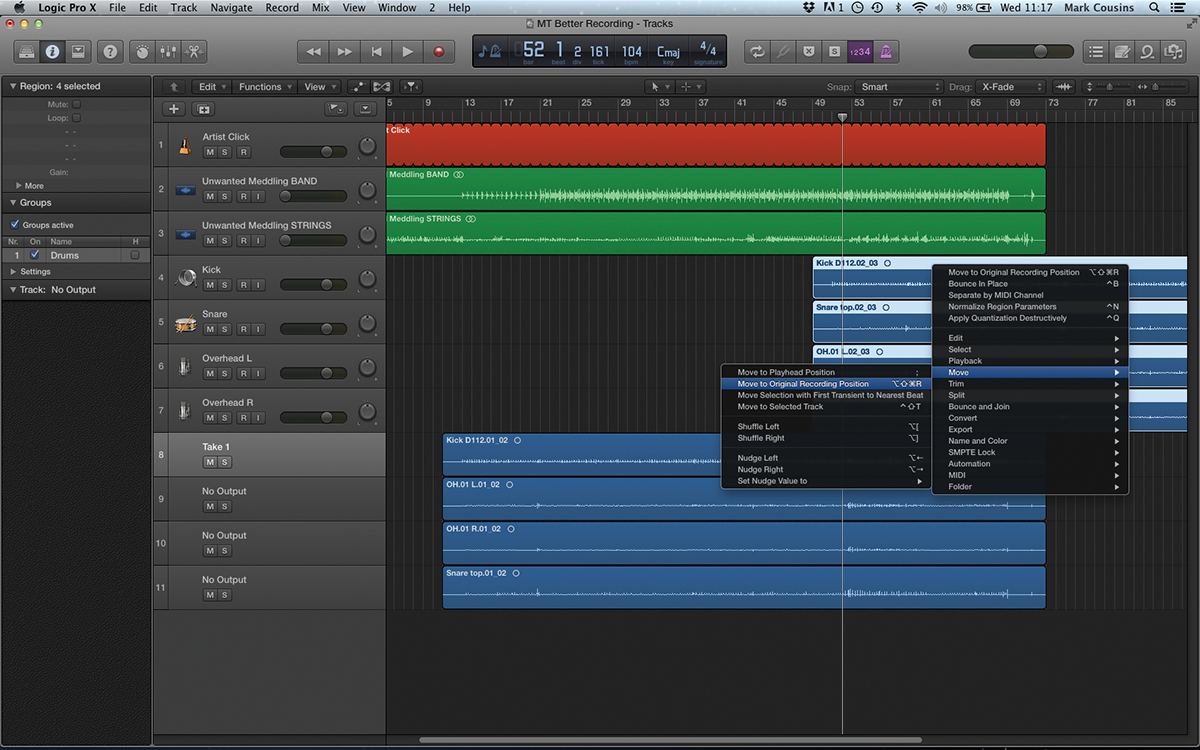
13: If you do end up moving one of the takes, remember to use the contextual menu command Move > Move to Original Record Position. This will reposition the selected take to its correct time alignment, even if it’s in an edited form.
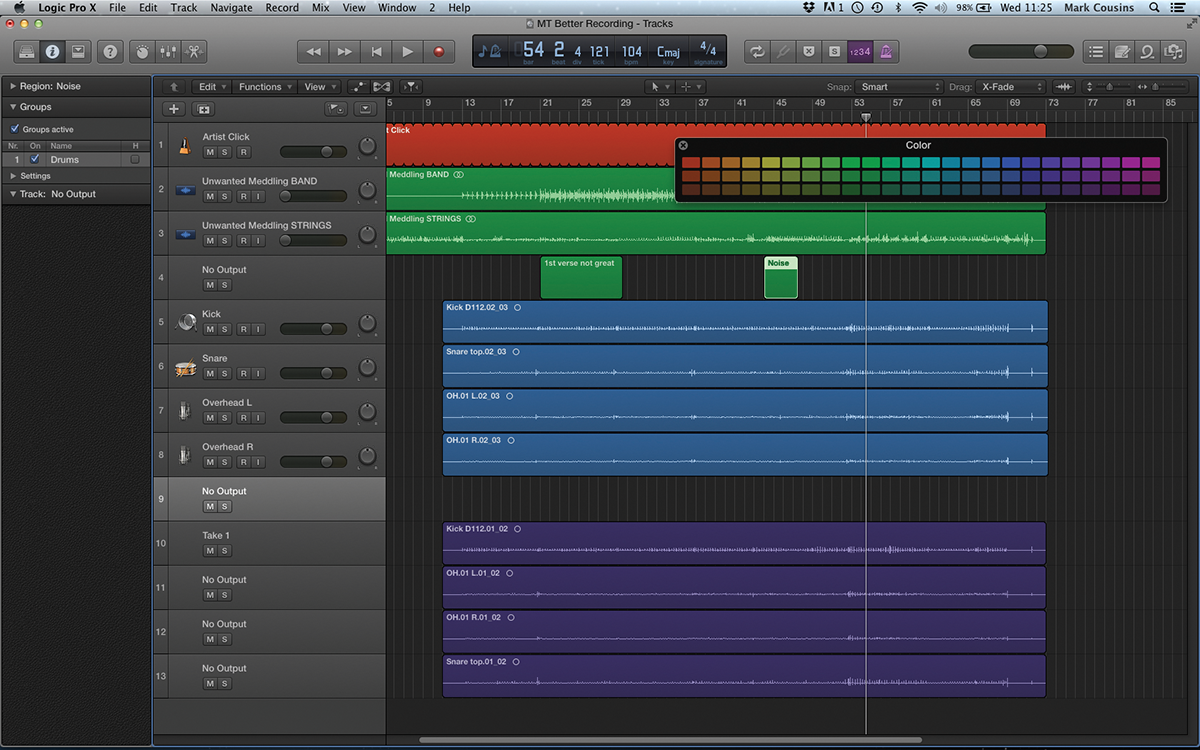
14: If you’re going to start comping the takes together, you might want to consider colour coding. Another good tip is to use a No Output track on the top of the take to create time-based notes to identify any performance issues.
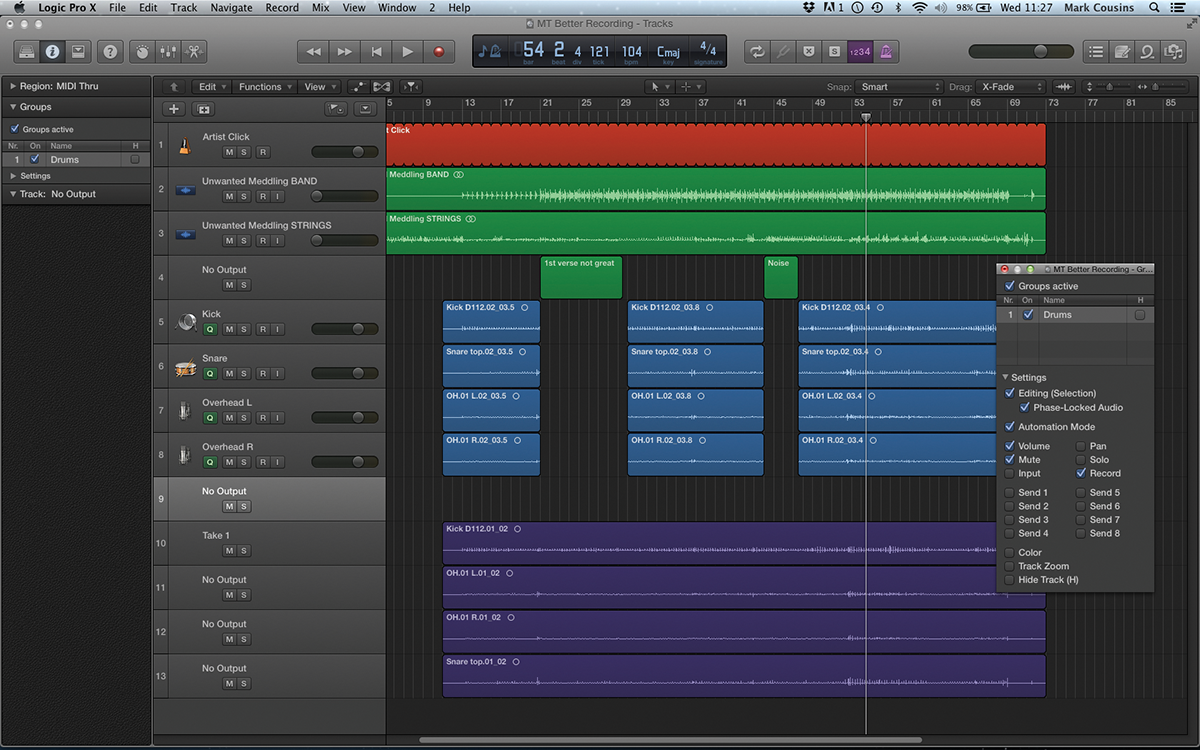
15: The grouping functionality we added at the start of the session can also be used for editing purposes, so that edits on one region are carried over to the others. Under the group settings, check the Editing (Selection) and Phase-Locked Audio.
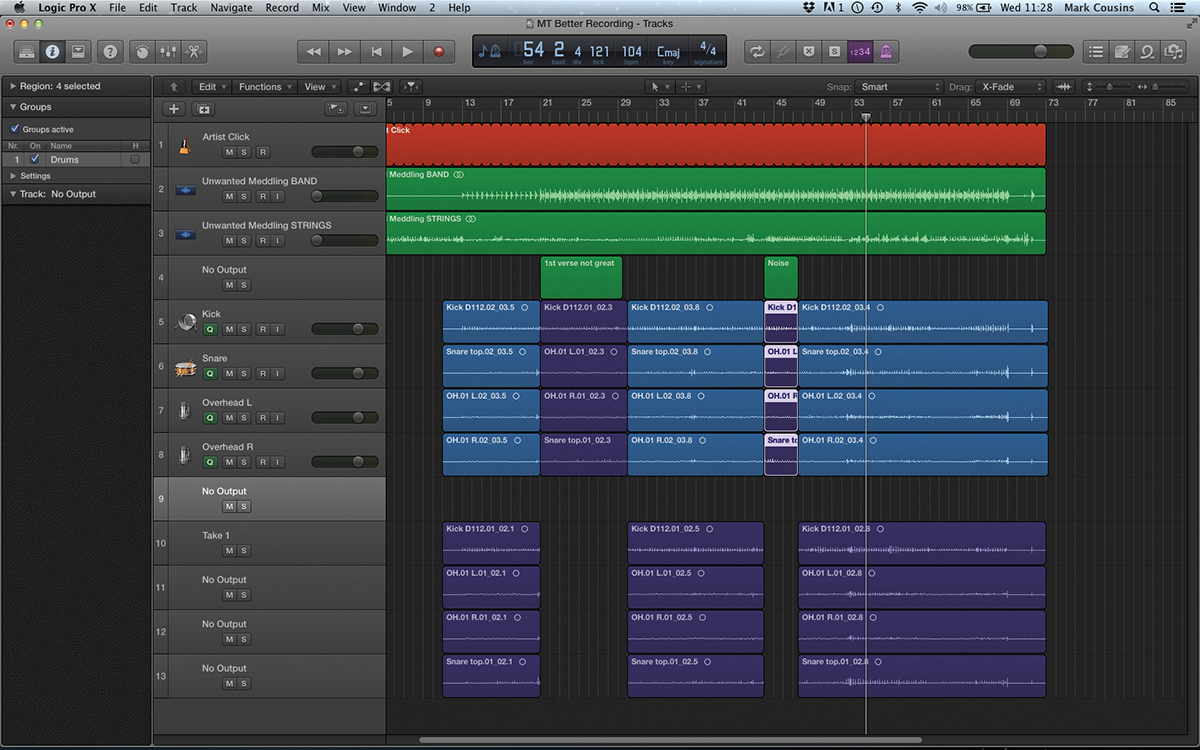
16: Here, we’ve comped the best parts of the two takes (using our guide notes on the last take) to create an optimal performance. Keep your edits on the beat for now, to ensure they work musically before you start refining any of the cut points.
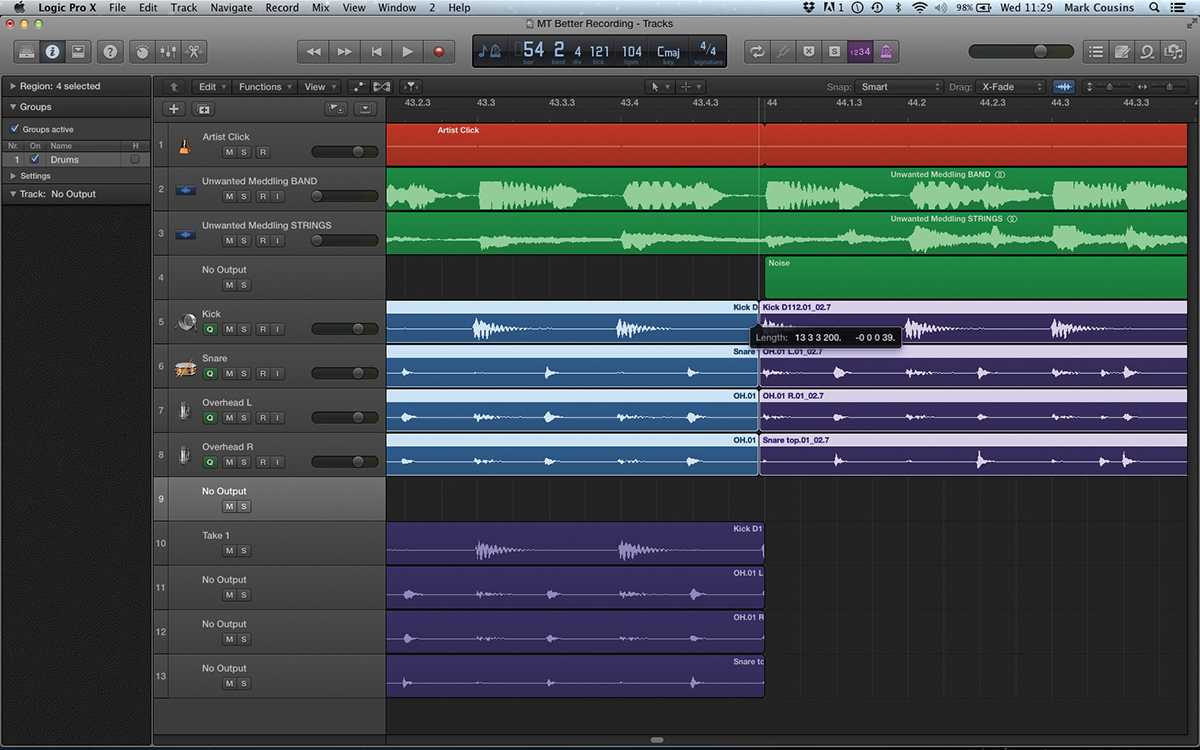
17: To refine the edit, zoom and position your pointer towards the top of the region on the edit point. You should now be able to rock the edit point (for both regions) either way, ensuring you don’t clip the transient at the cut point.
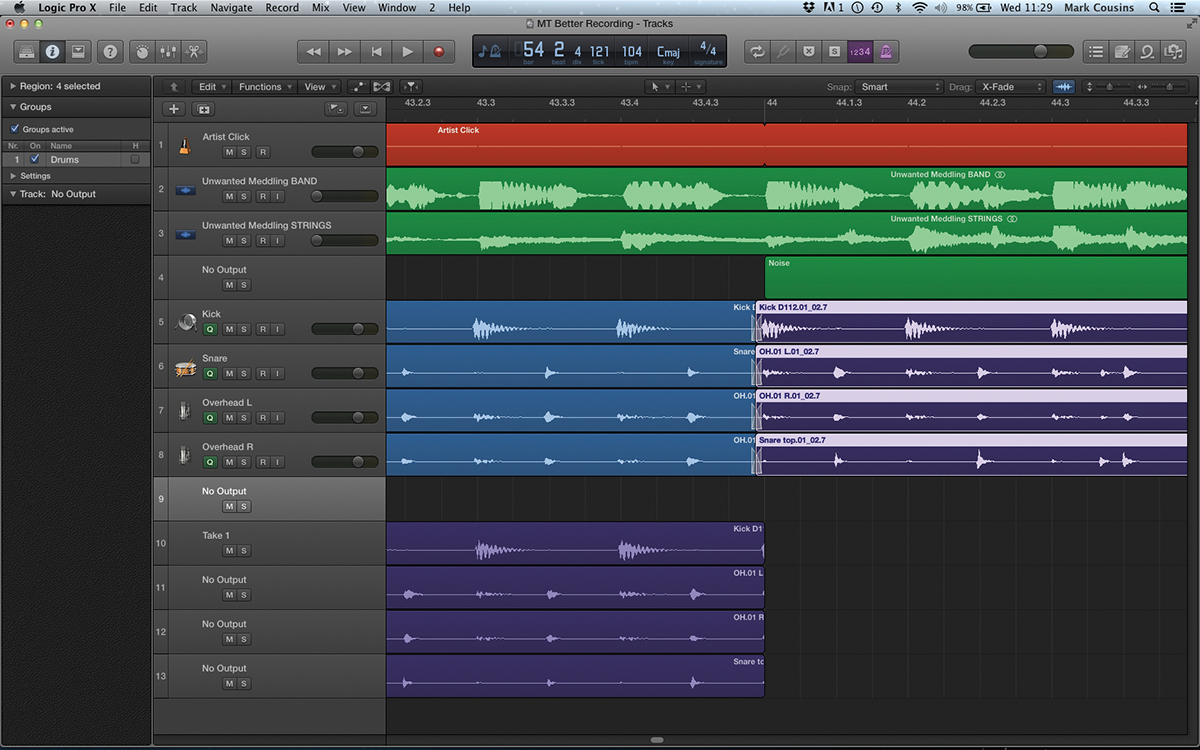
18: Assuming the X-Fade drag mode is active, you should be able to drag a small amount of the subsequent region backwards to create a smooth transition. Ideally, the crossfade should occur just before the next transient.
This tutorial is endorsed by Point Blank. With courses in London, online and now in LA, Point Blank is the Global Music School. You can study sound to picture on their Music Production Diploma courses, with pro industry tutors.
