Logic Tutorial: Producing Music To Picture Part One – Working With Movies and Markers
Welcome to the first of a new series of tutorials for producers aiming to work with film and TV. Mark Cousins shows you the first stages: importing your movie file and creating a series of markers that will form the backbone of your music-to-picture workflow. This is the first part of a brand new MusicTech […]
Welcome to the first of a new series of tutorials for producers aiming to work with film and TV. Mark Cousins shows you the first stages: importing your movie file and creating a series of markers that will form the backbone of your music-to-picture workflow.
This is the first part of a brand new MusicTech series on producing music to picture. It’s a thriving industry and if you are not involved, it’s certainly an area worth exploring. The idea of this series is to introduce concepts, explain principles and to give you some inspiration along the way.
The process of scoring music to picture requires a balance of both technical and creative disciplines – understanding how musical tools such as melody, harmony and rhythm can be used to accompany a picture, along with an appreciation of the technical logistics of synchronisation, working with virtual instruments, mixing and file delivery.
The all-important groundwork to this task, therefore, is established as soon as you import the movie into your DAW. Establishing an ordered, methodical workflow will enable you to get the most from your music, making it work seamlessly with the on-screen action and letting you quickly respond to revised picture cuts or creative whims of the director.
In this workshop we’re going to look at the essential first stages of music-to-picture work: importing a video file, placing markers, working with timecode and starting to use tempo as a means of synchronising to picture.
Stay in Sync
When you receive the video file to be scored, hopefully the cut will be finalised at this point and you’ll have some guidance from the director as to where they’d like the music. Try to get a version with and without a so-called temp track, which uses pre-existing cues to illustrate how the music might work.
Maintaining sync is all-important when you’re writing music to picture, so it’s worth noting a few things before you dive in with the composition process. Unless you’re locking precisely to timecode, the simplest solution is to make use of the 2-pop placed at the start of the film. The 2-pop is a short, 1-frame burst test tone used to mark the position exactly two seconds before the picture starts (in timecode, this would be denoted as 00:59:58:00, with the picture starting at 01:00:00:00).
Assuming the 2-pop stays in the same place, and is always printed at the start of your music track, the editor has a quick and easy way of lining the music back to picture.
Once you’ve imported your movie you’ll then need to think about placing a series of markers that will guide your composition process, and, in particular, ensure your music syncs with key hit points in the movie. The first marker, of course, will be after the couple of seconds of pre-roll (which will contain the all-important 2-pop), just as the picture starts. Subsequent markers identify the important hit points for your music, but it’s important to ensure that your music doesn’t end up matching every edit point in the movie.
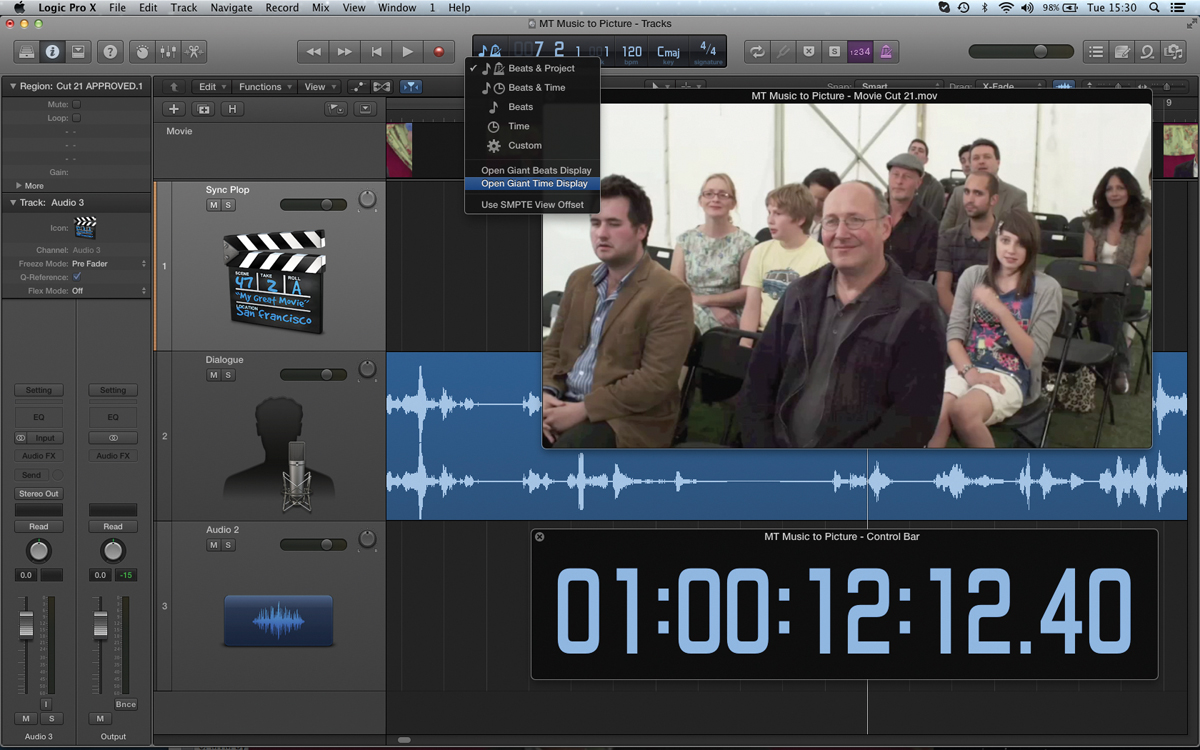
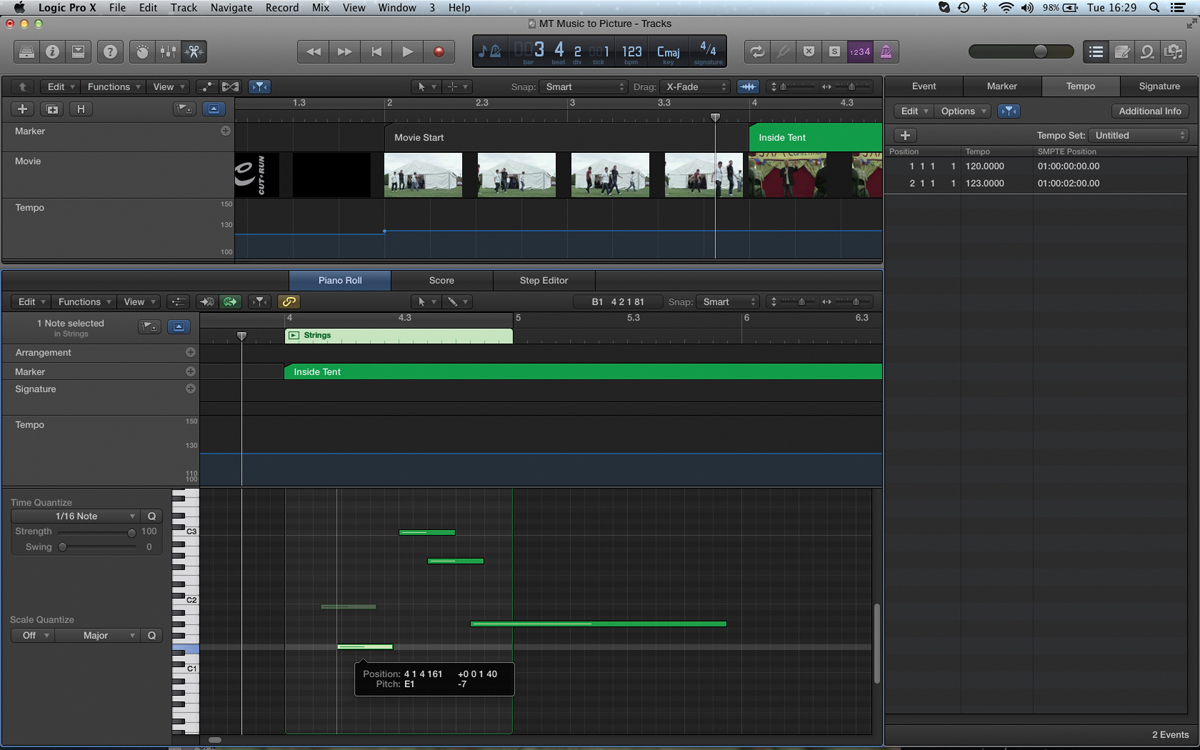
As you’re placing the markers, ensure that they’re locked to the absolute SMPTE position rather than a relative ‘bars and beats’ placement, which is what most DAWs default to. As you adjust the tempo – which is one of the key techniques for making your music conform to the hit points – you need to ensure the markers stay fixed at their relative timecode position.
One immediate application of your markers is to set your session so that the first bar of music matches the first frame of picture. By placing a tempo event at bar 2, and then adjusting the tempo of bar 1, you can ensure the first bar lasts the precise length of the pre-roll. If the pre-roll changes, simply adjust the tempo accordingly.
That’s it for part 1. As we’ll see later on in the series, the use of markers is a cornerstone in music-to-picture work, impacting on a variety of techniques a composer uses.
Focus On – The Wonders of Timecode & Film
Given that you maintain the absolute position of the 2-pop, the ability to 100% lock to timecode isn’t essential, but it can still be beneficial, especially on longer cues. If the film is supplied with so-called burnt-in timecode (where the timecode stamp for each frame is indicated at the bottom of the frame), it’s easy to match your session start time with the first frame of the movie file. Failing that, of course, you can always use the 2-pop and set your session start time to 00:59:58:00.
When exporting, always keep the 2-pop as a reference, but it’s also worth noting that the broadcast WAV format (BWF) stores the start point of the audio file as part of the WAV’s metadata.
Sync’ing and Adding Markers
1: To compose the music, you’ll be supplied with the most recent cut of the film. Ideally you’ll need to work with a version without any music so that you can ensure your music doesn’t interfere with any important dialogue or sound effects.
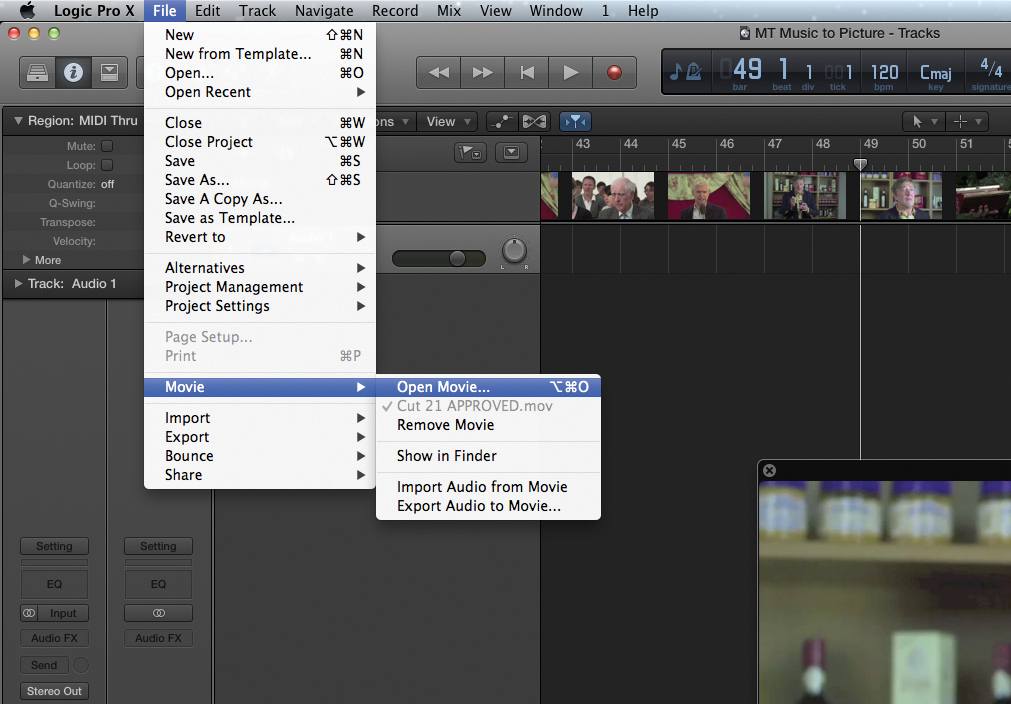
2: Create a new session in your DAW, and from the file menu choose the option to import a movie file. The movie will then be placed onto your DAW’s timeline with a series of thumbnails to show what’s happening at any point.

3: To keep a close ear on the dialogue/music balance, it’s well worth having it as a discrete track in the project’s mixer. Use the option to Import Audio from Movie so that your DAW extracts the existing soundtrack as a new audio file.
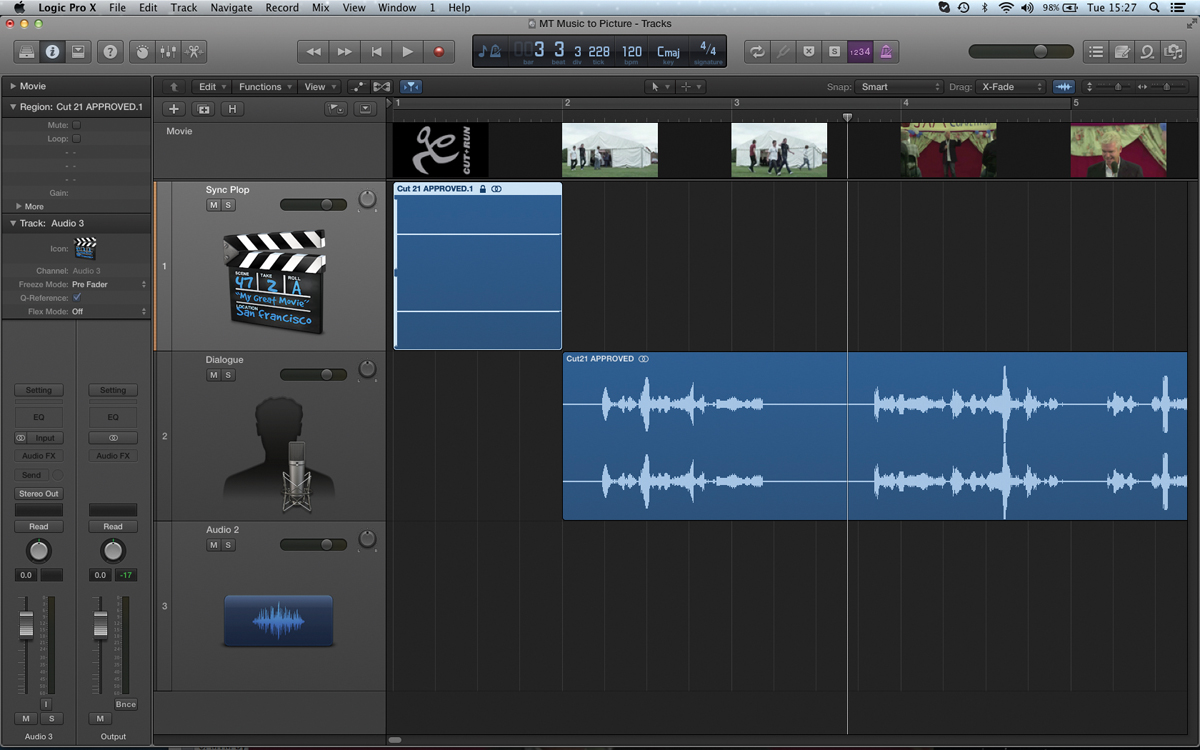
4: The existing soundtrack might have a 2-pop at the start, which is used as an ‘audio slate’ to mark two seconds before the picture starts. Ensure you separate this out onto a spare track, as you’ll need to print this with your final music mix.
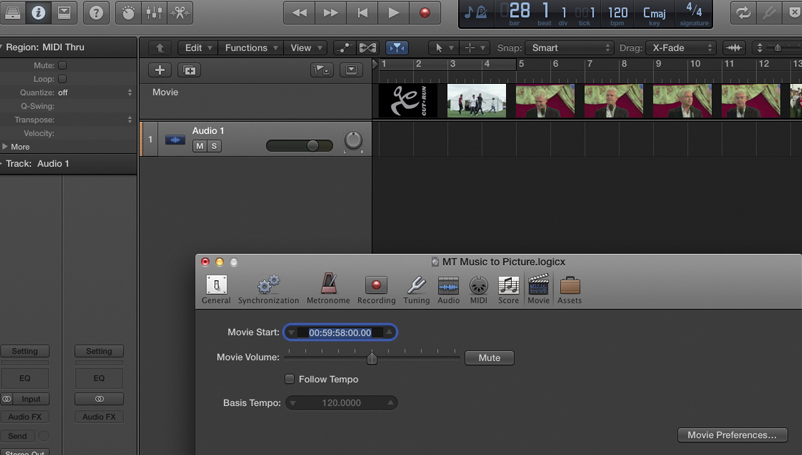
5: Changing the SMPTE start time of your session (based on the amount of pre-roll before the picture starts) can be helpful. Technically, you can also change the start time of the movie, which is useful if you need to quickly re-sync a new cut.
6: If you’ve got space on your monitor it’s well worth running the movie file in its own window, as well as opening a large SMPTE time display. Use these two windows to keep a close eye on the time and picture references in your music.
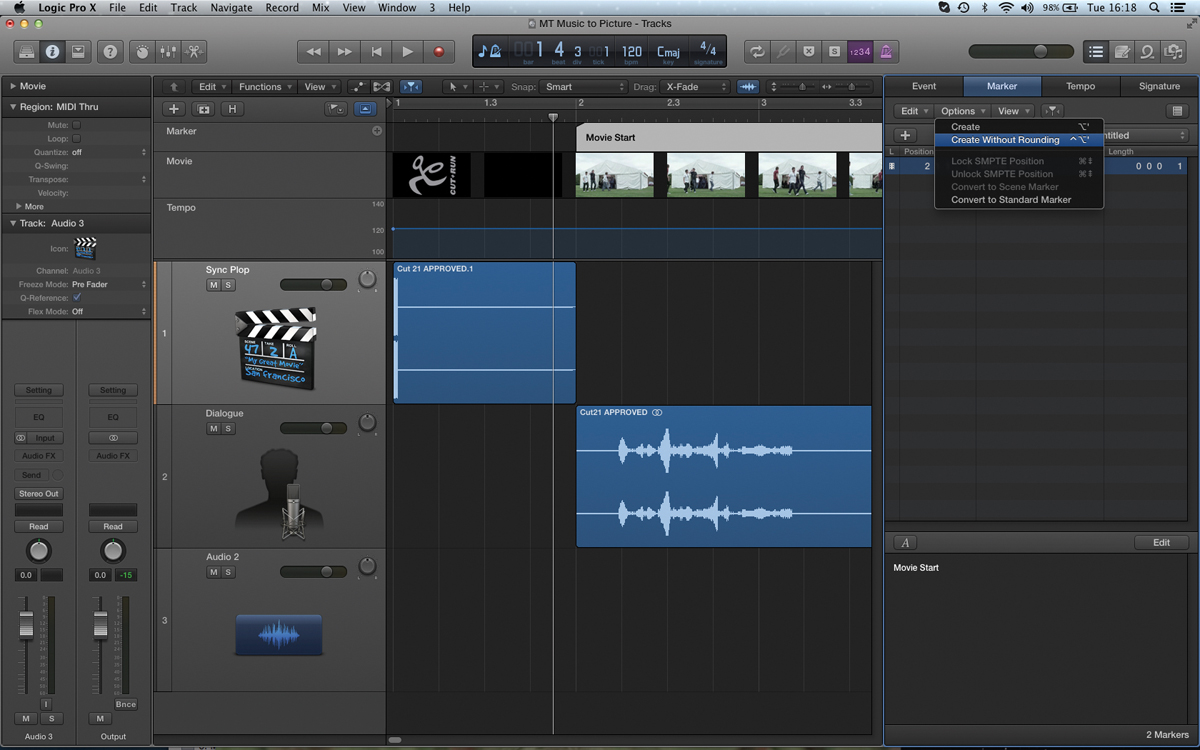
7: Markers are essential for music-to-picture work, providing a precise reference for scene transitions and hit points in the picture. Locate your song position pointer at the appropriate position in the movie and then create a New Marker.
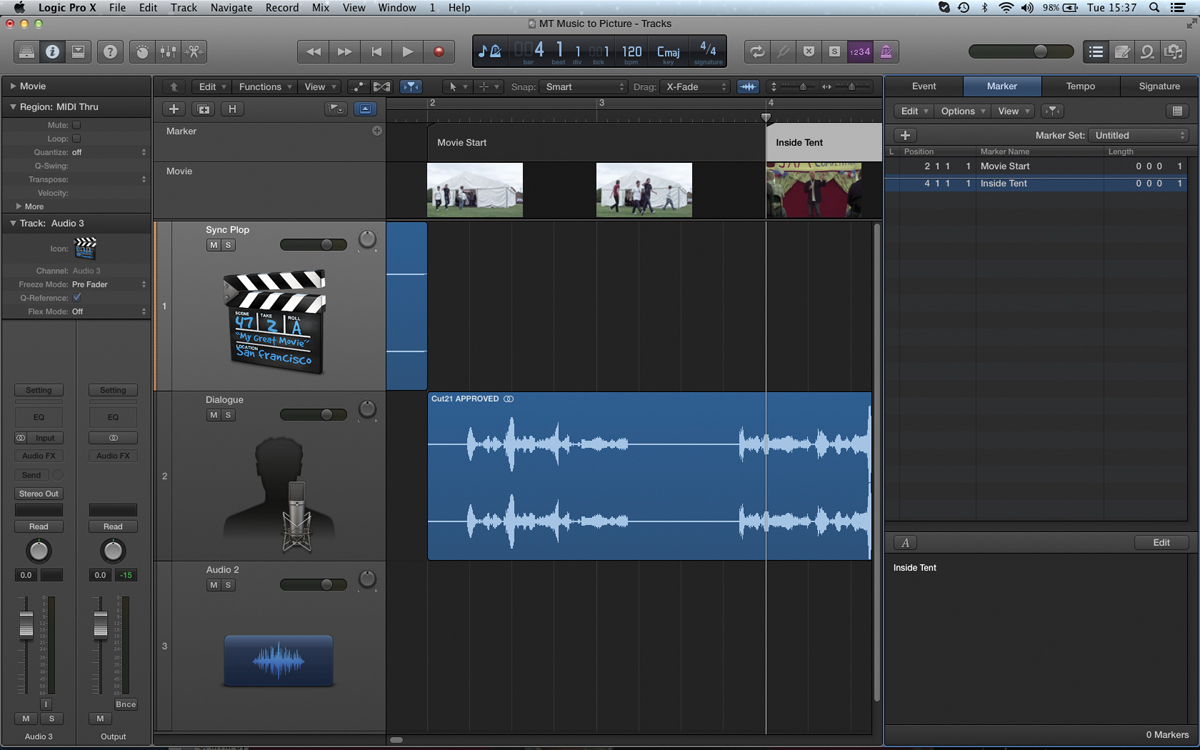
8: Step through the rest of the movie file and continue inserting scene markers and hit points into your project’s timeline. You don’t need to mark every hit point, just the key locations that the music needs to align with.
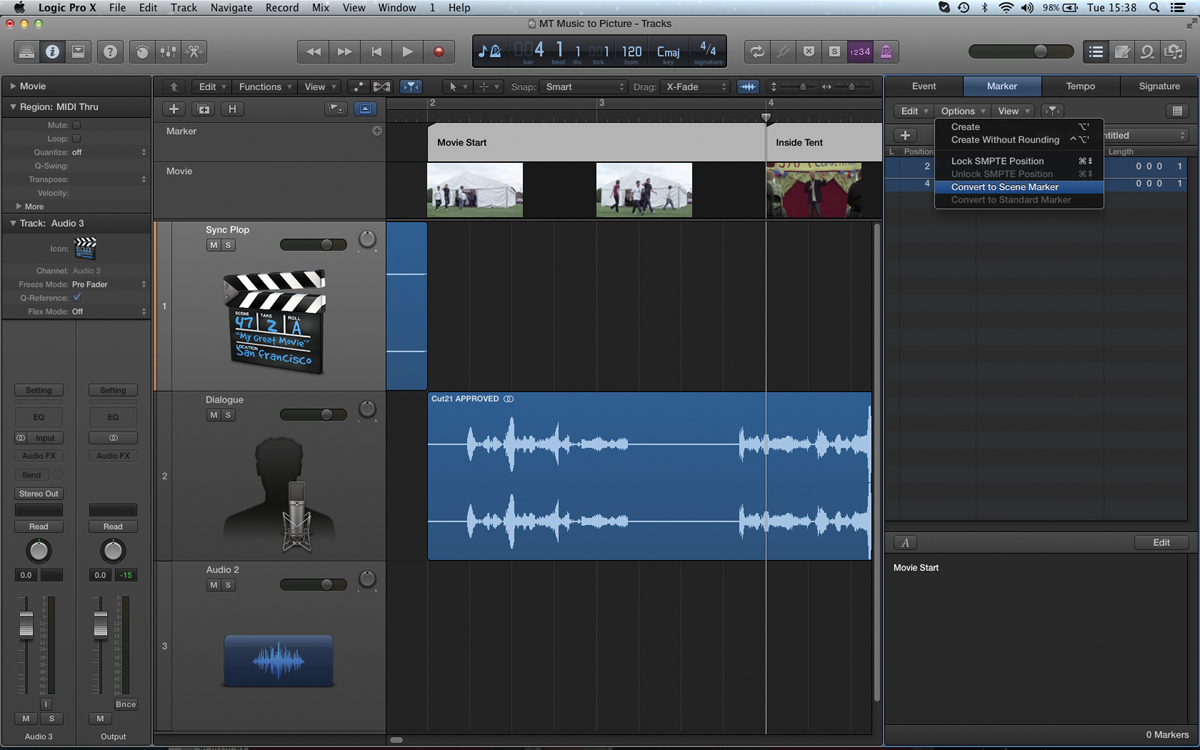
9: Once you’ve placed your markers, ensure they’re locked to SMPTE rather than bars and beats. When you subsequently change the tempo the markers will stay in the correct alignment with the picture, rather than moving to a new position.
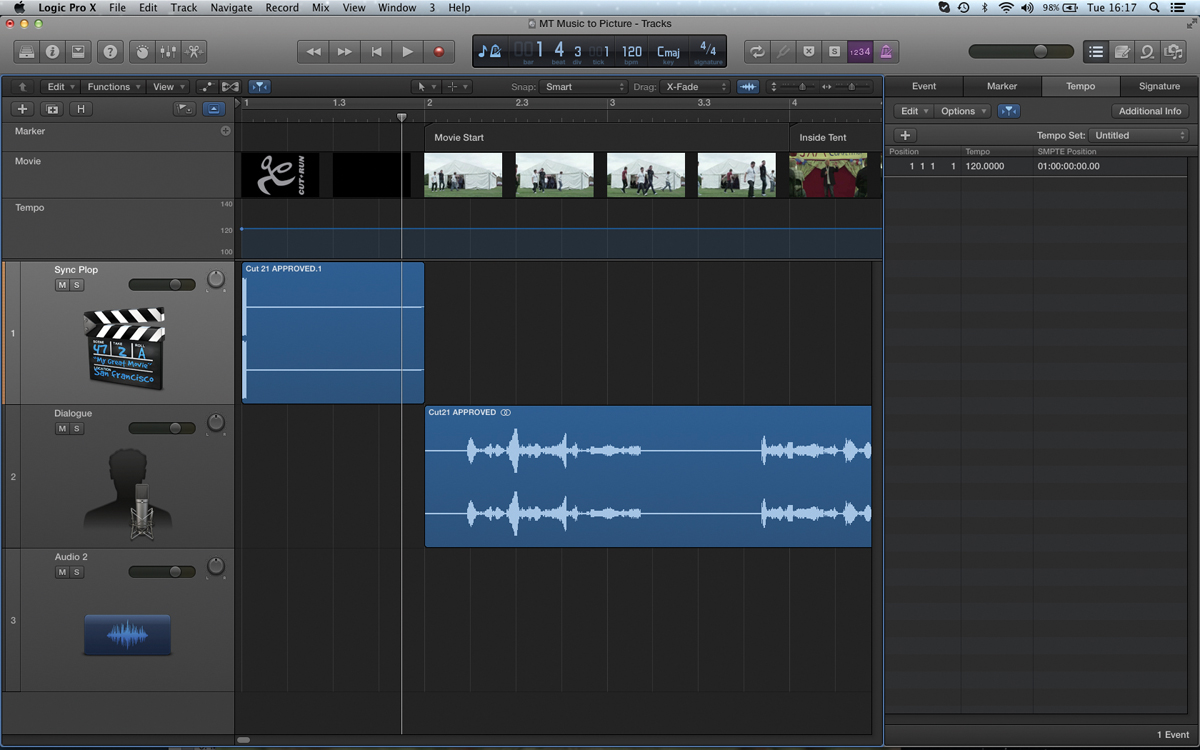
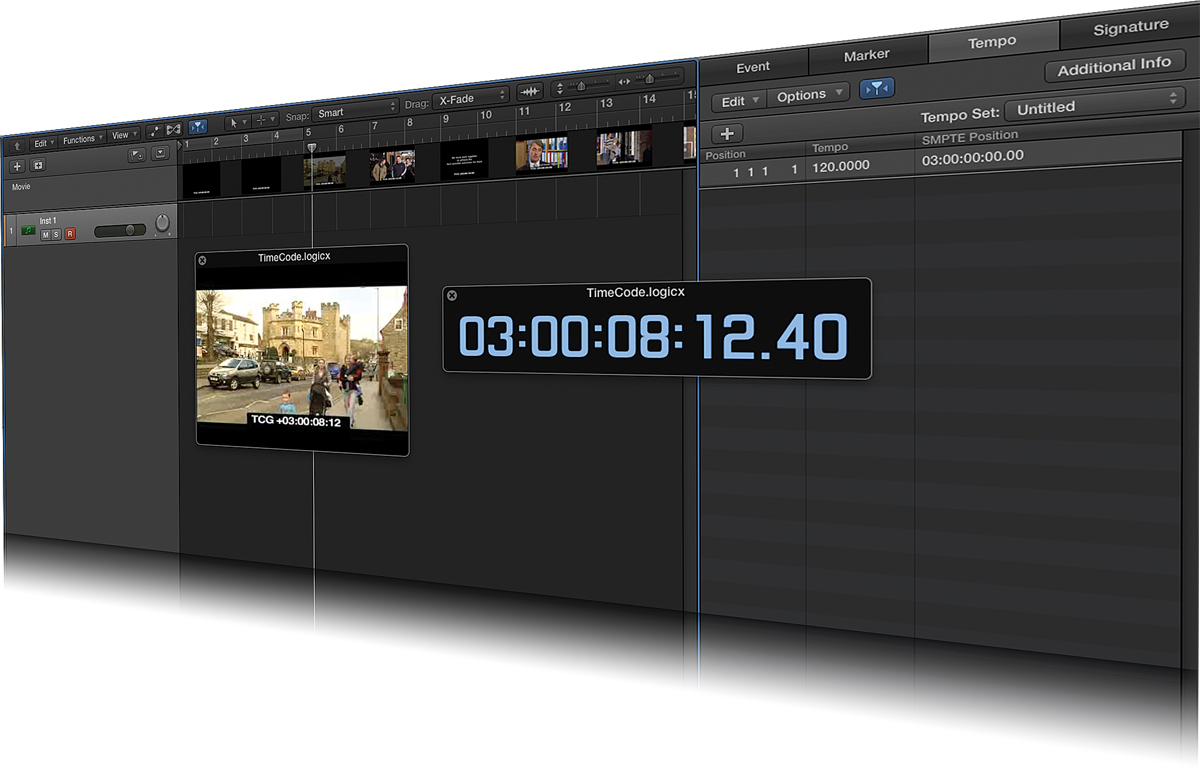
10: One immediately important task is to align the first bar of the music with the start of the picture. To do this we need to create two tempo events – one at the start of the movie, and another when the picture/music starts.
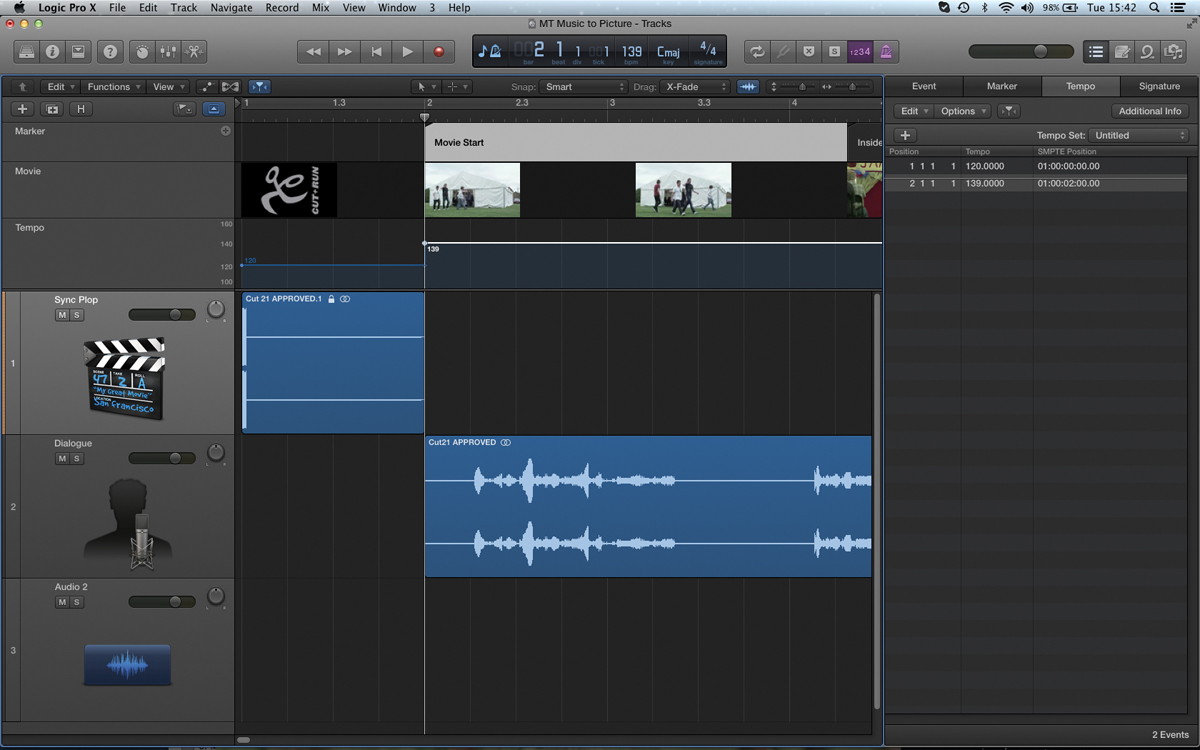
11: By adjusting the tempo of the first bar we can synchronise the beginning of the music cue with the start of the picture (in this case, 120bpm, as it’s precisely two seconds). The tempo of the first cue is then set at the start of bar two.
12: As we’ll see later on in the series, the use of markers is beneficial to a range of music-to-picture activities and really aids an efficient workflow. If the cut changes you’ll also be immediately aware of any issues that it raises.

