Logic Pro X Tutorial: Become a Power User Part 5 – Flex Time
Flex Time is one of Logic’s most significant and powerful tools – and often the key to a track’s rhythmic precision. Mark Cousins flexes his muscles. For this tutorial you will need the project files – Download Here Although some degree of tempo-elasticity has become a standard feature in most DAWs, it would be fair […]

Flex Time is one of Logic’s most significant and powerful tools – and often the key to a track’s rhythmic precision. Mark Cousins flexes his muscles.
For this tutorial you will need the project files – Download Here

Although some degree of tempo-elasticity has become a standard feature in most DAWs, it would be fair to say that there’s a great deal of variation between them in terms of the ease and effectiveness of the results. Logic’s Flex Time technology, though, is arguably one of the best of the bunch, whether you’re time-stretching loops to fit your session’s tempo, quantizing audio regions to match an existing MIDI sequence, or tightening a drum kit recording. Indeed, irrespective of the type of music you produce, Flex Time is a powerful ally when it comes to creating a perfect performance that best conveys your artistic vision.
Given the breadth of what can be achieved with Flex Time, it’s worth taking some time to fully understand how it works. In essence, Flex Time works by analysing the material in your project, building a unique series of Transient Markers for each audio region placed on a given track. Using the Transient Markers, a region can then be manipulated in a number of ways – either stretching it in a ‘telescopic’ fashion so that a region is slightly quicker or slower, or moving and stretching individual notes and events within the sequence.
To carry out ‘flexing’ as efficiently as possible it’s important that you make a distinction between the different Flex modes a track can be assigned. The different modes are largely self-explanatory: use Monophonic for single-note lines such as a vocal or bass line; Polyphonic for material that has a collection of notes at different pitches, like a piano or a guitar playing chords; and Rhythmic for percussive sources such as a drum kit. The other modes – namely, Speed (FX) and Tempophone (FX) – delve into more experimental realms, but are also worth exploring.
The most important point to remember, though, is that Flex Time edits are nondestructive. Any edits that you created will be marked with Flex Markers – simply delete a single Flex Marker – or reset an entire region’s Flex Markers – and the audio will be returned to its original form. Given this inherent flexibility (and undo-ability) Flex Time is a superb creative tool, enabling you to quickly manipulate timing properties with the same inherent ease as you would a MIDI performance.
Flexing Time
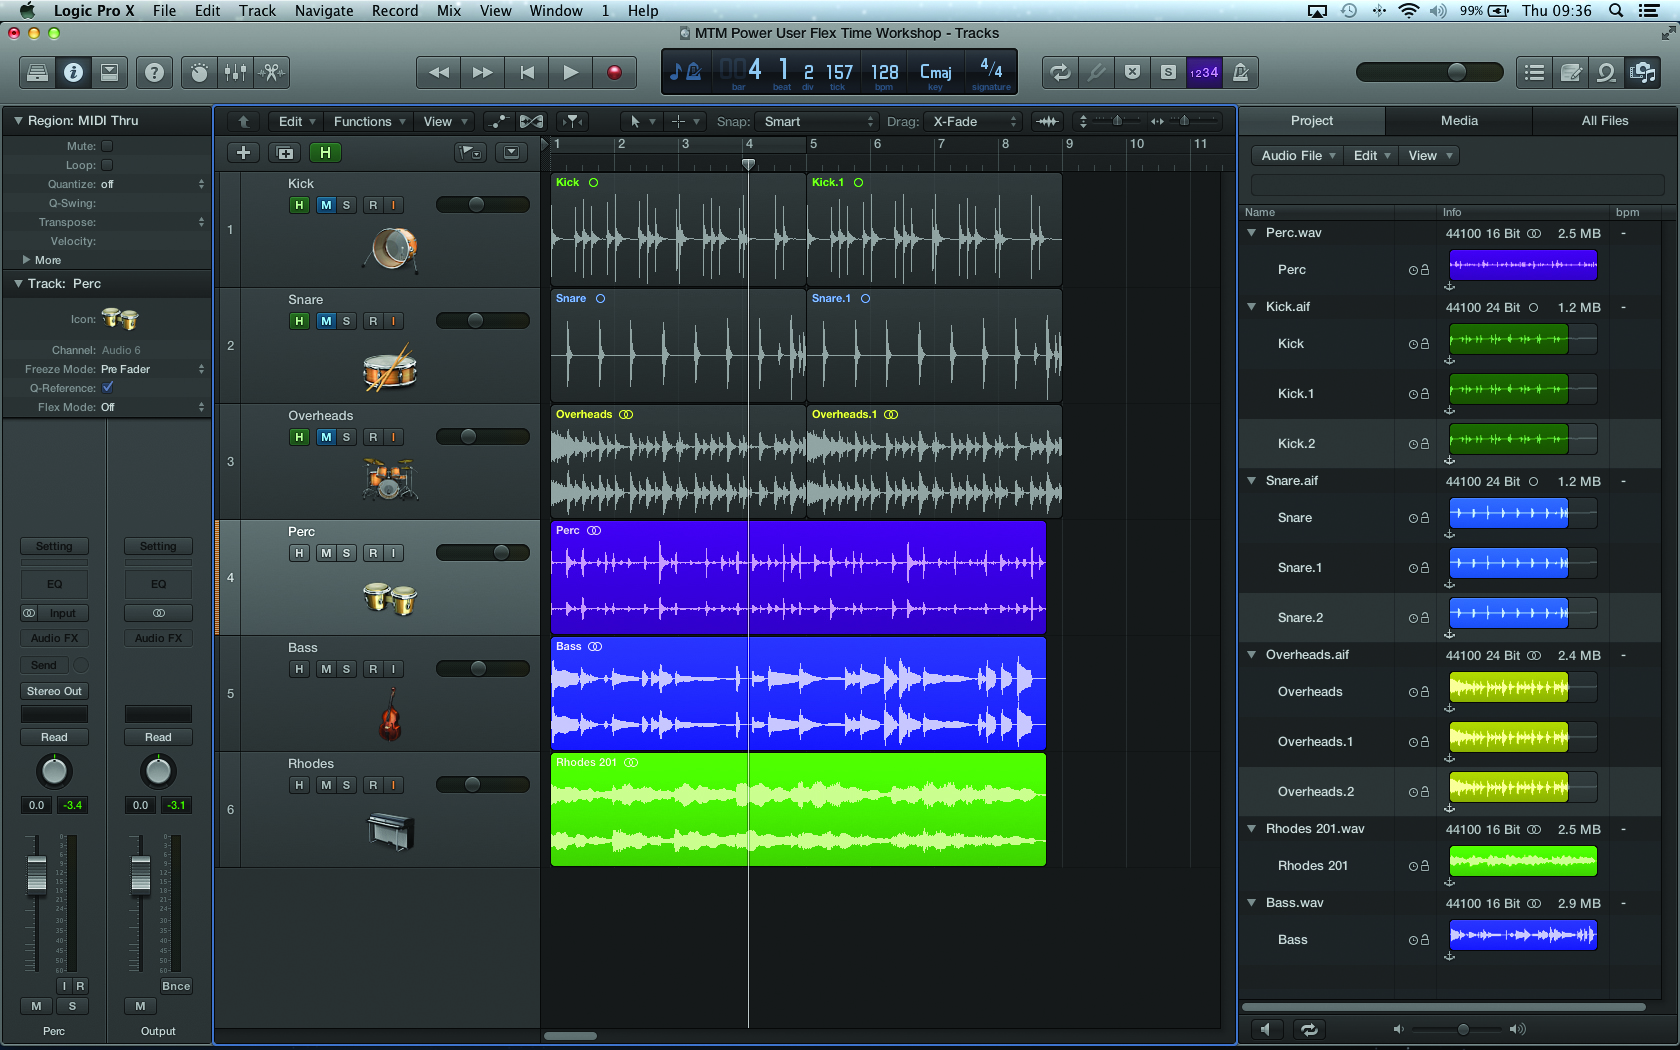
1: Open your downloaded project file . Our starting point is a session that was originally recorded at 128BPM; it was then augmented with additional material – perc, bass and a Rhodes line – recorded at a different tempo. Currently, the newly imported material lands short of bar 9, indicating it was recorded at a faster tempo.
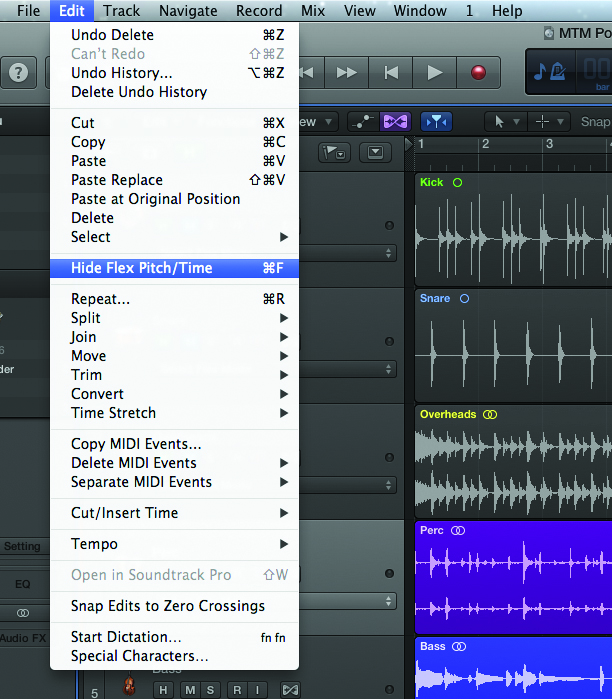
2: To adjust the timing of the new material we’re going to use Flex Time. To carry out any Flex Time editing we need to enable the Flex View, which will change various aspects of the tracks area to allow us to visualise and edit the timing properties of a region. Enable the Flex View via the menu command Edit>Show Flex Pitch/Time.
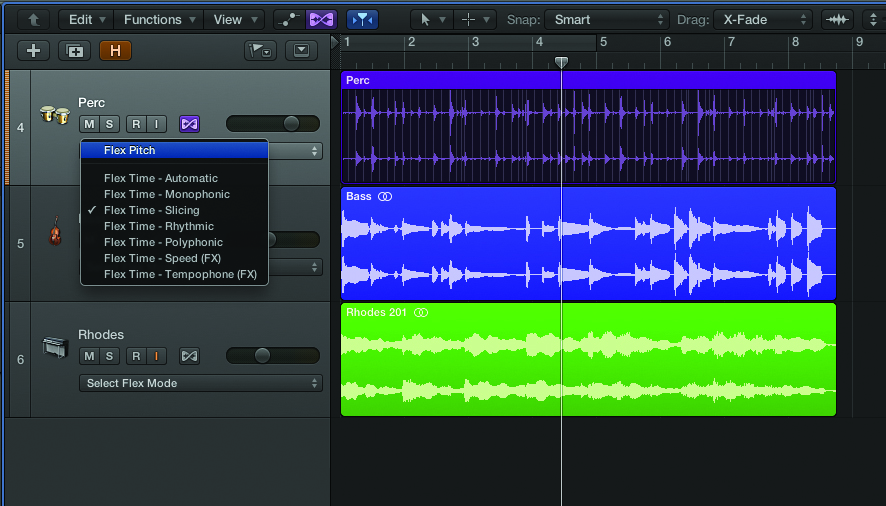
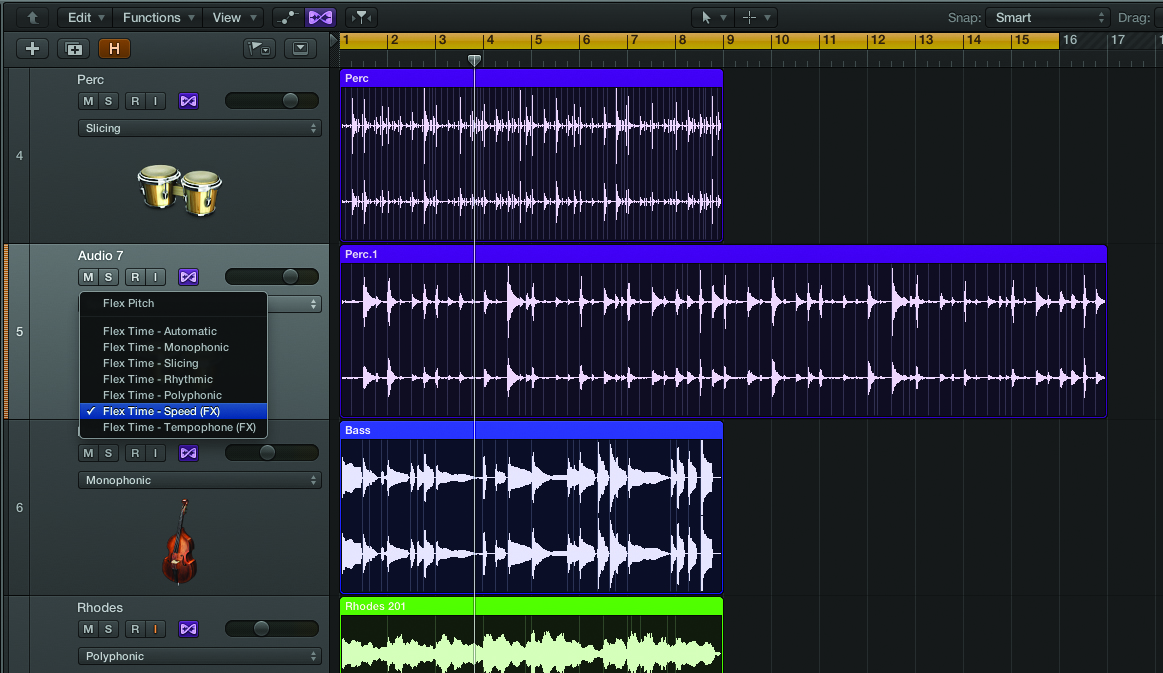
3: Each track within your project can be assigned a unique Flex mode. In theory, the different Flex modes let you tailor the time-stretching algorithm to the material you’re trying to process. In our case, we might choose either Slicing or Rhythmic for the percussion track, Monophonic for the bass, and Polyphonic for the Rhodes track.
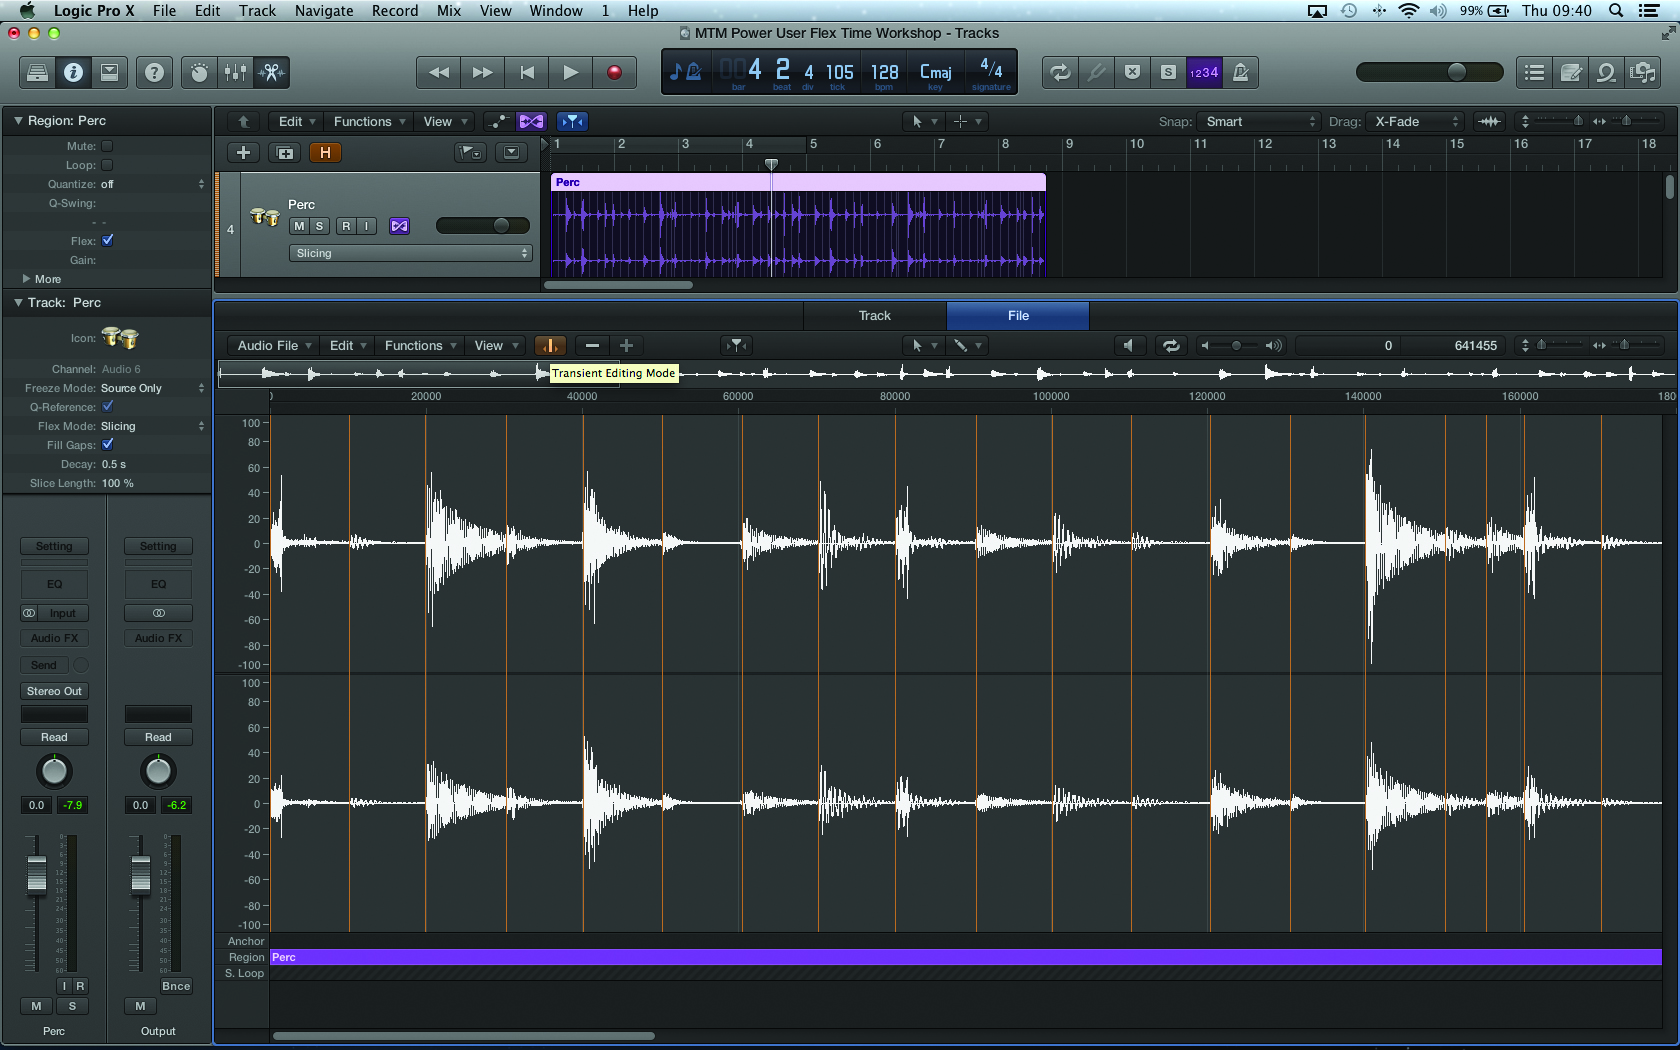
4: Once you’ve assigned a track a Flex mode, Logic will spend a short amount of time analysing the regions placed on it. The result of the analysis will be a series of so-called Transient Markers. You can view and edit Transient Markers using the Audio File Editor, although, in most cases, the Transient Markers that Logic places are usually 100% correct.
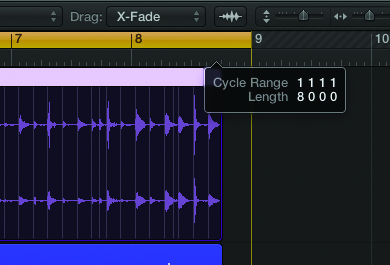
5: At this stage we could choose to simply expand the length of the region by hand and perform a ‘Telescopic’ Flex Time edit. A more refined solution, though, is to use some of Logic’s own editing tools that will stretch the region at sample-level accuracy. First, set a cycle length for the eventual length of the region; in this case running to the end of bar 9.
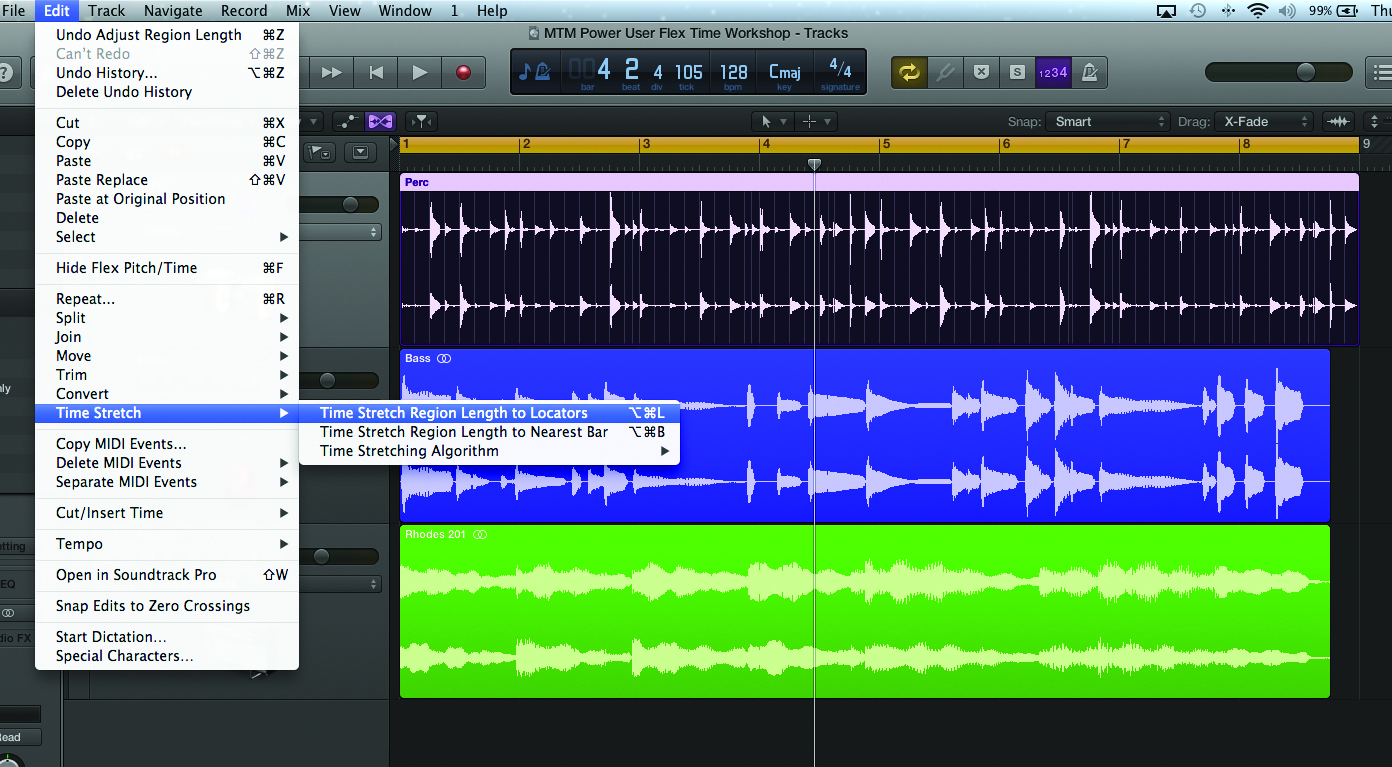
6: To perform the Flex Time stretch, use the menu item Edit>Time Stretch>Time Stretch Region Length to Locators. Once you’ve activated the command, Logic will move the end point of the region to match the current cycle length. As Flex Time is active, this edit is carried out nondestructively using the current Flex mode.
7: Another interesting application of a so-called Telescopic stretch is a double- or half-time stretch using the Speed mode. Try copying the percussion region to a new track, this time setting its Flex mode to Speed (FX). Stretch the region to twice its original length. The result sounds much the same as tape running at half-speed, with the percussion dropping an octave in pitch.
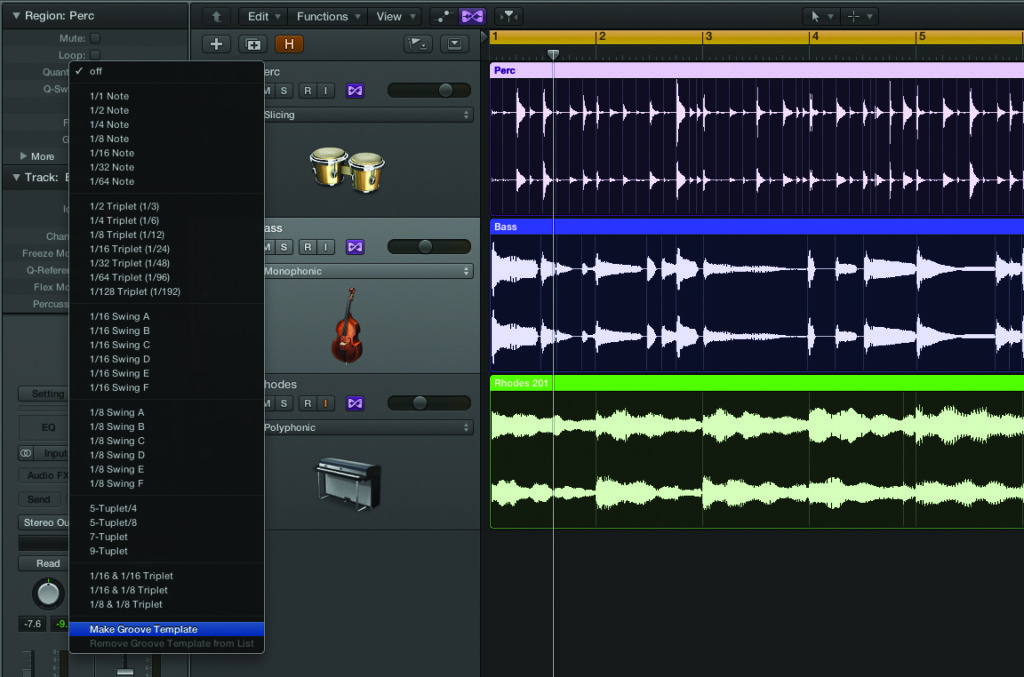
8: One of the best applications of Flex Time is the ability to apply an audio quantize. Rather than just applying a rigid 1/16th quantize, though, it’s often beneficial to transfer the groove of one part to another. In this example, highlight the percussion region and select Make Groove Template from Inspector’s Quantize menu.
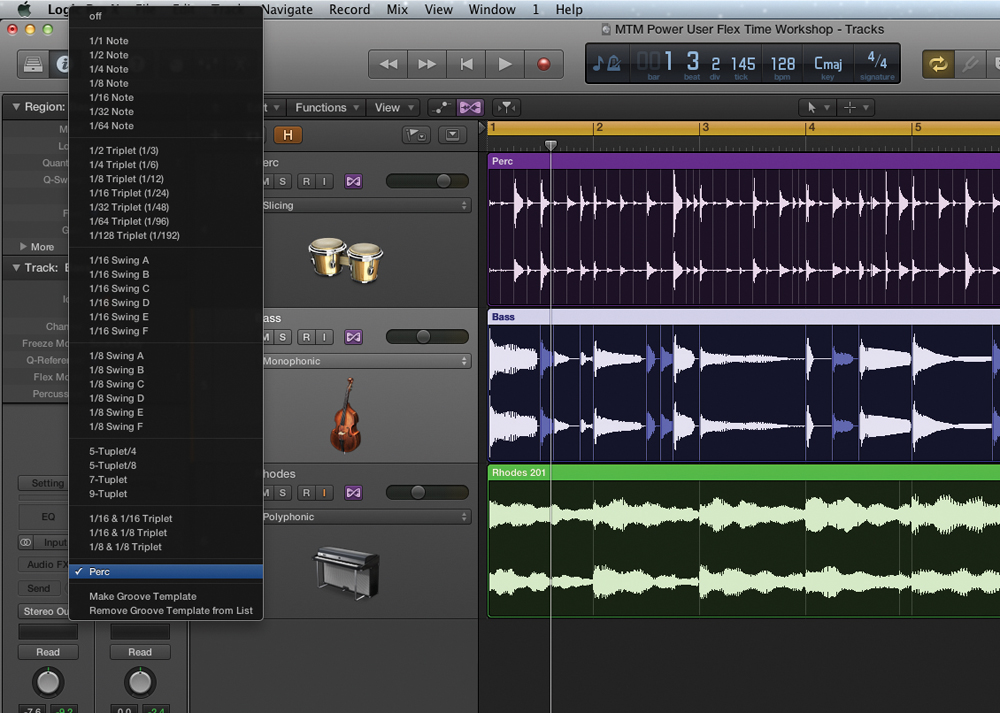
9: To apply the newly created groove template quantize to the bass, highlight the region and from the dropdown Quantize menu and select the groove you’ve just created, called Perc. Note how the bass notes have now been repositioned: either compressing a note, indicated by the darker shading, or expanding it, indicated by the lighter shading.

10: As you can see, Flex Time offers a completely elastic approach to the timing of an audio file. If you don’t like the edits, you can always click on the small X at the top of the region to delete one of the Flex Markers; [Ctrl]-clicking on the region and selecting Reset All Flex Edits will affect all those within a region.
Click here to continue to Page 2 >