Logic Pro X Tutorial: Become a Power User Part 6 – Using Drummer
Beyond the immediacy of Logic Pro X’s Drummer, there’s plenty of hidden depth and flexibility to explore. Mark Cousins slaves to the rhythm. Drummer is undoubtedly one of Logic Pro X’s best features, especially given its ability to produce lifelike rhythm tracks in literally a matter of seconds. However, for those of us who are […]
Beyond the immediacy of Logic Pro X’s Drummer, there’s plenty of hidden depth and flexibility to explore. Mark Cousins slaves to the rhythm.
Drummer is undoubtedly one of Logic Pro X’s best features, especially given its ability to produce lifelike rhythm tracks in literally a matter of seconds. However, for those of us who are used to programming in drum tracks the hard way, it might appear that the system is relatively ‘locked-in’. That’s fine, providing you want to use Apple’s algorithmic rhythm-generation wholesale, but somewhat less useful if you want to do something that involves a little more of your own creative input.
Delve a little deeper, though, and you soon find that what appears to be a closed solution can actually be expanded to yield an almost infinite amount of creative freedom.
In this tutorial, therefore, we’re going to look at how to use Drummer to get a ‘best-of-both-worlds’ solution – one that takes on the pleasure of quickly assembled rhythm tracks, but also one that enables you to refine and develop the initial output from Drummer in a far more personal way.
We’ll start with kit deconstruction and remixing – using the Drummer Kit Designer plug-in and the Tracks Stacks feature to examine and refine every last detail of our drum kit. From swapping-out individual elements of the kit through to using and abusing the room mic channels, we’ll see how the sound that Drummer initially presents is only the start of your creative journey.
Moving beyond Drummer and Drum Kit Designer, we’ll also take a look at how you can use additional virtual instruments to inject punch and power into the basic kit sound you’ve created. Using features such as Region Demixing, we’ll see how the basic pattern created by Drummer can be easily transferred to other instruments. Of course, if you already have a preferred piece of virtual drumming software, this is also relevant as a means of using Drummer’s unique algorithm pattern-creation with the sound palette that you’re already familiar with.
Ultimately, though, this tutorial is a perfect demonstration of how the immediacy and straightforward approach of many aspects of Logic Pro X belie an inner complexity that isn’t fully apparent until you really begin to dig in to the program. Understanding and utilising the full list of features, therefore, will really enable you to extract the maximum creative potential from Logic Pro X, as well as making your music significantly more distinctive, which is something that’s always worth striving for.
Working With Drummer
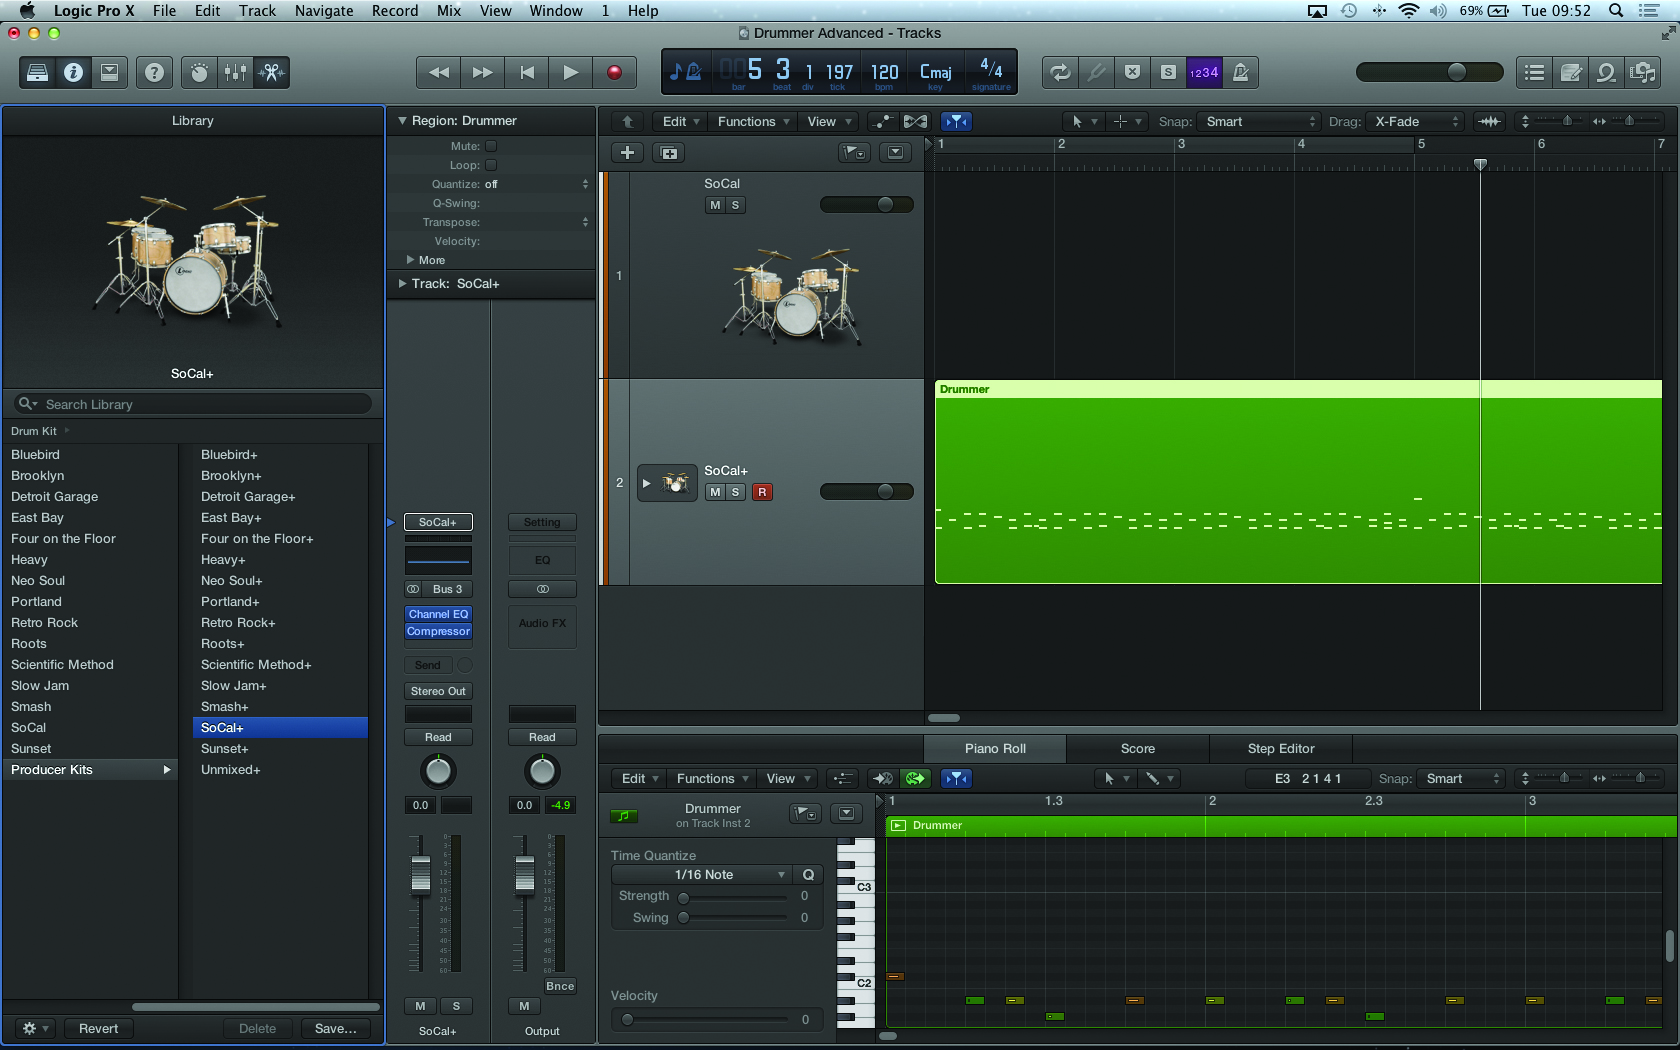
1: Assembling a basic rhythm track in Drummer is straightforward enough, but things get a little tricky when you need more control over the pattern – such as changing the velocity of a specific drum hit, for example – or you need to shape the sound of the kit in more radical ways. Thankfully, though, there are ways of increasing your involvement in the process.
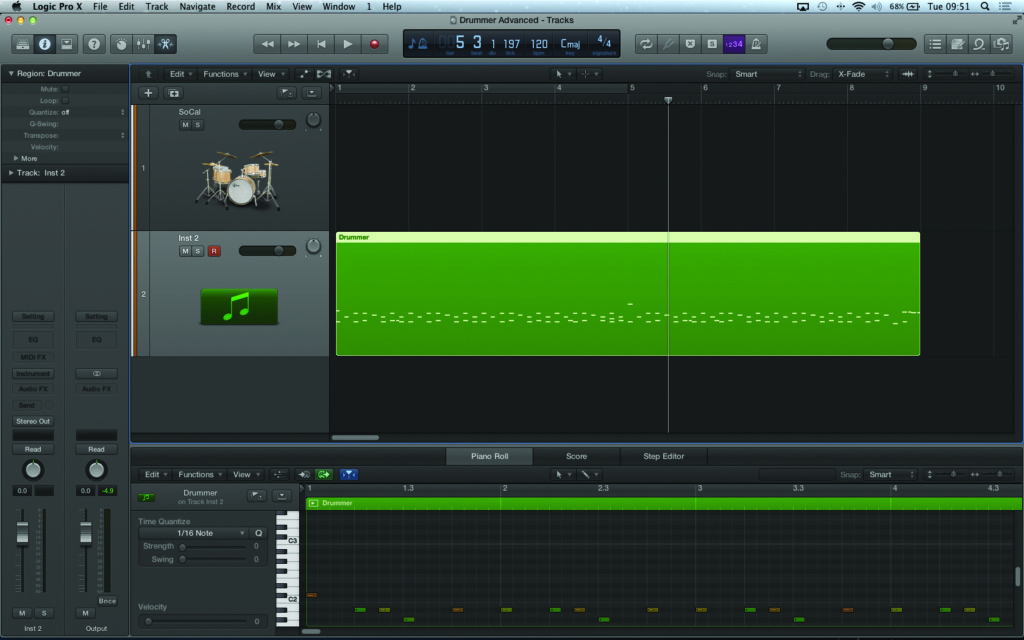
2: Once you’ve assembled your basic groove, create a new instrument and move the Drummer region to the newly created track. Notice how the style of the region changes, effectively creating a MIDI region of the original Drummer groove. In theory, this MIDI trigger can be used with any virtual instrument you see fit.
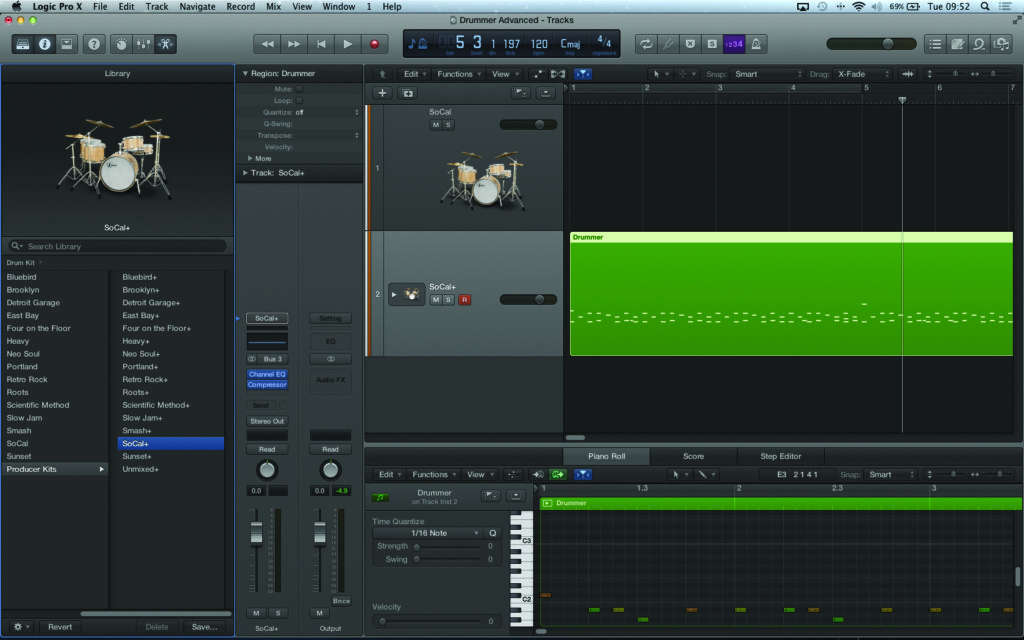
3: To recall the original drum sound, try loading the accompanying Producer Kits from the Library. The Producer Kits (indicated by the + suffix) are actually in the form of Track Stacks, facilitating access to each and every part of the kit. In theory, you can also experiment using a different kit selection, as the mapping remains consistent with the GM standard.
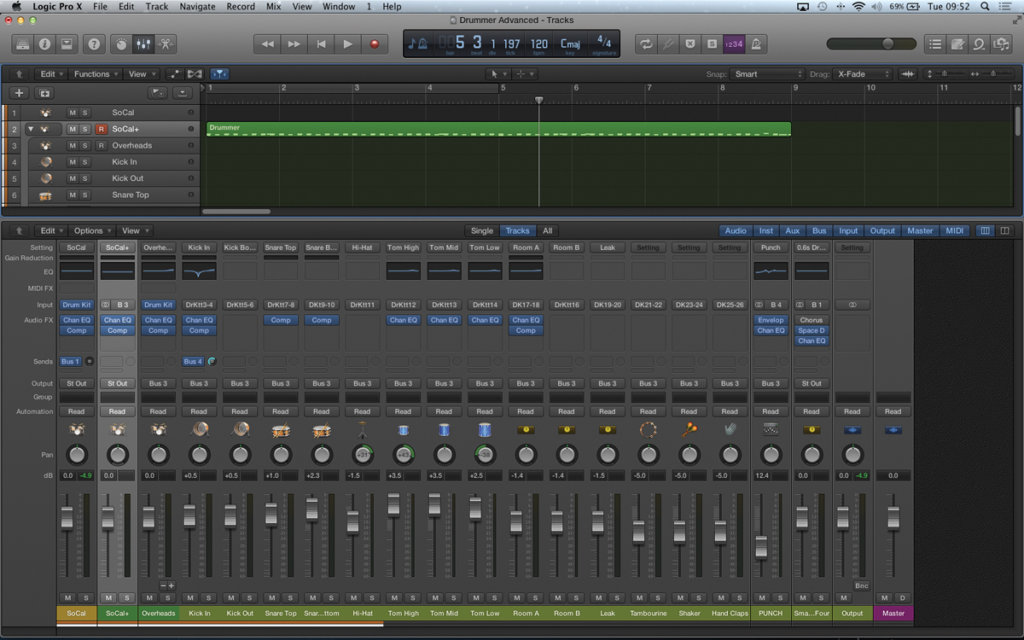
4: Press the small arrow on the Drum Kit Designer track to expand the Track Stack. With the mixer open, you should see all of the individual channels for the drum kit, as well as the aux masters for reverb sends and so on, depending on the kit you select. Even at this stage, you can achieve a lot simply by rebalancing the kit.
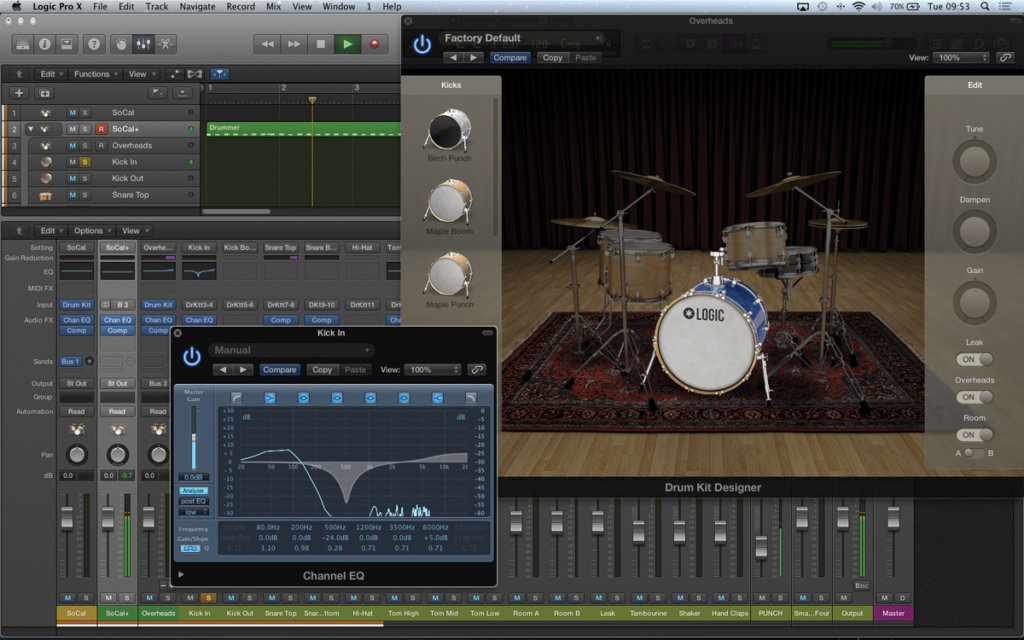
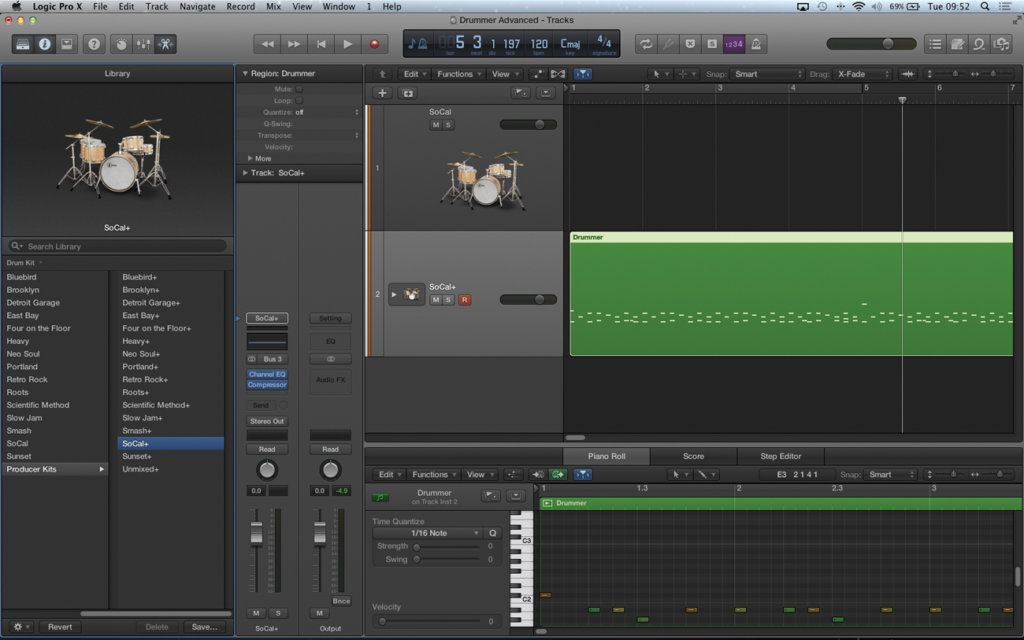
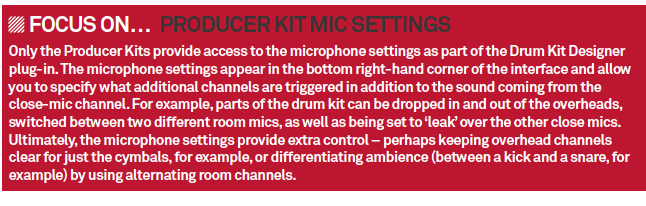
5: More detailed control can be achieved on an instrument-by-instrument basis. Open the Drum Kit Designer plug-in if you want to experiment with different drum selections or see the tuning of the drums. Compression and EQ, accessible from each channel strip, are also important for changing the presentation of each element.
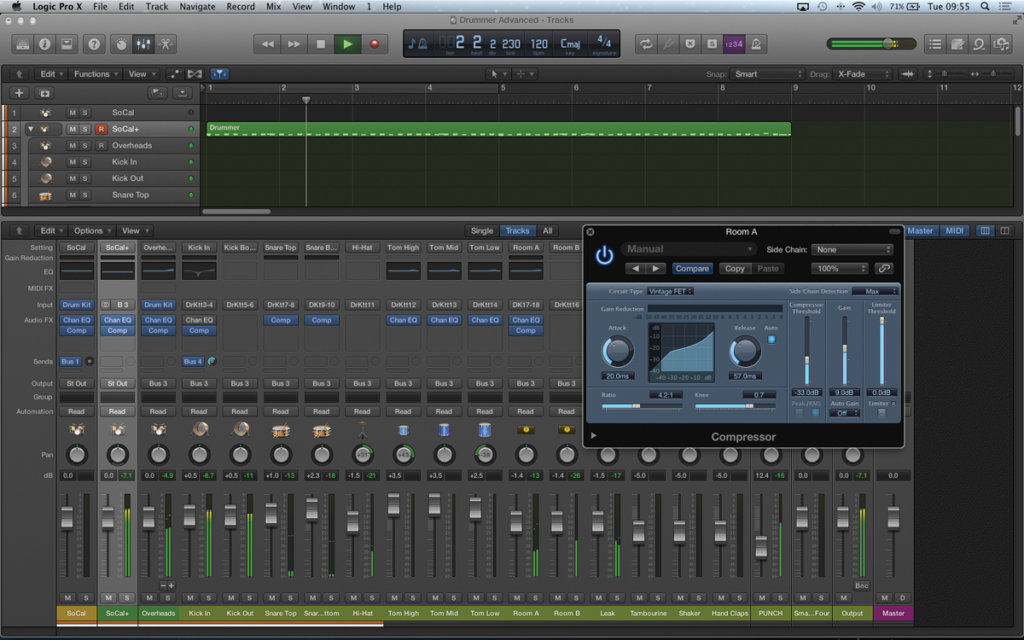
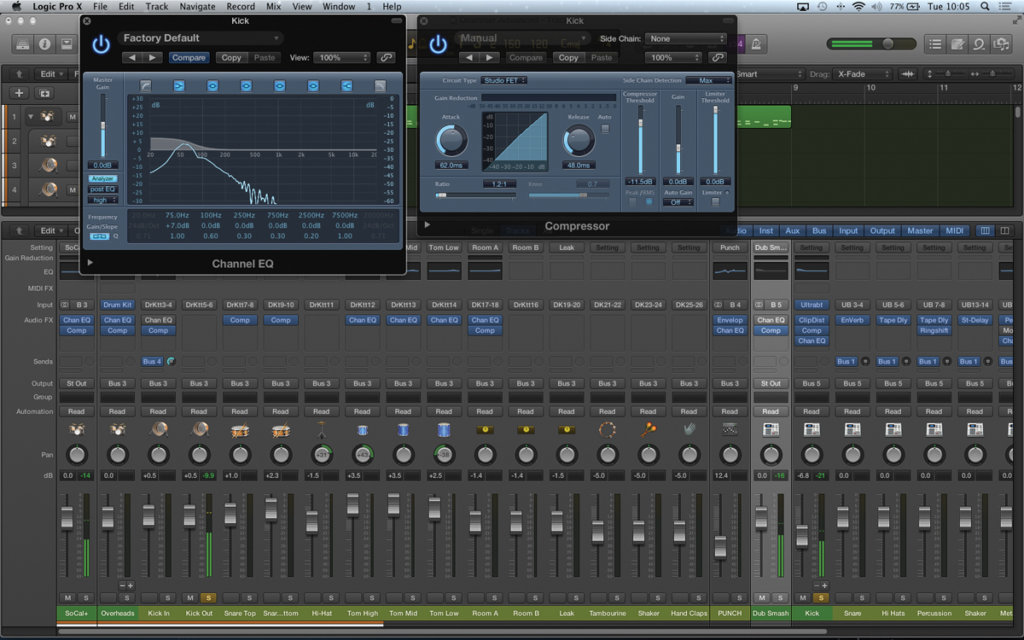
6: One of the best features of the Track Stacked Producer Kits is the access to the room mic channels (usually labelled Room A and Room B). If you want to add body to the sound of your kit, try experimenting with compression across these channels – in this case using a Vintage FET Circuit Type and a 4.2:1 ratio.
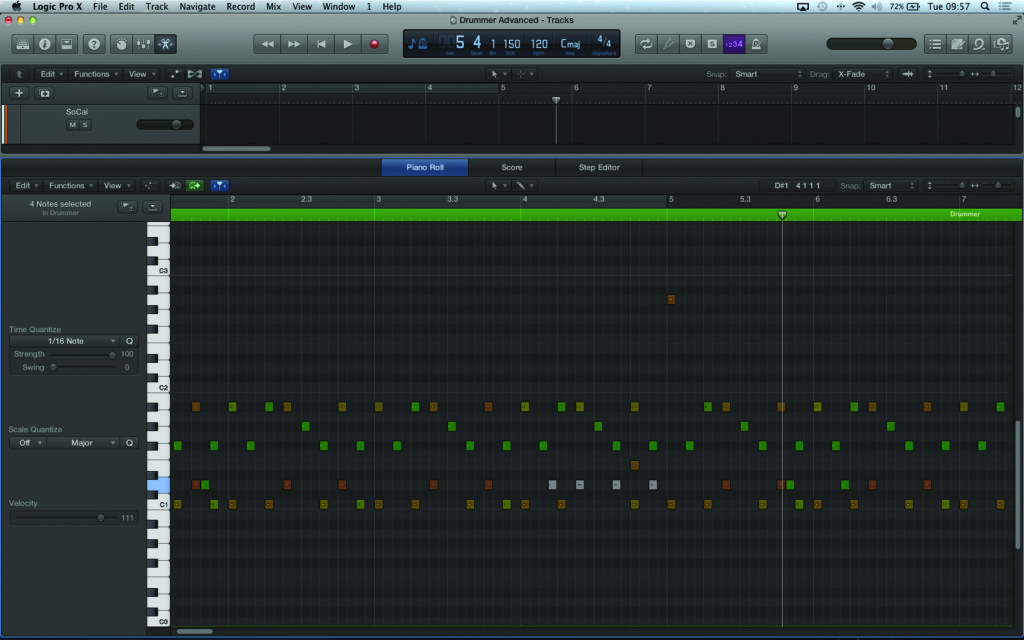
7: Once you’re happy with the sound you can start to take a more detailed look at the sequence data. Viewed as note data, of course, you can edit and refine the drums in a more directed way – muting unwanted notes from the sequence, holding off fills, adding extra ghost notes, editing velocity levels and so on.

8: A really important benefit of the region being held as MIDI data is the ability to finesse the quantizing of the drums. This could involve changing to a completely different setting (from a 1/16th quantize to a 1/12th, for example) or using a groove extracted from another part. Keep the Strength control low, though, to prevent the part from sounding too mechanical.

9: There’s no reason for your newly created drum sequence data to stay attached exclusively to the Drum Kit Designer plug-in. Try creating a new virtual instrument and selecting one of the Drum Machine settings from the Library. The pattern should play back exactly, especially given the use of GM mapping on the drum sounds.
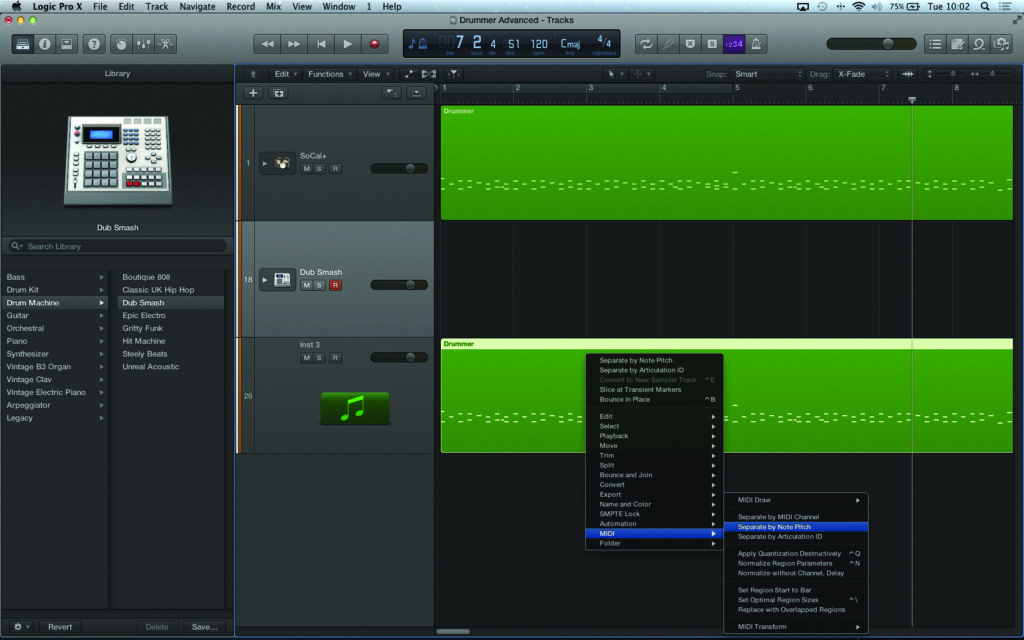
10: Some of the most powerful results are achieved when an electronic kit strategically doubles the acoustic drums. On an empty instrument track, copy the sequence data over, [Ctrl]-click on the region and select MIDI>Separate by Note Pitch from the contextual menu. The Demix option will then separate the sequence data on an instrument-by-instrument basis.
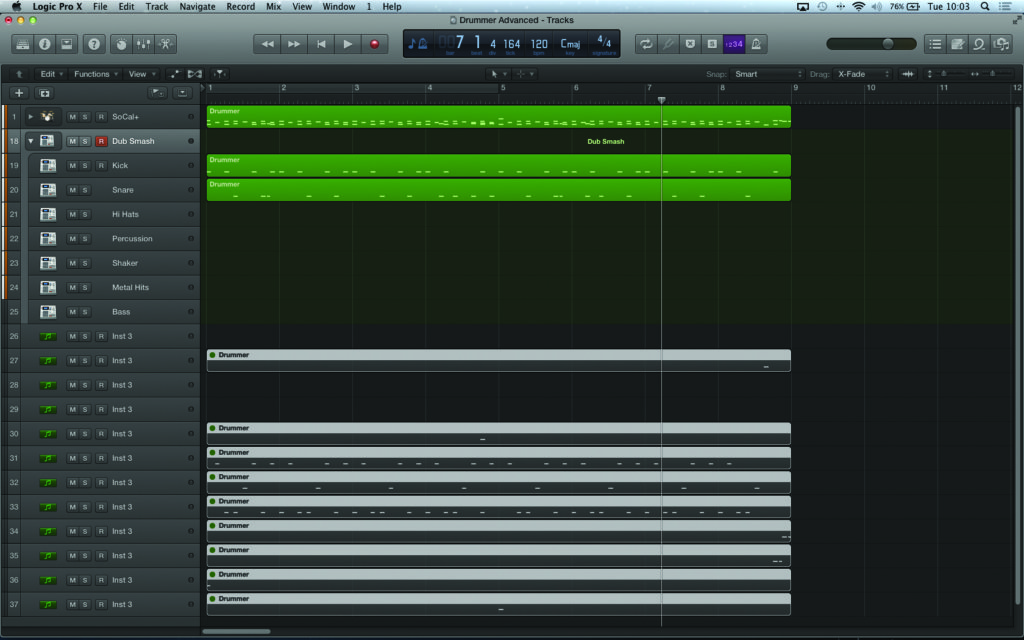
11: Try expanding the Drum Machine channel’s Track Stack and then moving over the corresponding MIDI sequence data for the parts you want to double. The positions of the ‘blobs’ should make it clear what the part is, and they can be placed on the corresponding track to make things clear. When you’re done, collapse the Stack accordingly.
12: To refine the doubling effect, it’s worth solo’ing the two parts in isolation. Using tools like EQ, you can help define the relationship between the two sounds – adding more weight to the electronic kick drum, for example, the emphasis filling in the extreme low end. Some compression will also help add body to the electronic kick.